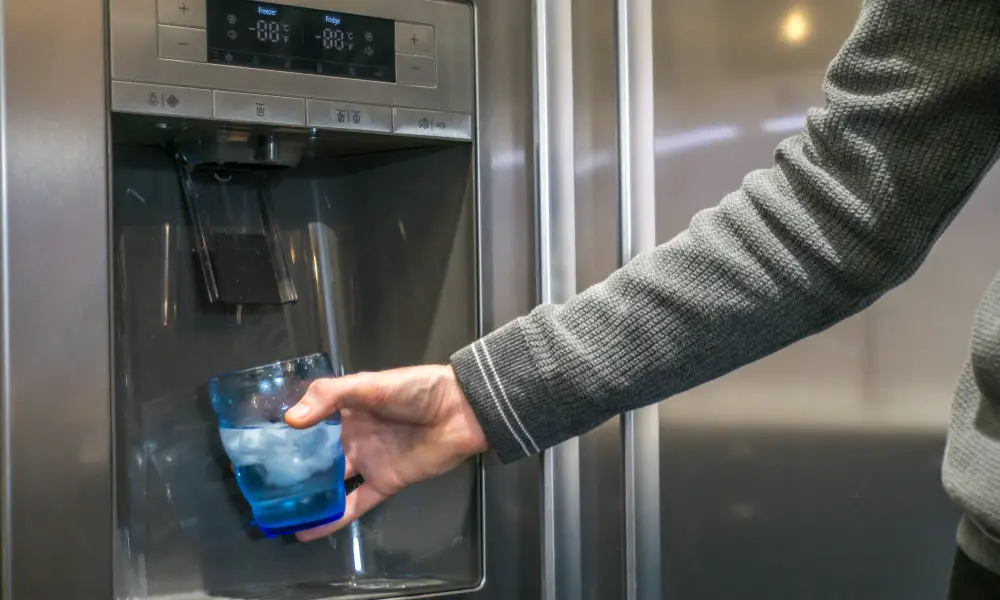
The quest for the freshest and safest drinking water possible is never-ending. Nowadays, refrigerators with water filters are a popular option in many homes. They remove multiple contaminants from tap water leaving us with a pure and refreshing drink. That is if the system is properly maintained.
What many people do not realize is that your refrigerator water filter needs replacing every six months to ensure it is doing its job properly. Over time, the filter collects the filtered-out contaminants and loses its effect. But how do we change our refrigerator water filters?
Thankfully, changing the water filter in your fridge is both quick and easy. To change your water filter you will need:
- A new refrigerator water filter
- A towel
- About 10 minutes of time
Step-by-Step Guide for Refrigerator Water Filter Replacement
Step 1. Check your old filter needs to be replaced
Most water filters need replacing every six months to ensure they are functioning effectively.
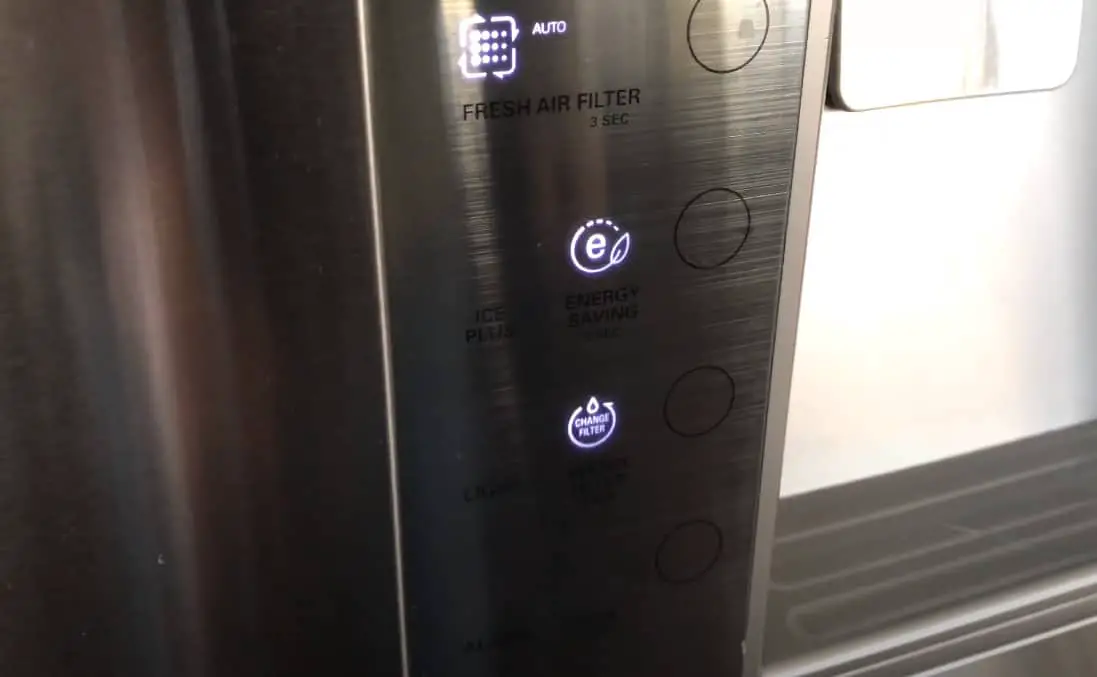
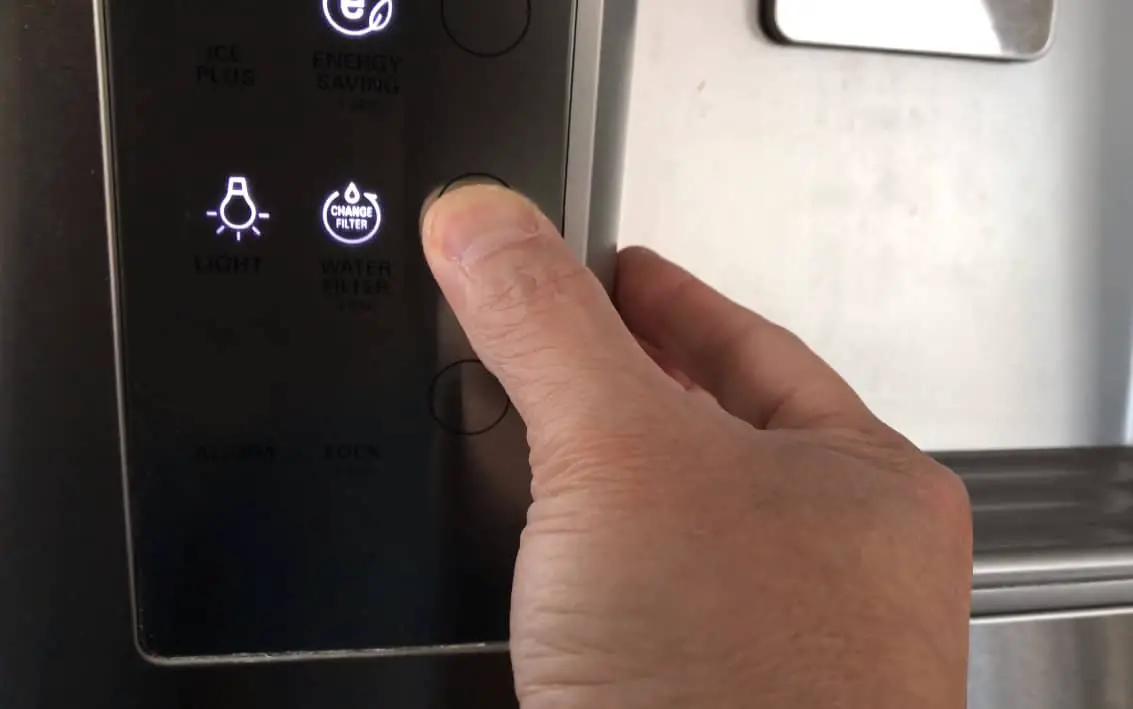
Many American-style refrigerators with built-in water filters have an electronic display just above the water dispenser. On this display, you will find an indicator light that will let you know when your filter is ready to be changed.
If your refrigerator does not have one of these displays, check for a sticker in your fridge which may say when the filter was installed and when it due to be changed.
If you cannot find any indication of when your filter is due to a renewal, think back to when you bought your refrigerator or when you last changed the filter. If you think this was more than six months ago, change the filter and make a note so that you will know when to change it in the future.
Step 2. Locate your water filter
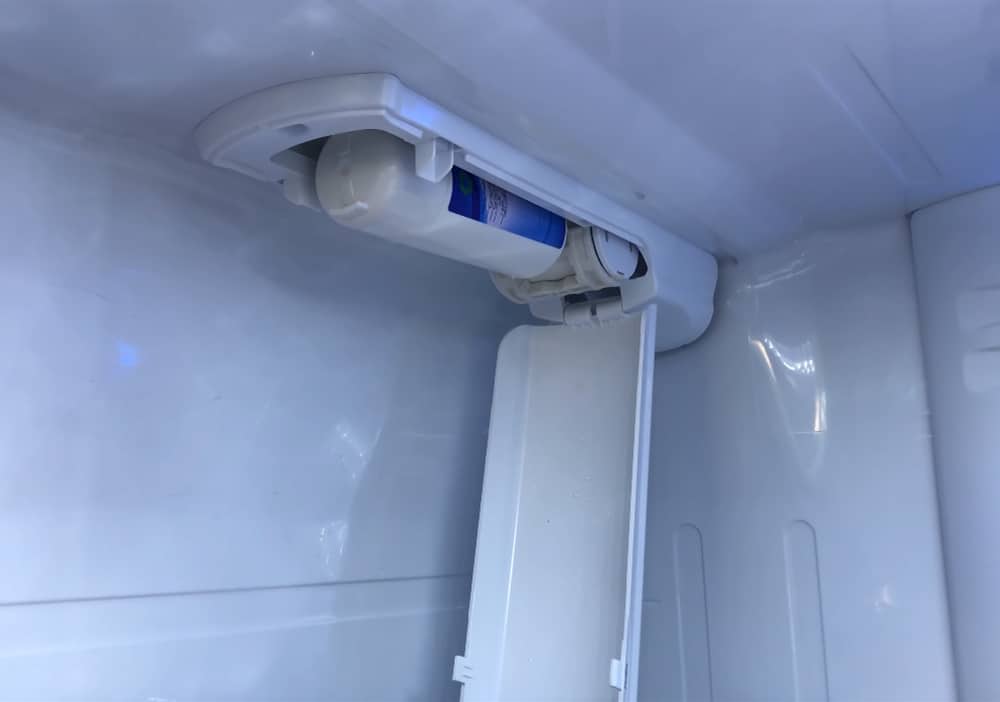
The majority of water filters are located in one of two places: at the base of your fridge or inside the fridge in the top right corner. In some cases, your water filter may be mounted on the wall and connected to your refrigerator by small hoses.
Wherever your filter, you can identify it by looking for either a twistable knob or a push button that will eject the filter, or by looking for a wall-mounted filter.
If you have looked in the top back corner, the fridge grille, and surrounding walls and still cannot find the location of your water filter, look in your user manual.
Step 3. Determine the type of filter you have
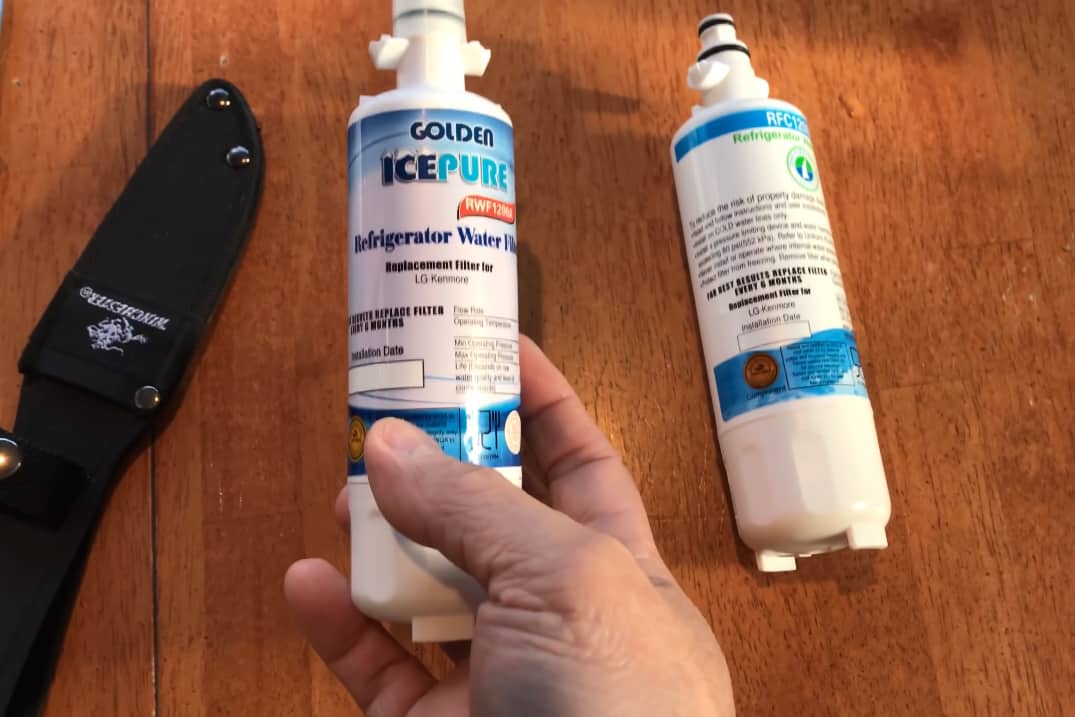
There are three common refrigerator filter types, and once you have located the filter you need to determine which it is.
- Push-in filters: These are built-in filters which have an eject button
- Twist-in filter: These are built-in filters with a twist release knob
- In-line filters: These are found on older models and are attached to the back of the refrigerator or the wall
Step 4. Turn off your icebox and water supply

Now you have located your filter, you need to prevent water from flowing through it while you remove it. Regardless of which filter type you have, ensure that you switch off the ice machine to stop the water flow.
For old-style in-line filters, the water will also need to be turned off from the main supply by shutting off the pipe.
Step 5. Remove your water filter
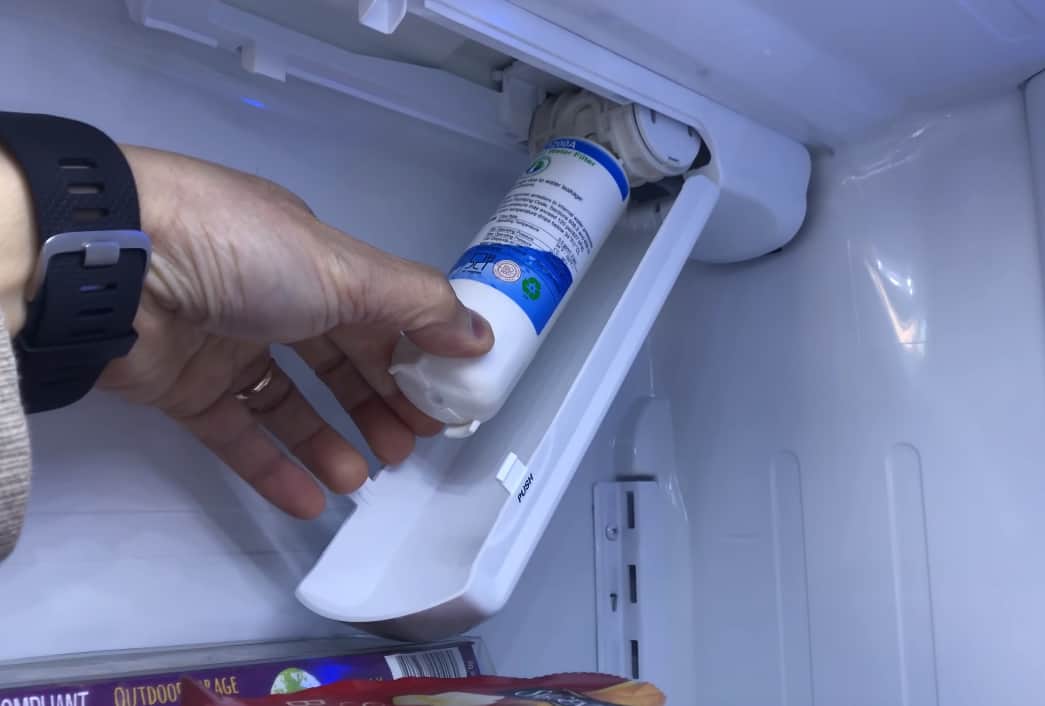
Now you are good to go with removing your old filter. How your filter is removed from your refrigerator depends on the type of filter that you have.
For push filters, simply push the eject button and the old filter should pop out of the lock, and you can then slide the filter out of its compartment. For twist filters, twist the knob counter-clockwise to release the filter, and again slide it out.
In-line filters are slightly more complex. Start by finding out which way the water is flowing through the filter which will be indicated by an arrow. Next, unhook the filter from the brackets which are holding it up on the wall.
Starting at the outlet end, remove the safety clip from where the tubing enters the filter by sliding it off, then push down on the collar of the filter and the tubing will be released. Repeat this on the other end of the filter and then remove it. For a simple demo of this, check out this video.
Step 6. Insert your new filter
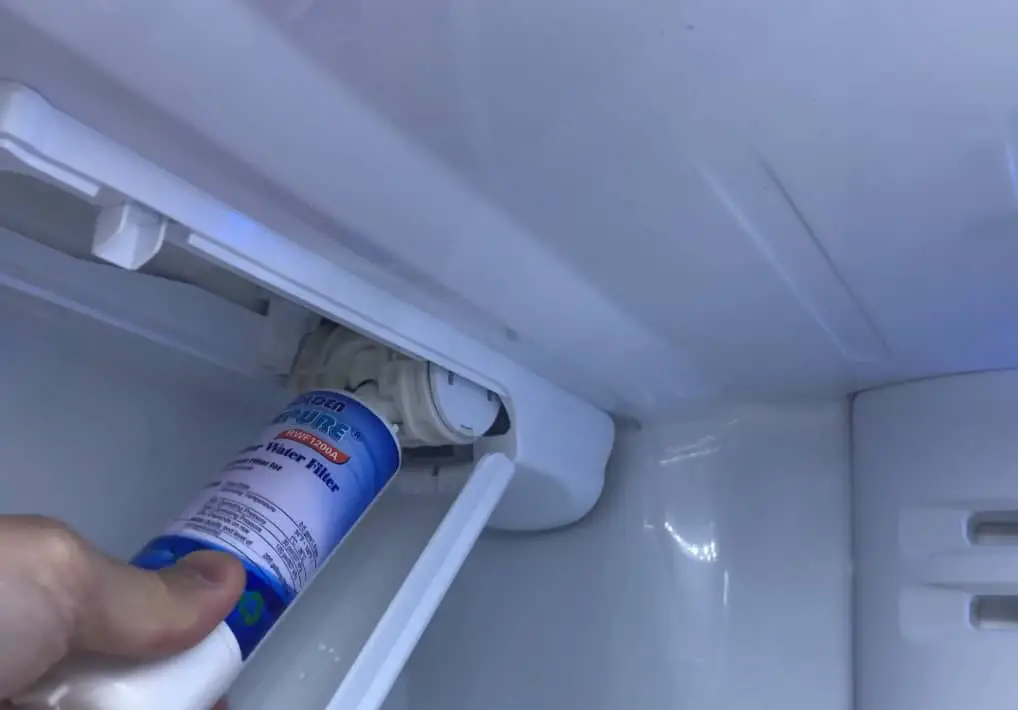
With the old filter successfully removed and discarded, all that is left is to insert your new filter. For push and twist filters, simply align the new filter with the compartment and slide it into place.
Secure it by pushing until the eject button pops out or by twisting clockwise until it snaps into place, for push and twist filters, respectively.
For in-line filters, ensure the flow direction of your new filter is in the same direction as the old filter. Remove the safety caps and safety clips from both ends. Then push the tubing into both ends of the new filter;
you should feel the hose move inwards in two steps and around 18mm of tubing will be inserted at each end. Put the safety clips back on to secure and then fasten the new filter into the wall brackets.
Step 7. Turn back on your icebox and water supply
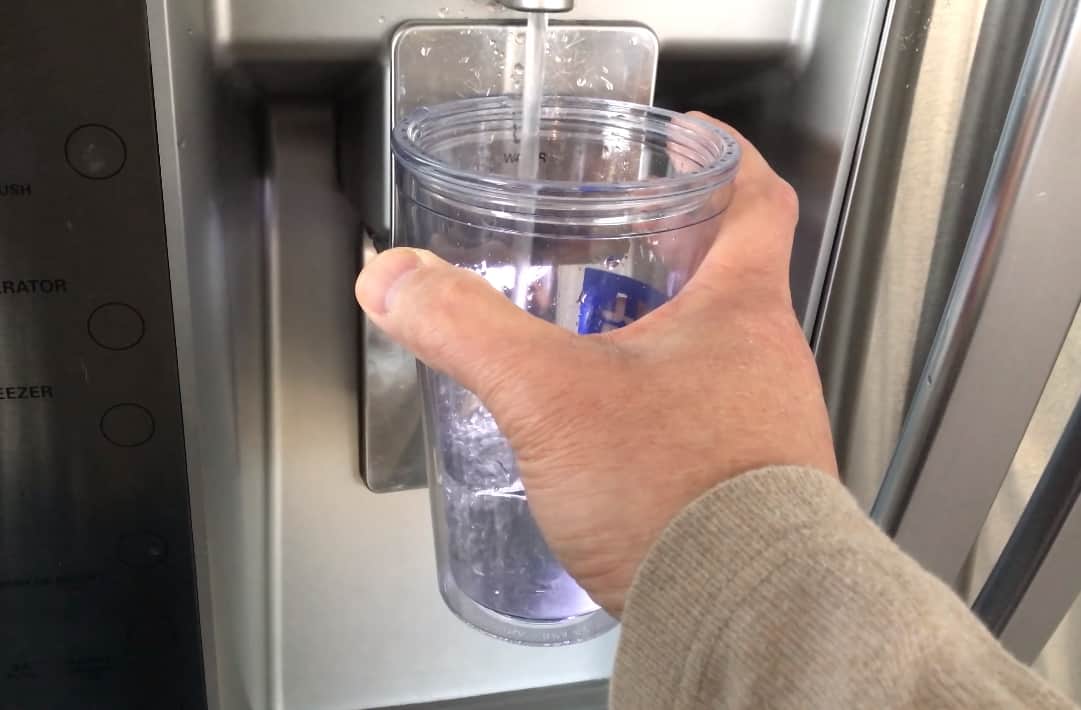
Once you are certain your new filter is fitted correctly and securely, turn your icebox back on. For those of you with in-line filters, you can now also go ahead and turn back on your water supply.
Flush out the new filter by running enough water to approximately fill up ten glasses. Do not drink this water; it will contain carbon residue from the filter that needs clearing.
Those are all the steps you need to change your water filter, regardless of which refrigerator model or filter type you have. For a few extra handy tips continue reading.
Extra Tips and Tricks
- Use a towel or bucket: Sometimes when replacing your water filter, you can have small water spillages. This is especially true for awkward in-line filters! Place a towel, a bucket, or both under the filter to catch any spillages.
- Look at your filter to determine flow direction: Some in-line filters may not have an arrow indicating flow direction on them. An easy way to figure out the flow is to look at the two entry points of the tubing. The end with the larger diameter will be the water inlet, and the smaller end will be the water outlet.
- Dispense water before removing your filter: Sometimes no matter how hard you pull your filter will not budge. This is usually due to high water pressure. To fix this, close off the water supply if you have not already and dispense a little water from your fridge to lower the pressure.
- Match up your new filter with the old one: Before taking the caps off your new filter and trying to insert it, make sure you compare it against your old one. If they look the same, then you have definitely got the correct filter type and should have no problems with the installation.
- Trim the tubing for in-line filters: Sometimes the tubing can become scratched and damaged meaning the new filter will not attach to the tubing securely. For easier insertion into the new filter and fewer leaks, try trimming the tubing so that the end is square and undamaged.
- Watch for leaks: When changing your filter, especially if it is your first time, keep an eye out for any leaks as the new filter may not have been properly inserted. If you spot any leaks, repeat steps 4-7.
- Make a note of changing your filter: With fridges with a digital display and indicator light, make sure you remember to reset it so you know when your filter will need changing again. If your refrigerator has no display, make note of when the next change is due so that you do not forget.
- If your indicator light is on, change your filter: Are you pretty sure it has not yet been six months since you changed your filter, but the indicator light on your fridge is on? Still change your filter. A lot of fridges calculate when a new filter is needed by the amount of water that has run through it, rather than by a period of time passing. If you have a busy family home, your filter will likely need replacing more than once every six months.
The Round-Up
That is all there is to changing your refrigerator water filter and we hope you have found this guide useful. Remember the seven simple steps:
- Check your filter needs to be replaced
- Locate your filter
- Determine which filter type you have
- Turn off your icebox and water supply
- Remove your old filter
- Insert your new filter
- Turn your water supply back on
After doing this once, changing your filter in the future will be straightforward. Remember to do so every six months so that the water your drink is fresh, pure, and top quality.