Oh, what’s more heartwarming than cooking up something special for your loved one this Valentine’s Day? Whether you’re planning a cozy dinner for two or a sweet treat to share, our roundup of 25 romantic recipes is sure to inspire. From decadent desserts to savory dishes that speak the language of love, these delicious ideas will make your celebration unforgettable. Keep reading to find your perfect match!
Chocolate Covered Strawberries
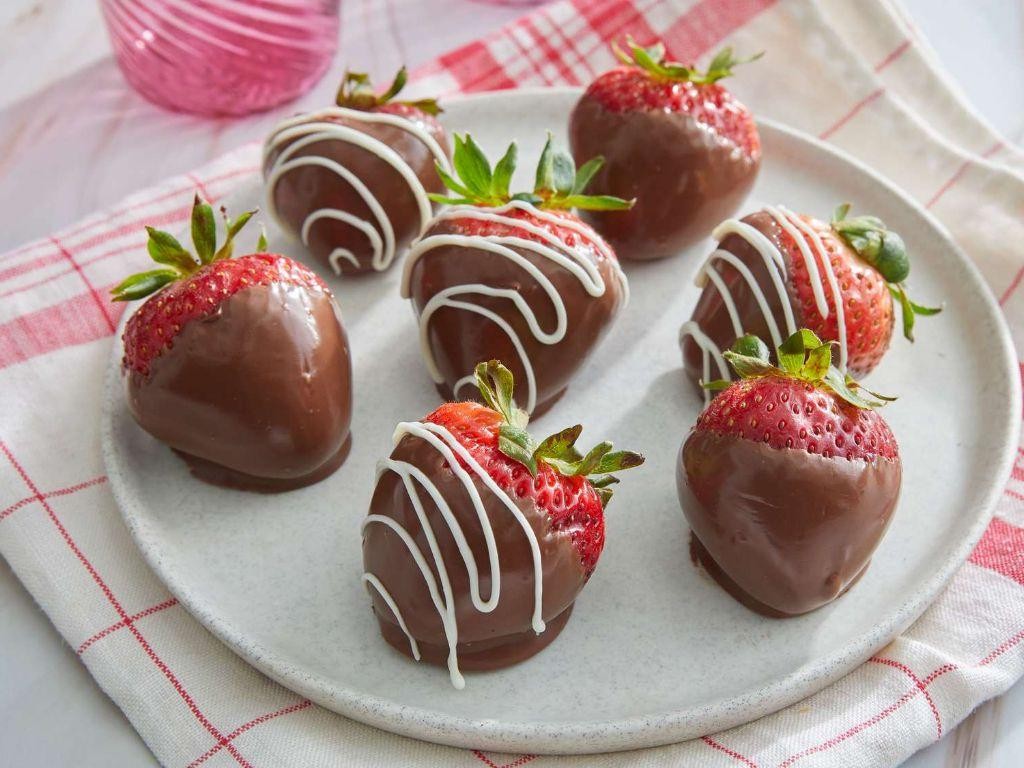
Making chocolate covered strawberries is one of those simple pleasures that never fails to delight. Whether it’s for a romantic gesture, a party treat, or just because, I find myself reaching for this recipe time and time again. There’s something magical about the combination of juicy strawberries and rich chocolate that feels both indulgent and somewhat healthy—because fruit, right?
Ingredients
- 1 pound fresh strawberries (look for the brightest red, plumpest berries—they’re the sweetest)
- 8 ounces semi-sweet chocolate chips (I swear by Ghirardelli for that perfect melt)
- 1 tablespoon coconut oil (this little secret makes the chocolate extra glossy and easy to dip)
Instructions
- Rinse the strawberries under cold water and pat them completely dry with a paper towel. Any water will cause the chocolate to seize, so take your time here.
- Line a baking sheet with parchment paper. This will be your staging area for the strawberries post-dip.
- In a microwave-safe bowl, combine the chocolate chips and coconut oil. Microwave in 30-second intervals, stirring between each, until the chocolate is completely melted and smooth. Tip: Don’t overheat the chocolate to avoid burning.
- Holding a strawberry by the stem, dip it into the melted chocolate, swirling to coat about three-quarters of the berry. Allow any excess chocolate to drip back into the bowl.
- Place the dipped strawberry on the prepared baking sheet. Repeat with the remaining strawberries. Tip: For a fancy touch, you can drizzle them with white chocolate or sprinkle with crushed nuts before the chocolate sets.
- Refrigerate the strawberries for at least 30 minutes, or until the chocolate is firm to the touch. Tip: If you’re in a hurry, the freezer can speed up the process, but don’t leave them in too long or they’ll get frosty.
Ready to serve, these chocolate covered strawberries are a perfect blend of crisp, fresh berry and smooth, rich chocolate. They’re gorgeous arranged on a platter for a party or packed into a cute box as a heartfelt gift. Either way, they’re bound to disappear quickly!
Heart Shaped Pancakes
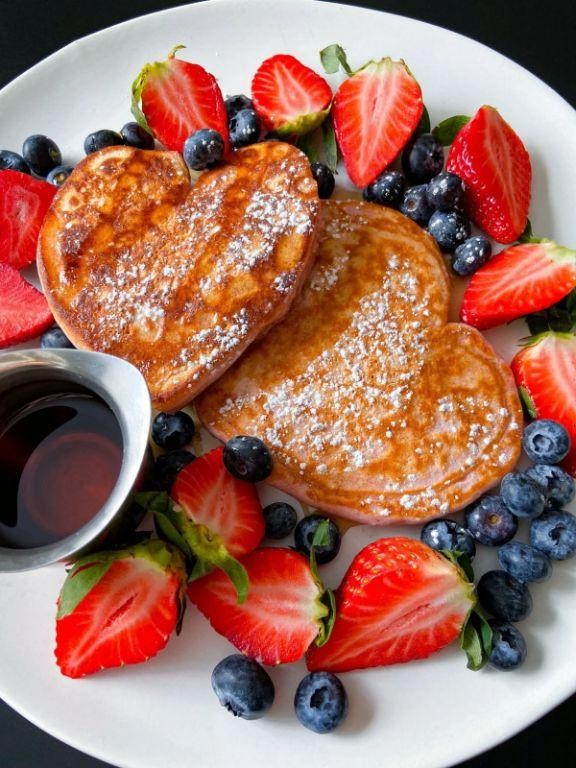
Something about flipping pancakes always brings me back to lazy Sunday mornings with my family, trying to outdo each other with the most creative shapes. Heart-shaped pancakes became our Valentine’s Day tradition, but honestly, they’re too fun to save for just one day a year.
Ingredients
- 1 cup all-purpose flour (I swear by King Arthur for consistently fluffy results)
- 2 tbsp sugar (a little sweetness never hurt anyone)
- 1 tsp baking powder (the secret to that perfect rise)
- 1/2 tsp salt (balances the sweetness just right)
- 1 cup milk (whole milk makes them extra rich)
- 1 large egg (room temp blends smoother, trust me)
- 2 tbsp unsalted butter, melted (plus extra for the pan)
- 1 tsp vanilla extract (the more, the merrier in my book)
Instructions
- In a large bowl, whisk together the flour, sugar, baking powder, and salt until well combined.
- In another bowl, beat the milk, egg, melted butter, and vanilla extract until smooth. Tip: A fork works just fine here—no need to dirty a whisk.
- Pour the wet ingredients into the dry ingredients and stir until just combined. Tip: Lumps are okay; overmixing leads to tough pancakes.
- Heat a non-stick skillet over medium heat and brush with a little melted butter. Tip: The butter should sizzle but not smoke—that’s your cue it’s ready.
- Pour batter into the skillet in a heart shape. Use a spoon to help guide the shape if needed. Cook until bubbles form on the surface and the edges look set, about 2-3 minutes.
- Flip carefully with a spatula and cook for another 1-2 minutes until golden brown.
Out of the skillet, these pancakes are delightfully fluffy with just the right amount of sweetness. Serve them stacked high with a drizzle of maple syrup and fresh berries for a breakfast that’s as Instagram-worthy as it is delicious.
Beef Wellington for Two
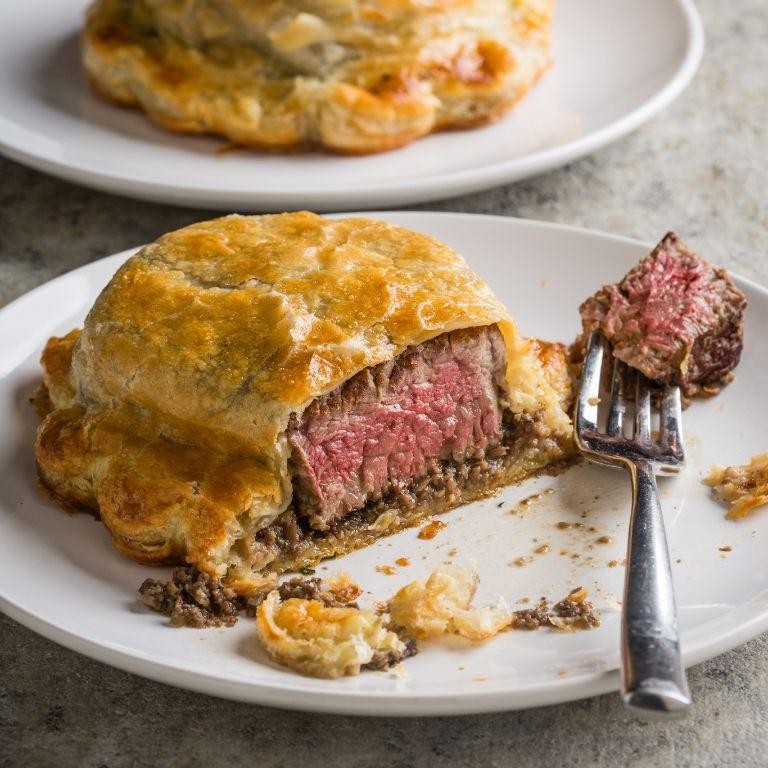
Kicking off our cozy dinner series, Beef Wellington for Two is that show-stopping dish I turn to when I want to impress without the stress. It’s just my husband and me most nights, and this recipe scales down the classic perfectly—think tender beef, flaky pastry, and that rich mushroom duxelles, all in portions that don’t leave us eating leftovers for days.
Ingredients
- 1 (8 oz) beef tenderloin – because nothing beats the tenderness of a center-cut piece.
- 1 tbsp extra virgin olive oil – my kitchen staple for that perfect sear.
- 1 cup mushrooms, finely chopped – I like cremini for their earthy flavor.
- 1 small shallot, minced – it’s all about that subtle sweetness.
- 1 tbsp unsalted butter – because butter makes everything better.
- 1 sheet puff pastry, thawed – I always keep a box in the freezer for emergencies.
- 1 egg, beaten – room temp eggs give the pastry that golden shine.
- Salt and pepper – to season, but I’m generous with the pepper for a bit of heat.
Instructions
- Preheat your oven to 400°F (200°C) – a hot oven is key to a crispy pastry.
- Season the beef tenderloin generously with salt and pepper on all sides.
- Heat olive oil in a pan over high heat and sear the beef until browned all over, about 2 minutes per side. Tip: Don’t move the beef around too much to get a good crust.
- Remove the beef and set aside. In the same pan, melt butter and sauté mushrooms and shallot until soft and all the moisture has evaporated, about 5 minutes. Tip: Spread the duxelles thin on a plate to cool quickly.
- Roll out the puff pastry on a floured surface to about 1/8 inch thickness.
- Spread the cooled mushroom mixture in the center of the pastry, place the beef on top, and wrap the pastry around the beef, sealing the edges with beaten egg.
- Brush the outside of the pastry with more beaten egg for a golden finish. Tip: Make a few small slits on top to let steam escape.
- Bake for 20-25 minutes until the pastry is golden and puffed.
You’ll love the contrast of the crispy pastry against the juicy, medium-rare beef inside. Serve it sliced on a bed of arugula for a peppery bite that cuts through the richness.
Lobster Tail with Garlic Butter
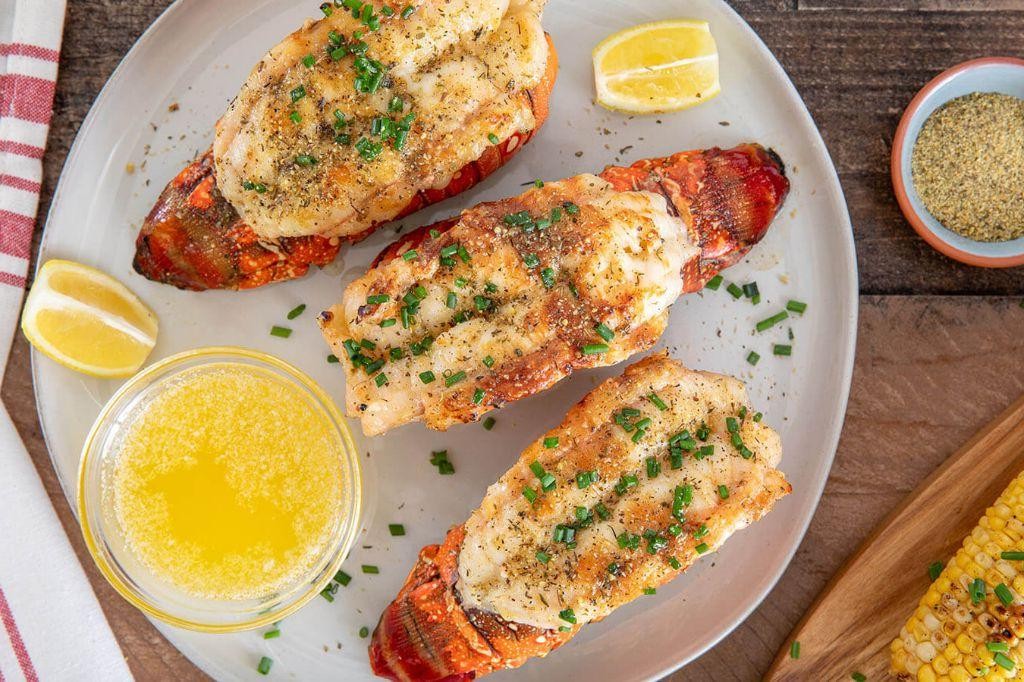
Deliciously decadent and surprisingly simple to make, this Lobster Tail with Garlic Butter is a dish that never fails to impress. I remember the first time I tried making it at home, thinking it was reserved for fancy restaurants, but here we are, about to dive into how you can recreate this luxurious meal in your own kitchen.
Ingredients
- 2 lobster tails (I like to get them fresh from the seafood counter, but frozen works too—just thaw them overnight in the fridge)
- 1/2 cup unsalted butter (I always use unsalted to control the seasoning better)
- 4 cloves garlic, minced (fresh is key here for that punchy flavor)
- 1 tbsp lemon juice (a squeeze of fresh lemon brightens everything up)
- 1/4 tsp salt (I prefer sea salt for its clean taste)
- 1/4 tsp black pepper (freshly ground makes all the difference)
- 2 tbsp chopped parsley (for that fresh, herby finish)
Instructions
- Preheat your oven to 375°F (190°C) to ensure it’s ready for the lobster tails.
- Using kitchen shears, carefully cut the top shell of each lobster tail down the middle, stopping at the tail fin. Tip: Keep the shears parallel to the cutting board to avoid cutting into the meat.
- Gently pry the shell open and lift the meat out, resting it on top of the shell. This technique, known as ‘butterflying,’ makes for a stunning presentation.
- In a small saucepan over low heat, melt the butter with the minced garlic, lemon juice, salt, and pepper. Stir occasionally until the garlic is fragrant, about 2 minutes. Tip: Don’t let the garlic brown, or it’ll turn bitter.
- Brush the lobster meat generously with the garlic butter mixture, reserving some for serving.
- Place the prepared lobster tails on a baking sheet and bake for 12-15 minutes, or until the meat is opaque and firm to the touch. Tip: The internal temperature should reach 140°F (60°C) for perfect doneness.
- Remove from the oven and drizzle with the remaining garlic butter. Sprinkle with chopped parsley for a pop of color and freshness.
Buttery, garlicky, and with just the right amount of lemon zing, these lobster tails are a showstopper. Serve them over a bed of creamy risotto or with a simple side of steamed asparagus for a meal that feels both indulgent and balanced.
Raspberry White Chocolate Cheesecake
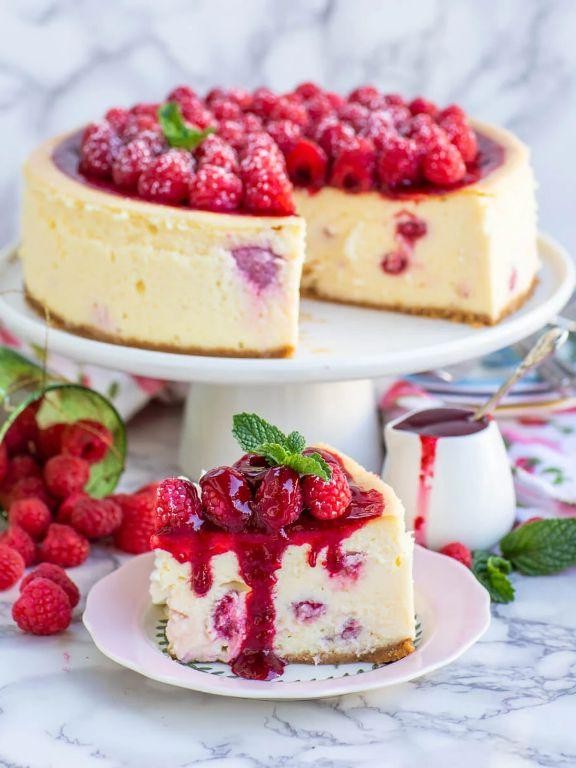
How many times have I found myself staring at the fridge, craving something sweet yet sophisticated? That’s when this Raspberry White Chocolate Cheesecake comes to mind, a perfect blend of tart and sweet that never fails to impress. It’s my go-to when I need a dessert that looks as good as it tastes, and trust me, it’s easier to make than you’d think.
Ingredients
- 1 1/2 cups graham cracker crumbs (I always keep a box in the pantry for moments like these)
- 1/4 cup granulated sugar (just the right amount to sweeten the crust)
- 1/2 cup unsalted butter, melted (I prefer unsalted to control the sweetness)
- 24 oz cream cheese, softened (room temperature is key for a smooth filling)
- 3/4 cup granulated sugar (yes, more sugar, but it’s cheesecake after all)
- 3 large eggs (room temperature eggs blend better, reducing cracks)
- 1 tsp vanilla extract (the real deal, none of that imitation stuff)
- 8 oz white chocolate, melted (I like to use a high-quality brand for a richer taste)
- 1 cup fresh raspberries (plus more for garnish, because we eat with our eyes first)
Instructions
- Preheat your oven to 325°F (163°C). A properly heated oven is crucial for even baking.
- Mix graham cracker crumbs, 1/4 cup sugar, and melted butter in a bowl until well combined. Press firmly into the bottom of a 9-inch springform pan. Tip: Use the bottom of a glass to press the crumbs evenly.
- Bake the crust for 10 minutes, then let it cool. This step ensures a crisp base.
- Beat cream cheese and 3/4 cup sugar until smooth. Add eggs one at a time, then vanilla, mixing well after each addition. Tip: Scrape the bowl sides to incorporate all ingredients evenly.
- Stir in melted white chocolate until fully blended. The mixture should be silky.
- Pour over the cooled crust. Drop spoonfuls of raspberries onto the filling, then swirl gently with a knife for a marbled effect.
- Bake for 45-50 minutes until the edges are set but the center is slightly wobbly. Tip: A water bath can prevent cracks, but I often skip it for simplicity.
- Cool in the oven with the door ajar for 1 hour, then refrigerate for at least 4 hours. Patience is key for the perfect texture.
After all that waiting, you’re rewarded with a cheesecake that’s creamy, rich, and punctuated with bursts of raspberry. I love serving it with a drizzle of raspberry sauce and a few extra berries on top for that Instagram-worthy finish.
Filet Mignon with Red Wine Reduction
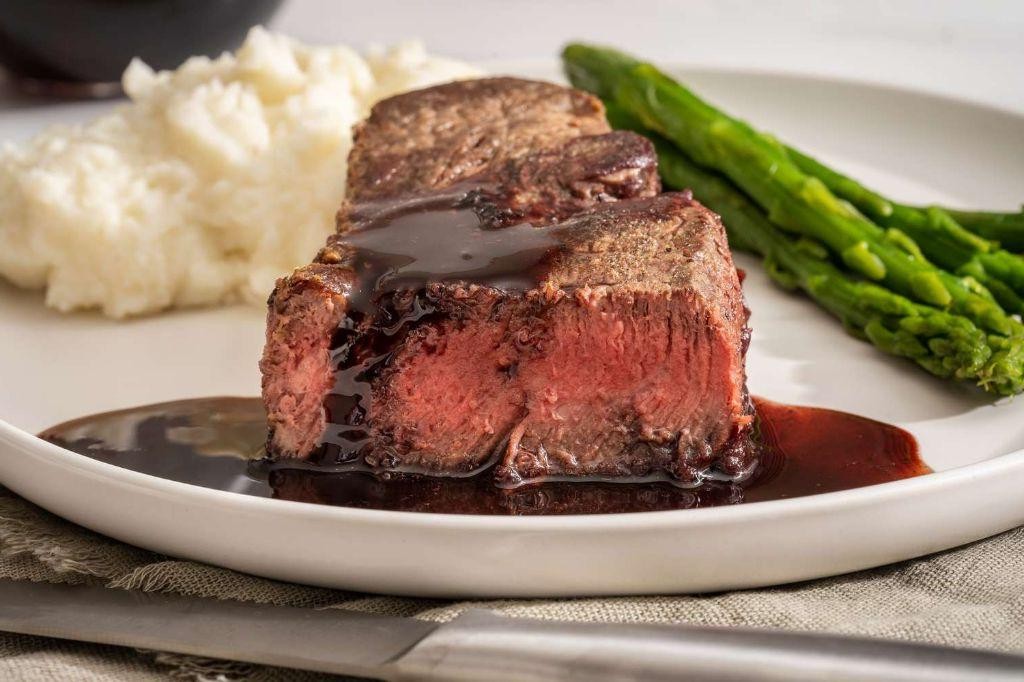
Yesterday, I found myself craving something indulgent yet elegant for dinner, and that’s when I decided to whip up a Filet Mignon with Red Wine Reduction. It’s a dish that feels special but is surprisingly straightforward to make, perfect for those nights when you want to treat yourself without spending hours in the kitchen.
Ingredients
- 2 filet mignon steaks (about 1.5 inches thick, because thickness matters for that perfect medium-rare)
- 1 tbsp extra virgin olive oil (my go-to for its fruity notes)
- 1 tbsp unsalted butter (because everything’s better with butter)
- 1/2 cup dry red wine (I used a Cabernet Sauvignon for its bold flavors)
- 1/2 cup beef broth (homemade if you have it, but store-bought works in a pinch)
- 1 tsp fresh thyme leaves (they add a lovely aroma)
- Salt and freshly ground black pepper (to season, because seasoning is key)
Instructions
- Preheat your oven to 400°F (200°C). This ensures a perfectly cooked steak with a beautiful crust.
- Season both sides of the filet mignon steaks generously with salt and pepper. Don’t be shy; the seasoning should coat the steak evenly.
- Heat the olive oil in an oven-safe skillet over medium-high heat until it’s shimmering but not smoking. This is crucial for getting that golden crust.
- Add the steaks to the skillet and sear for 3 minutes on each side. Use tongs to flip them; a fork will pierce the meat and let those precious juices escape.
- Transfer the skillet to the preheated oven and cook for about 6 minutes for medium-rare. For a more well-done steak, add a couple of minutes, but keep an eye on it.
- Remove the skillet from the oven (remember, the handle is hot!) and place the steaks on a plate to rest. Tent them with foil to keep warm.
- In the same skillet, melt the butter over medium heat. Add the thyme and let it sizzle for about 30 seconds to infuse the butter.
- Pour in the red wine and beef broth, scraping up any browned bits from the bottom of the pan. These bits are flavor gold.
- Simmer the mixture until it’s reduced by half, about 5 minutes. The sauce should coat the back of a spoon when it’s ready.
- Plate the steaks and drizzle with the red wine reduction. Serve immediately.
Zesty and rich, the red wine reduction complements the tender filet mignon beautifully, making each bite a luxurious experience. Try serving it with a side of roasted asparagus or creamy mashed potatoes for a complete meal that’s sure to impress.
Valentine’s Day Sugar Cookies

Ah, Valentine’s Day—the perfect excuse to whip up something sweet and shareable. I remember the first time I made these sugar cookies; they were a hit, and now they’re a yearly tradition in my kitchen. There’s something about the combination of buttery dough and festive sprinkles that just screams love.
Ingredients
- 2 1/4 cups all-purpose flour (I swear by King Arthur for consistent results)
- 1/2 tsp baking powder (freshness matters, so I always check the date)
- 1/4 tsp salt (a pinch of sea salt elevates the flavor)
- 3/4 cup unsalted butter, room temperature (softened but not melted—key for the perfect texture)
- 3/4 cup granulated sugar (I sometimes use organic for a slightly deeper taste)
- 1 large egg, room temperature (cold eggs can make the dough tricky to work with)
- 2 tsp vanilla extract (pure vanilla makes all the difference)
- Valentine’s Day sprinkles (because more is always better when it comes to sprinkles)
Instructions
- Preheat your oven to 350°F (175°C) and line two baking sheets with parchment paper.
- In a medium bowl, whisk together the flour, baking powder, and salt until well combined.
- In a large bowl, beat the butter and sugar together on medium speed until light and fluffy, about 3 minutes.
- Add the egg and vanilla extract to the butter mixture, beating until fully incorporated.
- Gradually mix in the dry ingredients on low speed until just combined—overmixing leads to tough cookies.
- Roll the dough into 1-inch balls, then flatten slightly and press into sprinkles.
- Place cookies 2 inches apart on the prepared baking sheets and bake for 10-12 minutes, until the edges are just golden.
- Let the cookies cool on the baking sheets for 5 minutes before transferring to a wire rack to cool completely.
Kicking back with one of these cookies is like a little hug for your taste buds—soft, buttery, and just the right amount of sweet. Try sandwiching them with a dollop of raspberry jam for an extra special treat.
Chocolate Lava Cakes
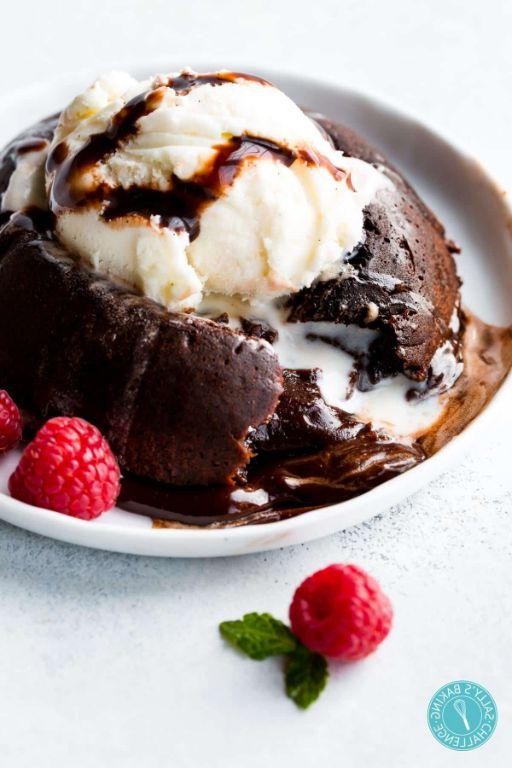
Sometimes, all you need is a little indulgence to turn your day around, and that’s exactly what these Chocolate Lava Cakes promise. I remember the first time I tried making them; the kitchen was a mess, but the result was pure magic.
Ingredients
- 1/2 cup unsalted butter (I always keep mine at room temperature for easier mixing)
- 4 ounces semi-sweet chocolate (the better the quality, the richer the flavor)
- 1 cup powdered sugar (because who doesn’t love a little extra sweetness?)
- 2 large eggs (room temperature eggs blend more smoothly into the batter)
- 2 egg yolks (adds that extra richness we’re after)
- 1 teaspoon vanilla extract (my secret weapon for depth of flavor)
- 1/2 cup all-purpose flour (sifted to avoid any lumps)
- A pinch of salt (just to balance all that sweetness)
Instructions
- Preheat your oven to 425°F. This high heat is crucial for getting that perfect lava flow.
- Grease four 6-ounce ramekins with butter and dust with flour, tapping out the excess. This ensures your cakes will slide out beautifully.
- In a microwave-safe bowl, melt the butter and chocolate together in 30-second bursts, stirring in between, until smooth. Tip: Don’t overheat the chocolate to avoid seizing.
- Whisk in the powdered sugar until well combined. The mixture should look glossy.
- Add the eggs, egg yolks, and vanilla extract, whisking vigorously to incorporate air into the batter. Tip: This step is key for that light, soufflé-like texture.
- Gently fold in the flour and salt until just combined. Overmixing can lead to dense cakes.
- Divide the batter evenly among the prepared ramekins. Tip: Fill them only 3/4 full to allow room for rising.
- Bake for 12-14 minutes. The edges should be set, but the centers will still be jiggly—that’s your lava!
- Let the cakes cool for 1 minute, then invert onto plates. Serve immediately.
Perfectly gooey in the middle with a tender cake exterior, these Chocolate Lava Cakes are a dream. I love serving them with a scoop of vanilla ice cream for that classic hot-and-cold contrast.
Strawberry Champagne Cupcakes
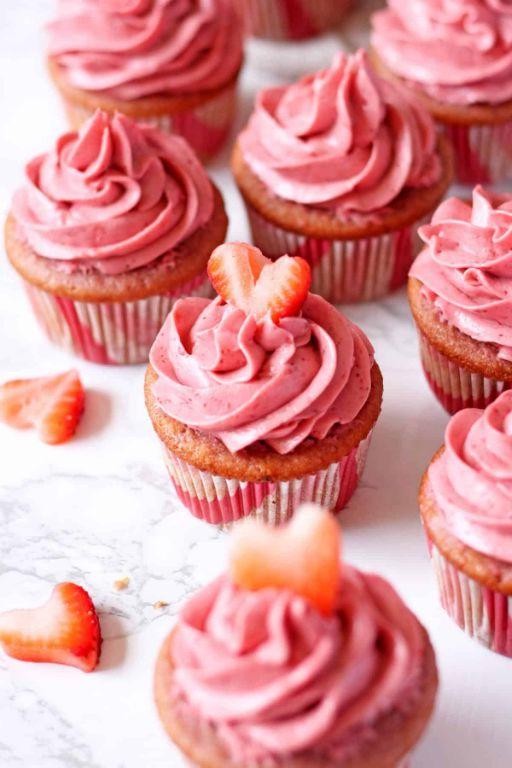
Nothing says celebration quite like the combination of strawberries and champagne, and these Strawberry Champagne Cupcakes are no exception. I first stumbled upon this recipe during a friend’s bridal shower and knew I had to make it my own. Now, it’s my go-to for any festive occasion, and trust me, it’s as fun to make as it is to eat.
Ingredients
- 1 1/2 cups all-purpose flour (I always sift mine for extra fluffiness)
- 1/2 cup granulated sugar (because life’s too short for less sweetness)
- 1/4 cup champagne (the drier, the better, in my opinion)
- 1/2 cup unsalted butter, room temperature (this is key for a smooth batter)
- 2 large eggs, room temperature (they blend better when not cold)
- 1/2 cup fresh strawberries, pureed (I like to sneak in a few extra for more flavor)
- 1 tsp vanilla extract (the real deal, none of that imitation stuff)
- 1/2 tsp baking powder (for that perfect rise)
- 1/4 tsp salt (just a pinch to balance the sweetness)
Instructions
- Preheat your oven to 350°F (175°C) and line a muffin tin with cupcake liners. This ensures even baking and easy cleanup.
- In a large bowl, cream together the butter and sugar until light and fluffy. This should take about 3 minutes with an electric mixer.
- Add the eggs one at a time, beating well after each addition. Room temperature eggs incorporate more smoothly, preventing a curdled look.
- Gently fold in the strawberry puree and champagne. The mixture might look a bit split, but it’ll come together with the dry ingredients.
- In a separate bowl, whisk together the flour, baking powder, and salt. Gradually add this to the wet ingredients, mixing until just combined. Overmixing leads to tough cupcakes.
- Divide the batter evenly among the cupcake liners, filling each about 2/3 full. This gives them room to rise without overflowing.
- Bake for 18-20 minutes, or until a toothpick inserted into the center comes out clean. The tops should be lightly golden.
- Let the cupcakes cool in the pan for 5 minutes, then transfer to a wire rack to cool completely. This prevents them from becoming soggy.
Kick your dessert game up a notch with these Strawberry Champagne Cupcakes. The champagne adds a subtle sophistication, while the strawberries keep it fresh and fruity. Serve them at your next brunch for a touch of elegance, or enjoy one (or two) as a sweet treat to brighten your day.
Pasta with Pink Sauce
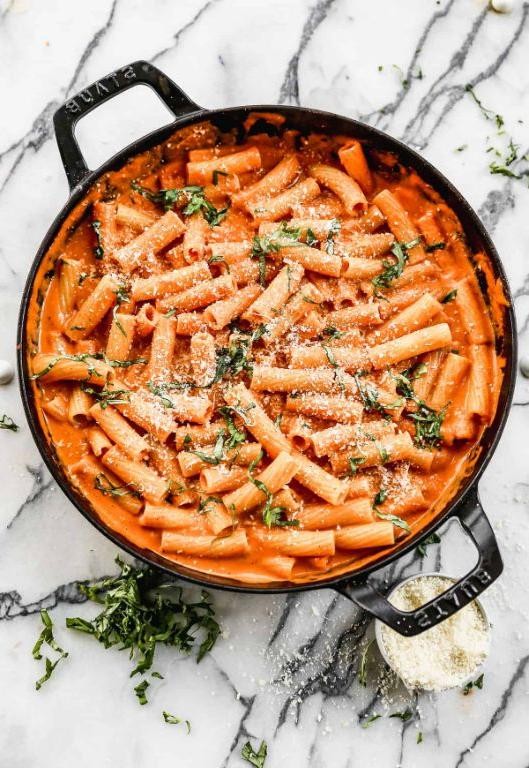
Very few dishes can whisk me back to my grandmother’s kitchen like a hearty plate of pasta with pink sauce. It’s that perfect blend of creamy and tangy, with a hint of sweetness that makes it irresistible. Today, I’m sharing my go-to recipe that’s as simple as it is delicious.
Ingredients
- 1 lb of your favorite pasta (I’m partial to penne for its ability to hold sauce)
- 2 tbsp extra virgin olive oil (the good stuff makes a difference)
- 3 cloves garlic, minced (because more garlic is always better)
- 1 cup heavy cream (room temperature blends smoother)
- 1 cup marinara sauce (homemade if you have it, but no judgment here)
- 1/2 cup grated Parmesan cheese (plus extra for serving)
- Salt to taste (I like to use sea salt for a cleaner flavor)
- Fresh basil leaves for garnish (tearing them releases more aroma)
Instructions
- Bring a large pot of salted water to a boil over high heat. Tip: Salt the water like the sea for the best pasta flavor.
- Add the pasta and cook according to package instructions until al dente, about 8-10 minutes. Tip: Stir occasionally to prevent sticking.
- While the pasta cooks, heat olive oil in a large skillet over medium heat. Add minced garlic and sauté until fragrant, about 1 minute. Tip: Don’t let the garlic brown or it’ll turn bitter.
- Pour in the heavy cream and marinara sauce, stirring to combine. Let the mixture simmer for 5 minutes, allowing the flavors to meld.
- Drain the pasta, reserving 1/2 cup of pasta water. Add the pasta to the skillet with the sauce, tossing to coat. If the sauce is too thick, add reserved pasta water a little at a time.
- Stir in the Parmesan cheese until melted and the sauce is creamy. Season with salt as needed.
- Garnish with torn basil leaves and serve immediately with extra Parmesan on the side.
Creamy, dreamy, and just the right amount of tang, this pasta with pink sauce is a crowd-pleaser. Try serving it with a side of garlic bread to soak up every last drop of that delicious sauce.
Red Velvet Cake Bites
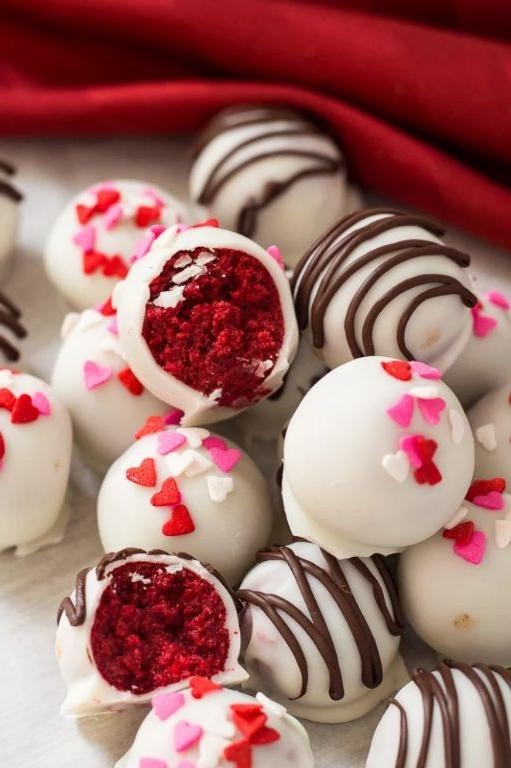
Zesty and vibrant, these Red Velvet Cake Bites are my go-to when I need a little pick-me-up or something special to share at gatherings. There’s something about their rich color and creamy texture that turns any moment into a celebration.
Ingredients
- 1 1/2 cups all-purpose flour (I swear by King Arthur for consistent results)
- 1 cup granulated sugar (because life’s too short for less sweet)
- 1/2 cup unsalted butter, room temperature (soft butter is key for that perfect mix)
- 1 large egg, room temperature (trust me, it blends better)
- 1 tbsp cocoa powder (the darker, the better for that signature hue)
- 1 tsp vanilla extract (pure vanilla makes all the difference)
- 1/2 tsp baking soda (freshness matters, so check the date)
- 1/2 cup buttermilk (for that tender crumb)
- 1 tbsp red food coloring (I like the gel kind for vibrant color)
- 8 oz cream cheese, softened (full-fat for the win)
- 2 cups powdered sugar (sifted to avoid lumps)
- 1 tsp vanilla extract (yes, again, because flavor)
Instructions
- Preheat your oven to 350°F (175°C) and line a baking sheet with parchment paper. Tip: An oven thermometer ensures accuracy.
- In a large bowl, cream together the butter and sugar until light and fluffy, about 3 minutes. Tip: Scrape the bowl sides for even mixing.
- Beat in the egg and vanilla extract until well combined.
- Whisk together the flour, cocoa powder, and baking soda in a separate bowl.
- Alternately add the dry ingredients and buttermilk to the butter mixture, starting and ending with the dry. Tip: Mix just until combined to keep the bites tender.
- Stir in the red food coloring until the batter is uniformly colored.
- Drop tablespoon-sized balls of dough onto the prepared baking sheet, spacing them 2 inches apart.
- Bake for 10-12 minutes, or until the edges are set but the centers are still soft. Tip: They’ll firm up as they cool.
- Let cool on the baking sheet for 5 minutes, then transfer to a wire rack to cool completely.
- For the frosting, beat the cream cheese until smooth, then gradually add the powdered sugar and vanilla, beating until creamy.
- Once the cake bites are cool, frost each one with a dollop of cream cheese frosting.
Kicking back with these Red Velvet Cake Bites is like a mini vacation. Their moist, velvety texture paired with the tangy cream cheese frosting is irresistible. Try serving them on a vintage cake stand for an extra touch of charm at your next brunch.
Love Potion Cocktail
Zesty and vibrant, the Love Potion Cocktail is my go-to drink for those evenings when I want to add a little magic to the night. It’s a blend of sweet, tangy, and floral notes that somehow manages to capture the essence of summer in a glass. I first stumbled upon this recipe during a lazy afternoon experimenting with flavors, and it’s been a staple in my cocktail repertoire ever since.
Ingredients
- 1 cup of cranberry juice (I love the tartness it brings, but feel free to adjust based on your preference)
- 1/2 cup of peach schnapps (this adds a sweet, fruity layer that’s irresistible)
- 1/4 cup of lime juice (freshly squeezed, please—it makes all the difference)
- 1 tbsp of honey (for that smooth, mellow sweetness)
- Ice cubes (because no cocktail is complete without that chill factor)
- A splash of club soda (for a bit of fizz and lightness)
- Edible flowers for garnish (they’re not just pretty; they add a subtle floral note)
Instructions
- In a cocktail shaker, combine the cranberry juice, peach schnapps, lime juice, and honey. Shake well until the honey is fully dissolved—about 30 seconds should do the trick.
- Fill two glasses to the brim with ice cubes. This ensures your cocktail stays chilled from the first sip to the last.
- Strain the mixture evenly into the prepared glasses. The vibrant color is part of the allure, so take a moment to admire it.
- Top each glass with a splash of club soda. Gently stir to combine, ensuring you don’t lose too much fizz.
- Garnish with edible flowers. Not only do they look stunning, but they also hint at the floral notes within.
Bursting with flavors, this Love Potion Cocktail is as enchanting to taste as it is to behold. The balance of tart cranberry and sweet peach, with a hint of lime and honey, creates a symphony of flavors that’s both refreshing and indulgent. Serve it at your next gathering and watch as it becomes the talk of the evening—just don’t forget to share the recipe when asked!
Cherry Chocolate Truffles

Perfect for those who adore the combination of sweet and tart, these Cherry Chocolate Truffles are a decadent treat that’s surprisingly simple to make. I remember the first time I tried them at a friend’s party; I was hooked after the first bite and knew I had to recreate them at home.
Ingredients
- 1 cup dark chocolate chips (I swear by Ghirardelli for that rich, smooth melt)
- 1/2 cup heavy cream (cold from the fridge works best for me)
- 1/4 cup dried cherries (chopped finely, but leave a few chunks for texture)
- 1 tbsp unsalted butter (room temp to blend smoothly)
- 1/2 tsp vanilla extract (pure, not imitation, for the best flavor)
- Cocoa powder for dusting (I like Dutch-processed for its deep color and mild taste)
Instructions
- Place the dark chocolate chips in a heatproof bowl. I find that a glass bowl works best for even melting.
- In a small saucepan, heat the heavy cream over medium heat until it just begins to simmer, about 2-3 minutes. Watch closely to avoid boiling.
- Pour the hot cream over the chocolate chips and let it sit for 1 minute to soften the chocolate.
- Add the butter and vanilla extract to the bowl, then stir gently with a spatula until the mixture is smooth and glossy. Tip: If the chocolate isn’t melting completely, you can place the bowl over a pot of simmering water for a few seconds.
- Fold in the chopped dried cherries until evenly distributed throughout the chocolate mixture.
- Cover the bowl with plastic wrap and refrigerate for at least 2 hours, or until the mixture is firm enough to scoop. Tip: Chilling overnight gives the best consistency for rolling.
- Using a small cookie scoop or a teaspoon, form the mixture into 1-inch balls and roll them between your palms to smooth. Tip: If the mixture is too sticky, dust your hands lightly with cocoa powder.
- Roll each truffle in cocoa powder until fully coated, then place on a parchment-lined tray.
- Refrigerate the truffles for another 30 minutes to set before serving.
You’ll love the contrast between the creamy chocolate and the chewy, tangy cherries in these truffles. They’re perfect for gifting, or just treating yourself to a little luxury any day of the week.
Valentine’s Day Heart Pizza

So, Valentine’s Day is around the corner, and what better way to celebrate love than with a heart-shaped pizza? I remember the first time I made this for my partner; the look of surprise and joy was priceless. It’s become our little tradition, and I’m excited to share it with you.
Ingredients
- 1 1/2 cups all-purpose flour (I swear by King Arthur for that perfect crust)
- 1/2 cup warm water (about 110°F, just right to wake up the yeast)
- 1 tsp active dry yeast (a little patience here goes a long way)
- 1/2 tsp sugar (to feed the yeast, I like using organic cane sugar)
- 1/2 tsp salt (I prefer sea salt for its subtle crunch)
- 1 tbsp extra virgin olive oil (my go-to for that rich flavor)
- 1/2 cup marinara sauce (homemade if you have the time, but no judgment here)
- 1 cup shredded mozzarella cheese (because more cheese is always better)
- Your favorite toppings (we’re partial to pepperoni and fresh basil)
Instructions
- In a large bowl, combine the warm water, yeast, and sugar. Let it sit for 5 minutes until frothy. Tip: This is your yeast waking up, so don’t rush it.
- Add the flour, salt, and olive oil to the yeast mixture. Stir until a dough forms. Tip: If the dough feels sticky, a little more flour can save the day.
- Knead the dough on a floured surface for about 5 minutes until smooth. Then, place it in a greased bowl, cover, and let it rise in a warm place for 1 hour. Tip: Your oven with the light on is a perfect cozy spot.
- Preheat your oven to 475°F. Roll out the dough into a large heart shape on a floured surface. Transfer to a baking sheet.
- Spread the marinara sauce over the dough, leaving a small border for the crust. Sprinkle with mozzarella and add your toppings.
- Bake for 12-15 minutes until the crust is golden and the cheese is bubbly. Tip: Keep an eye on it; ovens can be sneaky.
When it comes out of the oven, the crust is perfectly crisp, with a chewy center, and the toppings are just begging to be devoured. Serve it with a side of love stories or a glass of red wine for the full Valentine’s effect.
Rosemary Garlic Lamb Chops
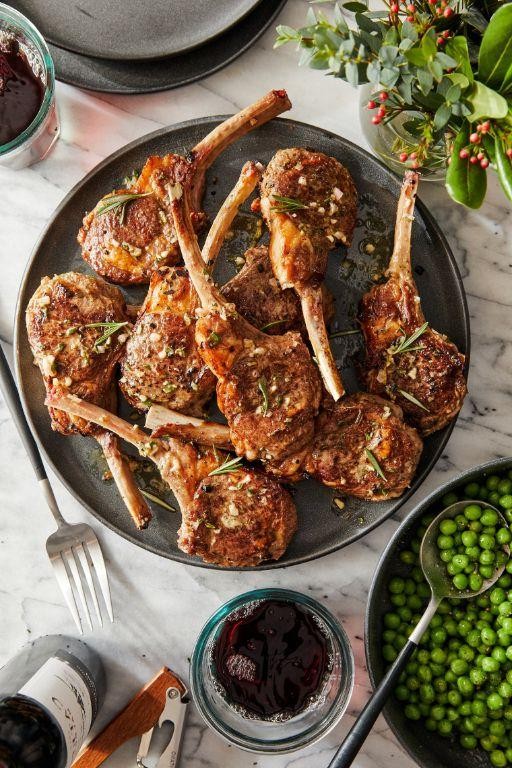
Dinner parties are my favorite way to unwind, and nothing impresses quite like these Rosemary Garlic Lamb Chops. They’re a staple in my kitchen, especially when I want to add a touch of elegance without spending hours cooking.
Ingredients
- 4 lamb chops (about 1 inch thick, because thickness matters for that perfect medium-rare)
- 2 tbsp extra virgin olive oil (my go-to for its fruity notes)
- 3 garlic cloves, minced (fresh is best, but I won’t judge if you use pre-minced on a busy day)
- 1 tbsp fresh rosemary, finely chopped (dried works in a pinch, but fresh brings the aroma to life)
- 1 tsp sea salt (I love the crunch and flavor it adds)
- 1/2 tsp black pepper (freshly ground, please)
Instructions
- Preheat your oven to 400°F (200°C) to ensure it’s hot enough for a good sear.
- Heat olive oil in an oven-safe skillet over medium-high heat until shimmering, about 2 minutes. This is key for preventing the chops from sticking.
- Season lamb chops evenly with salt and pepper on both sides. I like to do this right before cooking to keep the meat juicy.
- Sear the chops for 2 minutes per side until a golden crust forms. Don’t move them around; let the heat do its work.
- Reduce heat to medium, add minced garlic and rosemary around the chops, and cook for 1 minute until fragrant. Tip: Stir the aromatics to prevent burning.
- Transfer the skillet to the preheated oven and roast for 6 minutes for medium-rare. For medium, go for 8 minutes. Use a meat thermometer to check for 145°F (63°C).
- Remove from oven and let rest for 5 minutes. This step is crucial for redistributing the juices.
Unbelievably tender and packed with flavor, these lamb chops are a showstopper. Serve them over a bed of creamy mashed potatoes or with a side of roasted vegetables for a complete meal that’s sure to impress.
Sparkling Raspberry Lemonade
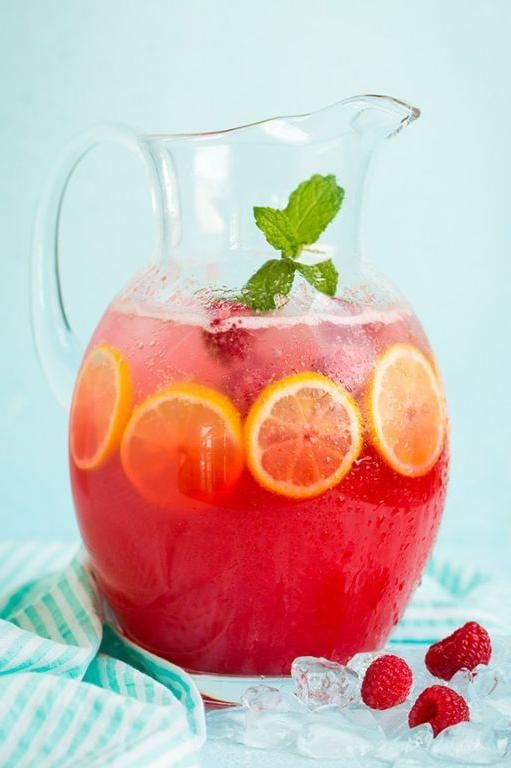
Zesty afternoons call for something refreshing, and nothing beats the homemade Sparkling Raspberry Lemonade I stumbled upon during a summer picnic. It’s become my go-to for beating the heat, and I love how the raspberries add a sweet twist to the classic lemonade.
Ingredients
- 1 cup fresh raspberries (frozen works in a pinch, but fresh is my preference for that vibrant color)
- 1 cup granulated sugar (I sometimes cut this down to 3/4 cup if the raspberries are super sweet)
- 1 cup freshly squeezed lemon juice (about 4-6 lemons, depending on size—I always roll them on the counter first to get more juice)
- 4 cups cold sparkling water (chilled is best for that immediate refreshment)
- Ice cubes (I like using crushed ice for quicker cooling)
Instructions
- In a medium saucepan, combine the raspberries and sugar over medium heat. Stir occasionally until the sugar dissolves and the raspberries break down, about 5 minutes.
- Remove the saucepan from heat and strain the mixture through a fine-mesh sieve into a pitcher, pressing on the solids to extract as much liquid as possible. Discard the seeds and pulp.
- Add the freshly squeezed lemon juice to the pitcher and stir to combine with the raspberry syrup.
- Just before serving, pour in the cold sparkling water and stir gently to mix. Tip: Stirring too vigorously will lose the fizz, so be gentle.
- Fill glasses with ice cubes and pour the sparkling raspberry lemonade over the ice. Tip: For an extra fancy touch, garnish with a few whole raspberries or a lemon slice on the rim.
Here’s how it turns out: The Sparkling Raspberry Lemonade is a perfect balance of sweet and tart, with the effervescence adding a light, airy texture. Serve it in mason jars with striped paper straws for a picnic-ready presentation that’s as Instagram-worthy as it is delicious.
Dark Chocolate Mousse
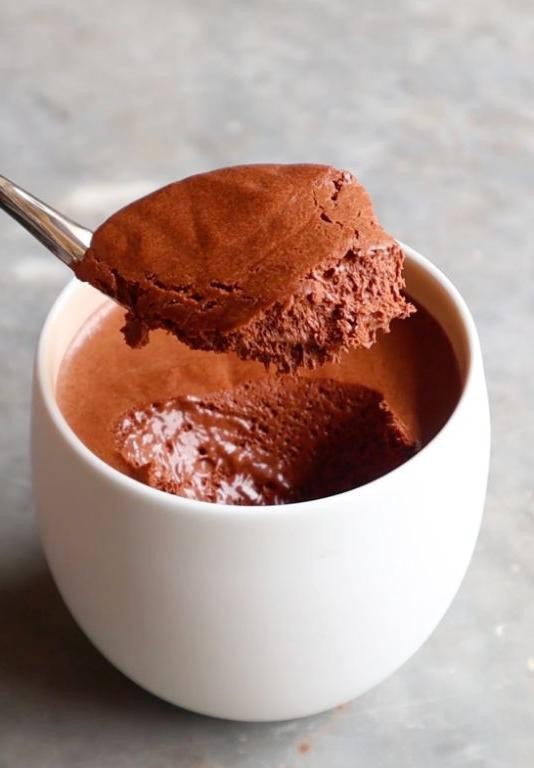
Finally, a dessert that feels like a hug in a bowl—Dark Chocolate Mousse. I remember the first time I tried making it; the kitchen was a mess, but the result was pure magic. Now, it’s my go-to when I need something decadent yet surprisingly simple to whip up.
Ingredients
- 8 oz high-quality dark chocolate (I swear by 70% cocoa for that perfect balance)
- 1 cup heavy cream (cold, straight from the fridge works best)
- 3 large eggs (room temperature eggs blend smoother, trust me)
- 1/4 cup granulated sugar (I sometimes reduce this to 2 tbsp if I’m feeling less sweet)
- 1 tsp vanilla extract (the real deal, not imitation)
- A pinch of salt (just a pinch to elevate the chocolate flavor)
Instructions
- Chop the dark chocolate into small pieces and melt it in a heatproof bowl over simmering water, stirring occasionally until smooth. Tip: Keep the water at a gentle simmer to avoid overheating the chocolate.
- Separate the eggs, placing the yolks in one bowl and the whites in another. Tip: Ensure no yolk gets into the whites for the best volume when whipped.
- Whisk the egg yolks with half the sugar until pale and slightly thickened. This usually takes about 2 minutes.
- Gently fold the melted chocolate into the egg yolk mixture until fully combined. Tip: Let the chocolate cool slightly to avoid cooking the eggs.
- In a clean bowl, whip the heavy cream to soft peaks. Be careful not to over-whip, or it’ll become grainy.
- In another bowl, beat the egg whites with the remaining sugar and a pinch of salt until stiff peaks form. This adds airiness to the mousse.
- Fold the whipped cream into the chocolate mixture, then gently fold in the beaten egg whites until no streaks remain.
- Divide the mousse into serving glasses and chill for at least 4 hours, or overnight for best results.
Out of this world, the mousse sets into a cloud-like texture with a rich, deep chocolate flavor that’s not overly sweet. Serve it with a sprinkle of sea salt or fresh berries for a contrast that’ll have everyone asking for seconds.
Baked Brie with Cranberries
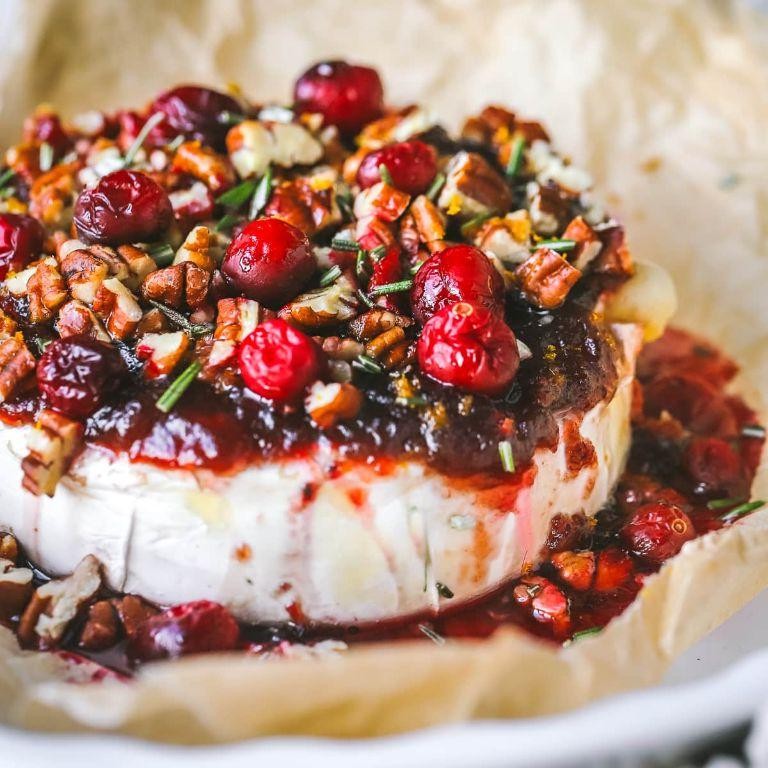
Oh, the joy of discovering the perfect appetizer that’s both elegant and effortless! Baked Brie with Cranberries has become my go-to for last-minute gatherings, blending creamy, melty cheese with the tart sweetness of cranberries in a way that never fails to impress.
Ingredients
- 1 wheel of Brie cheese (about 8 oz) – I always opt for a high-quality, double-cream Brie for that extra gooey center.
- 1/2 cup cranberry sauce – Homemade or store-bought, but I swear by my grandma’s quick stovetop version with a hint of orange zest.
- 1/4 cup chopped walnuts – Toasted lightly for a crunch that contrasts beautifully with the soft Brie.
- 1 tbsp honey – A drizzle of local honey adds a lovely sweetness that ties everything together.
- 1 sprig of fresh rosemary – Because a little herbaceous note makes it feel even more special.
Instructions
- Preheat your oven to 350°F (175°C). This ensures the Brie melts evenly without the outside getting too hard.
- Place the Brie wheel on a parchment-lined baking sheet. If you’re worried about the cheese oozing out, a small baking dish works too.
- Spread the cranberry sauce evenly over the top of the Brie. Don’t skimp here; the tartness of the cranberries cuts through the richness of the cheese.
- Sprinkle the chopped walnuts over the cranberry sauce. Toasting the walnuts beforehand, as I mentioned, really elevates the dish.
- Drizzle honey over the top. A little goes a long way, so just a light drizzle will do.
- Bake for 15-20 minutes, or until the Brie is soft to the touch but not completely melted through. You’ll know it’s ready when the edges start to bubble slightly.
- Garnish with fresh rosemary before serving. It’s not just for looks; the aroma is incredible.
The first crack into the baked Brie reveals a river of creamy cheese, perfectly balanced by the tart cranberries and crunchy walnuts. Serve it with slices of baguette or apple slices for a delightful mix of textures and flavors that’ll have everyone coming back for more.
Valentine’s Day Themed Charcuterie Board
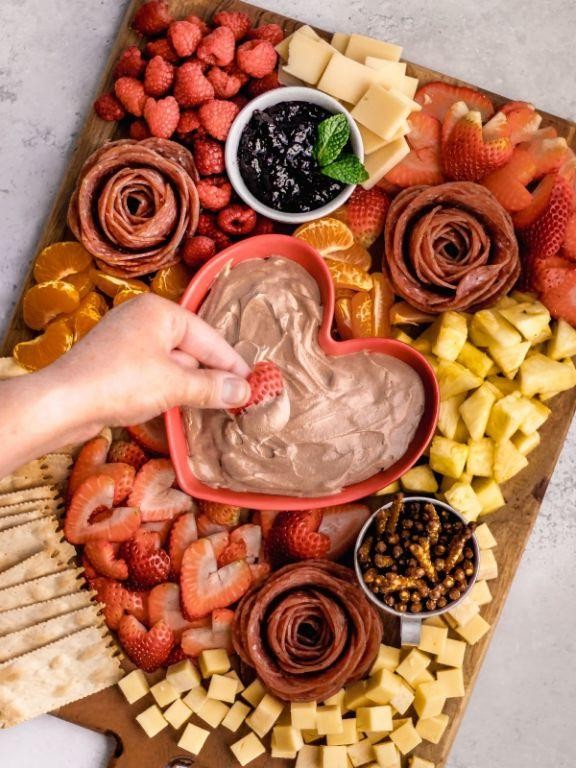
This Valentine’s Day, I wanted to create something that’s not only delicious but also visually stunning, so I decided on a Valentine’s Day Themed Charcuterie Board. It’s perfect for sharing with your loved one or as a centerpiece for your Galentine’s gathering. Trust me, the combination of sweet, savory, and everything in between will have everyone reaching for more.
Ingredients
- 1 cup strawberries, hulled and sliced (I love using organic strawberries for their vibrant color and sweetness)
- 1/2 cup raspberries (they add a beautiful pop of color and a tangy contrast)
- 1/4 cup dark chocolate chips (I prefer Ghirardelli for their rich flavor)
- 1/4 cup white chocolate chips (for a sweet, creamy balance)
- 1/2 cup brie cheese, sliced (room temperature makes it creamier and easier to slice)
- 1/2 cup salami, rolled (I like to use a mix of spicy and mild for variety)
- 1/4 cup honey (local honey is my go-to for its floral notes)
- 1/4 cup almonds, roasted (for a crunchy texture)
- 1/4 cup dried apricots (they add a chewy sweetness that pairs well with the cheese)
Instructions
- Start by arranging the brie cheese and salami on a large wooden board, leaving space for the other ingredients.
- Place the strawberries and raspberries around the cheese and meat, creating little pockets of color.
- Scatter the dark and white chocolate chips among the fruits for a sweet surprise. Tip: Melt some chocolate chips to drizzle over the board for an extra decadent touch.
- Drizzle honey over the brie cheese and around the board for a glossy finish. Tip: Warm the honey slightly for easier drizzling.
- Add the roasted almonds and dried apricots to fill in any gaps, ensuring every bite has a mix of textures. Tip: Toast the almonds yourself for a fresher, crunchier bite.
Now, the board is ready to serve! The combination of creamy brie, spicy salami, sweet fruits, and crunchy almonds creates a symphony of flavors and textures. For an extra romantic touch, pair it with a glass of sparkling rosé and some candlelight. Nothing says Valentine’s Day like a beautifully crafted charcuterie board shared with someone special.
Pink Velvet Macarons
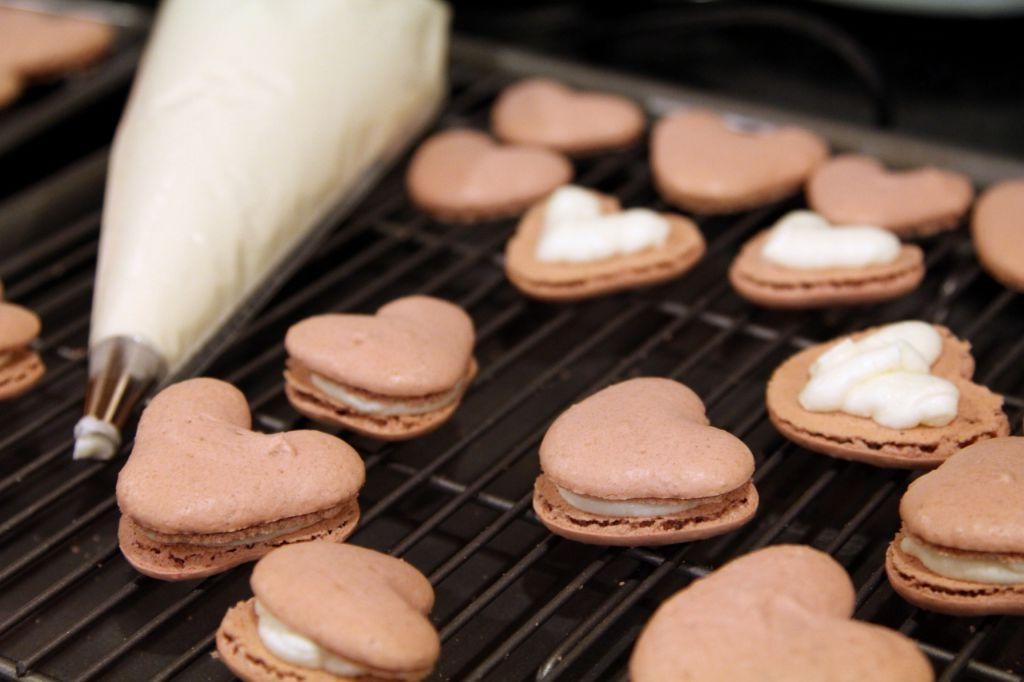
Delightfully delicate and irresistibly chic, Pink Velvet Macarons are my go-to when I want to impress at a brunch or simply treat myself to something sweet. Inspired by the classic red velvet, these macarons bring a playful twist with their soft pink hue and creamy filling, making them as much a feast for the eyes as they are for the palate.
Ingredients
- 1 cup almond flour – I swear by Bob’s Red Mill for its fine texture.
- 1 3/4 cups powdered sugar – because granulated just won’t do for that smooth shell.
- 3 large egg whites – room temperature is key for peak perfection.
- 1/4 cup granulated sugar – for that just-right sweetness.
- 1 tsp vanilla extract – the good stuff, none of that imitation.
- Red food coloring – a few drops to achieve that dreamy pink.
- 1/2 cup unsalted butter, softened – for the luscious filling.
- 1 cup cream cheese, softened – Philadelphia brand has never let me down.
- 1 1/2 cups powdered sugar – yes, more, for the filling’s sweet embrace.
Instructions
- Preheat your oven to 300°F (150°C) and line two baking sheets with parchment paper.
- Sift together almond flour and powdered sugar into a large bowl to avoid any lumps.
- In a separate bowl, beat egg whites on medium speed until foamy, then gradually add granulated sugar until stiff peaks form.
- Gently fold in the vanilla extract and red food coloring into the egg white mixture.
- Carefully fold the dry ingredients into the wet until the batter flows like lava.
- Pipe 1-inch circles onto the prepared baking sheets, then tap the sheets on the counter to release air bubbles.
- Let the macarons sit at room temperature for 30 minutes until they form a skin.
- Bake for 18 minutes, then let cool completely on the baking sheets.
- For the filling, beat together butter, cream cheese, and powdered sugar until light and fluffy.
- Pair up the macaron shells and pipe the filling onto one half, then sandwich together.
Perfectly crisp on the outside with a chewy center, these Pink Velvet Macarons are a dream. Serve them on a vintage cake stand for an extra touch of elegance, or pack them in a pretty box for a heartfelt gift.
Strawberry Rose Smoothie
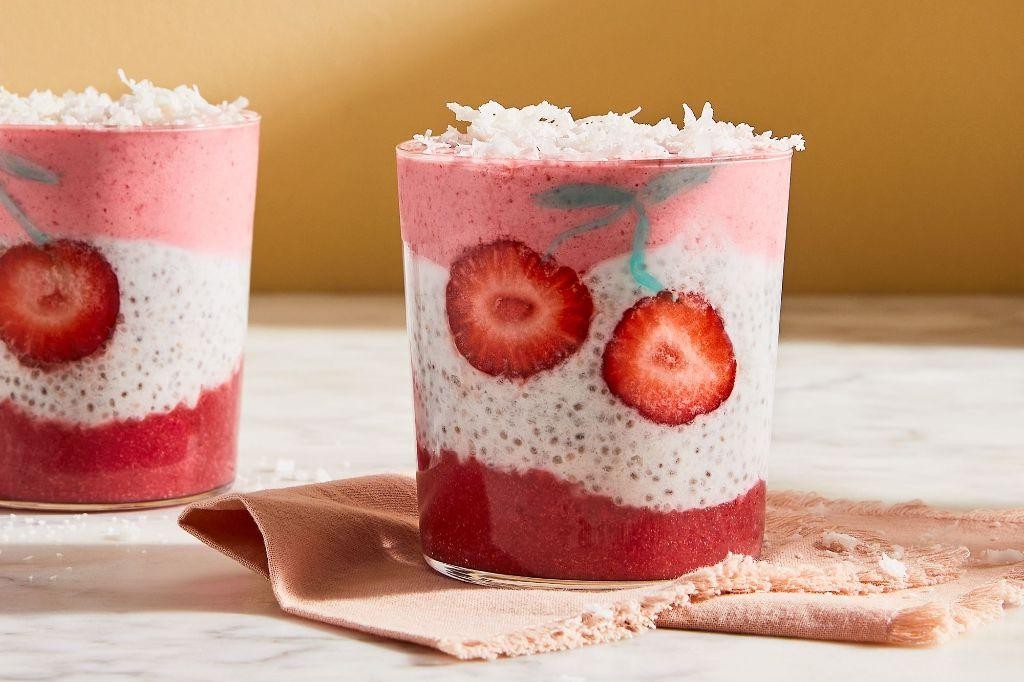
Summer mornings call for something refreshing and slightly indulgent, and that’s exactly what this Strawberry Rose Smoothie delivers. I stumbled upon this combination during a brunch experiment, and now it’s my go-to when I want to feel a bit fancy without the fuss.
Ingredients
- 1 cup frozen strawberries (I find frozen gives the perfect icy texture without diluting the flavor)
- 1/2 cup Greek yogurt (for that creamy tang—non-fat works, but whole milk yogurt is richer)
- 1 tbsp rose water (a little goes a long way; I love the floral note it adds)
- 1/2 cup almond milk (unsweetened is my preference to control the sweetness)
- 1 tbsp honey (local if you have it; the flavor is unmatched)
- Ice cubes (a handful, but adjust based on how thick you like it)
Instructions
- Add the frozen strawberries, Greek yogurt, rose water, almond milk, and honey to your blender.
- Blend on high for 30 seconds, then check the consistency. Tip: If it’s too thick, add a splash more almond milk.
- Add a handful of ice cubes and blend again for another 30 seconds until smooth. Tip: For an extra smooth texture, blend for an additional 10 seconds.
- Pour into your favorite glass and serve immediately. Tip: Garnish with a fresh strawberry or a sprinkle of dried rose petals for that Instagram-worthy look.
Light, floral, and perfectly sweet, this smoothie is like a sip of summer. I love serving it in a chilled glass with a stainless steel straw for that extra touch of elegance.
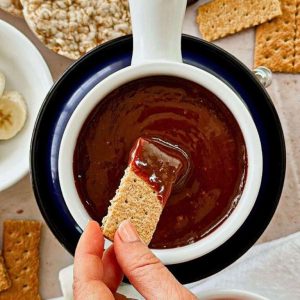
Chocolate Dipped Pretzels
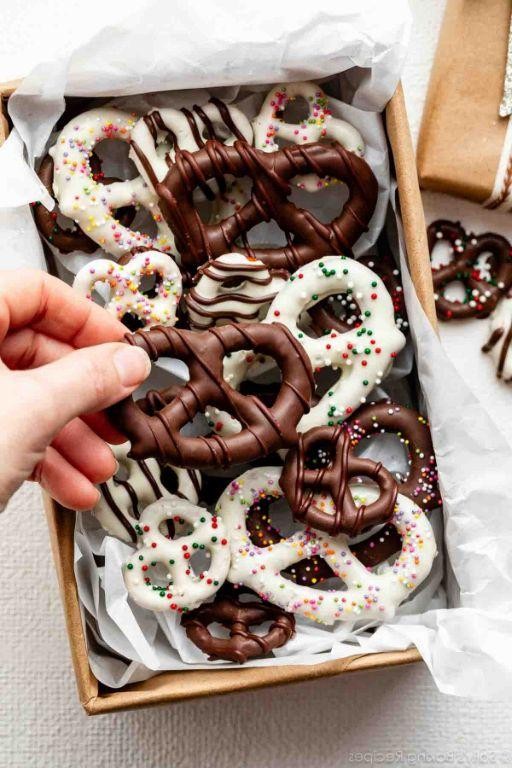
Whenever I’m in need of a quick yet utterly satisfying treat, chocolate dipped pretzels are my go-to. There’s something about the salty crunch meeting the sweet, creamy chocolate that feels like a hug in snack form. Plus, they’re incredibly easy to whip up, making them perfect for last-minute gifts or a cozy night in.
Ingredients
- 1 cup of semi-sweet chocolate chips (I swear by Ghirardelli for that melt-in-your-mouth quality)
- 2 tbsp coconut oil (this little secret makes the chocolate extra glossy and easy to dip)
- 20 pretzel rods (the thick ones hold up best, but feel free to use twists for bite-sized treats)
- Sprinkles or crushed nuts (optional, but they add a fun crunch and pop of color)
Instructions
- Line a baking sheet with parchment paper and set aside. This little prep step saves so much mess later.
- In a microwave-safe bowl, combine the chocolate chips and coconut oil. Microwave in 30-second bursts, stirring in between, until fully melted. Tip: Don’t overheat the chocolate to avoid seizing.
- Hold a pretzel rod at one end and dip it into the melted chocolate, swirling to coat about three-quarters of the pretzel. Tip: Twisting as you lift helps excess chocolate drip off smoothly.
- If using, immediately sprinkle your toppings over the wet chocolate before it sets. This is where you can get creative with colors and textures.
- Place the dipped pretzel on the prepared baking sheet and repeat with the remaining pretzels.
- Let the chocolate set at room temperature for about 30 minutes, or speed up the process by placing them in the fridge for 15 minutes. Tip: Room temperature setting gives the chocolate a nicer snap.
Perfect for sharing or savoring solo, these chocolate dipped pretzels strike a delightful balance between sweet and salty. The smooth chocolate shell gives way to the satisfying crunch of the pretzel, making each bite a little moment of joy. Try arranging them in a mason jar tied with a ribbon for a charming, edible gift.
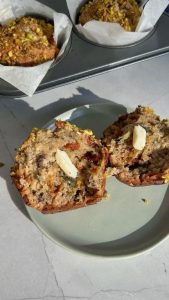
Valentine’s Day Breakfast in Bed
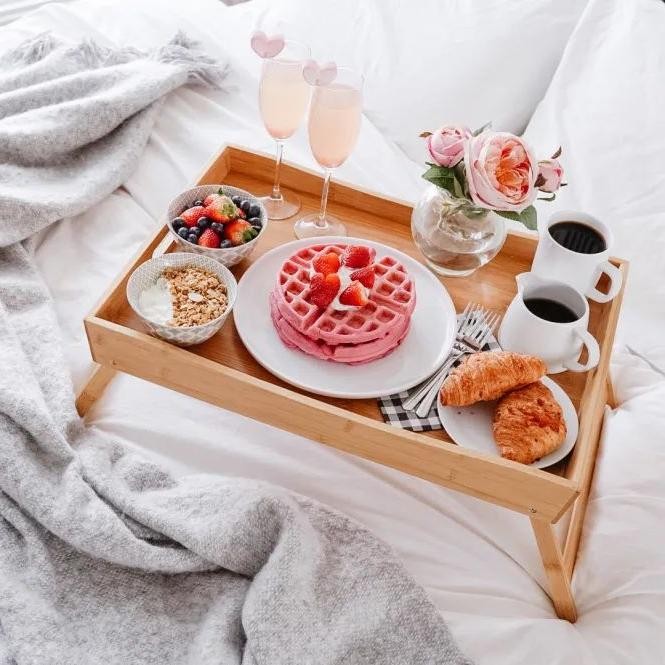
Last Valentine’s Day, I decided to surprise my partner with a breakfast in bed that was as heartfelt as it was delicious. It’s a tradition I’ve cherished, turning simple ingredients into a morning celebration of love. Here’s how you can recreate this cozy moment.
Ingredients
- 2 large eggs (I prefer room temp eggs here; they blend more smoothly)
- 1 tbsp extra virgin olive oil (my go-to for its fruity notes)
- 1/2 cup all-purpose flour (for that perfect pancake fluffiness)
- 1 cup fresh strawberries (sliced, because they’re sweeter when they’re in season)
- 2 tbsp maple syrup (the real deal, none of that imitation stuff)
- 1/4 tsp salt (just a pinch to balance the sweetness)
- 1 tsp vanilla extract (it adds a warm, comforting aroma)
Instructions
- In a mixing bowl, whisk together the eggs and olive oil until fully combined. Tip: A fork works just as well as a whisk for this step.
- Gradually add the flour to the egg mixture, stirring continuously to avoid lumps. Tip: Sifting the flour beforehand can make this step even smoother.
- Heat a non-stick skillet over medium heat (about 350°F) and pour 1/4 cup of the batter for each pancake.
- Cook for 2-3 minutes until bubbles form on the surface, then flip and cook for another 1-2 minutes. Tip: The edges should look set before you flip.
- While the pancakes cook, toss the sliced strawberries with maple syrup and vanilla extract in a bowl.
- Serve the pancakes warm, topped with the strawberry mixture. Just like that, you’ve got a plate full of love.
Just imagine the soft, fluffy pancakes paired with the juicy, syrup-soaked strawberries—it’s a texture and flavor match made in heaven. For an extra touch of romance, serve with a side of whipped cream or a sprinkle of powdered sugar.
Love Letter Puff Pastries
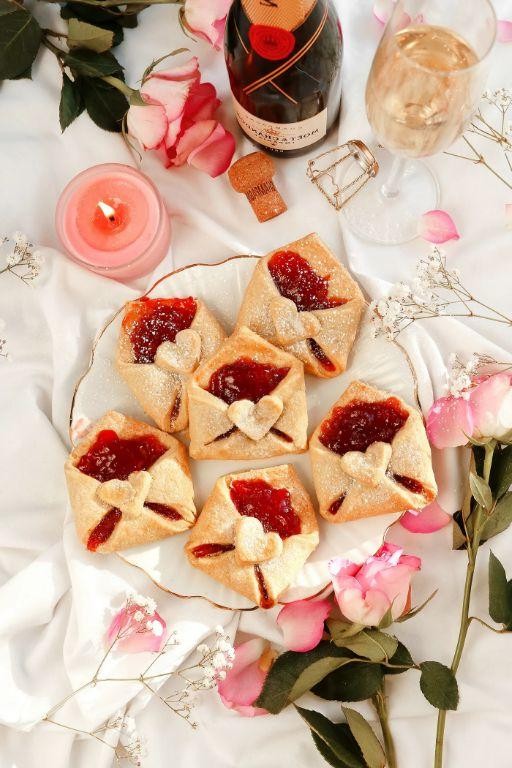
Kicking off the weekend with something sweet and sentimental, I stumbled upon creating these Love Letter Puff Pastries during a lazy Sunday morning. It’s my twist on a classic, filled with love and a bit of nostalgia from my grandma’s kitchen.
Ingredients
- 2 cups all-purpose flour (I swear by King Arthur for that perfect flakiness)
- 1 cup unsalted butter, chilled and cubed (trust me, cold butter is the secret to flaky layers)
- 1/2 cup cold water (ice cold to keep the dough tender)
- 1/4 cup granulated sugar (for that just-right sweetness)
- 1 tsp vanilla extract (the good stuff, pure vanilla makes all the difference)
- 1 egg, beaten (for that golden shine, room temp eggs blend better)
Instructions
- In a large bowl, whisk together the flour and sugar. Add the cubed butter and use your fingers to press it into the flour until the mixture resembles coarse crumbs.
- Gradually add the cold water and vanilla extract, stirring until the dough just comes together. Tip: Overworking the dough makes it tough, so stop as soon as it forms a ball.
- Wrap the dough in plastic and chill in the refrigerator for at least 1 hour. This step is crucial for easy rolling and flaky results.
- Preheat your oven to 375°F (190°C) and line a baking sheet with parchment paper.
- On a lightly floured surface, roll out the dough to about 1/8-inch thickness. Cut into rectangles or hearts for that love letter effect.
- Brush each pastry with the beaten egg for a glossy finish. Bake for 15-20 minutes, or until golden and puffed. Tip: Keep an eye on them after 15 minutes to prevent over-browning.
- Let cool on the baking sheet for 5 minutes before transferring to a wire rack. Tip: They’re fragile when hot, so handle with care.
Coming out of the oven, these pastries are irresistibly flaky with a buttery aroma that fills the kitchen. Serve them warm with a dusting of powdered sugar or alongside your morning coffee for a touch of sweetness that feels like a hug.
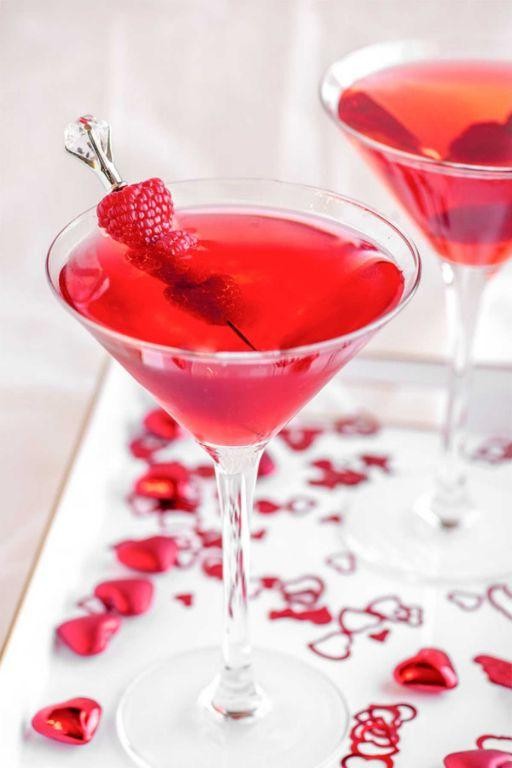
Cupid’s Arrow Cocktail
![]()
Sometimes, all it takes is a little spark to ignite the flames of love, and what better way to do that than with a Cupid’s Arrow Cocktail? This vibrant, sweet, and slightly tangy drink is my go-to for date nights or when I want to treat myself to something special. It’s a simple yet elegant cocktail that never fails to impress.
Ingredients
- 2 oz vodka – I find that a premium brand makes all the difference in smoothness.
- 1 oz cranberry juice – The tartness balances the sweetness perfectly.
- 1/2 oz lime juice – Freshly squeezed, please! Bottled lime juice just doesn’t cut it.
- 1/2 oz simple syrup – Homemade is best, but store-bought works in a pinch.
- Ice cubes – Because no cocktail is complete without that chill factor.
- Lime wheel and fresh cranberries for garnish – They add a pop of color and a hint of freshness.
Instructions
- Fill a cocktail shaker halfway with ice cubes to ensure your drink gets perfectly chilled without being watered down.
- Pour the vodka, cranberry juice, lime juice, and simple syrup into the shaker. The order doesn’t matter, but I like to start with the liquids to minimize spillage.
- Shake vigorously for about 15 seconds. You’ll know it’s ready when the shaker feels frosty to the touch.
- Strain the mixture into a chilled martini glass. Chilling the glass beforehand keeps your cocktail cold longer.
- Garnish with a lime wheel and a few fresh cranberries on a skewer for that Cupid’s arrow effect.
Vibrant and inviting, this cocktail is a feast for the eyes as much as it is for the palate. The balance of sweet and tart makes it irresistibly refreshing, and serving it with a playful garnish turns it into a conversation starter. Perfect for sharing with someone special or enjoying solo as a little act of self-love.
Conclusion
Tantalizing your taste buds has never been easier with our roundup of 25 Romantic Valentine’s Day Recipes. Whether you’re cooking for two or hosting a love-filled feast, these dishes promise to delight. We’d love to hear which recipes stole your heart—drop a comment below! And if you found inspiration here, spread the love by sharing this article on Pinterest. Happy cooking and even happier Valentine’s Day!