Kickstart your baking adventure with these 17 Delicious Thumbprint Cookie Recipes that promise to add a creative twist to your cookie jar! Perfect for home cooks looking to impress with minimal fuss, each recipe offers a unique take on the classic thumbprint cookie. From fruity jams to rich chocolate fillings, there’s a flavor for every palate. Ready to find your next favorite? Let’s dive in!
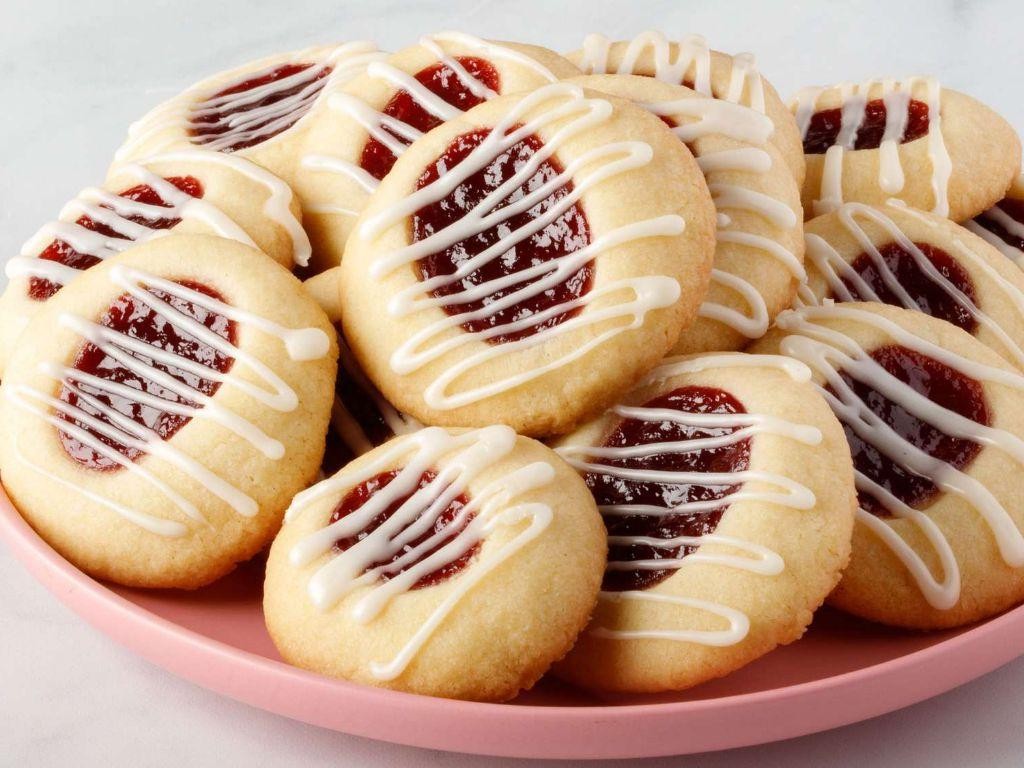
Classic Jam Thumbprint Cookies
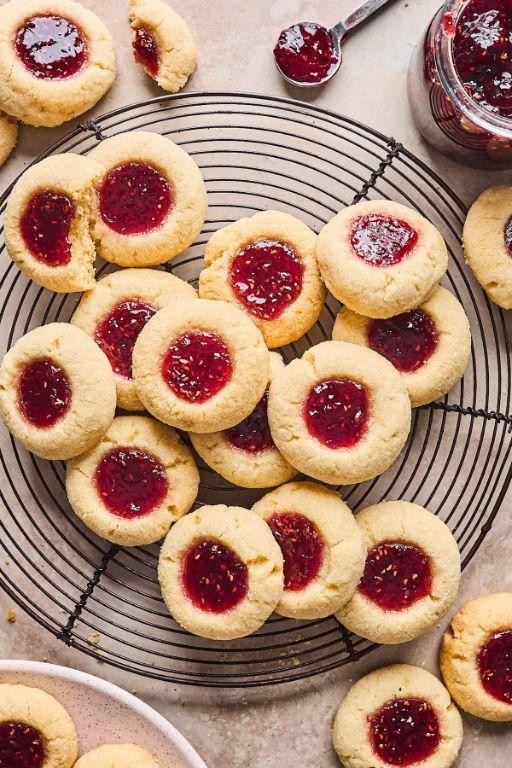
Delightfully simple yet irresistibly tasty, these Classic Jam Thumbprint Cookies are a must-try for anyone looking to add a sweet touch to their baking repertoire. Perfect for beginners, this recipe walks you through each step to ensure your cookies come out just right.
Ingredients
- 1 cup of softened butter, because room temperature is key for that perfect mix
- 1/2 cup of sugar, to sweeten things up just right
- 2 cups of all-purpose flour, the foundation of our cookie dough
- A splash of vanilla extract, for that hint of warmth
- 1/2 cup of your favorite jam, because variety is the spice of life
Instructions
- Preheat your oven to 350°F (175°C), ensuring it’s just the right temperature for baking.
- In a large bowl, cream together the softened butter and sugar until light and fluffy. Tip: This step is crucial for texture, so don’t rush it.
- Mix in the vanilla extract, blending it well into the butter and sugar mixture.
- Gradually add the flour to the mixture, stirring until a soft dough forms. Tip: If the dough feels too sticky, a little more flour can help, but add sparingly.
- Roll the dough into 1-inch balls and place them on a baking sheet lined with parchment paper.
- Using your thumb or the back of a spoon, make an indentation in the center of each ball. Tip: This is where the jam will go, so make sure it’s deep enough to hold a good amount.
- Fill each indentation with about 1/2 teaspoon of jam, choosing your favorite flavor for a personal touch.
- Bake for 12-15 minutes, or until the edges are just starting to turn golden. Tip: Keep an eye on them, as oven times can vary.
- Let the cookies cool on the baking sheet for 5 minutes before transferring them to a wire rack to cool completely.
Light and buttery with a sweet jam center, these cookies offer a delightful contrast in textures. Serve them alongside a cup of tea for a cozy afternoon treat, or pack them in a decorative box for a heartfelt homemade gift.
Chocolate Thumbprint Cookies with Peanut Butter Filling

Whipping up a batch of these Chocolate Thumbprint Cookies with Peanut Butter Filling is like creating little edible treasures. Perfect for beginners, this recipe guides you through each step to ensure delicious results every time.
Ingredients
- 1 cup of all-purpose flour
- 1/2 cup of unsweetened cocoa powder
- 1/2 cup of softened butter
- 2/3 cup of granulated sugar
- 1 large egg, separated
- 2 tbsp of milk
- 1 tsp of vanilla extract
- A pinch of salt
- 1/2 cup of creamy peanut butter
- 1/4 cup of powdered sugar
- A splash of water, if needed
Instructions
- Preheat your oven to 350°F and line a baking sheet with parchment paper.
- In a medium bowl, whisk together the flour, cocoa powder, and salt until well combined.
- In a separate large bowl, beat the softened butter and granulated sugar together until light and fluffy.
- Add the egg yolk, milk, and vanilla extract to the butter mixture, beating until smooth.
- Gradually mix in the dry ingredients until a dough forms. If the dough feels too dry, add a splash of water.
- Roll the dough into 1-inch balls, then dip each ball into the lightly beaten egg white.
- Place the balls on the prepared baking sheet and use your thumb to make an indentation in the center of each.
- Bake for 10-12 minutes, or until the cookies are set but still soft in the center.
- While the cookies bake, mix the peanut butter and powdered sugar in a small bowl until smooth.
- Once the cookies are out of the oven, immediately fill each thumbprint with the peanut butter mixture.
- Let the cookies cool on the baking sheet for 5 minutes, then transfer to a wire rack to cool completely.
Just out of the oven, these cookies boast a crisp exterior with a melt-in-your-mouth peanut butter center. Serve them alongside a cold glass of milk for the ultimate comfort snack, or package them up as a thoughtful homemade gift.
Lemon Curd Thumbprint Cookies
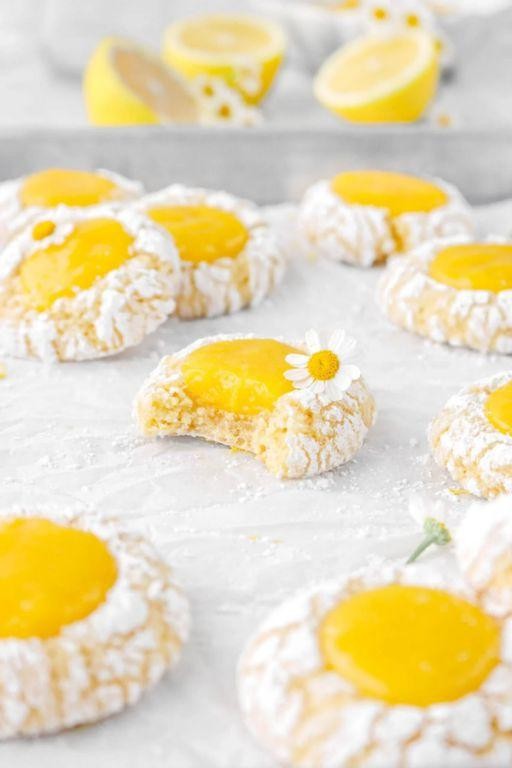
Every baker needs a go-to cookie recipe that’s both simple to make and irresistibly delicious, and these Lemon Curd Thumbprint Cookies are just that. With a buttery base and a tangy lemon curd center, they’re the perfect blend of sweet and tart.
Ingredients
- 1 cup of unsalted butter, softened (that’s 2 sticks, if you’re eyeballing it)
- 1/2 cup of granulated sugar, plus a little extra for rolling
- 2 cups of all-purpose flour (spooned and leveled, please)
- A pinch of salt (just a tiny one)
- 1/2 cup of lemon curd (homemade or store-bought, no judgment here)
Instructions
- Preheat your oven to 350°F (175°C) and line a baking sheet with parchment paper. This prevents sticking and makes cleanup a breeze.
- In a large bowl, beat the softened butter and 1/2 cup of sugar together until light and fluffy. Tip: Room temperature butter creams better, so take it out of the fridge an hour before.
- Gradually mix in the flour and salt until the dough comes together. It should be soft but not sticky. If it’s too crumbly, a splash of cold water can help.
- Roll the dough into 1-inch balls, then roll each ball in the extra sugar for a sparkly finish.
- Place the balls on the prepared baking sheet and use your thumb or the back of a teaspoon to make an indentation in the center of each. Tip: Dip your thumb in flour to prevent sticking.
- Fill each indentation with about 1/2 teaspoon of lemon curd. Don’t overfill, or it’ll bubble over.
- Bake for 12-14 minutes, or until the edges are just starting to turn golden. Tip: Rotate the baking sheet halfway through for even browning.
- Let the cookies cool on the baking sheet for 5 minutes before transferring to a wire rack to cool completely.
Ultimate comfort in cookie form, these treats boast a crisp edge with a melt-in-your-mouth center. Serve them alongside a cup of tea for a delightful afternoon pick-me-up, or stack them high on a pretty plate for your next gathering.
Raspberry Almond Thumbprint Cookies
Now, let’s dive into making these delightful Raspberry Almond Thumbprint Cookies, a perfect blend of nutty and fruity flavors that are sure to impress. These cookies are not only delicious but also fun to make, offering a hands-on baking experience that’s great for beginners.
Ingredients
- 1 cup of almond flour, for that nutty base
- 1/2 cup of unsalted butter, softened to room temperature
- 1/4 cup of granulated sugar, just enough sweetness
- 1 egg yolk, to bind everything together
- A splash of vanilla extract, for a hint of warmth
- A couple of tablespoons of raspberry jam, for the thumbprint filling
- A pinch of salt, to balance the flavors
Instructions
- Preheat your oven to 350°F (175°C) and line a baking sheet with parchment paper.
- In a mixing bowl, cream together the softened butter and granulated sugar until light and fluffy. Tip: Ensure your butter is at room temperature for easier mixing.
- Beat in the egg yolk and vanilla extract until well combined.
- Gradually add the almond flour and a pinch of salt, mixing until a dough forms. Tip: If the dough feels too sticky, chill it in the fridge for 30 minutes.
- Roll the dough into 1-inch balls and place them on the prepared baking sheet.
- Use your thumb or the back of a teaspoon to make an indentation in the center of each ball. Tip: Dip your thumb in water to prevent sticking.
- Fill each indentation with a small amount of raspberry jam.
- Bake for 12-15 minutes, or until the edges are lightly golden. Let them cool on the baking sheet for 5 minutes before transferring to a wire rack.
Here you have it, Raspberry Almond Thumbprint Cookies with a crisp exterior and a soft, jammy center. They’re perfect for afternoon tea or as a sweet gift packaged in a pretty box.
Salted Caramel Thumbprint Cookies
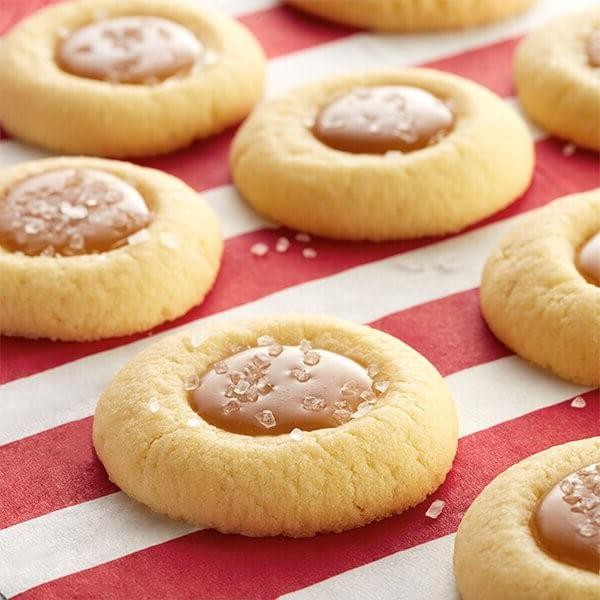
Delightfully simple yet irresistibly tasty, these Salted Caramel Thumbprint Cookies are the perfect blend of sweet and salty, with a buttery base that melts in your mouth. Follow these steps to create a batch that’s sure to impress.
Ingredients
- 1 cup of unsalted butter, softened
- a couple of large egg yolks
- a splash of vanilla extract
- 2 cups of all-purpose flour
- a pinch of salt
- 1/2 cup of granulated sugar
- 1/4 cup of salted caramel sauce
- a sprinkle of sea salt for topping
Instructions
- Preheat your oven to 350°F and line a baking sheet with parchment paper.
- In a large bowl, cream together the softened butter and granulated sugar until light and fluffy, about 3 minutes.
- Beat in the egg yolks and vanilla extract until well combined.
- Gradually mix in the flour and a pinch of salt until the dough comes together.
- Roll the dough into 1-inch balls and place them on the prepared baking sheet, spacing them about 2 inches apart.
- Use your thumb or the back of a teaspoon to make an indentation in the center of each ball.
- Fill each indentation with about 1/2 teaspoon of salted caramel sauce.
- Bake for 12-14 minutes, or until the edges are lightly golden.
- Remove from the oven and immediately sprinkle a tiny bit of sea salt on top of each cookie.
- Let the cookies cool on the baking sheet for 5 minutes before transferring to a wire rack to cool completely.
Zesty with a hint of salt, these cookies offer a delightful contrast to the rich caramel. Serve them alongside a cup of coffee for an afternoon treat, or pack them in a decorative box for a thoughtful homemade gift.
Double Chocolate Thumbprint Cookies

Baking these Double Chocolate Thumbprint Cookies is like creating little edible treasures that are sure to impress. Perfect for beginners, this recipe walks you through each step to ensure delicious results every time.
Ingredients
- 1 cup of all-purpose flour
- 1/2 cup of cocoa powder
- 1/2 cup of unsalted butter, softened
- 1/2 cup of granulated sugar
- 1 large egg yolk
- A splash of vanilla extract
- A pinch of salt
- 1/2 cup of chocolate chips, melted
- A couple of tablespoons of powdered sugar for dusting
Instructions
- Preheat your oven to 350°F (175°C) and line a baking sheet with parchment paper.
- In a medium bowl, whisk together the flour, cocoa powder, and salt until well combined.
- In a separate large bowl, beat the softened butter and granulated sugar together until light and fluffy, about 2 minutes.
- Mix in the egg yolk and vanilla extract until fully incorporated.
- Gradually add the dry ingredients to the wet ingredients, mixing until a dough forms. Tip: If the dough is too sticky, chill it for 30 minutes for easier handling.
- Roll the dough into 1-inch balls and place them on the prepared baking sheet.
- Use your thumb or the back of a teaspoon to make an indentation in the center of each ball. Tip: Dipping your thumb in water prevents sticking.
- Bake for 10-12 minutes, or until the cookies are set but still soft in the center.
- Remove from the oven and immediately press the indentations again if they’ve puffed up. Tip: This ensures perfect wells for the chocolate filling.
- Let the cookies cool on the baking sheet for 5 minutes, then transfer to a wire rack to cool completely.
- Once cooled, fill each indentation with melted chocolate chips.
- Dust with powdered sugar before serving for an extra touch of sweetness.
How delightful these cookies turn out with their rich chocolate flavor and melt-in-your-mouth texture. Serve them alongside a glass of cold milk or as a fancy dessert at your next gathering for a guaranteed crowd-pleaser.
Coconut Thumbprint Cookies with Mango Jam

Whipping up a batch of these tropical-inspired cookies is a breeze, even for beginners. Let’s dive into the simple steps to create these delightful treats that combine the rich flavor of coconut with the sweet tang of mango jam.
Ingredients
- 1 cup of all-purpose flour
- 1/2 cup of unsalted butter, softened
- 1/4 cup of granulated sugar
- a pinch of salt
- 1/2 cup of shredded coconut
- 1/4 cup of mango jam
- a splash of vanilla extract
Instructions
- Preheat your oven to 350°F (175°C) and line a baking sheet with parchment paper.
- In a mixing bowl, cream together the softened butter and granulated sugar until light and fluffy. Tip: Ensure your butter is at room temperature for easier mixing.
- Mix in the vanilla extract and a pinch of salt until well combined.
- Gradually add the all-purpose flour to the mixture, stirring until a dough forms. Tip: If the dough feels too sticky, chill it in the fridge for 10 minutes.
- Fold in the shredded coconut until evenly distributed throughout the dough.
- Roll the dough into small balls, about 1 inch in diameter, and place them on the prepared baking sheet.
- Using your thumb or the back of a teaspoon, make an indentation in the center of each ball. Tip: If the dough cracks, gently press it back together with your fingers.
- Fill each indentation with a small amount of mango jam, about 1/2 teaspoon per cookie.
- Bake in the preheated oven for 12-15 minutes, or until the edges are lightly golden.
- Allow the cookies to cool on the baking sheet for 5 minutes before transferring to a wire rack to cool completely.
Biting into these cookies reveals a buttery, coconut-infused base with a gooey mango jam center that’s irresistibly delicious. Serve them alongside a cup of tea for a cozy afternoon treat, or pack them in a lunchbox for a sweet surprise.
Peanut Butter and Jelly Thumbprint Cookies

Here’s a classic treat with a playful twist that’s perfect for any skill level. Peanut Butter and Jelly Thumbprint Cookies combine the nostalgic flavors of your childhood sandwich into a bite-sized dessert that’s both fun to make and delicious to eat.
Ingredients
- 1 cup of creamy peanut butter
- 1 cup of granulated sugar
- 1 large egg
- A splash of vanilla extract
- A couple of tablespoons of your favorite jelly or jam
Instructions
- Preheat your oven to 350°F and line a baking sheet with parchment paper.
- In a mixing bowl, combine the peanut butter, sugar, egg, and vanilla extract until smooth. Tip: If the dough feels too sticky, chilling it for 30 minutes makes it easier to handle.
- Roll the dough into 1-inch balls and place them on the prepared baking sheet, spacing them about 2 inches apart.
- Use your thumb or the back of a spoon to make an indentation in the center of each ball. Tip: Lightly greasing your thumb can prevent sticking.
- Fill each indentation with a small amount of jelly or jam. Tip: Using a piping bag or a small spoon can help keep the edges clean.
- Bake for 10-12 minutes, or until the edges are lightly golden. The cookies will be soft but will firm up as they cool.
- Let the cookies cool on the baking sheet for 5 minutes before transferring them to a wire rack to cool completely.
Crunchy on the outside with a soft, chewy center, these cookies are a delightful contrast of textures. The peanut butter base pairs perfectly with the sweet, fruity jam, making them a hit at any gathering. Try serving them with a glass of cold milk for the ultimate nostalgic experience.
Orange Marmalade Thumbprint Cookies

Ready to bake something sweet and simple? These Orange Marmalade Thumbprint Cookies are a delightful treat that combines the tangy flavor of orange marmalade with buttery, crumbly cookies. Perfect for beginners, this recipe walks you through each step to ensure delicious results every time.
Ingredients
- 1 cup of unsalted butter, softened
- a half cup of granulated sugar
- a couple of large egg yolks
- 2 cups of all-purpose flour
- a pinch of salt
- a splash of vanilla extract
- about a half cup of orange marmalade
Instructions
- Preheat your oven to 350°F and line a baking sheet with parchment paper.
- In a large bowl, cream together the softened butter and granulated sugar until light and fluffy.
- Beat in the egg yolks one at a time, then mix in the vanilla extract.
- Gradually add the flour and salt to the wet ingredients, mixing until just combined.
- Roll the dough into 1-inch balls and place them on the prepared baking sheet.
- Use your thumb or the back of a spoon to make an indentation in the center of each ball.
- Fill each indentation with about a teaspoon of orange marmalade.
- Bake for 12-15 minutes, or until the edges are lightly golden.
- Let the cookies cool on the baking sheet for 5 minutes before transferring to a wire rack.
You’ll love the contrast between the crisp cookie edges and the soft, jammy center. These cookies are perfect for afternoon tea or as a sweet gift packaged in a pretty box.
Pistachio Thumbprint Cookies with Dark Chocolate
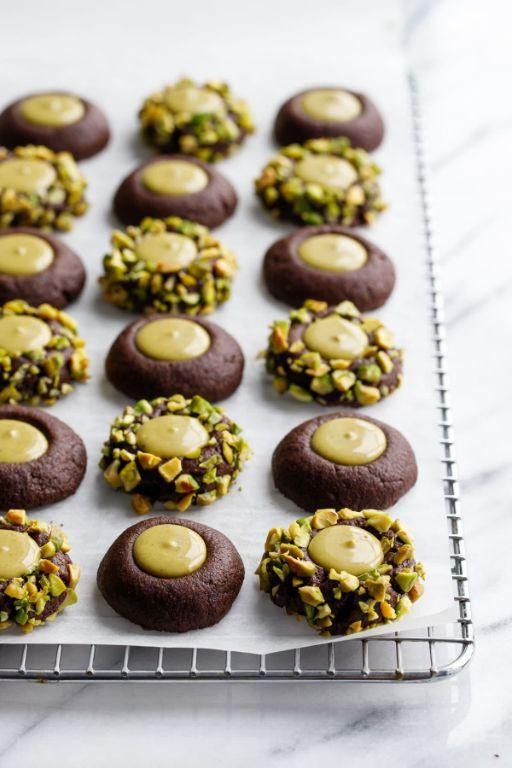
Gathering around the kitchen to bake something sweet and nutty? These Pistachio Thumbprint Cookies with Dark Chocolate are a delightful treat that combines the richness of dark chocolate with the subtle crunch of pistachios, perfect for any occasion.
Ingredients
- 1 cup of all-purpose flour
- 1/2 cup of unsalted butter, softened
- 1/3 cup of granulated sugar
- 1 egg yolk
- A splash of vanilla extract
- A pinch of salt
- 1/2 cup of finely chopped pistachios
- 1/4 cup of dark chocolate chips
- A couple of teaspoons of milk, if needed
Instructions
- Preheat your oven to 350°F (175°C) and line a baking sheet with parchment paper.
- In a mixing bowl, cream together the softened butter and granulated sugar until light and fluffy. Tip: Ensure your butter is at room temperature for easier mixing.
- Beat in the egg yolk and vanilla extract until well combined.
- Gradually mix in the flour and salt until a dough forms. If the dough is too dry, add a teaspoon of milk at a time until it comes together.
- Roll the dough into 1-inch balls, then roll each ball in the chopped pistachios to coat evenly. Tip: Lightly wet your hands to prevent the dough from sticking.
- Place the coated balls on the prepared baking sheet and use your thumb to make an indentation in the center of each.
- Bake for 10-12 minutes, or until the edges are lightly golden. Tip: The cookies will firm up as they cool, so don’t overbake.
- Remove from the oven and immediately press a few dark chocolate chips into the center of each cookie. The residual heat will melt the chocolate slightly.
- Allow the cookies to cool on the baking sheet for 5 minutes before transferring to a wire rack to cool completely.
Buttery and crisp with a gooey chocolate center, these cookies are a textural dream. Serve them alongside a cup of coffee for a mid-afternoon pick-me-up or as a sophisticated dessert at your next dinner party.
Cherry Cheesecake Thumbprint Cookies
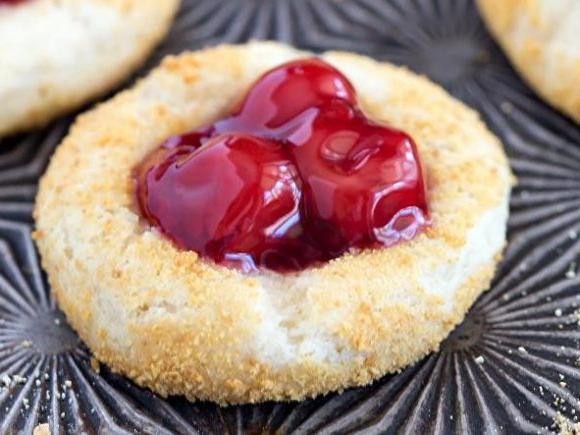
Just imagine biting into a soft, buttery cookie with a creamy cheesecake center and a sweet cherry surprise. These Cherry Cheesecake Thumbprint Cookies are the perfect blend of textures and flavors, making them a hit at any gathering or a cozy night in.
Ingredients
– 1 cup of softened butter (that’s two sticks, if you’re eyeballing it)
– A generous half cup of sugar, plus a little extra for rolling
– 2 cups of all-purpose flour (spooned and leveled, please)
– A pinch of salt (just to balance the sweetness)
– 4 ounces of cream cheese, softened (let it sit out for a bit)
– A quarter cup of powdered sugar (for that smooth cheesecake filling)
– A splash of vanilla extract (because flavor matters)
– About half a cup of cherry jam (or any jam you love)
Instructions
1. Preheat your oven to 350°F (175°C) and line a baking sheet with parchment paper.
2. In a large bowl, beat the softened butter and sugar together until fluffy. Tip: This takes about 3 minutes with an electric mixer.
3. Gradually mix in the flour and salt until the dough comes together. It should be soft but not sticky.
4. Roll the dough into 1-inch balls, then roll each ball in sugar for a little sparkle.
5. Place the balls on the prepared baking sheet and use your thumb to make an indentation in the center of each. Tip: A small spoon back works great if your thumbs are too big.
6. Bake for 10 minutes, then remove from the oven and press the indentations again if they’ve puffed up.
7. While the cookies bake, mix the cream cheese, powdered sugar, and vanilla until smooth.
8. Once the cookies are slightly cooled, fill each indentation with a teaspoon of the cream cheese mixture.
9. Top each with a small dollop of cherry jam.
10. Return to the oven for another 5 minutes, just until the filling sets.
11. Let the cookies cool on the baking sheet for 5 minutes before transferring to a wire rack.Delight in the contrast of the crisp sugar-coated exterior against the creamy, tangy filling, with bursts of sweet cherry. Serve these beauties on a vintage plate for an extra touch of charm, or pack them in a cute box for a thoughtful homemade gift.
Maple Pecan Thumbprint Cookies

You’ll find these Maple Pecan Thumbprint Cookies are a delightful treat that combines the rich flavors of maple and the crunch of pecans in a tender cookie. Perfect for beginners, this recipe walks you through each step to ensure success.
Ingredients
- 1 cup of all-purpose flour
- A pinch of salt
- 1/2 cup of unsalted butter, softened
- 1/4 cup of maple syrup
- 1/2 cup of finely chopped pecans
- A splash of vanilla extract
- 1/4 cup of powdered sugar for dusting
Instructions
- Preheat your oven to 350°F (175°C) and line a baking sheet with parchment paper.
- In a medium bowl, whisk together the flour and salt to combine.
- In a separate bowl, beat the softened butter and maple syrup until light and fluffy, about 2 minutes. Tip: Ensure your butter is at room temperature for easier mixing.
- Stir in the vanilla extract and chopped pecans into the butter mixture.
- Gradually add the flour mixture to the wet ingredients, mixing until just combined. Tip: Overmixing can lead to tough cookies, so stop as soon as the flour is incorporated.
- Roll the dough into 1-inch balls and place them on the prepared baking sheet. Use your thumb to make an indentation in the center of each ball. Tip: If the dough sticks to your hands, lightly dust them with flour.
- Bake for 12-15 minutes, or until the edges are lightly golden. The cookies will still be soft but will firm up as they cool.
- Let the cookies cool on the baking sheet for 5 minutes before transferring them to a wire rack to cool completely.
- Once cooled, dust the cookies with powdered sugar for a sweet finish.
Very tender and buttery, these cookies have a delightful crunch from the pecans and a sweet maple flavor that’s not overpowering. Serve them alongside a cup of coffee or tea for a cozy afternoon treat, or package them up as a thoughtful homemade gift.
Blueberry Lemon Thumbprint Cookies
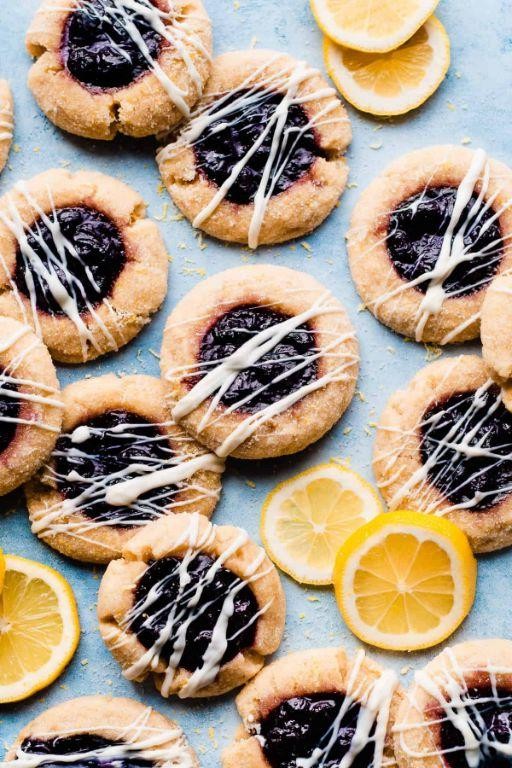
You’ll love how these Blueberry Lemon Thumbprint Cookies combine the tangy zest of lemon with the sweet burst of blueberries, creating a perfect balance of flavors in every bite. Let’s dive into making these delightful treats step by step.
Ingredients
- 1 cup of unsalted butter, softened
- a couple of eggs
- a splash of vanilla extract
- 2 and a half cups of all-purpose flour
- a pinch of salt
- half a cup of granulated sugar
- a handful of fresh blueberries
- the zest of one lemon
- a quarter cup of lemon juice
Instructions
- Preheat your oven to 350°F (175°C) and line a baking sheet with parchment paper.
- In a large bowl, cream together the softened butter and granulated sugar until light and fluffy.
- Beat in the eggs one at a time, then stir in the vanilla extract, lemon zest, and lemon juice.
- Gradually mix in the flour and salt until the dough comes together. Tip: If the dough feels too sticky, chill it for 30 minutes to make it easier to handle.
- Roll the dough into 1-inch balls and place them on the prepared baking sheet.
- Use your thumb or the back of a spoon to make an indentation in the center of each ball.
- Fill each indentation with a few blueberries. Tip: Gently press the blueberries into the dough to prevent them from rolling out during baking.
- Bake for 12-15 minutes, or until the edges are lightly golden. Tip: Rotate the baking sheet halfway through for even baking.
- Let the cookies cool on the baking sheet for 5 minutes before transferring to a wire rack to cool completely.
Perfectly tender with a slight crunch at the edges, these cookies are a delightful contrast of textures. The lemon zest brightens the blueberries’ sweetness, making them a refreshing treat for any occasion. Try serving them with a dollop of whipped cream for an extra indulgent dessert.
Gingerbread Thumbprint Cookies with Apple Butter

Ready to dive into the cozy world of baking? These gingerbread thumbprint cookies with apple butter are the perfect blend of spicy and sweet, offering a delightful treat that’s as fun to make as it is to eat.
Ingredients
- 2 cups of all-purpose flour
- 1 tsp of ground ginger
- 1/2 tsp of ground cinnamon
- 1/4 tsp of ground cloves
- 1/2 cup of unsalted butter, softened
- 1/2 cup of brown sugar, packed
- 1 large egg yolk
- 1/4 cup of molasses
- A splash of vanilla extract
- 1/2 cup of apple butter
Instructions
- Preheat your oven to 350°F and line a baking sheet with parchment paper.
- In a medium bowl, whisk together the flour, ginger, cinnamon, and cloves until well combined.
- In a large bowl, beat the softened butter and brown sugar together until light and fluffy.
- Mix in the egg yolk, molasses, and vanilla extract until everything is well incorporated.
- Gradually add the dry ingredients to the wet ingredients, mixing until a dough forms. Tip: If the dough feels too sticky, chill it for 30 minutes to make it easier to handle.
- Roll the dough into 1-inch balls and place them on the prepared baking sheet.
- Use your thumb or the back of a spoon to make an indentation in the center of each ball.
- Fill each indentation with a teaspoon of apple butter. Tip: For a smoother filling, warm the apple butter slightly before using.
- Bake for 10-12 minutes, or until the edges are just starting to brown. Tip: Let the cookies cool on the baking sheet for 5 minutes before transferring to a wire rack to cool completely.
After baking, these cookies boast a soft, chewy texture with a spicy gingerbread flavor that’s perfectly complemented by the sweet apple butter filling. Serve them on a rustic wooden board for a charming holiday presentation or pack them in a cute box as a thoughtful homemade gift.
White Chocolate Cranberry Thumbprint Cookies
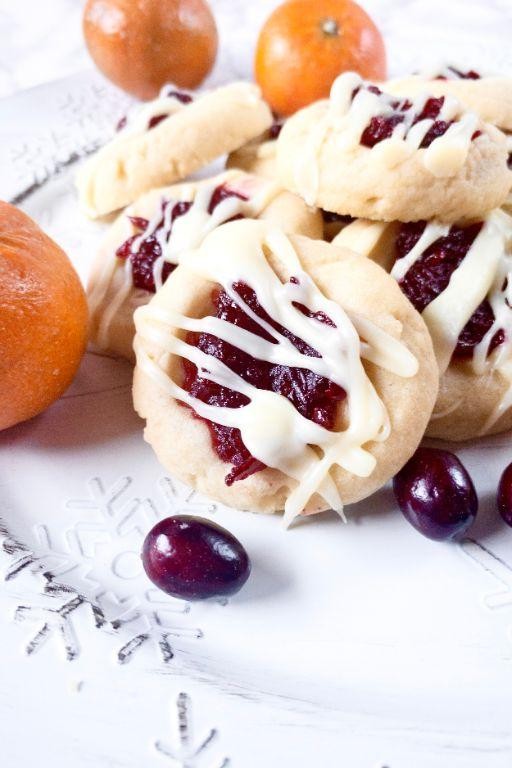
Delightfully sweet with a tangy twist, these White Chocolate Cranberry Thumbprint Cookies are a festive treat that’s surprisingly simple to make. Perfect for beginners, this recipe walks you through each step to ensure your cookies come out perfectly every time.
Ingredients
- 1 cup of softened butter
- a half cup of granulated sugar
- a couple of teaspoons of vanilla extract
- 2 cups of all-purpose flour
- a pinch of salt
- a splash of milk
- a half cup of dried cranberries, finely chopped
- a quarter cup of white chocolate chips
Instructions
- Preheat your oven to 350°F and line a baking sheet with parchment paper.
- In a large bowl, cream together the softened butter and granulated sugar until light and fluffy. Tip: Ensure your butter is at room temperature for easier mixing.
- Mix in the vanilla extract, then gradually add the flour and salt, combining until the dough comes together. If the dough feels too dry, add a splash of milk.
- Fold in the finely chopped dried cranberries until evenly distributed throughout the dough.
- Roll the dough into 1-inch balls and place them on the prepared baking sheet. Tip: Use a melon baller for uniformly sized cookies.
- Make a thumbprint indentation in the center of each dough ball. Tip: Dip your thumb in flour to prevent sticking.
- Bake for 12-15 minutes, or until the edges are just starting to turn golden.
- Remove from the oven and immediately press a few white chocolate chips into the center of each cookie. The residual heat will melt them slightly.
- Allow the cookies to cool on the baking sheet for 5 minutes before transferring to a wire rack to cool completely.
Unbelievably soft with a chewy center, these cookies offer a delightful contrast between the sweet white chocolate and tart cranberries. Serve them alongside a cup of hot cocoa for an extra cozy treat.
Espresso Thumbprint Cookies with Dulce de Leche

Perfect for those who adore the rich flavors of coffee and caramel, these Espresso Thumbprint Cookies with Dulce de Leche combine the boldness of espresso with the sweet, creamy texture of dulce de leche, creating a delightful treat that’s sure to impress.
Ingredients
- 1 cup of all-purpose flour
- 1/2 cup of unsalted butter, softened
- 1/4 cup of granulated sugar
- 1 large egg yolk
- 1 tbsp of instant espresso powder
- A pinch of salt
- 1/2 cup of dulce de leche
Instructions
- Preheat your oven to 350°F (175°C) and line a baking sheet with parchment paper.
- In a mixing bowl, cream together the softened butter and granulated sugar until light and fluffy. Tip: Ensure the butter is at room temperature for easier mixing.
- Beat in the egg yolk until fully incorporated.
- Sift in the all-purpose flour, instant espresso powder, and a pinch of salt. Mix until a dough forms. Tip: Sifting the dry ingredients helps avoid lumps in your dough.
- Roll the dough into 1-inch balls and place them on the prepared baking sheet.
- Using your thumb or the back of a teaspoon, make an indentation in the center of each dough ball.
- Bake for 10-12 minutes, or until the edges are just starting to turn golden. Tip: Keep an eye on them after 10 minutes to prevent over-baking.
- Remove from the oven and immediately re-press the indentations if they’ve puffed up during baking.
- Let the cookies cool on the baking sheet for 5 minutes, then transfer to a wire rack to cool completely.
- Once cooled, fill each indentation with a small spoonful of dulce de leche.
Unbelievably rich and flavorful, these cookies offer a perfect balance between the bitterness of espresso and the sweetness of dulce de leche. Serve them with a cup of coffee for an extra caffeine kick or as a sophisticated dessert at your next dinner party.
Vanilla Bean Thumbprint Cookies with Strawberry Jam
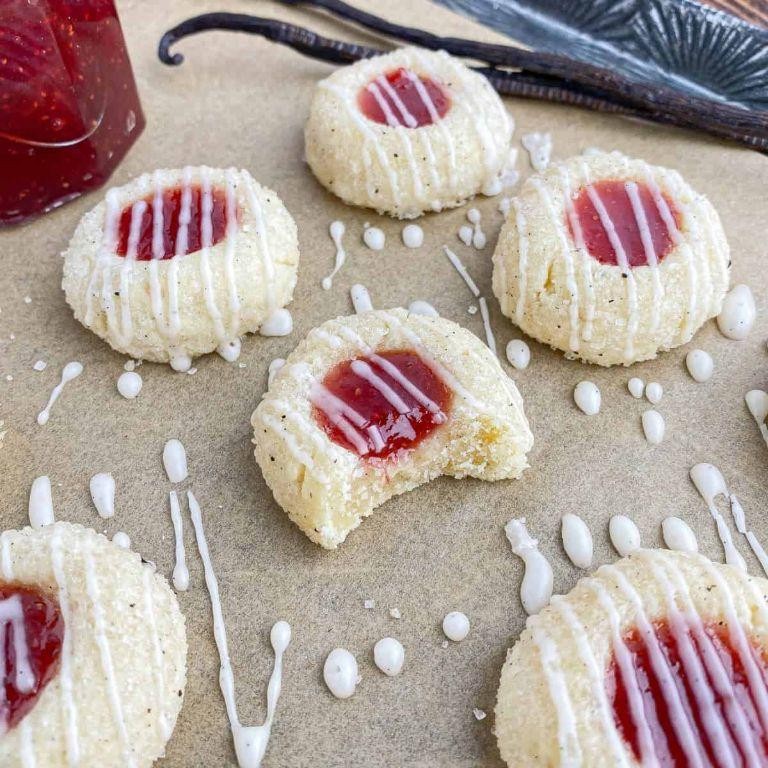
Sometimes, the simplest recipes bring the most joy, especially when they involve the classic combination of vanilla and strawberry. Today, we’re diving into making Vanilla Bean Thumbprint Cookies with Strawberry Jam, a treat that’s as fun to make as it is to eat.
Ingredients
- 1 cup of unsalted butter, softened
- a half cup of granulated sugar
- a splash of pure vanilla extract
- the seeds from 1 vanilla bean
- 2 cups of all-purpose flour
- a pinch of salt
- a quarter cup of strawberry jam
Instructions
- Preheat your oven to 350°F (175°C) and line a baking sheet with parchment paper.
- In a large bowl, cream together the softened butter and granulated sugar until light and fluffy. Tip: Ensure your butter is at room temperature for easier mixing.
- Add the vanilla extract and the seeds from the vanilla bean to the butter mixture, mixing well to incorporate.
- Gradually add the flour and a pinch of salt to the mixture, stirring until a soft dough forms. Tip: Don’t overmix to keep the cookies tender.
- Roll the dough into 1-inch balls and place them on the prepared baking sheet. Use your thumb to make an indentation in the center of each ball.
- Fill each indentation with a small amount of strawberry jam. Tip: A piping bag can make this step cleaner and more precise.
- Bake for 12-15 minutes, or until the edges are lightly golden. Let them cool on the baking sheet for 5 minutes before transferring to a wire rack.
Vanilla Bean Thumbprint Cookies with Strawberry Jam offer a delightful contrast between the crisp edges and the soft, jam-filled center. Serve them alongside a cup of tea for a cozy afternoon treat, or package them up as a sweet homemade gift.
Conclusion
Hooray for thumbprint cookies! This roundup offers 17 scrumptious ways to enjoy these delightful treats, perfect for any occasion. Whether you’re a baking novice or a seasoned pro, there’s a recipe here to inspire your next kitchen adventure. We’d love to hear which one becomes your favorite—drop us a comment below! Don’t forget to share the love by pinning this article on Pinterest. Happy baking!