Zesty flavors and hearty meals await in our roundup of 19 Delicious Sunday Dinner Recipes Easy! Perfect for home cooks across North America, this collection is all about bringing comfort, ease, and a dash of excitement to your Sunday table. Whether you’re craving something classic or in the mood for a new favorite, these recipes promise to make your weekend dining unforgettable. Let’s dive in!
Roast Chicken with Garlic and Herbs
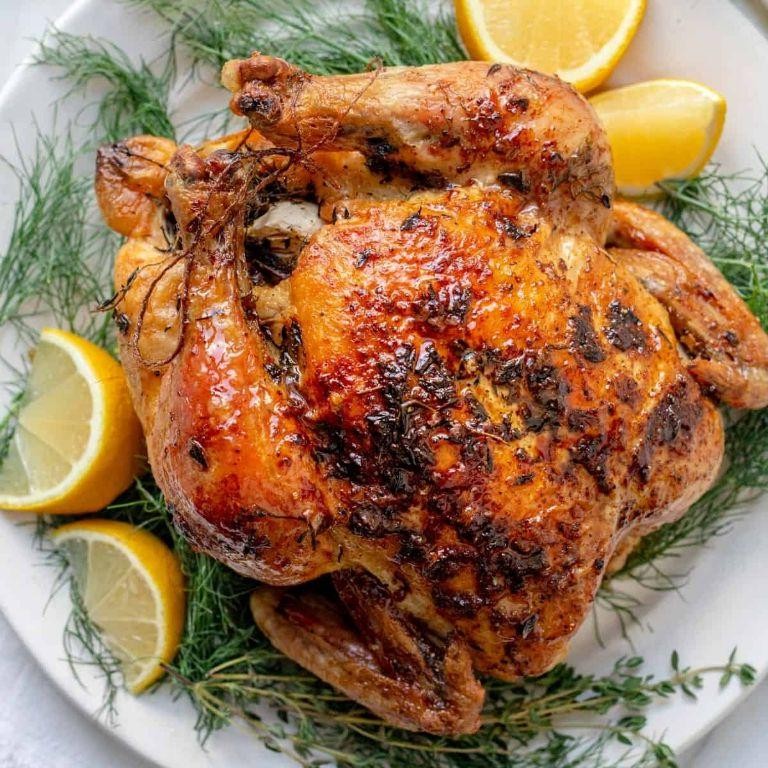
Unbelievably simple yet impressively flavorful, this roast chicken with garlic and herbs has been my go-to dish for both weeknight dinners and special occasions. There’s something about the way the garlic melds with the herbs that turns a humble chicken into a showstopper.
Ingredients
- Whole chicken – 1 (about 4 lbs)
- Garlic – 6 cloves
- Fresh rosemary – 2 tbsp
- Fresh thyme – 2 tbsp
- Olive oil – 2 tbsp
- Salt – 1 tsp
- Black pepper – ½ tsp
Instructions
- Preheat your oven to 375°F (190°C). Tip: Letting the chicken sit at room temperature for 30 minutes before roasting ensures even cooking.
- Pat the chicken dry with paper towels. This helps the skin get crispy.
- Mince the garlic and chop the rosemary and thyme finely.
- In a small bowl, mix the garlic, herbs, olive oil, salt, and pepper to create a paste.
- Rub the herb paste all over the chicken, including under the skin for maximum flavor.
- Place the chicken in a roasting pan and roast in the preheated oven for 1 hour and 20 minutes, or until the internal temperature reaches 165°F (74°C) when measured with a meat thermometer at the thickest part of the thigh.
- Let the chicken rest for 10 minutes before carving. Tip: Resting allows the juices to redistribute, making the meat juicier.
Roasting the chicken this way yields a crispy, golden skin with meat that’s incredibly moist and infused with the aromatic garlic and herbs. Serve it alongside roasted vegetables or over a bed of wild rice for a meal that feels both rustic and refined.
Beef Bourguignon
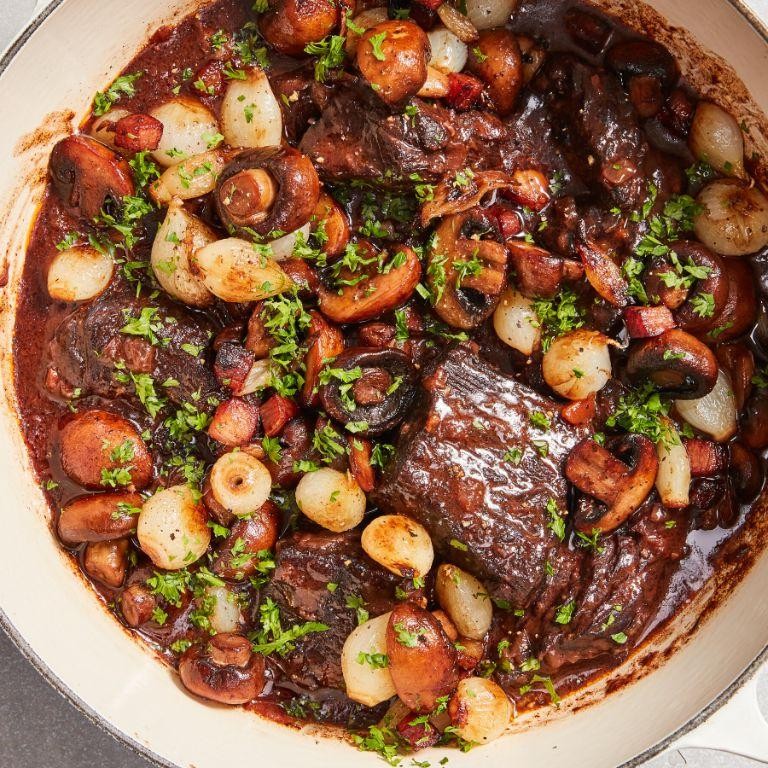
Remember the first time I tried Beef Bourguignon at a quaint little bistro in Paris? It was love at first bite. The rich, deep flavors of the beef simmered in red wine with mushrooms and onions transported me straight to the French countryside. Now, I make it at home whenever I need a comforting, hearty meal that feels like a hug.
Ingredients
- Beef chuck – 2 lbs, cut into 2-inch cubes
- Bacon – 4 oz, chopped
- Red wine – 2 cups
- Beef broth – 1 cup
- Carrots – 2, sliced
- Onion – 1, chopped
- Garlic – 2 cloves, minced
- Flour – 2 tbsp
- Tomato paste – 1 tbsp
- Thyme – 1 tsp
- Bay leaf – 1
- Salt – 1 tsp
- Pepper – ½ tsp
- Mushrooms – 8 oz, quartered
- Butter – 2 tbsp
Instructions
- Preheat your oven to 325°F.
- In a large Dutch oven, cook the bacon over medium heat until crispy. Remove and set aside.
- Season the beef with salt and pepper, then brown in the bacon fat in batches. Remove and set aside.
- In the same pot, sauté the onions, carrots, and garlic until softened, about 5 minutes.
- Stir in the flour and tomato paste, cooking for 1 minute to remove the raw flour taste.
- Pour in the red wine and beef broth, scraping up any browned bits from the bottom of the pot.
- Return the beef and bacon to the pot. Add the thyme and bay leaf. Bring to a simmer.
- Cover and transfer to the oven. Cook for 2 hours, until the beef is tender.
- Meanwhile, in a skillet, melt the butter over medium heat. Add the mushrooms and cook until golden, about 5 minutes.
- After the beef has cooked for 2 hours, stir in the mushrooms. Cook for an additional 30 minutes in the oven.
- Remove the bay leaf before serving.
Hearty and rich, this Beef Bourguignon is perfect over mashed potatoes or with a crusty baguette to soak up the sauce. The beef melts in your mouth, and the mushrooms add an earthy depth that’s irresistible. Try serving it with a glass of the same red wine you used in the recipe for a full-circle moment.
Homemade Meatloaf with Mashed Potatoes
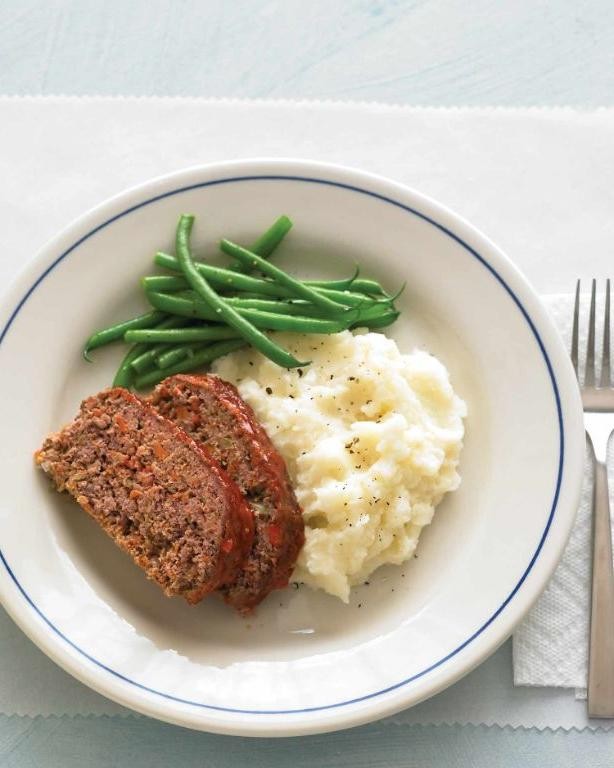
Unbelievable how a simple dish like meatloaf can bring back so many memories of family dinners. I remember my grandma’s version being the highlight of my week, and today, I’m sharing my take on this classic comfort food, paired with creamy mashed potatoes.
Ingredients
- Ground beef – 1.5 lbs
- Breadcrumbs – 1 cup
- Egg – 1
- Ketchup – ¼ cup
- Onion powder – 1 tsp
- Salt – 1 tsp
- Black pepper – ½ tsp
- Potatoes – 2 lbs
- Butter – ½ cup
- Milk – ½ cup
- Salt – 1 tsp
Instructions
- Preheat your oven to 375°F (190°C).
- In a large bowl, mix 1.5 lbs of ground beef, 1 cup of breadcrumbs, 1 egg, ¼ cup of ketchup, 1 tsp of onion powder, 1 tsp of salt, and ½ tsp of black pepper until well combined. Tip: For a moister meatloaf, don’t overmix the ingredients.
- Shape the mixture into a loaf and place it in a baking dish. Bake for 1 hour. Tip: For a glossy finish, brush the top with additional ketchup halfway through baking.
- While the meatloaf bakes, peel and chop 2 lbs of potatoes. Boil them in salted water until tender, about 15 minutes.
- Drain the potatoes and return them to the pot. Add ½ cup of butter, ½ cup of milk, and 1 tsp of salt. Mash until smooth. Tip: Warm the milk before adding to prevent the mashed potatoes from becoming gluey.
- Let the meatloaf rest for 10 minutes before slicing. Serve with the mashed potatoes.
Perfectly tender and flavorful, this meatloaf pairs wonderfully with the creamy mashed potatoes. For a twist, try serving it with a side of roasted vegetables or a simple green salad to round out the meal.
Slow Cooker Pot Roast
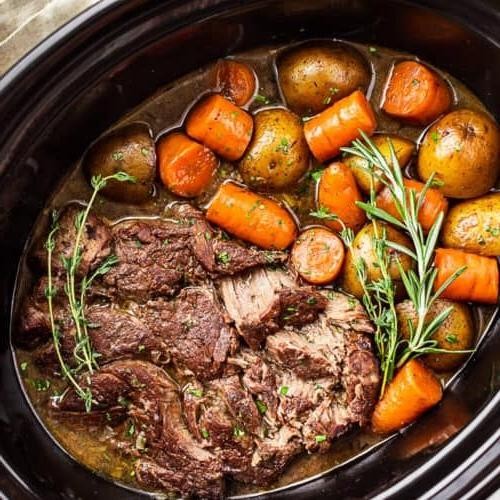
Unbelievably easy and packed with flavor, this Slow Cooker Pot Roast has become my go-to for busy weeknights. There’s something magical about throwing everything into the pot in the morning and coming home to a meal that tastes like you’ve been slaving over the stove all day.
Ingredients
- Beef chuck roast – 3 lbs
- Potatoes – 4, cut into chunks
- Carrots – 4, sliced
- Onion – 1, quartered
- Beef broth – 1 cup
- Worcestershire sauce – 2 tbsp
- Garlic powder – 1 tsp
- Salt – 1 tsp
- Black pepper – ½ tsp
Instructions
- Place the beef chuck roast in the slow cooker.
- Add the potatoes, carrots, and onion around the roast.
- In a small bowl, mix together the beef broth, Worcestershire sauce, garlic powder, salt, and black pepper. Pour over the roast and vegetables.
- Cover and cook on low for 8 hours or on high for 4 hours. Tip: For the best flavor, resist the urge to peek under the lid while cooking.
- Once cooking time is up, carefully remove the roast and vegetables to a serving platter. Tip: Let the roast rest for 10 minutes before slicing to keep it juicy.
- If desired, thicken the cooking liquid by simmering it in a saucepan with a slurry of cornstarch and water. Tip: This step is optional but adds a delicious gravy to your meal.
Perfectly tender and rich in flavor, this pot roast pairs wonderfully with a side of crusty bread to soak up the gravy. For a twist, try shredding the beef and serving it over mashed cauliflower for a low-carb option.
Baked Salmon with Lemon Butter Sauce
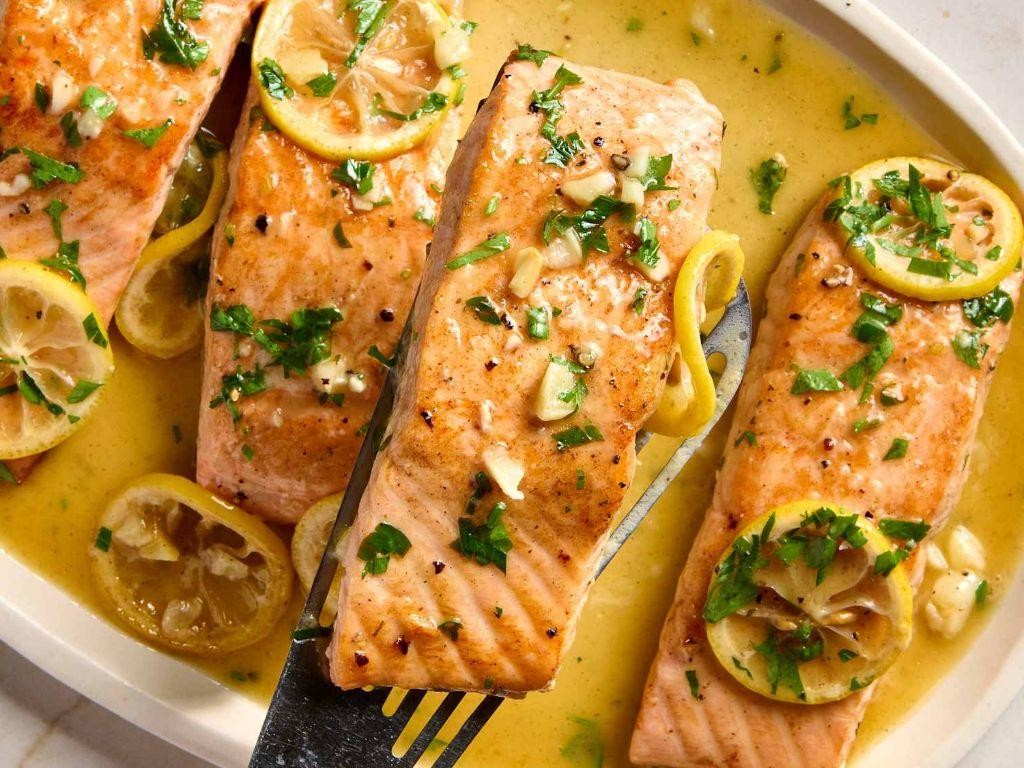
Honestly, there’s nothing quite like the simplicity and elegance of a perfectly baked salmon, especially when it’s drizzled with a tangy lemon butter sauce. I remember the first time I tried this dish at a friend’s dinner party, and I’ve been hooked ever since, tweaking the recipe to perfection in my own kitchen.
Ingredients
- Salmon fillets – 4 (6 oz each)
- Butter – 4 tbsp
- Lemon – 1, juiced
- Garlic – 2 cloves, minced
- Salt – ½ tsp
- Black pepper – ¼ tsp
Instructions
- Preheat your oven to 375°F (190°C) and line a baking sheet with parchment paper for easy cleanup.
- Place the salmon fillets on the prepared baking sheet, skin-side down, ensuring they’re not touching.
- In a small saucepan over medium heat, melt the butter. Add the minced garlic and sauté for 1 minute until fragrant.
- Remove the saucepan from heat and stir in the lemon juice, salt, and black pepper. Tip: For a smoother sauce, strain the lemon juice before adding.
- Evenly pour the lemon butter sauce over the salmon fillets. Tip: Use a spoon to baste the fillets with the sauce for extra flavor.
- Bake in the preheated oven for 12-15 minutes, or until the salmon flakes easily with a fork. Tip: Avoid overcooking to keep the salmon moist.
- Remove from the oven and let rest for 2 minutes before serving.
Gorgeously flaky and infused with the bright flavors of lemon and garlic, this baked salmon is a showstopper. Serve it over a bed of quinoa or with roasted asparagus for a complete meal that’s as nutritious as it is delicious.
Grilled Steak with Chimichurri Sauce
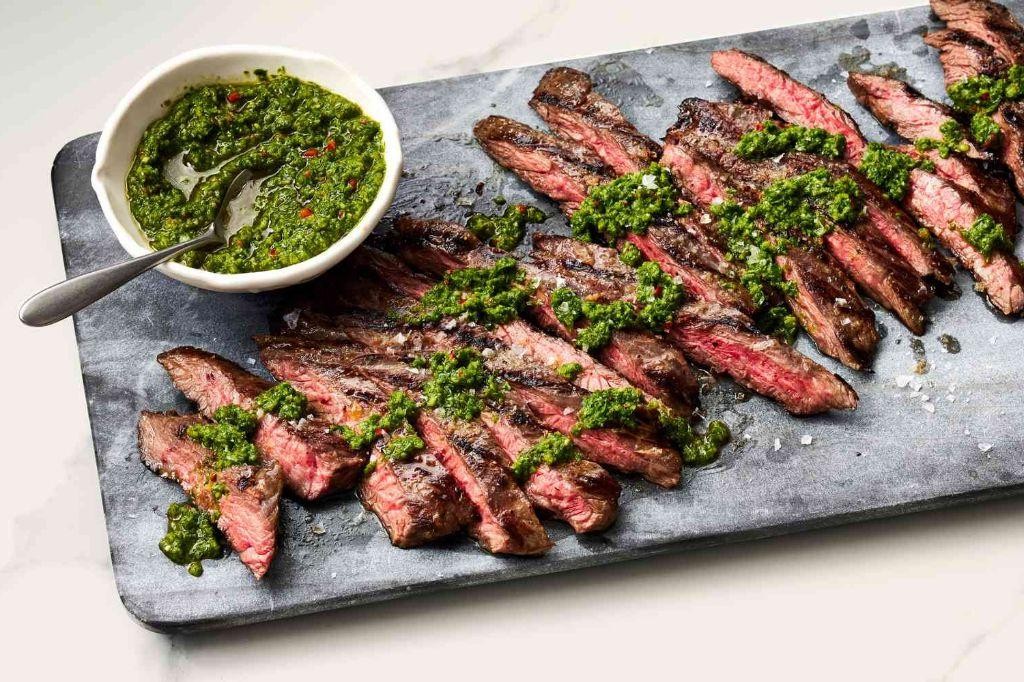
Remember those summer evenings when the grill is your best friend? That’s exactly where this grilled steak with chimichurri sauce comes into play, a dish that’s as much about the joy of cooking outdoors as it is about the vibrant flavors. I love how the chimichurri’s freshness cuts through the richness of the steak, making it a perfect balance for any barbecue enthusiast.
Ingredients
- Steak – 1 lb
- Olive oil – 2 tbsp
- Garlic – 2 cloves
- Parsley – 1 cup
- Red wine vinegar – 2 tbsp
- Salt – 1 tsp
- Pepper – ½ tsp
Instructions
- Preheat your grill to high heat, aiming for about 450°F. This ensures a good sear on the steak.
- While the grill heats, rub the steak with 1 tbsp of olive oil, then season both sides with salt and pepper. Tip: Letting the steak sit at room temperature for 20 minutes before grilling ensures even cooking.
- Place the steak on the grill. Cook for 4 minutes on one side, then flip and cook for another 3 minutes for medium-rare. Tip: Avoid moving the steak around too much to get those perfect grill marks.
- While the steak cooks, make the chimichurri by finely chopping the parsley and garlic, then mixing them with the remaining olive oil, red wine vinegar, and a pinch of salt. Tip: For a smoother sauce, pulse the ingredients in a food processor.
- Remove the steak from the grill and let it rest for 5 minutes before slicing. This allows the juices to redistribute.
- Serve the sliced steak with a generous drizzle of chimichurri sauce.
Here’s the magic: the steak’s juicy interior pairs beautifully with the chimichurri’s herby punch, creating a dish that’s both hearty and refreshing. Try serving it over a bed of arugula for an extra peppery bite.
Classic Lasagna

How many times have I found myself standing in the kitchen, craving something hearty and comforting, only to settle on making a classic lasagna? It’s a dish that feels like a warm hug, layered with rich flavors and textures that come together in perfect harmony. Today, I’m sharing my go-to recipe that’s been a hit at countless family dinners.
Ingredients
- Lasagna noodles – 12 oz
- Ground beef – 1 lb
- Tomato sauce – 24 oz
- Ricotta cheese – 15 oz
- Mozzarella cheese – 2 cups, shredded
- Parmesan cheese – ½ cup, grated
- Egg – 1
- Salt – 1 tsp
- Black pepper – ½ tsp
- Olive oil – 1 tbsp
Instructions
- Preheat your oven to 375°F (190°C).
- Bring a large pot of salted water to a boil and cook the lasagna noodles according to package instructions until al dente, then drain and set aside. Tip: Adding a splash of olive oil to the water prevents noodles from sticking.
- In a skillet over medium heat, add olive oil and cook the ground beef until browned, about 5-7 minutes. Drain excess fat.
- Stir in the tomato sauce, salt, and black pepper into the beef, simmering for 5 minutes to blend the flavors.
- In a bowl, mix the ricotta cheese, egg, and half of the Parmesan cheese until well combined. Tip: Beating the egg before mixing ensures a smoother ricotta layer.
- In a 9×13 inch baking dish, layer 1/3 of the noodles, followed by 1/2 of the beef mixture, 1/2 of the ricotta mixture, and 1/3 of the mozzarella cheese. Repeat the layers, ending with noodles and the remaining mozzarella and Parmesan cheese on top.
- Cover with foil and bake for 25 minutes, then remove the foil and bake for another 10 minutes until the cheese is bubbly and golden. Tip: Letting the lasagna sit for 10 minutes before serving makes it easier to slice.
Lasagna is all about the layers, each one offering a different texture and flavor, from the tender noodles to the creamy ricotta and the savory beef. Serve it with a crisp green salad and garlic bread for a meal that’s sure to impress.
Pork Tenderloin with Apples and Onions

This morning, as I sipped my coffee and watched the sunrise, I realized it’s the perfect day for a dish that combines the sweetness of apples with the savory depth of pork. Pork Tenderloin with Apples and Onions is a dish that reminds me of family dinners during the fall, but honestly, it’s so good I make it year-round.
Ingredients
- Pork tenderloin – 1 lb
- Apples – 2, sliced
- Onions – 1, sliced
- Olive oil – 2 tbsp
- Salt – 1 tsp
- Black pepper – ½ tsp
- Thyme – 1 tsp
Instructions
- Preheat your oven to 375°F. This ensures even cooking and a beautifully browned exterior.
- Season the pork tenderloin with salt, pepper, and thyme. Tip: Letting the meat sit with the seasoning for 10 minutes enhances the flavor.
- Heat olive oil in an oven-safe skillet over medium-high heat. Add the pork, searing each side for 3 minutes until golden brown. Tip: Don’t move the pork around too much to get a perfect sear.
- Remove the pork and set aside. In the same skillet, add the sliced apples and onions, cooking for 5 minutes until they start to soften.
- Return the pork to the skillet, nestling it among the apples and onions. Transfer the skillet to the oven and roast for 20 minutes, or until the pork reaches an internal temperature of 145°F. Tip: Use a meat thermometer for accuracy.
- Let the pork rest for 5 minutes before slicing. This keeps the juices from running out.
Unbelievable how the apples caramelize and the onions turn sweet, creating a sauce-like consistency that’s divine over the tender pork. Serve it with a side of roasted potatoes or a crisp green salad for a complete meal that feels both rustic and refined.
Vegetable Stir Fry with Tofu
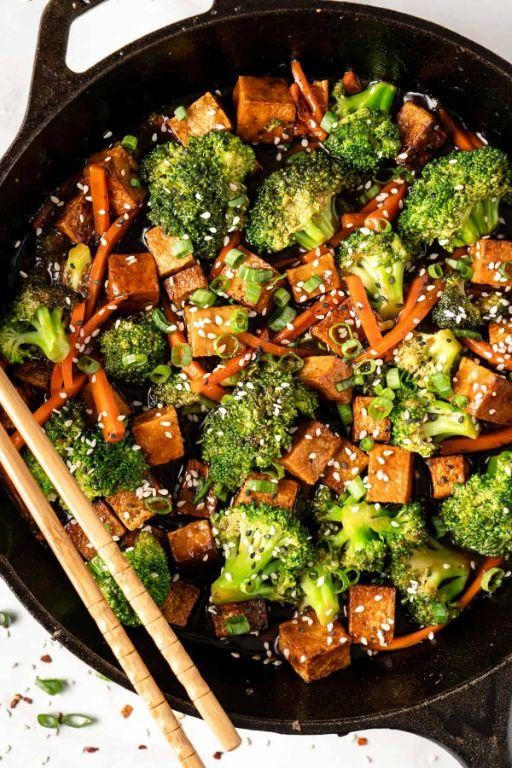
Many evenings, I find myself staring into the fridge, wondering what to whip up that’s quick, healthy, and satisfying. That’s how this Vegetable Stir Fry with Tofu became a staple in my kitchen—it’s versatile, packed with nutrients, and comes together in no time.
Ingredients
- Firm tofu – 14 oz
- Vegetable oil – 2 tbsp
- Broccoli florets – 2 cups
- Carrots – 1 cup, sliced
- Soy sauce – 3 tbsp
- Garlic – 2 cloves, minced
- Ginger – 1 tsp, grated
Instructions
- Press the tofu for 15 minutes to remove excess water, then cut into 1-inch cubes.
- Heat 1 tbsp of vegetable oil in a large pan over medium-high heat (350°F). Add tofu cubes and cook until golden brown on all sides, about 5 minutes. Tip: Don’t overcrowd the pan to ensure each piece gets crispy.
- Remove tofu and set aside. In the same pan, add the remaining 1 tbsp of oil.
- Add minced garlic and grated ginger, sauté for 30 seconds until fragrant.
- Toss in broccoli florets and sliced carrots. Stir fry for 5 minutes until vegetables are tender but still crisp. Tip: Keep the heat high to get a nice char on the veggies.
- Return the tofu to the pan. Add soy sauce and stir everything together for another 2 minutes. Tip: For a thicker sauce, mix 1 tsp of cornstarch with 1 tbsp of water and add it here.
- Serve hot over rice or noodles.
What I love most about this dish is the contrast between the crispy tofu and the vibrant, crunchy vegetables. It’s a colorful, flavorful meal that’s as pleasing to the eye as it is to the palate. Try adding a sprinkle of sesame seeds or a dash of chili flakes for an extra kick.
Shrimp Scampi Pasta
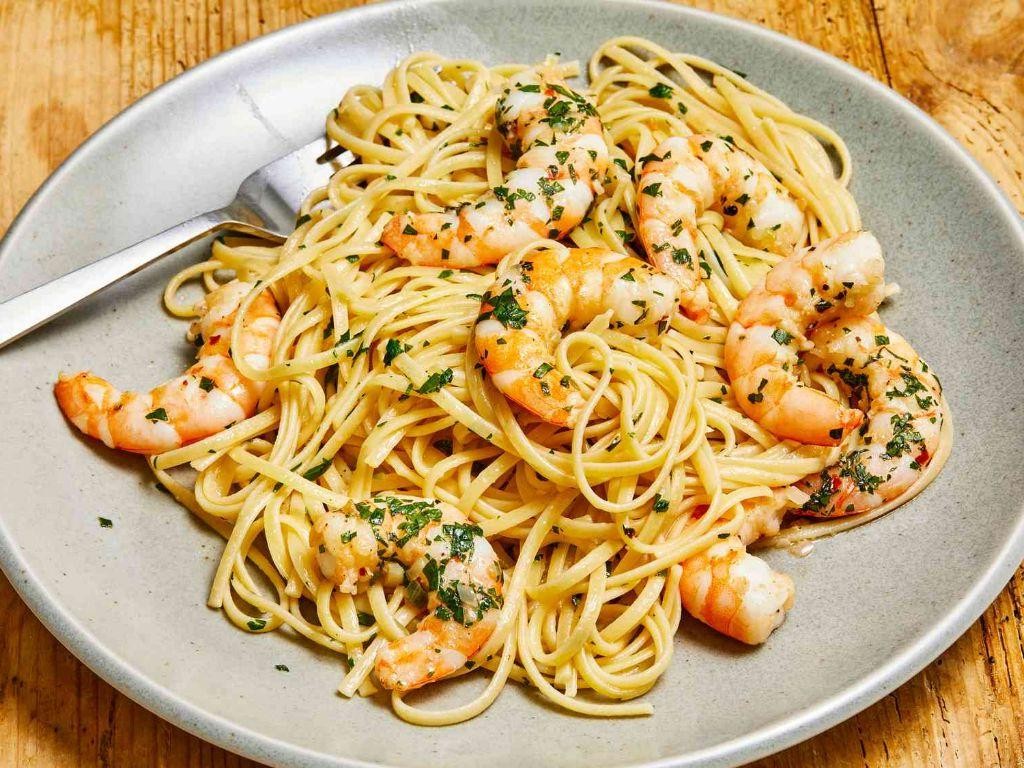
This summer, I’ve been all about quick, flavorful dishes that don’t keep me in the kitchen for too long, and Shrimp Scampi Pasta has been my go-to. There’s something about the garlicky, buttery sauce paired with succulent shrimp that feels both indulgent and light—perfect for those warm evenings when you crave something satisfying but not heavy.
Ingredients
- Linguine – 8 oz
- Shrimp – 1 lb, peeled and deveined
- Butter – 4 tbsp
- Garlic – 4 cloves, minced
- White wine – ½ cup
- Lemon juice – 2 tbsp
- Parsley – ¼ cup, chopped
- Salt – ½ tsp
- Red pepper flakes – ¼ tsp
Instructions
- Bring a large pot of salted water to a boil and cook the linguine according to package instructions until al dente, about 8-10 minutes. Tip: Save ½ cup of pasta water before draining.
- While the pasta cooks, melt butter in a large skillet over medium heat. Add garlic and red pepper flakes, sautéing for 1 minute until fragrant.
- Increase heat to medium-high, add shrimp, and cook for 2 minutes per side until pink and opaque. Tip: Don’t overcrowd the shrimp to ensure even cooking.
- Pour in white wine and lemon juice, simmering for 2 minutes to reduce slightly.
- Add the drained pasta to the skillet, tossing to coat in the sauce. If needed, add reserved pasta water a tablespoon at a time to loosen the sauce. Tip: The starch in the pasta water helps the sauce cling to the noodles.
- Stir in parsley and salt, tossing everything together for another minute.
Zesty and vibrant, this Shrimp Scampi Pasta is a delightful mix of tender shrimp and perfectly cooked linguine, all coated in a garlicky, buttery sauce with just a hint of heat. Serve it with a crisp white wine and a simple green salad for a meal that feels like a vacation on a plate.
BBQ Ribs with Coleslaw

Mmm, there’s nothing quite like the smell of BBQ ribs wafting through the air on a summer afternoon. I remember the first time I tried making them at home, worried they wouldn’t live up to my favorite BBQ joint’s, but with a little patience and the right technique, they turned out finger-licking good. Paired with a crisp coleslaw, it’s the perfect balance of smoky and fresh.
Ingredients
- Pork ribs – 2 lbs
- BBQ sauce – 1 cup
- Coleslaw mix – 4 cups
- Mayonnaise – ½ cup
- Apple cider vinegar – 2 tbsp
- Sugar – 1 tbsp
- Salt – 1 tsp
- Black pepper – ½ tsp
Instructions
- Preheat your oven to 300°F.
- Season the ribs with salt and black pepper, rubbing the spices into the meat.
- Place the ribs on a baking sheet, cover with foil, and bake for 2 hours. Tip: Wrapping them in foil keeps the moisture in, making the ribs tender.
- Remove the foil, brush the ribs with BBQ sauce, and bake uncovered for another 30 minutes at 350°F. Tip: Increasing the temperature helps caramelize the sauce.
- While the ribs bake, mix coleslaw mix, mayonnaise, apple cider vinegar, and sugar in a large bowl. Tip: Letting the coleslaw sit for at least 30 minutes before serving enhances the flavors.
- Once the ribs are done, let them rest for 10 minutes before slicing.
Great for gatherings, these ribs are fall-off-the-bone tender with a smoky sweetness that pairs beautifully with the tangy crunch of coleslaw. Serve them on a platter with extra BBQ sauce on the side for dipping, and watch them disappear.
Chicken Parmesan
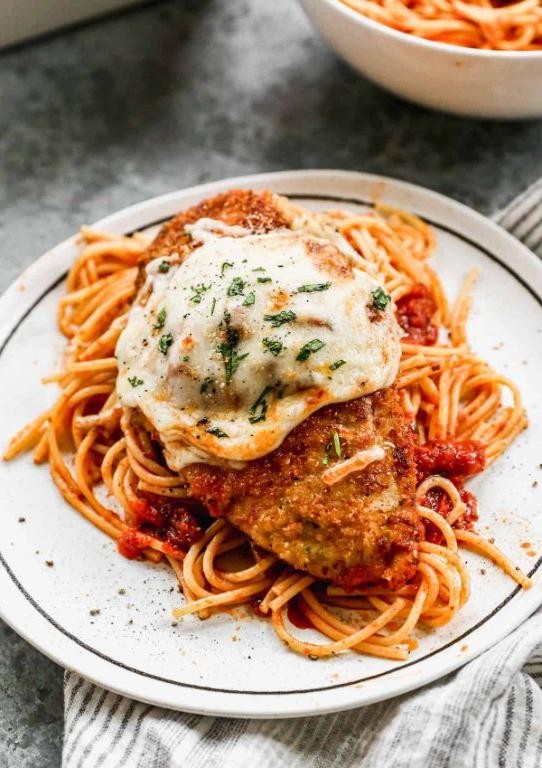
Oh, the joy of biting into a perfectly crispy yet tender Chicken Parmesan! It’s a dish that never fails to bring comfort to my table, especially on those busy weeknights when I crave something hearty without spending hours in the kitchen. I remember the first time I made it, skeptical about getting that golden crust just right, but oh, was the effort worth it!
Ingredients
- Chicken breasts – 2
- Egg – 1
- Breadcrumbs – 1 cup
- Marinara sauce – 1 cup
- Mozzarella cheese – 1 cup, shredded
- Parmesan cheese – ½ cup, grated
- Olive oil – 2 tbsp
- Salt – ½ tsp
- Black pepper – ¼ tsp
Instructions
- Preheat your oven to 400°F (200°C) to ensure it’s hot enough for baking the chicken to perfection.
- Pound the chicken breasts to an even thickness of about ½ inch for uniform cooking.
- Season both sides of the chicken with salt and black pepper, enhancing the flavor from the inside out.
- Beat the egg in a shallow dish, providing a sticky base for the breadcrumbs to adhere to.
- Coat each chicken breast in the beaten egg, then dredge in breadcrumbs, pressing gently to ensure full coverage.
- Heat olive oil in a large skillet over medium-high heat until shimmering, about 2 minutes, for that ideal golden sear.
- Cook the breaded chicken for 3-4 minutes per side until golden brown, achieving that irresistible crunch.
- Transfer the chicken to a baking dish, spoon marinara sauce over each piece, and sprinkle with mozzarella and Parmesan cheeses.
- Bake for 15-20 minutes until the cheese is bubbly and slightly browned, melding all the flavors together beautifully.
Rich in flavor with a delightful contrast between the crispy coating and juicy chicken, this Chicken Parmesan is a crowd-pleaser. Serve it over a bed of spaghetti for a classic combo, or slice it up for a hearty sandwich filling that’ll make any meal special.
Beef Tacos with All the Fixings

Growing up in a bustling household, beef tacos were our go-to for a quick, yet satisfying meal that everyone could customize to their liking. Today, I’m sharing my foolproof recipe that’s as fun to make as it is to eat, perfect for those busy weeknights or casual gatherings.
Ingredients
- Ground beef – 1 lb
- Taco seasoning – 2 tbsp
- Water – ½ cup
- Taco shells – 8
- Shredded lettuce – 2 cups
- Diced tomatoes – 1 cup
- Shredded cheese – 1 cup
- Sour cream – ½ cup
Instructions
- Heat a large skillet over medium-high heat and add the ground beef. Cook until no pink remains, breaking it apart with a spoon, about 5-7 minutes.
- Drain any excess fat from the skillet, then return it to the heat. Stir in the taco seasoning and water, bringing the mixture to a simmer. Reduce heat to low and let it simmer for 5 minutes, stirring occasionally.
- While the beef simmers, warm the taco shells according to package instructions, usually about 5 minutes in a 350°F oven.
- Once the beef is ready, assemble the tacos by spooning the beef mixture into each shell, then topping with shredded lettuce, diced tomatoes, shredded cheese, and a dollop of sour cream.
- Tip: For an extra kick, add a sprinkle of chili powder to the beef while it simmers. Tip: Warm your taco shells in the oven for a crispier texture. Tip: Let everyone build their own taco for a fun, interactive meal.
Delight in the crispy shells filled with savory beef and fresh toppings, creating a perfect bite every time. Serve these tacos with a side of lime wedges and hot sauce for those who love an extra zing.
Vegetable Lasagna
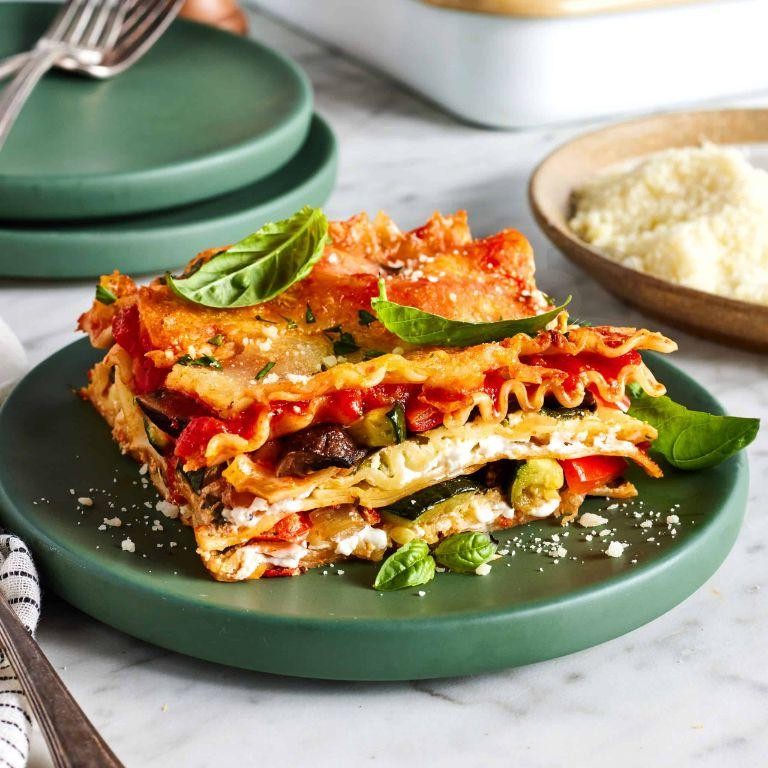
Every time I think about comfort food, my mind immediately goes to a hearty, cheesy vegetable lasagna. It’s the kind of dish that brings everyone to the table, and today, I’m sharing my go-to recipe that’s packed with layers of flavor and veggies. I remember the first time I made it for a potluck, and it was gone before I could even get a second helping!
Ingredients
- Lasagna noodles – 12 oz
- Ricotta cheese – 15 oz
- Mozzarella cheese – 2 cups, shredded
- Parmesan cheese – 1/2 cup, grated
- Spinach – 10 oz, frozen and thawed
- Marinara sauce – 24 oz
- Egg – 1
- Garlic powder – 1 tsp
- Salt – 1/2 tsp
- Black pepper – 1/4 tsp
Instructions
- Preheat your oven to 375°F (190°C).
- Boil lasagna noodles according to package instructions until al dente, then drain and lay flat on a sheet of aluminum foil to prevent sticking.
- In a mixing bowl, combine ricotta cheese, egg, garlic powder, salt, and black pepper. Tip: Squeeze all the water out of the thawed spinach before adding it to the mixture for a firmer lasagna.
- Spread a thin layer of marinara sauce at the bottom of a 9×13 inch baking dish.
- Place a layer of lasagna noodles over the sauce, then spread half of the ricotta mixture over the noodles, followed by a layer of spinach, and a sprinkle of mozzarella and parmesan cheeses.
- Repeat the layers, ending with a final layer of noodles, marinara sauce, and the remaining cheeses. Tip: Covering the lasagna with foil for the first 25 minutes of baking prevents the top from burning.
- Bake uncovered for an additional 10 minutes, or until the cheese is bubbly and slightly golden. Tip: Let the lasagna sit for 10 minutes after baking to make slicing easier.
Cheesy, with just the right amount of crunch from the edges, this vegetable lasagna is a crowd-pleaser. Serve it with a side of garlic bread or a fresh salad for a complete meal that’s sure to impress.
Lamb Chops with Mint Pesto
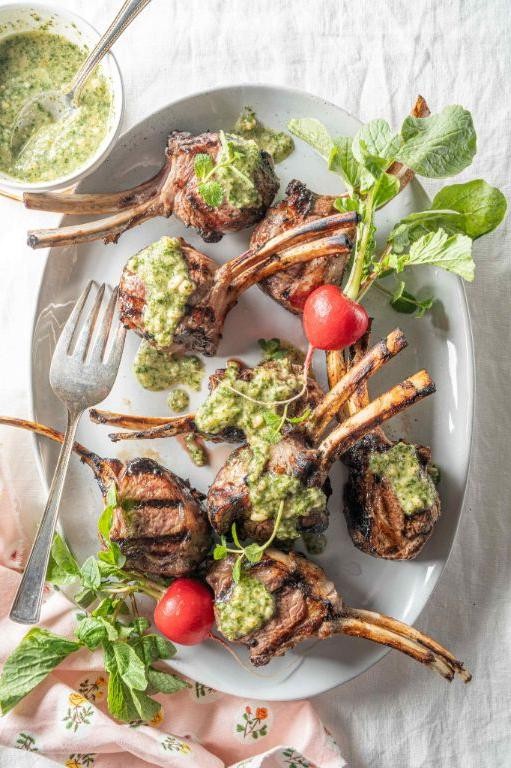
Zesty and vibrant, this Lamb Chops with Mint Pesto recipe is a game-changer for your dinner routine. I stumbled upon this combination during a summer barbecue, and it’s been a staple in my kitchen ever since. The mint pesto adds a refreshing twist that perfectly complements the rich flavor of the lamb.
Ingredients
- Lamb chops – 4
- Fresh mint leaves – 1 cup
- Pine nuts – ¼ cup
- Garlic – 2 cloves
- Olive oil – ½ cup
- Parmesan cheese – ¼ cup, grated
- Salt – ½ tsp
- Black pepper – ¼ tsp
Instructions
- Preheat your grill to medium-high heat, about 400°F, ensuring it’s clean and lightly oiled to prevent sticking.
- While the grill heats, combine mint leaves, pine nuts, garlic, olive oil, Parmesan cheese, salt, and black pepper in a food processor. Blend until smooth to create the mint pesto. Tip: Toast the pine nuts lightly before blending for a deeper flavor.
- Season the lamb chops evenly with salt and black pepper on both sides.
- Grill the lamb chops for 3-4 minutes on each side for medium-rare, or until they reach your desired doneness. Tip: Let the chops rest for 5 minutes after grilling to retain their juices.
- Serve the lamb chops with a generous dollop of mint pesto on top. Tip: For an extra touch, drizzle a bit of olive oil over the chops before serving.
Velvety tender lamb chops paired with the herby brightness of mint pesto create a dish that’s both elegant and comforting. Try serving them over a bed of quinoa or with roasted vegetables for a complete meal that’s sure to impress.
Turkey Meatballs with Spaghetti
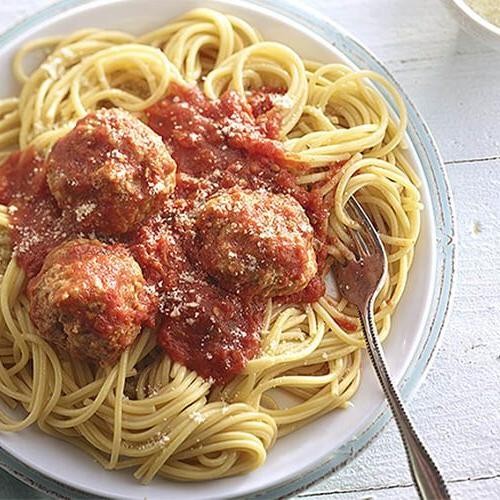
Every time I think about comfort food, my mind immediately goes to a hearty plate of turkey meatballs with spaghetti. It’s a dish that reminds me of family dinners and the joy of sharing a meal made with love. Today, I’m excited to share my go-to recipe that’s both simple and satisfying.
Ingredients
- Ground turkey – 1 lb
- Breadcrumbs – ½ cup
- Egg – 1
- Garlic powder – 1 tsp
- Salt – ½ tsp
- Black pepper – ¼ tsp
- Olive oil – 2 tbsp
- Spaghetti – 8 oz
- Marinara sauce – 2 cups
- Parmesan cheese – ¼ cup
Instructions
- Preheat your oven to 375°F and line a baking sheet with parchment paper.
- In a large bowl, combine the ground turkey, breadcrumbs, egg, garlic powder, salt, and black pepper. Mix until just combined to keep the meatballs tender.
- Shape the mixture into 1-inch balls and place them on the prepared baking sheet. Tip: Wet your hands slightly to prevent sticking.
- Bake the meatballs for 20 minutes, or until they’re golden brown and cooked through.
- While the meatballs bake, cook the spaghetti according to the package instructions until al dente. Drain and set aside.
- Heat the olive oil in a large skillet over medium heat. Add the cooked meatballs and marinara sauce, simmering for 5 minutes to blend the flavors.
- Serve the spaghetti topped with the meatballs and sauce. Sprinkle with Parmesan cheese before serving. Tip: For an extra touch, garnish with fresh basil leaves.
Serve this dish hot and watch as the tender meatballs and perfectly cooked spaghetti come together in a symphony of flavors. The Parmesan adds a salty, umami depth that makes each bite irresistible. Try pairing it with a crisp green salad for a complete meal.
Eggplant Parmesan

Perfectly crispy on the outside, tender on the inside, and smothered in a rich tomato sauce and melted cheese, Eggplant Parmesan is a dish that feels like a hug in food form. I remember the first time I made it, skeptical that it could rival the meaty versions I grew up loving, but one bite was all it took to convert me.
Ingredients
- Eggplant – 1 large
- Flour – 1 cup
- Eggs – 2
- Breadcrumbs – 1 cup
- Olive oil – ½ cup
- Tomato sauce – 2 cups
- Mozzarella cheese – 2 cups, shredded
- Parmesan cheese – ½ cup, grated
- Salt – 1 tsp
- Black pepper – ½ tsp
Instructions
- Preheat oven to 375°F.
- Slice eggplant into ½-inch rounds. Sprinkle with salt and let sit for 30 minutes to draw out moisture, then pat dry.
- Set up a breading station: place flour, beaten eggs, and breadcrumbs in separate shallow dishes.
- Dredge each eggplant slice in flour, dip in egg, then coat with breadcrumbs.
- Heat olive oil in a large skillet over medium heat. Fry eggplant slices until golden brown, about 3 minutes per side. Tip: Don’t overcrowd the pan to ensure even cooking.
- Spread a thin layer of tomato sauce in a baking dish. Arrange fried eggplant slices in a single layer.
- Top with more tomato sauce, then sprinkle with mozzarella and Parmesan cheeses. Tip: For extra flavor, add a pinch of black pepper between layers.
- Repeat layers until all ingredients are used, finishing with cheese on top.
- Bake for 25 minutes, or until cheese is bubbly and golden. Tip: Let it rest for 5 minutes before serving to set the layers.
Golden and glorious straight from the oven, this Eggplant Parmesan boasts layers of flavor and texture that are simply irresistible. Serve it over a bed of spaghetti for a hearty meal, or enjoy a slice on its own with a crisp green salad on the side.
Chicken and Dumplings
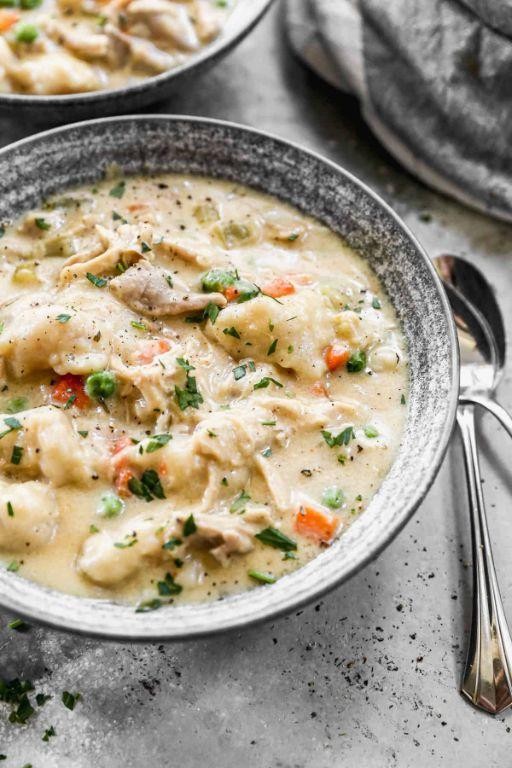
Warm, comforting, and utterly satisfying, chicken and dumplings is the dish I turn to when I need a hug in a bowl. It reminds me of my grandmother’s kitchen, where the aroma of simmering chicken would fill the air, promising a meal that was as nourishing as it was delicious.
Ingredients
- Chicken breasts – 2
- Chicken broth – 4 cups
- Flour – 1 cup
- Baking powder – 2 tsp
- Milk – ½ cup
- Butter – 2 tbsp
- Salt – 1 tsp
- Pepper – ½ tsp
Instructions
- In a large pot, bring the chicken broth to a boil over medium-high heat.
- Add the chicken breasts to the boiling broth, reduce heat to low, cover, and simmer for 20 minutes until the chicken is fully cooked.
- Remove the chicken from the broth, let it cool slightly, then shred it into bite-sized pieces.
- In a mixing bowl, combine flour, baking powder, salt, and pepper. Tip: Sifting the flour can make the dumplings lighter.
- Cut the butter into the dry ingredients until the mixture resembles coarse crumbs.
- Stir in the milk until just combined to form a dough. Tip: Overmixing can make the dumplings tough.
- Drop tablespoon-sized pieces of the dough into the simmering broth. Tip: Space them out to prevent sticking.
- Cover the pot and let the dumplings cook for 15 minutes without lifting the lid.
- Return the shredded chicken to the pot, stir gently, and cook for another 5 minutes until everything is heated through.
Kindly note how the dumplings soak up the broth, becoming fluffy yet firm, while the chicken stays tender. Serve this hearty dish with a sprinkle of fresh parsley for a pop of color and freshness.
Vegetable Curry with Rice
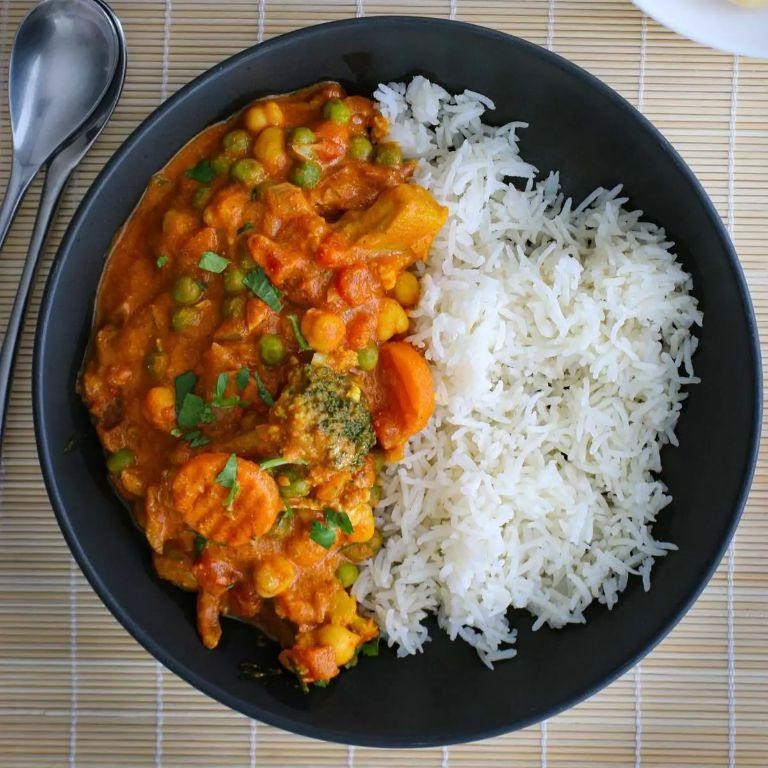
Today, I’m sharing a dish that’s become a weeknight hero in my kitchen: Vegetable Curry with Rice. It’s the perfect blend of comforting and nutritious, and the best part? It’s incredibly forgiving, making it ideal for those evenings when you’re not quite sure what to cook.
Ingredients
- Rice – 1 cup
- Vegetable oil – 2 tbsp
- Onion – 1, diced
- Garlic – 2 cloves, minced
- Curry powder – 2 tbsp
- Mixed vegetables – 2 cups (carrots, peas, bell peppers)
- Coconut milk – 1 can (13.5 oz)
- Water – 1 cup
- Salt – ½ tsp
Instructions
- Rinse the rice under cold water until the water runs clear, then set aside to drain. This removes excess starch for fluffier rice.
- Heat the vegetable oil in a large pot over medium heat. Add the diced onion and sauté until translucent, about 5 minutes.
- Add the minced garlic and curry powder to the pot, stirring constantly for 1 minute to toast the spices, which unlocks their flavor.
- Stir in the mixed vegetables, coconut milk, water, and salt. Bring the mixture to a boil, then reduce the heat to low and simmer for 15 minutes, stirring occasionally.
- Add the drained rice to the pot, stirring to combine. Cover and cook on low heat for 20 minutes, or until the rice is tender and has absorbed all the liquid. Tip: Resist the urge to peek; keeping the lid on ensures even cooking.
- Remove the pot from the heat and let it sit, covered, for 5 minutes. This allows the rice to steam and become even more tender.
Unbelievably simple, yet packed with flavor, this Vegetable Curry with Rice is a testament to how a few ingredients can come together to create something truly special. Serve it with a sprinkle of fresh cilantro or a squeeze of lime for an extra burst of freshness.
Conclusion
Variety is the spice of life, and our roundup of 19 Delicious Sunday Dinner Recipes Easy brings just that to your table! Whether you’re craving comfort food or something new, these recipes promise to delight. We’d love to hear which dishes become your favorites—drop us a comment below. Loved this collection? Share the love on Pinterest and spread the joy of easy, tasty meals!