Who says you have to give up sweets to keep your blood sugar in check? Dive into our collection of 20 Delicious Sugar-Free Dessert Recipes designed especially for diabetics and anyone looking for healthier alternatives. From creamy cheesecakes to rich chocolate treats, these desserts prove that you can enjoy the sweeter things in life without the guilt. Keep reading to discover your next favorite sugar-free delight!
Chocolate Avocado Mousse
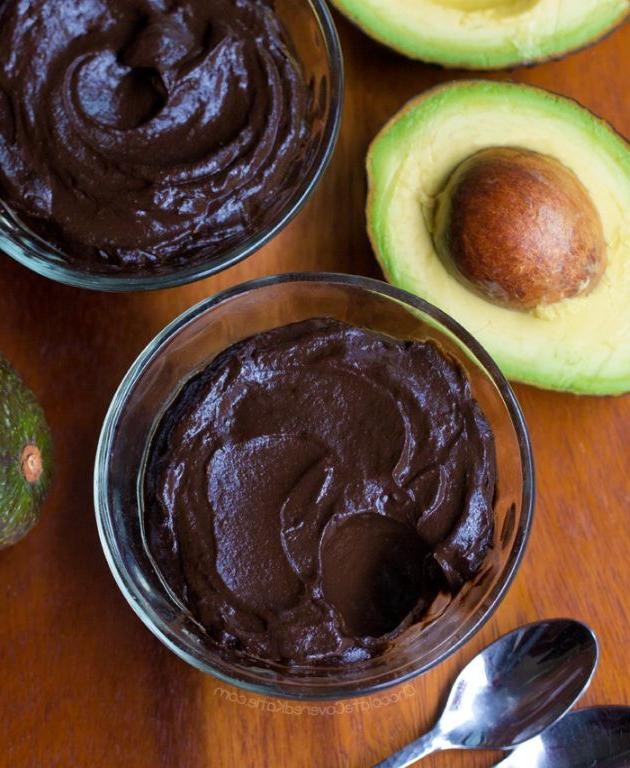
Kindly indulge in the luxurious simplicity of Chocolate Avocado Mousse, a dessert that marries the creamy richness of avocado with the deep, velvety tones of dark chocolate, creating a symphony of flavors that’s both indulgent and surprisingly wholesome.
Ingredients
- 2 ripe avocados, pitted and scooped (the riper, the creamier the mousse)
- 1/2 cup high-quality dark chocolate chips (I swear by Ghirardelli 60% cacao for the perfect balance)
- 1/4 cup pure maple syrup (for a natural sweetness that complements the chocolate)
- 1/4 cup unsweetened cocoa powder (Dutch-processed adds a smoother flavor)
- 1 tsp pure vanilla extract (the real deal makes all the difference)
- A pinch of sea salt (to elevate all the flavors)
- 1/2 cup heavy cream, chilled (for whipping into soft peaks)
Instructions
- Melt the dark chocolate chips in a microwave-safe bowl in 30-second intervals, stirring between each, until smooth. Let it cool slightly.
- In a food processor, combine the avocado flesh, melted chocolate, maple syrup, cocoa powder, vanilla extract, and sea salt. Blend until completely smooth, scraping down the sides as needed.
- In a separate bowl, whip the chilled heavy cream until soft peaks form. This should take about 2-3 minutes with an electric mixer on high speed.
- Gently fold the whipped cream into the avocado-chocolate mixture until fully incorporated, being careful not to deflate the cream.
- Divide the mousse among serving dishes and refrigerate for at least 2 hours, or until set. This patience rewards you with the perfect texture.
Zesty yet rich, this mousse boasts a silky texture that melts on the tongue, with the avocado lending a subtle freshness that balances the chocolate’s intensity. Serve it garnished with fresh berries or a sprinkle of cocoa powder for an elegant finish.
Almond Flour Blueberry Muffins
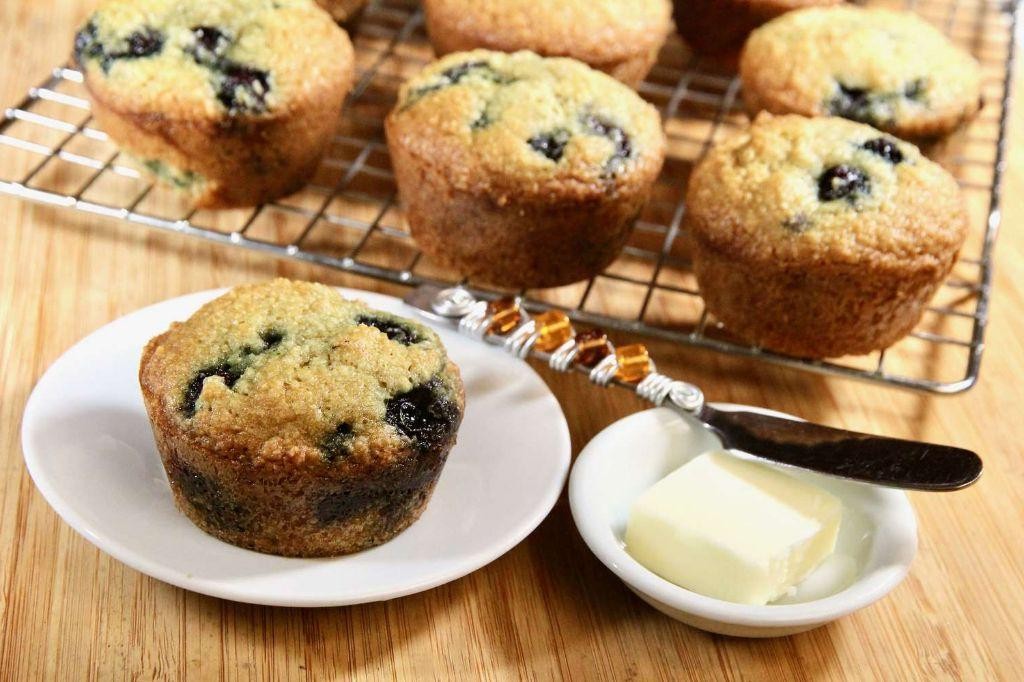
These Almond Flour Blueberry Muffins are a delightful treat that perfectly balances the nutty richness of almond flour with the sweet, tangy burst of fresh blueberries. Ideal for a leisurely breakfast or a sophisticated afternoon snack, they’re a testament to the beauty of simple, quality ingredients.
Ingredients
- 2 cups almond flour – I find that a finely ground flour yields a smoother texture.
- 1/2 cup maple syrup – Pure maple syrup adds a depth of flavor that’s irreplaceable.
- 3 large eggs – Room temperature eggs blend more seamlessly into the batter.
- 1/4 cup melted coconut oil – Extra virgin coconut oil imparts a subtle, sweet aroma.
- 1 tsp vanilla extract – A splash of vanilla elevates the muffins’ flavor profile.
- 1/2 tsp baking soda – The key to achieving that perfect rise.
- 1/4 tsp sea salt – Just a pinch to balance the sweetness.
- 1 cup fresh blueberries – Tossed in a bit of almond flour to prevent sinking.
Instructions
- Preheat your oven to 350°F (175°C) and line a muffin tin with parchment liners for easy removal.
- In a large bowl, whisk together the almond flour, baking soda, and sea salt until well combined.
- In another bowl, beat the eggs, then add the maple syrup, melted coconut oil, and vanilla extract, whisking until smooth.
- Gently fold the wet ingredients into the dry ingredients, being careful not to overmix—this keeps the muffins tender.
- Toss the blueberries with a tablespoon of almond flour, then fold them into the batter to distribute evenly.
- Divide the batter evenly among the prepared muffin cups, filling each about 3/4 full.
- Bake for 20-25 minutes, or until the tops are golden and a toothpick inserted into the center comes out clean.
- Allow the muffins to cool in the tin for 5 minutes before transferring to a wire rack to cool completely.
Almond Flour Blueberry Muffins emerge from the oven with a moist, tender crumb and a lightly crisp exterior. The blueberries become little pockets of jammy sweetness, making each bite a delightful contrast of textures. Serve them warm with a dollop of clotted cream for an indulgent twist.
Coconut Flour Pancakes
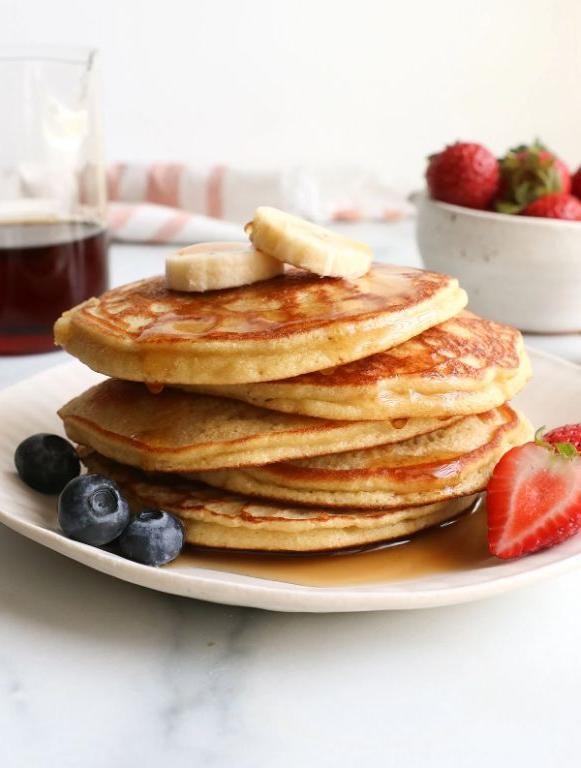
Yieldingly light and subtly sweet, these coconut flour pancakes are a gluten-free morning delight that doesn’t skimp on flavor or fluffiness. Perfect for a leisurely weekend brunch, they’re a testament to how simple ingredients can create something truly special.
Ingredients
- 1/2 cup coconut flour (I find this brand gives the perfect texture)
- 4 large eggs, preferably at room temperature for smoother blending
- 1 cup almond milk (unsweetened is my choice for a cleaner taste)
- 2 tablespoons pure maple syrup, plus extra for serving
- 1 teaspoon vanilla extract (the real deal makes all the difference)
- 1/4 teaspoon sea salt (a pinch more if you like a contrast to the sweetness)
- 1/2 teaspoon baking powder (for that essential rise)
- Coconut oil, for greasing the pan (a light brush is all you need)
Instructions
- In a large mixing bowl, whisk together the coconut flour, baking powder, and sea salt until well combined.
- Add the eggs, almond milk, maple syrup, and vanilla extract to the dry ingredients. Whisk vigorously for about 2 minutes until the batter is smooth and free of lumps. Tip: Let the batter sit for 5 minutes to thicken slightly; coconut flour absorbs liquid over time.
- Heat a non-stick skillet or griddle over medium-low heat (325°F is ideal) and lightly grease with coconut oil.
- Pour 1/4 cup of batter onto the skillet for each pancake. Cook for 2-3 minutes until bubbles form on the surface and the edges look set. Tip: Resist the urge to flip too early; these pancakes need a bit more patience than traditional ones.
- Carefully flip the pancakes and cook for another 1-2 minutes until golden brown and cooked through. Tip: Keep finished pancakes warm in a 200°F oven while you cook the rest.
Airy with a delicate crumb and a hint of tropical sweetness, these pancakes are a dream when drizzled with extra maple syrup and topped with fresh berries. For an extra indulgent twist, a dollop of coconut whipped cream elevates them to dessert-for-breakfast status.
Peanut Butter Cookies
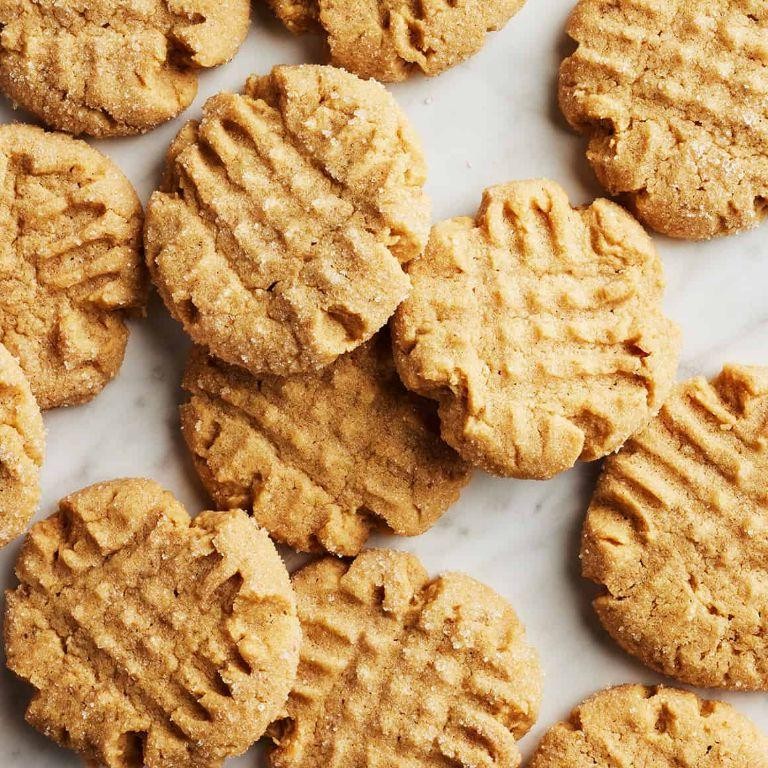
Kneading together the rich, nutty flavors of peanut butter with the sweet, buttery undertones of classic cookie dough, these peanut butter cookies are a timeless treat that beckons with every bite. Perfectly crisp on the edges yet tender at the center, they embody the essence of homemade comfort.
Ingredients
- 1 cup creamy peanut butter (I swear by the natural, unsweetened kind for a deeper peanut flavor)
- 1/2 cup unsalted butter, softened (room temperature blends more smoothly)
- 1/2 cup granulated sugar (for that perfect sparkle and crunch)
- 1/2 cup packed light brown sugar (adds a moist chewiness)
- 1 large egg (room temperature, please, for even mixing)
- 1 1/4 cups all-purpose flour (measured by spooning and leveling)
- 3/4 tsp baking soda (the secret to their perfect rise)
- 1/2 tsp baking powder (for a bit of lift)
- 1/4 tsp salt (just a pinch to balance the sweetness)
Instructions
- Preheat your oven to 350°F (177°C) and line two baking sheets with parchment paper for easy cleanup.
- In a large bowl, beat together the peanut butter, softened butter, granulated sugar, and brown sugar until light and fluffy, about 3 minutes. Tip: Scrape down the sides of the bowl halfway through to ensure everything is evenly mixed.
- Beat in the egg until fully incorporated, creating a smooth, cohesive mixture.
- In a separate bowl, whisk together the flour, baking soda, baking powder, and salt to evenly distribute the leavening agents.
- Gradually add the dry ingredients to the wet mixture, mixing just until combined. Overmixing can lead to tough cookies, so stop as soon as the flour disappears.
- Roll the dough into 1-inch balls and place them 2 inches apart on the prepared baking sheets. Flatten each ball slightly with a fork, creating a classic crisscross pattern. Tip: Dip the fork in sugar between presses to prevent sticking and add a subtle sparkle.
- Bake for 10-12 minutes, or until the edges are lightly golden but the centers are still soft. Tip: They’ll firm up as they cool, so don’t overbake for that perfect chewy texture.
- Let the cookies cool on the baking sheets for 5 minutes before transferring to a wire rack to cool completely.
Nowhere does simplicity shine brighter than in these peanut butter cookies, where each bite offers a delightful contrast of textures—crispy, chewy, and irresistibly crumbly. Serve them alongside a cold glass of milk for a classic pairing, or crumble over vanilla ice cream for an indulgent twist.
Vanilla Chia Seed Pudding

Nothing quite compares to the simplicity and elegance of Vanilla Chia Seed Pudding, a dish that marries the subtle sweetness of vanilla with the nutritious punch of chia seeds, creating a dessert that’s as wholesome as it is delightful.
Ingredients
- 1/2 cup chia seeds – I find that organic chia seeds offer the best texture and flavor.
- 2 cups almond milk – Unsweetened vanilla almond milk is my preference for a cleaner taste.
- 2 tbsp pure maple syrup – A drizzle of this adds just the right amount of sweetness.
- 1 tsp vanilla extract – Always opt for pure vanilla extract for that irreplaceable depth of flavor.
- A pinch of sea salt – This tiny addition surprisingly elevates the overall taste.
Instructions
- In a medium mixing bowl, combine the chia seeds and almond milk, whisking thoroughly to prevent any clumps.
- Add the maple syrup, vanilla extract, and a pinch of sea salt to the mixture, stirring until everything is well incorporated.
- Cover the bowl with plastic wrap, ensuring it’s touching the surface of the mixture to prevent a skin from forming.
- Refrigerate the mixture for at least 4 hours, or overnight for best results, allowing the chia seeds to fully absorb the liquid and expand.
- Before serving, give the pudding a good stir to break up any clumps and achieve a smooth, creamy consistency.
Zesty and refreshing, this Vanilla Chia Seed Pudding boasts a creamy texture with a delightful pop from the chia seeds. Serve it layered with fresh berries and a sprinkle of granola for a breakfast that feels like dessert, or enjoy it straight from the bowl for a quick, nutritious snack.
Pumpkin Spice Latte Cheesecake
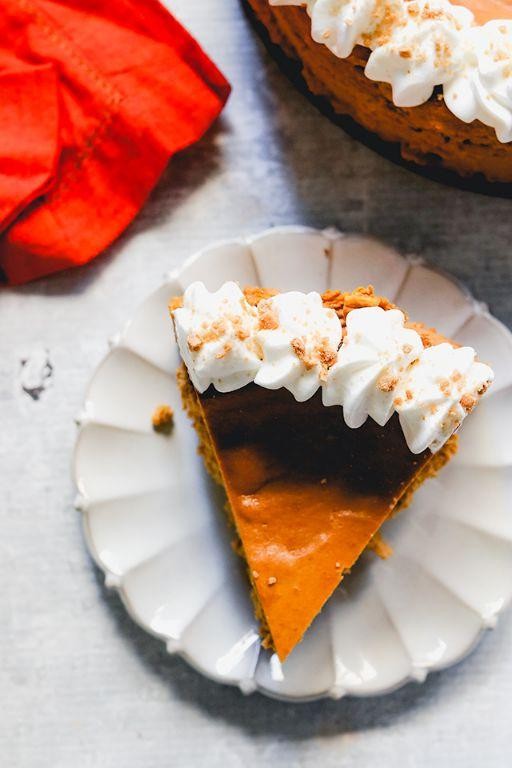
Captivating the essence of autumn in every bite, this Pumpkin Spice Latte Cheesecake marries the warmth of pumpkin spice with the rich, creamy texture of cheesecake, creating a dessert that’s both indulgent and nostalgically comforting.
Ingredients
- 1 1/2 cups graham cracker crumbs (I find the honey-flavored ones add a subtle sweetness)
- 1/4 cup granulated sugar (for that perfect crust crunch)
- 1/2 cup unsalted butter, melted (extra virgin olive oil is my go-to for a lighter version)
- 24 oz cream cheese, room temperature (I prefer room temp eggs here for smoother blending)
- 3/4 cup granulated sugar (to sweeten the deal just right)
- 1 cup pumpkin puree (homemade or canned, but ensure it’s pure pumpkin)
- 3 large eggs (room temperature, as mentioned, for seamless integration)
- 1/4 cup heavy cream (for that luxurious texture)
- 2 tsp pumpkin pie spice (the star of the show)
- 1 tsp vanilla extract (pure, for an unmatched aroma)
- 1/2 cup strong brewed coffee, cooled (espresso works wonders here)
Instructions
- Preheat your oven to 325°F (163°C) and grease a 9-inch springform pan.
- Mix graham cracker crumbs, 1/4 cup sugar, and melted butter until combined. Press firmly into the pan’s bottom. Tip: Use a flat-bottomed cup to press the crust evenly.
- Bake the crust for 10 minutes, then let it cool. This step ensures a crisp base.
- Beat cream cheese and 3/4 cup sugar until smooth. Tip: Scrape the bowl’s sides to avoid lumps.
- Add pumpkin puree, eggs one at a time, heavy cream, pumpkin pie spice, and vanilla extract. Mix until just combined.
- Gently stir in the cooled coffee until fully incorporated. Tip: Overmixing can introduce air bubbles, so be gentle.
- Pour the filling over the crust and smooth the top. Bake for 55-60 minutes until the edges are set but the center slightly jiggles.
- Turn off the oven, crack the door open, and let the cheesecake cool inside for 1 hour to prevent cracking.
- Refrigerate for at least 4 hours, preferably overnight, before serving.
This cheesecake boasts a velvety texture with a harmonious blend of pumpkin spice and coffee flavors. Try garnishing with whipped cream and a sprinkle of cinnamon for an extra festive touch.
Strawberry Banana Ice Cream
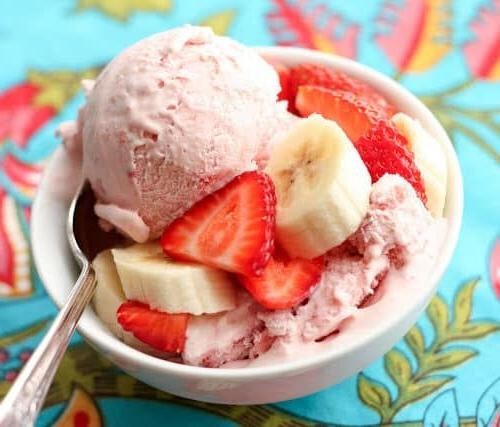
Amidst the warmth of summer, there’s nothing quite as refreshing as the creamy, dreamy delight of homemade Strawberry Banana Ice Cream. This no-churn wonder combines the sweet tang of ripe strawberries with the mellow richness of bananas, creating a dessert that’s as effortless to make as it is indulgent to savor.
Ingredients
- 2 cups fresh strawberries, hulled and sliced (the riper, the sweeter your ice cream will be)
- 3 ripe bananas, peeled and frozen (I find that freezing them overnight gives the creamiest texture)
- 1/2 cup heavy cream (for that luxurious mouthfeel we all crave)
- 1/4 cup granulated sugar (adjust based on the sweetness of your fruit)
- 1 tsp pure vanilla extract (the real deal makes all the difference)
Instructions
- In a blender, combine the sliced strawberries, frozen bananas, heavy cream, sugar, and vanilla extract. Blend on high until the mixture is completely smooth, about 2 minutes. Tip: If your blender struggles, let the bananas sit out for 5 minutes to soften slightly.
- Pour the mixture into a loaf pan or a freezer-safe container. Smooth the top with a spatula for an even freeze.
- Cover the container with plastic wrap, pressing it directly onto the surface of the mixture to prevent ice crystals from forming. Freeze for at least 4 hours, or until firm. Tip: For easier scooping, let the ice cream sit at room temperature for 5 minutes before serving.
- Once set, scoop the ice cream into bowls or cones. Tip: Garnish with fresh strawberry slices or a drizzle of chocolate sauce for an extra touch of elegance.
Nowhere does simplicity meet sophistication quite like in this Strawberry Banana Ice Cream. The velvety texture and vibrant flavors make it a standout, whether served in a classic cone or as part of a more elaborate dessert creation.
Lemon Poppy Seed Cake
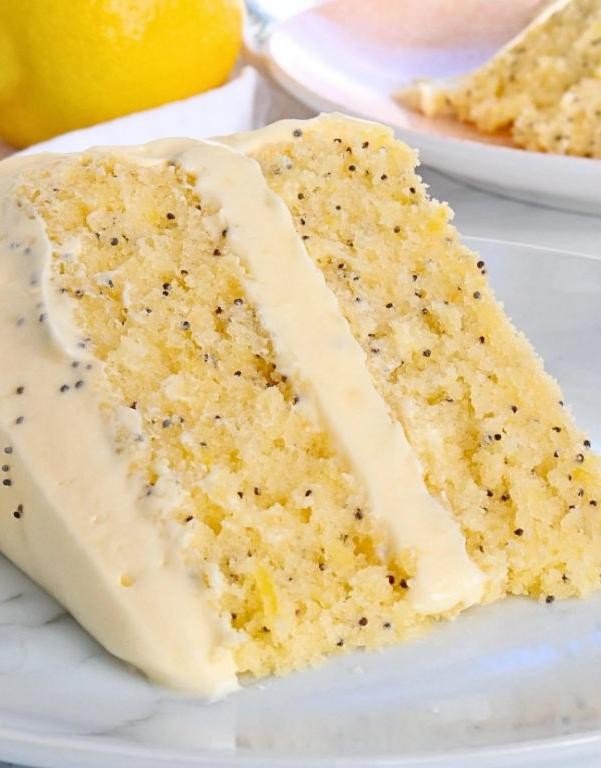
Zesty and vibrant, this Lemon Poppy Seed Cake is a delightful harmony of tangy citrus and subtle crunch, perfect for those who cherish a dessert that balances sweetness with a refreshing twist. Crafted with care, it’s a testament to the beauty of simple ingredients coming together to create something truly special.
Ingredients
- 1 1/2 cups all-purpose flour (I always sift mine for a lighter texture)
- 1/2 cup unsalted butter, softened (room temperature blends smoother)
- 1 cup granulated sugar (for that perfect sweetness)
- 2 large eggs (room temperature eggs incorporate better)
- 1/4 cup fresh lemon juice (the zest is where the magic lies, don’t skip it!)
- 1 tbsp lemon zest (for an extra zing)
- 2 tbsp poppy seeds (they add a lovely crunch)
- 1/2 tsp baking powder (for just the right rise)
- 1/4 tsp baking soda (balances the acidity)
- 1/2 cup buttermilk (makes the cake incredibly moist)
- 1/2 tsp vanilla extract (a dash enhances all flavors)
Instructions
- Preheat your oven to 350°F (175°C) and grease a 9-inch round cake pan, lining the bottom with parchment paper for easy removal.
- In a medium bowl, whisk together the sifted flour, baking powder, baking soda, and poppy seeds, setting aside.
- In a large bowl, cream the softened butter and sugar together until light and fluffy, about 3 minutes. Tip: Scrape down the sides of the bowl to ensure even mixing.
- Beat in the eggs one at a time, then stir in the vanilla extract, lemon juice, and lemon zest.
- Alternately add the dry ingredients and buttermilk to the butter mixture, beginning and ending with the dry ingredients. Mix until just combined. Tip: Overmixing can lead to a dense cake.
- Pour the batter into the prepared pan, smoothing the top with a spatula.
- Bake for 25-30 minutes, or until a toothpick inserted into the center comes out clean. Tip: The cake should spring back when lightly touched.
- Allow the cake to cool in the pan for 10 minutes before transferring to a wire rack to cool completely.
Unveiling a cake that’s moist, with a tender crumb and bursts of lemon in every bite, this Lemon Poppy Seed Cake is a celebration of flavors. Serve it with a dollop of whipped cream or a drizzle of lemon glaze for an extra indulgent treat.
Raspberry Coconut Bars
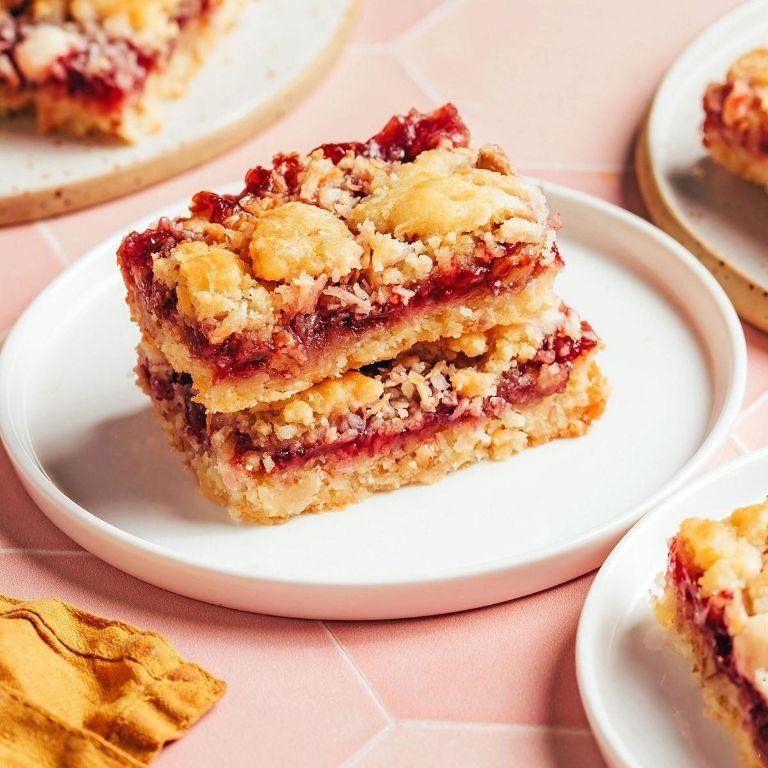
Nothing heralds the arrival of summer quite like the vibrant pairing of raspberries and coconut, a duo that transforms into a sublime dessert with these Raspberry Coconut Bars. Perfect for picnics or a sophisticated afternoon tea, these bars strike a delightful balance between tart and sweet, encased in a buttery, crumbly crust.
Ingredients
- 1 1/2 cups all-purpose flour (I always sift mine for a lighter texture)
- 1/2 cup granulated sugar (for that just-right sweetness)
- 1/2 cup unsalted butter, chilled and diced (cold butter is key to a flaky crust)
- 2 cups fresh raspberries (frozen can work in a pinch, but fresh is best)
- 1/2 cup shredded coconut (toasted for an extra layer of flavor)
- 1/4 cup honey (a drizzle adds a lovely gloss and sweetness)
- 1 tsp vanilla extract (pure vanilla makes all the difference)
Instructions
- Preheat your oven to 350°F (175°C) and line an 8-inch square baking pan with parchment paper, leaving an overhang for easy removal.
- In a large bowl, whisk together the flour and sugar. Add the diced butter and use your fingers to rub it into the flour until the mixture resembles coarse crumbs.
- Press the crumb mixture firmly into the bottom of the prepared pan to form an even layer. Bake for 15 minutes, or until the edges just begin to turn golden.
- While the crust bakes, gently toss the raspberries with honey and vanilla in a bowl. Tip: If your raspberries are very tart, a little extra honey won’t hurt.
- Spread the raspberry mixture over the warm crust, then sprinkle evenly with shredded coconut. Return to the oven and bake for another 20 minutes, or until the coconut is lightly toasted.
- Allow the bars to cool completely in the pan on a wire rack before lifting out using the parchment overhang and cutting into squares.
Rich with the tang of raspberries and the tropical hint of coconut, these bars offer a chewy yet crisp texture that’s utterly irresistible. Serve them with a dollop of whipped cream or a scoop of vanilla ice cream for an extra indulgent treat.
Apple Cinnamon Oatmeal Cookies

These Apple Cinnamon Oatmeal Cookies are the epitome of comfort, blending the warmth of cinnamon with the sweet, tender bites of apple for a treat that feels like a hug in every bite.
Ingredients
- 1 cup unsalted butter, softened (I find that butter at room temperature blends more smoothly)
- 1 cup packed brown sugar (for that deep, molasses-like sweetness)
- 1/2 cup granulated sugar (to balance the richness)
- 2 large eggs (room temperature eggs incorporate better)
- 1 tsp vanilla extract (pure vanilla makes all the difference)
- 1 1/2 cups all-purpose flour (measured by spooning and leveling for accuracy)
- 1 tsp baking soda (fresh for maximum rise)
- 1 tsp ground cinnamon (the star spice, don’t skimp)
- 1/2 tsp salt (to enhance all the flavors)
- 3 cups old-fashioned oats (for that perfect chew)
- 1 cup finely chopped apple (I love Honeycrisp for their sweetness and firm texture)
Instructions
- Preheat your oven to 350°F (175°C) and line baking sheets with parchment paper for easy cleanup.
- In a large bowl, cream together the softened butter, brown sugar, and granulated sugar until light and fluffy, about 3 minutes. Tip: Scrape down the sides of the bowl to ensure even mixing.
- Beat in the eggs one at a time, then stir in the vanilla extract. Tip: Adding eggs one at a time prevents the mixture from curdling.
- In a separate bowl, whisk together the flour, baking soda, cinnamon, and salt. Gradually add this to the wet ingredients, mixing just until combined.
- Fold in the oats and chopped apple until evenly distributed. Tip: Don’t overmix to keep the cookies tender.
- Drop rounded tablespoons of dough onto the prepared baking sheets, spacing them about 2 inches apart.
- Bake for 10-12 minutes, or until the edges are golden but the centers are still soft. Tip: They’ll firm up as they cool, so don’t overbake.
- Let the cookies cool on the baking sheets for 5 minutes before transferring to a wire rack to cool completely.
Lightly spiced and wonderfully chewy, these cookies are a delightful twist on the classic oatmeal cookie. Serve them warm with a drizzle of caramel for an extra indulgent treat.
Dark Chocolate Truffles

Rich, velvety, and indulgent, dark chocolate truffles are the epitome of luxury in the confectionery world. Perfect for gifting or savoring solo, these bite-sized delights promise a deep cocoa flavor encased in a delicate, melt-in-your-mouth shell.
Ingredients
- 8 oz high-quality dark chocolate (70% cocoa or higher), chopped finely for smooth melting
- 1/2 cup heavy cream, warmed slightly to blend seamlessly with the chocolate
- 2 tbsp unsalted butter, at room temperature to enrich the ganache
- 1 tsp pure vanilla extract, for a hint of warmth and depth
- Cocoa powder or crushed nuts, for coating—I love the contrast of bitter cocoa against the sweet ganache
Instructions
- Place the chopped dark chocolate in a heatproof bowl, ensuring there are no large chunks for even melting.
- In a small saucepan, heat the heavy cream over medium heat until it just begins to simmer, about 2-3 minutes—do not let it boil.
- Pour the warm cream over the chocolate, letting it sit for 1 minute to soften the chocolate before stirring gently with a spatula until smooth and glossy.
- Add the room temperature butter and vanilla extract to the chocolate mixture, stirring until fully incorporated and the ganache is silky.
- Cover the bowl with plastic wrap, pressing it directly onto the surface of the ganache to prevent a skin from forming, and refrigerate for at least 2 hours until firm.
- Using a small scoop or a teaspoon, portion the ganache and roll into 1-inch balls between your palms—work quickly to prevent melting.
- Roll each truffle in cocoa powder or crushed nuts until fully coated, then place on a parchment-lined tray.
- Chill the truffles for another 30 minutes to set before serving or storing in an airtight container in the refrigerator.
Now, these dark chocolate truffles boast a luxurious, creamy center with a sophisticated bitterness that chocolate aficionados will adore. Serve them atop a dessert plate with a dusting of gold powder for an extra touch of elegance, or package them in a beautiful box as a heartfelt homemade gift.
Carrot Cake Bites
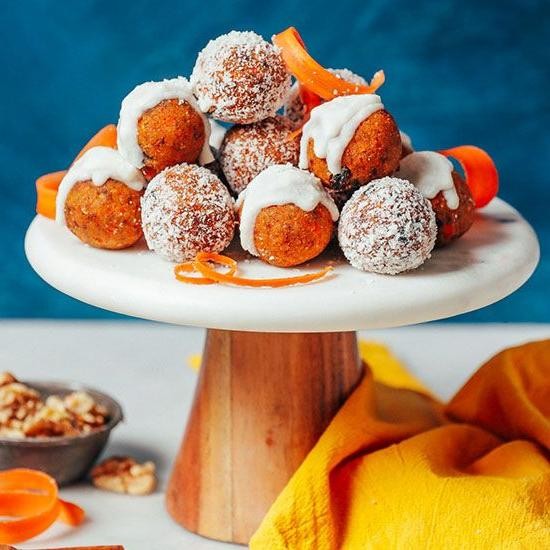
Carrot Cake Bites offer a delightful twist on the classic dessert, combining the earthy sweetness of carrots with the rich warmth of spices, all in a bite-sized treat perfect for any occasion.
Ingredients
- 1 cup finely grated carrots (I find organic carrots lend a fresher taste)
- 1/2 cup almond flour (for a nutty depth that complements the carrots beautifully)
- 1/4 cup pure maple syrup (the real deal adds a nuanced sweetness)
- 1/4 cup coconut oil, melted (extra virgin gives a cleaner flavor)
- 1 tsp vanilla extract (a splash of Madagascar vanilla elevates the aroma)
- 1 tsp cinnamon (I always reach for Ceylon cinnamon for its subtle complexity)
- 1/4 tsp nutmeg (freshly grated nutmeg makes all the difference)
- 1/4 tsp sea salt (a pinch of flaky sea salt balances the sweetness)
- 1/2 cup rolled oats (for a chewy texture that contrasts nicely with the soft carrots)
Instructions
- Preheat your oven to 350°F (175°C) and line a baking sheet with parchment paper.
- In a large bowl, combine the grated carrots, almond flour, maple syrup, melted coconut oil, vanilla extract, cinnamon, nutmeg, and sea salt. Mix until well incorporated.
- Fold in the rolled oats gently, ensuring they’re evenly distributed throughout the mixture.
- Using a tablespoon, scoop the mixture and roll into balls, placing them on the prepared baking sheet. Tip: Wet your hands slightly to prevent sticking.
- Bake for 15-18 minutes, or until the edges are just starting to turn golden. Tip: Rotate the baking sheet halfway through for even baking.
- Allow the bites to cool on the baking sheet for 5 minutes before transferring to a wire rack to cool completely. Tip: They firm up as they cool, so patience is key.
Golden and fragrant, these Carrot Cake Bites boast a moist interior with a slightly crisp exterior. Serve them atop a dollop of cream cheese frosting for an indulgent treat, or enjoy them as is for a wholesome snack.
Matcha Green Tea Cupcakes
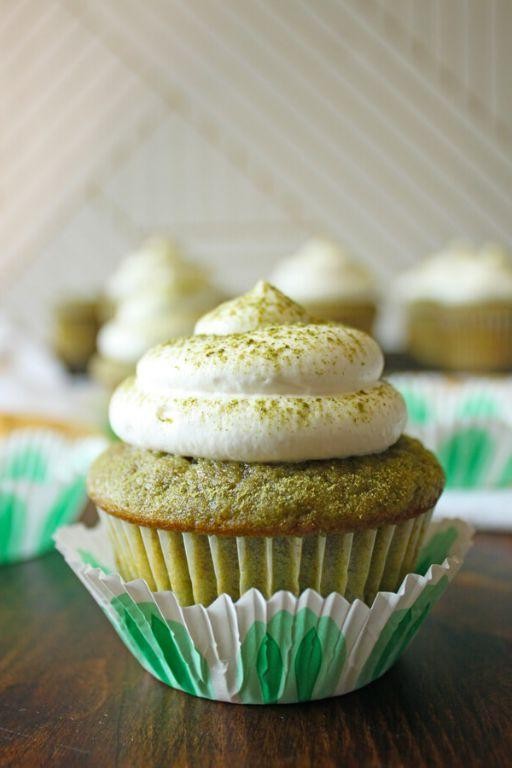
Just as the first light of dawn brings a promise of renewal, these Matcha Green Tea Cupcakes offer a fresh, vibrant start to any gathering. Their delicate balance of earthy matcha and sweet vanilla embodies the elegance of Japanese tea ceremonies, reimagined for the modern American palate.
Ingredients
- 1 1/2 cups all-purpose flour (I always sift mine for that airy texture we love)
- 1 cup granulated sugar (for just the right sweetness)
- 1 1/2 tsp baking powder (the fresher, the better)
- 1/2 tsp salt (I use fine sea salt for a cleaner taste)
- 2 tbsp matcha green tea powder (go for ceremonial grade for that vibrant color and depth of flavor)
- 1/2 cup unsalted butter, room temperature (softened to the touch but not melted)
- 2 large eggs, room temperature (they incorporate better when not cold)
- 1/2 cup whole milk (the richness makes all the difference)
- 1 tsp vanilla extract (pure, never imitation)
Instructions
- Preheat your oven to 350°F (175°C) and line a cupcake pan with 12 liners.
- In a medium bowl, whisk together the flour, sugar, baking powder, salt, and matcha powder until well combined.
- In a large bowl, beat the butter until creamy, about 2 minutes. Tip: Scrape the bowl’s sides to ensure even mixing.
- Add the eggs one at a time to the butter, beating well after each addition.
- Alternately add the dry ingredients and milk to the butter mixture, starting and ending with the dry ingredients. Mix until just combined. Tip: Overmixing leads to dense cupcakes.
- Stir in the vanilla extract until just incorporated.
- Divide the batter evenly among the cupcake liners, filling each about 2/3 full.
- Bake for 18-20 minutes, or until a toothpick inserted into the center comes out clean. Tip: Rotate the pan halfway through for even baking.
- Allow the cupcakes to cool in the pan for 5 minutes, then transfer to a wire rack to cool completely.
Out of the oven, these cupcakes boast a tender crumb and a moist interior, with the matcha’s grassy notes perfectly complemented by the vanilla’s sweetness. Serve them with a dusting of matcha powder or a dollop of whipped cream for an extra touch of elegance.
Blackberry Cobbler
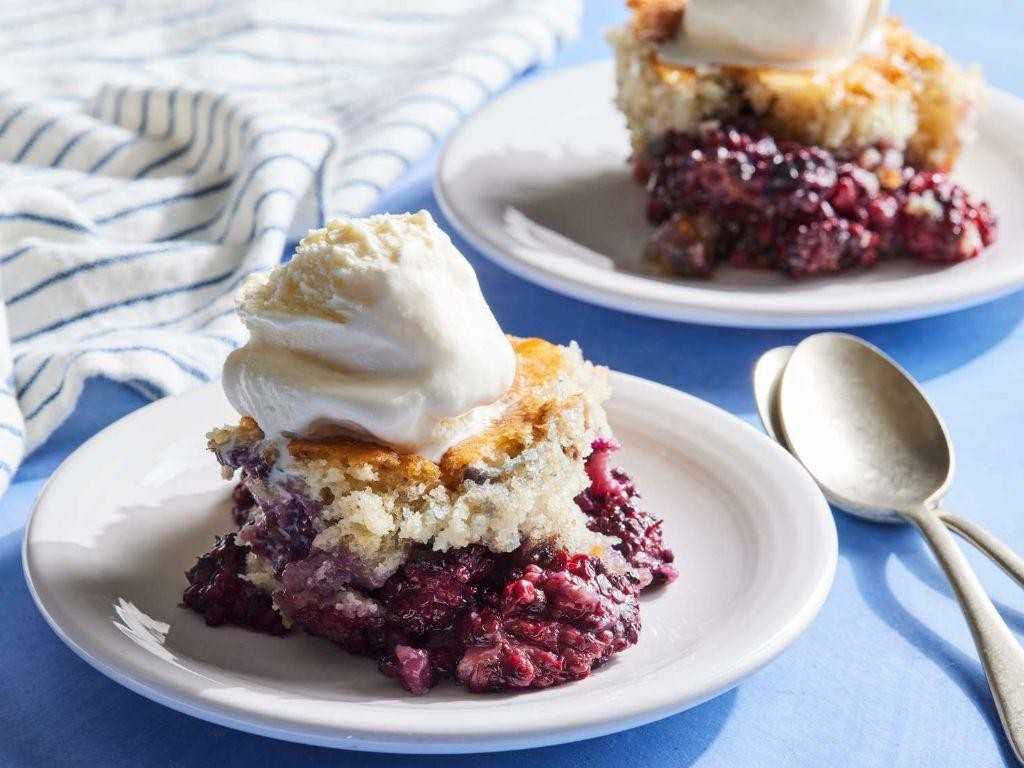
Gracefully bridging the gap between rustic charm and sophisticated dessert, this Blackberry Cobbler is a celebration of summer’s bounty. With its juicy, tart blackberries nestled under a golden, buttery crust, it’s a dish that promises to delight the senses and bring a touch of elegance to any table.
Ingredients
- 4 cups fresh blackberries (frozen can work in a pinch, but fresh berries truly shine here)
- 1 cup granulated sugar (I find this amount perfectly balances the blackberries’ natural tartness)
- 1 cup all-purpose flour (for a lighter texture, I sometimes substitute half with cake flour)
- 1/2 cup unsalted butter, melted (extra virgin olive oil is my go-to for a fruitier note, but butter wins for richness)
- 1/2 cup whole milk (room temperature blends more smoothly into the batter)
- 2 tsp baking powder (this ensures our cobbler topping is wonderfully fluffy)
- 1/4 tsp salt (just a pinch to elevate all the flavors)
Instructions
- Preheat your oven to 375°F (190°C), ensuring it’s fully heated for even baking.
- In a 9-inch baking dish, gently toss the blackberries with 1/2 cup of the sugar, allowing them to macerate slightly while you prepare the batter.
- In a mixing bowl, whisk together the flour, remaining 1/2 cup sugar, baking powder, and salt to eliminate any lumps.
- Stir in the melted butter and milk until just combined; a few lumps are okay—overmixing leads to a tough topping.
- Pour the batter over the blackberries, spreading it gently to cover most of the fruit but leaving some berries peeking through for a rustic look.
- Bake for 45 minutes, or until the topping is golden brown and a toothpick inserted into the center comes out clean.
- Let the cobbler rest for at least 10 minutes before serving; this allows the juices to thicken slightly.
Zesty and vibrant, this cobbler’s contrast between the tender, jammy blackberries and the crisp, cake-like topping is nothing short of magical. Serve it warm with a scoop of vanilla ice cream for a delightful play on temperatures and textures, or enjoy it as is, letting the simplicity of the dish speak for itself.
Pecan Pie Fat Bombs
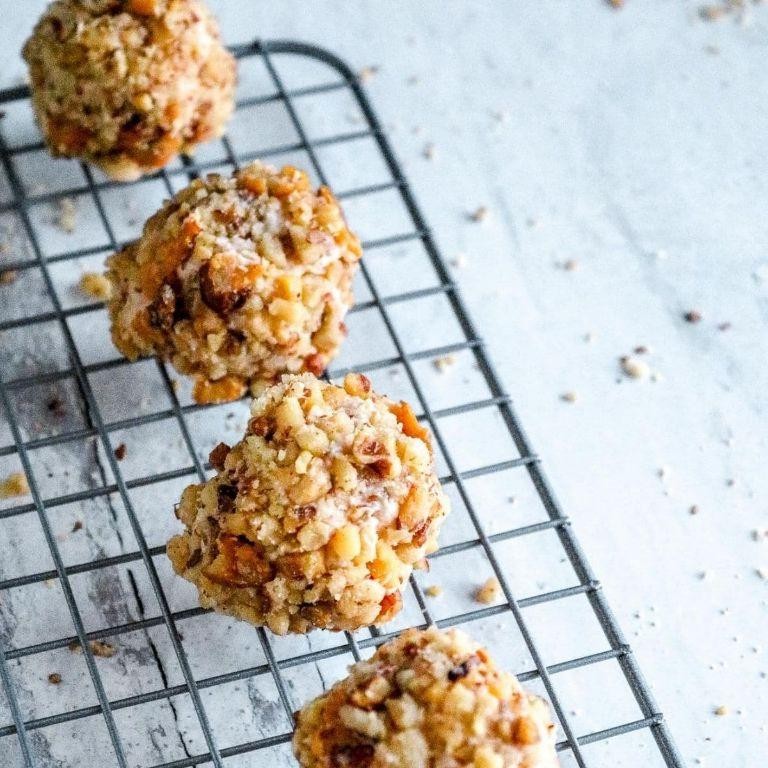
Gracefully blending the rich, buttery essence of traditional pecan pie into bite-sized delights, these Pecan Pie Fat Bombs are a decadent treat that marries convenience with indulgence. Perfect for those moments when you crave something sweet yet sophisticated, these little gems are a testament to the art of minimalist baking.
Ingredients
- 1 cup finely chopped pecans – toasting them lightly beforehand unlocks a deeper flavor.
- 1/2 cup almond flour – my secret for achieving that irresistibly tender texture.
- 1/4 cup pure maple syrup – the darker the grade, the more pronounced the caramel notes.
- 1/4 cup coconut oil, melted – extra virgin ensures a clean, subtle coconut aroma.
- 1 tsp vanilla extract – a dash of homemade vanilla elevates the entire dish.
- A pinch of sea salt – flaky Maldon salt adds a delightful crunch and contrast.
Instructions
- Preheat your oven to 350°F (175°C) and line a mini muffin tin with paper liners for easy removal.
- In a mixing bowl, combine the chopped pecans, almond flour, maple syrup, melted coconut oil, vanilla extract, and sea salt. Stir until the mixture is uniformly moist.
- Spoon the mixture into the prepared muffin tin, pressing down gently to compact each fat bomb. Tip: Use the back of a spoon dipped in water to smooth the tops without sticking.
- Bake for 12-15 minutes, or until the edges are just beginning to turn golden. Keep an eye on them; pecans can go from perfectly toasted to burnt in a blink.
- Allow the fat bombs to cool in the tin for 10 minutes before transferring to a wire rack to cool completely. Tip: Chilling them in the fridge for an hour firms them up beautifully.
- Once set, serve at room temperature to appreciate their full flavor and texture. Tip: Drizzle with a little extra maple syrup and a sprinkle of sea salt before serving for an extra touch of elegance.
Keenly balanced between crunchy and creamy, these Pecan Pie Fat Bombs offer a symphony of textures and flavors in every bite. Serve them as a refined end to a dinner party or keep them on hand for a quick, luxurious snack that feels like a cheat day without the guilt.
Orange Creamsicle Popsicles

Kickstarting the summer with a nostalgic treat, these Orange Creamsicle Popsicles blend the creamy richness of vanilla with the bright, citrusy zing of oranges, creating a perfectly balanced frozen delight that’s both refreshing and indulgent.
Ingredients
- 2 cups fresh orange juice (strained for a smoother texture)
- 1 cup heavy cream (for that luxurious creaminess)
- 1/2 cup granulated sugar (I find this amount perfectly balances the tartness of the oranges)
- 1 tsp pure vanilla extract (the real deal makes all the difference)
- A pinch of salt (to enhance all the flavors)
Instructions
- In a medium saucepan over low heat, combine the heavy cream, sugar, and a pinch of salt. Stir continuously until the sugar is completely dissolved, about 3 minutes. Tip: Avoid boiling to keep the cream from curdling.
- Remove the saucepan from the heat and stir in the vanilla extract. Let the mixture cool to room temperature, about 20 minutes. Tip: Cooling prevents the orange juice from curdling when mixed.
- Once cooled, gently whisk in the fresh orange juice until fully combined. Tip: Straining the orange juice ensures your popsicles are silky smooth.
- Pour the mixture into popsicle molds, leaving a small space at the top for expansion. Insert sticks and freeze until solid, at least 6 hours or overnight.
- To unmold, run warm water over the outside of the molds for a few seconds, then gently pull the popsicles out.
Unveiling these popsicles reveals a creamy interior with a vibrant orange hue, offering a delightful contrast between the velvety vanilla and the tangy citrus. Serve them on a hot day for a refreshing treat, or drizzle with dark chocolate for an elegant twist.
Cherry Almond Smoothie Bowl
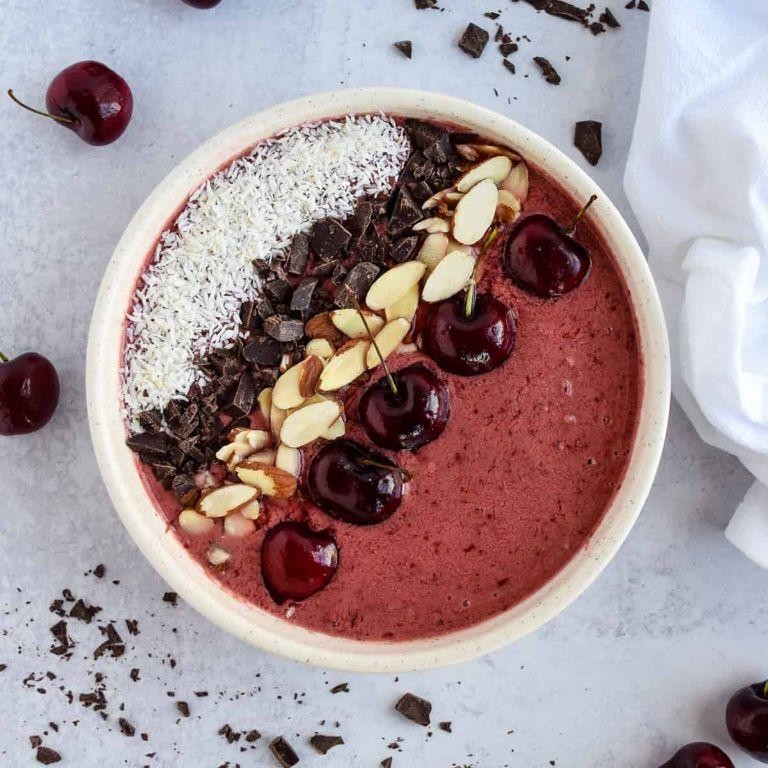
Kickstart your morning with a Cherry Almond Smoothie Bowl, a vibrant blend that marries the tartness of cherries with the nutty richness of almonds, creating a symphony of flavors that’s both refreshing and indulgent.
Ingredients
- 1 cup frozen cherries (I find the frozen variety lends a creamier texture)
- 1 ripe banana (the spottier, the sweeter)
- 1/2 cup almond milk (unsweetened is my preference for a cleaner taste)
- 1 tbsp almond butter (for that extra nutty depth)
- 1/4 cup granola (homemade or store-bought, crunch is key)
- 1 tsp chia seeds (a sprinkle for that omega-3 boost)
- A drizzle of honey (local if you can, for a touch of floral sweetness)
Instructions
- In a high-speed blender, combine the frozen cherries, banana, almond milk, and almond butter. Blend on high for 45 seconds, or until the mixture is smooth and creamy. Tip: If the mixture is too thick, add a splash more almond milk to reach your desired consistency.
- Pour the smoothie into a bowl. The texture should be thick enough to support toppings without sinking.
- Sprinkle the granola evenly over the top, followed by the chia seeds. Tip: For an extra crunch, toast the granola lightly before adding it to the bowl.
- Finish with a drizzle of honey over the toppings. Tip: The honey not only adds sweetness but also creates a beautiful glossy finish.
Zesty and vibrant, this smoothie bowl offers a delightful contrast between the creamy base and the crunchy toppings. Serve it in a colorful bowl to highlight its inviting hues, or pair it with a side of fresh fruit for an extra refreshing twist.
Mocha Almond Fudge
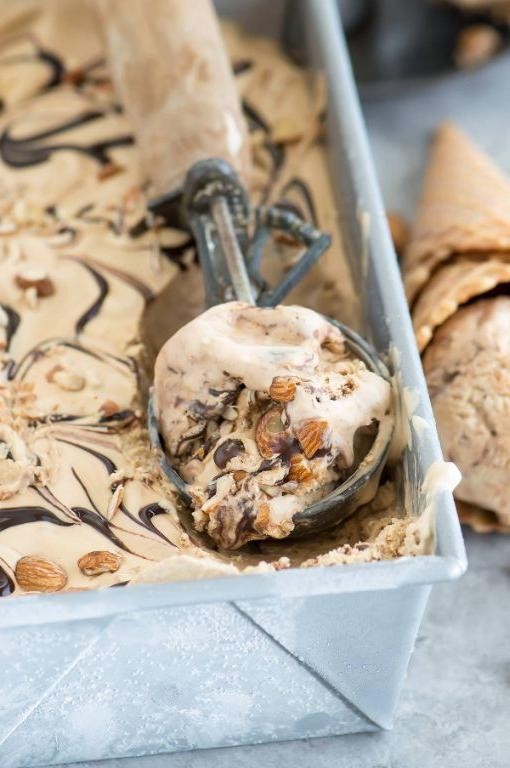
Combining the rich depths of coffee with the nutty crunch of almonds, this Mocha Almond Fudge is a decadent treat that promises to delight the senses. Crafted with care, each bite offers a harmonious blend of flavors that are both sophisticated and comforting.
Ingredients
- 1 cup heavy cream – for that luxurious texture we all crave.
- 2 cups granulated sugar – I find organic sugar lends a cleaner sweetness.
- 1/2 cup unsalted butter – always use the good stuff for the best flavor.
- 1/4 cup cocoa powder – Dutch-processed for a deeper chocolate taste.
- 1 tbsp instant espresso powder – the secret to that mocha magic.
- 1 tsp vanilla extract – pure, never imitation, for the best aroma.
- 1 cup chopped almonds – toasted lightly to bring out their nutty essence.
- A pinch of salt – to balance the sweetness perfectly.
Instructions
- Line an 8-inch square baking pan with parchment paper, leaving an overhang on the sides for easy removal.
- In a medium saucepan, combine the heavy cream, sugar, and butter. Cook over medium heat, stirring constantly until the sugar dissolves and the mixture comes to a boil.
- Once boiling, stop stirring and let the mixture reach 235°F on a candy thermometer, which is the soft-ball stage. This should take about 5 minutes.
- Remove from heat and quickly stir in the cocoa powder, espresso powder, vanilla extract, and salt until smooth.
- Fold in the chopped almonds, ensuring they’re evenly distributed throughout the fudge.
- Pour the mixture into the prepared pan, smoothing the top with a spatula. Let it cool at room temperature for at least 2 hours before cutting into squares.
Mocha Almond Fudge is a textural dream, with a creamy base that gives way to the satisfying crunch of almonds. Serve it alongside a cup of strong coffee to echo the mocha flavors, or gift it in a beautiful box for a homemade present that’s sure to impress.
Spiced Pear Crisp
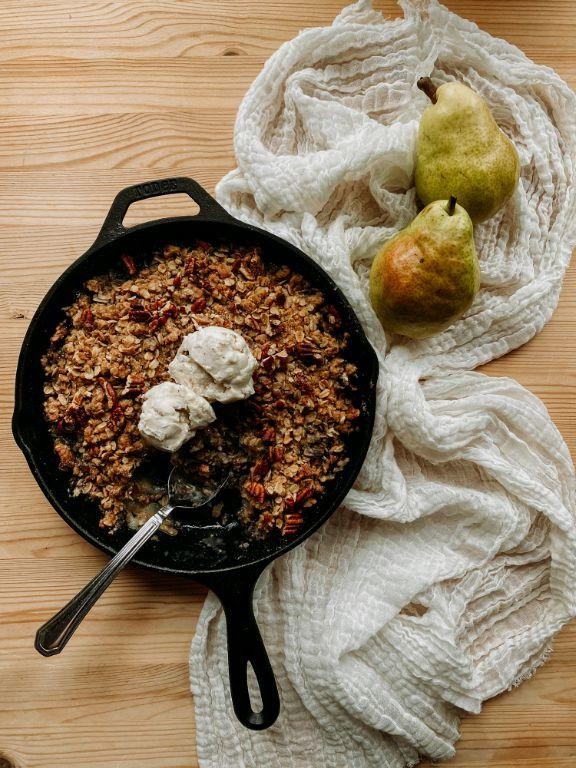
Delightfully aromatic and effortlessly comforting, this Spiced Pear Crisp marries the delicate sweetness of ripe pears with a warmly spiced, buttery topping. Perfect for those crisp autumn evenings or as a refined dessert to impress, it’s a testament to the beauty of simple ingredients transformed into something extraordinary.
Ingredients
- 4 large, ripe pears, peeled and sliced (Bartlett or Anjou work wonderfully for their balance of sweetness and texture)
- 1/2 cup granulated sugar (I find this amount perfectly highlights the pears’ natural sweetness without overpowering)
- 1 tsp ground cinnamon (a must for that quintessential warmth)
- 1/4 tsp ground nutmeg (just a hint adds incredible depth)
- 1 tbsp lemon juice (freshly squeezed, to brighten the flavors)
- 1 cup all-purpose flour (for that irresistibly crisp topping)
- 1/2 cup packed brown sugar (the molasses notes are key here)
- 1/2 cup unsalted butter, chilled and diced (quality butter makes all the difference)
- 1/2 tsp salt (to balance the sweetness)
Instructions
- Preheat your oven to 375°F (190°C), ensuring it’s fully heated for even baking.
- In a large bowl, gently toss the sliced pears with granulated sugar, cinnamon, nutmeg, and lemon juice until evenly coated. Transfer to a 9-inch baking dish.
- For the topping, combine flour, brown sugar, and salt in a separate bowl. Add the diced butter, using your fingers to work it into the flour mixture until it resembles coarse crumbs.
- Sprinkle the topping evenly over the pears, covering them completely for that perfect crisp texture.
- Bake for 35-40 minutes, or until the topping is golden brown and the pears are bubbling around the edges.
- Let the crisp cool for at least 10 minutes before serving to allow the flavors to meld beautifully.
Out of the oven, this Spiced Pear Crisp boasts a golden, crumbly topping that gives way to tender, spiced pears beneath. Serve it warm with a scoop of vanilla ice cream for a delightful contrast, or enjoy it as is for a simpler, yet equally satisfying treat.
Walnut Date Energy Balls
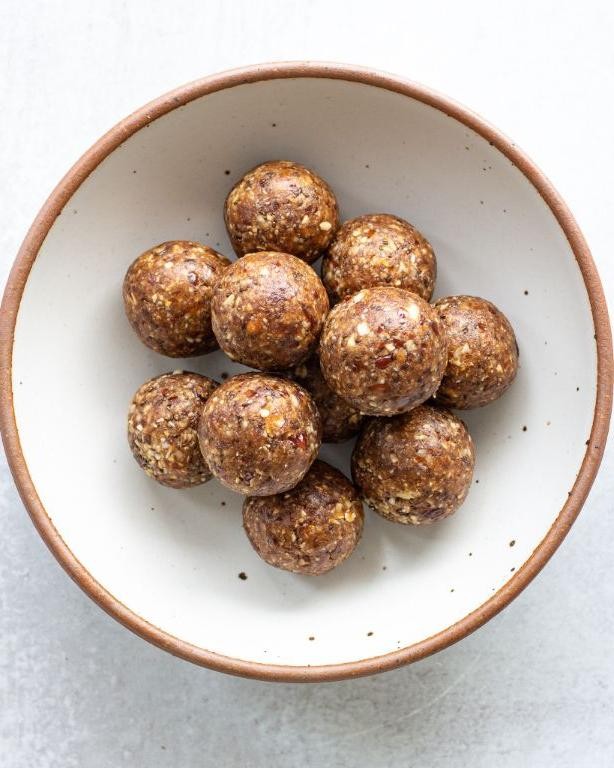
Amidst the hustle of daily life, these Walnut Date Energy Balls emerge as a sublime fusion of nutrition and indulgence, offering a quick yet sophisticated snack that delights the palate and energizes the body.
Ingredients
- 1 cup Medjool dates, pitted (their natural sweetness is unmatched)
- 1/2 cup raw walnuts (for that perfect crunch)
- 1 tbsp pure maple syrup (a drizzle of liquid gold)
- 1/2 tsp vanilla extract (the secret to depth of flavor)
- A pinch of sea salt (to elevate all the flavors)
- 1/4 cup unsweetened shredded coconut (for rolling, because texture matters)
Instructions
- In a food processor, combine the Medjool dates and raw walnuts. Pulse until the mixture is finely chopped and starts to clump together.
- Add the pure maple syrup, vanilla extract, and sea salt to the food processor. Pulse again until the mixture is well combined and forms a sticky dough.
- Using your hands, roll the dough into 1-inch balls. Tip: If the dough sticks to your hands, lightly wet them with water.
- Roll each ball in the unsweetened shredded coconut until fully coated. Tip: For extra flavor, toast the coconut lightly before rolling.
- Place the energy balls on a parchment-lined tray and refrigerate for at least 30 minutes to set. Tip: This step is crucial for the perfect texture.
Silky from the dates, with a satisfying crunch from the walnuts, these energy balls are a testament to simplicity meeting elegance. Serve them atop a chic marble platter for your next gathering, or keep them stashed in your bag for a quick pick-me-up.
Conclusion
We hope this roundup of 20 delicious sugar-free dessert recipes brings joy and sweetness to your table without the worry. Perfect for diabetics or anyone looking to enjoy healthier treats, these recipes are sure to satisfy. Don’t forget to try them out, share your favorites in the comments, and pin this article on Pinterest for more sweet inspiration. Happy baking!


