Small plates are the secret to turning any meal into a celebration, offering a delightful way to sample a variety of flavors without committing to a single dish. Whether you’re hosting a cozy gathering or simply spicing up your weeknight dinners, our roundup of 22 Delicious Small Plate Recipes for Every Occasion promises to inspire your next culinary adventure. Dive in and discover your new favorites!
Bruschetta with Tomato and Basil

Feast your eyes and prepare your taste buds for a dish that’s as vibrant as a summer’s day and as easy as pie—well, easier actually, because there’s no pie involved. Bruschetta with Tomato and Basil is the no-fuss, all-flavor appetizer that’ll have your guests thinking you’ve been slaving away in the kitchen, when in reality, you’ve been lounging with a glass of wine.
Ingredients
- Baguette – 1
- Tomatoes – 2 cups, diced
- Fresh basil – ¼ cup, chopped
- Garlic – 2 cloves, minced
- Olive oil – 2 tbsp
- Balsamic vinegar – 1 tbsp
- Salt – ½ tsp
Instructions
- Preheat your oven to 375°F. Slice the baguette into ½-inch thick pieces and arrange them on a baking sheet.
- Brush each slice lightly with olive oil. Toast in the oven for 5-7 minutes until golden and crispy. Tip: Keep an eye on them to prevent over-toasting!
- While the bread toasts, combine diced tomatoes, chopped basil, minced garlic, remaining olive oil, balsamic vinegar, and salt in a bowl. Mix gently. Tip: Let the mixture sit for 10 minutes to allow flavors to meld.
- Once the bread is toasted, rub each slice with a garlic clove for an extra flavor kick. Tip: This step is optional but highly recommended for garlic lovers.
- Spoon the tomato mixture onto each bread slice. Serve immediately.
Zesty, fresh, and with a perfect crunch, this bruschetta is a symphony of textures and flavors. Try serving it on a rustic wooden board for that Instagram-worthy presentation, or just eat it straight off the baking sheet—we won’t judge.
Mini Quiches with Spinach and Feta

Howdy, brunch enthusiasts and snack lovers alike! Let’s dive into the world of bite-sized bliss with these Mini Quiches with Spinach and Feta—perfect for those who believe good things come in small packages (and who are we to argue?).
Ingredients
- Pie crust – 1, pre-made
- Eggs – 4
- Heavy cream – 1/2 cup
- Spinach – 1 cup, chopped
- Feta cheese – 1/2 cup, crumbled
- Salt – 1/4 tsp
- Black pepper – 1/4 tsp
Instructions
- Preheat your oven to 375°F (190°C) and lightly grease a mini muffin tin. Tip: A quick spritz of cooking spray ensures your quiches pop out effortlessly.
- Roll out the pie crust and cut into 24 small circles to fit the muffin tin. Press each circle into the tin. Tip: Use a small glass or cookie cutter for uniform circles—consistency is key for even baking.
- In a bowl, whisk together eggs, heavy cream, salt, and pepper until smooth. Tip: For fluffier quiches, whisk vigorously to incorporate air.
- Divide the chopped spinach and crumbled feta evenly among the pie crust cups.
- Pour the egg mixture over the spinach and feta in each cup, filling just below the rim.
- Bake for 15-20 minutes, or until the edges are golden and the centers are set. Visual cue: The quiches should puff up slightly and no longer jiggle when shaken.
- Let cool in the tin for 5 minutes before transferring to a wire rack. Serve warm or at room temperature.
Just imagine: each bite delivers a creamy, savory punch with the perfect crusty embrace. These mini quiches are not just a meal; they’re a conversation starter—serve them on a rustic platter with a side of spicy aioli for dipping, and watch the compliments roll in.
Stuffed Mushrooms with Cream Cheese

Yum, yum, yum! If you’re looking for a bite-sized appetizer that packs a punch of flavor, you’ve hit the jackpot with these Stuffed Mushrooms with Cream Cheese. They’re the perfect blend of creamy, savory, and downright delicious, guaranteed to disappear faster than you can say ‘more please!’
Ingredients
- Mushrooms – 24 oz
- Cream cheese – 8 oz
- Garlic powder – 1 tsp
- Salt – ½ tsp
- Pepper – ¼ tsp
- Olive oil – 1 tbsp
Instructions
- Preheat your oven to 375°F (190°C) to get it ready for baking perfection.
- Clean the mushrooms with a damp paper towel and remove the stems, creating a perfect little cup for the filling. Tip: Save the stems for a future omelet or soup to reduce waste.
- In a mixing bowl, combine the cream cheese, garlic powder, salt, and pepper until smooth. Tip: Let the cream cheese sit at room temperature for easier mixing.
- Lightly brush each mushroom cap with olive oil to ensure they don’t stick to the pan and get a nice golden edge.
- Spoon the cream cheese mixture into each mushroom cap, filling them generously. Tip: Use a piping bag for a cleaner, more professional look.
- Place the stuffed mushrooms on a baking sheet and bake for 20 minutes, or until the mushrooms are tender and the filling is slightly golden.
Now, these little beauties are ready to steal the show! The mushrooms offer a tender bite, while the cream cheese filling is luxuriously smooth with a hint of garlic. Serve them on a platter with a sprinkle of fresh herbs for a pop of color, or pop them straight into your mouth—we won’t judge!
Caprese Skewers with Balsamic Glaze
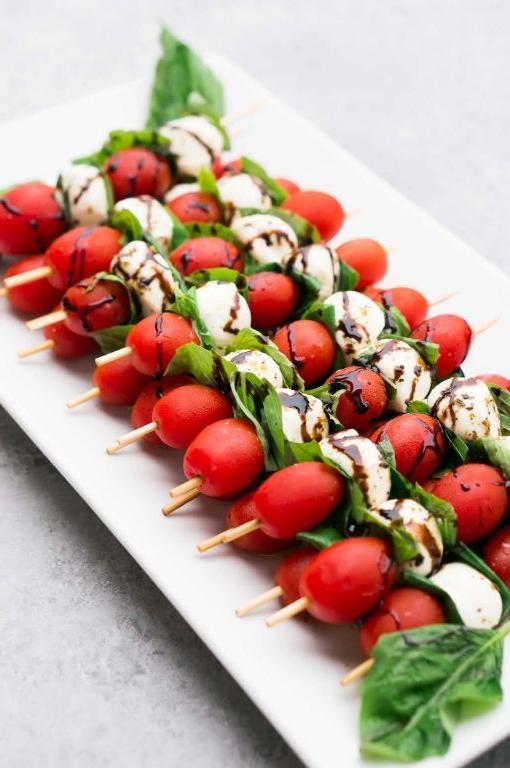
Picture this: you’re at a party, and amidst the sea of predictable snacks, there’s a hero on a toothpick—our Caprese Skewers with Balsamic Glaze. They’re like the little black dress of appetizers: simple, chic, and always in style.
Ingredients
- Cherry tomatoes – 1 pint
- Fresh mozzarella balls – 8 oz
- Fresh basil leaves – 1 cup
- Balsamic glaze – ¼ cup
- Wooden skewers – 20 count
Instructions
- Preheat your oven to 350°F to toast the skewers for 5 minutes, ensuring they’re splinter-free and party-ready.
- Thread one cherry tomato, one mozzarella ball, and one basil leaf onto each skewer, repeating the pattern until all ingredients are used. Tip: Pierce the tomato at the stem end for a snug fit.
- Arrange the skewers on a serving platter, drizzle generously with balsamic glaze. Tip: Hold the bottle high for a fancy, even drizzle that would make any food stylist proud.
- Let the skewers sit for 10 minutes before serving to allow the flavors to mingle. Tip: This is the perfect time to snap that Instagram-worthy pic.
Get ready to bask in the glory of these skewers—their juicy tomatoes, creamy mozzarella, and punchy basil are a trio that sings in harmony, especially when that balsamic glaze steps in like the mic drop of flavors. Serve them on a rustic wooden board for that extra ‘wow’ factor, or just pass them around because, let’s be honest, they won’t last long.
Deviled Eggs with a Spicy Twist

Unbelievably easy yet devilishly delicious, these spicy deviled eggs are about to become your go-to party trick. With a kick that’ll wake up your taste buds and a creamy texture that’s downright addictive, they’re the perfect blend of simple and sensational.
Ingredients
- Eggs – 6
- Mayonnaise – ¼ cup
- Dijon mustard – 1 tsp
- Hot sauce – 1 tsp
- Paprika – ¼ tsp
- Salt – ¼ tsp
Instructions
- Place 6 eggs in a single layer at the bottom of a large pot and cover with cold water by 1 inch.
- Bring the water to a boil over high heat, then cover the pot and remove it from the heat. Let the eggs sit for 12 minutes.
- Transfer the eggs to a bowl of ice water and let them cool for at least 5 minutes before peeling.
- Cut each egg in half lengthwise and gently remove the yolks, placing them in a medium bowl.
- Mash the yolks with a fork, then mix in ¼ cup mayonnaise, 1 tsp Dijon mustard, 1 tsp hot sauce, and ¼ tsp salt until smooth.
- Spoon or pipe the yolk mixture back into the egg white halves.
- Sprinkle each egg half with ¼ tsp paprika for a pop of color and flavor.
- Chill the deviled eggs in the refrigerator for at least 30 minutes before serving to let the flavors meld.
Kick your snack game up a notch with these spicy deviled eggs, where the creamy filling and the subtle heat from the hot sauce create a flavor explosion. Serve them on a platter garnished with extra paprika or a few dashes of hot sauce for an eye-catching presentation that’s as bold as the taste.
Garlic Shrimp with Lemon Aioli
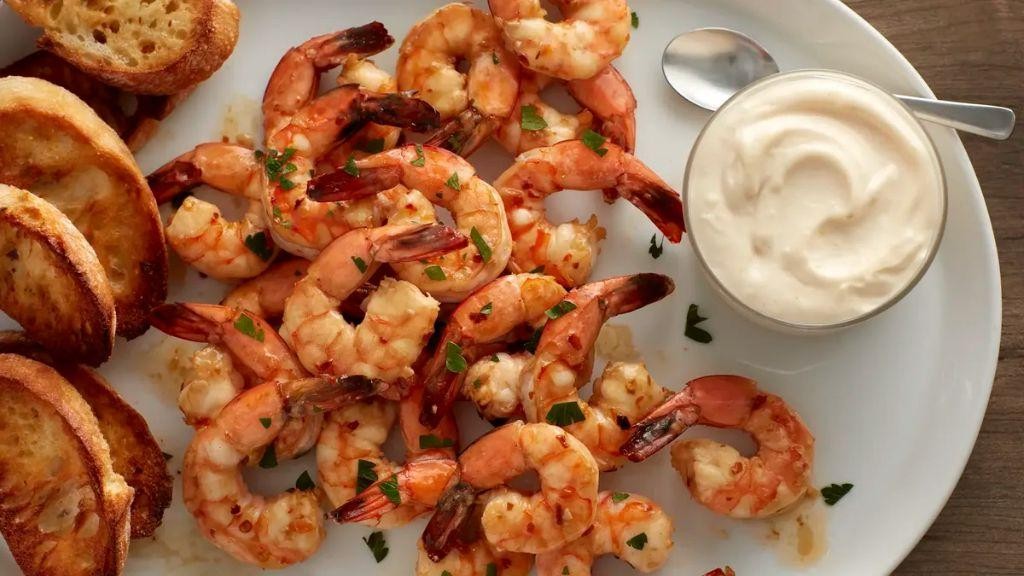
Alright, let’s dive into a dish that’s as easy to whip up as it is to devour—Garlic Shrimp with Lemon Aioli. Perfect for those nights when you want to feel fancy without the fuss, this recipe is a guaranteed crowd-pleaser that’ll have everyone asking for seconds (and the recipe).
Ingredients
- Shrimp – 1 lb
- Garlic – 4 cloves
- Olive oil – 2 tbsp
- Mayonnaise – ½ cup
- Lemon – 1
- Salt – ½ tsp
- Pepper – ¼ tsp
Instructions
- Peel and devein the shrimp, leaving the tails on for a pretty presentation.
- Mince the garlic finely to ensure it distributes evenly in the dish.
- Heat olive oil in a large skillet over medium-high heat until shimmering, about 2 minutes.
- Add the shrimp and garlic to the skillet, cooking for 2 minutes per side until the shrimp are pink and opaque.
- While the shrimp cook, zest the lemon and then juice it, being careful to remove any seeds.
- In a small bowl, mix the mayonnaise, lemon zest, and 1 tbsp of lemon juice to create the aioli.
- Season the shrimp with salt and pepper right before removing them from the heat to keep them juicy.
- Serve the shrimp hot with the lemon aioli on the side for dipping or drizzling.
This Garlic Shrimp with Lemon Aioli is a symphony of flavors—succulent shrimp with a punch of garlic, balanced by the creamy, tangy aioli. Try serving it over a bed of crisp greens or with a side of crusty bread to soak up every last bit of that delicious aioli.
Prosciutto-Wrapped Asparagus
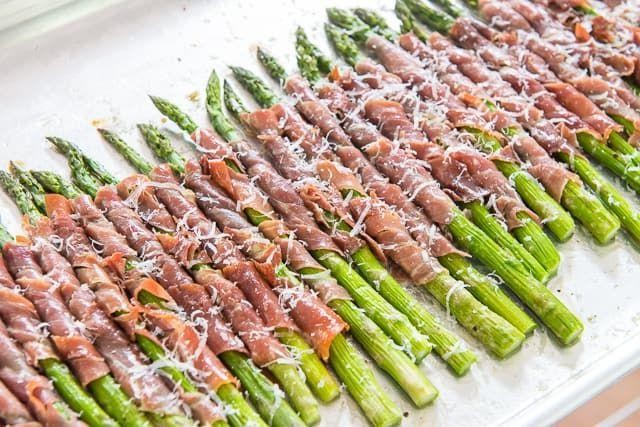
Mmm, imagine this: crispy, salty prosciutto hugging tender, vibrant asparagus spears, creating a match made in culinary heaven that’s as easy to make as it is to devour.
Ingredients
- Asparagus – 1 lb
- Prosciutto – 8 slices
- Olive oil – 1 tbsp
- Black pepper – ¼ tsp
Instructions
- Preheat your oven to 400°F (200°C) and line a baking sheet with parchment paper for easy cleanup.
- Trim the tough ends off the asparagus spears. Tip: They naturally snap at the right spot if you bend them near the end.
- Divide the asparagus into 8 equal bundles. Tip: Aim for about 4-5 spears per bundle for the perfect bite.
- Wrap each bundle with a slice of prosciutto, starting at the bottom and spiraling up to the top. Tip: Don’t wrap too tightly; the prosciutto will shrink as it cooks.
- Place the wrapped bundles on the prepared baking sheet, drizzle with olive oil, and sprinkle with black pepper.
- Bake for 15-18 minutes, until the prosciutto is crispy and the asparagus is tender when pierced with a fork.
Ready to serve? These bundles are a textural dream—crispy, salty prosciutto against the tender, slightly sweet asparagus. Try serving them atop a creamy polenta or alongside a sunny-side-up egg for a brunch twist that’ll have everyone talking.
Mini Beef Wellingtons

Now, who said elegance can’t come in mini? These Mini Beef Wellingtons are your ticket to impressing at any gathering without breaking a sweat—or the bank. Perfectly portioned, they pack all the luxuriousness of their full-sized counterpart into bite-sized delights that are as fun to make as they are to devour.
Ingredients
- Beef tenderloin – 1 lb
- Puff pastry – 1 sheet
- Dijon mustard – 2 tbsp
- Egg – 1
- Salt – ½ tsp
- Pepper – ½ tsp
Instructions
- Preheat your oven to 400°F (200°C) and line a baking sheet with parchment paper.
- Cut the beef tenderloin into 4 equal pieces and season each with salt and pepper.
- Sear the beef pieces in a hot pan for 1 minute on each side, then brush each with Dijon mustard. Tip: Don’t overcrowd the pan to ensure a perfect sear.
- Roll out the puff pastry on a floured surface and cut into 4 squares large enough to wrap each beef piece.
- Place a beef piece in the center of each pastry square, fold the corners over the beef, and seal the edges. Tip: Use a bit of water to help seal the pastry if needed.
- Whisk the egg and brush it over the pastry for a golden finish. Tip: This step is your secret to that Instagram-worthy shine.
- Bake for 20-25 minutes until the pastry is golden and puffed.
Kick your feet up and bask in the glory of these Mini Beef Wellingtons, where the buttery, flaky pastry meets the juicy, tender beef in a symphony of flavors. Serve them atop a smear of extra Dijon for dipping, or go wild with a side of roasted veggies for a plate that’s as colorful as it is delicious.
Goat Cheese and Fig Crostini

So, you’ve decided to elevate your snack game to levels of sophistication that would make even the most discerning foodie nod in approval. Let’s dive into the world of Goat Cheese and Fig Crostini, where crunchy meets creamy and sweet tangos with tangy.
Ingredients
- Baguette – 1, sliced into ½ inch pieces
- Goat cheese – 8 oz
- Fresh figs – 6, sliced
- Honey – 2 tbsp
- Olive oil – 2 tbsp
- Fresh thyme – 1 tbsp, chopped
Instructions
- Preheat your oven to 375°F. This is the perfect temperature to get your crostini crispy without turning them into charcoal.
- Arrange the baguette slices on a baking sheet. Brush each slice lightly with olive oil. This little step ensures each bite is golden and delicious.
- Toast the slices in the oven for 5-7 minutes, or until they’re just golden around the edges. Keep an eye on them; they go from perfectly toasted to burnt faster than you can say ‘oops’.
- Let the toasted baguette slices cool for a minute. This prevents the goat cheese from turning into a melty mess when you spread it.
- Spread a generous layer of goat cheese on each crostini. The more, the merrier, as long as it doesn’t overwhelm the other flavors.
- Top each with a couple of fig slices. The figs add a sweet contrast to the tangy goat cheese, creating a flavor explosion in your mouth.
- Drizzle honey over the top of each crostini. This adds a touch of sweetness that ties all the flavors together beautifully.
- Sprinkle with fresh thyme for a herby finish that adds a pop of color and flavor.
Delightfully crisp, creamy, and sweet, these crostini are a testament to the magic that happens when simple ingredients come together. Serve them at your next gathering and watch them disappear faster than you can say ‘more please’.
Smoked Salmon Cucumber Bites
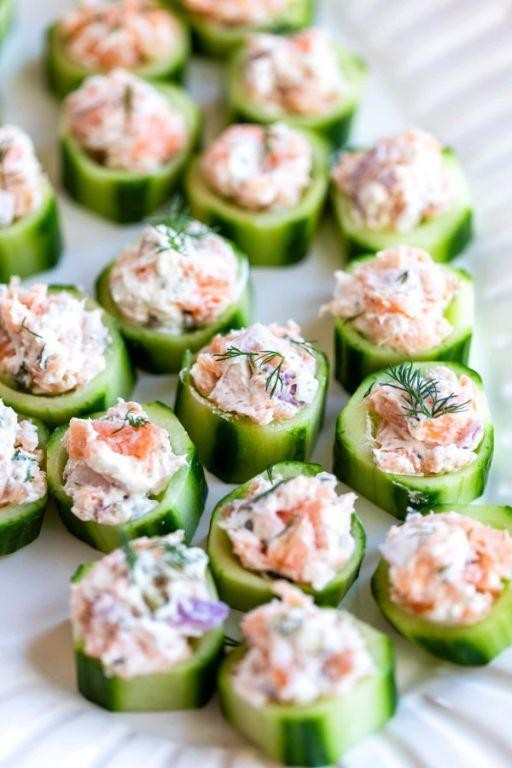
Feast your eyes on the easiest, breeziest appetizer that’ll have your guests swooning faster than you can say ‘more please!’ These Smoked Salmon Cucumber Bites are the perfect blend of fancy and fuss-free, making you look like a culinary wizard with minimal effort.
Ingredients
- English cucumber – 1
- Smoked salmon – 8 oz
- Cream cheese – ½ cup
- Fresh dill – 2 tbsp
- Lemon zest – 1 tsp
Instructions
- Wash the English cucumber and slice it into ½-inch thick rounds. Pro tip: Use a mandoline for uniform slices that stand up straight on your serving platter.
- In a small bowl, mix the cream cheese, fresh dill, and lemon zest until well combined. This herby, zesty spread is the secret weapon that ties everything together.
- Spread a generous teaspoon of the cream cheese mixture onto each cucumber round. Don’t skimp—this is the glue that holds your salmon in place!
- Top each cream cheese-slathered cucumber with a small piece of smoked salmon. Fold the salmon for a rustic look or lay it flat for a more polished presentation.
- Garnish with a tiny sprig of dill or a sprinkle of lemon zest for that Instagram-worthy finish. Serve immediately or chill for up to an hour before serving to let the flavors meld.
Yield to the crisp crunch of cucumber meeting the silky salmon, all brought together by the creamy, tangy spread. These bites are not just a treat for the taste buds but a feast for the eyes—perfect for elevating your next gathering from meh to magnificent!
Chicken Satay with Peanut Sauce

Craving something that’ll make your taste buds do a happy dance? Look no further than this Chicken Satay with Peanut Sauce recipe, a dish that’s as fun to make as it is to eat, guaranteed to bring a little excitement to your dinner routine.
Ingredients
- Chicken breast – 1 lb
- Soy sauce – 2 tbsp
- Brown sugar – 1 tbsp
- Garlic – 2 cloves, minced
- Peanut butter – ½ cup
- Coconut milk – ¼ cup
- Lime juice – 1 tbsp
- Skewers – 8, soaked in water for 30 minutes
Instructions
- Cut the chicken breast into thin strips, about ½ inch wide.
- In a bowl, mix soy sauce, brown sugar, and minced garlic to create the marinade.
- Add the chicken strips to the marinade, ensuring each piece is well coated. Let it sit for at least 30 minutes in the fridge. Tip: For deeper flavor, marinate overnight.
- Thread the marinated chicken onto the soaked skewers, folding the strips accordion-style for even cooking.
- Preheat your grill or grill pan to medium-high heat (about 375°F).
- Grill the skewers for 3-4 minutes on each side, or until the chicken is fully cooked and has nice grill marks. Tip: Don’t overcrowd the grill to ensure each skewer cooks evenly.
- While the chicken cooks, combine peanut butter, coconut milk, and lime juice in a small saucepan over low heat. Stir until smooth and heated through. Tip: If the sauce is too thick, add a little more coconut milk until you reach your desired consistency.
- Serve the chicken satay hot with the peanut sauce on the side for dipping.
How about that for a dish that packs a punch? The chicken is juicy and charred to perfection, while the peanut sauce is creamy with just the right amount of tang. Try serving these skewers over a bed of rice or with a side of cucumber salad for a meal that’s anything but boring.
Zucchini and Corn Fritters
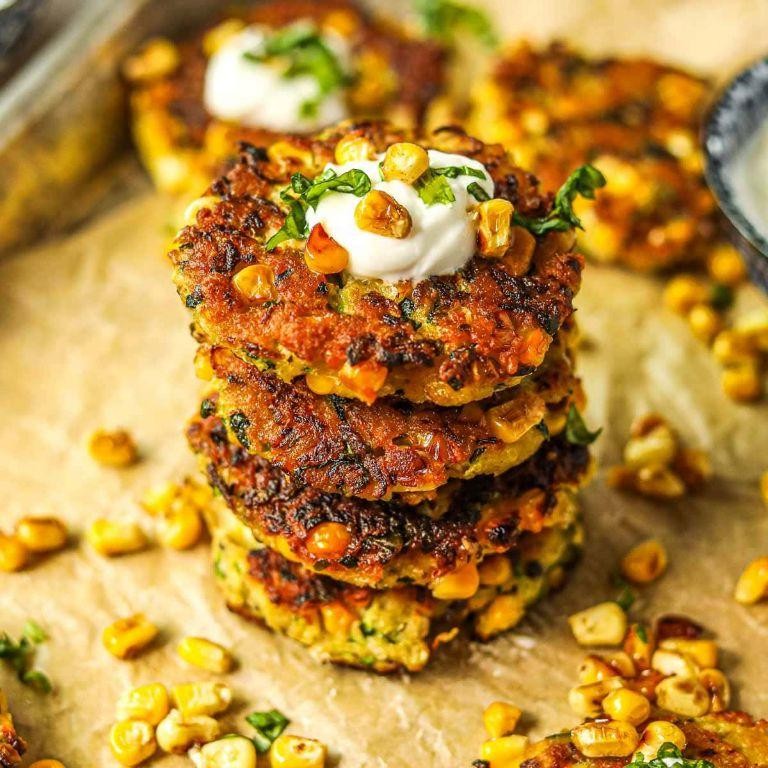
Kickstart your summer mornings with these crispy, golden Zucchini and Corn Fritters that are as easy to make as they are delicious. Perfect for those ‘I need something tasty but quick’ moments, these fritters are your new best friend.
Ingredients
- Zucchini – 2 cups, grated
- Corn kernels – 1 cup
- Flour – 1 cup
- Eggs – 2
- Salt – ½ tsp.
- Black pepper – ¼ tsp.
- Vegetable oil – 2 tbsp.
Instructions
- In a large bowl, combine grated zucchini, corn kernels, flour, eggs, salt, and black pepper. Mix until just combined. Tip: Squeeze excess moisture from the zucchini to prevent soggy fritters.
- Heat vegetable oil in a large skillet over medium heat (350°F). Tip: Test the oil’s readiness by dropping a small amount of batter in; if it sizzles, you’re good to go.
- Drop ¼ cup portions of the batter into the skillet, flattening slightly with the back of a spoon. Cook for 3-4 minutes on each side or until golden brown and crispy. Tip: Don’t overcrowd the skillet to ensure even cooking.
- Transfer cooked fritters to a paper towel-lined plate to drain any excess oil.
Absolutely irresistible when served hot, these fritters boast a delightful crunch outside with a tender, veggie-packed center. Try them with a dollop of sour cream or a drizzle of hot sauce for an extra kick.
Parmesan Crisps with Avocado Dip

Just when you thought cheese couldn’t get any better, along comes this crispy, cheesy delight paired with a creamy avocado dip that’s basically a hug for your taste buds. Perfect for when you’re pretending to be fancy but really just want to eat cheese with a spoon.
Ingredients
- Parmesan cheese – 1 cup
- Avocado – 1
- Lime juice – 1 tbsp
- Salt – ¼ tsp
- Pepper – ¼ tsp
Instructions
- Preheat your oven to 400°F and line a baking sheet with parchment paper.
- Place small piles of Parmesan cheese on the baking sheet, spacing them about 2 inches apart to allow for spreading.
- Bake for 5-7 minutes or until the edges are golden brown and the centers are bubbly. Tip: Watch closely after 5 minutes to prevent burning.
- Remove from the oven and let cool for 2 minutes before transferring to a wire rack to crisp up further.
- While the crisps cool, mash the avocado in a bowl until smooth.
- Stir in lime juice, salt, and pepper until well combined. Tip: For extra zing, add a pinch of garlic powder.
- Serve the Parmesan crisps with the avocado dip on the side. Tip: Garnish the dip with a sprinkle of red pepper flakes for a pop of color and heat.
Zesty, crunchy, and utterly addictive, these Parmesan crisps with avocado dip are the snack you didn’t know you needed. Serve them at your next gathering and watch them disappear faster than your resolve to eat just one.
Mini Taco Cups with Ground Beef

Kickstart your party with these bite-sized delights that pack all the punch of a full-sized taco in a cute, cup-sized package. Perfect for when you want to impress without the stress, these mini taco cups are the ultimate crowd-pleaser.
Ingredients
- Ground beef – 1 lb
- Taco seasoning – 1 packet
- Wonton wrappers – 24
- Shredded cheddar cheese – 1 cup
- Sour cream – ½ cup
- Salsa – ½ cup
Instructions
- Preheat your oven to 375°F and lightly grease a mini muffin tin.
- Press one wonton wrapper into each cup of the muffin tin, ensuring the edges stick out slightly for that perfect cup shape.
- Bake the wonton wrappers for 5 minutes until they’re just starting to turn golden. Tip: This pre-bake prevents sogginess once the fillings are added.
- While the cups bake, brown the ground beef in a skillet over medium-high heat, breaking it into small pieces, about 5-7 minutes.
- Drain any excess fat from the beef, then stir in the taco seasoning and ¼ cup of water. Simmer for 3 minutes until thickened.
- Remove the wonton cups from the oven and fill each with a spoonful of the beef mixture, then top with a sprinkle of cheddar cheese.
- Return the tin to the oven and bake for another 5 minutes, just until the cheese is melted and bubbly. Tip: Watch closely to avoid over-browning the wonton edges.
- Let the cups cool in the tin for 2 minutes before transferring to a serving platter. Tip: Use a small spoon or fork to gently lift them out to keep their shape intact.
- Top each cup with a dollop of sour cream and a spoonful of salsa right before serving.
Vibrant and bursting with flavor, these mini taco cups offer a crunchy contrast to the savory beef and melted cheese inside. Serve them on a colorful platter with extra salsa on the side for dipping, and watch them disappear before your eyes.
Bacon-Wrapped Dates
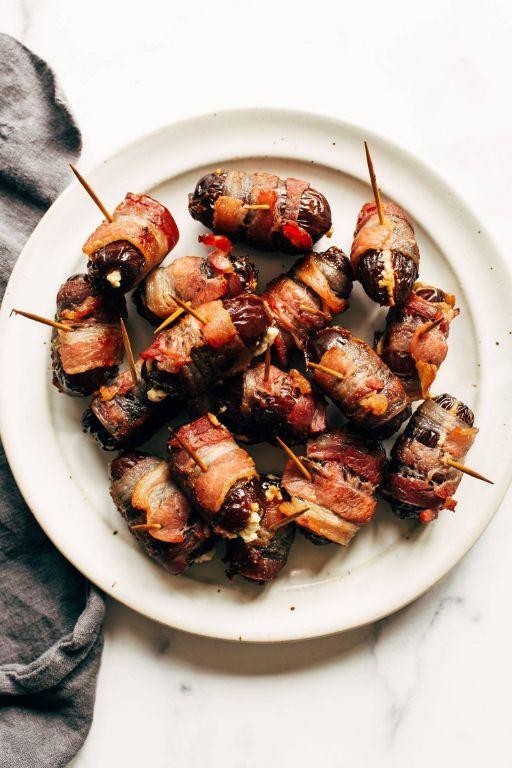
Feast your eyes (and soon, your mouth) on this bite-sized bliss that’s the perfect mix of sweet, salty, and downright addictive. Bacon-wrapped dates are the no-fuss, all-flavor party hero you didn’t know you needed.
Ingredients
- Dates – 24
- Bacon – 12 slices
- Toothpicks – 24
Instructions
- Preheat your oven to 375°F and line a baking sheet with parchment paper for easy cleanup.
- Slice each bacon slice in half crosswise to make 24 shorter strips. Tip: Partially freezing the bacon makes it easier to handle and cut.
- Wrap each date with a half-slice of bacon, securing it with a toothpick. Tip: For extra flavor, consider stuffing the dates with a small piece of cheese before wrapping.
- Arrange the wrapped dates on the prepared baking sheet, ensuring they’re not touching to allow for even cooking.
- Bake for 15-20 minutes, or until the bacon is crispy and golden brown. Tip: Keep an eye on them after 15 minutes to prevent burning, as oven temperatures can vary.
- Let cool for a few minutes before serving to avoid burning your mouth on molten date filling.
Ready to wow? These little gems offer a crispy bacon shell with a gooey, sweet center that’s irresistible. Serve them on a platter with a drizzle of honey or a sprinkle of sea salt for an extra layer of flavor that’ll have guests coming back for more.
Spinach and Artichoke Dip in Bread Bowl
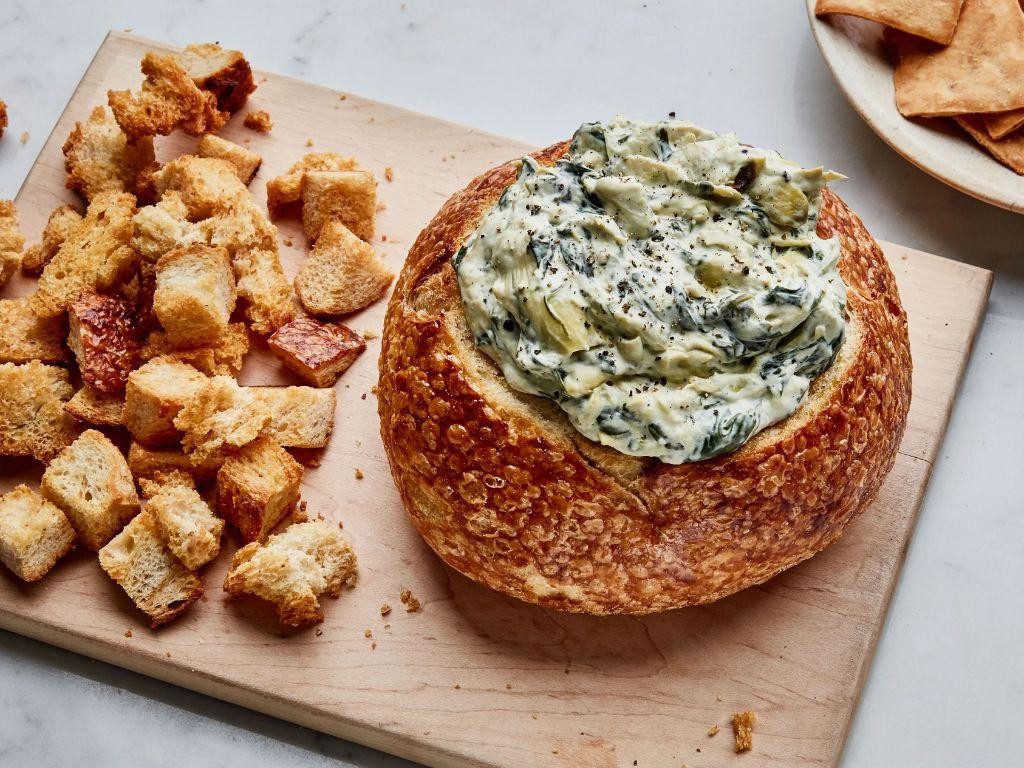
Mmm, imagine diving into a bowl so delicious, it’s literally edible. That’s right, we’re talking about a Spinach and Artichoke Dip that’s not just served in a bread bowl—it’s a love affair between creamy, cheesy goodness and the carb of your dreams.
Ingredients
- Spinach – 10 oz, frozen
- Artichoke hearts – 14 oz can, drained
- Cream cheese – 8 oz, softened
- Sour cream – 1 cup
- Mayonnaise – ½ cup
- Garlic – 2 cloves, minced
- Mozzarella cheese – 1 cup, shredded
- Parmesan cheese – ½ cup, grated
- Round bread loaf – 1
Instructions
- Preheat your oven to 350°F. This ensures your dip gets perfectly bubbly without burning the bread bowl.
- Thaw the spinach and squeeze out all the water. Wet spinach is the enemy of a creamy dip.
- Chop the artichoke hearts into small pieces. Uniform size means every bite is packed with flavor.
- In a large bowl, mix cream cheese, sour cream, and mayonnaise until smooth. A hand mixer can save you elbow grease here.
- Stir in the spinach, artichoke hearts, garlic, mozzarella, and parmesan until well combined. Taste? Who needs to when it’s this foolproof?
- Cut the top off the bread loaf and hollow out the center, leaving a 1-inch border. Save the insides for dipping—waste not, want not.
- Fill the bread bowl with the dip mixture. Pile it high; this is no time for modesty.
- Bake for 25 minutes or until the top is golden and the edges of the bread are crispy. Watch for the cheese to start singing (a.k.a. bubbling).
- Let it cool for 5 minutes before serving. Patience is a virtue, especially when molten cheese is involved.
Zesty, creamy, and with just the right amount of crunch from the bread bowl, this dip is a crowd-pleaser that’ll have your guests fighting over the last scoop. Serve it with the bread you hollowed out, veggies for the ‘healthy’ folks, or just a spoon for the truly committed.
Mini Crab Cakes with Remoulade
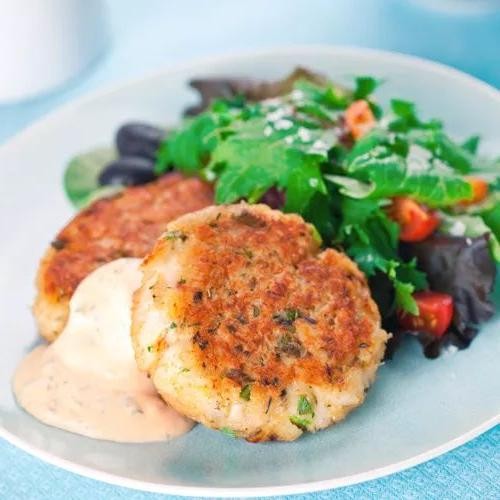
Feast your eyes on these bite-sized delights that pack a punch of flavor and elegance, perfect for when you want to impress without the stress. Mini Crab Cakes with Remoulade are your ticket to a fancy appetizer that’s surprisingly simple to whip up, proving that good things do come in small packages.
Ingredients
- Crab meat – 1 lb
- Breadcrumbs – ½ cup
- Mayonnaise – ¼ cup
- Egg – 1
- Dijon mustard – 1 tbsp
- Lemon juice – 1 tbsp
- Old Bay seasoning – 1 tsp
- Vegetable oil – 2 tbsp
- Salt – ½ tsp
Instructions
- In a large bowl, combine crab meat, breadcrumbs, mayonnaise, egg, Dijon mustard, lemon juice, Old Bay seasoning, and salt. Mix gently to avoid breaking up the crab meat too much.
- Shape the mixture into 12 small patties, about 2 inches in diameter. Tip: Wet your hands slightly to prevent sticking.
- Heat vegetable oil in a large skillet over medium heat until shimmering, about 350°F.
- Cook the crab cakes in batches, 3-4 minutes per side, until golden brown and crispy. Tip: Don’t overcrowd the pan to ensure even cooking.
- Transfer to a paper towel-lined plate to drain any excess oil. Tip: Keep cooked crab cakes warm in a 200°F oven while finishing the rest.
Crunchy on the outside, tender on the inside, these mini crab cakes are a textural dream with a zesty kick from the remoulade. Serve them atop a bed of arugula for a pop of color or as sliders with a dollop of extra remoulade for the ultimate bite.
Roasted Red Pepper Hummus with Pita Chips

Get ready to dip into the creamiest, dreamiest hummus that’ll make your taste buds do a happy dance. Roasted red pepper hummus with homemade pita chips is not just a snack; it’s a vibe, a party in your mouth where everyone’s invited.
Ingredients
- Chickpeas – 1 can (15 oz), drained
- Roasted red peppers – ½ cup
- Tahini – ¼ cup
- Lemon juice – 2 tbsp
- Garlic – 1 clove
- Olive oil – 2 tbsp
- Cumin – ½ tsp
- Salt – ½ tsp
- Pita bread – 4 pieces
Instructions
- Preheat your oven to 350°F for the pita chips.
- Cut each pita bread into 8 triangles and spread them on a baking sheet.
- Brush the pita triangles lightly with olive oil and sprinkle with a pinch of salt.
- Bake for 10 minutes or until golden and crispy, flipping halfway through for even browning.
- While the pita chips bake, combine chickpeas, roasted red peppers, tahini, lemon juice, garlic, olive oil, cumin, and salt in a food processor.
- Blend until smooth, scraping down the sides as needed. If too thick, add water 1 tbsp at a time until desired consistency.
- Transfer the hummus to a serving bowl and drizzle with a little olive oil for that Instagram-worthy finish.
Every bite of this hummus is a creamy, smoky delight with a hint of lemon zing, perfect for scooping up with those golden, crispy pita chips. Try serving it with a side of fresh veggies for a colorful, crunchy contrast.
Cheese and Charcuterie Board

Kickstart your next gathering with a Cheese and Charcuterie Board that’s as easy to assemble as it is to devour. Perfect for those who believe the best parties are the ones where you can eat with your hands and call it classy.
Ingredients
- Assorted cheeses – 3 types
- Cured meats – 3 types
- Crackers – 1 bag
- Olives – ½ cup
- Nuts – ½ cup
- Fresh fruit – 1 cup
Instructions
- Select a large board or platter as your canvas; wood or marble works best for aesthetics and functionality.
- Arrange the cheeses first, spacing them out evenly. Tip: Include a variety of textures, from soft brie to hard aged cheddar.
- Next, add the cured meats, folding or rolling them for visual appeal. Tip: Salami can be folded into quarters and stood up to create height.
- Fill in the gaps with crackers, placing them near cheeses they pair well with.
- Scatter olives and nuts in small bowls or directly on the board to add color and crunch. Tip: Toasting the nuts beforehand enhances their flavor.
- Finally, add fresh fruit like grapes or sliced apples for a sweet contrast.
Vibrant and varied, this board is a feast for the eyes and the palate. Serve it with a bold red wine or a crisp white to complement the rich flavors, and watch as it becomes the centerpiece of your party.
Mini Margherita Pizzas

These mini Margherita pizzas are your ticket to a quick, delicious meal that’s as fun to make as it is to eat. Perfect for those nights when you’re craving pizza but not the hassle, these little guys pack all the flavor of the classic without the commitment to a whole pie.
Ingredients
- Pizza dough – 1 lb
- Tomato sauce – ½ cup
- Fresh mozzarella – 8 oz
- Fresh basil leaves – 10
- Olive oil – 1 tbsp
- Salt – ½ tsp
Instructions
- Preheat your oven to 475°F and lightly grease a baking sheet with olive oil.
- Divide the pizza dough into 4 equal parts and roll each into a small circle, about ¼ inch thick.
- Spread 2 tbsp of tomato sauce evenly over each dough circle, leaving a small border for the crust.
- Tear the mozzarella into small pieces and distribute evenly over the sauce.
- Bake in the preheated oven for 10-12 minutes, or until the crust is golden and the cheese is bubbly.
- While the pizzas are baking, thinly slice the basil leaves.
- Remove the pizzas from the oven and immediately sprinkle with fresh basil and a pinch of salt.
- Drizzle with a little olive oil before serving for an extra flavor boost.
Here’s how these mini Margherita pizzas turn out: crispy on the outside, soft and chewy on the inside, with the perfect balance of tangy tomato sauce, creamy mozzarella, and fresh basil. Try serving them on a wooden board for a rustic, shareable appetizer that’ll disappear in seconds.
Sweet Potato Rounds with Goat Cheese
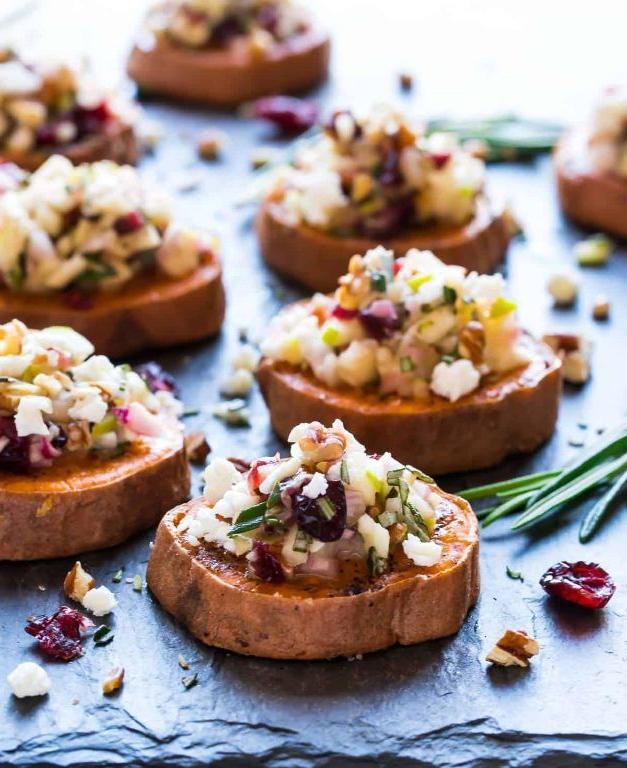
Oh, sweet potato, how do we love thee? Let us count the ways… especially when you’re sliced, roasted to perfection, and topped with creamy goat cheese. This dish is a game-changer for your appetizer lineup or a fancy-ish snack that’ll make you feel like a gourmet chef with minimal effort.
Ingredients
- Sweet potatoes – 2 large
- Olive oil – 2 tbsp
- Salt – ½ tsp
- Goat cheese – 4 oz
- Honey – 1 tbsp
Instructions
- Preheat your oven to 400°F (because good things come to those who wait… and preheat).
- Slice the sweet potatoes into ¼-inch thick rounds. Pro tip: uniform thickness means even cooking, so channel your inner perfectionist here.
- Toss the sweet potato rounds with olive oil and salt. Make sure each round is lightly coated – no oil slicks here, please.
- Arrange the rounds in a single layer on a baking sheet. Crowding is a no-go; give them space to crisp up.
- Roast for 20 minutes, then flip each round. They should be golden and slightly crispy. If not, give them a few more minutes – patience is a virtue.
- Remove from the oven and let cool for 5 minutes. This is the perfect time to crumble your goat cheese.
- Top each round with a small piece of goat cheese. A little goes a long way, unless you’re a cheese fiend, then who are we to judge?
- Drizzle with honey. This is the sweet kiss that ties everything together.
So, what’s the verdict? These rounds are a delightful mix of crispy and creamy, with a sweet and savory dance that’ll have your taste buds doing the tango. Serve them on a rustic wooden board for that Instagram-worthy touch, or just eat them straight off the baking sheet – we won’t tell.
Antipasto Skewers

Kickstart your party with these Antipasto Skewers, the no-fuss, all-flavor appetizer that’s basically a party on a stick. Perfect for when you want to impress without the stress, these skewers are your ticket to being the host with the most.
Ingredients
- Cherry tomatoes – 1 cup
- Mozzarella balls – 1 cup
- Basil leaves – ½ cup
- Olive oil – 2 tbsp
- Balsamic glaze – 2 tbsp
- Salt – ½ tsp
- Black pepper – ¼ tsp
Instructions
- Preheat your oven to 350°F to toast the skewers for 5 minutes, ensuring they’re safe and ready for action.
- Thread one cherry tomato, one mozzarella ball, and one basil leaf onto each skewer, repeating until all ingredients are used. Tip: Soak wooden skewers in water for 30 minutes beforehand to prevent burning.
- Arrange the skewers on a serving platter, drizzle with olive oil, and sprinkle salt and black pepper evenly. Tip: For an extra flavor punch, let them sit for 10 minutes before serving.
- Finish by drizzling balsamic glaze over the skewers right before serving to keep the presentation sharp. Tip: Use a squeeze bottle for a neat, restaurant-quality drizzle.
Unbelievably simple yet bursting with fresh, tangy, and creamy flavors, these Antipasto Skewers are a vibrant addition to any table. Serve them on a rustic wooden board for that Instagram-worthy charm or as a colorful centerpiece that’ll have guests reaching for more.
Conclusion
Now that you’ve explored these 22 delicious small plate recipes, there’s no doubt your next gathering will be a hit! Whether you’re hosting a cozy dinner or a festive party, these dishes promise to delight. We’d love to hear which recipes you try—drop a comment with your favorites and don’t forget to share the love on Pinterest. Happy cooking!