Unleash your inner chef on the open road with these 17 delicious RV recipes designed for adventurous cooks! Whether you’re craving quick dinners under the stars, seasonal favorites that celebrate local flavors, or comforting meals that feel like home, we’ve got you covered. Dive into our roundup and discover dishes that’ll make your next journey as tasty as it is memorable. Keep reading to fuel your wanderlust—and your appetite!
One-Pot RV Chili
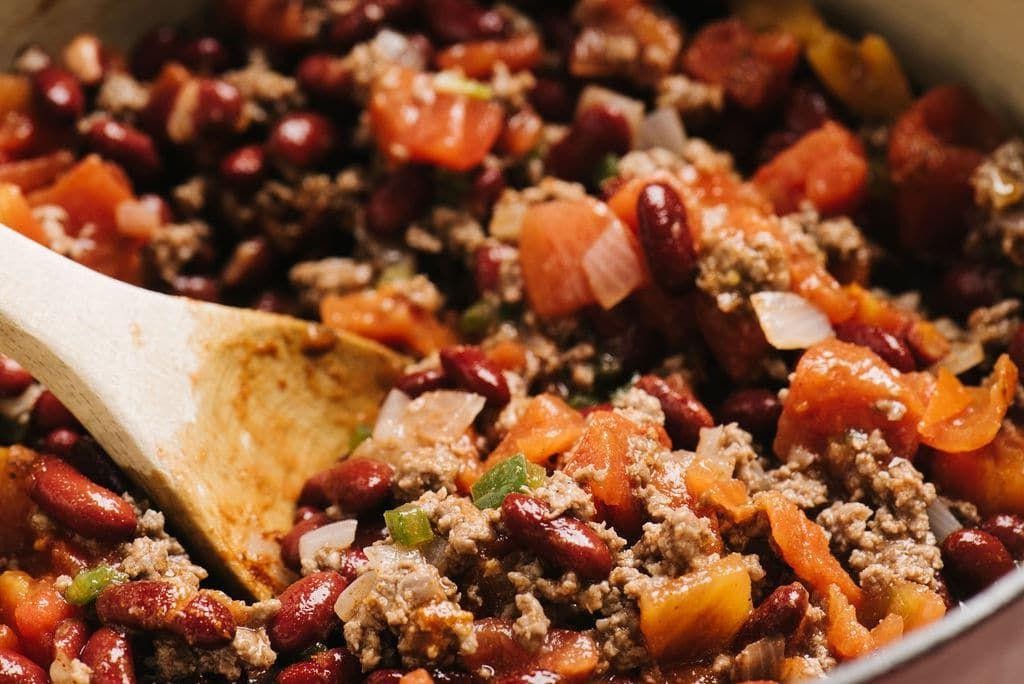
You’ll love this One-Pot RV Chili for its simplicity and depth of flavor, perfect for cozy nights on the road or at home.
Ingredients
- 1 lb ground beef, 80% lean for optimal flavor
- 1 medium yellow onion, diced
- 2 cloves garlic, minced
- 1 can (15 oz) kidney beans, drained and rinsed
- 1 can (15 oz) diced tomatoes, fire-roasted for a smoky touch
- 1 cup beef broth, rich and savory
- 2 tbsp chili powder, freshly ground
- 1 tsp cumin, aromatic and earthy
- 1/2 tsp salt, fine sea salt
- 1/4 tsp black pepper, coarsely ground
- 1 tbsp olive oil, extra virgin for a fruity note
Instructions
- Heat olive oil in a large pot over medium heat until shimmering.
- Add diced onion, cooking until translucent, about 5 minutes.
- Stir in minced garlic, cooking for 30 seconds until fragrant.
- Add ground beef, breaking it apart with a spoon, and cook until no longer pink, about 7 minutes.
- Mix in chili powder, cumin, salt, and black pepper, coating the beef evenly.
- Pour in beef broth, scraping the bottom to deglaze the pot.
- Add kidney beans and diced tomatoes, stirring to combine.
- Bring to a simmer, then reduce heat to low, covering the pot.
- Let cook for 25 minutes, stirring occasionally to prevent sticking.
- Remove from heat and let stand for 5 minutes before serving.
Perfectly hearty, this chili boasts a robust texture with a smoky, slightly spicy kick. Serve it over a bed of fluffy rice or with a side of crusty bread for dipping.
Campfire Grilled Cheese Sandwich
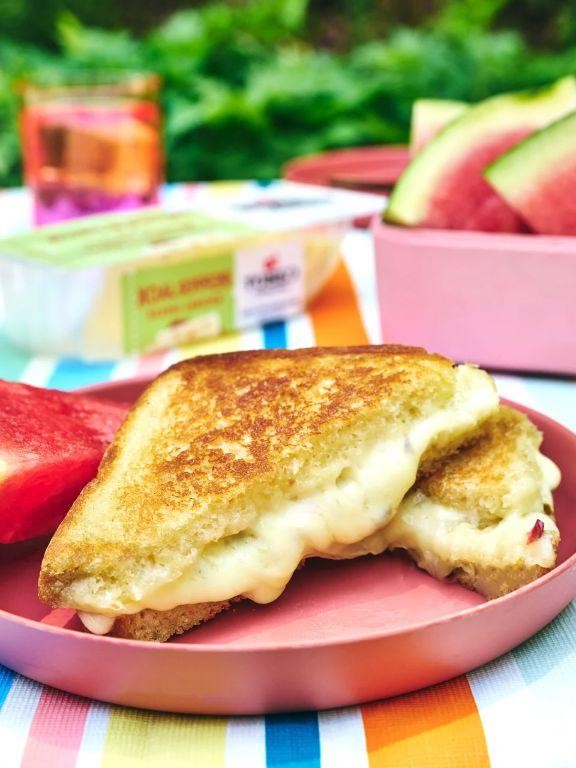
Savor the simplicity of a campfire grilled cheese sandwich, where crispy meets gooey under the stars. This no-fuss recipe turns basic ingredients into a comforting classic with minimal effort.
Ingredients
– 2 slices of thick-cut sourdough bread
– 2 tbsp of creamy unsalted butter, softened
– 1 cup of sharp cheddar cheese, freshly grated
– 1/4 cup of smoky gouda cheese, freshly grated
– 1 tbsp of rich extra virgin olive oil
Instructions
1. Preheat a cast-iron skillet over medium campfire heat (about 350°F) for 5 minutes.
2. Spread 1 tbsp of softened unsalted butter evenly on one side of each sourdough bread slice.
3. Combine sharp cheddar and smoky gouda cheeses in a bowl for a balanced flavor profile.
4. Drizzle olive oil in the skillet, ensuring the surface is lightly coated to prevent sticking.
5. Place one bread slice, buttered side down, in the skillet. Top with the cheese mixture, spreading evenly.
6. Cover with the second bread slice, buttered side up, pressing gently to adhere.
7. Cook for 3-4 minutes until the bottom is golden brown and crispy. Flip carefully with a spatula.
8. Cook the other side for another 3-4 minutes until equally golden and the cheese is fully melted.
9. Remove from heat. Let sit for 1 minute to allow the cheese to set slightly for easier cutting.
10. Slice diagonally and serve immediately. Enjoy the contrast of crispy edges and a molten, cheesy center. Elevate this sandwich by pairing it with a tangy tomato soup or a crisp apple slice for a refreshing crunch.
RV Kitchen Sink Cookies

Kickstart your baking adventure with these RV Kitchen Sink Cookies, a no-nonsense treat packed with everything but the kitchen sink. Perfect for on-the-go snacking or a hearty dessert, they’re as versatile as they are delicious.
Ingredients
– 1 cup unsalted butter, softened to room temperature
– 1 cup granulated sugar, fine and sparkling
– 1 cup packed brown sugar, dark and molasses-rich
– 2 large eggs, farm-fresh and room temperature
– 1 tsp pure vanilla extract, aromatic and smooth
– 2 cups all-purpose flour, sifted and light
– 1 tsp baking soda, fresh and potent
– 1/2 tsp baking powder, aluminum-free
– 1/2 tsp salt, fine sea salt
– 1 cup rolled oats, old-fashioned and hearty
– 1 cup semi-sweet chocolate chips, melty and luxurious
– 1/2 cup chopped walnuts, toasted and crunchy
– 1/2 cup shredded coconut, sweet and flaky
– 1/2 cup dried cranberries, tart and chewy
Instructions
1. Preheat your oven to 375°F (190°C) and line baking sheets with parchment paper.
2. In a large bowl, cream together the softened butter, granulated sugar, and brown sugar until light and fluffy, about 3 minutes.
3. Beat in the eggs one at a time, then stir in the vanilla extract until well combined.
4. In a separate bowl, whisk together the flour, baking soda, baking powder, and salt.
5. Gradually add the dry ingredients to the wet ingredients, mixing just until incorporated.
6. Fold in the oats, chocolate chips, walnuts, coconut, and dried cranberries until evenly distributed throughout the dough.
7. Drop tablespoon-sized balls of dough onto the prepared baking sheets, spacing them 2 inches apart.
8. Bake for 10-12 minutes, or until the edges are golden but the centers are still soft.
9. Let the cookies cool on the baking sheets for 5 minutes before transferring to a wire rack to cool completely.
Tip: For extra chewy cookies, slightly underbake and let them rest on the hot baking sheet for an additional 5 minutes.
Tip: Toast the walnuts beforehand to enhance their nutty flavor.
Tip: Use a cookie scoop for uniformly sized cookies that bake evenly.
Warm from the oven, these cookies boast a perfect balance of chewiness and crunch, with bursts of chocolate and fruit in every bite. Serve them with a cold glass of milk or crumble over vanilla ice cream for an indulgent twist.
Portable Pancakes for the Road

Busy mornings call for quick, satisfying solutions. These portable pancakes are your grab-and-go breakfast dream.
Ingredients
- 1 cup all-purpose flour, sifted for lightness
- 1 tbsp granulated sugar, for a subtle sweetness
- 2 tsp baking powder, for fluffy rise
- 1/2 tsp salt, to enhance flavors
- 1 cup whole milk, creamy and rich
- 1 large farm-fresh egg, beaten
- 2 tbsp unsalted butter, melted and slightly cooled
- 1 tsp pure vanilla extract, for aromatic depth
Instructions
- In a large bowl, whisk together the sifted flour, sugar, baking powder, and salt.
- In another bowl, combine the whole milk, beaten egg, melted butter, and vanilla extract until smooth.
- Pour the wet ingredients into the dry ingredients. Stir until just combined; lumps are okay for tender pancakes.
- Heat a non-stick skillet over medium heat (350°F). Test by sprinkling a few water drops; they should dance.
- Pour 1/4 cup batter per pancake onto the skillet. Cook until bubbles form on top and edges look set, about 2 minutes.
- Flip carefully. Cook until golden brown, about 1-2 minutes more. Keep warm in a 200°F oven if serving later.
- Repeat with remaining batter, greasing the skillet lightly between batches if needed.
Not just for breakfast, these pancakes pack well for picnics. Their fluffy texture and buttery taste make them a hit cold or warm. Try drizzling with honey or sandwiching with peanut butter for extra delight.
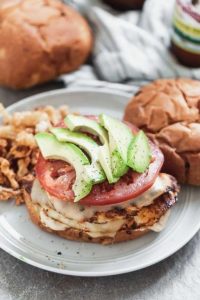
Easy RV Tacos
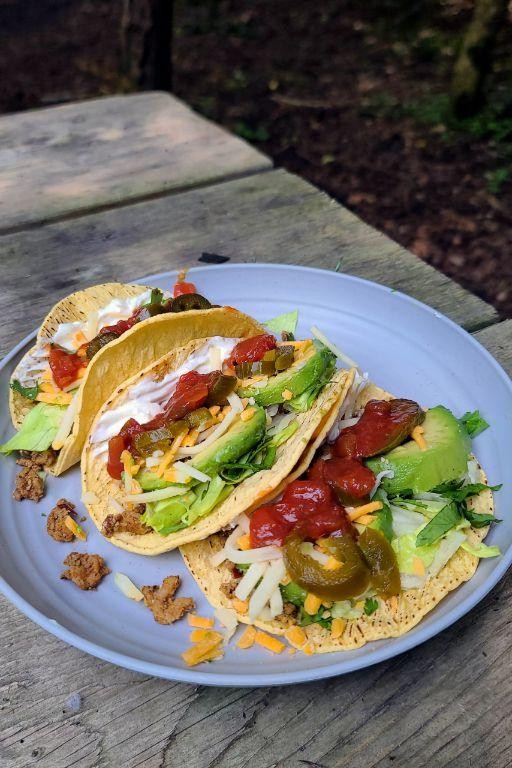
Craving tacos but short on kitchen space? These Easy RV Tacos are your go-to solution, perfect for cooking on the road or at home with minimal fuss.
Ingredients
- 1 lb ground beef, 80/20 for optimal juiciness
- 1 tbsp taco seasoning, bold and spicy
- 1/2 cup water, to meld flavors
- 8 small corn tortillas, warm and pliable
- 1 cup shredded cheddar cheese, sharp and melty
- 1/2 cup diced tomatoes, ripe and juicy
- 1/4 cup chopped cilantro, fresh and fragrant
- 1/2 avocado, sliced creamy and ripe
- 1 lime, cut into wedges for a zesty finish
Instructions
- Heat a large skillet over medium-high heat until a drop of water sizzles.
- Add the ground beef, breaking it apart with a spatula. Cook until no pink remains, about 5 minutes.
- Drain excess fat, leaving about 1 tbsp in the skillet for flavor.
- Stir in the taco seasoning and water. Simmer for 3 minutes until thickened. Tip: Letting it simmer enhances the spices.
- Warm the tortillas in a dry skillet for 30 seconds per side. Tip: Keep them stacked under a towel to stay warm.
- Divide the beef among tortillas. Top with cheese, tomatoes, cilantro, and avocado.
- Squeeze lime wedges over the tacos before serving. Tip: The acidity brightens all the flavors.
The tacos boast a perfect balance of creamy avocado, tangy lime, and spicy beef. Serve them straight from the skillet for a communal, hands-on meal.
Dutch Oven RV Stew
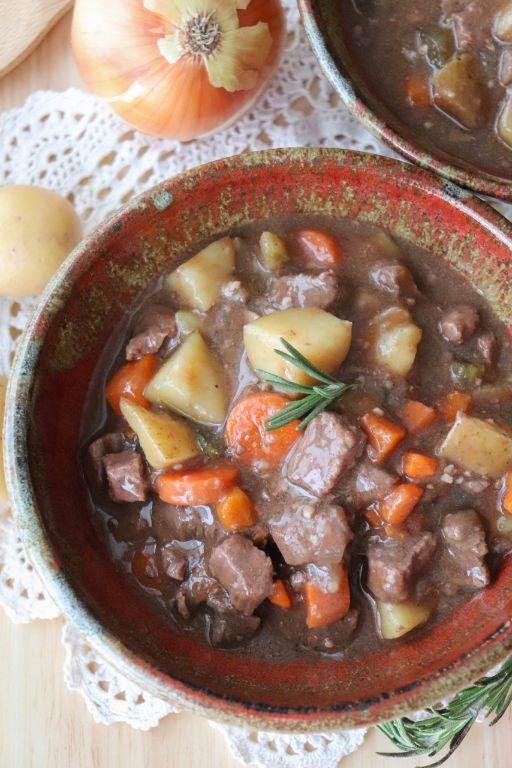
Filling and hearty, this Dutch Oven RV Stew is perfect for cozy nights on the road or at home. Packed with robust flavors, it’s a one-pot wonder that demands minimal cleanup.
Ingredients
– 2 lbs chuck roast, cut into 1-inch cubes
– 3 tbsp rich extra virgin olive oil
– 1 large yellow onion, finely chopped
– 3 cloves garlic, minced
– 4 cups beef stock, low-sodium
– 3 large carrots, peeled and sliced into 1/2-inch rounds
– 2 large russet potatoes, peeled and diced into 1-inch cubes
– 1 tbsp tomato paste
– 1 tsp finely ground black pepper
– 1 tsp sea salt
– 2 sprigs fresh thyme
– 1 bay leaf
Instructions
1. Heat olive oil in a Dutch oven over medium-high heat until shimmering.
2. Add beef cubes in a single layer, searing until deeply browned on all sides, about 3 minutes per side. Work in batches to avoid overcrowding.
3. Lower heat to medium, add onion and garlic, sautéing until translucent, about 5 minutes.
4. Stir in tomato paste, cooking for 1 minute to deepen its flavor.
5. Pour in beef stock, scraping the bottom to release any browned bits.
6. Add carrots, potatoes, black pepper, salt, thyme, and bay leaf, stirring to combine.
7. Bring stew to a boil, then reduce heat to low, covering with a lid.
8. Simmer gently for 2 hours, stirring occasionally, until meat is fork-tender.
9. Remove thyme sprigs and bay leaf before serving.
Simmering slowly melds the flavors, creating a stew with tender meat and vegetables in a rich, savory broth. Serve with crusty bread for dipping or over a bed of creamy mashed potatoes for extra comfort.
Quick RV Pasta Primavera

Make this Quick RV Pasta Primavera when you need a fast, flavorful meal on the road. It’s packed with fresh veggies and ready in minutes.
Ingredients
- 8 oz dried penne pasta
- 2 tbsp rich extra virgin olive oil
- 1 cup crisp broccoli florets
- 1/2 cup sweet cherry tomatoes, halved
- 1/4 cup thinly sliced crunchy bell peppers
- 2 cloves garlic, minced
- 1/4 tsp crushed red pepper flakes
- 1/4 cup grated Parmesan cheese
- Salt to taste
Instructions
- Bring a large pot of salted water to a rolling boil over high heat.
- Add 8 oz dried penne pasta to the boiling water. Cook for 9 minutes, stirring occasionally, until al dente.
- While pasta cooks, heat 2 tbsp rich extra virgin olive oil in a large skillet over medium heat.
- Add 1 cup crisp broccoli florets, 1/2 cup sweet cherry tomatoes, and 1/4 cup thinly sliced crunchy bell peppers to the skillet. Sauté for 3 minutes, until veggies are just tender.
- Stir in 2 cloves minced garlic and 1/4 tsp crushed red pepper flakes. Cook for 1 minute, until fragrant.
- Drain pasta, reserving 1/4 cup pasta water. Add pasta to the skillet with veggies.
- Toss everything together, adding reserved pasta water as needed to create a light sauce.
- Remove from heat. Stir in 1/4 cup grated Parmesan cheese. Season with salt to taste.
Outcome: This dish offers a delightful mix of textures, from the al dente pasta to the crisp-tender veggies. The slight heat from the red pepper flakes balances the sweetness of the tomatoes. Serve it straight from the skillet for a rustic, shareable meal.
RV-Friendly Beef Jerky
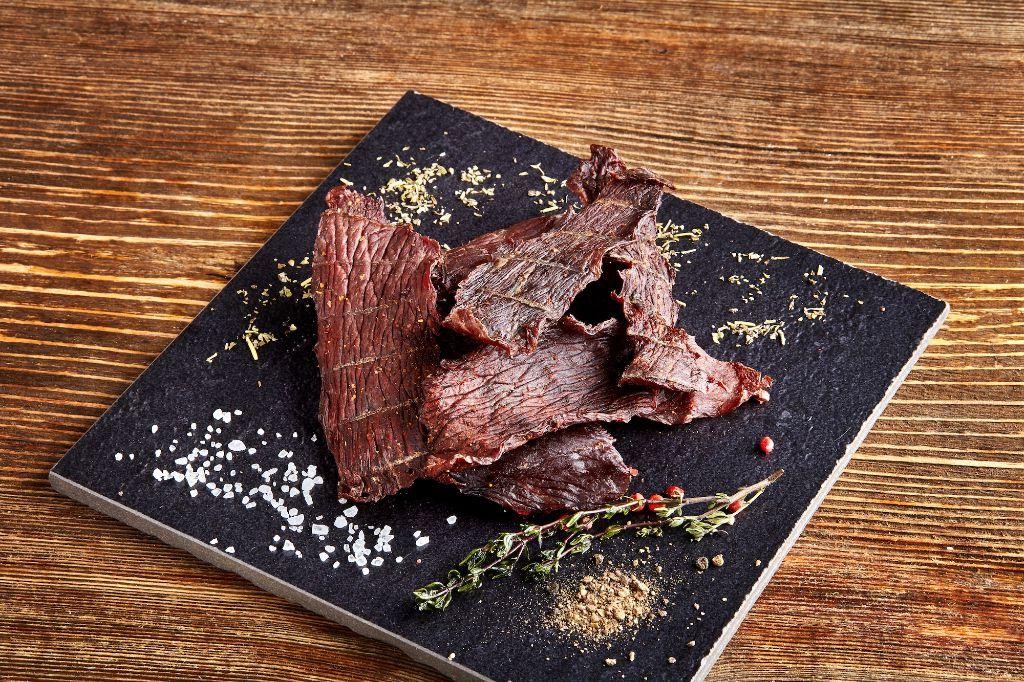
Grab your gear for a snack that’s perfect for the road. This RV-friendly beef jerky is lean, flavorful, and easy to make.
Ingredients
- 1 lb lean beef sirloin, thinly sliced against the grain
- 1/4 cup soy sauce, rich and full-bodied
- 2 tbsp Worcestershire sauce, tangy and robust
- 1 tbsp smoked paprika, earthy and aromatic
- 1 tsp garlic powder, pungent and finely ground
- 1 tsp onion powder, sweet and mild
- 1/2 tsp black pepper, freshly cracked
- 1/2 tsp liquid smoke, hickory-flavored
Instructions
- Slice the beef sirloin into 1/4-inch thick strips, ensuring uniformity for even drying.
- In a bowl, combine soy sauce, Worcestershire sauce, smoked paprika, garlic powder, onion powder, black pepper, and liquid smoke. Mix well.
- Add beef strips to the marinade, coating each piece thoroughly. Cover and refrigerate for 12 hours, flipping once halfway through.
- Preheat oven to 175°F. Line a baking sheet with parchment paper.
- Remove beef from marinade, shaking off excess. Arrange strips on the baking sheet without overlapping.
- Bake for 4 hours, flipping strips every hour, until jerky is dry but still pliable.
- Cool completely on a wire rack before storing in an airtight container.
Done right, this jerky boasts a perfect chew with a smoky, savory kick. Pack it for hikes or enjoy as a protein-packed snack on your next RV adventure.
Solar Oven RV Bread
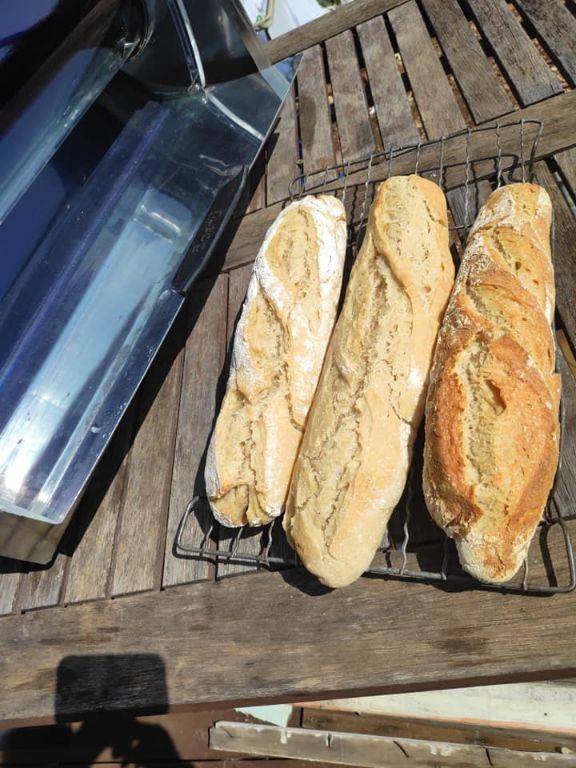
Make this Solar Oven RV Bread when you’re craving homemade bread but lack a traditional oven. It’s surprisingly simple and delivers a crusty exterior with a soft interior.
Ingredients
- 3 cups all-purpose flour, sifted for lightness
- 1 tsp active dry yeast, for a reliable rise
- 1 tsp kosher salt, for enhanced flavor
- 1 1/4 cups warm water (110°F), to activate yeast
- 1 tbsp honey, for a subtle sweetness
- 2 tbsp olive oil, rich and fruity
Instructions
- In a large bowl, combine sifted flour, yeast, and salt.
- Add warm water, honey, and olive oil to the dry ingredients. Mix until a shaggy dough forms.
- Knead the dough on a floured surface for 10 minutes until smooth and elastic. Tip: Use the windowpane test to check gluten development.
- Place dough in a greased bowl, cover with a damp cloth, and let rise in a warm spot for 1 hour or until doubled in size.
- Punch down the dough and shape into a loaf. Place in a greased loaf pan. Tip: For a rustic look, shape into a round and place on a parchment-lined tray.
- Preheat your solar oven to 350°F. Ensure it’s positioned to receive maximum sunlight.
- Bake the bread for 30-35 minutes until golden brown and sounds hollow when tapped. Tip: Rotate the oven occasionally for even baking.
- Cool on a wire rack for at least 15 minutes before slicing.
Not only does this bread have a delightful chew and slight sweetness, but it also pairs wonderfully with sharp cheeses or a smear of jam. Try toasting slices for an extra crunch.
RV Microwave Mug Cake

Whipping up a quick dessert in your RV has never been easier with this microwave mug cake. Perfect for satisfying sweet cravings on the go.
Ingredients
- 4 tbsp all-purpose flour, sifted
- 3 tbsp granulated sugar, fine
- 2 tbsp unsweetened cocoa powder, rich and dark
- 1/4 tsp baking powder, fresh
- 1 pinch salt, fine
- 3 tbsp whole milk, creamy
- 2 tbsp vegetable oil, light
- 1/4 tsp pure vanilla extract, aromatic
Instructions
- In a 12-ounce microwave-safe mug, whisk together the sifted flour, fine sugar, rich cocoa powder, fresh baking powder, and fine salt until well combined.
- Add the creamy milk, light vegetable oil, and aromatic vanilla extract to the dry ingredients. Stir until the batter is smooth with no lumps.
- Microwave on high for 90 seconds. Tip: The cake is done when it springs back lightly to the touch.
- Let the mug cake cool for 1 minute before serving. Tip: This rest period helps the cake set properly.
- Enjoy directly from the mug or invert onto a plate. Tip: Top with a scoop of vanilla ice cream for an extra treat.
Expect a moist, fluffy texture with deep chocolate flavors. Serve warm with a dusting of powdered sugar or a drizzle of caramel for added decadence.
Trailside RV Trail Mix
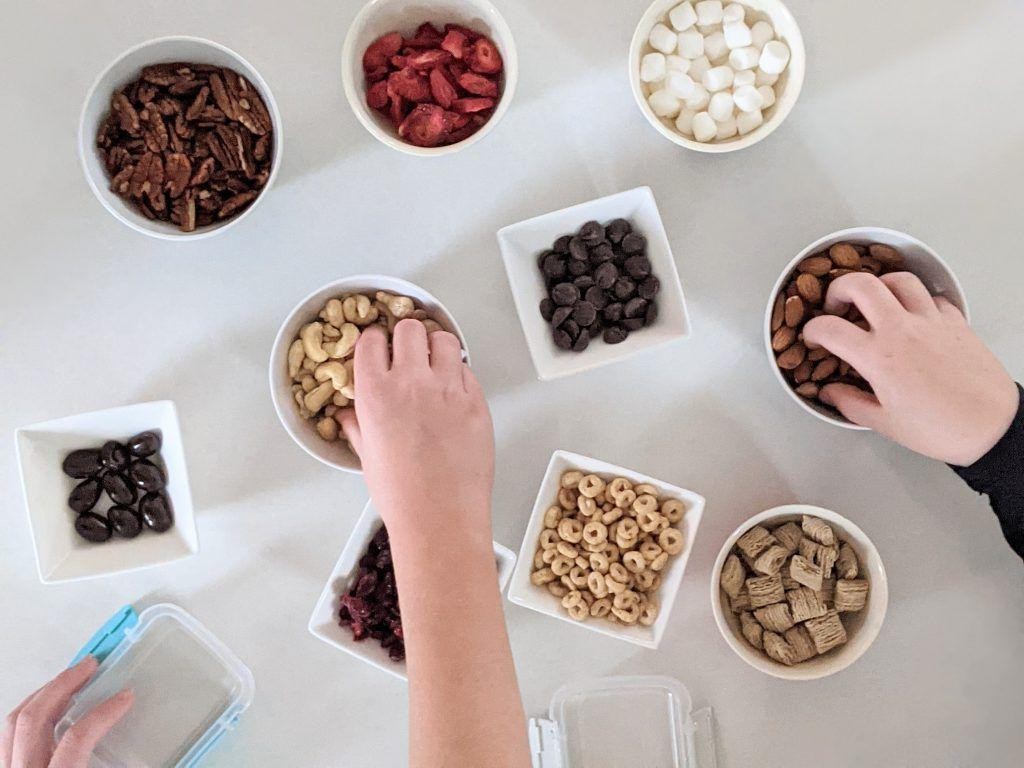
Pack this Trailside RV Trail Mix for your next adventure—it’s a no-fuss, energy-boosting snack that’s as easy to make as it is delicious.
Ingredients
- 1 cup roasted, unsalted almonds (crunchy and nutty)
- 1 cup dried cranberries (chewy and tart)
- 1/2 cup dark chocolate chunks (rich and melty)
- 1/2 cup pretzel sticks (salty and crisp)
- 1/4 cup honey (sweet and sticky)
- 1 tbsp coconut oil (smooth and fragrant)
Instructions
- Preheat your oven to 350°F to toast the almonds for extra crunch.
- Spread the almonds on a baking sheet and toast for 5 minutes, stirring once halfway through to ensure even browning.
- While the almonds cool, combine dried cranberries, dark chocolate chunks, and pretzel sticks in a large bowl.
- In a small saucepan over low heat, warm the honey and coconut oil until fully melted and combined, about 2 minutes.
- Pour the honey mixture over the dry ingredients, tossing gently to coat everything evenly without breaking the pretzels.
- Spread the mix on parchment paper to cool completely, separating any large clumps for individual pieces.
Hearty and satisfying, this trail mix offers a perfect balance of sweet and salty with varied textures. Serve it in small paper cones for easy sharing on the go.
RV Refrigerator Pickles
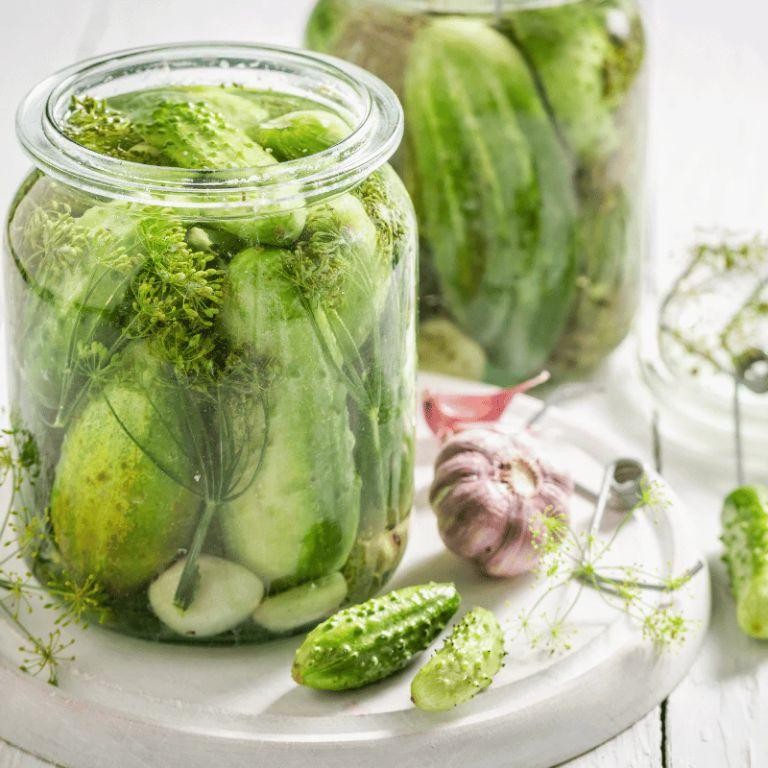
Make these RV refrigerator pickles for a crisp, tangy snack that’s ready in just a few hours. Perfect for on-the-go munching or as a crunchy burger topper.
Ingredients
- 1 1/2 cups distilled white vinegar, sharp and clear
- 1/2 cup granulated sugar, fine and sweet
- 1 tbsp kosher salt, coarse and flaky
- 1 tsp mustard seeds, tiny and pungent
- 1 tsp celery seeds, aromatic and earthy
- 1/2 tsp turmeric powder, vibrant and warm
- 2 cups thinly sliced cucumbers, fresh and crisp
- 1/2 cup thinly sliced white onion, sharp and layered
Instructions
- In a medium saucepan, combine vinegar, sugar, salt, mustard seeds, celery seeds, and turmeric. Bring to a boil over medium-high heat, stirring until sugar dissolves completely.
- Remove from heat and let the brine cool to room temperature, about 30 minutes. This prevents the cucumbers from becoming too soft.
- Pack cucumbers and onions tightly into a clean, 1-quart glass jar. Pour the cooled brine over the vegetables, ensuring they’re fully submerged.
- Seal the jar and refrigerate for at least 4 hours before serving, though overnight is best for full flavor development.
- Store in the refrigerator for up to 2 weeks. The pickles will become more flavorful over time.
After chilling, these pickles offer a perfect balance of sweet and sour with a satisfying crunch. Try them chopped in tuna salad or as a zesty garnish for grilled meats.
Compact RV Pizza

Perfect for on-the-go meals, this Compact RV Pizza packs big flavor into a small package. Ideal for travelers craving homemade pizza without the fuss.
Ingredients
- 1 pre-made pizza dough (store-bought or homemade, room temperature)
- 1/2 cup rich tomato sauce (smooth, with a hint of garlic)
- 1 cup shredded mozzarella cheese (fresh, high-moisture)
- 1/4 cup sliced pepperoni (spicy, thinly sliced)
- 1 tbsp extra virgin olive oil (fruity, high-quality)
- 1/2 tsp dried oregano (fragrant, freshly opened)
Instructions
- Preheat your RV oven to 475°F. Place a cast iron skillet inside to heat up for 10 minutes.
- Roll out the pizza dough on a lightly floured surface to fit your skillet. Aim for a thickness of about 1/4 inch.
- Carefully remove the hot skillet from the oven. Drizzle olive oil, then lay the dough in the skillet, pressing edges up slightly.
- Spread tomato sauce evenly over the dough, leaving a small border for the crust.
- Sprinkle mozzarella cheese over the sauce, then arrange pepperoni slices on top.
- Bake for 12-15 minutes, until the crust is golden and cheese is bubbly. Tip: Rotate the skillet halfway for even cooking.
- Remove from oven, sprinkle with oregano, and let cool for 2 minutes before slicing. Tip: Use a pizza cutter for clean slices.
- Serve immediately. The crust is crispy on the outside, chewy inside, with a perfect balance of spicy pepperoni and creamy cheese. Try drizzling with hot honey for a sweet heat twist.
RV Skillet Cornbread
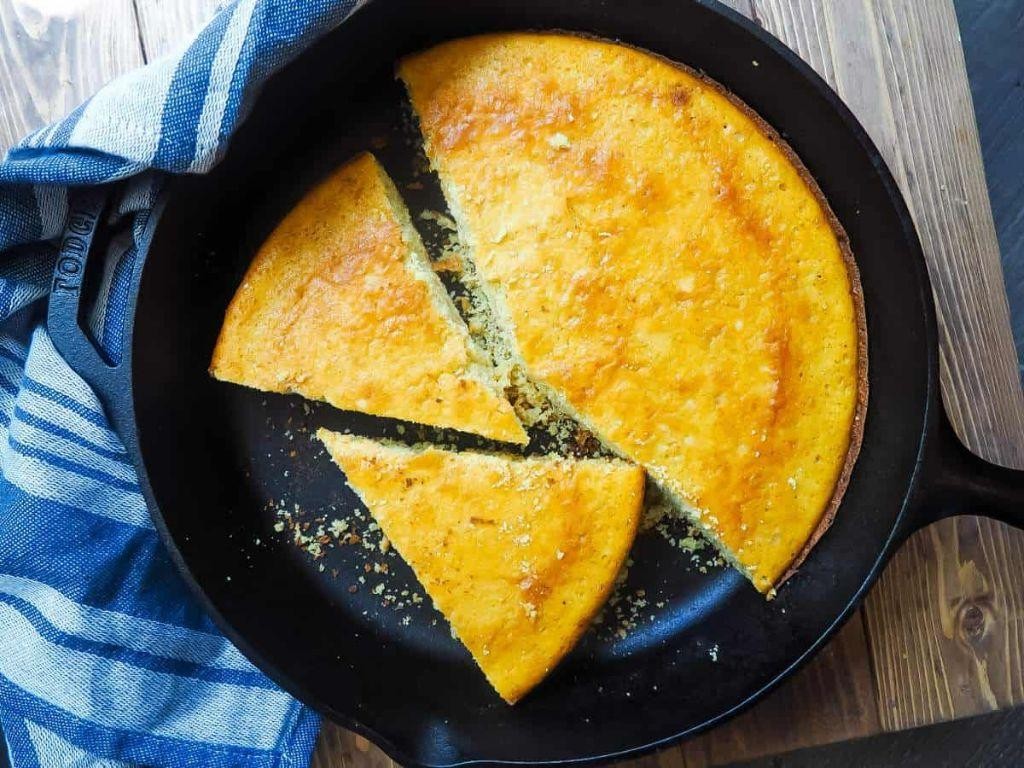
Just imagine pulling a golden, buttery skillet cornbread from your RV oven, the aroma filling your cozy space. This recipe is simplicity at its best, perfect for life on the road.
Ingredients
- 1 cup stone-ground yellow cornmeal
- 1 cup all-purpose flour, sifted
- 1/4 cup granulated sugar
- 1 tbsp baking powder
- 1 tsp fine sea salt
- 1 cup buttermilk, room temperature
- 1/2 cup unsalted butter, melted and slightly cooled
- 1 large farm-fresh egg, lightly beaten
Instructions
- Preheat your RV oven to 425°F. Place a 10-inch cast iron skillet inside to heat.
- In a large bowl, whisk together the cornmeal, flour, sugar, baking powder, and salt.
- In another bowl, mix the buttermilk, melted butter, and egg until combined.
- Pour the wet ingredients into the dry ingredients. Stir until just combined; avoid overmixing for tender cornbread.
- Carefully remove the hot skillet from the oven. Swirl a tablespoon of butter in it to coat.
- Pour the batter into the skillet. It should sizzle slightly, creating a crispy edge.
- Bake for 20-25 minutes, until the top is golden and a toothpick comes out clean.
- Let cool for 5 minutes before slicing. Tip: For extra flavor, drizzle with honey or top with a pat of butter.
Rich in texture with a crispy crust and soft center, this cornbread pairs wonderfully with chili or as a breakfast treat with jam. Try serving it warm straight from the skillet for the ultimate experience.
On-the-Go RV Oatmeal

Packing for an RV trip doesn’t mean skimping on a hearty breakfast. This oatmeal is quick, nutritious, and perfectly portable.
Ingredients
- 1 cup rolled oats (old-fashioned, not instant)
- 2 cups water (fresh, cold)
- 1/2 tsp salt (fine sea salt)
- 1 tbsp honey (raw, unfiltered)
- 1/4 cup dried cranberries (plump, sweet-tart)
- 1/4 cup walnuts (toasted, chopped)
- 1/2 tsp cinnamon (ground, aromatic)
Instructions
- In a medium saucepan, combine rolled oats, water, and salt. Bring to a boil over medium-high heat.
- Reduce heat to low. Simmer uncovered for 5 minutes, stirring occasionally to prevent sticking.
- Tip: For creamier oatmeal, stir more frequently during simmering.
- Remove from heat. Stir in honey, dried cranberries, walnuts, and cinnamon until well combined.
- Tip: Let the oatmeal sit covered for 2 minutes off the heat to thicken slightly.
- Serve hot. For RV-friendly storage, transfer to insulated containers.
- Tip: Add a splash of milk or a dollop of yogurt before serving for extra richness.
Ultra-creamy with a hint of sweetness, this oatmeal is studded with chewy cranberries and crunchy walnuts. Try it with a drizzle of maple syrup for a decadent twist.
RV No-Bake Energy Bites

Got a long road trip ahead? These RV No-Bake Energy Bites are your perfect travel companion. Packed with nutrients and easy to make, they’re the ultimate snack for on-the-go energy.
Ingredients
- 1 cup creamy almond butter, smooth and unsweetened
- 1/3 cup raw honey, golden and thick
- 1 tsp pure vanilla extract, aromatic and rich
- 1 1/2 cups old-fashioned oats, hearty and whole
- 1/2 cup ground flaxseed, finely milled for texture
- 1/2 cup mini chocolate chips, semi-sweet and melty
- 1/4 cup chia seeds, tiny but nutrient-packed
Instructions
- In a large mixing bowl, combine 1 cup creamy almond butter, 1/3 cup raw honey, and 1 tsp pure vanilla extract. Stir until the mixture is smooth and well-blended.
- Add 1 1/2 cups old-fashioned oats, 1/2 cup ground flaxseed, 1/2 cup mini chocolate chips, and 1/4 cup chia seeds to the bowl. Mix thoroughly until all ingredients are evenly distributed.
- Using your hands, roll the mixture into 1-inch balls. If the mixture is too sticky, chill it in the refrigerator for 10 minutes to firm up.
- Place the energy bites on a baking sheet lined with parchment paper. Chill in the refrigerator for at least 30 minutes to set.
- Store the energy bites in an airtight container in the refrigerator for up to 2 weeks, or freeze for longer storage.
Lightly sweet with a satisfying crunch, these energy bites are a delight. Serve them chilled for a refreshing snack or pack them for your next adventure.
RV Cooler Coleslaw
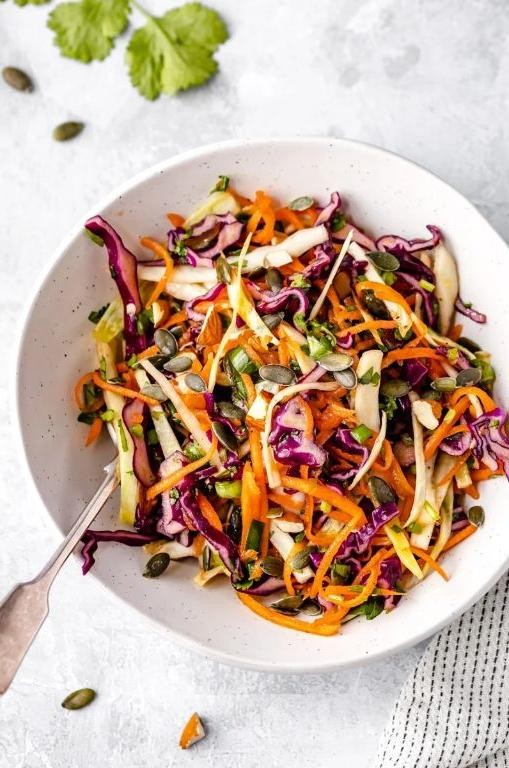
Great for road trips or backyard barbecues, this coleslaw stays crisp and refreshing even after hours in the cooler.
Ingredients
- 1 small head green cabbage, thinly sliced
- 2 large carrots, shredded
- 1/2 cup mayonnaise, creamy
- 1/4 cup apple cider vinegar, tangy
- 2 tbsp sugar, granulated
- 1 tsp celery seed, aromatic
- 1/2 tsp salt, fine
- 1/4 tsp black pepper, freshly ground
Instructions
- In a large bowl, combine the thinly sliced green cabbage and shredded carrots.
- In a separate small bowl, whisk together the creamy mayonnaise, tangy apple cider vinegar, and granulated sugar until smooth.
- Pour the dressing over the cabbage and carrots. Toss to coat evenly.
- Sprinkle in the aromatic celery seed, fine salt, and freshly ground black pepper. Toss again.
- Cover the bowl with plastic wrap. Chill in the refrigerator for at least 2 hours to let flavors meld.
- Before serving, give the coleslaw a final toss to redistribute the dressing.
Yields a crunchy, slightly sweet slaw with a vinegar kick. Perfect piled high on pulled pork sandwiches or as a crisp side to grilled meats.
Conclusion
So, there you have it—17 mouthwatering RV recipes that promise to spice up your adventures on the road! Whether you’re a seasoned camper or just starting out, these dishes are sure to delight. Don’t forget to whip up your favorites, share your thoughts in the comments, and pin this article to your Pinterest board for your next culinary journey. Happy cooking and safe travels!