As the crisp autumn air ushers in Rosh Hashanah, it’s time to gather around the table with loved ones and indulge in the rich, comforting flavors of the holiday. Whether you’re a seasoned chef or a curious newcomer to Jewish cuisine, our roundup of 18 Traditional Rosh Hashanah Recipes promises to inspire your festive menu with dishes that are as meaningful as they are delicious. Let’s dive into these timeless favorites!
Honey Glazed Roast Chicken
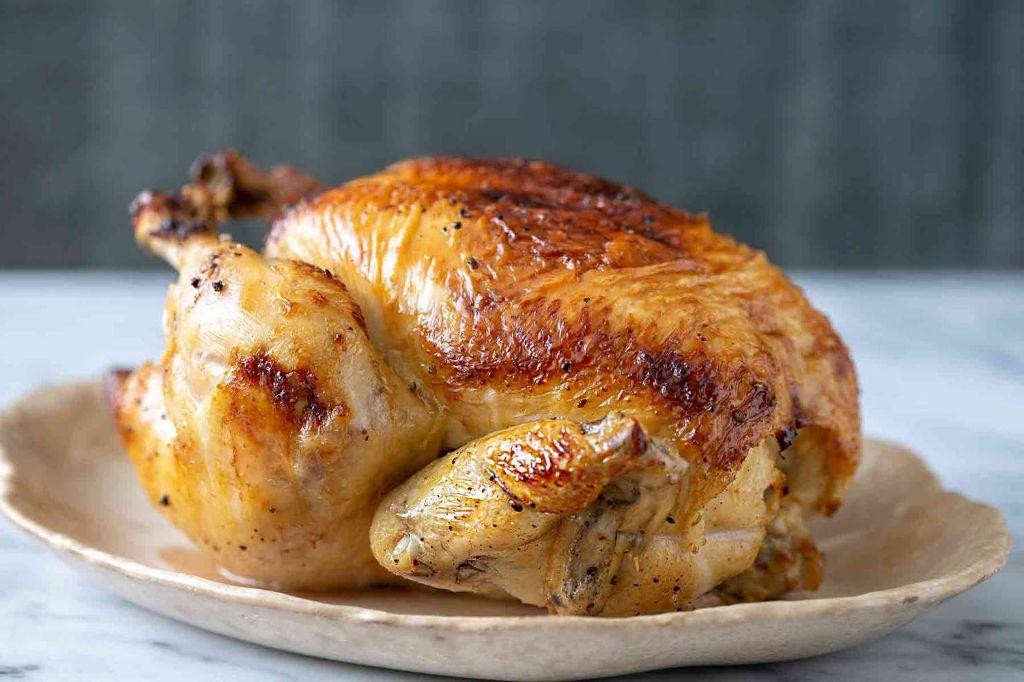
So, you’ve decided to embark on the culinary adventure of making Honey Glazed Roast Chicken, huh? Brace yourself for a dish that’s as easy to fall in love with as it is to make, promising a crispy, golden exterior with a juicy, flavorful interior that’ll have your taste buds doing a happy dance.
Ingredients
- Whole chicken – 1 (about 4 lbs)
- Honey – ¼ cup
- Soy sauce – 2 tbsp
- Garlic powder – 1 tsp
- Salt – 1 tsp
- Black pepper – ½ tsp
Instructions
- Preheat your oven to 375°F (190°C) to ensure it’s ready to work its magic on your chicken.
- In a small bowl, whisk together honey, soy sauce, garlic powder, salt, and black pepper until well combined. This glaze is the secret to your chicken’s irresistible flavor.
- Place the whole chicken in a roasting pan, breast side up. Pro tip: Letting the chicken sit at room temperature for 20 minutes before roasting ensures even cooking.
- Generously brush the honey glaze all over the chicken, making sure to coat every nook and cranny for maximum flavor.
- Roast the chicken in the preheated oven for about 1 hour and 15 minutes, or until the internal temperature reaches 165°F (74°C) when measured with a meat thermometer at the thickest part of the thigh. Another pro tip: Basting the chicken with the pan juices halfway through cooking will keep it moist and flavorful.
- Once done, let the chicken rest for 10 minutes before carving. This allows the juices to redistribute, ensuring every bite is succulent. Final pro tip: For an extra crispy skin, broil the chicken for the last 2-3 minutes of cooking, but keep a close eye to prevent burning.
Perfectly golden and glistening, this Honey Glazed Roast Chicken boasts a sweet and savory crust that gives way to tender, juicy meat. Serve it atop a bed of roasted veggies or alongside a crisp salad for a meal that’s as visually stunning as it is delicious.
Apple and Honey Challah
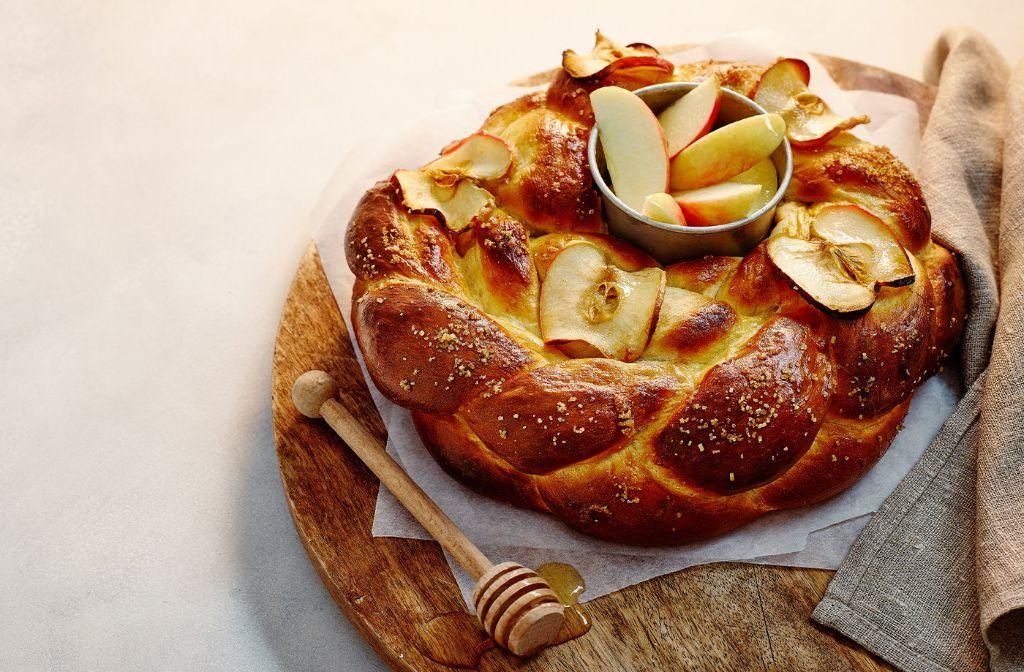
Hold onto your aprons, folks, because we’re about to dive into a loaf so sweet, it could probably solve world peace—or at least make your breakfast table a happier place. This Apple and Honey Challah is the fluffy, golden answer to your carb cravings, with a twist that’ll have you saying, ‘Why didn’t I think of that?’
Ingredients
- Flour – 4 cups
- Eggs – 2 large
- Honey – ½ cup
- Apple – 1, diced
- Yeast – 1 packet
- Salt – 1 tsp
- Water – 1 cup, warm
- Butter – ¼ cup, melted
Instructions
- In a large bowl, dissolve yeast in warm water and let sit for 5 minutes until frothy.
- Add honey, eggs, and melted butter to the yeast mixture, whisking until combined.
- Gradually mix in flour and salt until a dough forms. Tip: If the dough sticks to your hands, add a little more flour.
- Knead the dough on a floured surface for 10 minutes until smooth and elastic.
- Place the dough in a greased bowl, cover with a towel, and let rise in a warm place for 1 hour or until doubled in size.
- Punch down the dough and fold in the diced apple. Tip: Toss the apple in a bit of flour to prevent sinking during baking.
- Divide the dough into 3 equal parts, roll into ropes, and braid them together on a baking sheet.
- Cover the braid and let rise for another 30 minutes. Preheat oven to 350°F during this time.
- Bake for 25-30 minutes until golden brown. Tip: For a shiny finish, brush the loaf with an egg wash before baking.
Bite into this challah, and you’ll meet a texture so soft it’s like hugging a cloud, with bursts of apple sweetness and a honeyed glow that’s downright show-stopping. Serve it toasted with a smear of butter, or dare to dunk it in your morning coffee for a breakfast of champions.
Pomegranate Roasted Salmon
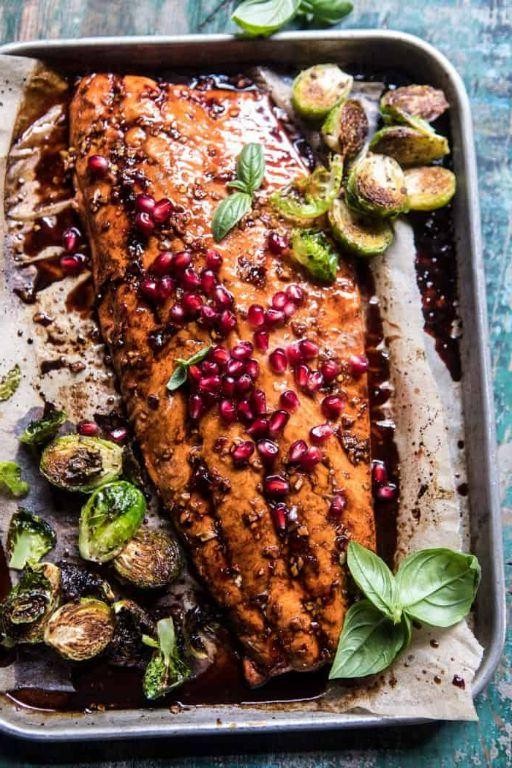
Pomegranate Roasted Salmon is the dish that’ll make your taste buds dance and your dinner guests think you’ve secretly been training under a Michelin-starred chef. It’s sweet, it’s savory, and it’s surprisingly simple to whip up—even if your cooking skills are more ‘microwave maestro’ than ‘gourmet genius’.
Ingredients
- Salmon fillets – 2 (6 oz each)
- Pomegranate juice – ½ cup
- Honey – 2 tbsp
- Olive oil – 1 tbsp
- Salt – ½ tsp
- Black pepper – ¼ tsp
Instructions
- Preheat your oven to 375°F (190°C) and line a baking sheet with parchment paper for easy cleanup.
- In a small saucepan over medium heat, combine pomegranate juice and honey. Simmer for 5 minutes until slightly thickened, then remove from heat. Tip: Stir occasionally to prevent burning.
- Place salmon fillets on the prepared baking sheet. Drizzle with olive oil and season with salt and black pepper.
- Brush half of the pomegranate glaze over the salmon fillets. Tip: Save the other half for serving to add an extra burst of flavor.
- Roast in the preheated oven for 12-15 minutes, or until the salmon flakes easily with a fork. Tip: For a caramelized top, broil for the last 2 minutes.
- Serve the salmon drizzled with the remaining glaze.
Delightfully, the salmon comes out perfectly tender with a glossy, slightly sticky glaze that’s packed with a tangy-sweet punch. Try serving it over a bed of quinoa or alongside roasted Brussels sprouts for a meal that’s as nutritious as it is delicious.
Sweet Potato and Carrot Tzimmes
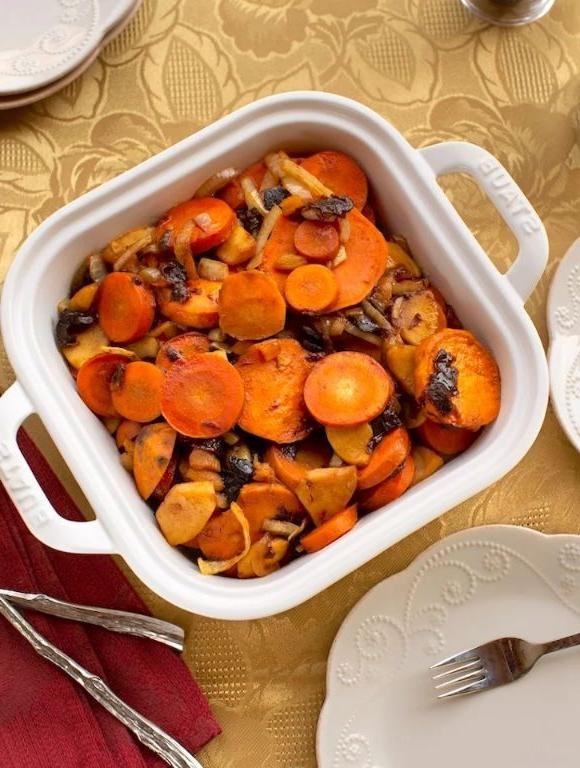
Craving a dish that’s as vibrant as your personality? Sweet Potato and Carrot Tzimmes is here to dazzle your taste buds with its sweet, savory, and slightly tangy flavors, all while being a breeze to whip up.
Ingredients
- Sweet potatoes – 2 cups, peeled and cubed
- Carrots – 1 cup, sliced
- Honey – ¼ cup
- Orange juice – ½ cup
- Cinnamon – 1 tsp
- Salt – ½ tsp
Instructions
- Preheat your oven to 375°F (190°C) to get it ready for baking magic.
- Toss the sweet potatoes and carrots in a large mixing bowl, ensuring they’re well acquainted.
- Drizzle honey and orange juice over the veggies, then sprinkle cinnamon and salt. Mix until every piece is lovingly coated. Tip: For an extra flavor kick, let the mixture marinate for 10 minutes before baking.
- Transfer the mixture to a baking dish, spreading it out evenly. Cover with foil to keep the moisture in.
- Bake for 45 minutes, then remove the foil and bake for another 15 minutes to let the top caramelize beautifully. Tip: Check halfway through to stir, ensuring even cooking.
- Once the veggies are tender and the sauce has thickened into a glossy glaze, remove from the oven. Tip: Let it sit for 5 minutes before serving to allow the flavors to meld.
Kick back and savor the tender sweetness of the veggies, perfectly balanced with a hint of spice. Serve it as a standout side or spoon it over creamy polenta for a cozy, comforting meal that’s anything but ordinary.
Beef Brisket with Dried Fruits

Craving a dish that’s a hug in food form? This beef brisket with dried fruits is your culinary soulmate, combining tender meat with the sweet whispers of dried fruits for a meal that’s downright magical.
Ingredients
- Beef brisket – 3 lbs
- Dried apricots – 1 cup
- Dried prunes – 1 cup
- Beef broth – 2 cups
- Garlic – 4 cloves, minced
- Olive oil – 2 tbsp
- Salt – 1 tsp
- Black pepper – ½ tsp
Instructions
- Preheat your oven to 325°F. This low and slow approach is key to brisket bliss.
- Heat olive oil in a large oven-proof pot over medium-high heat. Sear the brisket on all sides until deeply browned, about 4 minutes per side. Tip: Don’t rush the sear—it’s the foundation of flavor.
- Remove the brisket and set aside. In the same pot, sauté garlic until fragrant, about 30 seconds.
- Add dried apricots, prunes, beef broth, salt, and pepper to the pot. Stir to combine.
- Return the brisket to the pot, nestling it among the fruits and broth. Cover with a lid.
- Braise in the oven for 3.5 hours, or until the brisket is fork-tender. Tip: Resist the urge to peek—keeping the lid on ensures moist, tender meat.
- Let the brisket rest for 10 minutes before slicing against the grain. Tip: Slicing against the grain is the secret to melt-in-your-mouth texture.
Flavorful, tender, and with a hint of sweetness, this brisket is a showstopper. Serve it over a bed of creamy polenta or alongside roasted veggies for a meal that’ll have everyone asking for seconds.
Matzo Ball Soup

Feeling under the weather or just in the mood for a hug in a bowl? Matzo Ball Soup is your golden ticket to comfort town, with fluffy dumplings that’ll make your taste buds do a happy dance.
Ingredients
- Matzo meal – 1 cup
- Eggs – 4 large
- Chicken broth – 8 cups
- Salt – 1 tsp
- Pepper – ½ tsp
- Vegetable oil – ¼ cup
Instructions
- In a large bowl, whisk together 4 large eggs and ¼ cup vegetable oil until well combined.
- Stir in 1 cup matzo meal, 1 tsp salt, and ½ tsp pepper. Mix until just combined, then refrigerate for 30 minutes to firm up. Tip: Don’t overmix, or your matzo balls will be tough!
- Bring 8 cups chicken broth to a boil in a large pot over high heat.
- With wet hands, form the chilled matzo mixture into 1-inch balls. Tip: Wetting your hands prevents the mixture from sticking.
- Gently drop the matzo balls into the boiling broth. Reduce heat to low, cover, and simmer for 20 minutes. Tip: Resist the urge to peek; keeping the lid on ensures fluffy matzo balls.
- After 20 minutes, remove the lid and check that the matzo balls are cooked through by cutting one in half.
Cloud-like matzo balls floating in a savory broth—this soup is a cozy masterpiece. Serve it with a sprinkle of fresh dill or a side of crusty bread for dipping, and watch it disappear before your eyes.
Round Raisin Challah
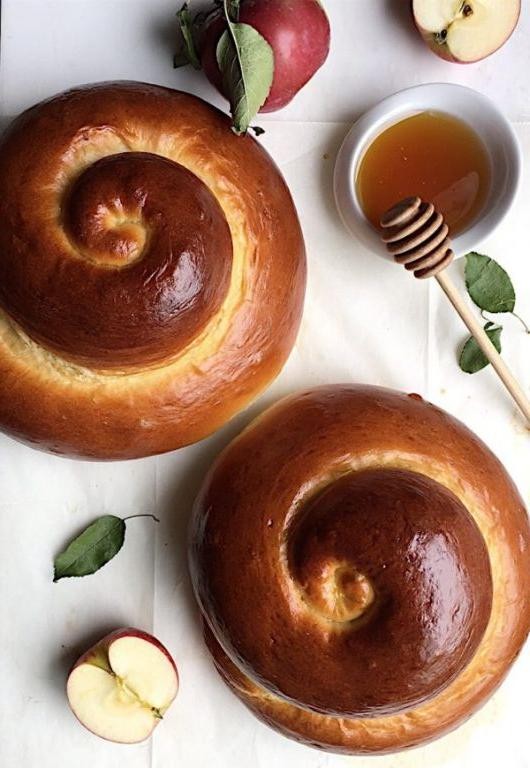
Now, who said bread can’t have a little fun? Our Round Raisin Challah is here to prove that even the most traditional dishes can twist, turn, and twirl into something spectacular. Perfect for those who love their bread sweet, soft, and slightly mischievous.
Ingredients
- Flour – 4 cups
- Water – 1 cup
- Eggs – 2
- Sugar – ½ cup
- Salt – 1 tsp
- Yeast – 2 tsp
- Raisins – 1 cup
- Butter – ¼ cup, melted
Instructions
- In a large bowl, mix flour, sugar, salt, and yeast.
- Add water, 1 egg, and melted butter to the dry ingredients. Stir until a dough forms.
- Knead the dough on a floured surface for 10 minutes until smooth and elastic.
- Fold in raisins evenly throughout the dough.
- Place the dough in a greased bowl, cover with a damp cloth, and let rise in a warm place for 1 hour or until doubled in size.
- Punch down the dough and divide into 3 equal parts. Roll each into a long rope.
- Braid the ropes together, tucking the ends under to form a round loaf.
- Transfer the loaf to a baking sheet lined with parchment paper. Cover and let rise for another 30 minutes.
- Preheat oven to 350°F.
- Beat the remaining egg and brush over the loaf for a golden finish.
- Bake for 25-30 minutes until the challah is deep golden brown and sounds hollow when tapped.
Here’s the scoop: this challah is like a hug in bread form—soft, sweet, and stuffed with surprises. Serve it warm with a dollop of honey butter or toast it for a crunchy twist on your morning routine.
Apple Cake with Honey Syrup
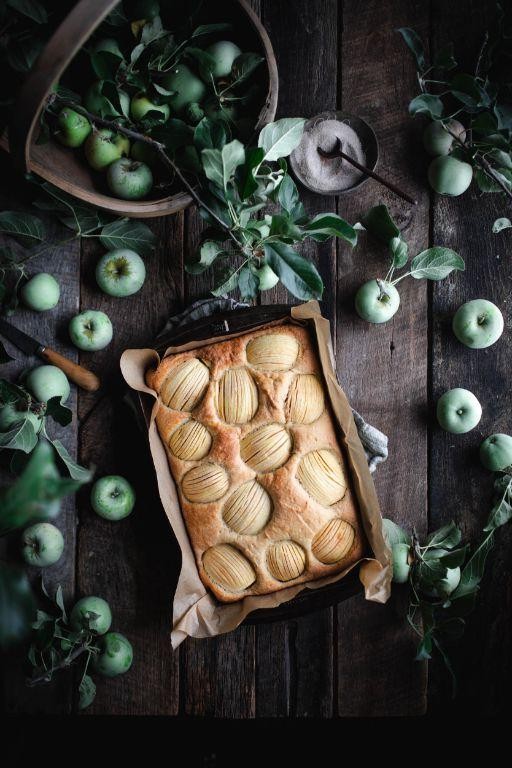
Oh, the joys of baking when you can turn humble apples into a show-stopping dessert that whispers sweet nothings to your taste buds! This Apple Cake with Honey Syrup is like a cozy sweater for your soul, perfect for those days when you crave something sweet but not overly complicated.
Ingredients
- Flour – 2 cups
- Sugar – 1 cup
- Eggs – 2
- Butter – ½ cup, melted
- Apples – 3, peeled and sliced
- Baking powder – 1 tsp
- Salt – ½ tsp
- Honey – ½ cup
- Water – ¼ cup
Instructions
- Preheat your oven to 350°F (175°C) and grease a 9-inch round baking pan. Tip: Use butter for greasing to add extra flavor.
- In a large bowl, whisk together flour, sugar, baking powder, and salt.
- Add eggs and melted butter to the dry ingredients, mixing until just combined. Tip: Overmixing can lead to a dense cake, so stop when you no longer see dry flour.
- Fold in the sliced apples gently, ensuring they’re evenly distributed throughout the batter.
- Pour the batter into the prepared pan and bake for 40-45 minutes, or until a toothpick inserted into the center comes out clean.
- While the cake bakes, combine honey and water in a small saucepan over medium heat. Stir until the honey dissolves, then simmer for 5 minutes to thicken slightly. Tip: Keep an eye on the syrup to prevent it from boiling over.
- Once the cake is out of the oven, poke holes all over the top with a skewer and pour the warm honey syrup over it, allowing it to soak in.
How about that? The cake emerges moist and tender, with the honey syrup adding a glossy sheen and a touch of floral sweetness. Serve it warm with a dollop of whipped cream or a scoop of vanilla ice cream for an extra indulgent treat.
Roasted Root Vegetables with Honey
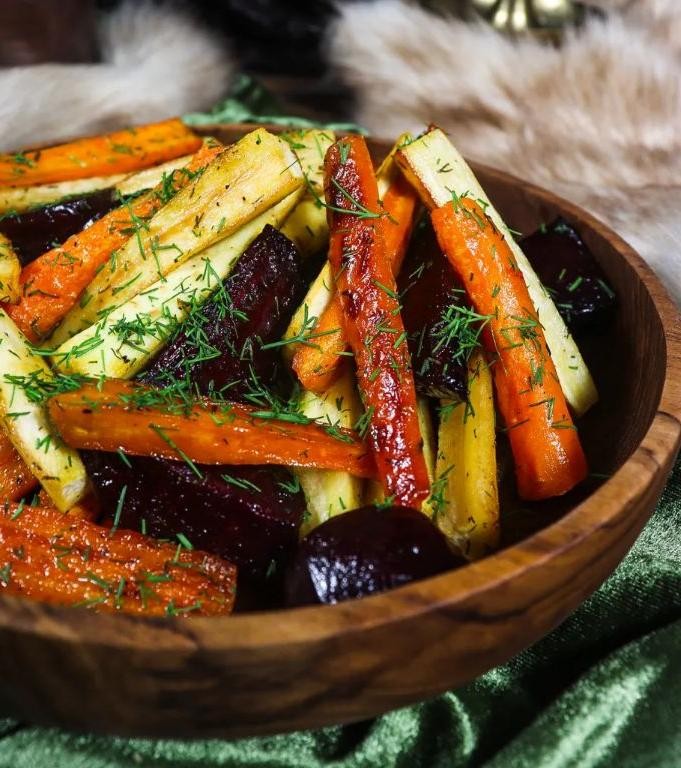
Kickstart your taste buds with this irresistibly sweet and savory dish that’s as easy to make as it is to devour. Perfect for those who think vegetables are just ‘meh,’ this recipe will have you singing their praises—or at least eating them without a fuss.
Ingredients
- Carrots – 2 cups, chopped
- Sweet potatoes – 2 cups, chopped
- Beets – 1 cup, chopped
- Olive oil – 2 tbsp
- Honey – 2 tbsp
- Salt – ½ tsp
- Black pepper – ¼ tsp
Instructions
- Preheat your oven to 400°F (because good things come to those who wait—and preheat).
- Toss the chopped carrots, sweet potatoes, and beets in olive oil, ensuring each piece is lightly coated for that perfect roast.
- Spread the vegetables in a single layer on a baking sheet—crowding is for parties, not roasting pans.
- Roast for 25 minutes, then give them a quick stir to ensure even cooking and prevent any veggie from feeling left out.
- Drizzle honey over the vegetables and sprinkle with salt and black pepper. This is where the magic happens, so don’t skimp.
- Return to the oven for another 10 minutes, or until the vegetables are tender and caramelized to perfection.
- Let them cool for a minute—unless you’re into third-degree burns on your tongue.
Just like that, you’ve got a dish that’s a symphony of textures—crispy edges, tender middles, and a sweetness that’ll make you forget you’re eating your veggies. Serve it over a bed of quinoa for a hearty meal, or alongside your favorite protein for a dinner that’s anything but boring.
Gefilte Fish with Horseradish
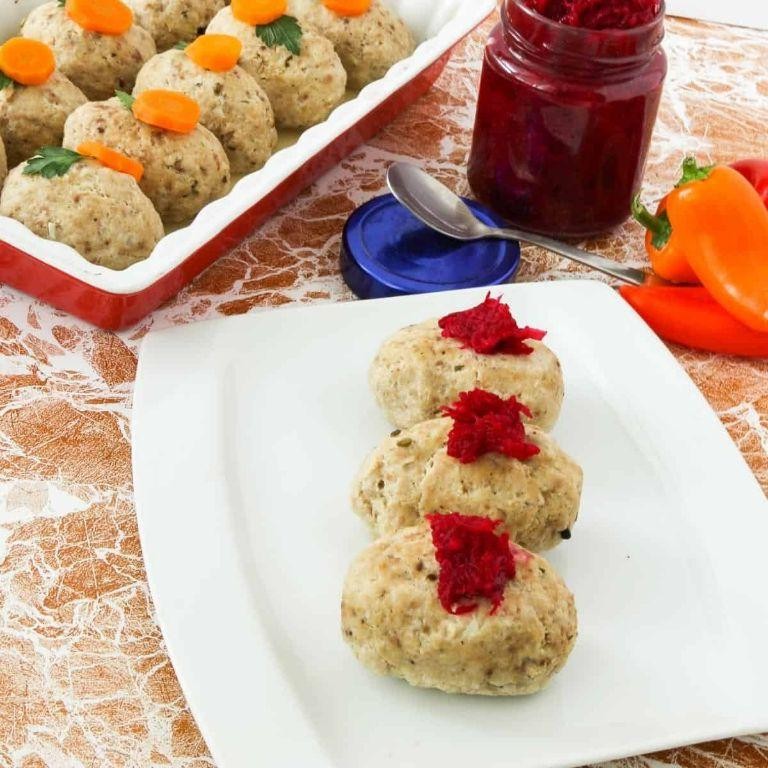
Yikes, you’ve stumbled upon the holy grail of Jewish cuisine that’s as fun to say as it is to eat—Gefilte Fish with Horseradish! This dish is like the little black dress of Passover: timeless, a bit fancy, and always a conversation starter.
Ingredients
- Gefilte fish loaf – 1 (22 oz)
- Horseradish – ¼ cup
- Water – 4 cups
- Sugar – 1 tbsp
- Salt – 1 tsp
Instructions
- Preheat your oven to 350°F because we’re about to turn up the heat on tradition.
- In a large pot, bring 4 cups of water to a boil. This is your fish’s first-class ticket to flavor town.
- Gently place the gefilte fish loaf into the boiling water. Tip: Keep the loaf whole for a dramatic reveal later.
- Reduce the heat to a simmer and let the fish loaf cook for 1 hour. Patience is key—good things come to those who wait.
- While the fish is cooking, mix ¼ cup of horseradish with 1 tbsp of sugar and 1 tsp of salt in a small bowl. This will be your zesty sidekick.
- After the hour is up, carefully remove the fish loaf from the water and let it cool for 10 minutes. Tip: Use a slotted spoon to avoid a fishy fiasco.
- Once cooled, slice the gefilte fish loaf into ½-inch thick pieces. Tip: A sharp knife is your best friend here for clean cuts.
- Serve each slice with a dollop of the horseradish mixture on top. Boom—you’ve just elevated a classic.
Unbelievable, right? The gefilte fish is tender and subtly sweet, while the horseradish brings a punch that’ll clear your sinuses and your worries. Try serving it on a bed of lettuce for a pop of color that’ll make your plate Instagram-worthy.
Stuffed Cabbage Rolls
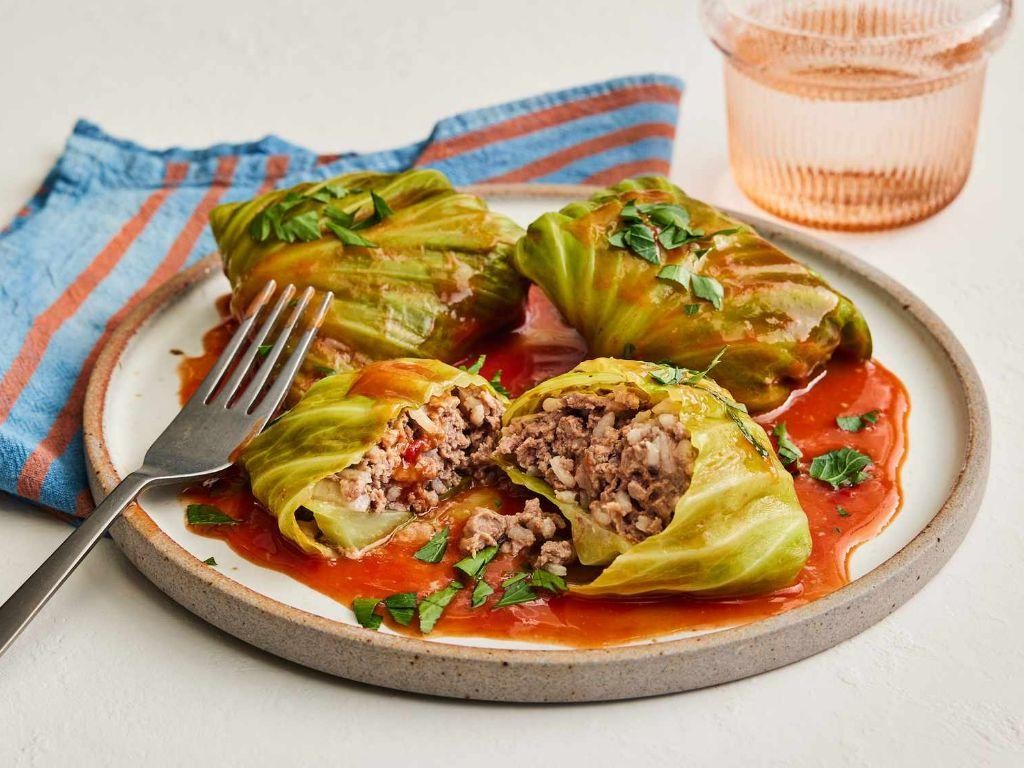
Hungry for a dish that wraps comfort in a leafy embrace? Look no further than these stuffed cabbage rolls, a cozy classic that’s like a hug from grandma—if grandma were a cabbage.
Ingredients
- Cabbage – 1 head
- Ground beef – 1 lb
- Cooked rice – 1 cup
- Tomato sauce – 2 cups
- Salt – 1 tsp
- Pepper – ½ tsp
Instructions
- Preheat your oven to 350°F—because good things come to those who bake.
- Boil the whole cabbage in a large pot of water for 3 minutes, then peel off 12 leaves. Tip: Save the small leaves for a crunchy salad later!
- Mix ground beef, cooked rice, salt, and pepper in a bowl. This is your roll’s soul—make it count.
- Place a spoonful of the beef mixture on each cabbage leaf, roll tightly, and tuck in the ends. Think of it as swaddling a baby, but tastier.
- Arrange the rolls in a baking dish, cover with tomato sauce, and bake for 45 minutes. Tip: Cover with foil for the first 30 minutes to keep them moist.
- Remove from oven and let sit for 5 minutes. Patience is a virtue, especially when it prevents mouth burns.
Now, these rolls are a symphony of textures—tender cabbage, hearty filling, and a saucy top note. Serve them atop a mound of mashed potatoes for a carb-on-carb love story.
Lekach Honey Cake
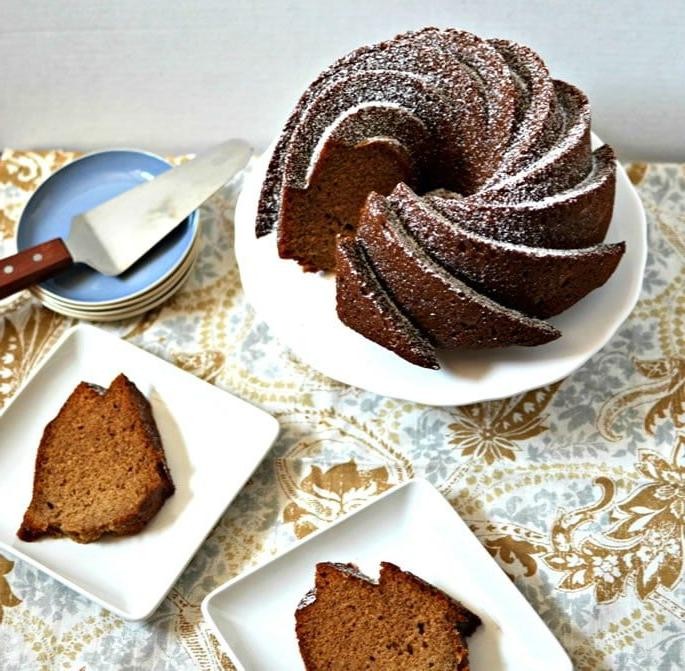
Feast your eyes (and soon, your taste buds) on this Lekach Honey Cake, a sweet slice of heaven that’s been sweetening up lives for centuries. Perfect for when you want to impress or just treat yourself, because let’s be honest, you deserve it.
Ingredients
- Flour – 2 cups
- Honey – 1 cup
- Eggs – 3
- Baking soda – 1 tsp
- Coffee – ½ cup, strong
Instructions
- Preheat your oven to 350°F (175°C) and grease a 9-inch baking pan. Tip: Use butter for greasing to add a rich flavor.
- In a large bowl, whisk together the flour and baking soda. Tip: Sifting the flour can make your cake lighter.
- In another bowl, beat the eggs until fluffy, then gradually add the honey, mixing continuously.
- Slowly blend the dry ingredients into the wet mixture, alternating with the coffee to keep the batter smooth. Tip: Adding coffee enhances the honey’s flavor without making the cake taste like coffee.
- Pour the batter into the prepared pan and bake for 40 minutes, or until a toothpick inserted into the center comes out clean.
Golden and aromatic, this Lekach Honey Cake is moist with a slightly sticky top, making it irresistible. Serve it with a dollop of whipped cream or a drizzle of extra honey for an extra touch of decadence.
Caramelized Onion and Potato Kugel

Hold onto your hats, folks, because we’re about to dive into a dish that’s as comforting as your favorite blanket but with a crispy, golden twist that’ll make your taste buds do a happy dance.
Ingredients
- Potatoes – 4 large
- Onions – 2 large
- Eggs – 3
- Flour – ¼ cup
- Salt – 1 tsp
- Black pepper – ½ tsp
- Vegetable oil – ¼ cup
Instructions
- Preheat your oven to 375°F (190°C) and grease a 9×13 inch baking dish with a bit of the vegetable oil.
- Peel and thinly slice the potatoes and onions. For extra crispiness, use a mandoline slicer on the potatoes.
- In a large bowl, whisk together the eggs, flour, salt, and black pepper until smooth.
- Add the sliced potatoes and onions to the bowl and toss until everything is well coated with the egg mixture.
- Heat the remaining vegetable oil in a large skillet over medium heat. Add the potato and onion mixture, spreading it evenly. Cook for 5 minutes without stirring to let the bottom get a nice golden color.
- Transfer the mixture to the prepared baking dish, pressing down firmly to compact it. Bake for 45 minutes, or until the top is golden and crispy.
- Let the kugel cool for 10 minutes before slicing. This rest time helps the layers set, making it easier to cut.
This kugel is a masterpiece of contrasts: creamy inside with a crackly crust that sings with the sweet depth of caramelized onions. Serve it with a dollop of sour cream or, for a brunch twist, top with a poached egg and a sprinkle of chives.
Spiced Sweet Wine Poached Pears

Brace yourselves, because these Spiced Sweet Wine Poached Pears are about to become the star of your dessert table. Imagine pears, but make them fancy—swimming in a bath of sweet wine and spices until they’re tender, juicy, and utterly irresistible.
Ingredients
- Pears – 4, peeled
- Sweet red wine – 2 cups
- Sugar – ½ cup
- Cinnamon stick – 1
- Star anise – 2
Instructions
- In a large pot, combine sweet red wine, sugar, cinnamon stick, and star anise. Bring to a simmer over medium heat, stirring until sugar dissolves.
- Add peeled pears to the pot, ensuring they are fully submerged. If not, add a bit of water until they are.
- Reduce heat to low and let pears poach for 25 minutes, turning them occasionally for even color.
- After 25 minutes, check pears for tenderness with a knife. If they’re not soft enough, continue poaching for another 5-10 minutes.
- Once tender, remove pears from liquid and set aside. Increase heat to medium-high and reduce the poaching liquid by half, about 10 minutes, until it thickens slightly.
- Serve pears warm or chilled, drizzled with the reduced poaching liquid.
Unbelievably tender and infused with the warmth of cinnamon and star anise, these pears are a dessert dream. Serve them with a scoop of vanilla ice cream for a contrast of temperatures that’ll make your taste buds sing.
Quinoa Stuffed Peppers

Get ready to spice up your dinner routine with these quinoa stuffed peppers—a dish that’s as fun to make as it is to eat, proving that healthy can indeed be hearty and hilarious.
Ingredients
- Quinoa – 1 cup
- Bell peppers – 4
- Black beans – 1 can (15 oz)
- Corn – 1 cup
- Shredded cheese – 1 cup
- Olive oil – 1 tbsp
- Salt – ½ tsp
Instructions
- Preheat your oven to 375°F because good things come to those who bake.
- Rinse the quinoa under cold water, then cook it according to package instructions—fluffiness is key here.
- While the quinoa is cooking, cut the tops off the bell peppers and remove the seeds. A little pepper surgery never hurt anyone.
- In a large bowl, mix the cooked quinoa, black beans, corn, and half of the shredded cheese. This is where the magic happens.
- Drizzle the inside of each pepper with olive oil and sprinkle with salt. It’s like giving them a little spa treatment before the main event.
- Stuff each pepper with the quinoa mixture until they’re brimming with goodness. Pack it in like you’re preparing for a quinoa shortage.
- Top each pepper with the remaining cheese because, let’s be honest, cheese makes everything better.
- Place the peppers in a baking dish and bake for 25-30 minutes, or until the peppers are tender and the cheese is golden and bubbly.
- Let them cool for a few minutes before serving—patience is a virtue, especially when cheese is involved.
Who knew stuffed peppers could be this exciting? The quinoa adds a delightful nuttiness, while the melted cheese brings it all together in a gooey, glorious finish. Serve these bad boys with a side of salsa for an extra kick, or enjoy them as is—they’re that good.
Roasted Garlic and Herb Mashed Potatoes

Venture into the realm of comfort food with a dish that’s like a warm hug for your taste buds—roasted garlic and herb mashed potatoes. It’s the side dish that steals the show, every time, with its creamy texture and a flavor that’s bold enough to stand up to the main course but humble enough to know its place.
Ingredients
- Potatoes – 2 lbs
- Garlic – 1 head
- Butter – ½ cup
- Milk – ½ cup
- Fresh herbs (rosemary, thyme) – 2 tbsp
- Salt – 1 tsp
- Pepper – ½ tsp
Instructions
- Preheat your oven to 400°F. Cut the top off the garlic head, drizzle with a bit of oil, wrap in foil, and roast for 30 minutes until soft and golden.
- While the garlic roasts, peel and chop the potatoes into even chunks. Pro tip: Even sizes mean even cooking—no one likes a half-mashed spud.
- Boil the potatoes in salted water for 15-20 minutes until fork-tender. Drain well—watery potatoes are the enemy of fluffiness.
- Mash the potatoes with butter and milk until smooth. Squeeze the roasted garlic into the mix for that deep, caramelized flavor.
- Chop the fresh herbs finely and fold them into the mashed potatoes along with salt and pepper. Herb tip: Fresh is best, but if you’re in a pinch, dried herbs can work at half the amount.
- Give it a final taste and adjust seasoning if needed. Remember, potatoes are like a blank canvas—they need a little help to shine.
Perfectly creamy with a punch of garlic and a whisper of herbs, these mashed potatoes are the ultimate comfort food. Serve them piled high with a pat of butter melting on top, or get fancy and pipe them into elegant swirls for your next dinner party.
Date and Walnut Charoset
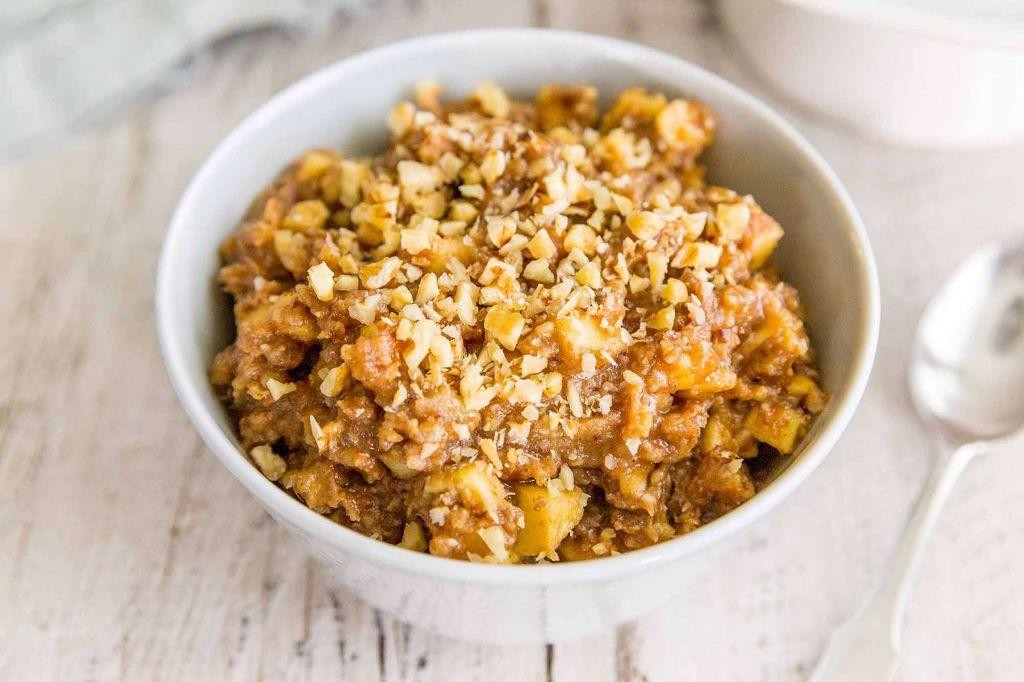
Craving something sweet, nutty, and downright divine? Let’s dive into the world of Date and Walnut Charoset, a dish that’s as fun to make as it is to eat, blending the richness of dates with the crunch of walnuts for a match made in culinary heaven.
Ingredients
- Dates – 1 cup
- Walnuts – ½ cup
- Cinnamon – 1 tsp
- Orange juice – 2 tbsp
Instructions
- Chop the dates into small pieces using a sharp knife for easier blending.
- Toast the walnuts in a dry skillet over medium heat for 5 minutes, stirring occasionally, until fragrant. Tip: Keep an eye on them to prevent burning.
- Combine the chopped dates and toasted walnuts in a food processor.
- Add cinnamon and orange juice to the food processor. Tip: The orange juice not only adds flavor but helps bind the mixture.
- Pulse the mixture until it reaches a coarse, sticky consistency. Tip: For a smoother texture, blend longer, but stop before it becomes a paste.
- Transfer the charoset to a bowl and let it sit for 10 minutes to allow the flavors to meld.
Who knew such simple ingredients could create a symphony of flavors? This charoset boasts a delightful contrast between the sticky sweetness of dates and the earthy crunch of walnuts, perfect as a spread on toast or a quirky topping for your morning oatmeal.
Spinach and Cheese Bourekas

Oh, the joy of biting into something crispy on the outside, yet sinfully soft and cheesy on the inside—welcome to the world of Spinach and Cheese Bourekas, where every bite is a little hug for your taste buds.
Ingredients
- Puff pastry sheets – 1 package (17.3 oz)
- Spinach – 2 cups, chopped
- Feta cheese – 1 cup, crumbled
- Egg – 1, beaten
- Sesame seeds – 2 tbsp
Instructions
- Preheat your oven to 375°F (190°C) and line a baking sheet with parchment paper.
- Thaw the puff pastry sheets according to package instructions, usually about 30 minutes at room temperature.
- In a bowl, mix the chopped spinach and crumbled feta cheese until well combined.
- Unfold the puff pastry sheets on a lightly floured surface and cut each sheet into 9 equal squares.
- Place a small spoonful of the spinach and feta mixture in the center of each square.
- Fold the squares diagonally to form triangles, pressing the edges firmly to seal. Tip: Use a fork to crimp the edges for a decorative touch and to ensure they stay sealed.
- Brush the tops of the bourekas with the beaten egg and sprinkle sesame seeds over them. Tip: The egg wash gives them a beautiful golden color, so don’t skip this step!
- Bake for 20-25 minutes, or until the bourekas are puffed up and golden brown. Tip: Rotate the baking sheet halfway through for even browning.
- Remove from the oven and let cool for a few minutes before serving.
Crunchy, flaky, and packed with a creamy spinach and feta filling, these bourekas are perfect for breakfast, brunch, or anytime you need a savory pick-me-up. Serve them with a side of Greek yogurt or tzatziki for dipping, and watch them disappear before your eyes.
Conclusion
We hope this roundup of 18 Traditional Rosh Hashanah Recipes inspires your holiday table with delicious, time-honored dishes. Each recipe is a celebration of flavor and tradition, perfect for home cooks across North America. Don’t forget to try them out, share your favorites in the comments, and pin this article on Pinterest to spread the joy. Wishing you a sweet and prosperous New Year!


