Nothing beats the joy of whipping up a sweet treat that’s both delicious and quick to make, especially when time is of the essence. Whether you’re craving something chocolatey, fruity, or a little bit of both, our roundup of 25 Delicious Quick Dessert Recipes Easy to Make is here to save your day. Perfect for busy home cooks, these recipes promise maximum flavor with minimal effort. Let’s dive in!
Chocolate Mug Cake
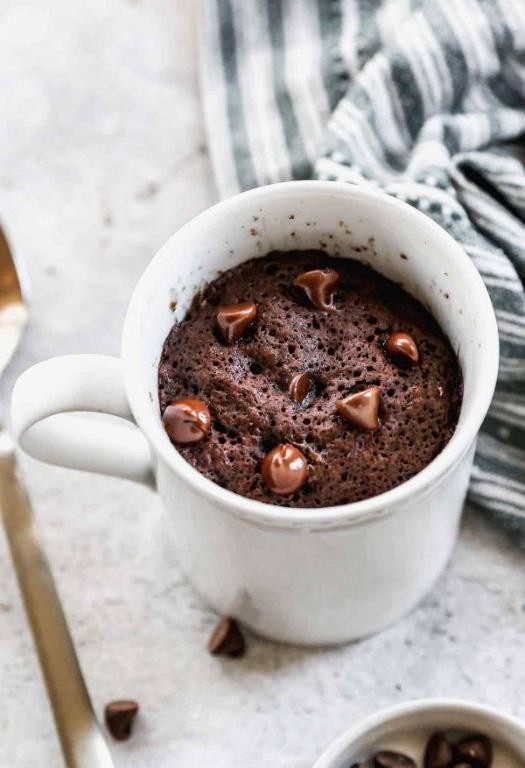
Looking for a quick and easy dessert that satisfies your chocolate cravings in minutes? This chocolate mug cake is your go-to fix, perfect for those late-night sweet tooth emergencies or a cozy treat any time of day.
Ingredients
- For the cake:
- 4 tbsp all-purpose flour
- 2 tbsp granulated sugar
- 2 tbsp unsweetened cocoa powder
- 1/4 tsp baking powder
- Pinch of salt
- 3 tbsp milk
- 2 tbsp vegetable oil
- 1/4 tsp vanilla extract
Instructions
- In a microwave-safe mug, whisk together the flour, sugar, cocoa powder, baking powder, and salt until no lumps remain.
- Add the milk, vegetable oil, and vanilla extract to the dry ingredients. Stir until just combined, being careful not to overmix.
- Microwave on high for 1 minute and 30 seconds. Tip: Microwave times may vary, so start checking at 1 minute to avoid overcooking.
- Let the mug cake sit for 1 minute before eating. Tip: This resting time allows the cake to finish cooking from residual heat and makes it easier to handle.
- Enjoy straight from the mug or top with a scoop of vanilla ice cream for an extra treat. Tip: For a richer flavor, sprinkle a few chocolate chips on top before microwaving.
You’ll love how this mug cake turns out fluffy and moist, with a deep chocolate flavor that’s not too sweet. Try serving it with a dollop of whipped cream or a drizzle of caramel sauce for a decadent twist.
3-Ingredient Peanut Butter Cookies
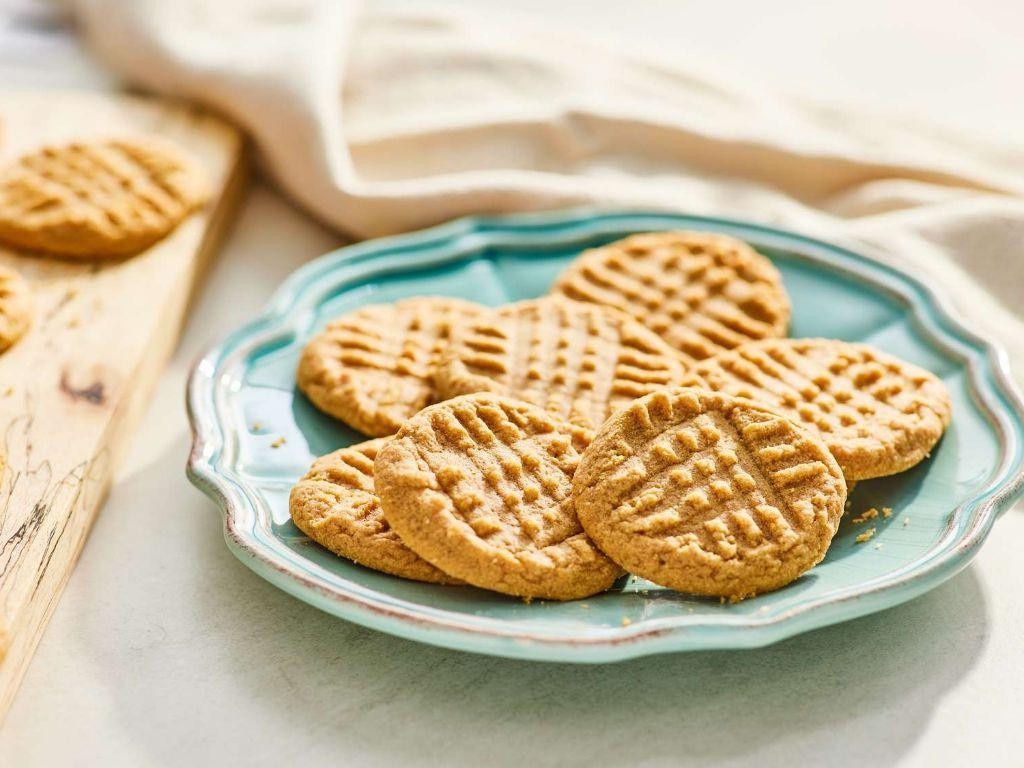
Did you know you can whip up delicious cookies with just three ingredients? Yes, it’s that simple, and these peanut butter cookies are proof. Perfect for when you’re craving something sweet but don’t want to fuss with a long list of ingredients.
Ingredients
- For the cookies:
- 1 cup creamy peanut butter
- 1 cup granulated sugar
- 1 large egg
Instructions
- Preheat your oven to 350°F (175°C) and line a baking sheet with parchment paper. This prevents sticking and makes cleanup a breeze.
- In a medium bowl, mix together 1 cup creamy peanut butter, 1 cup granulated sugar, and 1 large egg until well combined. Tip: If the dough feels too sticky, you can chill it for 10 minutes to make it easier to handle.
- Roll the dough into 1-inch balls and place them on the prepared baking sheet, spacing them about 2 inches apart.
- Use a fork to gently press down on each ball, creating a crisscross pattern. This not only looks classic but also helps the cookies bake evenly.
- Bake for 10-12 minutes, or until the edges are lightly golden. Tip: The cookies will look soft when they come out but will firm up as they cool, so don’t overbake.
- Let the cookies cool on the baking sheet for 5 minutes before transferring them to a wire rack to cool completely. Tip: For extra crunch, you can sprinkle a little sea salt on top right after baking.
Perfectly chewy with a rich peanut butter flavor, these cookies are a hit every time. Try sandwiching them with a scoop of vanilla ice cream for an indulgent treat.
Strawberry Cheesecake Bites
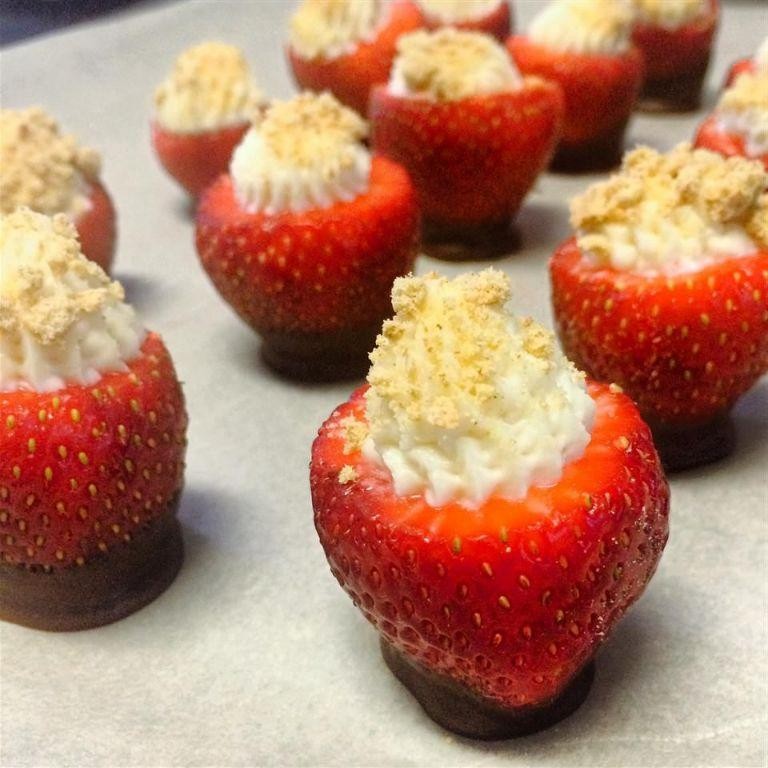
Kick off your summer parties with these irresistible Strawberry Cheesecake Bites. They’re the perfect mix of creamy, tangy, and sweet, all packed into a bite-sized treat that’s sure to disappear fast.
Ingredients
- For the crust:
- 1 1/2 cups graham cracker crumbs
- 1/4 cup melted butter
- 2 tbsp sugar
- For the filling:
- 8 oz cream cheese, softened
- 1/4 cup sugar
- 1 tsp vanilla extract
- 1/2 cup heavy cream
- For the topping:
- 1 cup fresh strawberries, diced
- 2 tbsp sugar
Instructions
- Preheat your oven to 350°F (175°C). Line a mini muffin tin with paper liners.
- In a bowl, mix graham cracker crumbs, melted butter, and 2 tbsp sugar until well combined. Press 1 tbsp of the mixture into the bottom of each liner. Bake for 5 minutes, then let cool. Tip: Use the back of a spoon to press the crust down firmly for an even layer.
- Beat the cream cheese, 1/4 cup sugar, and vanilla extract until smooth. In another bowl, whip the heavy cream to stiff peaks, then fold into the cream cheese mixture. Tip: Ensure the cream cheese is at room temperature to avoid lumps.
- Spoon the filling over the cooled crusts, filling each liner almost to the top. Chill in the refrigerator for at least 2 hours. Tip: For a smoother finish, use a piping bag to fill the liners.
- Combine diced strawberries and 2 tbsp sugar in a small bowl. Let sit for 10 minutes to macerate, then spoon over the chilled cheesecake bites.
Serve these Strawberry Cheesecake Bites chilled for a refreshing texture contrast between the crunchy crust and creamy filling. The fresh strawberry topping adds a juicy burst of flavor that complements the rich cheesecake perfectly. Try garnishing with a mint leaf for an extra touch of elegance.
5-Minute Cinnamon Roll Apple Pie
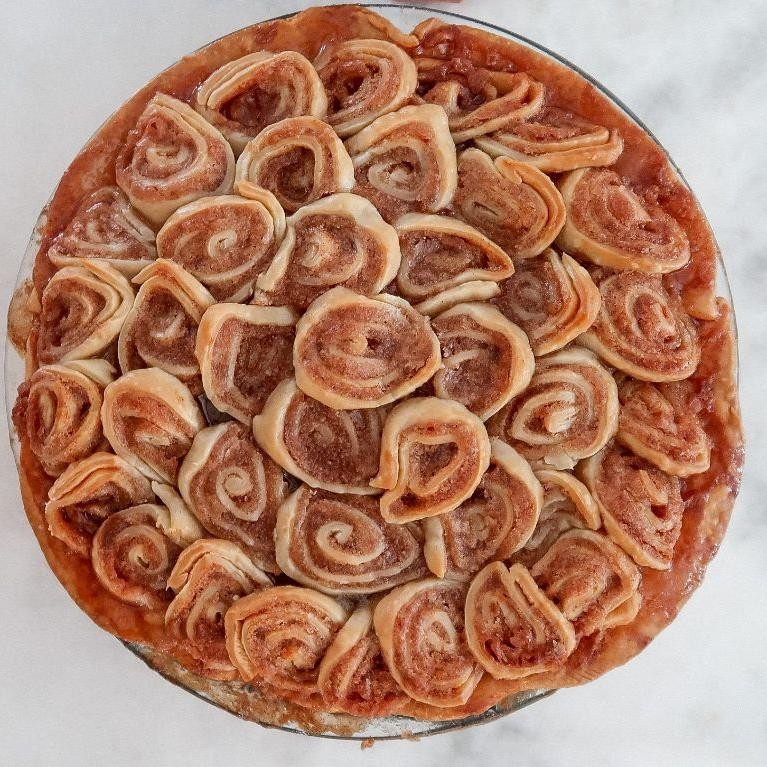
Perfect for those mornings when you’re craving something sweet but don’t have hours to spend in the kitchen, this 5-Minute Cinnamon Roll Apple Pie combines the cozy flavors of cinnamon rolls with the classic taste of apple pie. You’ll love how easy it is to whip up!
Ingredients
- For the pie:
- 1 can (8 oz) refrigerated cinnamon roll dough
- 1 cup apple pie filling
- 1 tbsp butter, melted
- 1 tsp ground cinnamon
- For the glaze:
- 1/4 cup powdered sugar
- 1 tbsp milk
Instructions
- Preheat your oven to 375°F and grease a small pie dish or baking pan.
- Unroll the cinnamon roll dough and press it into the bottom and up the sides of the prepared dish to form a crust.
- Spread the apple pie filling evenly over the cinnamon roll crust.
- Brush the melted butter over the apple filling and sprinkle with ground cinnamon.
- Bake for 5 minutes, or until the edges of the cinnamon roll crust are golden brown.
- While the pie bakes, whisk together the powdered sugar and milk in a small bowl to make the glaze.
- Remove the pie from the oven and drizzle with the glaze before serving.
Unbelievably easy and delicious, this pie offers a soft, gooey texture with a crispy crust edge. Serve it warm with a scoop of vanilla ice cream for an extra special treat.
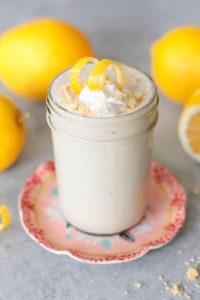
Easy Lemon Bars

Ready to whip up something sweet and tangy? These easy lemon bars are your ticket to a delicious dessert that’s perfect for any occasion. You’ll love the buttery crust paired with the zesty lemon filling.
Ingredients
- For the crust:
- 1 cup all-purpose flour
- 1/2 cup unsalted butter, softened
- 1/4 cup granulated sugar
- For the filling:
- 2 large eggs
- 1 cup granulated sugar
- 2 tbsp all-purpose flour
- 1/2 tsp baking powder
- 1/4 cup fresh lemon juice
- 1 tbsp lemon zest
Instructions
- Preheat your oven to 350°F (175°C). This ensures your lemon bars bake evenly.
- In a medium bowl, mix 1 cup flour, 1/2 cup softened butter, and 1/4 cup sugar until crumbly. Press this mixture firmly into the bottom of an 8×8 inch baking pan. Tip: Use the back of a spoon to smooth the crust for an even layer.
- Bake the crust for 20 minutes, or until lightly golden. This pre-baking step prevents a soggy bottom.
- While the crust bakes, whisk together 2 eggs, 1 cup sugar, 2 tbsp flour, 1/2 tsp baking powder, 1/4 cup lemon juice, and 1 tbsp lemon zest in a bowl until smooth.
- Pour the lemon mixture over the hot crust as soon as it comes out of the oven. Tip: Doing this while the crust is hot helps the filling set properly.
- Return the pan to the oven and bake for another 20-25 minutes, or until the filling is set and doesn’t jiggle when shaken lightly.
- Let the lemon bars cool completely in the pan on a wire rack. Tip: For clean cuts, chill them in the fridge for an hour before slicing.
These lemon bars strike the perfect balance between sweet and tart, with a melt-in-your-mouth texture. Try dusting them with powdered sugar or serving with a dollop of whipped cream for an extra special touch.
Quick Banana Pudding
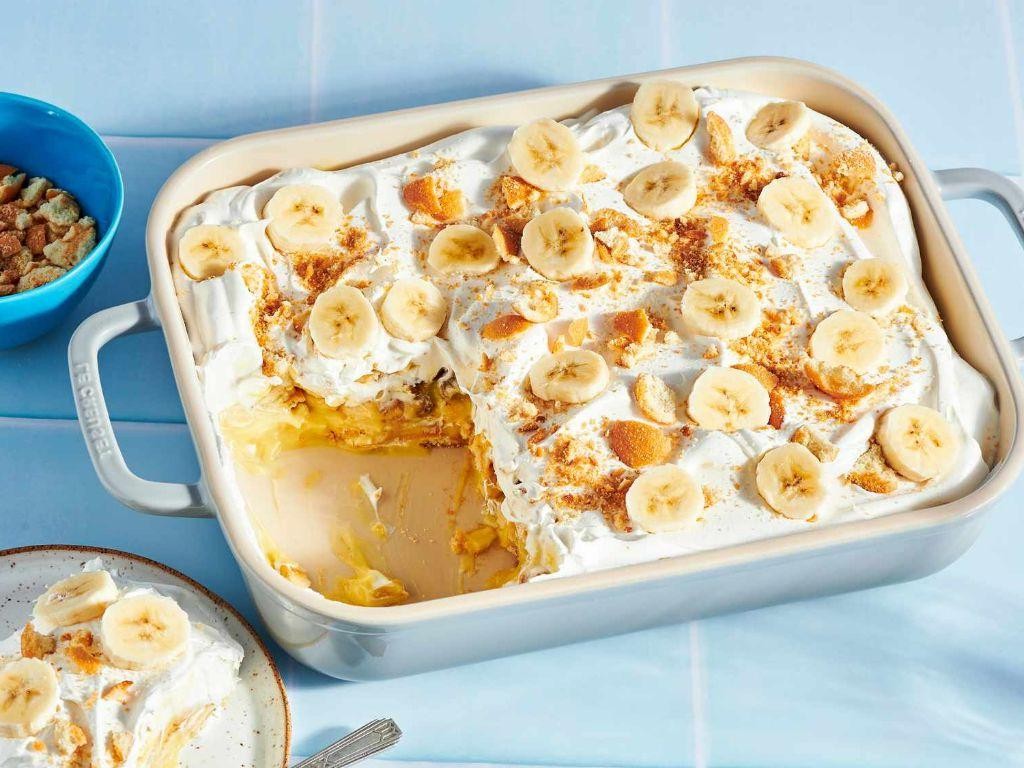
Got a craving for something sweet but short on time? This quick banana pudding is your go-to dessert, blending creamy, fruity flavors with a satisfying crunch. You’ll love how easy it is to whip up, even on your busiest days.
Ingredients
- For the pudding:
- 2 cups cold milk
- 1 package (3.4 oz) instant vanilla pudding mix
- For the layers:
- 1 box (11 oz) vanilla wafer cookies
- 4 ripe bananas, sliced
- 1 cup whipped topping, thawed
Instructions
- In a large bowl, whisk together the cold milk and instant vanilla pudding mix for 2 minutes until smooth. Let it sit for 5 minutes to thicken.
- Arrange a layer of vanilla wafer cookies at the bottom of a 9×13 inch dish.
- Top the cookies with a layer of sliced bananas, covering the cookies evenly.
- Spread half of the pudding over the bananas, smoothing it with a spatula.
- Repeat the layers: cookies, bananas, and the remaining pudding.
- Finish by spreading the whipped topping over the top layer of pudding.
- Cover and refrigerate for at least 2 hours before serving to allow the flavors to meld.
Fresh out of the fridge, this banana pudding is creamy with a delightful contrast of textures from the soft bananas and crunchy cookies. Try serving it in individual cups for a fun twist at your next gathering.
Microwave Chocolate Fudge
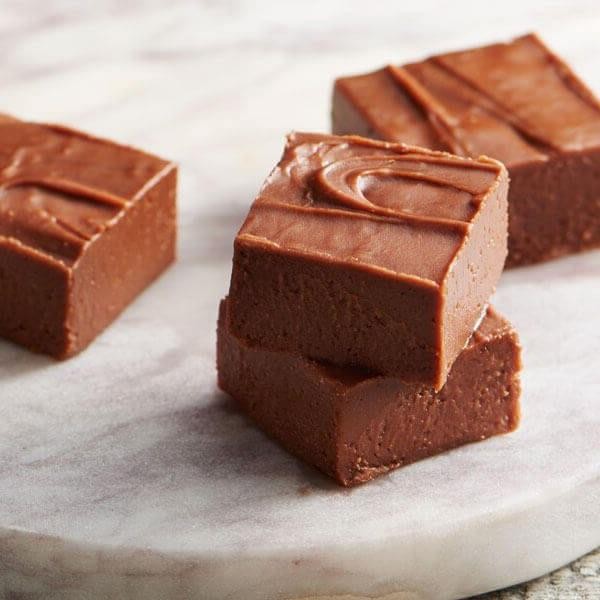
Did you know you can whip up a decadent dessert in minutes with just a few ingredients? This microwave chocolate fudge is your go-to for a quick sweet fix, no fancy equipment needed.
Ingredients
- For the fudge:
- 3 cups semi-sweet chocolate chips
- 1 can (14 oz) sweetened condensed milk
- 4 tbsp unsalted butter
- 1 tsp vanilla extract
- A pinch of salt
Instructions
- Grab a microwave-safe bowl and toss in the chocolate chips, sweetened condensed milk, and butter.
- Microwave on high for 1 minute, then stir. If the chocolate isn’t fully melted, zap it for another 30 seconds. Tip: Avoid overheating to keep the fudge smooth.
- Stir in the vanilla extract and a pinch of salt until everything’s well combined. Tip: The salt enhances the chocolate flavor, so don’t skip it.
- Pour the mixture into a lined 8×8 inch baking dish, smoothing the top with a spatula.
- Chill in the fridge for at least 2 hours, or until set. Tip: For cleaner cuts, dip your knife in hot water before slicing.
- Once set, cut into squares and serve. Store any leftovers in an airtight container in the fridge.
This fudge is irresistibly creamy with a rich chocolate flavor that’s not too sweet. Try topping it with sea salt or crushed nuts for an extra crunch.
Vanilla Ice Cream with Berry Compote
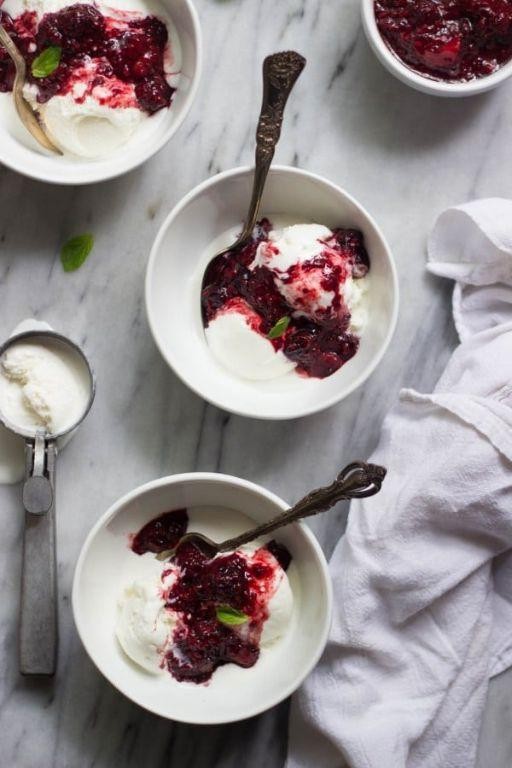
Feeling like treating yourself to something sweet and refreshing? This vanilla ice cream with berry compote is the perfect way to cool down on a hot summer day. It’s simple to make and bursting with flavors that’ll make your taste buds dance.
Ingredients
- For the vanilla ice cream:
- 2 cups heavy cream
- 1 cup whole milk
- 3/4 cup granulated sugar
- 1 tbsp vanilla extract
- For the berry compote:
- 2 cups mixed berries (strawberries, blueberries, raspberries)
- 1/4 cup granulated sugar
- 1 tbsp lemon juice
Instructions
- In a large bowl, whisk together the heavy cream, whole milk, granulated sugar, and vanilla extract until the sugar is completely dissolved.
- Pour the mixture into an ice cream maker and churn according to the manufacturer’s instructions, usually about 20-25 minutes, until it reaches a soft-serve consistency.
- Transfer the churned ice cream to a lidded container and freeze for at least 4 hours, or until firm.
- While the ice cream is freezing, make the berry compote. In a medium saucepan, combine the mixed berries, granulated sugar, and lemon juice over medium heat.
- Cook the berry mixture, stirring occasionally, for about 10 minutes, or until the berries have broken down and the sauce has thickened slightly.
- Remove the compote from heat and let it cool to room temperature before serving.
Once everything’s ready, scoop the vanilla ice cream into bowls and drizzle generously with the berry compote. The contrast between the creamy ice cream and the tangy, sweet berries is absolutely divine. For an extra touch, sprinkle some fresh mint leaves on top or serve with a side of shortbread cookies.
Speedy Chocolate Chip Cookies
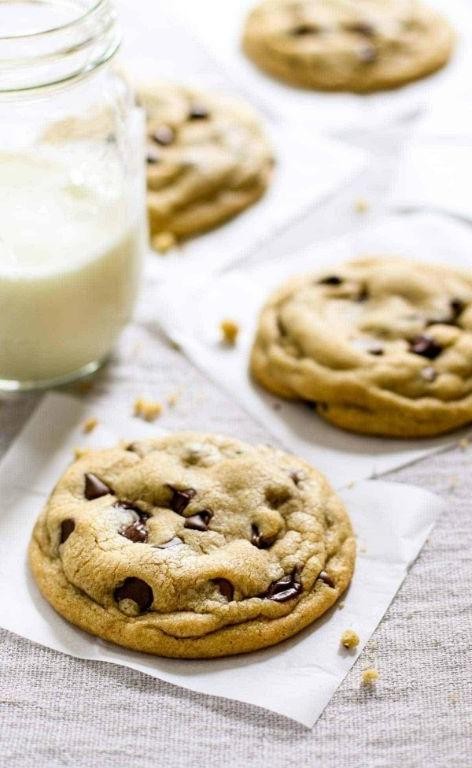
Alright, you’re craving something sweet but don’t want to spend all day in the kitchen. These speedy chocolate chip cookies are your answer—quick to make and even quicker to disappear.
Ingredients
- For the dough:
- 1 cup all-purpose flour
- 1/2 tsp baking soda
- 1/4 tsp salt
- 1/2 cup unsalted butter, melted
- 1/2 cup brown sugar
- 1/4 cup granulated sugar
- 1 tsp vanilla extract
- 1 egg
- 1 cup chocolate chips
Instructions
- Preheat your oven to 350°F (175°C) and line a baking sheet with parchment paper.
- In a medium bowl, whisk together the flour, baking soda, and salt. Tip: Sifting the flour can make your cookies lighter.
- In a large bowl, mix the melted butter, brown sugar, granulated sugar, and vanilla until smooth.
- Beat in the egg until the mixture is creamy. Tip: Room temperature eggs mix better.
- Gradually add the dry ingredients to the wet ingredients, mixing just until combined.
- Fold in the chocolate chips. Tip: Save a few chips to press on top of the cookies before baking for a prettier finish.
- Drop tablespoon-sized balls of dough onto the prepared baking sheet, spacing them about 2 inches apart.
- Bake for 10-12 minutes, or until the edges are golden but the centers are still soft.
- Let the cookies cool on the baking sheet for 5 minutes before transferring to a wire rack.
Soft in the middle with just the right amount of crunch on the edges, these cookies are perfect with a glass of cold milk. Try sandwiching a scoop of vanilla ice cream between two for an indulgent treat.
Raspberry Chocolate Mousse
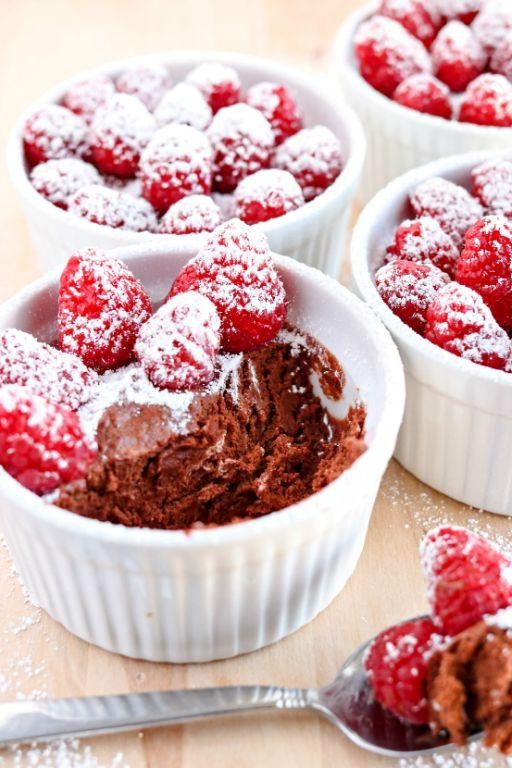
Ever find yourself craving something sweet but don’t want to spend hours in the kitchen? This Raspberry Chocolate Mousse is your answer—quick, decadent, and bursting with flavor.
Ingredients
- For the mousse:
- 1 cup heavy cream
- 1/2 cup raspberry puree
- 1/4 cup powdered sugar
- 1 tsp vanilla extract
- 1/2 cup dark chocolate, melted
- For garnish:
- Fresh raspberries
- Mint leaves
Instructions
- In a large bowl, whip the heavy cream until soft peaks form, about 3 minutes.
- Gently fold in the raspberry puree, powdered sugar, and vanilla extract until fully combined.
- Drizzle in the melted dark chocolate while continuously folding the mixture to create a marbled effect.
- Divide the mousse into serving glasses and refrigerate for at least 2 hours to set.
- Before serving, garnish with fresh raspberries and mint leaves for a pop of color and freshness.
Delightfully creamy with a perfect balance of tart and sweet, this mousse is a showstopper. Serve it in elegant glasses for a dinner party or enjoy it straight from the bowl—no judgment here.
Instant Pot Cheesecake
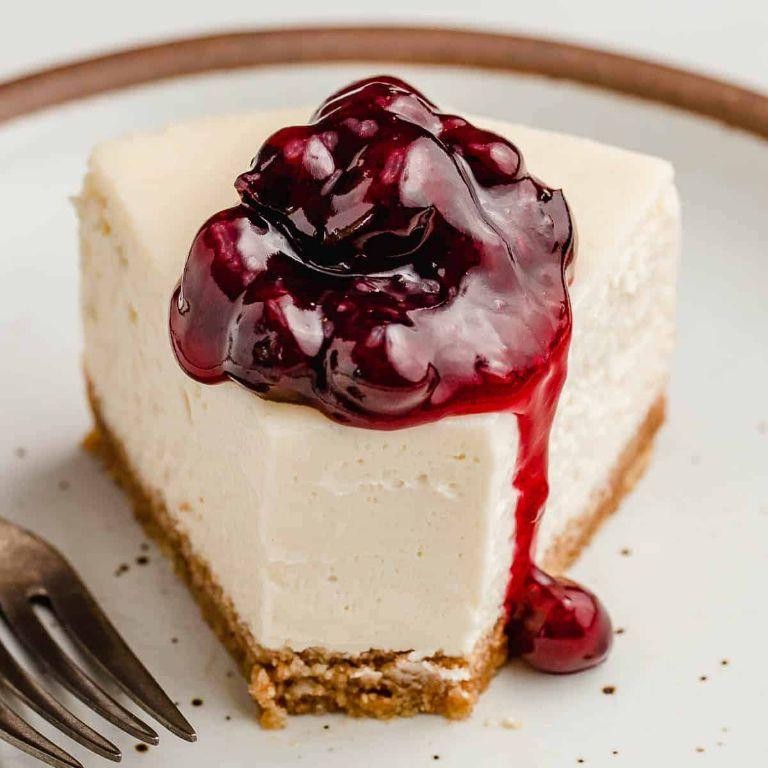
Kick back and relax because making cheesecake just got a whole lot easier with your Instant Pot. You’ll love how simple it is to whip up this creamy, dreamy dessert that’s sure to impress.
Ingredients
- For the crust:
- 1 1/2 cups graham cracker crumbs
- 1/4 cup melted butter
- 1 tbsp sugar
- For the filling:
- 16 oz cream cheese, softened
- 1/2 cup sugar
- 2 eggs
- 1 tsp vanilla extract
- 1/2 cup sour cream
Instructions
- In a medium bowl, mix the graham cracker crumbs, melted butter, and 1 tbsp sugar until well combined.
- Press the mixture firmly into the bottom of a 7-inch springform pan to form the crust. Tip: Use the bottom of a glass to press the crumbs evenly.
- In a large bowl, beat the softened cream cheese and 1/2 cup sugar until smooth and creamy.
- Add the eggs one at a time, beating well after each addition.
- Mix in the vanilla extract and sour cream until the filling is smooth. Tip: Scrape the sides of the bowl to ensure everything is fully incorporated.
- Pour the filling over the crust in the springform pan.
- Cover the pan tightly with aluminum foil to prevent water from getting in.
- Pour 1 cup of water into the Instant Pot and place the trivet inside.
- Lower the springform pan onto the trivet using a sling made of aluminum foil for easy lifting.
- Secure the lid, set the valve to sealing, and cook on high pressure for 35 minutes. Tip: Let the pressure release naturally for 10 minutes before quick releasing any remaining pressure.
- Carefully remove the cheesecake from the Instant Pot and let it cool to room temperature.
- Refrigerate for at least 4 hours, or overnight, before serving.
Delight in the creamy texture and rich flavor of this Instant Pot cheesecake. Serve it with fresh berries or a drizzle of caramel for an extra special touch.
Quick and Easy Tiramisu
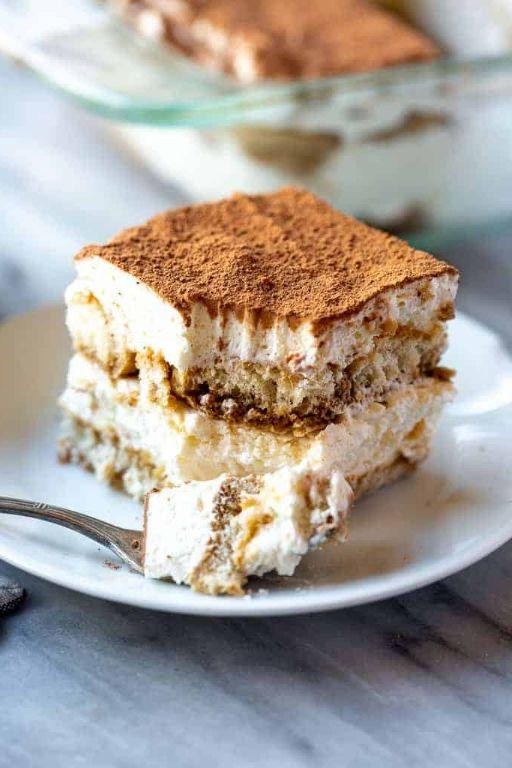
You’ve probably had those days when you crave something sweet but don’t want to spend hours in the kitchen. This quick and easy tiramisu is your go-to dessert, ready in no time with minimal fuss.
Ingredients
- For the coffee mixture:
- 1 cup strong brewed coffee, cooled
- 2 tbsp coffee liqueur (optional)
- For the cream layer:
- 1 1/2 cups mascarpone cheese
- 3/4 cup heavy cream
- 1/2 cup granulated sugar
- 1 tsp vanilla extract
- For assembly:
- 24 ladyfingers
- 2 tbsp cocoa powder, for dusting
Instructions
- In a shallow dish, mix the cooled coffee and coffee liqueur. Set aside.
- In a large bowl, beat the mascarpone cheese, heavy cream, sugar, and vanilla extract until smooth and peaks form. Tip: Ensure the mascarpone is at room temperature for easier mixing.
- Quickly dip each ladyfinger into the coffee mixture, one at a time, and layer them in the bottom of an 8×8 inch dish. Tip: Don’t soak the ladyfingers too long, or they’ll fall apart.
- Spread half of the cream mixture over the ladyfingers.
- Repeat the layers with the remaining ladyfingers and cream mixture.
- Cover and refrigerate for at least 4 hours, or overnight for best results. Tip: The longer it chills, the more the flavors meld together.
- Before serving, dust the top with cocoa powder.
Mmm, this tiramisu is creamy with just the right coffee kick. Serve it chilled with a sprinkle of cocoa or a drizzle of chocolate sauce for an extra indulgent treat.
Simple Strawberry Shortcake
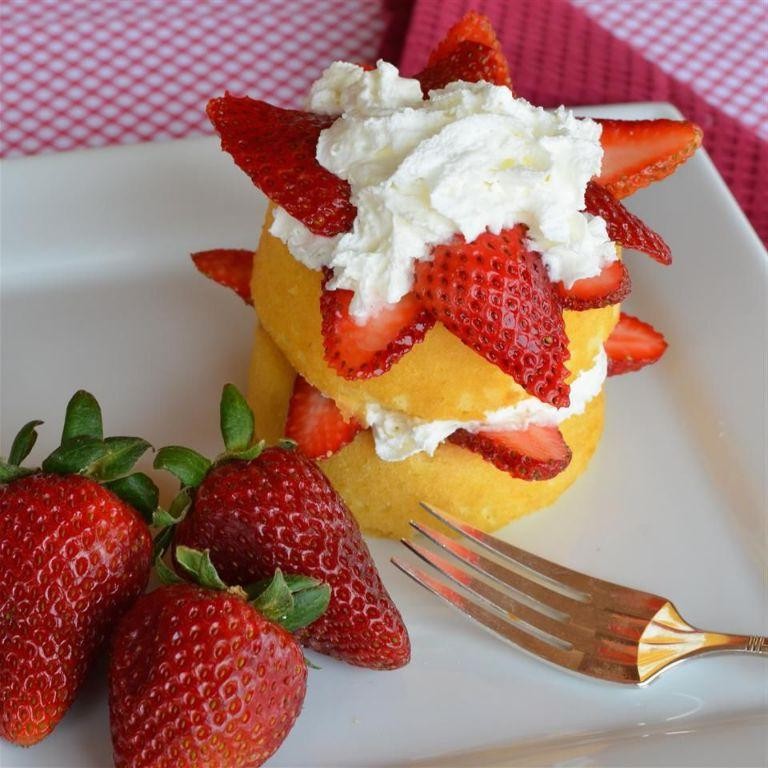
Let’s dive into making a Simple Strawberry Shortcake, a classic dessert that’s as delightful to make as it is to eat. You’ll love how the fresh strawberries and fluffy cake come together for a perfect summer treat.
Ingredients
- For the shortcake: 2 cups all-purpose flour, 1/4 cup granulated sugar, 1 tbsp baking powder, 1/2 tsp salt, 1/2 cup unsalted butter (cold and cubed), 2/3 cup whole milk
- For the strawberries: 1 lb fresh strawberries (hulled and sliced), 1/4 cup granulated sugar
- For the whipped cream: 1 cup heavy cream, 2 tbsp powdered sugar, 1 tsp vanilla extract
Instructions
- Preheat your oven to 425°F and line a baking sheet with parchment paper.
- In a large bowl, whisk together the flour, sugar, baking powder, and salt for the shortcake.
- Add the cold, cubed butter to the dry ingredients. Use your fingers or a pastry cutter to blend until the mixture resembles coarse crumbs.
- Pour in the milk and stir just until the dough comes together. Tip: Don’t overmix to keep the shortcake tender.
- Turn the dough onto a floured surface, gently pat it into a 1-inch thick rectangle, and cut into 6 squares. Place on the prepared baking sheet.
- Bake for 12-15 minutes or until golden brown. Let cool on a wire rack.
- While the shortcakes bake, mix the sliced strawberries with sugar in a bowl. Let sit for at least 10 minutes to macerate.
- For the whipped cream, beat the heavy cream, powdered sugar, and vanilla extract until stiff peaks form. Tip: Chill your bowl and beaters for quicker whipping.
- Split the cooled shortcakes in half. Layer the bottom halves with strawberries and their juices, then a dollop of whipped cream, and top with the other half.
Great job! The shortcakes are buttery and crisp, while the strawberries add a juicy sweetness. Try serving them with a drizzle of chocolate sauce for an extra indulgent twist.
5-Ingredient Nutella Brownies

Deliciously easy and irresistibly chocolatey, these 5-Ingredient Nutella Brownies are your next go-to dessert. You won’t believe how simple they are to whip up, and the result? Pure magic.
Ingredients
- For the brownies:
- 1 cup Nutella
- 2 large eggs
- 1/2 cup all-purpose flour
- For the topping:
- 1/2 cup chopped hazelnuts
- 1/4 cup mini chocolate chips
Instructions
- Preheat your oven to 350°F (175°C) and line an 8×8 inch baking pan with parchment paper, leaving some overhang for easy removal.
- In a medium bowl, whisk together the Nutella and eggs until smooth. Tip: Make sure the Nutella is at room temperature for easier mixing.
- Gently fold in the flour until just combined. Be careful not to overmix to keep the brownies fudgy.
- Pour the batter into the prepared pan, spreading it evenly with a spatula.
- Sprinkle the chopped hazelnuts and mini chocolate chips evenly over the top. Tip: Lightly toast the hazelnuts beforehand for extra flavor.
- Bake for 20-25 minutes, or until the edges are set but the center is still slightly soft. Tip: A toothpick inserted into the center should come out with a few moist crumbs.
- Let the brownies cool completely in the pan before slicing into squares.
These brownies are wonderfully fudgy with a crackly top, packed with Nutella flavor in every bite. Serve them warm with a scoop of vanilla ice cream for an indulgent treat.
Fast Apple Crisp
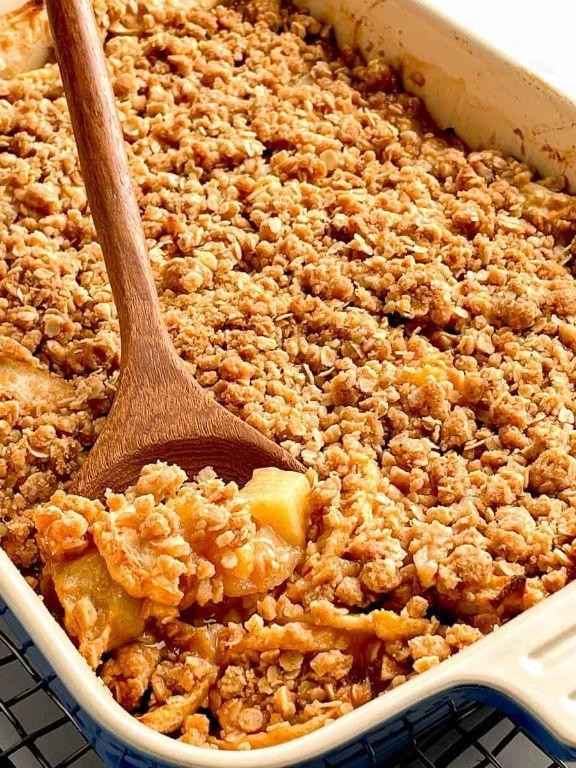
Wondering what to do with those apples sitting on your counter? This fast apple crisp is your answer—quick, delicious, and perfect for any day of the week.
Ingredients
- For the filling:
- 4 cups thinly sliced apples
- 1/2 cup granulated sugar
- 1 tbsp lemon juice
- 1 tsp ground cinnamon
- For the topping:
- 1 cup old-fashioned oats
- 1/2 cup all-purpose flour
- 1/2 cup packed brown sugar
- 1/2 tsp baking powder
- 1/4 tsp salt
- 1/2 cup unsalted butter, melted
Instructions
- Preheat your oven to 375°F (190°C). Grease an 8-inch square baking dish lightly.
- In a large bowl, mix the sliced apples, granulated sugar, lemon juice, and cinnamon until the apples are evenly coated. Tip: Use a mix of apple varieties for a more complex flavor.
- Spread the apple mixture evenly in the prepared baking dish.
- In another bowl, combine the oats, flour, brown sugar, baking powder, and salt. Stir in the melted butter until the mixture is crumbly. Tip: For extra crunch, add a handful of chopped nuts to the topping.
- Sprinkle the topping evenly over the apples. Tip: Don’t press down the topping—it crisps up better when left loose.
- Bake for 30-35 minutes, or until the topping is golden brown and the apples are bubbly.
Very few desserts are as comforting as a warm apple crisp. The juicy apples and crispy topping make it irresistible. Serve it with a scoop of vanilla ice cream for an extra special treat.
Easy Oreo Truffles

So, you’re craving something sweet but don’t want to spend hours in the kitchen? These Easy Oreo Truffles are your answer. They’re no-bake, require just a few ingredients, and are ridiculously delicious.
Ingredients
- For the truffles:
- 1 package (14.3 oz) Oreo cookies
- 1 package (8 oz) cream cheese, softened
- For the coating:
- 2 cups semi-sweet chocolate chips
- 1 tbsp coconut oil
Instructions
- Place the Oreo cookies in a food processor and pulse until you have fine crumbs.
- Transfer the crumbs to a large bowl and add the softened cream cheese. Mix until well combined.
- Roll the mixture into 1-inch balls and place them on a baking sheet lined with parchment paper. Freeze for 30 minutes to firm up.
- In a microwave-safe bowl, combine the chocolate chips and coconut oil. Microwave in 30-second intervals, stirring in between, until fully melted.
- Dip each Oreo ball into the melted chocolate, using a fork to let the excess drip off. Return to the parchment paper.
- Once all truffles are coated, refrigerate for at least 1 hour to set the chocolate.
Done! These truffles are creamy, chocolatey, and have that signature Oreo crunch. Try rolling them in crushed Oreos or drizzling with white chocolate for extra flair.
Quick Blueberry Cobbler
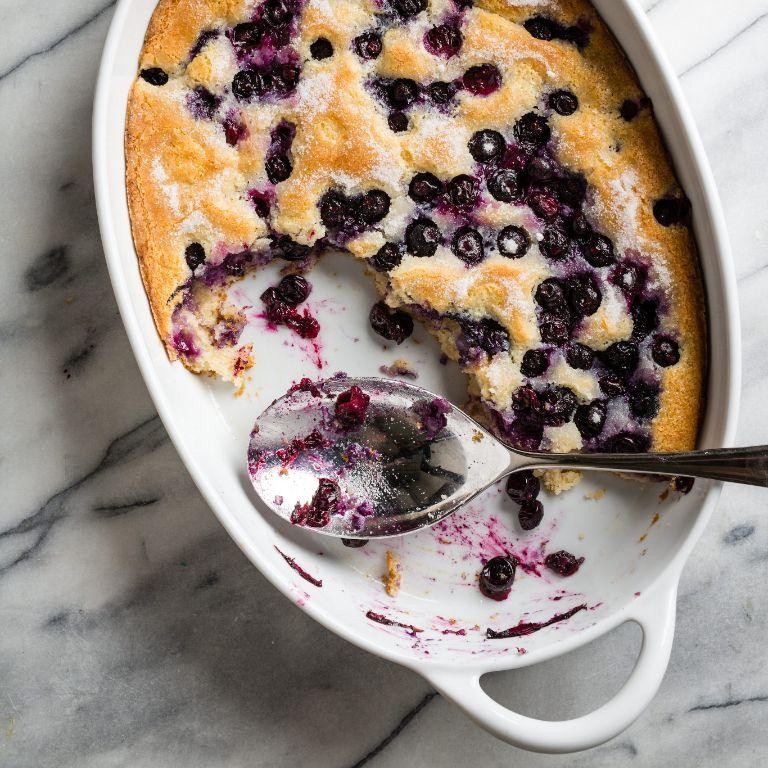
Let’s face it, you’re craving something sweet but don’t want to spend hours in the kitchen. This quick blueberry cobbler is your answer—easy, delicious, and ready in no time.
Ingredients
- For the filling:
- 4 cups fresh blueberries
- 1/2 cup granulated sugar
- 1 tbsp lemon juice
- 1 tsp vanilla extract
- For the topping:
- 1 cup all-purpose flour
- 1/2 cup granulated sugar
- 1 tsp baking powder
- 1/2 tsp salt
- 1/2 cup milk
- 1/4 cup unsalted butter, melted
Instructions
- Preheat your oven to 375°F (190°C).
- In a large bowl, mix the blueberries, 1/2 cup sugar, lemon juice, and vanilla extract until well combined. Tip: If your blueberries are tart, you can add an extra tablespoon of sugar.
- Pour the blueberry mixture into a 9-inch baking dish.
- In another bowl, whisk together the flour, 1/2 cup sugar, baking powder, and salt.
- Stir in the milk and melted butter into the dry ingredients until just combined. Tip: Don’t overmix; a few lumps are okay for a tender topping.
- Drop spoonfuls of the batter over the blueberry mixture, covering as much as possible.
- Bake for 35-40 minutes, or until the topping is golden and the filling is bubbly. Tip: Place a baking sheet underneath to catch any spills.
Fresh out of the oven, this cobbler boasts a juicy blueberry filling with a golden, cake-like topping. Serve it warm with a scoop of vanilla ice cream for the ultimate comfort dessert.
Microwave Peanut Brittle

Zesty and quick, this microwave peanut brittle is your go-to when you’re craving something sweet and crunchy without the fuss. You’ll love how easy it is to whip up, and the payoff is huge—perfect for gifting or keeping all to yourself.
Ingredients
- For the brittle:
- 1 cup granulated sugar
- 1/2 cup light corn syrup
- 1 cup salted peanuts
- 1 tbsp butter
- 1 tsp vanilla extract
- 1 tsp baking soda
Instructions
- In a microwave-safe bowl, mix 1 cup granulated sugar and 1/2 cup light corn syrup. Microwave on high for 4 minutes.
- Carefully remove the bowl (it will be hot) and stir in 1 cup salted peanuts. Microwave for another 3 minutes.
- Add 1 tbsp butter and 1 tsp vanilla extract to the mixture, stirring well. Microwave for 1 more minute.
- Quickly stir in 1 tsp baking soda until the mixture becomes light and foamy.
- Immediately pour the mixture onto a greased baking sheet, spreading it thinly with a spatula.
- Let the brittle cool completely at room temperature, about 1 hour, then break into pieces.
Out of the oven, this peanut brittle is irresistibly crunchy with a perfect balance of sweet and salty. Try crumbling it over ice cream for a decadent twist or pack it in pretty jars for homemade holiday gifts.
Simple Chocolate Covered Strawberries

Easy to make and even easier to love, these chocolate-covered strawberries are the perfect blend of sweet and fresh. You’ll love how they turn a simple fruit into a decadent treat with just a few ingredients.
Ingredients
- For the strawberries:
- 1 pound fresh strawberries, washed and dried thoroughly
- For the chocolate coating:
- 1 cup semi-sweet chocolate chips
- 1 tablespoon coconut oil
Instructions
- Line a baking sheet with parchment paper and set aside.
- In a microwave-safe bowl, combine the chocolate chips and coconut oil.
- Microwave the mixture in 30-second intervals, stirring after each, until completely melted and smooth. Tip: Avoid overheating to prevent the chocolate from seizing.
- Hold a strawberry by the stem and dip it into the melted chocolate, twisting to coat evenly.
- Allow any excess chocolate to drip off, then place the strawberry on the prepared baking sheet. Tip: For a neater finish, use a spoon to help coat the strawberry evenly.
- Repeat with the remaining strawberries.
- Place the baking sheet in the refrigerator for at least 30 minutes, or until the chocolate is set. Tip: For added flair, drizzle with white chocolate or sprinkle with chopped nuts before the chocolate sets.
Zesty and fresh, these strawberries are a hit at any gathering. The chocolate shell cracks delightfully with each bite, revealing the juicy berry inside. Try serving them on a stick for a fun, popsicle-style treat.
Rapid Rice Pudding

Even if you’re short on time, this Rapid Rice Pudding is your ticket to a comforting dessert. You’ll love how simple it is to whip up with just a few pantry staples.
Ingredients
- For the pudding:
- 1 cup white rice
- 2 cups water
- 1/2 tsp salt
- For the creamy mixture:
- 2 cups whole milk
- 1/2 cup sugar
- 1 tsp vanilla extract
- 1/2 tsp cinnamon
Instructions
- Rinse the white rice under cold water until the water runs clear.
- In a medium saucepan, combine the rinsed rice, water, and salt. Bring to a boil over high heat.
- Once boiling, reduce the heat to low, cover, and simmer for 15 minutes, or until the water is absorbed and the rice is tender.
- Tip: Stir the rice occasionally to prevent sticking.
- Add the whole milk, sugar, vanilla extract, and cinnamon to the cooked rice. Stir well to combine.
- Cook over medium heat, stirring frequently, for 10 minutes, or until the mixture thickens to your desired consistency.
- Tip: For a thicker pudding, let it simmer a few minutes longer.
- Remove from heat and let it sit for 5 minutes to cool slightly before serving.
- Tip: Sprinkle a little extra cinnamon on top for a beautiful finish.
Fluffy and creamy, this Rapid Rice Pudding is a dream with its subtle sweetness and hint of cinnamon. Try serving it warm with a drizzle of honey or a dollop of whipped cream for an extra treat.
Easy Pumpkin Pie Dip
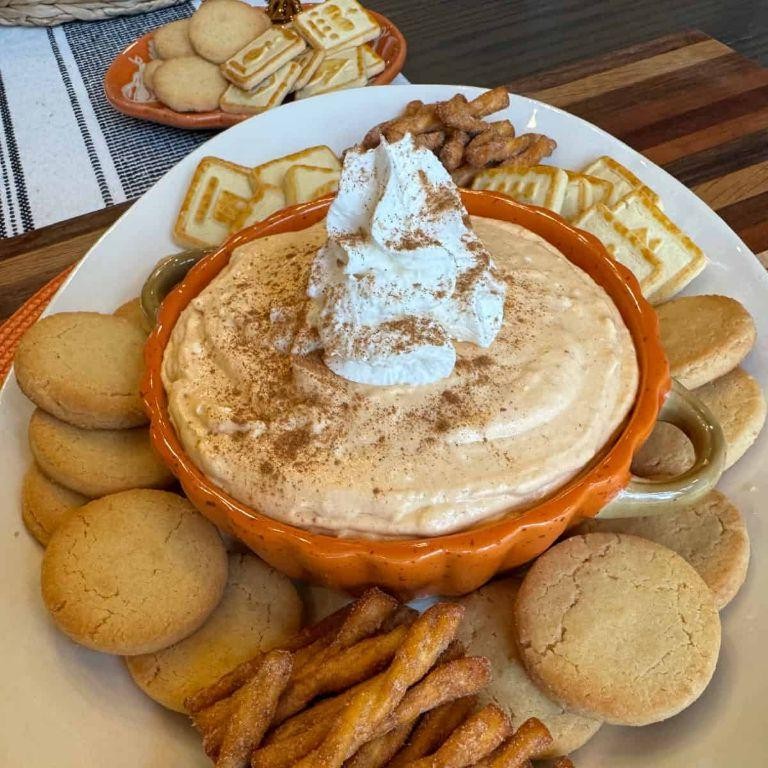
This pumpkin pie dip is your go-to for a quick, delicious treat that screams fall. You’ll love how simple it is to whip up, and it’s perfect for any gathering or just a cozy night in.
Ingredients
- For the dip:
- 1 cup canned pumpkin puree
- 8 oz cream cheese, softened
- 1/2 cup brown sugar
- 1/4 cup granulated sugar
- 1 tsp vanilla extract
- 1 tsp pumpkin pie spice
- 1/2 tsp cinnamon
- For serving:
- Graham crackers
- Sliced apples
Instructions
- In a large mixing bowl, combine the pumpkin puree and softened cream cheese until smooth. Tip: Make sure the cream cheese is at room temperature to avoid lumps.
- Add the brown sugar, granulated sugar, vanilla extract, pumpkin pie spice, and cinnamon to the bowl. Mix until all ingredients are well incorporated and the mixture is creamy. Tip: For a smoother texture, use a hand mixer on low speed.
- Cover the bowl with plastic wrap and refrigerate for at least 1 hour before serving. Tip: Chilling the dip allows the flavors to meld together beautifully.
- Serve the dip chilled with graham crackers and sliced apples on the side for dipping.
Here’s the scoop: this dip is creamy, spiced just right, and pairs wonderfully with the crunch of graham crackers or the freshness of apple slices. Try it as a spread on toast for a breakfast twist!
Quick Cherry Pie Bombs

Oh, you’re going to love these Quick Cherry Pie Bombs! They’re the perfect mix of sweet, tart, and oh-so-easy to make. Imagine biting into a crispy, buttery crust with a burst of cherry filling—yes, it’s as good as it sounds.
Ingredients
- For the crust:
- 2 cups all-purpose flour
- 1/2 cup unsalted butter, cold and cubed
- 1/4 cup granulated sugar
- 1/4 tsp salt
- 4-6 tbsp ice water
- For the filling:
- 1 cup cherry pie filling
- 1 tbsp lemon juice
- For finishing:
- 1 egg, beaten
- 2 tbsp granulated sugar, for sprinkling
Instructions
- Preheat your oven to 375°F (190°C) and line a baking sheet with parchment paper.
- In a large bowl, mix the flour, sugar, and salt for the crust. Tip: Keep the butter cold for a flakier crust.
- Add the cubed butter to the flour mixture. Use your fingers or a pastry cutter to blend until the mixture resembles coarse crumbs.
- Gradually add ice water, one tablespoon at a time, until the dough comes together. Tip: Don’t overwork the dough to keep it tender.
- Roll the dough into 12 equal balls and flatten each into a small disc on the prepared baking sheet.
- In a small bowl, mix the cherry pie filling with lemon juice. Spoon a teaspoon of filling onto the center of each dough disc.
- Fold the edges of the dough over the filling, pinching to seal. Tip: A little water on your fingers can help seal the edges if they’re not sticking.
- Brush the tops of the pie bombs with beaten egg and sprinkle with sugar.
- Bake for 20-25 minutes, or until golden brown. Let cool for 5 minutes before serving.
Now, these cherry pie bombs are best enjoyed warm, with the filling just oozing out. Serve them with a scoop of vanilla ice cream for an extra indulgent treat—trust me, it’s a game-changer.
Speedy S’mores Dip
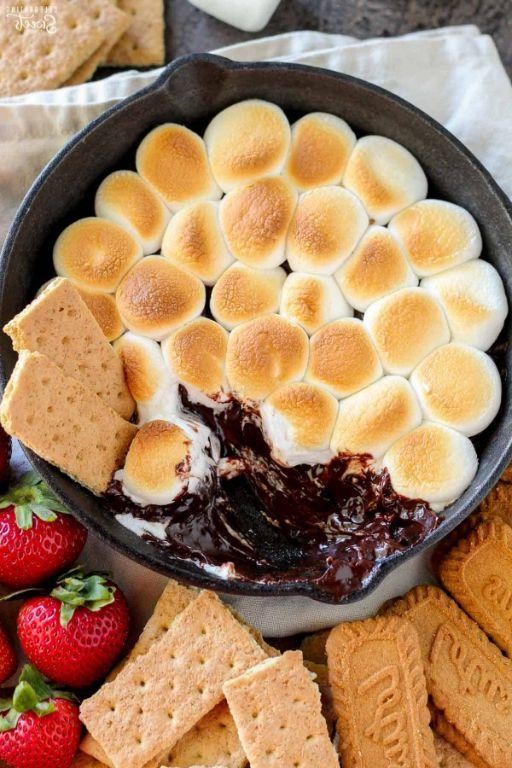
Zesty and quick, this Speedy S’mores Dip is your go-to for a sweet treat that screams summer. You’ll love how simple it is to whip up, especially when those s’mores cravings hit hard.
Ingredients
- For the dip:
- 1 cup semi-sweet chocolate chips
- 1/2 cup heavy cream
- 1 tsp vanilla extract
- For serving:
- 1 cup mini marshmallows
- Graham crackers, for dipping
Instructions
- In a microwave-safe bowl, combine the chocolate chips and heavy cream.
- Microwave on high for 1 minute, then stir until smooth. If needed, microwave in 15-second intervals until fully melted.
- Stir in the vanilla extract until well combined.
- Pour the chocolate mixture into a serving dish.
- Top with mini marshmallows, covering the chocolate layer evenly.
- Using a kitchen torch, lightly toast the marshmallows until golden brown. Watch closely to avoid burning.
- Serve immediately with graham crackers for dipping.
Ultra-creamy with a hint of vanilla, this dip pairs perfectly with the crunch of graham crackers. Try serving it with fruit slices for a fun twist!
Simple Coconut Macaroons
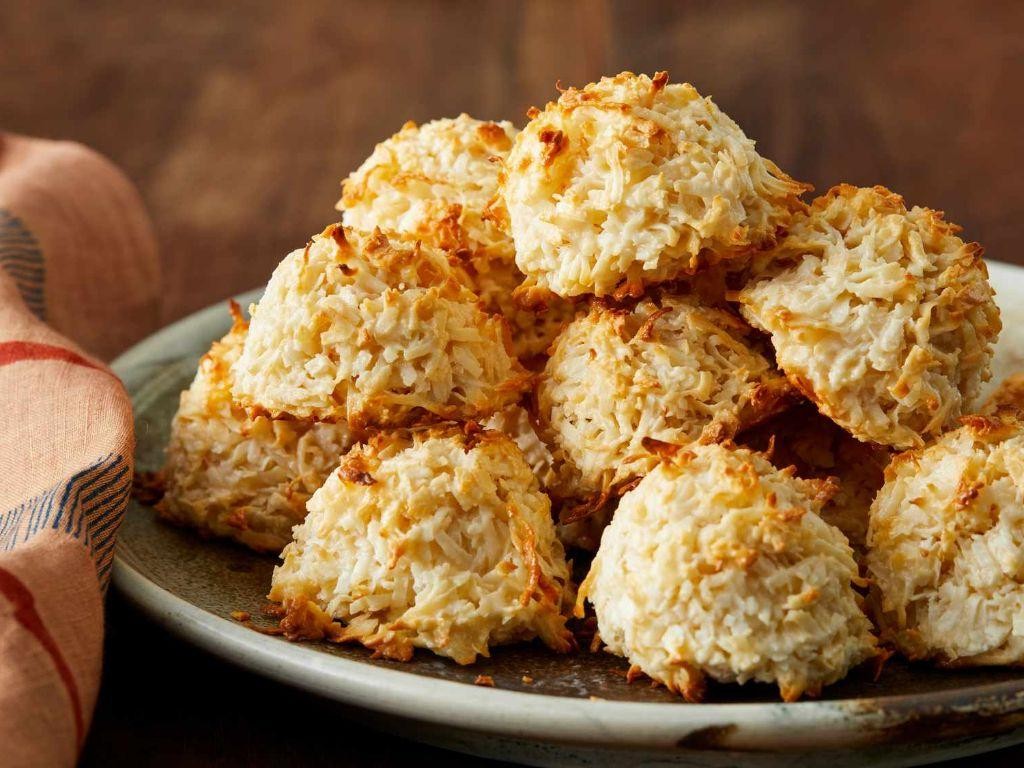
Very few treats strike the perfect balance between simplicity and indulgence like these coconut macaroons. You’ll love how easy they are to whip up, especially when a sweet craving hits.
Ingredients
- For the macaroons:
- 14 oz sweetened shredded coconut
- 2/3 cup granulated sugar
- 1/4 cup all-purpose flour
- 1/4 tsp salt
- 4 large egg whites
- 1 tsp vanilla extract
Instructions
- Preheat your oven to 325°F and line a baking sheet with parchment paper.
- In a large bowl, mix together the shredded coconut, sugar, flour, and salt until well combined.
- Tip: Make sure your egg whites are at room temperature for easier mixing.
- Add the egg whites and vanilla extract to the coconut mixture, stirring until everything is evenly moistened.
- Tip: If the mixture seems too dry, you can add an extra egg white, but do so one at a time to avoid making it too wet.
- Using a cookie scoop or your hands, form the mixture into small mounds and place them on the prepared baking sheet.
- Tip: For uniform macaroons, use a tablespoon measure to scoop the mixture.
- Bake for 20-25 minutes, or until the macaroons are golden brown on the edges.
- Let them cool on the baking sheet for 5 minutes before transferring to a wire rack to cool completely.
Zesty and sweet, these macaroons have a crispy exterior with a chewy center. Try drizzling them with melted chocolate for an extra decadent touch.
Fast Fruit Salad with Honey Drizzle
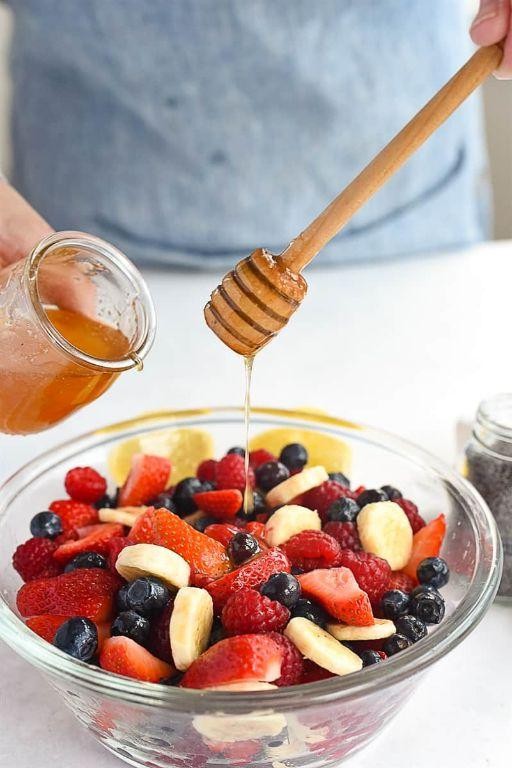
Wondering what to whip up when you’re short on time but craving something sweet and refreshing? This fast fruit salad with a honey drizzle is your go-to. It’s as easy as chopping, mixing, and drizzling—perfect for a quick snack or a light dessert.
Ingredients
- For the salad:
- 2 cups mixed berries (strawberries, blueberries, raspberries)
- 1 banana, sliced
- 1 apple, diced
- For the drizzle:
- 2 tbsp honey
- 1 tbsp lemon juice
Instructions
- Wash all the fruits under cold running water.
- Pat the fruits dry with a clean towel to remove excess water.
- Slice the strawberries and banana, and dice the apple into bite-sized pieces.
- In a large bowl, gently mix the berries, banana slices, and diced apple.
- In a small bowl, whisk together the honey and lemon juice until well combined.
- Drizzle the honey mixture over the fruit salad just before serving to keep the fruits fresh.
- Toss the salad lightly to ensure all the fruits are coated with the honey drizzle.
Unbelievably simple, right? The combination of juicy berries, crisp apple, and creamy banana with the sweet and tangy honey drizzle creates a delightful contrast. Serve it in a hollowed-out watermelon for a fun, summery presentation.
Conclusion
Out of all the sweet treats out there, these 25 quick dessert recipes stand out for their simplicity and deliciousness. Perfect for busy home cooks in North America, they promise to satisfy any sweet tooth with minimal effort. We’d love to hear which recipes became your favorites—drop us a comment below! And if you enjoyed this roundup, don’t forget to share the love on Pinterest. Happy baking!