Dive into the vibrant world of preserved lemons, where each recipe is a passport to flavor-packed meals that’ll brighten your table and tantalize your taste buds. Whether you’re a seasoned chef or a curious home cook, our roundup of 20 Exquisite Preserved Lemons Recipes promises to inspire your next culinary adventure. Get ready to transform simple ingredients into extraordinary dishes—let’s zest up your cooking game!
Moroccan Chicken with Preserved Lemons and Olives
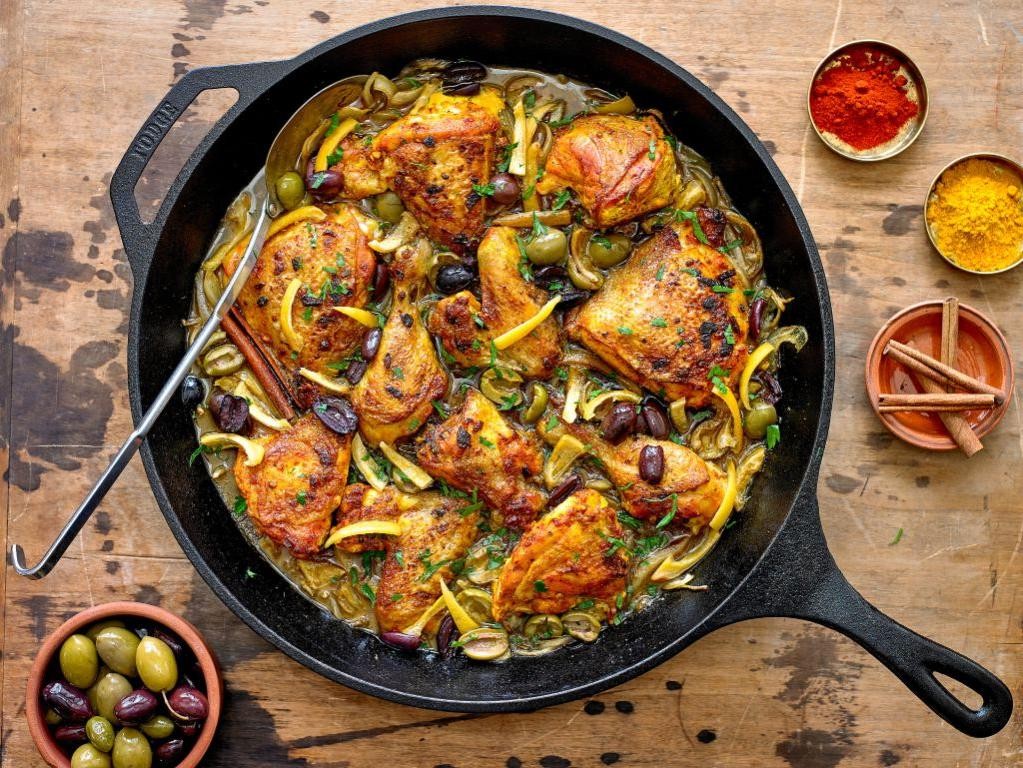
This Moroccan Chicken with Preserved Lemons and Olives is a dish that transports me straight to the bustling markets of Marrakech every time I make it. The combination of tangy lemons, briny olives, and aromatic spices creates a flavor profile that’s both exotic and comforting.
Ingredients
- Chicken thighs – 4
- Preserved lemons – 2, quartered
- Green olives – 1 cup
- Garlic – 4 cloves, minced
- Ginger – 1 tbsp, grated
- Cumin – 1 tsp
- Paprika – 1 tsp
- Olive oil – 2 tbsp
- Chicken stock – 1 cup
Instructions
- Heat olive oil in a large skillet over medium-high heat until shimmering, about 2 minutes.
- Season chicken thighs with salt, then sear in the skillet for 5 minutes per side until golden brown. Tip: Don’t overcrowd the pan to ensure a good sear.
- Remove chicken and set aside. In the same skillet, add garlic and ginger, sautéing for 1 minute until fragrant.
- Stir in cumin and paprika, then return chicken to the skillet.
- Add preserved lemons, olives, and chicken stock, bringing to a simmer. Tip: The preserved lemons are salty, so taste before adding extra salt.
- Cover and simmer on low heat for 25 minutes, until chicken is cooked through. Tip: The sauce should thicken slightly; if it’s too thin, uncover and simmer for an additional 5 minutes.
- Serve hot, garnished with additional preserved lemon slices if desired.
So there you have it—a dish that’s as vibrant in color as it is in flavor. The chicken turns out incredibly tender, soaking up all the lemony, spicy goodness, while the olives add a perfect salty bite. Try serving it over a bed of couscous or with warm, crusty bread to soak up every last drop of that delicious sauce.
Preserved Lemon and Herb Roasted Potatoes
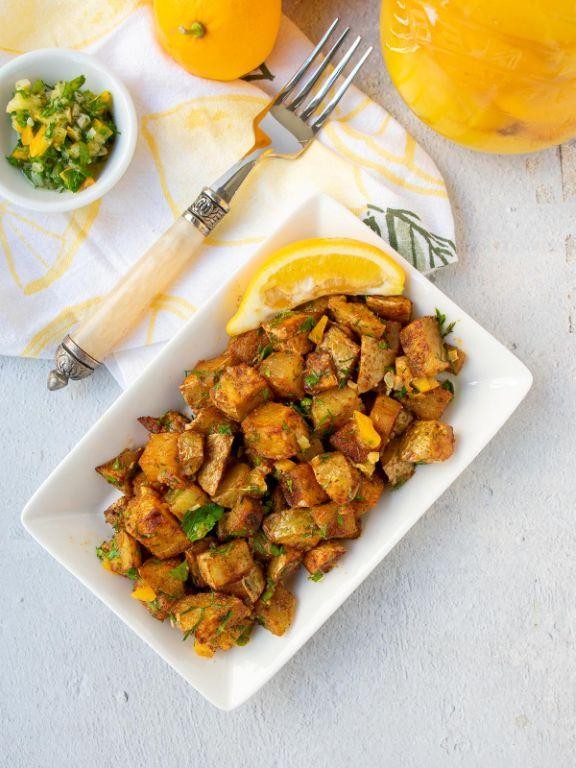
Sometimes, the simplest dishes bring the most comfort, and that’s exactly what I found when I first made these preserved lemon and herb roasted potatoes. The tangy punch of preserved lemon mixed with the earthy herbs transforms the humble potato into something truly special.
Ingredients
- Potatoes – 2 lbs
- Preserved lemon – 1, finely chopped
- Fresh rosemary – 1 tbsp, chopped
- Fresh thyme – 1 tbsp, chopped
- Olive oil – 3 tbsp
- Salt – 1 tsp
Instructions
- Preheat your oven to 400°F (200°C) to ensure it’s hot enough for roasting.
- Wash and cut the potatoes into 1-inch pieces for even cooking.
- In a large bowl, toss the potatoes with olive oil, salt, preserved lemon, rosemary, and thyme until evenly coated. Tip: For extra flavor, let the potatoes marinate in this mixture for 30 minutes before roasting.
- Spread the potatoes in a single layer on a baking sheet. Tip: Use parchment paper for easy cleanup and to prevent sticking.
- Roast in the preheated oven for 40-45 minutes, stirring halfway through, until golden and crispy. Tip: For extra crispiness, broil for the last 2-3 minutes, watching closely to avoid burning.
Best enjoyed straight from the oven, these potatoes boast a crispy exterior with a fluffy inside, all brightened by the unique flavor of preserved lemon. Try serving them alongside grilled fish or chicken for a meal that’s sure to impress.
Preserved Lemon and Garlic Hummus
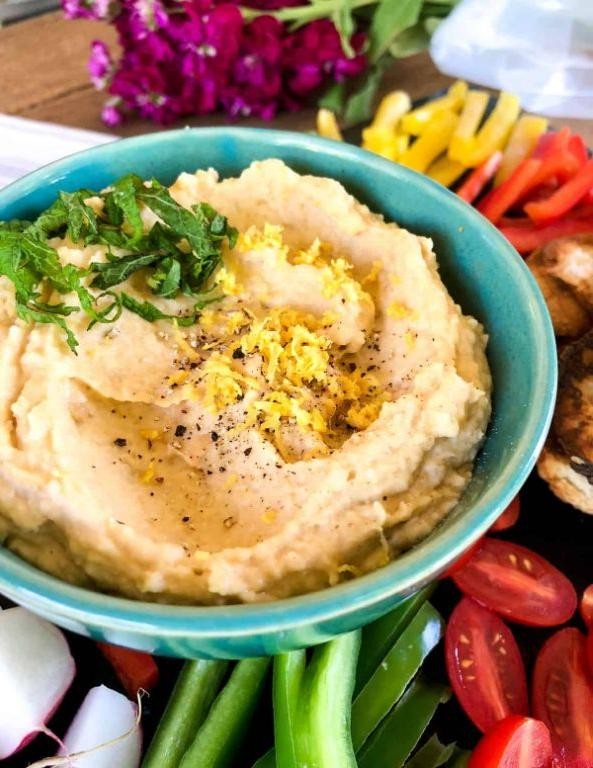
Unbelievably, the first time I tried making hummus, it was a disaster—too thick, too bland, you name it. But then I discovered the magic of preserved lemons and garlic, and let me tell you, it was a game-changer. This Preserved Lemon and Garlic Hummus is my go-to recipe now, perfect for those lazy Sunday afternoons when I want something quick yet flavorful.
Ingredients
- Chickpeas – 1 can (15 oz), drained
- Tahini – ¼ cup
- Preserved lemon – 1, peel only, chopped
- Garlic – 2 cloves, minced
- Olive oil – 2 tbsp
- Cumin – ½ tsp
- Water – 2 tbsp
Instructions
- In a food processor, combine the chickpeas, tahini, preserved lemon peel, minced garlic, and cumin.
- Process the mixture on high for 1 minute, then scrape down the sides with a spatula to ensure everything is evenly mixed.
- With the processor running, slowly drizzle in the olive oil, followed by the water, to achieve a smooth consistency. Tip: The water helps loosen the hummus without making it oily.
- Continue processing for another 2 minutes until the hummus is creamy and no chunks remain. Tip: If the hummus is too thick, add more water, 1 tbsp at a time, until desired consistency is reached.
- Taste and adjust seasoning if necessary, though the preserved lemon usually adds enough saltiness. Tip: For an extra garlic kick, add another minced clove.
Fantastically creamy with a tangy punch from the preserved lemon and a warm depth from the garlic, this hummus is a crowd-pleaser. Serve it with a drizzle of olive oil and a sprinkle of cumin on top, or get creative by using it as a spread in your next veggie wrap.
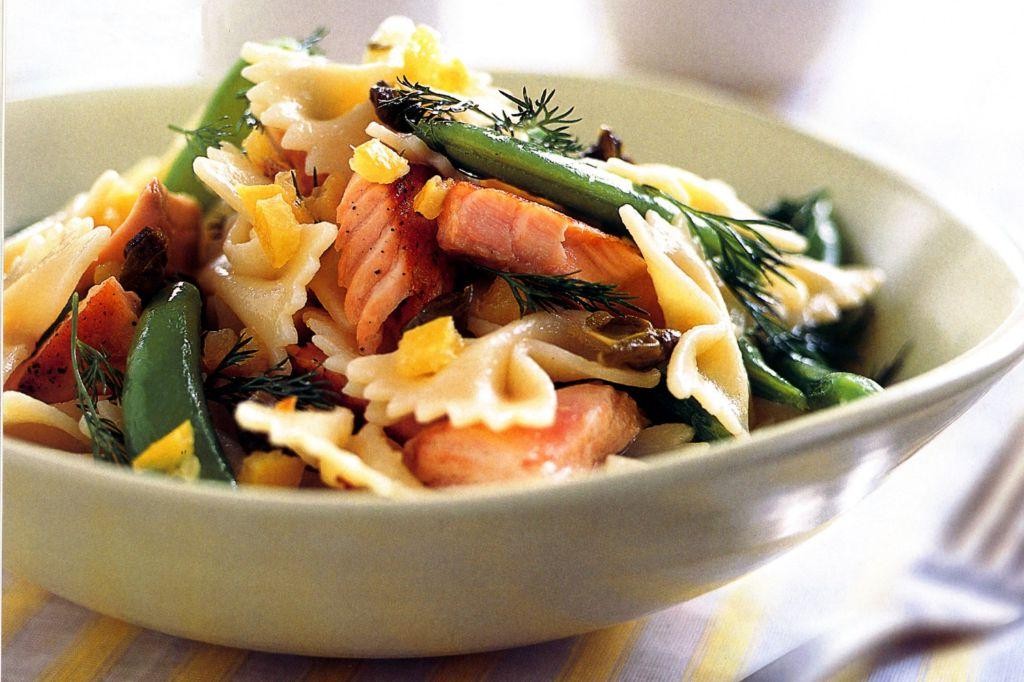
Preserved Lemon and Dill Salmon
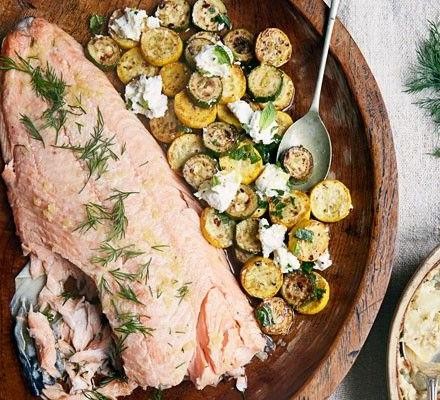
Venturing into the world of preserved lemons was a game-changer for my kitchen experiments, and this Preserved Lemon and Dill Salmon is a testament to that. It’s a dish that marries the bold, tangy flavors of preserved lemons with the fresh, herby notes of dill, creating a symphony of flavors that’s both sophisticated and surprisingly simple to make.
Ingredients
- Salmon fillets – 4 (6 oz each)
- Preserved lemons – 2 tbsp, finely chopped
- Fresh dill – 2 tbsp, chopped
- Olive oil – 1 tbsp
- Salt – ½ tsp
- Black pepper – ¼ tsp
Instructions
- Preheat your oven to 375°F (190°C) and line a baking sheet with parchment paper for easy cleanup.
- Pat the salmon fillets dry with paper towels to ensure a crispy skin, then place them skin-side down on the prepared baking sheet.
- In a small bowl, mix together the chopped preserved lemons, dill, olive oil, salt, and black pepper.
- Evenly spread the mixture over the top of each salmon fillet, pressing gently to adhere.
- Bake in the preheated oven for 12-15 minutes, or until the salmon flakes easily with a fork but is still moist inside.
- For an extra burst of flavor, let the salmon rest for 5 minutes before serving to allow the flavors to meld together beautifully.
Creating this dish is like painting with flavors; the preserved lemons add a vibrant, citrusy depth while the dill brings a light, fresh contrast. Serve it atop a bed of quinoa or with a side of roasted vegetables for a meal that’s as nutritious as it is delicious.
Preserved Lemon and Thyme Roasted Chicken
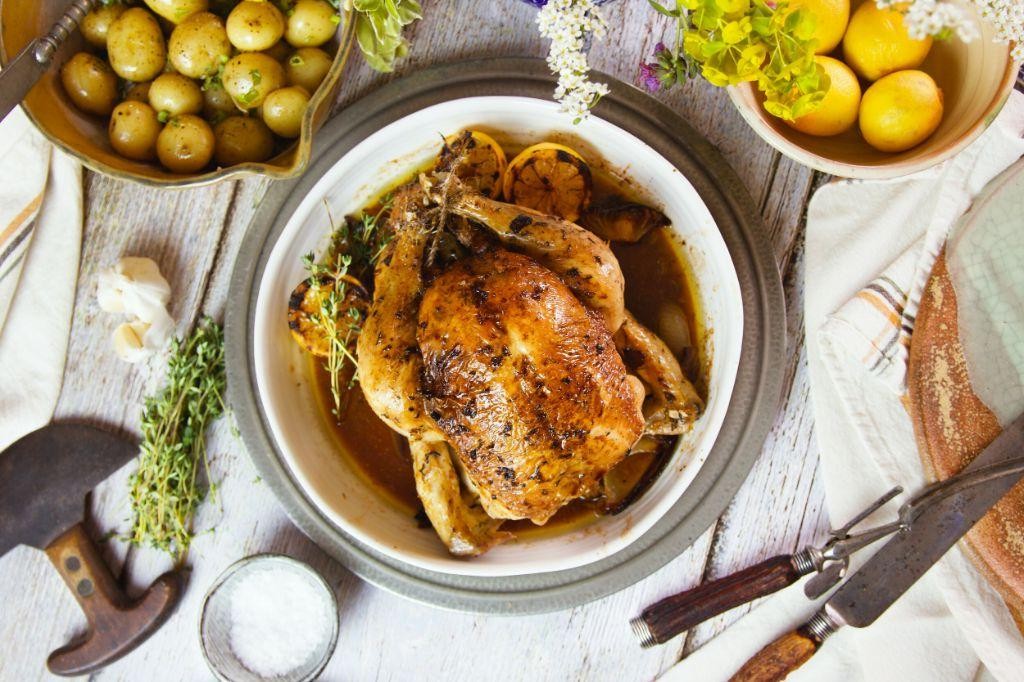
Finally, a dish that feels like a warm hug on a chilly evening—Preserved Lemon and Thyme Roasted Chicken. It’s my go-to when I want something effortlessly elegant yet deeply comforting, reminding me of the Sunday dinners my grandma used to make.
Ingredients
- Whole chicken – 1 (about 4 lbs)
- Preserved lemons – 2, quartered
- Fresh thyme – 1 tbsp
- Olive oil – 2 tbsp
- Salt – 1 tsp
- Black pepper – ½ tsp
Instructions
- Preheat your oven to 375°F (190°C). Tip: Always preheat your oven for at least 20 minutes to ensure even cooking.
- Pat the chicken dry with paper towels. This helps the skin get crispy.
- Rub the chicken all over with olive oil, then season with salt and black pepper.
- Stuff the cavity with preserved lemons and thyme. Tip: The preserved lemons add a unique tanginess, so don’t skip them!
- Place the chicken in a roasting pan, breast side up. Roast for 1 hour and 15 minutes. Tip: For golden skin, baste the chicken with its juices halfway through.
- Check for doneness by inserting a meat thermometer into the thigh; it should read 165°F (74°C).
- Let the chicken rest for 10 minutes before carving. This keeps it juicy.
With its crispy skin and succulent meat infused with the bright flavors of lemon and earthy thyme, this chicken is a showstopper. Try serving it over a bed of roasted vegetables for a complete meal that’s as beautiful as it is delicious.
Preserved Lemon and Olive Tapenade

Every time I stumble upon a jar of preserved lemons in my pantry, I’m reminded of the vibrant flavors they can bring to a dish. Today, I’m sharing my go-to Preserved Lemon and Olive Tapenade recipe, a zesty spread that’s perfect for elevating your appetizer game.
Ingredients
- Preserved lemons – ½ cup, finely chopped
- Kalamata olives – 1 cup, pitted
- Extra virgin olive oil – ¼ cup
- Garlic – 1 clove, minced
- Fresh thyme – 1 tbsp, chopped
Instructions
- In a food processor, combine the preserved lemons, Kalamata olives, minced garlic, and chopped thyme. Pulse until the mixture is coarsely chopped.
- With the processor running, slowly drizzle in the extra virgin olive oil until the tapenade reaches your desired consistency. Tip: For a smoother tapenade, process longer; for chunkier, pulse fewer times.
- Transfer the tapenade to a bowl and let it sit at room temperature for at least 30 minutes to allow the flavors to meld. Tip: This resting time is crucial for depth of flavor.
- Before serving, give the tapenade a quick stir and adjust the consistency with a little more olive oil if needed. Tip: If you’re not serving immediately, cover and refrigerate, but bring to room temperature before serving for the best taste.
Rich in flavor with a perfect balance of salty and tangy, this tapenade is a dream on crusty bread or as a bold accompaniment to grilled fish. The texture is luxuriously smooth with little bursts of olive and lemon, making every bite a delightful experience.
Preserved Lemon and Caper Pasta
Most weeknights, I’m all about simplicity in the kitchen, but that doesn’t mean sacrificing flavor. That’s where this Preserved Lemon and Caper Pasta comes in—a dish that’s as easy to make as it is delicious, with a tangy twist that’ll wake up your taste buds.
Ingredients
- Pasta – 8 oz
- Preserved lemon – 2 tbsp, finely chopped
- Capers – 2 tbsp, drained
- Garlic – 2 cloves, minced
- Olive oil – 2 tbsp
- Parmesan cheese – ¼ cup, grated
- Salt – ½ tsp
- Black pepper – ¼ tsp
Instructions
- Bring a large pot of salted water to a boil over high heat. Add the pasta and cook according to package instructions until al dente, about 8-10 minutes. Tip: Reserve ½ cup of pasta water before draining.
- While the pasta cooks, heat olive oil in a large skillet over medium heat. Add minced garlic and sauté until fragrant, about 30 seconds.
- Stir in the preserved lemon and capers, cooking for another minute to meld the flavors. Tip: The preserved lemon is salty, so taste before adding extra salt.
- Drain the pasta and add it to the skillet, tossing to coat in the sauce. If the pasta seems dry, add reserved pasta water a tablespoon at a time until desired consistency is reached.
- Remove from heat and stir in grated Parmesan cheese. Season with salt and black pepper to taste. Tip: For extra richness, finish with a drizzle of olive oil.
Absolutely vibrant with a punchy, salty tang from the preserved lemon and capers, this pasta is a weeknight hero. Serve it with a sprinkle of extra Parmesan and a side of crusty bread to soak up every last bit of sauce.
Preserved Lemon and Yogurt Cake

Remember the first time I stumbled upon the magic of preserved lemons? It was during a lazy Sunday brunch at a friend’s place, and their tangy, slightly fermented flavor completely transformed a simple dish. That’s the inspiration behind this Preserved Lemon and Yogurt Cake, a recipe that’s as much about the joy of discovery as it is about the delicious end result.
Ingredients
- Flour – 1.5 cups
- Sugar – 1 cup
- Preserved lemon – 1, finely chopped
- Yogurt – 1 cup
- Eggs – 3
- Baking powder – 1 tsp
- Salt – ½ tsp
Instructions
- Preheat your oven to 350°F (175°C) and grease a 9-inch round cake pan. Tip: For an extra non-stick guarantee, line the bottom with parchment paper.
- In a large bowl, whisk together flour, sugar, baking powder, and salt until well combined.
- In another bowl, beat the eggs until frothy, then mix in the yogurt and finely chopped preserved lemon. Tip: The finer the lemon is chopped, the more evenly its flavor will distribute through the cake.
- Gradually fold the wet ingredients into the dry ingredients until just combined. Be careful not to overmix to keep the cake light and fluffy.
- Pour the batter into the prepared pan and smooth the top with a spatula. Tip: A quick tap of the pan on the counter will help remove any air bubbles.
- Bake for 40-45 minutes, or until a toothpick inserted into the center comes out clean.
You’ll love how the preserved lemon adds a bright, complex flavor to the moist, tender crumb of this cake. Serve it with a dollop of whipped cream or a drizzle of honey for an extra special touch.
Preserved Lemon and Mint Quinoa Salad
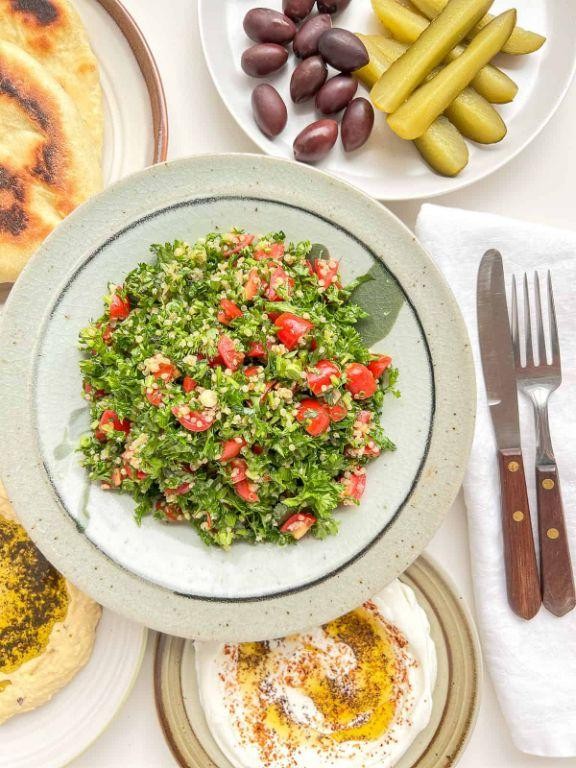
Craving something refreshing yet packed with flavor? I stumbled upon this Preserved Lemon and Mint Quinoa Salad during a lazy Sunday meal prep, and it’s been a game-changer for my lunch rotations. The tangy preserved lemons and fresh mint bring a burst of flavor that’s just irresistible.
Ingredients
- Quinoa – 1 cup
- Water – 2 cups
- Preserved lemon – 1, finely chopped
- Fresh mint leaves – ¼ cup, chopped
- Olive oil – 2 tbsp
- Salt – ½ tsp
Instructions
- Rinse the quinoa under cold water until the water runs clear to remove any bitterness.
- In a medium saucepan, combine the rinsed quinoa and water. Bring to a boil over high heat.
- Once boiling, reduce the heat to low, cover, and simmer for 15 minutes, or until the water is fully absorbed. Tip: Let it sit covered for 5 minutes off the heat for fluffier quinoa.
- Transfer the cooked quinoa to a large bowl and let it cool to room temperature.
- Add the finely chopped preserved lemon, chopped mint leaves, olive oil, and salt to the cooled quinoa.
- Toss everything together until well combined. Tip: For the best flavor, let the salad sit for 10 minutes before serving to allow the flavors to meld.
- Serve at room temperature or chilled. Tip: This salad pairs beautifully with grilled chicken or fish for a more substantial meal.
The salad has a delightful crunch from the quinoa, with the preserved lemon adding a unique tanginess that’s balanced by the freshness of the mint. Try serving it in lettuce cups for a fun, edible presentation that’s perfect for summer gatherings.
Preserved Lemon and Rosemary Focaccia
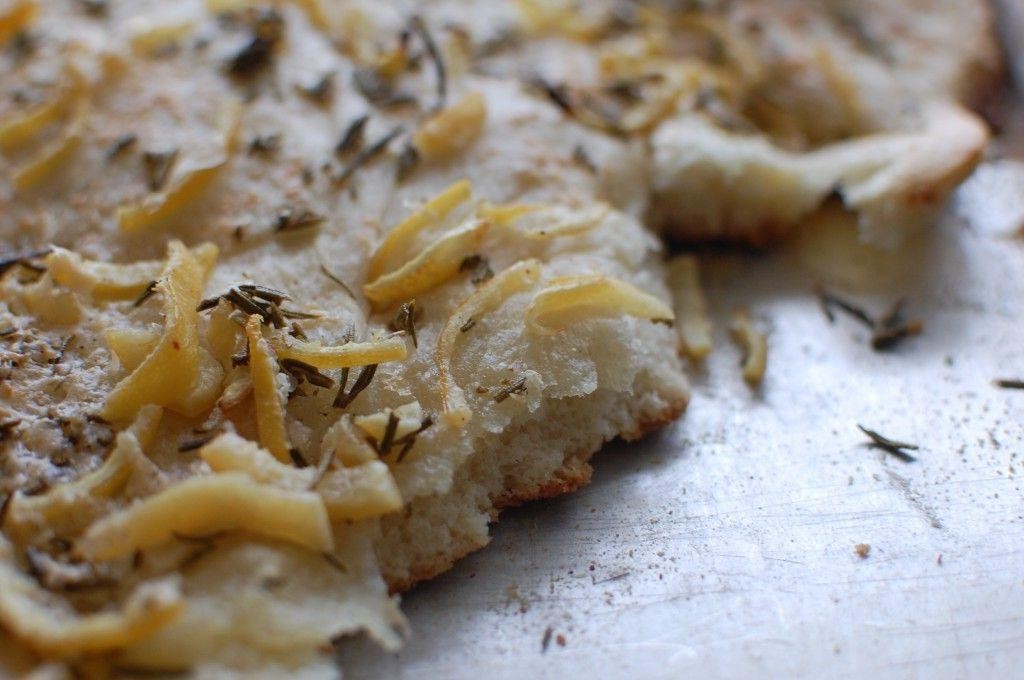
Craving something that combines the tangy zest of preserved lemons with the earthy aroma of rosemary? I stumbled upon this combination during a lazy Sunday baking spree, and let me tell you, it’s a game-changer for focaccia lovers. The process is surprisingly simple, and the result? Absolutely divine.
Ingredients
- Flour – 3 cups
- Water – 1 1/4 cups
- Salt – 1 tsp
- Yeast – 1 packet
- Preserved lemon – 1, finely chopped
- Rosemary – 2 tbsp, chopped
- Olive oil – 1/4 cup
Instructions
- In a large bowl, mix flour, water, salt, and yeast until a sticky dough forms. Tip: The dough should be wetter than usual bread dough for that perfect focaccia texture.
- Cover the bowl with a damp cloth and let it rise in a warm place for 1 hour, or until doubled in size.
- Preheat your oven to 425°F (220°C) and drizzle 2 tbsp of olive oil onto a baking sheet.
- Transfer the dough onto the oiled sheet, gently stretching it to fit. Don’t worry about being perfect; rustic is good here.
- Dimple the dough with your fingers, then sprinkle the preserved lemon and rosemary evenly over the top. Tip: The dimples help hold the toppings and create those lovely crispy edges.
- Drizzle the remaining olive oil over the top and bake for 20-25 minutes, until golden brown. Tip: For an extra crispy bottom, place the baking sheet on the lowest oven rack.
Absolutely bursting with flavor, this focaccia has a crispy exterior with a soft, airy interior. Serve it warm with a drizzle of olive oil or as a side to your favorite soup for a comforting meal.
Preserved Lemon and Almond Biscotti

Preserved lemons have a way of sneaking into my pantry every winter, and by summer, I’m always looking for creative ways to use them up. This year, I decided to pair their tangy, salty sweetness with the nutty crunch of almonds in a biscotti that’s perfect for dunking in your morning coffee or evening tea.
Ingredients
- Flour – 2 cups
- Sugar – ¾ cup
- Eggs – 2 large
- Preserved lemon – ¼ cup, finely chopped
- Almonds – ½ cup, chopped
- Baking powder – 1 tsp
- Salt – ½ tsp
Instructions
- Preheat your oven to 350°F and line a baking sheet with parchment paper.
- In a large bowl, whisk together the flour, sugar, baking powder, and salt.
- Add the eggs to the dry ingredients and mix until a dough forms. Tip: If the dough feels too sticky, add a tablespoon of flour at a time until it’s manageable.
- Fold in the preserved lemon and almonds until evenly distributed throughout the dough.
- Divide the dough in half and shape each portion into a log about 12 inches long on the prepared baking sheet. Tip: Wetting your hands slightly can help prevent the dough from sticking.
- Bake for 25 minutes, or until the logs are firm to the touch and lightly golden.
- Remove from the oven and let cool for 10 minutes. Reduce the oven temperature to 325°F.
- Using a serrated knife, slice the logs diagonally into ½-inch thick pieces. Tip: For cleaner cuts, saw gently rather than pressing down hard.
- Arrange the slices cut side down on the baking sheet and bake for another 10 minutes on each side, or until crisp and golden.
Just out of the oven, these biscotti are wonderfully crisp with a chewy center, but they’ll harden to the perfect dunking texture as they cool. The preserved lemon adds a bright, complex flavor that pairs surprisingly well with the richness of the almonds. Try serving them with a dollop of mascarpone for an extra indulgent treat.
Preserved Lemon and Ginger Tea
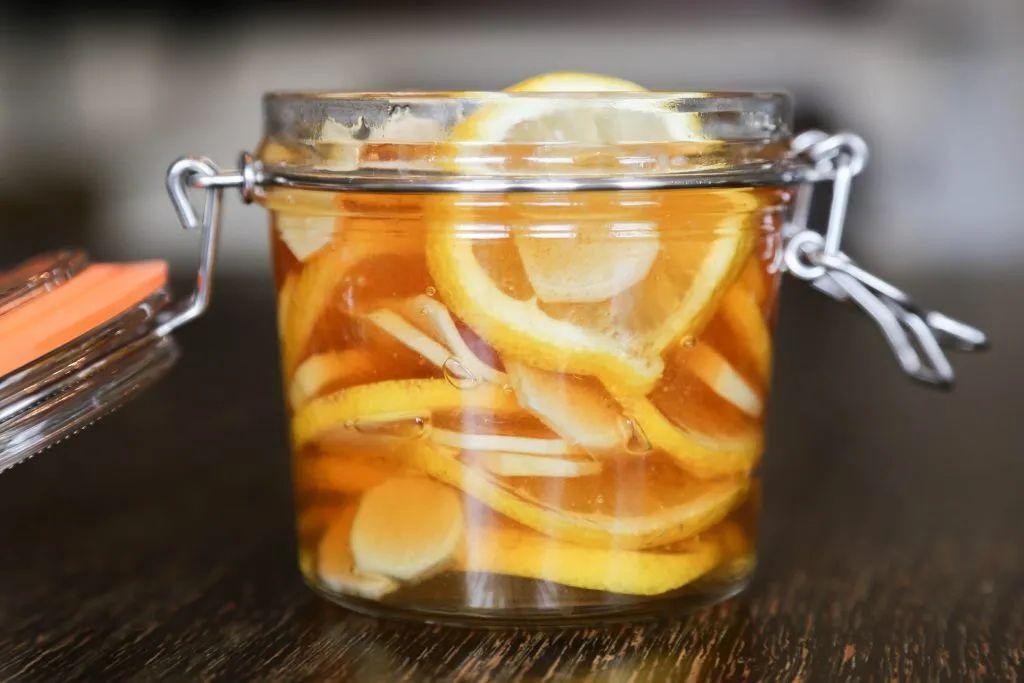
Yesterday, I stumbled upon a jar of preserved lemons in the back of my pantry, forgotten but still perfect. It inspired me to whip up this soothing Preserved Lemon and Ginger Tea, a remedy I swear by during those chilly mornings or when I need a quick pick-me-up.
Ingredients
- Water – 2 cups
- Preserved lemon – 1 tbsp, finely chopped
- Fresh ginger – 1 inch piece, thinly sliced
- Honey – 1 tbsp
Instructions
- In a small saucepan, bring 2 cups of water to a boil over high heat.
- Add the thinly sliced ginger to the boiling water. Reduce heat to medium and let it simmer for 5 minutes to infuse the water with ginger flavor.
- Stir in the finely chopped preserved lemon. Simmer for another 3 minutes to blend the flavors.
- Remove the saucepan from heat. Strain the tea into a cup to remove the ginger and lemon pieces.
- Add 1 tbsp of honey to the strained tea, stirring until fully dissolved. Tip: Adjust the amount of honey based on your sweetness preference, but remember, preserved lemons already add a salty tang.
- Let the tea cool for a minute before sipping. Tip: Covering the tea while it cools slightly helps retain the aromatic flavors.
- Serve warm. Tip: For an extra kick, add a pinch of cayenne pepper before serving.
Every sip of this tea offers a harmonious blend of tangy, spicy, and sweet notes, with the ginger providing a warm undertone. I love serving it in my favorite mug, garnished with a thin slice of fresh ginger for an extra touch of elegance and flavor.
Preserved Lemon and Avocado Toast
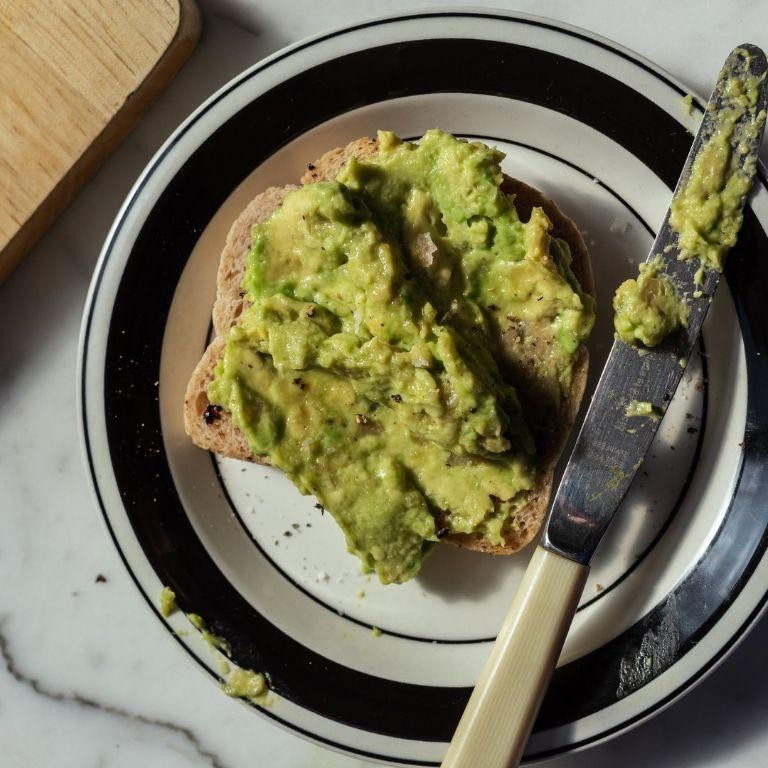
How many times have you stared into your fridge, hoping inspiration would strike? That’s exactly how I stumbled upon this Preserved Lemon and Avocado Toast—a happy accident that’s now my go-to breakfast. It’s the perfect blend of tangy and creamy, with a crunch that’ll make your mornings brighter.
Ingredients
- Bread – 2 slices
- Avocado – 1, ripe
- Preserved lemon – 1 tbsp, finely chopped
- Olive oil – 1 tbsp
- Salt – ¼ tsp
- Red pepper flakes – ¼ tsp
Instructions
- Toast the bread slices in a toaster or on a grill pan over medium heat until golden brown, about 2 minutes per side. Tip: For extra flavor, brush the bread lightly with olive oil before toasting.
- Cut the avocado in half, remove the pit, and scoop the flesh into a bowl. Mash it lightly with a fork, leaving some chunks for texture.
- Stir in the finely chopped preserved lemon and salt into the mashed avocado. Tip: Preserved lemons are salty, so adjust the additional salt accordingly.
- Spread the avocado mixture evenly over the toasted bread slices.
- Drizzle with olive oil and sprinkle red pepper flakes on top for a bit of heat. Tip: If you’re not a fan of spice, you can skip the red pepper flakes or substitute with a sprinkle of black pepper.
So there you have it—a dish that’s as simple as it is sensational. The creamy avocado pairs beautifully with the salty, tangy punch of preserved lemon, all atop a slice of perfectly crisp toast. Try topping it with a poached egg for an extra layer of decadence.
Preserved Lemon and Beetroot Salad
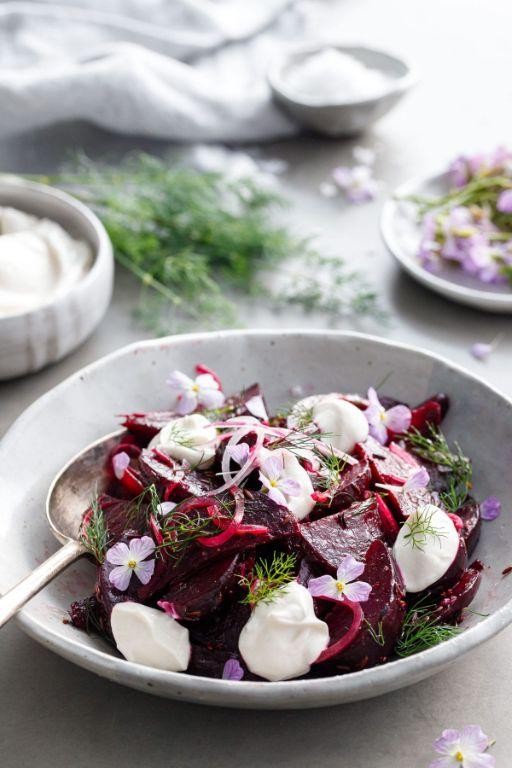
My kitchen adventures often lead me to unexpected flavor combinations, but preserved lemon and beetroot salad is one that I keep coming back to. It’s a vibrant dish that brings a tangy sweetness to the table, perfect for those who love a bit of zest in their meals.
Ingredients
- Beetroots – 2 cups, peeled and diced
- Preserved lemons – ¼ cup, finely chopped
- Olive oil – 2 tbsp
- Salt – ½ tsp
- Fresh mint leaves – ¼ cup, chopped
Instructions
- Preheat your oven to 400°F (200°C).
- Toss the diced beetroots with 1 tbsp of olive oil and ¼ tsp of salt on a baking sheet.
- Roast the beetroots in the preheated oven for 25 minutes, or until they are tender and slightly caramelized. Tip: Stir them halfway through for even cooking.
- While the beetroots are roasting, rinse the preserved lemons under cold water to remove excess salt, then finely chop them.
- Once the beetroots are done, let them cool to room temperature for about 10 minutes. Tip: Cooling them prevents the mint from wilting when mixed in.
- In a large bowl, combine the cooled beetroots, chopped preserved lemons, remaining 1 tbsp of olive oil, and the remaining ¼ tsp of salt. Gently toss to mix.
- Add the chopped mint leaves to the bowl and give everything one final gentle toss. Tip: Adding the mint last keeps its flavor fresh and vibrant.
Here you have it, a salad that’s as colorful as it is flavorful. The earthy sweetness of the beetroots pairs beautifully with the tangy punch of preserved lemons, while the mint adds a refreshing finish. Serve it alongside grilled fish or chicken for a meal that’s sure to impress.
Preserved Lemon and Walnut Baklava

Just when I thought baklava couldn’t get any better, I stumbled upon the magic of preserved lemons. Their tangy, slightly fermented flavor adds an unexpected twist to the classic sweet and nutty layers. It’s a recipe that’s become a staple in my kitchen, especially when I want to impress guests with something uniquely delicious.
Ingredients
- Phyllo dough – 1 package
- Butter – 1 cup, melted
- Walnuts – 2 cups, finely chopped
- Preserved lemon – 1, finely chopped
- Sugar – 1 cup
- Water – 1 cup
- Honey – ½ cup
Instructions
- Preheat your oven to 350°F (175°C). Grease a 9×13 inch baking dish lightly with some of the melted butter.
- Layer 8 sheets of phyllo dough in the prepared dish, brushing each sheet with melted butter before adding the next. Tip: Keep the unused phyllo covered with a damp towel to prevent drying.
- Mix the chopped walnuts and preserved lemon together, then spread half of this mixture over the layered phyllo.
- Add another 8 sheets of phyllo, buttering each as before, then top with the remaining walnut and lemon mixture.
- Finish with 8 more buttered phyllo sheets on top. Using a sharp knife, cut the baklava into diamond or square shapes before baking. Tip: Cutting before baking makes serving easier and helps the syrup soak in.
- Bake for 50 minutes, or until the baklava is golden and crisp.
- While the baklava bakes, combine sugar, water, and honey in a saucepan. Bring to a boil, then simmer for 10 minutes, stirring occasionally. Tip: The syrup should be slightly thickened but still pourable.
- Once the baklava is out of the oven, immediately pour the hot syrup over it. Let it cool completely before serving to allow the layers to absorb the syrup.
Delightfully crisp and flaky, this baklava strikes a perfect balance between the richness of walnuts and the bright, citrusy notes of preserved lemon. Serve it with a dollop of whipped cream or a scoop of vanilla ice cream for an extra indulgent treat.
Preserved Lemon and Cilantro Rice
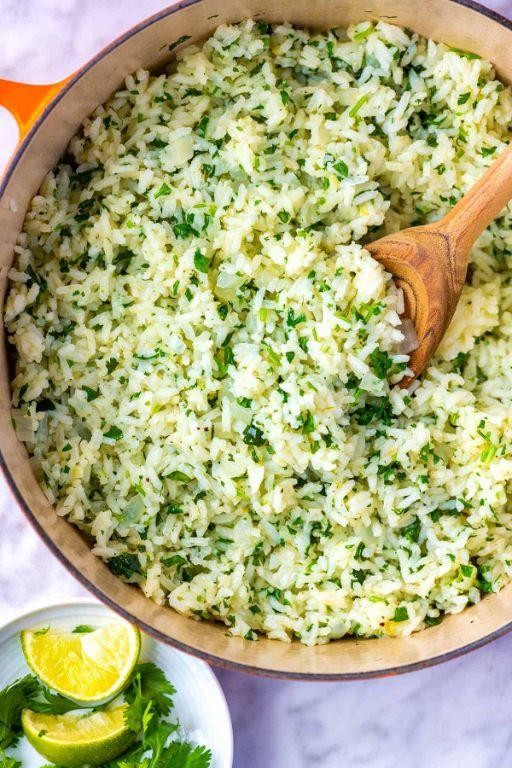
Kicking off the week with a dish that’s close to my heart, Preserved Lemon and Cilantro Rice is my go-to when I need something zesty, herby, and utterly comforting. It’s a recipe that reminds me of sunny afternoons and the joy of simple, flavorful cooking.
Ingredients
- Basmati rice – 1 cup
- Water – 2 cups
- Preserved lemon – 2 tbsp, finely chopped
- Fresh cilantro – ¼ cup, chopped
- Salt – ½ tsp
- Olive oil – 1 tbsp
Instructions
- Rinse the basmati rice under cold water until the water runs clear, to remove excess starch.
- In a medium pot, heat olive oil over medium heat. Add the rinsed rice and sauté for 2 minutes, stirring constantly to lightly toast the grains.
- Pour in water and add salt. Bring to a boil, then reduce heat to low, cover, and simmer for 15 minutes. Tip: Resist the urge to peek; keeping the lid on ensures even cooking.
- Remove the pot from heat and let it sit, covered, for 5 minutes. This allows the rice to steam and become fluffy.
- Fluff the rice with a fork, then gently fold in the preserved lemon and cilantro. Tip: For the best flavor, add the cilantro while the rice is still warm to help release its aroma.
- Serve immediately. Tip: This rice pairs beautifully with grilled fish or chicken for a complete meal.
You’ll love the bright, tangy pops of preserved lemon against the fresh, herbal notes of cilantro in this dish. Try serving it alongside a crisp salad for a light, refreshing meal that’s bursting with flavor.
Preserved Lemon and Honey Glazed Carrots
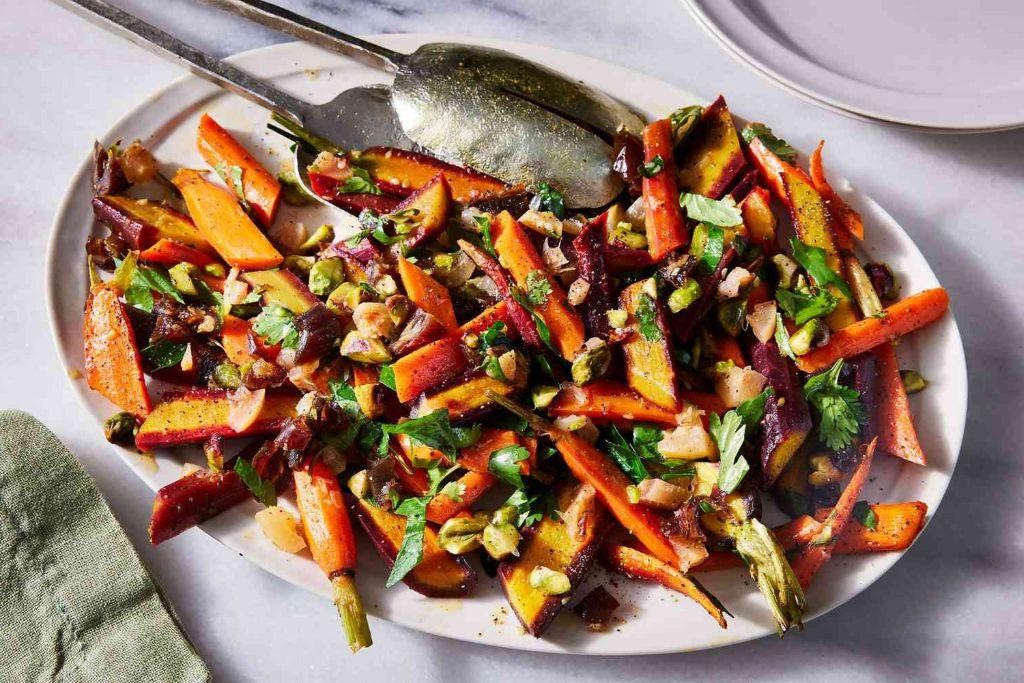
Over the years, I’ve found that the simplest dishes often steal the show at dinner parties, and these Preserved Lemon and Honey Glazed Carrots are no exception. Inspired by a tiny bistro in Seattle, this recipe has become my go-to for adding a sweet and tangy twist to the humble carrot.
Ingredients
- Carrots – 1 lb
- Preserved lemon – 2 tbsp, finely chopped
- Honey – 2 tbsp
- Butter – 2 tbsp
- Salt – ½ tsp
Instructions
- Preheat your oven to 400°F (200°C).
- Peel the carrots and slice them into even sticks, about 2 inches long and ½ inch thick, to ensure they cook uniformly.
- In a large bowl, toss the carrot sticks with melted butter, honey, preserved lemon, and salt until evenly coated. Tip: For an extra flavor boost, let the carrots marinate in this mixture for 10 minutes before roasting.
- Spread the carrots in a single layer on a baking sheet. Roast in the preheated oven for 20 minutes. Tip: Halfway through, give them a quick stir to promote even caramelization.
- After 20 minutes, check the carrots. They should be tender and glazed with a sticky, golden coating. If not, roast for an additional 5 minutes. Tip: For a deeper color and flavor, broil for the last 2 minutes, watching closely to prevent burning.
Last but not least, these carrots emerge from the oven with a perfect balance of sweetness from the honey and a punchy brightness from the preserved lemon. Serve them alongside a roasted chicken or fold into a grain bowl for a pop of color and flavor.
Preserved Lemon and Pistachio Ice Cream

Believe it or not, the idea for this Preserved Lemon and Pistachio Ice Cream came to me during a sweltering summer afternoon when I was craving something both refreshing and unexpected. The tangy punch of preserved lemons paired with the nutty crunch of pistachios creates a symphony of flavors that’s as unique as it is delicious.
Ingredients
- Heavy cream – 2 cups
- Whole milk – 1 cup
- Sugar – ¾ cup
- Preserved lemon – 1, finely chopped
- Shelled pistachios – ½ cup, chopped
- Salt – ¼ tsp
Instructions
- In a medium saucepan, combine the heavy cream, whole milk, and sugar over medium heat. Stir until the sugar dissolves completely, about 5 minutes.
- Remove the saucepan from the heat and stir in the finely chopped preserved lemon and salt. Let the mixture cool to room temperature, then cover and refrigerate for at least 4 hours, or overnight for best results.
- Pour the chilled mixture into an ice cream maker and churn according to the manufacturer’s instructions, usually about 20-25 minutes.
- During the last 5 minutes of churning, add the chopped pistachios to incorporate them evenly throughout the ice cream.
- Transfer the ice cream to a freezer-safe container and freeze until firm, at least 2 hours. For a softer texture, let it sit at room temperature for 5-10 minutes before serving.
You’ll love the creamy texture with bursts of tangy lemon and crunchy pistachios in every bite. Try serving it with a drizzle of honey or alongside a slice of almond cake for an extra special treat.
Preserved Lemon and Sage Butter Sauce
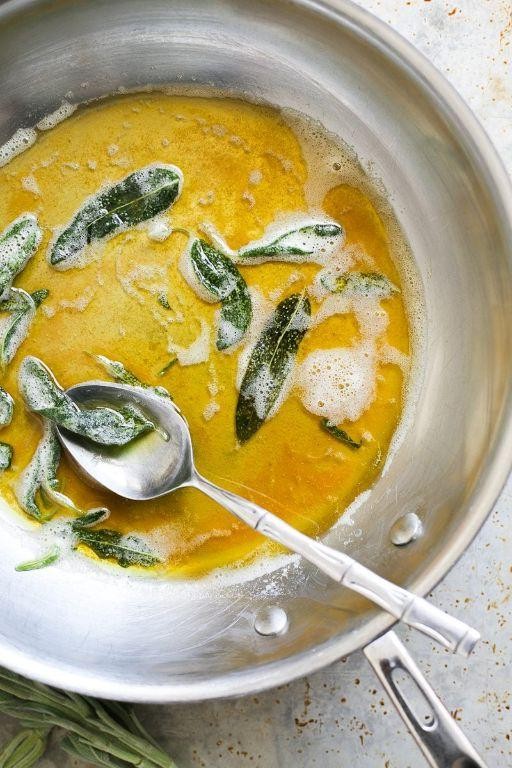
Very few things in the kitchen bring me as much joy as the moment when simple ingredients transform into something extraordinary. Today, I’m sharing a recipe that’s close to my heart—Preserved Lemon and Sage Butter Sauce. It’s a game-changer for weeknight dinners, turning the mundane into the magnificent with just a few ingredients.
Ingredients
- Butter – ½ cup
- Preserved lemon – 2 tbsp, finely chopped
- Fresh sage leaves – 8
- Garlic – 1 clove, minced
- White wine – ¼ cup
Instructions
- Melt the butter in a medium saucepan over low heat. Tip: Keep the heat low to prevent the butter from browning too quickly.
- Add the minced garlic and sauté for 1 minute, until fragrant but not browned.
- Stir in the preserved lemon and cook for another minute to release its flavors.
- Add the sage leaves whole, letting them crisp up in the butter for about 2 minutes. Tip: The sage should be crispy but not burnt, adding a nice texture to the sauce.
- Pour in the white wine, increase the heat to medium, and let the sauce simmer for 3 minutes to reduce slightly. Tip: The wine not only adds depth but also balances the richness of the butter.
- Remove from heat and let the sauce sit for a minute to thicken slightly before serving.
The sauce is luxuriously creamy with a bright, tangy kick from the preserved lemon and an earthy depth from the sage. Drizzle it over grilled chicken or fish, or toss it with pasta for a simple yet sophisticated meal.
Preserved Lemon and Coconut Macaroons

Waking up to the smell of something sweet baking in the oven is one of my favorite ways to start the day, and these Preserved Lemon and Coconut Macaroons are no exception. I stumbled upon this recipe during a lazy Sunday brunch experiment, and now it’s a staple in my kitchen for its zesty twist on a classic.
Ingredients
- Shredded coconut – 3 cups
- Condensed milk – 1 can (14 oz)
- Preserved lemon – 2 tbsp, finely chopped
- Egg whites – 2
- Vanilla extract – 1 tsp
Instructions
- Preheat your oven to 325°F and line a baking sheet with parchment paper.
- In a large bowl, mix the shredded coconut, condensed milk, and preserved lemon until well combined.
- In a separate bowl, beat the egg whites and vanilla extract until stiff peaks form. Tip: Ensure your bowl and beaters are completely clean for the best peaks.
- Gently fold the egg whites into the coconut mixture to keep the air in the eggs. Tip: Use a spatula and fold in a figure-eight motion for even mixing.
- Using a cookie scoop or tablespoon, drop the mixture onto the prepared baking sheet, spacing them about 2 inches apart.
- Bake for 20-25 minutes or until the macaroons are golden brown on the edges. Tip: Rotate the baking sheet halfway through for even browning.
- Let the macaroons cool on the baking sheet for 5 minutes before transferring to a wire rack to cool completely.
Zesty and sweet, these macaroons have a delightful crunch on the outside with a chewy center. Serve them alongside a cup of strong coffee for an afternoon pick-me-up, or drizzle with dark chocolate for an extra indulgent treat.
Conclusion
We hope this roundup of 20 exquisite preserved lemons recipes inspires your next culinary adventure! Each dish offers a unique way to enjoy the vibrant flavors of preserved lemons, perfect for home cooks across North America. Don’t forget to try your favorites, share your thoughts in the comments, and pin this article on Pinterest to spread the lemony love. Happy cooking!


