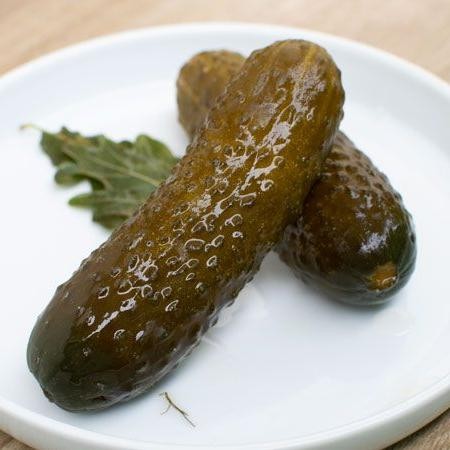
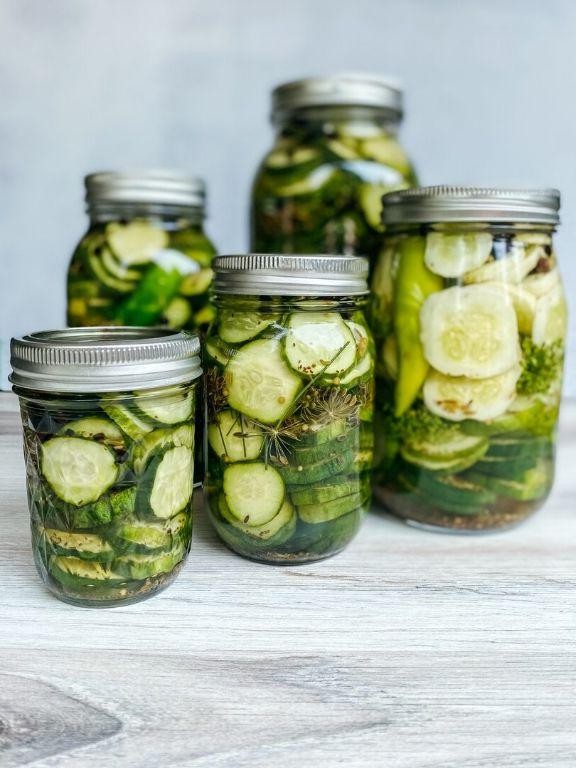
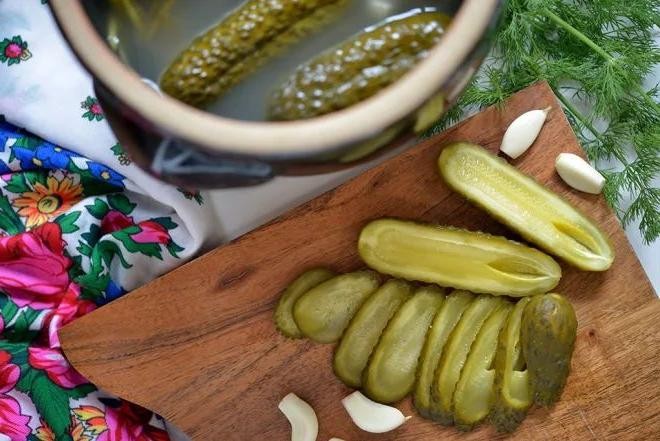
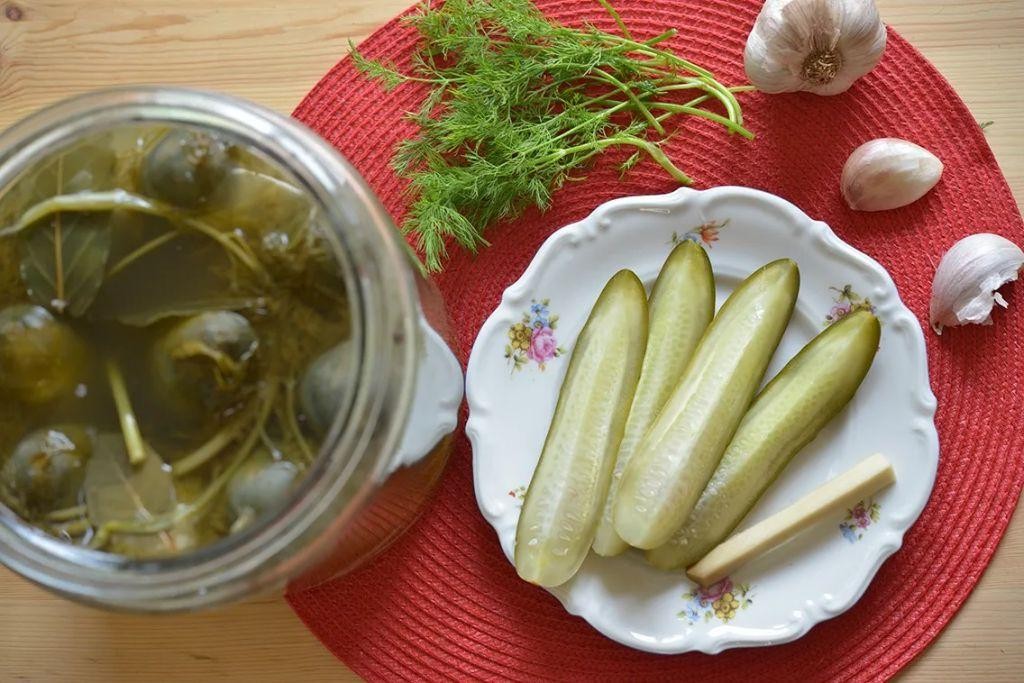
Ready to dive into the tangy, crunchy world of Polish dill pickles? Whether you’re a pickle enthusiast or just looking to spice up your meals, our ultimate guide to 19 delicious recipes is your ticket to flavor town. From classic to creative, these pickles are sure to add a zesty punch to your dishes. Keep reading to discover your next favorite recipe!
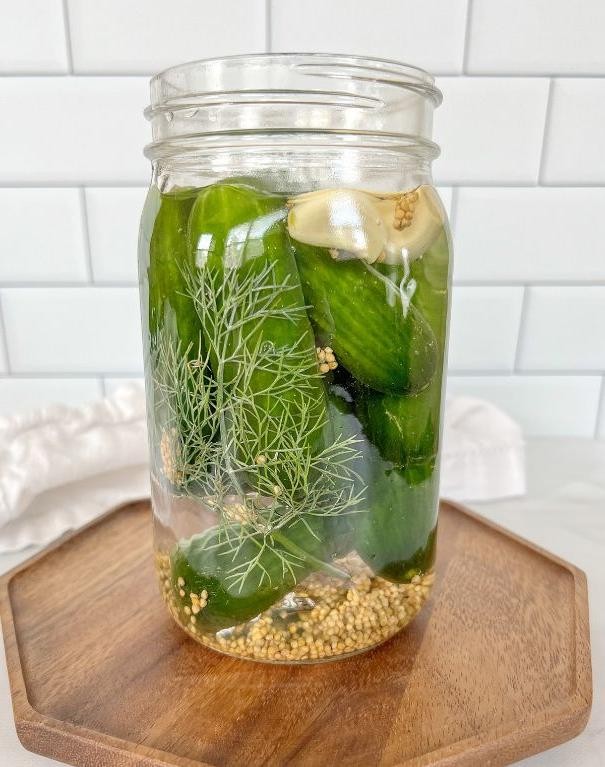
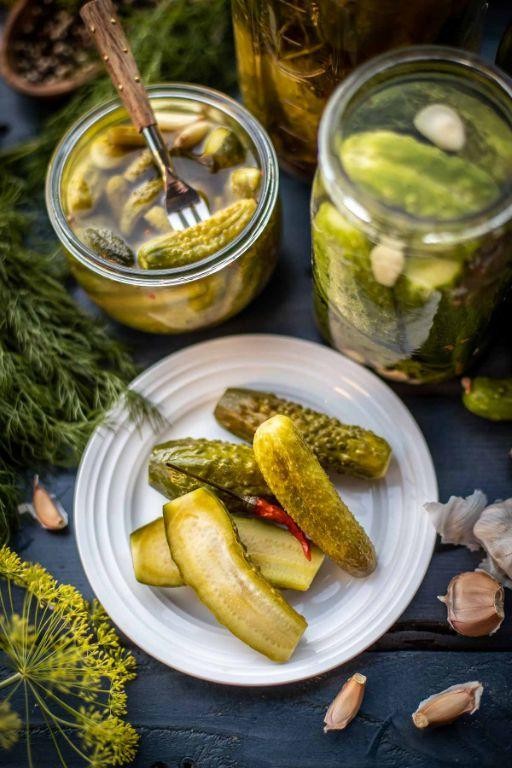
Classic Polish Dill Pickles
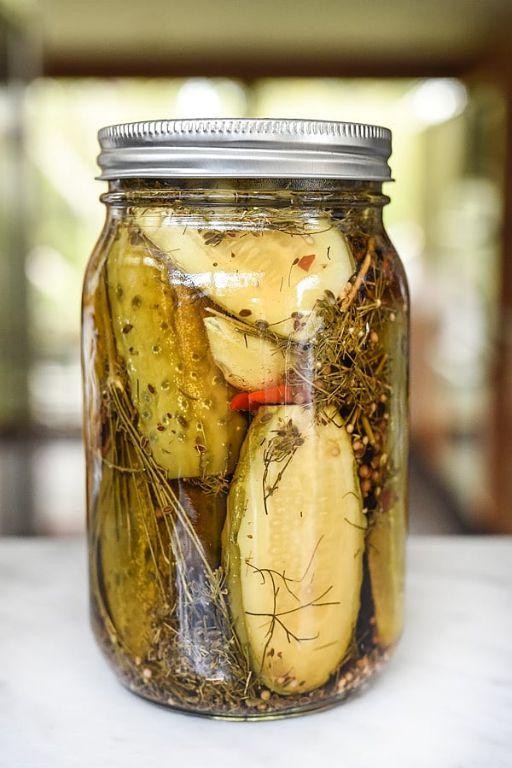
Perfectly crisp and bursting with tangy flavor, these Classic Polish Dill Pickles have been a staple in my kitchen for years. I remember my grandmother’s cellar lined with jars of these gems, each one a testament to her patience and skill. Now, I’m sharing her secrets with you, so you can bring a taste of tradition into your home.
Ingredients
- 3 lbs pickling cucumbers, scrubbed and trimmed
- 4 cups distilled water
- 1 cup white vinegar (5% acidity)
- 1/4 cup pickling salt
- 8 cloves garlic, peeled and smashed
- 4 heads fresh dill
- 2 tbsp mustard seeds
- 1 tbsp black peppercorns
- 1 tsp coriander seeds
- 4 bay leaves
Instructions
- Sterilize 4 quart-sized mason jars and their lids in boiling water for 10 minutes, then set aside to dry.
- In a large pot, combine distilled water, white vinegar, and pickling salt. Bring to a boil over high heat, stirring until the salt is completely dissolved.
- Divide the garlic, fresh dill, mustard seeds, black peppercorns, coriander seeds, and bay leaves evenly among the sterilized jars.
- Pack the cucumbers vertically into the jars, ensuring they fit snugly without overcrowding.
- Pour the hot brine over the cucumbers, leaving 1/2 inch of headspace at the top of each jar.
- Wipe the rims of the jars with a clean, damp cloth to remove any residue, then seal with the lids.
- Process the jars in a boiling water bath for 10 minutes to ensure a tight seal.
- Remove the jars from the water and let them cool to room temperature before storing in a cool, dark place for at least 2 weeks to develop flavor.
Crisp and aromatic, these pickles are a delight on their own or as a bold addition to sandwiches and salads. For a creative twist, try chopping them into relish or serving alongside a charcuterie board for a touch of acidity.
Spicy Polish Dill Pickles

Nothing beats the crunch and tang of a homemade pickle, especially when it’s got a spicy kick to wake up your taste buds. I stumbled upon this Spicy Polish Dill Pickles recipe during a summer visit to a friend’s farm, where we spent the afternoon pickling everything in sight. It’s become my go-to for adding a little zest to sandwiches, burgers, or just snacking straight from the jar.
Ingredients
- 2 lbs pickling cucumbers, halved lengthwise
- 4 cups distilled white vinegar
- 4 cups water
- 1/4 cup pickling salt
- 8 cloves garlic, smashed
- 2 tbsp dill seeds
- 2 tbsp black peppercorns
- 1 tbsp red pepper flakes
- 1 tsp mustard seeds
- 4 bay leaves
Instructions
- Sterilize 2 quart-sized mason jars and their lids by boiling them in water for 10 minutes. Remove with tongs and let air dry on a clean towel.
- In a large pot, combine vinegar, water, and pickling salt. Bring to a boil over high heat, stirring occasionally until the salt dissolves completely.
- Divide the garlic, dill seeds, black peppercorns, red pepper flakes, mustard seeds, and bay leaves evenly between the jars.
- Pack the cucumber halves tightly into the jars, leaving 1/2 inch of headspace at the top.
- Pour the boiling brine over the cucumbers in each jar, ensuring they are completely submerged and maintaining the 1/2 inch headspace.
- Wipe the rims of the jars with a clean, damp cloth to remove any residue. Seal tightly with the lids.
- Process the jars in a boiling water bath for 10 minutes to ensure a good seal. Remove and let cool at room temperature for 24 hours.
- Store the pickles in a cool, dark place for at least 2 weeks before opening to allow the flavors to fully develop.
Unbelievably crisp and bursting with a harmonious blend of heat and dill, these pickles are a testament to the magic of patience. Try them sliced thin on a grilled cheese for an unforgettable crunch.
Garlic Infused Polish Dill Pickles

Wondering how to elevate your pickle game with a touch of garlic and dill? I stumbled upon this recipe during a summer visit to a Polish farmer’s market, and it’s been a staple in my kitchen ever since. The combination of fresh dill and robust garlic creates a pickle that’s both aromatic and irresistibly crunchy.
Ingredients
- 4 cups distilled water
- 1/4 cup pickling salt
- 1 cup white vinegar (5% acidity)
- 4 cloves garlic, thinly sliced
- 2 tbsp fresh dill, finely chopped
- 1 tsp black peppercorns
- 1 lb pickling cucumbers, ends trimmed
Instructions
- In a large saucepan, combine distilled water, pickling salt, and white vinegar. Bring to a boil over medium-high heat, stirring until the salt is completely dissolved.
- Remove the brine from heat and let it cool to room temperature, about 1 hour. This prevents the cucumbers from becoming too soft.
- While the brine cools, pack the pickling cucumbers vertically into a clean, 1-quart mason jar.
- Evenly distribute the thinly sliced garlic, finely chopped fresh dill, and black peppercorns among the cucumbers in the jar.
- Pour the cooled brine over the cucumbers, ensuring they are completely submerged. Leave 1/2 inch of headspace at the top of the jar.
- Seal the jar tightly and refrigerate for at least 48 hours before tasting. The flavors will continue to develop over time.
Optimal texture is achieved after a week, when the cucumbers are fully infused with the garlic and dill. Serve these pickles chilled as a bold accompaniment to sandwiches or chop them into a tangy relish for hot dogs.
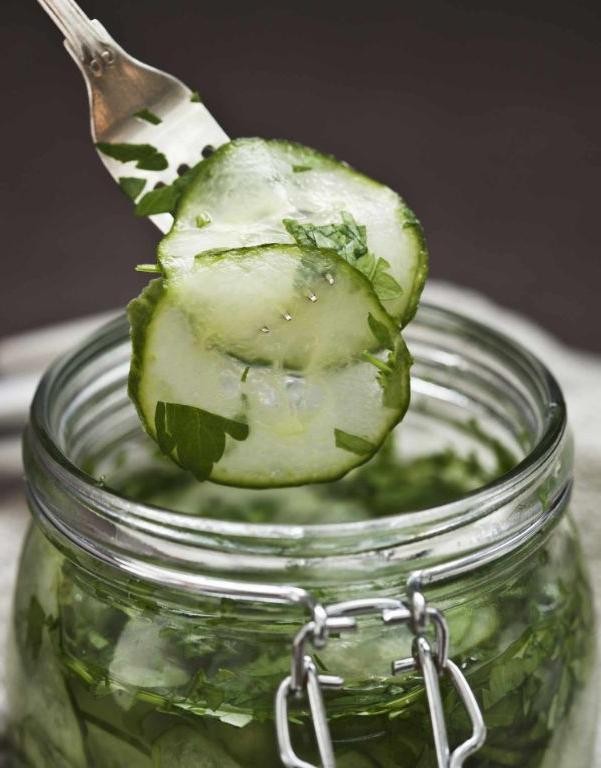
Honey Sweetened Polish Dill Pickles
Back when I first stumbled upon the recipe for Honey Sweetened Polish Dill Pickles at a quaint little farmers’ market, I was skeptical about the combination of honey and dill. But let me tell you, the sweet and tangy balance is nothing short of magical. It’s become a staple in my kitchen, especially during the summer months when cucumbers are at their peak.
Ingredients
- 2 lbs fresh pickling cucumbers, scrubbed and trimmed
- 4 cups filtered water
- 1 cup raw, unfiltered honey
- 1/2 cup white vinegar
- 3 tbsp kosher salt
- 4 garlic cloves, thinly sliced
- 2 tbsp whole black peppercorns
- 1 tbsp coriander seeds
- 1 bunch fresh dill, stems included
Instructions
- In a large pot, combine filtered water, raw unfiltered honey, white vinegar, and kosher salt. Bring to a boil over medium-high heat, stirring until the honey and salt are completely dissolved. Remove from heat and let cool to room temperature.
- While the brine cools, prepare your jars. Pack each jar tightly with scrubbed and trimmed pickling cucumbers, leaving about 1/2 inch of headspace at the top.
- Distribute the thinly sliced garlic cloves, whole black peppercorns, coriander seeds, and fresh dill evenly among the jars.
- Pour the cooled brine over the cucumbers in each jar, ensuring they are completely submerged. Seal the jars tightly.
- Let the jars sit at room temperature for 24 hours to begin the fermentation process. After 24 hours, transfer the jars to the refrigerator.
- Allow the pickles to ferment in the refrigerator for at least 1 week before tasting. For optimal flavor, wait 2 weeks.
Last but not least, these pickles offer a crisp texture with a perfect harmony of sweet and tangy flavors. Try serving them alongside a charcuterie board or chopped into a potato salad for an unexpected twist.
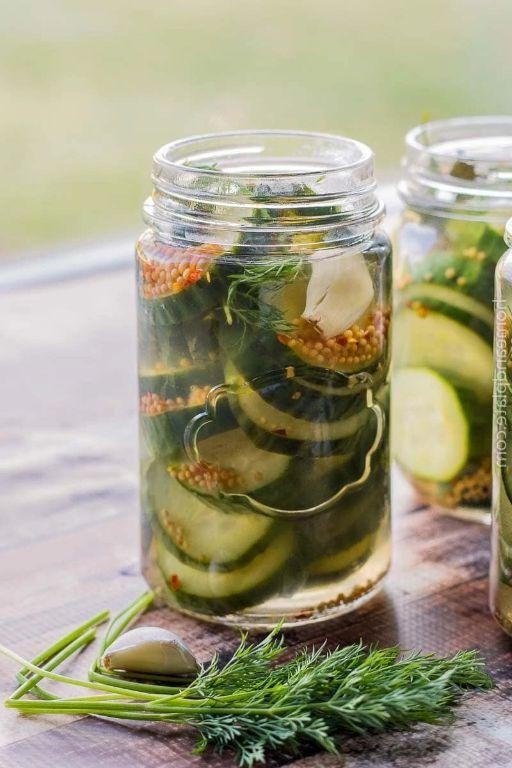
Polish Dill Pickles with Mustard Seeds
Over the years, I’ve found that the simplest recipes often hold the most flavor, and these Polish Dill Pickles with Mustard Seeds are no exception. There’s something incredibly satisfying about the crunch and tang of a homemade pickle, especially when it’s infused with the warmth of mustard seeds. I remember my grandmother used to say, ‘The secret is in the brine,’ and she wasn’t wrong.
Ingredients
- 2 lbs small cucumbers, ends trimmed
- 4 cups filtered water
- 1 cup white vinegar, 5% acidity
- 3 tbsp kosher salt
- 4 garlic cloves, thinly sliced
- 2 tbsp mustard seeds
- 1 tbsp black peppercorns
- 5 dill sprigs, fresh
Instructions
- Sterilize two 1-quart mason jars and their lids by boiling them in water for 10 minutes, then let them air dry on a clean towel.
- In a medium saucepan, combine the filtered water, white vinegar, and kosher salt. Bring to a boil over high heat, stirring until the salt is completely dissolved.
- Divide the garlic slices, mustard seeds, black peppercorns, and dill sprigs evenly between the two jars.
- Pack the cucumbers tightly into the jars, ensuring they are submerged below the neck of the jar.
- Pour the hot brine over the cucumbers, leaving 1/2 inch of headspace at the top of each jar.
- Seal the jars tightly and let them cool to room temperature before refrigerating.
- Allow the pickles to ferment in the refrigerator for at least 48 hours before tasting. For best flavor, wait 1 week.
With their crisp texture and bold, tangy flavor, these pickles are a perfect accompaniment to a hearty sandwich or a charcuterie board. Try slicing them thinly for a refreshing addition to your next potato salad.
Quick Polish Dill Pickles

Just when I thought my love for pickles couldn’t get any deeper, I stumbled upon this Quick Polish Dill Pickles recipe that’s become a staple in my kitchen. There’s something incredibly satisfying about the crunch and tang of homemade pickles, and this version is so straightforward, it’s perfect for pickle enthusiasts and beginners alike.
Ingredients
- 2 lbs small cucumbers, washed and ends trimmed
- 4 cups distilled water
- 1/4 cup white vinegar
- 3 tbsp kosher salt
- 4 garlic cloves, thinly sliced
- 2 tbsp fresh dill, chopped
- 1 tsp black peppercorns
- 1 tsp mustard seeds
Instructions
- In a large pot, combine distilled water, white vinegar, and kosher salt. Bring to a boil over high heat, stirring occasionally until the salt is completely dissolved. Remove from heat and let cool to room temperature.
- While the brine cools, prepare your cucumbers by washing them thoroughly and trimming off the ends. This step ensures your pickles will have the perfect crunch.
- In a clean, large jar, layer the cucumbers, garlic slices, fresh dill, black peppercorns, and mustard seeds. Pack them tightly but carefully to avoid bruising the cucumbers.
- Pour the cooled brine over the cucumbers in the jar, ensuring they are completely submerged. If necessary, place a small weight on top to keep them under the brine.
- Seal the jar tightly and let it sit at room temperature for 48 hours. After this, transfer the jar to the refrigerator. The pickles will be ready to eat in 5 days but will continue to develop flavor over time.
Yield to the crisp texture and vibrant flavor of these Quick Polish Dill Pickles, and you’ll find they’re irresistible straight from the jar or as a bold addition to sandwiches and salads. Their garlicky, dill-forward profile makes them a standout, and I love serving them alongside a charcuterie board for an extra punch of flavor.
Polish Dill Pickles with Horseradish
Venturing into the world of homemade pickles brings back memories of my grandmother’s kitchen, where the aroma of dill and horseradish filled the air. Today, I’m sharing my take on Polish Dill Pickles with Horseradish, a recipe that’s as close to her heart as it is to mine.
Ingredients
- 4 cups distilled water
- 1/4 cup kosher salt
- 1 tbsp sugar
- 2 cups white vinegar
- 1 lb fresh pickling cucumbers, ends trimmed
- 4 cloves garlic, smashed
- 2 tbsp fresh dill, chopped
- 1 tbsp horseradish root, freshly grated
- 1 tsp black peppercorns
- 1 tsp mustard seeds
Instructions
- In a large pot, combine distilled water, kosher salt, and sugar. Bring to a boil over high heat, stirring until salt and sugar are completely dissolved.
- Remove from heat and add white vinegar, stirring to combine. Allow the brine to cool to room temperature.
- Place cucumbers vertically in a clean, 1-quart mason jar, packing them tightly.
- Add smashed garlic cloves, chopped dill, grated horseradish, black peppercorns, and mustard seeds to the jar, distributing evenly around the cucumbers.
- Pour the cooled brine over the cucumbers, ensuring they are completely submerged. Tip: Use a fermentation weight to keep cucumbers under the brine if necessary.
- Seal the jar with a lid and let it sit at room temperature for 3 days to ferment. Tip: Place the jar on a plate to catch any overflow during fermentation.
- After 3 days, transfer the jar to the refrigerator. The pickles will be ready to eat after 1 week but will develop more flavor over time. Tip: For a crisper pickle, add a grape leaf to the jar before sealing.
Unbelievably crisp and bursting with tangy, spicy flavors, these pickles are perfect alongside a hearty sandwich or chopped into a potato salad for an extra kick. The horseradish adds a warmth that builds with each bite, making them irresistibly moreish.
Sweet and Sour Polish Dill Pickles
Zesty flavors and a tangy crunch are what make these Sweet and Sour Polish Dill Pickles a must-try for any pickle enthusiast. I remember the first time I stumbled upon this recipe in my grandmother’s old cookbook; it was a game-changer for my summer picnics.
Ingredients
- 2 lbs fresh cucumbers, sliced into 1/4-inch spears
- 1 cup distilled white vinegar
- 1 cup granulated sugar
- 1 tbsp kosher salt
- 1 tsp mustard seeds
- 1 tsp black peppercorns
- 4 cloves garlic, thinly sliced
- 1 large bunch fresh dill, roughly chopped
Instructions
- In a medium saucepan over medium heat, combine vinegar, sugar, and salt, stirring until the sugar and salt are completely dissolved, about 3 minutes.
- Add mustard seeds and black peppercorns to the saucepan, simmering for an additional 2 minutes to infuse the flavors.
- Layer cucumber spears, garlic slices, and chopped dill in a clean, 1-quart mason jar, packing tightly without crushing the cucumbers.
- Pour the hot vinegar mixture over the cucumbers, ensuring they are completely submerged. Let cool to room temperature, about 1 hour.
- Seal the jar and refrigerate for at least 48 hours before serving to allow the flavors to meld. Tip: For best results, gently shake the jar once a day to redistribute the spices.
With their perfect balance of sweetness and acidity, these pickles are a delightful addition to sandwiches or served alongside a sharp cheddar cheese. The garlic and dill add a depth of flavor that elevates them beyond your average pickle.
Polish Dill Pickles with Bay Leaves
Yesterday, I found myself reminiscing about my grandmother’s kitchen, where the aroma of dill and vinegar was as comforting as her stories. That’s when I decided to recreate her legendary Polish dill pickles with bay leaves, a recipe that’s as simple as it is flavorful.
Ingredients
- 4 cups distilled water
- 1 cup white vinegar (5% acidity)
- 2 tbsp pickling salt
- 1 tbsp sugar
- 4 garlic cloves, thinly sliced
- 2 tbsp fresh dill, chopped
- 4 bay leaves
- 1 lb small cucumbers, washed and ends trimmed
Instructions
- In a large saucepan, combine distilled water, white vinegar, pickling salt, and sugar. Bring to a boil over medium-high heat, stirring until the salt and sugar are completely dissolved.
- Remove the saucepan from heat and let the brine cool to room temperature, about 1 hour. This prevents the cucumbers from becoming mushy.
- While the brine cools, prepare a clean quart-sized jar by layering the garlic slices, fresh dill, and bay leaves at the bottom.
- Pack the cucumbers vertically into the jar, ensuring they fit snugly without overcrowding.
- Pour the cooled brine over the cucumbers, making sure they are completely submerged. Leave about 1/2 inch of headspace at the top of the jar.
- Seal the jar tightly and refrigerate for at least 48 hours before tasting. The pickles will develop more flavor over time.
So, after a couple of days, you’ll be greeted with crisp, tangy pickles that carry the subtle warmth of bay leaves. They’re perfect alongside a hearty sandwich or chopped into a refreshing summer salad.
Polish Dill Pickles with Peppercorns
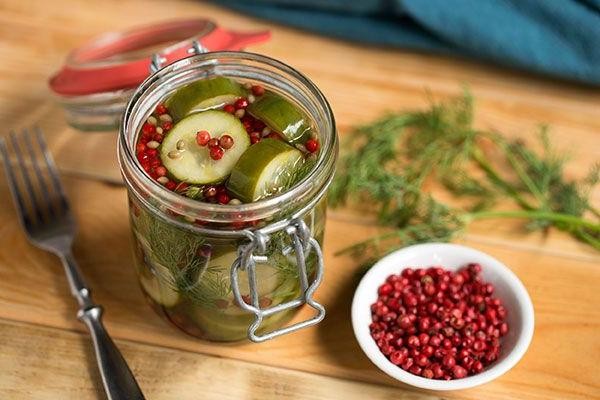
Summer brings back memories of my grandmother’s kitchen, where the tangy aroma of dill and vinegar filled the air as she prepared her famous Polish dill pickles. Today, I’m sharing my take on this classic, adding a peppery twist that elevates the humble cucumber to something truly special.
Ingredients
- 2 lbs fresh pickling cucumbers, scrubbed
- 4 cups distilled water
- 1 cup white vinegar (5% acidity)
- 3 tbsp pickling salt
- 4 garlic cloves, thinly sliced
- 2 tbsp whole black peppercorns
- 1 large bunch fresh dill, stems included
Instructions
- Sterilize two quart-sized mason jars and their lids by boiling them in water for 10 minutes. Remove with tongs and let air dry.
- In a large pot, combine distilled water, white vinegar, and pickling salt. Bring to a boil over high heat, stirring until the salt dissolves completely.
- Pack the cucumbers vertically into the jars, leaving 1/2 inch of headspace. Tuck the garlic slices, peppercorns, and dill between the cucumbers.
- Pour the hot brine over the cucumbers, ensuring they are completely submerged. Leave 1/4 inch of headspace.
- Wipe the rims of the jars with a clean, damp cloth to remove any residue. Seal tightly with the lids.
- Process the jars in a boiling water bath for 10 minutes to ensure a good seal. Remove and let cool at room temperature for 24 hours.
- Store in a cool, dark place for at least 2 weeks before opening to allow the flavors to develop fully.
My tip for the crispiest pickles? Use cucumbers that are firm and fresh, ideally picked within the last 24 hours. Also, the boiling water bath is crucial for safety but keep an eye on the time to avoid overcooking. Lastly, the wait might be the hardest part, but trust me, it’s worth it. These pickles emerge with a perfect crunch, a bold garlic and dill flavor, and a peppery kick that’s irresistible. Try them sliced thin on a grilled cheese sandwich for a tangy twist.
Polish Dill Pickles with Dill Seeds

Kicking off my summer preserving with a batch of homemade Polish dill pickles is a tradition I look forward to every year. There’s something incredibly satisfying about the crisp texture and tangy flavor of these pickles, especially when they’re packed with the aromatic punch of dill seeds.
Ingredients
- 4 lbs pickling cucumbers, scrubbed and trimmed
- 8 cups filtered water
- 1/2 cup white vinegar (5% acidity)
- 1/4 cup pickling salt
- 8 cloves garlic, peeled and lightly crushed
- 2 tbsp dill seeds
- 1 tbsp black peppercorns
- 4 bay leaves
Instructions
- Sterilize 2 quart-sized canning jars and their lids by boiling them in water for 10 minutes, then let them air dry on a clean towel.
- In a large pot, combine filtered water, white vinegar, and pickling salt. Bring to a boil over high heat, stirring until the salt is completely dissolved.
- Pack the cucumbers vertically into the sterilized jars, leaving 1/2 inch of headspace at the top.
- Divide the garlic cloves, dill seeds, black peppercorns, and bay leaves evenly between the jars, placing them among the cucumbers.
- Pour the boiling brine over the cucumbers, ensuring they are completely submerged and maintaining the 1/2 inch headspace.
- Wipe the rims of the jars with a clean, damp cloth to remove any residue, then seal with the lids and bands, tightening only until fingertip-tight.
- Process the jars in a boiling water bath for 10 minutes to ensure a proper seal, then remove and let cool on a towel-lined countertop for 24 hours.
- Check the seals after cooling; if any jars haven’t sealed, refrigerate and consume within 2 weeks.
Delightfully crunchy and bursting with the herby essence of dill, these pickles are perfect straight from the jar or chopped into a creamy potato salad for an extra zing.
Polish Dill Pickles with Garlic and Chili
Craving something tangy with a kick? Let me take you back to my grandmother’s kitchen, where the aroma of dill and garlic would fill the air every summer. That’s where I first fell in love with these Polish dill pickles, spiked with just enough chili to make them unforgettable.
Ingredients
- 4 cups filtered water
- 1/4 cup kosher salt
- 1 tbsp white sugar
- 4 cloves garlic, thinly sliced
- 2 fresh dill sprigs
- 1 tsp black peppercorns
- 1/2 tsp red chili flakes
- 1 lb small cucumbers, ends trimmed
Instructions
- In a medium saucepan, combine filtered water, kosher salt, and white sugar. Bring to a boil over high heat, stirring until salt and sugar are completely dissolved. Remove from heat and let cool to room temperature, about 1 hour.
- While the brine cools, prepare your jars. Place thinly sliced garlic, fresh dill sprigs, black peppercorns, and red chili flakes at the bottom of each jar.
- Pack the jars tightly with small cucumbers, ensuring they are snug but not crushed. Leave about 1/2 inch of headspace at the top.
- Pour the cooled brine over the cucumbers, making sure they are completely submerged. Seal the jars tightly.
- Let the jars sit at room temperature for 3 days to ferment. Check daily to ensure the cucumbers remain submerged, pressing them down if necessary.
- After 3 days, transfer the jars to the refrigerator. The pickles will continue to develop flavor but at a slower rate.
Bright and crunchy, these pickles are a testament to the magic of fermentation. Serve them alongside a charcuterie board or chop them into a potato salad for an extra zing.
Polish Dill Pickles with Coriander Seeds
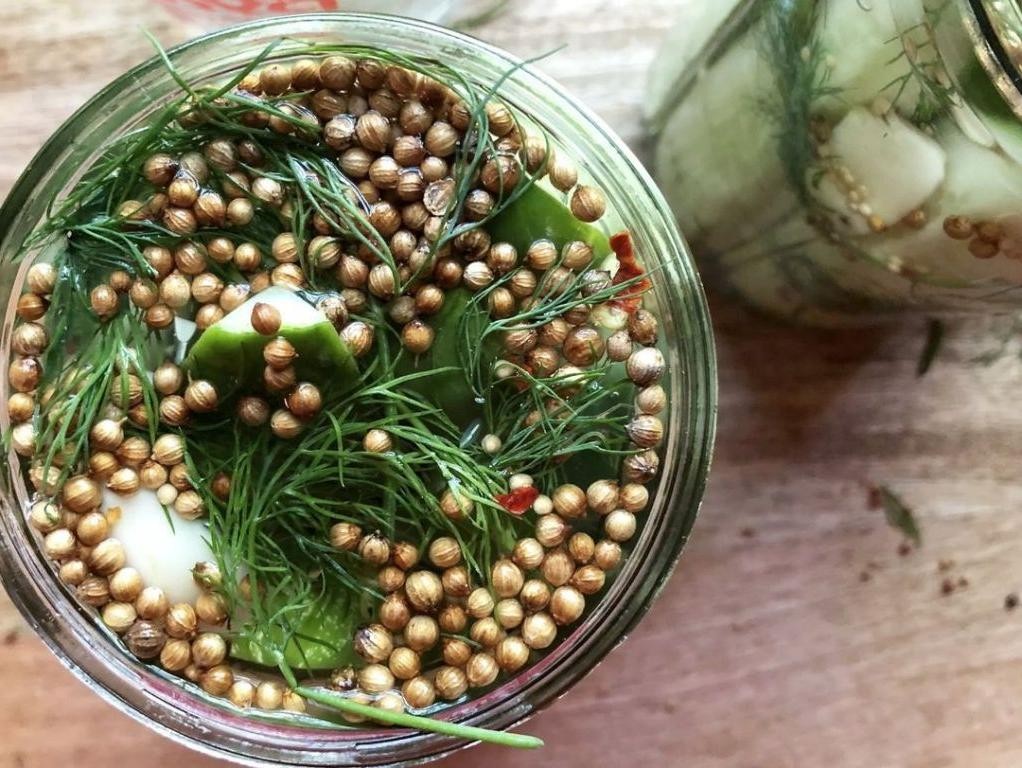
Having grown up in a household where pickling was almost a weekly ritual, I’ve come to appreciate the tangy crunch of a well-made dill pickle. Today, I’m sharing a recipe that’s close to my heart—Polish Dill Pickles with Coriander Seeds. It’s a recipe that brings back memories of summer afternoons spent in the kitchen with my grandmother, who believed that the secret to the perfect pickle was in the balance of spices and patience.
Ingredients
- 4 cups distilled water
- 1/4 cup kosher salt
- 1 tbsp coriander seeds, lightly crushed
- 2 cloves garlic, thinly sliced
- 1/2 tsp black peppercorns
- 1 bay leaf
- 1 lb small cucumbers, ends trimmed
- 1 large bunch fresh dill, stems included
Instructions
- In a medium saucepan, combine distilled water and kosher salt. Bring to a boil over high heat, stirring until salt is completely dissolved. Remove from heat and let cool to room temperature.
- While the brine cools, prepare your jars. Place cucumbers vertically in a clean, 1-quart mason jar, packing them tightly but without crushing.
- Add crushed coriander seeds, sliced garlic, black peppercorns, and bay leaf to the jar, distributing evenly among the cucumbers.
- Tuck the fresh dill around the cucumbers, ensuring it’s well distributed for even flavor.
- Pour the cooled brine over the cucumbers, ensuring they are completely submerged. Leave about 1/2 inch of headspace at the top of the jar.
- Seal the jar tightly and let it sit at room temperature for 3 days to ferment. Check daily to ensure the cucumbers remain submerged, pressing them down if necessary.
- After 3 days, taste a pickle. If it’s reached your desired level of tanginess, transfer the jar to the refrigerator to halt fermentation. If not, allow it to ferment for up to 2 more days, tasting daily.
Let these pickles be the star of your next charcuterie board or simply enjoy them straight from the jar. Their crisp texture and the harmonious blend of dill and coriander seeds make them irresistibly delicious. Perfect for those who appreciate the art of fermentation and the depth of flavor it brings.
Polish Dill Pickles with Allspice

Yesterday, I stumbled upon my grandmother’s old recipe book, and between its weathered pages, I found a treasure—her Polish Dill Pickles with Allspice. It’s a recipe that brings back memories of summer afternoons spent in her kitchen, the air filled with the tangy scent of vinegar and dill.
Ingredients
- 3 lbs small, firm cucumbers, washed and trimmed
- 4 cups distilled water
- 1 cup white vinegar (5% acidity)
- 3 tbsp pickling salt
- 5 garlic cloves, peeled and lightly crushed
- 2 tbsp whole allspice berries
- 1 large bunch fresh dill, including stems
Instructions
- Sterilize two quart-sized mason jars and their lids by boiling them in water for 10 minutes, then let them air dry on a clean towel.
- In a large pot, combine the distilled water, white vinegar, and pickling salt. Bring to a boil over high heat, stirring until the salt is completely dissolved.
- Pack the cucumbers vertically into the sterilized jars, leaving 1/2 inch of headspace at the top. Add the garlic cloves, allspice berries, and fresh dill evenly between the jars.
- Pour the hot brine over the cucumbers in each jar, ensuring they are completely submerged and maintaining the 1/2 inch headspace.
- Wipe the rims of the jars with a clean, damp cloth to remove any residue. Seal the jars with the lids and rings, tightening only until fingertip-tight.
- Process the jars in a boiling water bath for 10 minutes to ensure a proper seal. Remove the jars and let them cool undisturbed for 24 hours.
- Store the pickles in a cool, dark place for at least 2 weeks before opening to allow the flavors to fully develop.
When you finally crack open a jar, you’ll be greeted with pickles that are crisp, tangy, and aromatic with the warmth of allspice. They’re perfect alongside a hearty sandwich or chopped into a potato salad for an extra zing.
Polish Dill Pickles with Juniper Berries
Kneading through my grandmother’s recipe box, I stumbled upon a gem that brought back a flood of memories—Polish Dill Pickles with Juniper Berries. There’s something magical about the tangy crunch of a homemade pickle, especially when it’s infused with the earthy aroma of juniper berries. Today, I’m sharing this cherished family recipe, perfect for those who appreciate the art of pickling.
Ingredients
- 3 lbs small pickling cucumbers, scrubbed
- 4 cups distilled water
- 1/4 cup pickling salt
- 1 cup white vinegar
- 6 garlic cloves, smashed
- 2 tbsp whole black peppercorns
- 1 tbsp juniper berries, lightly crushed
- 10 fresh dill sprigs
- 2 bay leaves
Instructions
- Sterilize two 1-quart mason jars and their lids by boiling them in water for 10 minutes. Remove with tongs and let air dry.
- In a large pot, combine distilled water, pickling salt, and white vinegar. Bring to a boil over high heat, stirring until the salt dissolves completely.
- Divide the garlic, black peppercorns, juniper berries, dill sprigs, and bay leaves evenly between the jars.
- Pack the cucumbers vertically into the jars, ensuring they fit snugly without forcing.
- Pour the hot brine over the cucumbers, leaving 1/2 inch of headspace at the top of each jar.
- Wipe the rims of the jars with a clean, damp cloth to remove any residue. Seal tightly with the lids.
- Process the jars in a boiling water bath for 10 minutes to ensure a proper seal. Remove and let cool at room temperature for 24 hours.
- Store the pickles in a cool, dark place for at least 2 weeks before opening to allow the flavors to meld.
Let these pickles transport you to a simpler time with their crisp texture and complex flavor profile. Serve them alongside a charcuterie board or chop them into a potato salad for an unexpected twist.
Polish Dill Pickles with Oak Leaves
Wandering through the farmers’ market last weekend, I stumbled upon the most vibrant bunch of dill, sparking memories of my grandmother’s Polish dill pickles. There’s something magical about the crunch of a homemade pickle, especially when it’s infused with the subtle tannins from oak leaves, a trick I learned from a Polish neighbor years ago.
Ingredients
- 3 lbs pickling cucumbers, scrubbed and trimmed
- 4 cups distilled water
- 1/2 cup white vinegar (5% acidity)
- 1/4 cup pickling salt
- 8 cloves garlic, smashed
- 1 tbsp black peppercorns
- 1 tbsp mustard seeds
- 1/2 cup fresh dill heads
- 4 small oak leaves, rinsed and dried
Instructions
- In a large pot, combine distilled water, white vinegar, and pickling salt. Bring to a boil over high heat, stirring until the salt dissolves completely. Remove from heat and let cool to room temperature.
- Layer the cucumbers, garlic, black peppercorns, mustard seeds, dill heads, and oak leaves in a clean, large glass jar.
- Pour the cooled brine over the cucumbers, ensuring they are completely submerged. Use a fermentation weight if necessary.
- Cover the jar with a clean cloth secured with a rubber band to allow airflow while keeping out contaminants.
- Place the jar in a cool, dark place (around 68°F) for 3 days. Check daily for any signs of mold, skimming off if necessary.
- After 3 days, taste a pickle. If the flavor is to your liking, seal the jar and refrigerate. For stronger flavor, allow to ferment for up to 7 days before refrigerating.
Just like that, you’ve got yourself a jar of crisp, tangy pickles with a hint of earthiness from the oak leaves. Perfect for snacking straight from the jar or chopping into a rustic potato salad for an extra punch of flavor.
Polish Dill Pickles with Cherry Leaves

My journey with Polish dill pickles began on a sweltering summer day, much like today, when my grandmother handed me a jar of her homemade pickles with cherry leaves. The tangy aroma and crisp texture instantly won me over, and I’ve been hooked ever since.
Ingredients
- 3 lbs small pickling cucumbers, thoroughly washed
- 4 cups filtered water
- 1/4 cup kosher salt
- 6 cloves garlic, smashed
- 2 tbsp whole black peppercorns
- 1 tbsp mustard seeds
- 10 fresh dill sprigs, including stems
- 6 fresh cherry leaves
Instructions
- In a large pot, combine filtered water and kosher salt. Bring to a boil over high heat, stirring until salt is completely dissolved. Remove from heat and let cool to room temperature.
- Place garlic, black peppercorns, mustard seeds, dill sprigs, and cherry leaves at the bottom of a clean, large mason jar.
- Pack the jar tightly with pickling cucumbers, ensuring they fit snugly without crushing.
- Pour the cooled brine over the cucumbers, leaving 1/2 inch of headspace at the top of the jar.
- Seal the jar tightly and store in a cool, dark place for 3 days to ferment. Tip: Check daily to ensure the cucumbers remain submerged in the brine.
- After 3 days, transfer the jar to the refrigerator to halt fermentation. Tip: The pickles will develop more flavor over time, so waiting a week before tasting is ideal.
- Serve chilled. Tip: For an extra crunch, place the pickles in ice water for 10 minutes before serving.
Fresh out of the jar, these pickles offer a perfect balance of garlicky, dill-forward flavors with a subtle cherry leaf undertone. Their crispness makes them an irresistible snack or a vibrant addition to sandwiches and salads.
Polish Dill Pickles with Grape Leaves
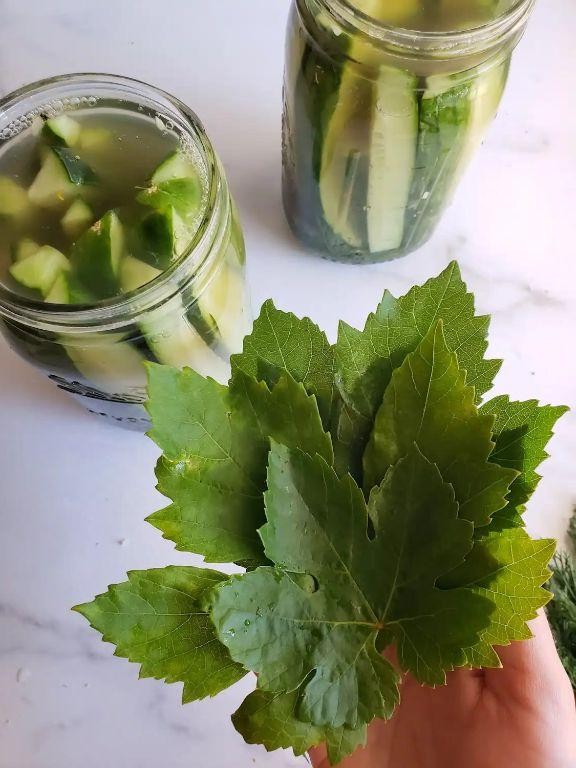
Having stumbled upon my grandmother’s handwritten recipe book last summer, I was thrilled to rediscover her Polish dill pickles with grape leaves—a tangy, crisp delight that brings back memories of humid Midwestern summers. Today, I’m sharing this cherished family recipe, tweaked just a bit to suit my love for extra garlic.
Ingredients
- 3 lbs small pickling cucumbers, scrubbed
- 4 cups filtered water
- 1/4 cup kosher salt
- 1 cup white vinegar
- 8 cloves garlic, smashed
- 2 tbsp whole black peppercorns
- 1 tbsp mustard seeds
- 4 fresh grape leaves
- 1 large bunch fresh dill, stems included
Instructions
- In a large pot, combine filtered water, kosher salt, and white vinegar. Bring to a boil over high heat, stirring until salt dissolves completely. Remove from heat and let cool to room temperature.
- Meanwhile, layer the scrubbed cucumbers, smashed garlic cloves, black peppercorns, mustard seeds, grape leaves, and fresh dill in a clean, large glass jar.
- Pour the cooled brine over the cucumbers, ensuring they are fully submerged. Tip: Use a small plate or fermentation weight to keep cucumbers under the brine.
- Cover the jar with a clean cloth secured with a rubber band to allow airflow while keeping out dust. Let ferment at room temperature (68-72°F) for 3 days.
- After 3 days, taste a pickle for desired sourness. For more tang, ferment up to 2 more days, tasting daily.
- Once satisfied with the flavor, seal the jar with a lid and refrigerate. The pickles will keep for up to 2 months.
Snappy with a perfect balance of garlic and dill, these pickles are a dream atop a grilled bratwurst or chopped into a creamy potato salad. The grape leaves? They’re the secret to that irresistible crunch.
Polish Dill Pickles with Black Currant Leaves
Over the years, I’ve found that the most memorable dishes often come from the simplest ingredients, and these Polish Dill Pickles with Black Currant Leaves are no exception. I first stumbled upon this recipe during a summer visit to a farmer’s market, where an elderly Polish woman shared her family’s secret to the crispiest, most flavorful pickles. Now, it’s a staple in my kitchen, especially during pickle season.
Ingredients
- 3 lbs small cucumbers, freshly picked
- 4 cups filtered water
- 1/4 cup kosher salt
- 5 garlic cloves, thinly sliced
- 2 tbsp whole black peppercorns
- 1 bunch fresh dill, stems included
- 10 black currant leaves, washed
Instructions
- In a large bowl, combine the filtered water and kosher salt, stirring until the salt is completely dissolved to create a brine.
- Place the cucumbers vertically in a clean, 1-gallon glass jar, layering them with the sliced garlic, black peppercorns, fresh dill, and black currant leaves.
- Pour the brine over the cucumbers, ensuring they are fully submerged. If necessary, place a small, clean weight on top to keep them under the brine.
- Cover the jar with a clean cloth secured with a rubber band to allow air circulation while keeping out dust.
- Let the jar sit at room temperature, away from direct sunlight, for 3 days. Check daily to ensure the cucumbers remain submerged and to skim off any foam that forms on the surface.
- After 3 days, taste a pickle for desired sourness. If satisfied, seal the jar and refrigerate to halt fermentation. If you prefer a stronger flavor, allow to ferment for up to 2 more days before refrigerating.
Diving into these pickles reveals a perfect balance of garlicky sharpness and the subtle, fruity undertones from the black currant leaves. Serve them alongside a charcuterie board or chop them into a potato salad for an unexpected twist.
Conclusion
Brimming with flavor and tradition, our roundup of 19 Delicious Polish Dill Pickles Recipes is your ticket to exploring the rich tastes of Poland right from your kitchen. Whether you’re a pickle pro or a curious newbie, there’s a recipe here to delight your palate. We’d love to hear which one becomes your favorite—don’t forget to leave a comment and share your pickle adventures on Pinterest!