Mother’s Day is the perfect occasion to show your love through the universal language of food. Whether you’re whipping up a quick weeknight meal or indulging in the comfort of seasonal favorites, our roundup of 20 heartwarming dinner recipes is sure to make her day extra special. From savory to sweet, these dishes are not just meals—they’re memories in the making. Keep reading to find the perfect recipe to celebrate the amazing mom in your life!
Grilled Salmon with Avocado Salsa
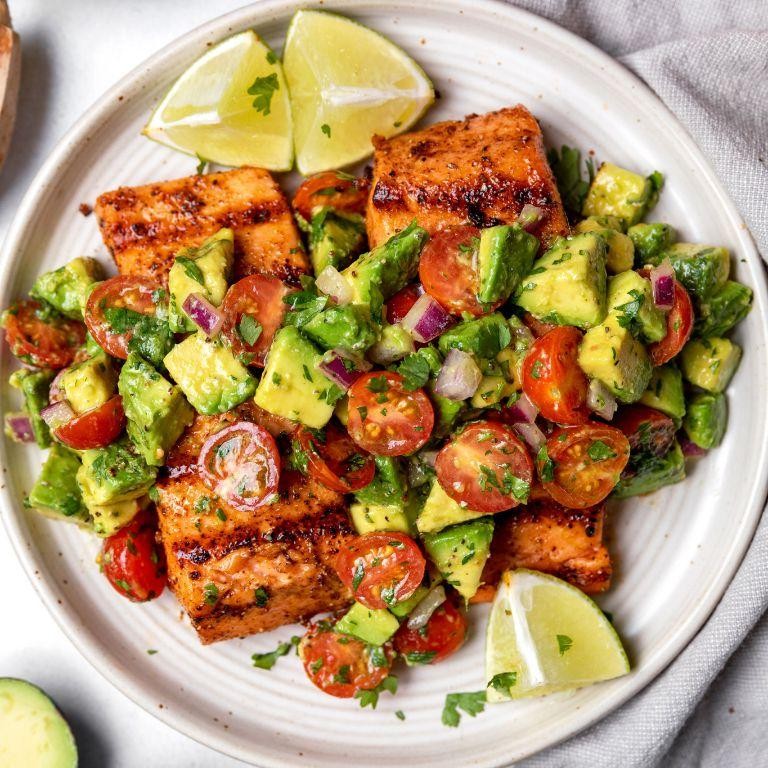
Brace yourselves, flavor seekers, because we’re about to dive fork-first into a dish that’s as nutritious as it is delicious—Grilled Salmon with Avocado Salsa. This isn’t just food; it’s a high-protein, omega-3-packed party on your plate, and trust me, your taste buds are invited.
Ingredients
- Salmon fillets – 2 (6 oz each)
- Avocado – 1, diced
- Tomato – 1, diced
- Red onion – ¼ cup, finely chopped
- Lime – 1, juiced
- Olive oil – 1 tbsp
- Salt – ½ tsp
- Black pepper – ¼ tsp
Instructions
- Preheat your grill to medium-high heat (375°F to 400°F). Tip: A well-heated grill ensures those perfect grill marks without sticking.
- Brush the salmon fillets with olive oil and season both sides with salt and black pepper.
- Place the salmon on the grill, skin-side down, and cook for 4-5 minutes. Tip: Don’t flip the salmon too soon; it should release easily when ready.
- Carefully flip the salmon and cook for another 3-4 minutes, or until the internal temperature reaches 145°F. Tip: Use a meat thermometer for accuracy.
- While the salmon cooks, combine the diced avocado, tomato, red onion, and lime juice in a bowl to make the salsa.
- Remove the salmon from the grill and let it rest for 2 minutes before serving.
- Top each salmon fillet with a generous spoonful of avocado salsa.
Oh, the joy of cutting into that perfectly grilled salmon, its flaky texture giving way to the creamy, zesty salsa. Serve it atop a bed of quinoa for a heartier meal, or keep it light with a side of crisp greens. Either way, you’re in for a treat.
Beef Wellington with Mushroom Duxelles

Venture into the realm of culinary royalty with a dish that’s as bold in flavor as it is in presentation. Beef Wellington with Mushroom Duxelles isn’t just food; it’s a statement piece that says, ‘I’ve got my life together’—or at least my dinner does.
Ingredients
- Beef tenderloin – 2 lbs
- Salt – 1 tsp
- Black pepper – ½ tsp
- Olive oil – 2 tbsp
- Cremini mushrooms – 8 oz
- Butter – 2 tbsp
- Puff pastry – 1 sheet
- Egg – 1
Instructions
- Preheat your oven to 425°F. This is your first step to greatness.
- Season the beef tenderloin with salt and pepper. Be generous; this is no time for shyness.
- Heat olive oil in a pan over high heat. Sear the beef on all sides until browned, about 2 minutes per side. Tip: Don’t move it around too much; let it develop a crust.
- Remove the beef and let it cool. Patience is a virtue, especially in cooking.
- In the same pan, melt butter and sauté mushrooms until they release their moisture and it evaporates, about 10 minutes. Tip: Chop the mushrooms finely for a smoother duxelles.
- Roll out the puff pastry on a floured surface. Spread the mushroom duxelles over it, then place the beef in the center.
- Wrap the pastry around the beef, sealing the edges with a bit of beaten egg. Tip: Use the egg wash to give your Wellington a golden, glossy finish.
- Bake for 25-30 minutes, or until the pastry is golden and the beef reaches an internal temperature of 135°F for medium-rare.
Flaky, buttery pastry gives way to tender, juicy beef, all hugged by earthy mushrooms. Serve it sliced thickly, with a side of roasted veggies or a bold red wine that can stand up to the flavors. This dish doesn’t just feed the body; it feeds the soul.
Lemon Garlic Butter Shrimp Pasta
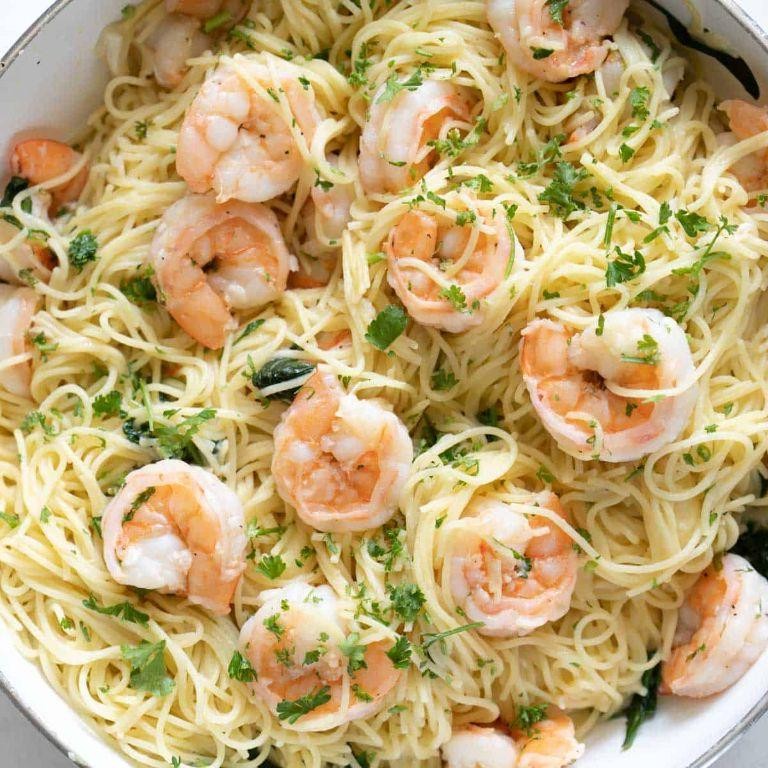
Now, let’s dive into a dish that’s as zesty as your aunt’s comments at Thanksgiving—Lemon Garlic Butter Shrimp Pasta. It’s the kind of meal that makes you forget about your carb-counting resolutions with just one bite.
Ingredients
- Shrimp – 1 lb
- Pasta – 8 oz
- Butter – 4 tbsp
- Garlic – 3 cloves
- Lemon – 1
- Salt – ½ tsp
- Pepper – ¼ tsp
- Parsley – 2 tbsp
Instructions
- Bring a large pot of salted water to a boil over high heat. Tip: Salt the water like the sea to flavor the pasta from the inside out.
- Add the pasta to the boiling water and cook for 8-10 minutes, or until al dente. Drain and set aside.
- While the pasta cooks, melt butter in a large skillet over medium heat. Tip: Keep the heat medium to prevent the butter from burning.
- Add minced garlic to the skillet and sauté for 1 minute, or until fragrant.
- Increase the heat to medium-high and add the shrimp to the skillet. Cook for 2-3 minutes per side, or until pink and opaque.
- Squeeze the juice of one lemon over the shrimp and sprinkle with salt and pepper. Stir to combine.
- Add the cooked pasta to the skillet and toss to coat in the lemon garlic butter sauce. Tip: A splash of pasta water can help the sauce cling to the noodles.
- Garnish with chopped parsley before serving.
Mmm, the pasta is luxuriously coated in a rich, buttery sauce with a bright kick of lemon, while the shrimp are perfectly tender. Serve it with a side of crusty bread to sop up every last drop of that delicious sauce, or top with extra lemon zest for an added zing.
Roasted Chicken with Herbs and Vegetables
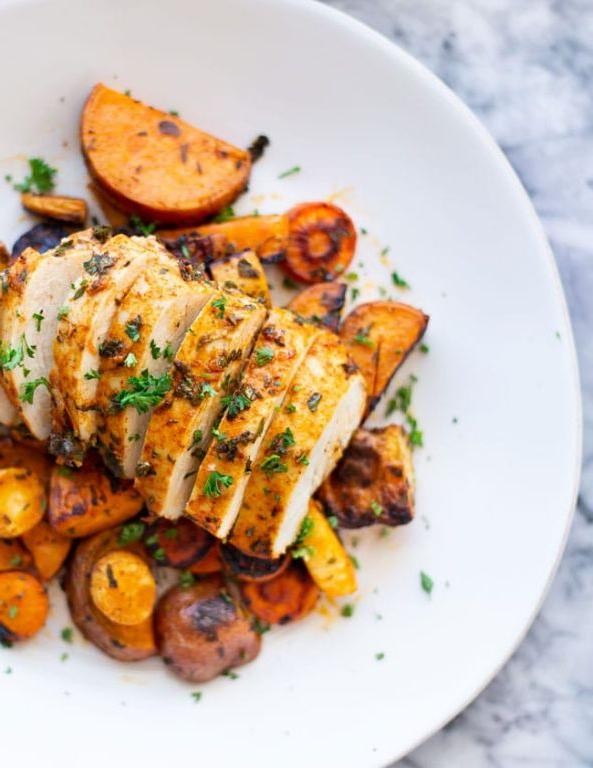
Picture this: a golden, herb-crusted chicken emerging from your oven, its aroma teasing your senses like a siren’s call to the dinner table. This isn’t just any chicken dish—it’s a symphony of flavors waiting to dance on your palate, with veggies that have soaked up all the herby goodness.
Ingredients
- Whole chicken – 1 (about 4 lbs)
- Olive oil – 2 tbsp
- Garlic powder – 1 tsp
- Dried thyme – 1 tsp
- Dried rosemary – 1 tsp
- Salt – 1 tsp
- Black pepper – ½ tsp
- Carrots – 2 cups, chopped
- Potatoes – 2 cups, chopped
Instructions
- Preheat your oven to 375°F. This ensures a perfectly roasted chicken with crispy skin.
- In a small bowl, mix olive oil, garlic powder, thyme, rosemary, salt, and black pepper. Tip: Rubbing the oil mixture under the chicken skin maximizes flavor.
- Place the chicken in a roasting pan. Rub the oil mixture all over the chicken, including inside the cavity.
- Arrange chopped carrots and potatoes around the chicken in the pan. Tip: Cutting veggies into uniform sizes ensures even cooking.
- Roast in the preheated oven for 90 minutes, or until the chicken’s internal temperature reaches 165°F. Tip: Letting the chicken rest for 10 minutes before carving keeps it juicy.
Now, the moment of truth: that first bite reveals tender, flavorful meat with a crispy skin, while the veggies are perfectly soft with a hint of herbaceous charm. Serve it straight from the pan for a rustic, family-style meal that’s sure to impress.
Vegetable Lasagna with Bechamel Sauce
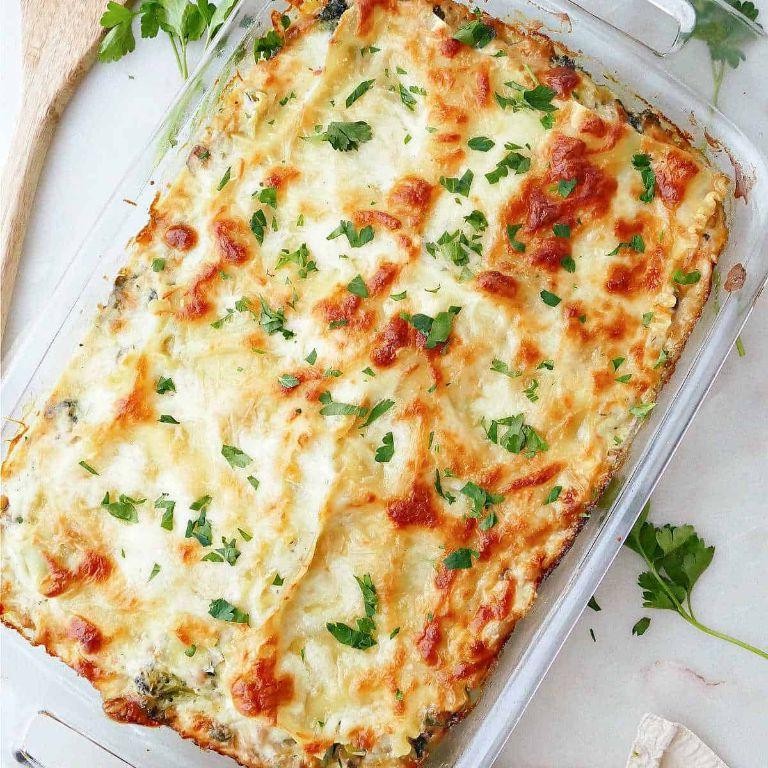
Today’s the day we ditch the meat and dive fork-first into a veggie-packed masterpiece that’ll make even the most devout carnivores question their life choices. Vegetable Lasagna with Bechamel Sauce is here to steal the spotlight, and trust me, it’s worth every cheesy, creamy bite.
Ingredients
- Lasagna noodles – 12
- Butter – 4 tbsp
- Flour – ¼ cup
- Milk – 3 cups
- Nutmeg – ¼ tsp
- Salt – 1 tsp
- Black pepper – ½ tsp
- Zucchini – 1, sliced
- Spinach – 2 cups
- Ricotta cheese – 15 oz
- Mozzarella cheese – 2 cups, shredded
- Parmesan cheese – ½ cup, grated
Instructions
- Preheat your oven to 375°F. This ensures a perfectly golden top without overcooking the veggies.
- Cook lasagna noodles according to package instructions until al dente, then drain and set aside. Tip: A drizzle of olive oil prevents sticking.
- Melt butter in a saucepan over medium heat. Whisk in flour to create a roux, cooking for 2 minutes until golden.
- Gradually add milk, whisking continuously to avoid lumps. Bring to a simmer, then stir in nutmeg, salt, and pepper. Cook for 5 minutes until thickened. Tip: Keep the heat medium-low for a smooth bechamel.
- Layer noodles, bechamel, zucchini, spinach, ricotta, and mozzarella in a 9×13 inch baking dish. Repeat layers, finishing with bechamel and a sprinkle of parmesan.
- Bake for 25 minutes until bubbly and golden. Tip: Let it rest for 10 minutes before slicing for cleaner cuts.
Kindly behold your creation: layers of tender noodles, vibrant veggies, and creamy bechamel meld into a harmonious bite. Serve with a crisp salad or garlic bread to turn this lasagna into a feast.
Lobster Thermidor
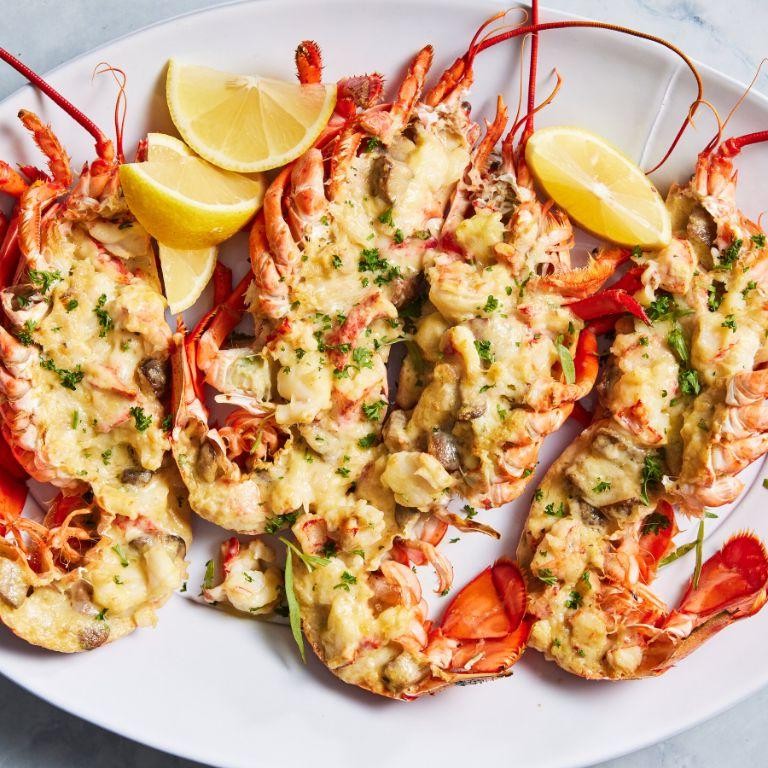
Craving a dish that screams luxury without the fuss of a Michelin star? Lobster Thermidor is your golden ticket, blending rich flavors with a dash of drama—perfect for impressing your in-laws or just treating yourself like the royalty you are.
Ingredients
- Lobster – 2 (1.5 lbs each)
- Butter – 4 tbsp
- Heavy cream – 1 cup
- Dijon mustard – 1 tbsp
- Parmesan cheese – ½ cup, grated
- White wine – ¼ cup
- Paprika – ½ tsp
Instructions
- Preheat your oven to 375°F—because every great dish starts with a warm welcome.
- Boil the lobsters in a large pot of salted water for 8 minutes, then cool and split them in half lengthwise. Tip: Save the shells for presentation; they’re nature’s fanciest serving dish.
- Remove the meat, chop it into bite-sized pieces, and set aside. Keep those shells intact; they’re going back in the oven later.
- In a skillet, melt butter over medium heat. Add the lobster meat, sautéing for 2 minutes until just golden. Tip: Don’t overcook; lobster’s like a good joke—best when it’s not overdone.
- Stir in heavy cream, Dijon mustard, and white wine. Simmer for 5 minutes until the sauce thickens slightly. Tip: If the sauce is too thin, let it reduce a bit more—patience is a virtue, especially in Thermidor.
- Stuff the lobster shells with the meat mixture, sprinkle with Parmesan and paprika, and bake for 10 minutes until bubbly and golden.
Zesty, creamy, and with a kick of mustard, this Lobster Thermidor is a textural dream—crispy on top, tender inside. Serve it straight from the shell for that ‘I definitely meant to look this fancy’ effect.
Filet Mignon with Red Wine Reduction
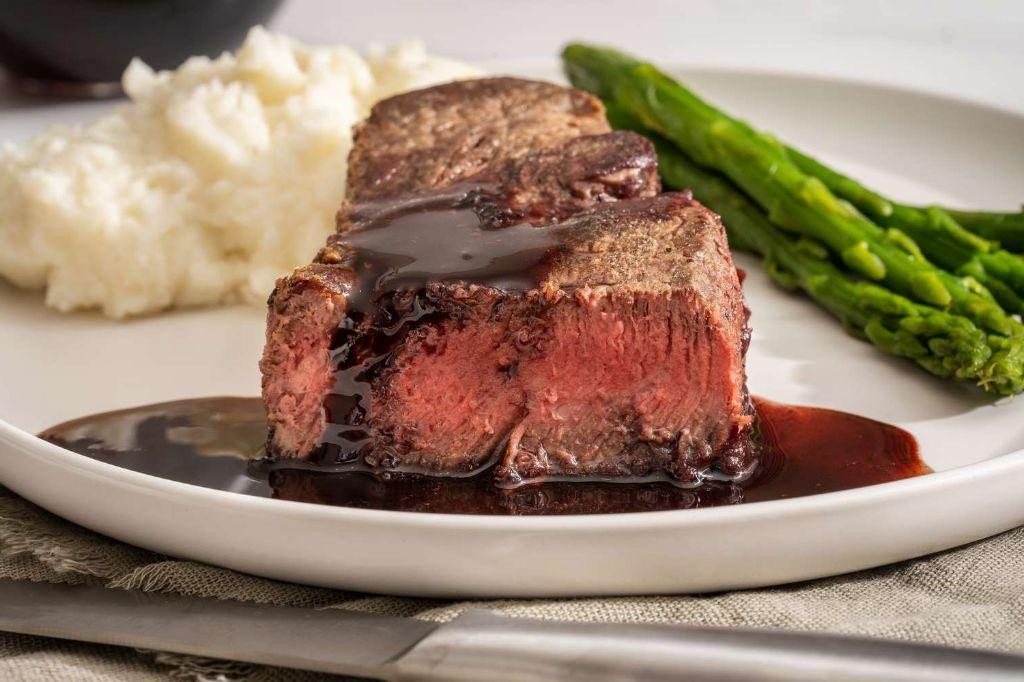
Oh, the sheer audacity of a dish that makes you feel like a gourmet chef with minimal effort! Filet Mignon with Red Wine Reduction is that fancy-pants meal you brag about making, and we’re here to spill the beans on how to nail it.
Ingredients
- Filet Mignon – 2 (6 oz each)
- Salt – ½ tsp
- Black pepper – ¼ tsp
- Olive oil – 1 tbsp
- Butter – 2 tbsp
- Garlic – 2 cloves, minced
- Red wine – ½ cup
- Beef broth – ½ cup
Instructions
- Preheat your oven to 400°F. This ensures a perfectly cooked interior after searing.
- Season both sides of the filet mignon with salt and black pepper. Tip: Let the steak sit at room temperature for 20 minutes before cooking for even cooking.
- Heat olive oil in an oven-safe skillet over medium-high heat until shimmering, about 2 minutes.
- Sear the steaks for 3 minutes on each side until a golden crust forms. Tip: Don’t move the steak around too much to get that perfect sear.
- Add butter and minced garlic to the skillet, spooning the melted butter over the steaks for 1 minute.
- Transfer the skillet to the oven and cook for 5-7 minutes for medium-rare. Tip: Use a meat thermometer to check for an internal temperature of 135°F.
- Remove the steaks from the skillet and let them rest on a plate covered loosely with foil for 5 minutes.
- In the same skillet, add red wine and beef broth, scraping up any browned bits. Simmer over medium heat until reduced by half, about 5 minutes.
- Pour the red wine reduction over the rested steaks before serving.
Juicy, tender, and packed with flavor, this filet mignon is a showstopper. Serve it atop a mound of creamy mashed potatoes or with a side of roasted asparagus for a meal that’ll have everyone asking for seconds.
Stuffed Bell Peppers with Quinoa and Black Beans

Kickstart your meal prep with these vibrant stuffed bell peppers that are as nutritious as they are Instagram-worthy. Packed with quinoa and black beans, they’re a hearty, plant-based delight that even the carnivores at your table will beg for seconds of.
Ingredients
- Bell peppers – 4
- Quinoa – 1 cup
- Black beans – 1 can (15 oz), drained and rinsed
- Olive oil – 2 tbsp
- Garlic – 2 cloves, minced
- Cumin – 1 tsp
- Salt – ½ tsp
- Pepper – ¼ tsp
- Shredded cheese – 1 cup
Instructions
- Preheat your oven to 375°F and lightly grease a baking dish with olive oil.
- Cut the tops off the bell peppers and remove the seeds and membranes. Tip: Choose peppers that can stand upright for easier stuffing.
- Rinse the quinoa under cold water, then cook it according to package instructions. Tip: Cooking quinoa in vegetable broth adds extra flavor.
- In a skillet, heat 1 tbsp olive oil over medium heat. Add the minced garlic and sauté for 1 minute until fragrant.
- Stir in the cooked quinoa, black beans, cumin, salt, and pepper. Cook for 2-3 minutes until everything is well combined.
- Stuff the bell peppers with the quinoa mixture and place them in the prepared baking dish. Tip: Pack the filling tightly to prevent it from drying out.
- Drizzle the remaining olive oil over the peppers and top with shredded cheese.
- Bake for 25-30 minutes, until the peppers are tender and the cheese is bubbly and golden.
Every bite of these stuffed bell peppers offers a delightful contrast between the tender pepper and the hearty, cheesy filling. Serve them atop a bed of greens for a colorful plate or alongside a dollop of sour cream for an extra creamy finish.
Chicken Piccata with Capers and Lemon
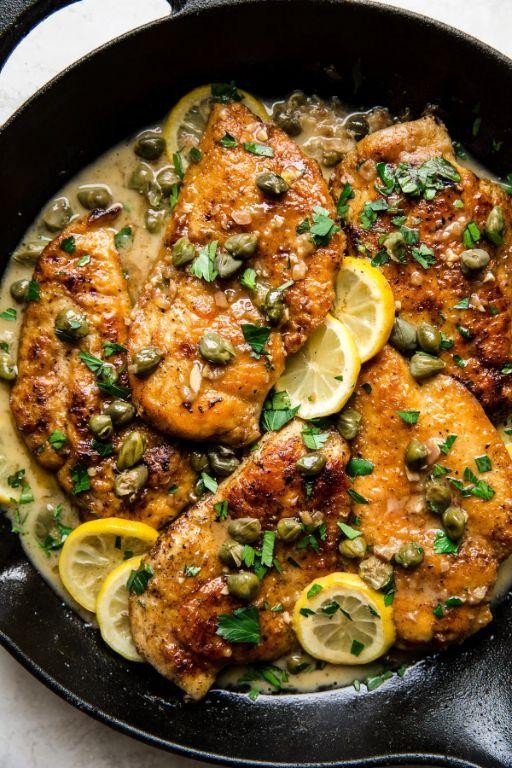
Alright, let’s dive into a dish that’s as zesty as your aunt’s comments at Thanksgiving—Chicken Piccata with Capers and Lemon. It’s the perfect blend of tangy, savory, and downright delicious, guaranteed to make your taste buds do a happy dance.
Ingredients
- Chicken breasts – 2, boneless and skinless
- Flour – ½ cup
- Salt – 1 tsp
- Black pepper – ½ tsp
- Butter – 2 tbsp
- Olive oil – 2 tbsp
- Chicken broth – 1 cup
- Lemon juice – ¼ cup
- Capers – 2 tbsp, drained
- Parsley – 2 tbsp, chopped
Instructions
- Pound the chicken breasts to an even ½-inch thickness between two pieces of plastic wrap. Tip: Use the flat side of a meat mallet for even pounding.
- Mix flour, salt, and pepper on a plate. Dredge each chicken breast in the mixture, shaking off excess.
- Heat butter and olive oil in a large skillet over medium-high heat until the butter is melted and the oil is shimmering.
- Add the chicken breasts and cook for 3-4 minutes per side, until golden brown and cooked through. Tip: Don’t overcrowd the pan to ensure a perfect sear.
- Remove chicken from the skillet and set aside on a plate.
- In the same skillet, add chicken broth and lemon juice, scraping up any browned bits. Bring to a simmer and cook for 2 minutes.
- Stir in capers and return the chicken to the skillet, simmering for another 2 minutes to heat through. Tip: The sauce should slightly thicken; if it’s too thin, let it simmer a bit longer.
- Sprinkle with chopped parsley before serving.
Mmm, the chicken is tender with a crispy exterior, swimming in a sauce that’s bright from the lemon and briny from the capers. Serve it over a bed of pasta or with crusty bread to soak up every last drop of that glorious sauce.
Eggplant Parmesan
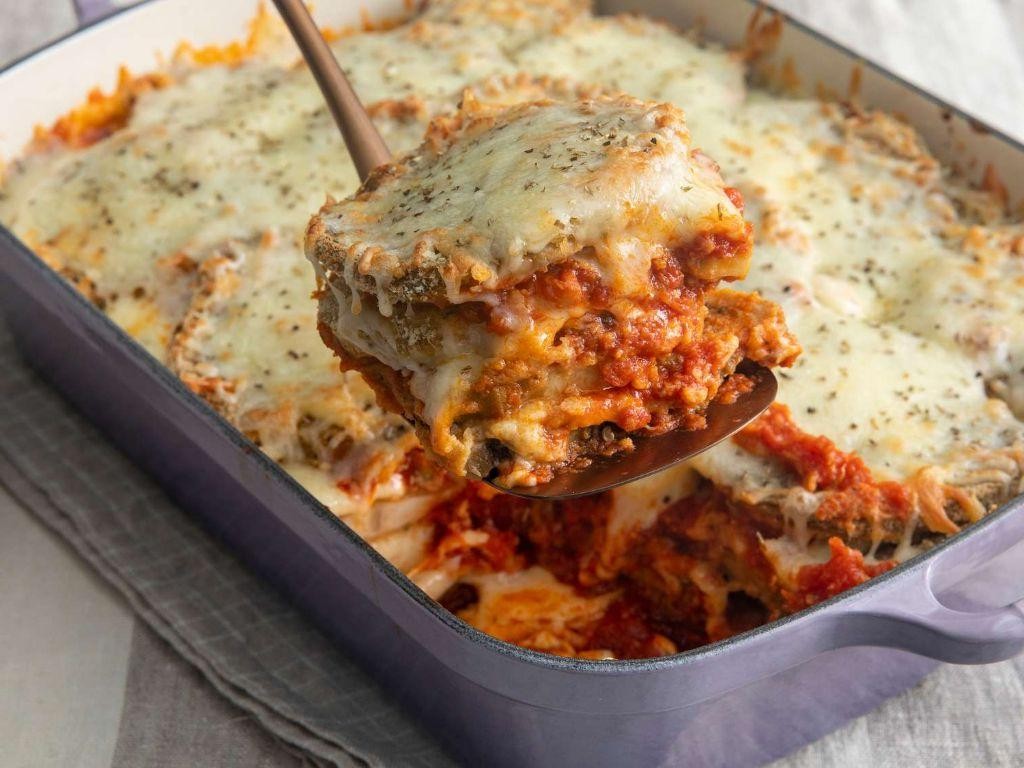
Look no further for a dish that’s as fun to make as it is to devour—Eggplant Parmesan is here to save your dinner plans with its crispy, cheesy, tomato-y glory.
Ingredients
- Eggplant – 1 large
- Flour – 1 cup
- Eggs – 2
- Breadcrumbs – 1 cup
- Marinara sauce – 2 cups
- Mozzarella cheese – 2 cups, shredded
- Parmesan cheese – ½ cup, grated
- Olive oil – ¼ cup
- Salt – 1 tsp
Instructions
- Preheat your oven to 375°F and grab a baking sheet—no need to grease it, we’re keeping it light.
- Slice the eggplant into ½-inch rounds. Pro tip: salting both sides and letting them sit for 10 minutes draws out bitterness and moisture.
- Set up your breading station: flour in one bowl, beaten eggs in another, and breadcrumbs mixed with ¼ cup Parmesan in a third.
- Dredge each eggplant slice in flour, dip in egg, then coat with breadcrumb mix. Place on the baking sheet.
- Bake for 25 minutes, flipping halfway, until golden and crispy. This is where the magic happens—no frying needed!
- Spread 1 cup marinara in a baking dish. Layer half the eggplant, then 1 cup mozzarella, and repeat. Top with remaining Parmesan.
- Bake for 20 minutes until bubbly. Let it rest for 5 minutes; patience is a virtue, especially with melted cheese.
Bite into layers of crispy eggplant, gooey cheese, and tangy sauce. Serve it over spaghetti for a carb-loaded feast or solo for a low-carb win.
Seared Scallops with Pea Puree
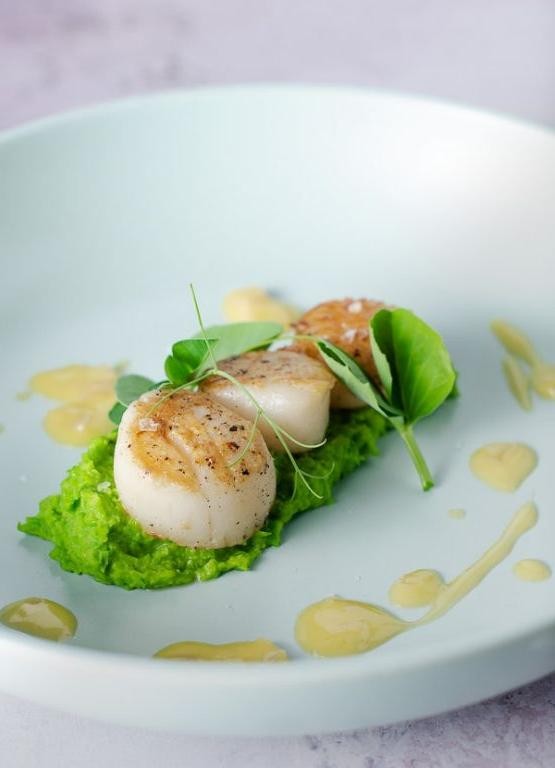
Ever tried to impress someone with your cooking skills but ended up burning water? Fear not, because seared scallops with pea puree is here to save your culinary reputation—it’s fancy enough to dazzle, yet simple enough that you won’t set off the smoke alarm.
Ingredients
- Scallops – 1 lb
- Frozen peas – 2 cups
- Butter – 2 tbsp
- Olive oil – 1 tbsp
- Salt – ½ tsp
- Pepper – ¼ tsp
- Garlic – 1 clove
Instructions
- Thaw frozen peas by placing them in a bowl of warm water for 5 minutes, then drain.
- In a blender, combine peas, 1 tbsp butter, and a pinch of salt. Blend until smooth, adding a splash of water if needed to reach a silky consistency. Tip: For an extra smooth puree, strain it through a fine mesh sieve.
- Heat olive oil in a pan over medium-high heat until it shimmers, about 2 minutes.
- Pat scallops dry with a paper towel and season both sides with salt and pepper. Tip: Dry scallops sear better, ensuring a golden crust.
- Add scallops to the pan, making sure they’re not touching. Cook for 2 minutes without moving them to get a good sear.
- Flip scallops, add remaining butter and minced garlic to the pan. Baste scallops with the melted butter for 1 minute. Tip: Basting adds flavor and ensures even cooking.
- Remove scallops from the pan and let them rest for 1 minute.
Just like that, you’ve got a dish where the scallops are caramelized to perfection, sitting atop a vibrant pea puree that’s as smooth as your cooking skills. Serve it with a sprinkle of fresh herbs or a squeeze of lemon to really make those flavors pop.
Braised Short Ribs with Mashed Potatoes
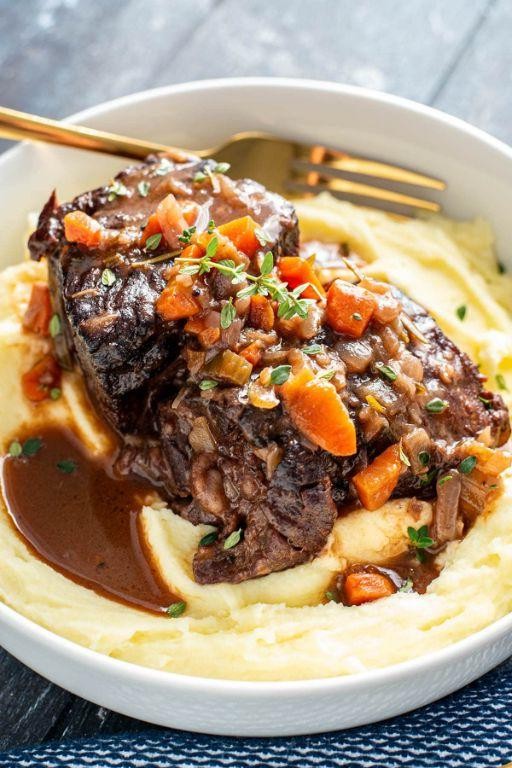
Now, let’s dive into a dish that’s as comforting as your favorite sweatpants but fancy enough to impress your in-laws – braised short ribs with mashed potatoes. It’s the culinary equivalent of a warm hug, with a side of buttery clouds.
Ingredients
- Short ribs – 4 lbs
- Salt – 2 tsp
- Black pepper – 1 tsp
- Olive oil – 2 tbsp
- Onion – 1, chopped
- Garlic – 4 cloves, minced
- Red wine – 1 cup
- Beef broth – 2 cups
- Thyme – 2 sprigs
- Potatoes – 2 lbs, peeled and cubed
- Butter – ½ cup
- Milk – ½ cup
Instructions
- Preheat your oven to 325°F. This low and slow approach is key to tender ribs.
- Season the short ribs with salt and pepper. Don’t be shy; this is their only chance to shine before the braise.
- Heat olive oil in a large oven-proof pot over medium-high heat. Brown the ribs on all sides, about 3 minutes per side. Tip: Do this in batches to avoid steaming the meat.
- Remove the ribs and sauté the onion and garlic until soft, about 5 minutes. The aroma will tell you when it’s time.
- Pour in the red wine, scraping up any browned bits. These bits are flavor gold.
- Add the beef broth and thyme, then return the ribs to the pot. The liquid should come halfway up the ribs.
- Cover and braise in the oven for 3 hours. The ribs are done when they’re fork-tender.
- While the ribs cook, boil the potatoes in salted water until tender, about 15 minutes. Drain well.
- Mash the potatoes with butter and milk until smooth. Tip: Warm the milk first to keep the mash fluffy.
- Season the mashed potatoes with salt to taste. Remember, under-seasoned potatoes are a sad affair.
Heavenly tender ribs meet creamy, dreamy mashed potatoes in this dish. Serve it with a sprinkle of fresh thyme on top for a pop of color and flavor that’ll make your plate Instagram-worthy.
Spinach and Ricotta Stuffed Shells

Ever find yourself staring into the fridge, dreaming of a dish that’s both comforting and slightly fancy? Spinach and Ricotta Stuffed Shells are here to save your dinner—and possibly your soul.
Ingredients
- Jumbo pasta shells – 12 oz
- Ricotta cheese – 15 oz
- Spinach – 10 oz, frozen and thawed
- Mozzarella cheese – 1 cup, shredded
- Parmesan cheese – ½ cup, grated
- Egg – 1
- Garlic powder – 1 tsp
- Salt – ½ tsp
- Marinara sauce – 24 oz
Instructions
- Preheat your oven to 375°F—because good things come to those who bake.
- Boil the jumbo pasta shells according to package instructions, then drain and let them cool. Tip: Add a splash of olive oil to prevent sticking.
- Squeeze all the water out of the thawed spinach like you’re wringing out life’s little disappointments.
- In a bowl, mix ricotta, spinach, mozzarella, parmesan, egg, garlic powder, and salt until it’s a happy, unified mixture.
- Spread a thin layer of marinara sauce at the bottom of a baking dish to prevent shell-sticking tragedies.
- Stuff each shell with the ricotta mixture like you’re tucking them into bed. Place them snugly in the dish.
- Pour the remaining marinara sauce over the shells, then sprinkle with extra mozzarella because cheese is life.
- Bake for 25 minutes, or until the cheese is bubbly and golden. Tip: Let it sit for 5 minutes before serving to avoid a cheese avalanche.
Fluffy, cheesy, and packed with flavor, these stuffed shells are a hug in food form. Serve them with a side of garlic bread for a carb-loaded love fest.
Pork Tenderloin with Apple Chutney
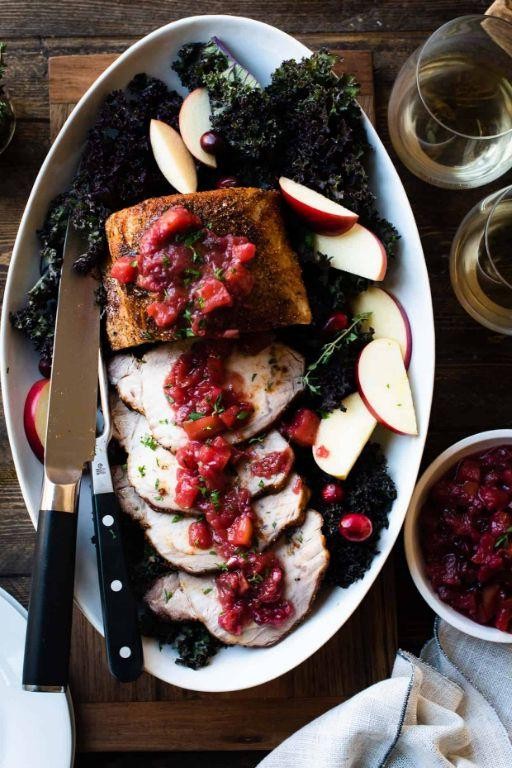
Buckle up, buttercups, because we’re about to take your taste buds on a joyride with a dish that’s as easy to make as it is to devour. Imagine succulent pork tenderloin playing tag with sweet and tangy apple chutney—it’s a match made in culinary heaven.
Ingredients
- Pork tenderloin – 1 lb
- Apples – 2, diced
- Brown sugar – ¼ cup
- Apple cider vinegar – 2 tbsp
- Cinnamon – ½ tsp
- Salt – ½ tsp
- Pepper – ¼ tsp
- Olive oil – 1 tbsp
Instructions
- Preheat your oven to 375°F—because good things come to those who wait (and preheat).
- Season the pork tenderloin with salt and pepper, then sear it in olive oil over medium-high heat until it’s golden brown, about 3 minutes per side. Tip: Don’t crowd the pan, or you’ll steam the pork instead of searing it.
- While the pork is searing, mix the diced apples, brown sugar, apple cider vinegar, and cinnamon in a bowl. Tip: Use a mix of sweet and tart apples for a more complex flavor.
- Transfer the seared pork to a baking dish and smother it with the apple mixture. Tip: If you’re feeling fancy, add a splash of bourbon to the chutney for an extra kick.
- Bake for 25 minutes, or until the pork reaches an internal temperature of 145°F. Let it rest for 5 minutes before slicing—this keeps the juices from running all over your cutting board.
Delight in the tender pork that’s perfectly complemented by the chunky, sweet-spicy apple chutney. Serve it over a bed of creamy mashed potatoes or alongside a crisp green salad for a meal that’s anything but ordinary.
Ratatouille with Goat Cheese
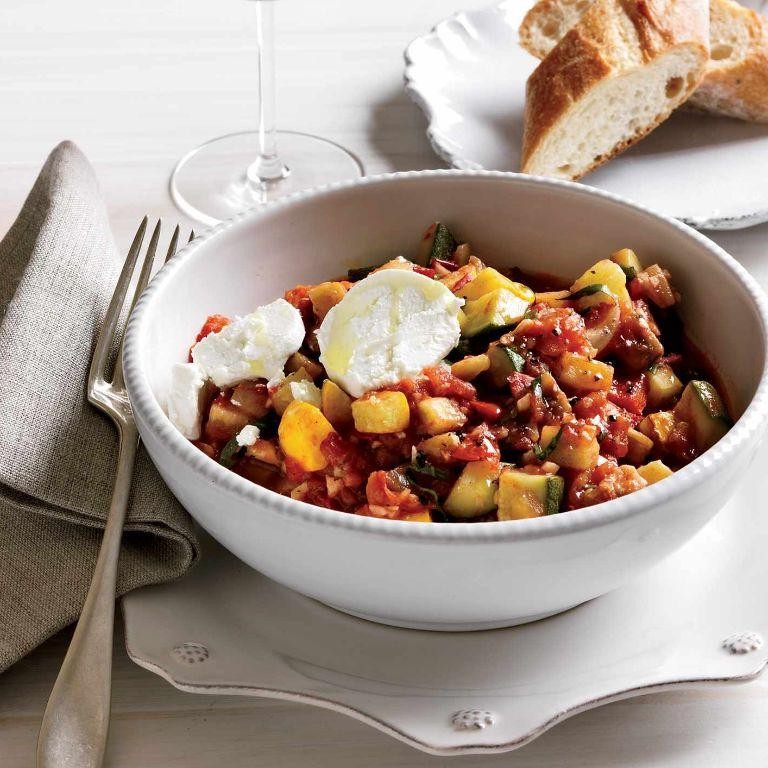
Veggies, meet your match! This Ratatouille with Goat Cheese is not just a mouthful to say but a downright delicious way to turn your garden haul into a dish that’ll have everyone at the table pretending they’re in a Pixar movie. And with goat cheese? Oh, we’re playing in the big leagues now.
Ingredients
- Eggplant – 1 medium, diced
- Zucchini – 1 medium, diced
- Red bell pepper – 1, diced
- Tomatoes – 2 cups, diced
- Onion – 1, diced
- Garlic – 3 cloves, minced
- Olive oil – 2 tbsp
- Goat cheese – 4 oz
- Salt – 1 tsp
- Black pepper – ½ tsp
Instructions
- Preheat your oven to 375°F because we’re about to get cozy.
- In a large skillet, heat olive oil over medium heat. Tip: If the oil shimmers, it’s ready to party.
- Add onion and garlic, sautéing until they’re just shy of golden, about 3 minutes.
- Toss in eggplant, zucchini, and bell pepper. Cook until they start to soften, about 5 minutes. Tip: Stir occasionally to prevent any veggie from getting too clingy to the pan.
- Add tomatoes, salt, and pepper. Let the mixture simmer for 10 minutes, stirring occasionally. Tip: The tomatoes should break down slightly, creating a saucy base.
- Transfer the mixture to a baking dish. Dollop goat cheese on top like you’re decorating a cake.
- Bake for 20 minutes, or until the goat cheese is slightly golden and the veggies are tender.
And there you have it—a Ratatouille with Goat Cheese that’s as vibrant in flavor as it is in color. The goat cheese adds a creamy tang that plays off the sweet, roasted veggies beautifully. Serve it with a crusty baguette to sop up all that goodness, or be fancy and plate it over polenta for a dinner that’ll have you saying, ‘Ratatouille who?’
Thai Green Curry with Chicken

Ready to spice up your dinner routine with a dish that packs as much personality as it does flavor? Thai Green Curry with Chicken is here to turn your meal into a vibrant adventure, no passport required.
Ingredients
- Chicken breast – 1 lb, sliced
- Green curry paste – 2 tbsp
- Coconut milk – 1 can (13.5 oz)
- Fish sauce – 1 tbsp
- Brown sugar – 1 tbsp
- Basil leaves – ½ cup
- Jasmine rice – 1 cup
Instructions
- Heat a large pan over medium heat and add the green curry paste, stirring for 1 minute until fragrant.
- Pour in the coconut milk, stirring to combine with the paste, and bring to a simmer.
- Add the sliced chicken breast to the pan, ensuring each piece is submerged in the curry sauce.
- Stir in the fish sauce and brown sugar, then reduce heat to low and let simmer for 15 minutes, or until the chicken is fully cooked.
- Tip: For an extra flavor boost, lightly crush the basil leaves before adding them to release their aromatic oils.
- Add the basil leaves to the curry, stirring gently, and cook for another 2 minutes.
- Tip: If the curry is too thick, add a splash of water to reach your desired consistency.
- While the curry simmers, cook the jasmine rice according to package instructions.
- Tip: For perfectly fluffy rice, let it sit covered for 5 minutes after cooking before fluffing with a fork.
- Serve the curry hot over the jasmine rice.
Unbelievably creamy with a kick that dances on your palate, this curry is a masterpiece of balance. Try serving it in a hollowed-out pineapple for a fun, tropical twist that’ll have your guests talking.
Wild Mushroom Risotto
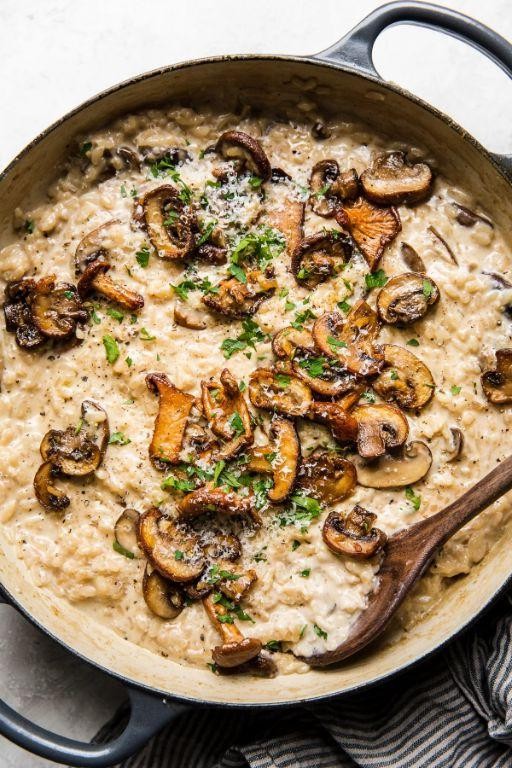
Zesty and utterly irresistible, this Wild Mushroom Risotto is here to prove that your weeknight dinners can indeed be both fancy and fuss-free. Let’s dive into a creamy, dreamy bowl of comfort that’s packed with earthy flavors and a whole lot of love.
Ingredients
- Arborio rice – 1.5 cups
- Wild mushrooms – 2 cups
- Chicken broth – 4 cups
- White wine – 0.5 cup
- Parmesan cheese – 0.75 cup
- Butter – 2 tbsp
- Olive oil – 2 tbsp
- Onion – 1, finely chopped
- Garlic – 2 cloves, minced
- Salt – 1 tsp
- Black pepper – 0.5 tsp
Instructions
- Heat chicken broth in a saucepan over medium heat until simmering, then reduce heat to low to keep warm.
- In a large pan, heat olive oil and 1 tbsp butter over medium heat. Add onions and garlic, sautéing until translucent, about 3 minutes.
- Add wild mushrooms to the pan, cooking until they release their moisture and become tender, about 5 minutes. Tip: Don’t overcrowd the pan to ensure they brown nicely.
- Stir in Arborio rice, coating it well with the oil and butter, and toast for 2 minutes until slightly translucent.
- Pour in white wine, stirring constantly until the liquid is fully absorbed.
- Begin adding the warm chicken broth one ladle at a time, stirring frequently and allowing each addition to be absorbed before adding the next. This process should take about 18-20 minutes. Tip: Keep the broth warm to maintain the cooking temperature.
- Once the rice is al dente and the mixture is creamy, remove from heat. Stir in the remaining butter, Parmesan cheese, salt, and black pepper. Tip: Let it rest for 2 minutes off the heat for the flavors to meld beautifully.
Every bite of this risotto is a creamy, cheesy, mushroomy delight, with the rice perfectly al dente and the flavors deeply comforting. Serve it in a warm bowl with an extra sprinkle of Parmesan and a side of crusty bread for the ultimate cozy meal.
Baked Cod with Tomato and Olive Tapenade
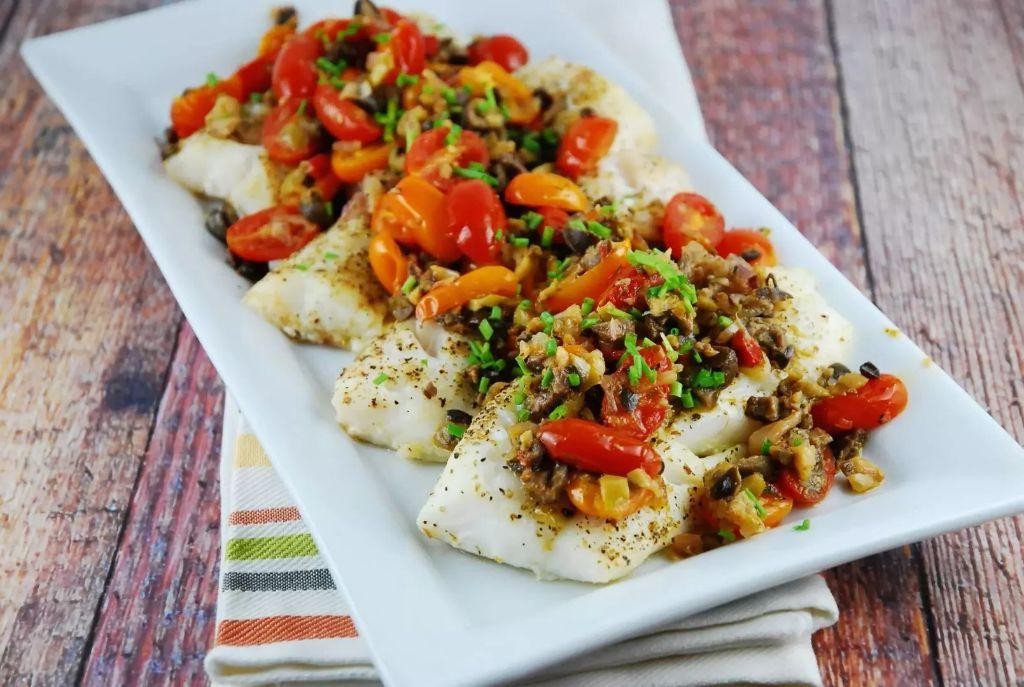
Alright, let’s dive into the ocean of flavors with this dish that’s as easy to make as it is to devour. A baked cod that’s so tender, it practically melts in your mouth, topped with a vibrant tomato and olive tapenade that’ll make your taste buds do a happy dance.
Ingredients
- Cod fillets – 4 (6 oz each)
- Cherry tomatoes – 1 cup, halved
- Kalamata olives – ½ cup, pitted and chopped
- Garlic – 2 cloves, minced
- Olive oil – 2 tbsp
- Lemon – 1, juiced
- Salt – ½ tsp
- Black pepper – ¼ tsp
Instructions
- Preheat your oven to 375°F (190°C) and lightly grease a baking dish. Tip: A well-preheated oven ensures even cooking.
- Place the cod fillets in the prepared dish and drizzle with 1 tbsp of olive oil, then season with salt and black pepper.
- In a bowl, mix together the cherry tomatoes, Kalamata olives, minced garlic, remaining olive oil, and lemon juice. Tip: Letting this mixture sit for 5 minutes before baking enhances the flavors.
- Spoon the tomato and olive tapenade evenly over the cod fillets.
- Bake in the preheated oven for 15-20 minutes, or until the cod flakes easily with a fork. Tip: Avoid overcooking to keep the cod moist and tender.
So, what’s the verdict? The cod comes out flaky and moist, perfectly complemented by the tangy and briny tapenade. Serve it over a bed of quinoa or with a side of roasted veggies for a meal that’s as nutritious as it is delicious.
Lamb Chops with Mint Pesto
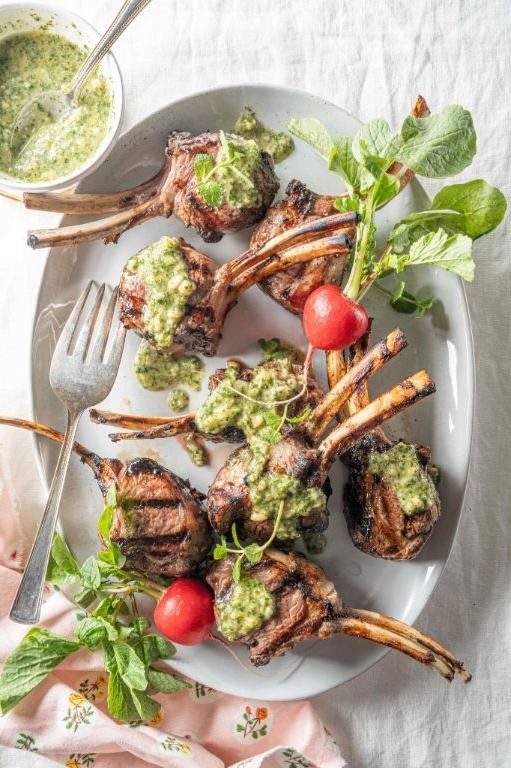
Hold onto your aprons, folks, because we’re about to dive into a dish that’s as fancy as it is forgiving—perfect for those ‘I-want-to-impress-but-also-not-stress’ kind of nights.
Ingredients
- Lamb chops – 8
- Olive oil – 2 tbsp
- Salt – 1 tsp
- Black pepper – ½ tsp
- Fresh mint leaves – 1 cup
- Pine nuts – ¼ cup
- Garlic – 2 cloves
- Parmesan cheese – ¼ cup, grated
- Lemon juice – 2 tbsp
Instructions
- Preheat your grill or grill pan to medium-high heat (about 400°F). This ensures those chops get a beautiful sear without turning into charcoal.
- While the grill heats, rub the lamb chops with olive oil, then season both sides with salt and black pepper. Pro tip: Let them sit at room temperature for 10 minutes for even cooking.
- Grill the lamb chops for 3-4 minutes per side for medium-rare. Remember, they’ll continue to cook a bit off the heat, so don’t overdo it.
- Meanwhile, make the mint pesto by blending mint leaves, pine nuts, garlic, Parmesan, and lemon juice in a food processor until smooth. Slowly drizzle in 2 tbsp of olive oil while blending. Kitchen hack: If the pesto is too thick, add a teaspoon of water to loosen it up.
- Serve the lamb chops hot with a generous dollop of mint pesto on top or on the side for dipping.
Zesty, herby, and with just the right amount of kick, these lamb chops are a game-changer. Try serving them over a bed of quinoa or with roasted veggies for a meal that’s as balanced as it is bold.
Chocolate Lava Cake with Raspberry Coulis
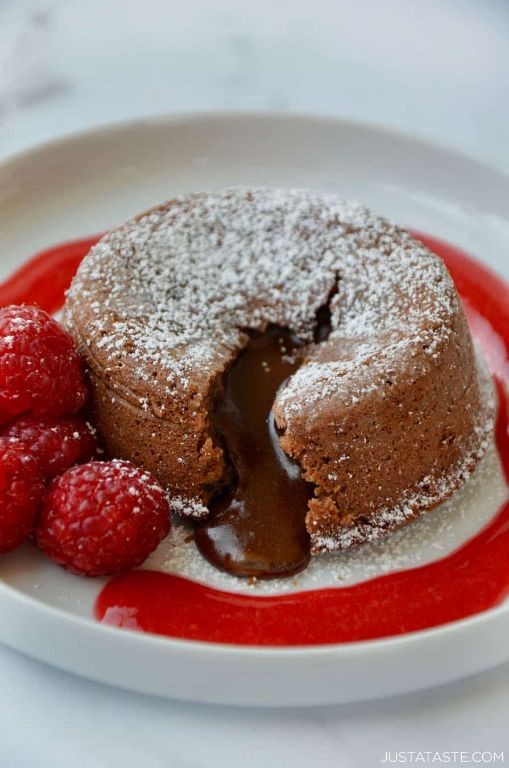
Brace yourselves, dessert lovers, because we’re about to dive fork-first into the molten magic of Chocolate Lava Cake with Raspberry Coulis. This decadent duo is like the superhero team of the dessert world—rich, gooey chocolate paired with the tangy punch of raspberry, ready to save your taste buds from the mundane.
Ingredients
- Butter – ½ cup
- Dark chocolate – 4 oz
- Eggs – 2
- Sugar – ¼ cup
- Flour – 2 tbsp
- Raspberries – 1 cup
- Powdered sugar – 2 tbsp
Instructions
- Preheat your oven to 425°F. This is your first step to lava cake glory.
- Melt butter and dark chocolate together in a microwave-safe bowl in 30-second bursts, stirring in between, until smooth. Tip: Don’t overheat, or you’ll summon the chocolate demons of separation.
- Whisk eggs and sugar in a separate bowl until pale and slightly thickened. This is your arm workout for the day.
- Gently fold the chocolate mixture into the egg mixture, then sift in the flour and fold until just combined. Overmixing is the enemy of fluffiness.
- Pour the batter into 2 greased ramekins, filling only halfway to leave room for the lava to rise. Bake for 12 minutes—no peeking, or you’ll let the heat escape!
- While the cakes bake, blend raspberries and powdered sugar until smooth for the coulis. Strain if you’re fancy, or leave it rustic if you’re lazy (no judgment).
- Remove cakes from the oven. They should be set on the edges but jiggly in the center—like a good dance move.
- Let them sit for 1 minute, then invert onto plates. The grand reveal!
- Drizzle with raspberry coulis and serve immediately. Watch as your guests’ eyes roll back in ecstasy.
Get ready to experience the ultimate texture contrast: the crisp exterior giving way to a river of molten chocolate, all brightened by the sharp sweetness of raspberry. Serve with a scoop of vanilla ice cream for the ‘I can’t believe I made this’ effect.
Conclusion
We hope this roundup of 20 Heartwarming Mother’s Day Dinner Recipes inspires you to create something special for the amazing mom in your life. Each dish is a delicious way to show your love and appreciation. Don’t forget to try out these recipes, share your favorites in the comments, and pin this article on Pinterest for future celebrations. Happy cooking and Happy Mother’s Day!