Looking for the perfect bite-sized treats to satisfy your sweet cravings? You’re in luck! Our roundup of 16 Delicious Mini Dessert Recipes is packed with easy-to-make, irresistible goodies that are just right for any occasion. From decadent chocolate bites to fruity delights, these mini desserts promise big flavors in every small package. Dive in and discover your next favorite sweet treat!
Mini Chocolate Lava Cakes
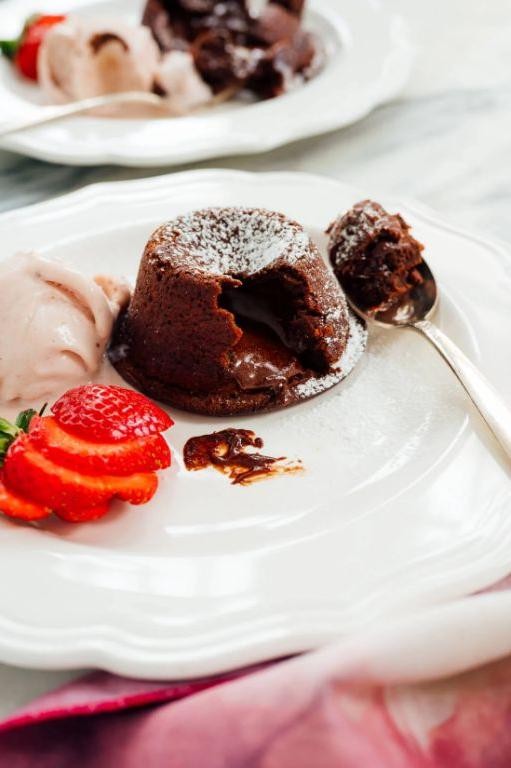
Ever had one of those days when you’re craving something sweet, but you don’t want to spend hours in the kitchen? These mini chocolate lava cakes are your answer. They’re rich, decadent, and surprisingly easy to make.
Ingredients
- 1/2 cup unsalted butter
- 4 oz semi-sweet chocolate
- 1 cup powdered sugar
- 2 large eggs
- 2 large egg yolks
- 1 tsp vanilla extract
- 1/2 cup all-purpose flour
Instructions
- Preheat your oven to 425°F. Grease four 6-ounce ramekins with butter and dust with flour, tapping out the excess.
- In a microwave-safe bowl, melt the butter and chocolate together in 30-second bursts, stirring after each until smooth.
- Whisk in the powdered sugar until well combined. Tip: Ensure the mixture is slightly cooled before adding eggs to prevent scrambling.
- Add the eggs, egg yolks, and vanilla extract to the chocolate mixture, whisking until smooth.
- Gently fold in the flour until just combined. Overmixing can make the cakes tough.
- Divide the batter evenly among the prepared ramekins. Tip: Fill them only 3/4 full to allow room for rising.
- Bake for 12-14 minutes, until the edges are firm but the centers are soft. Tip: The cakes should jiggle slightly when shaken.
- Let the cakes cool for 1 minute, then invert onto plates. Serve immediately.
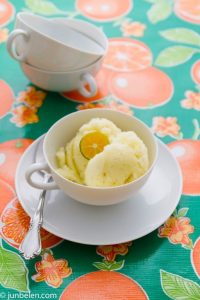
The cakes will have a gooey, molten center that oozes out when cut into. Pair them with a scoop of vanilla ice cream for an extra indulgent treat.
Petite Lemon Tarts
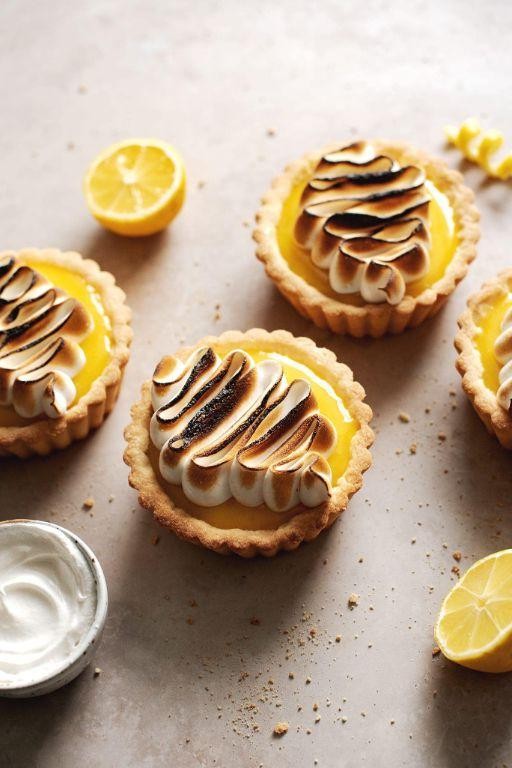
Fancy a little something sweet that won’t weigh you down? These petite lemon tarts are the perfect bite-sized treat, combining a buttery crust with a tangy lemon filling. You’ll love how easy they are to make and how impressive they look on any dessert table.
Ingredients
- 1 1/4 cups all-purpose flour
- 1/2 cup unsalted butter, chilled and cubed
- 1/4 cup granulated sugar
- 1/4 tsp salt
- 3 tbsp ice water
- 1/2 cup lemon juice
- 2 tbsp lemon zest
- 3/4 cup granulated sugar
- 2 large eggs
- 1/4 cup unsalted butter, melted
Instructions
- Preheat your oven to 350°F (175°C).
- In a large bowl, mix 1 1/4 cups all-purpose flour, 1/4 cup granulated sugar, and 1/4 tsp salt.
- Add 1/2 cup chilled, cubed unsalted butter to the flour mixture. Use your fingers to rub the butter into the flour until the mixture resembles coarse crumbs.
- Gradually add 3 tbsp ice water, stirring until the dough comes together. Tip: If the dough is too dry, add a little more water, a teaspoon at a time.
- Roll out the dough on a lightly floured surface to about 1/8-inch thickness. Cut into circles to fit your tart molds.
- Press the dough circles into the molds and trim the edges. Prick the bottoms with a fork.
- Bake the crusts for 10 minutes, then remove from the oven.
- In a separate bowl, whisk together 1/2 cup lemon juice, 2 tbsp lemon zest, 3/4 cup granulated sugar, 2 large eggs, and 1/4 cup melted unsalted butter until smooth.
- Pour the lemon filling into the pre-baked crusts.
- Bake for another 15-20 minutes, or until the filling is set and the edges are lightly golden. Tip: The filling should jiggle slightly in the center when shaken; it will set as it cools.
- Let the tarts cool in the molds for 10 minutes, then transfer to a wire rack to cool completely.
Mmm, these tarts are a delightful balance of sweet and tart, with a crisp crust that melts in your mouth. Serve them with a dollop of whipped cream or a sprinkle of powdered sugar for an extra special touch.
Miniature Red Velvet Cupcakes

Delightful doesn’t even begin to describe these miniature red velvet cupcakes. You’re going to love how they’re just the right size for a sweet treat without the guilt, and their vibrant color is sure to brighten any day.
Ingredients
- 1 1/4 cups all-purpose flour
- 1/2 cup granulated sugar
- 1/2 tsp baking soda
- 1/2 tsp salt
- 1/2 tsp cocoa powder
- 1/2 cup vegetable oil
- 1/2 cup buttermilk
- 1 large egg
- 1 tbsp red food coloring
- 1/2 tsp vanilla extract
- 1/2 tsp white vinegar
Instructions
- Preheat your oven to 350°F and line a mini cupcake pan with paper liners.
- In a large bowl, whisk together 1 1/4 cups all-purpose flour, 1/2 cup granulated sugar, 1/2 tsp baking soda, 1/2 tsp salt, and 1/2 tsp cocoa powder until well combined.
- In another bowl, mix 1/2 cup vegetable oil, 1/2 cup buttermilk, 1 large egg, 1 tbsp red food coloring, 1/2 tsp vanilla extract, and 1/2 tsp white vinegar until smooth.
- Gradually add the dry ingredients to the wet ingredients, stirring just until combined. Tip: Overmixing can lead to dense cupcakes, so stop as soon as you no longer see flour streaks.
- Fill each cupcake liner about two-thirds full with batter. Tip: A small cookie scoop can help keep your cupcakes uniform in size.
- Bake for 12-15 minutes, or until a toothpick inserted into the center of a cupcake comes out clean. Tip: Rotate the pan halfway through baking for even cooking.
- Let the cupcakes cool in the pan for 5 minutes, then transfer to a wire rack to cool completely.
Perfectly moist with a tender crumb, these cupcakes pack a punch of flavor that’s subtly chocolatey with a hint of tang. Try topping them with a dollop of cream cheese frosting and a sprinkle of crushed pecans for an extra special touch.
Tiny Tiramisu Cups
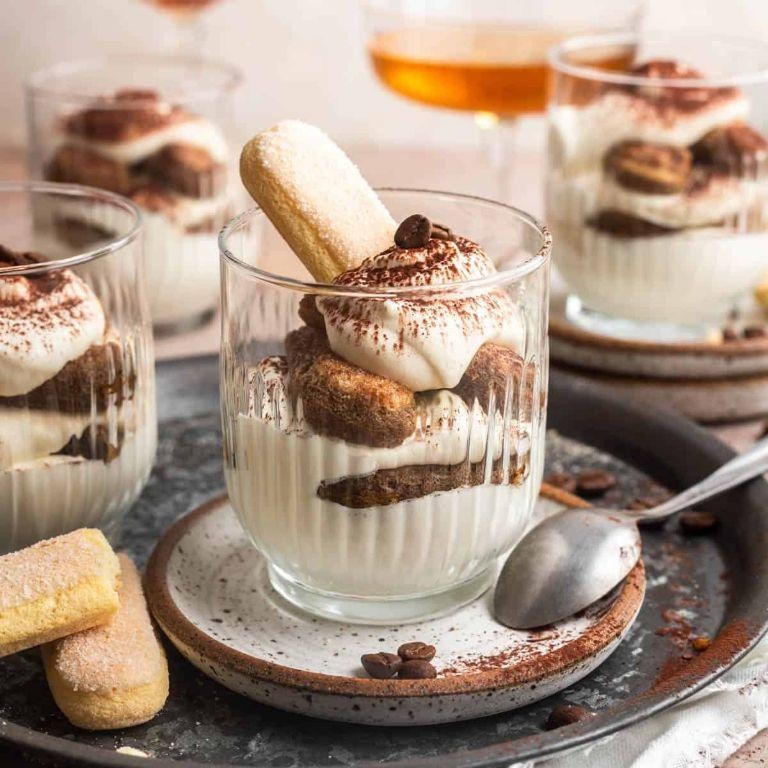
Ever find yourself craving tiramisu but don’t want to commit to a whole cake? These Tiny Tiramisu Cups are your perfect solution—easy to make, no fuss, and just the right size for a sweet treat.
Ingredients
- 1 cup mascarpone cheese
- 1/2 cup heavy cream
- 1/4 cup granulated sugar
- 1 tsp vanilla extract
- 1 cup strong brewed coffee, cooled
- 2 tbsp coffee liqueur
- 24 ladyfinger cookies
- 2 tbsp cocoa powder
Instructions
- In a large bowl, beat the mascarpone cheese, heavy cream, sugar, and vanilla extract together until smooth and creamy. Tip: Ensure your mascarpone is at room temperature for easier mixing.
- In a shallow dish, combine the cooled coffee and coffee liqueur. Quickly dip each ladyfinger into the coffee mixture—just a second on each side to avoid sogginess.
- Layer the bottom of each cup with a coffee-dipped ladyfinger. Tip: Use small glasses or jars for a cute presentation.
- Spoon a layer of the mascarpone mixture over the ladyfingers. Repeat the layers, ending with the mascarpone mixture.
- Chill the cups in the refrigerator for at least 4 hours, or overnight for best results. Tip: Cover with plastic wrap to prevent the tops from drying out.
- Before serving, dust the tops with cocoa powder for that classic tiramisu finish.
You’ll love how these Tiny Tiramisu Cups balance the rich, creamy mascarpone with the bold coffee flavor. Serve them at your next dinner party for a dessert that’s as impressive as it is easy to make.
Small Batch Chocolate Chip Cookies
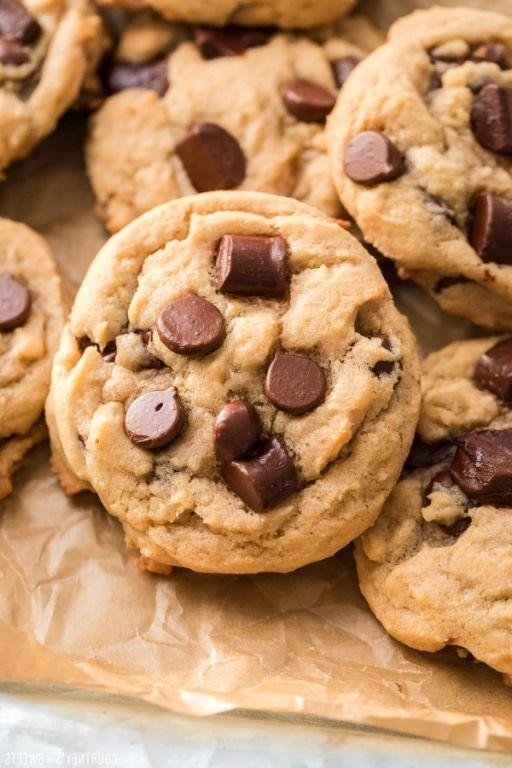
Sometimes, you just need a few warm, gooey chocolate chip cookies without ending up with a mountain of leftovers. That’s where this small batch recipe comes in handy.
Ingredients
- 1/2 cup all-purpose flour
- 1/4 tsp baking soda
- 1/4 tsp salt
- 2 tbsp unsalted butter, melted
- 2 tbsp granulated sugar
- 2 tbsp packed brown sugar
- 1/4 tsp vanilla extract
- 1 large egg yolk
- 1/4 cup semi-sweet chocolate chips
Instructions
- Preheat your oven to 350°F (175°C) and line a baking sheet with parchment paper.
- In a small bowl, whisk together the flour, baking soda, and salt.
- In another bowl, mix the melted butter, granulated sugar, brown sugar, and vanilla extract until well combined.
- Add the egg yolk to the butter mixture and stir until smooth.
- Gradually fold the dry ingredients into the wet ingredients until just combined.
- Gently mix in the chocolate chips, being careful not to overwork the dough.
- Scoop 4 equal portions of dough onto the prepared baking sheet, spacing them about 2 inches apart.
- Bake for 10-12 minutes, or until the edges are golden but the centers are still soft.
- Let the cookies cool on the baking sheet for 5 minutes before transferring to a wire rack.
Delightfully crisp on the edges and chewy in the middle, these cookies are perfect with a glass of cold milk. For an extra treat, try sandwiching a scoop of vanilla ice cream between two cookies.
Mini Cheesecakes with Berry Topping
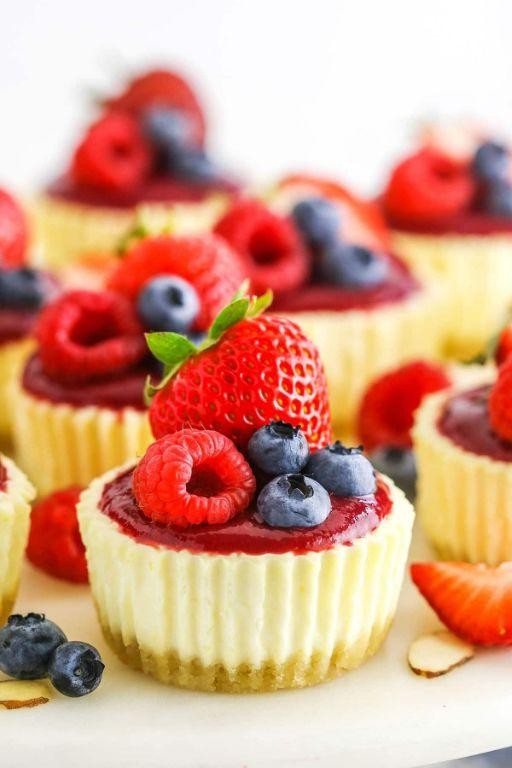
Kick off your dessert game with these mini cheesecakes that are as fun to make as they are to eat. Perfect for any occasion, they’re topped with a vibrant berry topping that’ll have everyone asking for seconds.
Ingredients
- 1 cup graham cracker crumbs
- 3 tbsp unsalted butter, melted
- 16 oz cream cheese, softened
- 1/2 cup granulated sugar
- 2 large eggs
- 1 tsp vanilla extract
- 1 cup mixed berries
- 1/4 cup granulated sugar
- 1 tbsp lemon juice
Instructions
- Preheat your oven to 325°F and line a muffin tin with paper liners.
- Mix 1 cup graham cracker crumbs with 3 tbsp melted butter until well combined. Press 1 tbsp of the mixture into the bottom of each liner.
- Bake the crusts for 5 minutes, then let them cool. Tip: This helps the crust set and prevents sogginess.
- Beat 16 oz softened cream cheese with 1/2 cup sugar until smooth. Add 2 eggs, one at a time, then mix in 1 tsp vanilla.
- Divide the filling evenly among the liners, filling each about 3/4 full. Tip: Tap the tin gently on the counter to remove air bubbles.
- Bake for 20 minutes or until the centers are just set. Cool in the tin, then refrigerate for at least 2 hours. Tip: Cheesecakes firm up as they chill, so patience is key.
- While the cheesecakes chill, combine 1 cup mixed berries, 1/4 cup sugar, and 1 tbsp lemon juice in a saucepan. Cook over medium heat until the berries break down and the sauce thickens, about 10 minutes. Cool before topping the cheesecakes.
Fresh out of the fridge, these mini cheesecakes are creamy with a slight tang, balanced by the sweet and tart berry topping. Serve them on a platter for a stunning dessert display or pack them individually for a sweet on-the-go treat.
Bite-Sized Apple Pies

Oh, you’re going to love these bite-sized apple pies! They’re the perfect little treats for when you’re craving something sweet but don’t want to commit to a whole slice. Easy to make and even easier to eat, they’re sure to be a hit at any gathering.
Ingredients
- 2 cups all-purpose flour
- 1/2 cup unsalted butter, chilled and diced
- 1/4 cup cold water
- 2 medium apples, peeled and finely chopped
- 1/4 cup granulated sugar
- 1 tsp ground cinnamon
- 1/4 tsp ground nutmeg
- 1 egg, beaten
Instructions
- Preheat your oven to 375°F and line a baking sheet with parchment paper.
- In a large bowl, mix the flour and butter until the mixture resembles coarse crumbs.
- Gradually add the cold water, stirring until the dough comes together. Tip: Handle the dough as little as possible to keep it tender.
- On a floured surface, roll out the dough to 1/8-inch thickness and cut into small circles.
- In another bowl, combine the apples, sugar, cinnamon, and nutmeg.
- Place a small amount of the apple mixture in the center of each dough circle.
- Fold the dough over the filling to create a half-circle shape and crimp the edges with a fork to seal. Tip: Make sure the edges are well sealed to prevent the filling from leaking.
- Brush the tops of the pies with the beaten egg for a golden finish.
- Bake for 15-20 minutes, or until the pies are golden brown. Tip: Keep an eye on them after 15 minutes to avoid overbaking.
You’ll adore the flaky crust and the sweet, spiced apple filling in every bite. Try serving them warm with a scoop of vanilla ice cream for an extra special treat.
Mini Pumpkin Spice Muffins
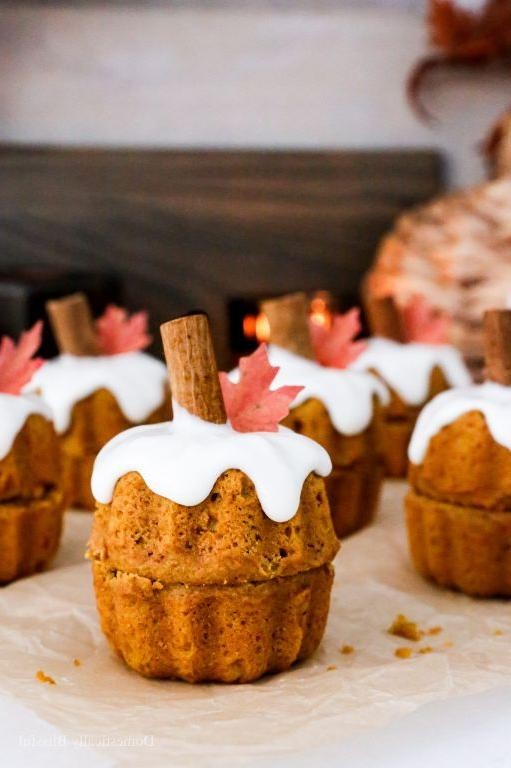
Every fall, you crave those warm, spicy flavors that make the season so cozy. These mini pumpkin spice muffins are your answer—easy to make and perfect for sharing (or not).
Ingredients
- 1 cup all-purpose flour
- 1/2 cup granulated sugar
- 1 tsp baking powder
- 1/2 tsp baking soda
- 1/2 tsp salt
- 1 tsp ground cinnamon
- 1/2 tsp ground nutmeg
- 1/4 tsp ground cloves
- 1/4 tsp ground ginger
- 1/2 cup canned pumpkin puree
- 1/4 cup vegetable oil
- 1 large egg
- 1/4 cup milk
- 1 tsp vanilla extract
Instructions
- Preheat your oven to 350°F (175°C). Line a mini muffin tin with paper liners or grease lightly.
- In a large bowl, whisk together 1 cup all-purpose flour, 1/2 cup granulated sugar, 1 tsp baking powder, 1/2 tsp baking soda, 1/2 tsp salt, 1 tsp ground cinnamon, 1/2 tsp ground nutmeg, 1/4 tsp ground cloves, and 1/4 tsp ground ginger.
- In another bowl, mix 1/2 cup canned pumpkin puree, 1/4 cup vegetable oil, 1 large egg, 1/4 cup milk, and 1 tsp vanilla extract until smooth.
- Pour the wet ingredients into the dry ingredients. Stir until just combined—don’t overmix, or the muffins will be tough.
- Fill each muffin cup about 3/4 full. A small cookie scoop works perfectly for this.
- Bake for 12-15 minutes, or until a toothpick inserted into the center comes out clean.
- Let the muffins cool in the tin for 5 minutes, then transfer to a wire rack.
Light and fluffy, these muffins pack a punch of pumpkin spice flavor. Try them warm with a dab of cream cheese frosting for an extra treat.
Little Key Lime Pies
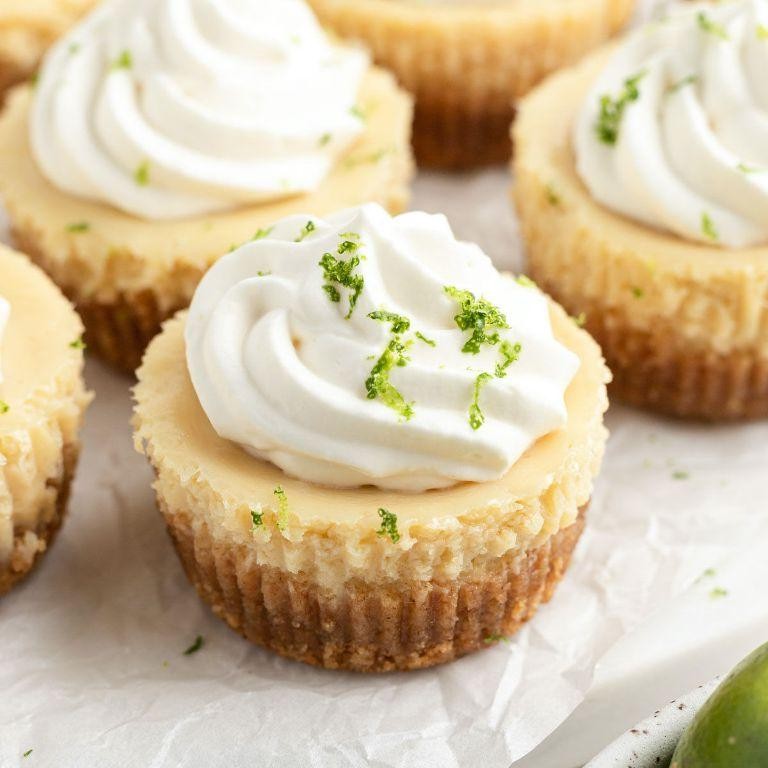
Oh, you’re going to love these little key lime pies! They’re the perfect mix of tangy and sweet, with a buttery crust that just melts in your mouth. Plus, they’re mini, so you can have more than one without feeling guilty.
Ingredients
- 1 1/2 cups graham cracker crumbs
- 1/3 cup granulated sugar
- 6 tbsp unsalted butter, melted
- 4 large egg yolks
- 14 oz sweetened condensed milk
- 1/2 cup key lime juice
- 1 tbsp key lime zest
Instructions
- Preheat your oven to 350°F (175°C).
- In a medium bowl, mix 1 1/2 cups graham cracker crumbs, 1/3 cup granulated sugar, and 6 tbsp melted unsalted butter until well combined.
- Press the mixture firmly into the bottom of a 12-cup mini muffin tin. Tip: Use the bottom of a small glass to press the crumbs evenly.
- Bake the crusts for 5 minutes, then let them cool slightly.
- In another bowl, whisk together 4 large egg yolks, 14 oz sweetened condensed milk, 1/2 cup key lime juice, and 1 tbsp key lime zest until smooth.
- Pour the filling into the crusts, filling each cup almost to the top.
- Bake for 15 minutes, or until the filling is set but still slightly jiggly in the center. Tip: The pies will firm up as they cool, so don’t overbake.
- Let the pies cool in the tin for 10 minutes, then transfer to a wire rack to cool completely. Tip: Run a knife around the edges to loosen them easily.
- Chill in the refrigerator for at least 1 hour before serving.
Ready to dig in? These little key lime pies have a creamy, velvety texture with a bright, citrusy punch. Serve them with a dollop of whipped cream and a sprinkle of lime zest for an extra special touch.
Miniature Peanut Butter Cups
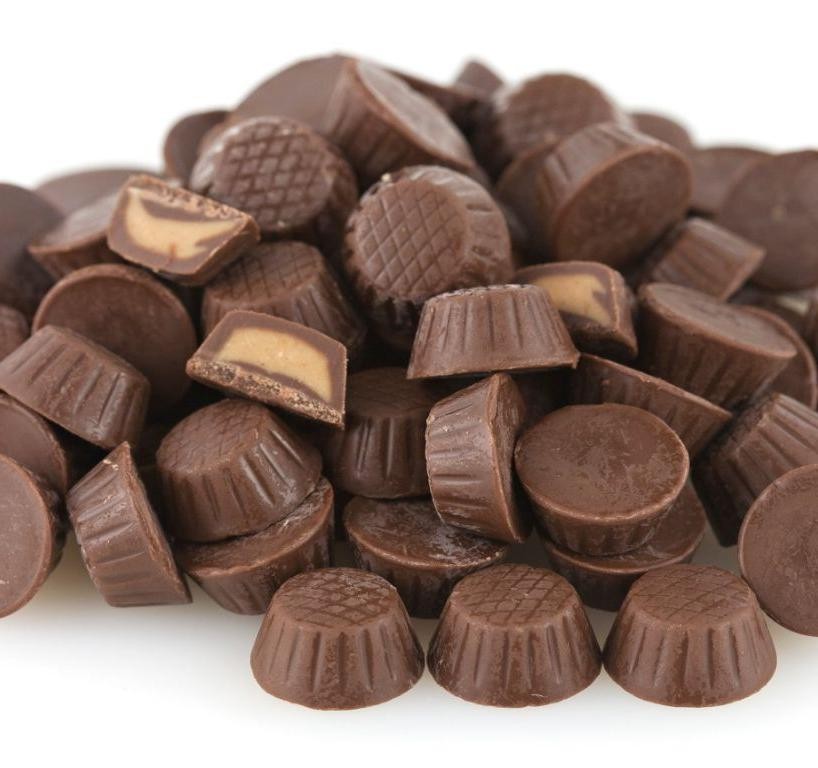
Looking for a sweet treat that’s easy to make and even easier to love? These miniature peanut butter cups are the perfect bite-sized indulgence, combining creamy peanut butter with rich chocolate for a dessert that’s sure to impress.
Ingredients
- 1 cup creamy peanut butter
- 1/2 cup powdered sugar
- 1/4 tsp salt
- 2 cups semi-sweet chocolate chips
- 1 tbsp coconut oil
Instructions
- Line a mini muffin tin with paper liners.
- In a medium bowl, mix together 1 cup creamy peanut butter, 1/2 cup powdered sugar, and 1/4 tsp salt until smooth.
- Roll the peanut butter mixture into small balls, about 1 tsp each, and place them on a parchment-lined tray. Tip: If the mixture is too sticky, chill it for 10 minutes.
- Freeze the peanut butter balls for 15 minutes to firm up.
- In a microwave-safe bowl, melt 2 cups semi-sweet chocolate chips with 1 tbsp coconut oil in 30-second intervals, stirring until smooth. Tip: Avoid overheating to prevent the chocolate from seizing.
- Pour a small amount of melted chocolate into each muffin liner, just enough to cover the bottom.
- Place a peanut butter ball into each liner, then cover with more melted chocolate until fully enclosed. Tip: Use a toothpick to help submerge the peanut butter ball if needed.
- Tap the tin gently on the counter to remove any air bubbles.
- Chill the peanut butter cups in the refrigerator for at least 30 minutes, or until the chocolate is set.
Delightfully rich and creamy, these miniature peanut butter cups offer a perfect balance of sweet and salty. Try drizzling them with a little extra melted chocolate or a sprinkle of sea salt for an extra special touch.
Small Vanilla Bean Scones
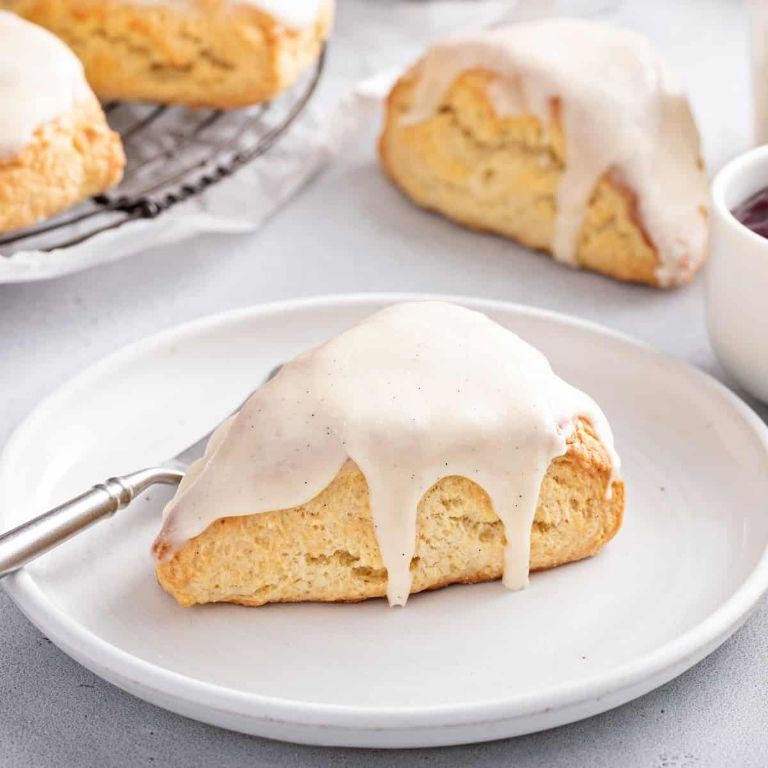
Baking these small vanilla bean scones is like bringing a little piece of bakery bliss right into your kitchen. You’ll love how their sweet, aromatic flavor pairs perfectly with your morning coffee or tea.
Ingredients
- 2 cups all-purpose flour
- 1/3 cup granulated sugar
- 1 tbsp baking powder
- 1/2 tsp salt
- 1/2 cup unsalted butter, cold and cubed
- 1 vanilla bean, seeds scraped
- 1/2 cup heavy cream
- 1 large egg
- 1 tsp vanilla extract
Instructions
- Preheat your oven to 400°F and line a baking sheet with parchment paper.
- In a large bowl, whisk together the flour, sugar, baking powder, and salt.
- Add the cold, cubed butter and vanilla bean seeds to the dry ingredients. Use a pastry cutter or your fingers to work the butter into the flour until the mixture resembles coarse crumbs.
- In a separate bowl, whisk together the heavy cream, egg, and vanilla extract.
- Pour the wet ingredients into the dry ingredients and stir just until the dough comes together. Tip: Overmixing can lead to tough scones, so mix until just combined.
- Turn the dough out onto a lightly floured surface and gently pat it into a 1-inch thick circle.
- Use a sharp knife or a biscuit cutter to cut the dough into small triangles or rounds. Tip: For even baking, try to make all the scones the same size.
- Place the scones on the prepared baking sheet, leaving about 2 inches between each.
- Bake for 12-15 minutes, or until the scones are lightly golden on top. Tip: Check the scones at the 12-minute mark to prevent overbaking.
- Transfer the scones to a wire rack to cool slightly before serving.
Soft and tender on the inside with a slight crispness on the outside, these scones are bursting with vanilla flavor. Serve them warm with a dollop of clotted cream or your favorite jam for an extra special treat.
Miniature Banana Bread Loaves
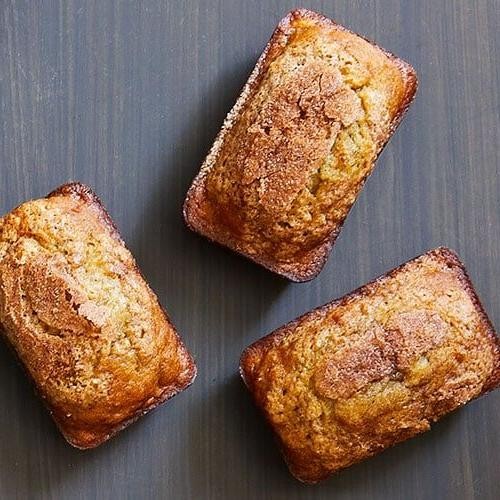
Oh, you’re going to love these miniature banana bread loaves! They’re the perfect size for a quick snack or a sweet treat to share, and they pack all the cozy, comforting flavor of traditional banana bread.
Ingredients
- 1 1/2 cups all-purpose flour
- 1 tsp baking soda
- 1/4 tsp salt
- 3/4 cup granulated sugar
- 1/3 cup unsalted butter, melted
- 1 large egg
- 3 ripe bananas, mashed
- 1/4 cup sour cream
- 1 tsp vanilla extract
Instructions
- Preheat your oven to 350°F and grease a miniature loaf pan.
- In a medium bowl, whisk together 1 1/2 cups all-purpose flour, 1 tsp baking soda, and 1/4 tsp salt.
- In a large bowl, mix 3/4 cup granulated sugar and 1/3 cup melted unsalted butter until well combined.
- Beat in 1 large egg, then stir in 3 mashed ripe bananas, 1/4 cup sour cream, and 1 tsp vanilla extract.
- Gradually fold the dry ingredients into the wet ingredients until just combined. Tip: Overmixing can lead to dense bread.
- Divide the batter evenly among the prepared loaf pan sections. Tip: A cookie scoop can make this step easier and cleaner.
- Bake for 25-30 minutes, or until a toothpick inserted into the center comes out clean. Tip: Check at 25 minutes to avoid overbaking.
- Let the loaves cool in the pan for 10 minutes before transferring to a wire rack.
You’ll adore the moist, tender crumb and the rich banana flavor of these little loaves. Try serving them warm with a dollop of whipped cream or a drizzle of caramel sauce for an extra special touch.
Tiny Strawberry Shortcakes
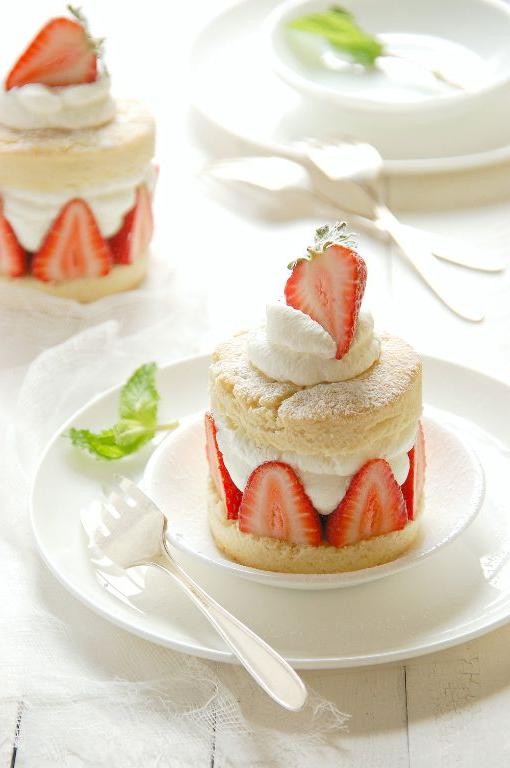
Ever find yourself craving something sweet but not too heavy? These tiny strawberry shortcakes are your answer. Perfect for summer picnics or a cozy night in, they’re as fun to make as they are to eat.
Ingredients
- 1 cup all-purpose flour
- 2 tbsp granulated sugar
- 1.5 tsp baking powder
- 1/4 tsp salt
- 1/4 cup cold unsalted butter, cubed
- 1/3 cup heavy cream
- 1/2 tsp vanilla extract
- 1 cup fresh strawberries, sliced
- 1/2 cup whipped cream
Instructions
- Preheat your oven to 425°F and line a baking sheet with parchment paper.
- In a large bowl, whisk together 1 cup all-purpose flour, 2 tbsp granulated sugar, 1.5 tsp baking powder, and 1/4 tsp salt.
- Add 1/4 cup cold unsalted butter, cubed, to the dry ingredients. Use your fingers to rub the butter into the flour until the mixture resembles coarse crumbs.
- Pour in 1/3 cup heavy cream and 1/2 tsp vanilla extract. Stir just until the dough comes together.
- Turn the dough onto a lightly floured surface and pat it into a 1-inch thick rectangle. Use a small round cutter to stamp out shortcakes.
- Place the shortcakes on the prepared baking sheet, leaving space between each. Bake for 12-15 minutes, or until golden brown.
- Let the shortcakes cool slightly, then split them in half horizontally.
- Layer the bottom halves with 1 cup fresh strawberries, sliced, and a dollop of 1/2 cup whipped cream. Top with the other half of the shortcake.
Kick back and enjoy the contrast of the tender shortcake with the juicy strawberries and fluffy cream. For an extra touch, drizzle with honey or sprinkle with mint leaves before serving.
Mini Chocolate Éclairs
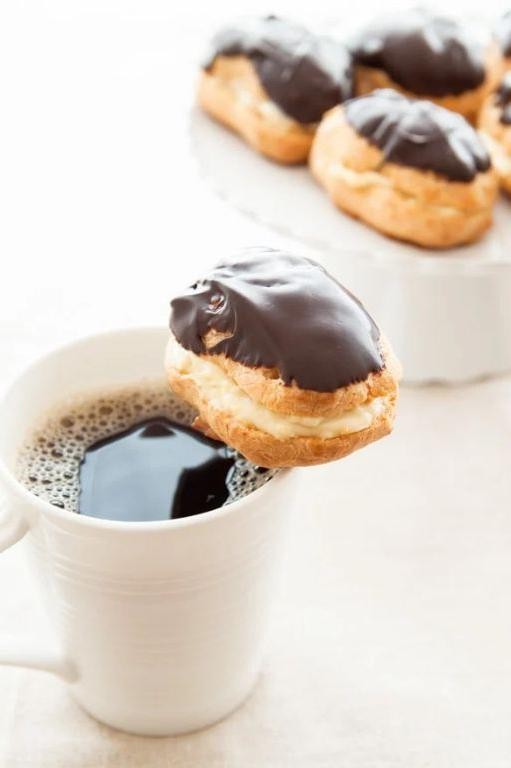
Craving something sweet and elegant but short on time? These mini chocolate éclairs are your answer, combining the classic French pastry’s luxurious feel with a bite-sized convenience.
Ingredients
- 1 cup water
- 1/2 cup unsalted butter
- 1 cup all-purpose flour
- 4 large eggs
- 1 cup heavy cream
- 2 tbsp powdered sugar
- 1 tsp vanilla extract
- 1/2 cup semisweet chocolate chips
- 1 tbsp unsalted butter
Instructions
- Preheat your oven to 375°F and line a baking sheet with parchment paper.
- In a medium saucepan, bring 1 cup water and 1/2 cup unsalted butter to a boil over medium heat.
- Reduce heat to low and add 1 cup all-purpose flour all at once, stirring vigorously until the mixture forms a ball.
- Remove from heat and let cool for 5 minutes. Tip: This prevents the eggs from cooking when added.
- Beat in 4 large eggs one at a time, ensuring each is fully incorporated before adding the next. The dough should be smooth and shiny.
- Transfer the dough to a piping bag fitted with a large round tip and pipe 2-inch logs onto the prepared baking sheet.
- Bake for 25 minutes or until golden brown and puffed. Do not open the oven door early, as this can cause them to collapse.
- Let cool completely on a wire rack. Tip: They should sound hollow when tapped if properly baked.
- In a mixing bowl, whip 1 cup heavy cream, 2 tbsp powdered sugar, and 1 tsp vanilla extract until stiff peaks form.
- Cut the éclairs in half horizontally and pipe the whipped cream onto the bottom halves, then replace the tops.
- Melt 1/2 cup semisweet chocolate chips and 1 tbsp unsalted butter together in the microwave in 30-second intervals, stirring until smooth.
- Dip the tops of the éclairs into the chocolate glaze and let set before serving. Tip: For a glossy finish, add a teaspoon of corn syrup to the glaze.
Rich and creamy with a crisp shell, these mini éclairs are perfect for parties or a fancy treat at home. Try dusting them with powdered sugar or drizzling with caramel for an extra touch of decadence.
Petite Coconut Macaroons
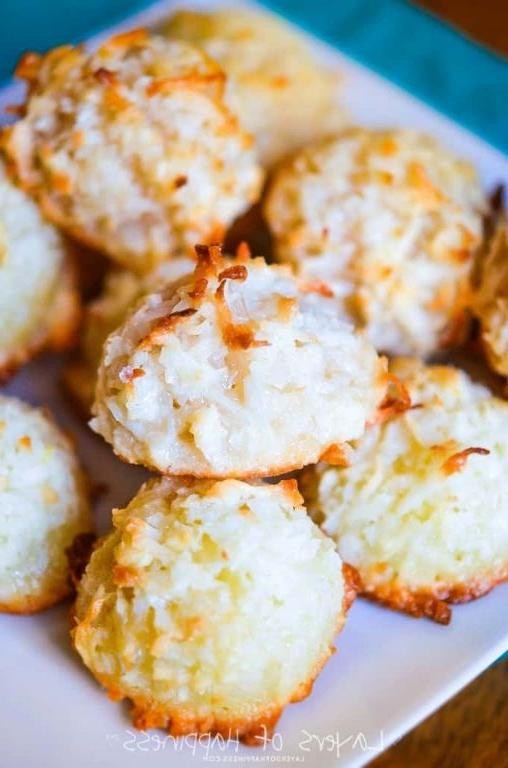
Mmm, you’re going to love these petite coconut macaroons. They’re sweet, chewy, and just the right size for a quick treat. Plus, they’re super easy to make with ingredients you probably already have.
Ingredients
- 2 cups shredded sweetened coconut
- 2/3 cup granulated sugar
- 1/4 cup all-purpose flour
- 1/4 tsp salt
- 2 large egg whites
- 1/2 tsp vanilla extract
Instructions
- Preheat your oven to 325°F and line a baking sheet with parchment paper.
- In a large bowl, mix together the shredded coconut, granulated sugar, flour, and salt until well combined.
- Add the egg whites and vanilla extract to the bowl, stirring until the mixture is evenly moistened.
- Using a tablespoon, scoop the mixture and form it into small mounds on the prepared baking sheet, spacing them about 2 inches apart.
- Bake for 20-25 minutes, or until the macaroons are golden brown on the edges and bottoms.
- Let the macaroons cool on the baking sheet for 5 minutes before transferring them to a wire rack to cool completely.
Perfectly golden and crispy on the outside, these macaroons are delightfully chewy inside. Try drizzling them with melted chocolate for an extra special touch.
Little Raspberry Chocolate Mousse Cups
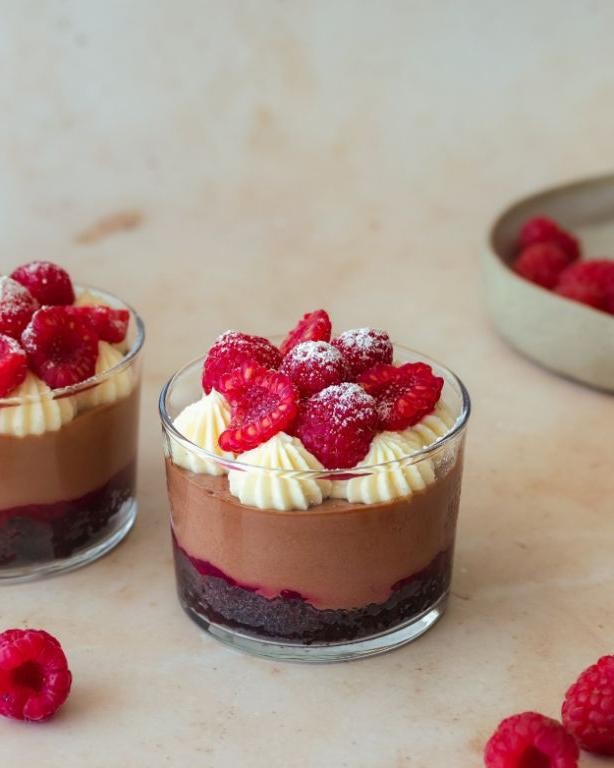
Very few desserts strike the perfect balance between elegance and ease like these Little Raspberry Chocolate Mousse Cups. You’ll love how they’re as fun to make as they are to eat, with layers of rich chocolate and tart raspberry that come together in no time.
Ingredients
- 1 cup heavy cream
- 1/2 cup raspberry puree
- 1/4 cup powdered sugar
- 1 tsp vanilla extract
- 4 oz dark chocolate, melted
- 12 fresh raspberries
Instructions
- In a large bowl, whip the heavy cream until soft peaks form, about 3 minutes.
- Gently fold in the raspberry puree, powdered sugar, and vanilla extract until fully combined.
- Divide the mixture evenly among 4 small cups, filling each halfway.
- Drizzle 1 oz of melted dark chocolate over the mousse in each cup.
- Refrigerate the cups for at least 2 hours to set.
- Before serving, top each cup with 3 fresh raspberries.
Just imagine the creamy mousse paired with the crunch of chocolate and the burst of fresh raspberry. These cups are a dreamy treat that’s perfect for impressing guests or treating yourself on a lazy afternoon.
Conclusion
Great news for all sweet lovers! This roundup of 16 mini dessert recipes is your ticket to bite-sized bliss. Whether you’re hosting a party or treating yourself, there’s something here for every craving. We’d love to hear which recipes you try—drop a comment with your favorites and don’t forget to share the sweetness on Pinterest. Happy baking!