Kickstart your meal prep with ease and flavor! Our roundup of 18 Delicious Make Ahead Casserole Recipes is your ticket to stress-free dinners that don’t skimp on taste. Whether you’re craving comfort food or looking for quick, hearty meals, these casseroles are perfect for busy weeknights or lazy weekends. Dive in and discover your next family favorite!
Cheesy Chicken Broccoli Casserole

How many times have I found myself staring into the fridge, wondering what to make with chicken and broccoli? Too many to count, but this Cheesy Chicken Broccoli Casserole has become my go-to solution. It’s comforting, easy to whip up, and always a hit with the family.
Ingredients
- 2 cups cooked chicken, shredded (I love using leftover rotisserie chicken for this)
- 3 cups fresh broccoli florets (trust me, fresh makes a difference)
- 1 can (10.5 oz) cream of chicken soup (the heart of the casserole)
- 1/2 cup mayonnaise (this adds a creamy richness)
- 1/2 cup milk (whole milk is my preference for extra creaminess)
- 1 1/2 cups shredded cheddar cheese (because more cheese is always better)
- 1/2 tsp garlic powder (for that little kick)
- 1/2 tsp onion powder (it’s all about layering flavors)
- 1/2 cup breadcrumbs (for that perfect crunchy topping)
- 2 tbsp melted butter (to mix with the breadcrumbs)
Instructions
- Preheat your oven to 350°F (175°C) and lightly grease a 9×13 inch baking dish.
- In a large bowl, combine the shredded chicken and broccoli florets.
- In another bowl, whisk together the cream of chicken soup, mayonnaise, milk, garlic powder, and onion powder until smooth.
- Pour the soup mixture over the chicken and broccoli, stirring until everything is well coated.
- Transfer the mixture to the prepared baking dish and spread it out evenly.
- Sprinkle the shredded cheddar cheese evenly over the top.
- In a small bowl, mix the breadcrumbs with the melted butter until the breadcrumbs are moistened.
- Sprinkle the breadcrumb mixture over the cheese layer.
- Bake in the preheated oven for 25-30 minutes, or until the casserole is bubbly and the topping is golden brown.
- Let the casserole sit for 5 minutes before serving to allow it to set.
Zesty and comforting, this casserole is a creamy, cheesy delight with a satisfying crunch from the breadcrumb topping. Serve it over a bed of rice or with a side of crusty bread to soak up all the deliciousness.
Beef and Bean Enchilada Casserole
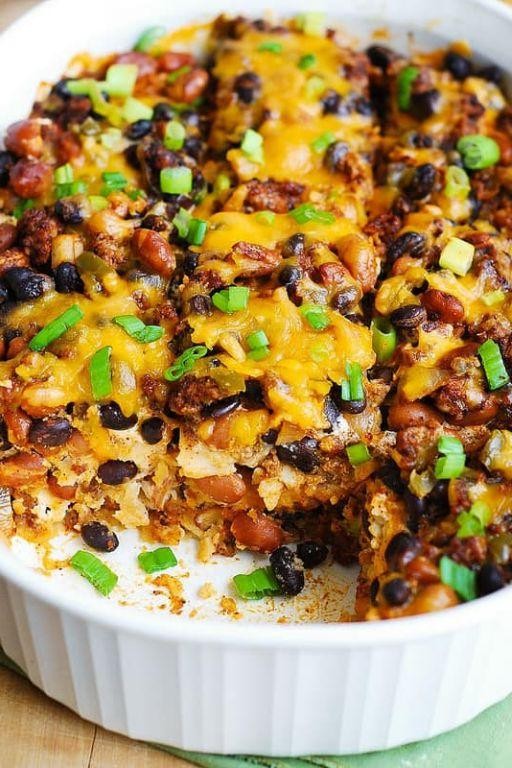
Craving something hearty and comforting? I recently whipped up this Beef and Bean Enchilada Casserole on a chilly evening, and it was the perfect dish to warm us up. It’s a layered masterpiece that combines the richness of beef with the heartiness of beans, all smothered in a tangy enchilada sauce.
Ingredients
- 1 lb ground beef (I like to use 80/20 for that perfect fat ratio)
- 1 can (15 oz) black beans, drained and rinsed (trust me, rinsing removes that extra sodium)
- 2 cups shredded cheddar cheese (because more cheese is always better)
- 1 cup enchilada sauce (homemade or store-bought, no judgment here)
- 6 corn tortillas (I slightly warm them up to make them more pliable)
- 1 tbsp olive oil (extra virgin is my kitchen staple)
- 1/2 cup diced onions (they add a nice crunch)
- 1 tsp cumin (for that earthy depth)
- 1/2 tsp garlic powder (because garlic makes everything better)
Instructions
- Preheat your oven to 375°F (190°C) to get it ready for baking.
- Heat olive oil in a large skillet over medium heat, then add the onions, cooking until translucent, about 3 minutes.
- Add the ground beef to the skillet, breaking it apart with a spoon, and cook until no longer pink, about 5 minutes. Tip: Drain excess fat for a lighter casserole.
- Stir in the black beans, cumin, and garlic powder, cooking for another 2 minutes to let the flavors meld.
- Spread a thin layer of enchilada sauce at the bottom of a 9×13 inch baking dish to prevent sticking.
- Layer 3 tortillas over the sauce, then half of the beef mixture, and 1 cup of cheese. Repeat the layers once more.
- Top with the remaining enchilada sauce and cheese. Tip: Covering with foil for the first 20 minutes prevents the cheese from burning.
- Bake uncovered for another 10 minutes, or until the cheese is bubbly and slightly golden. Tip: Let it sit for 5 minutes before serving to set the layers.
Now the casserole is ready to steal the show with its gooey cheese, tender beef, and beans wrapped in soft tortillas. I love serving it with a dollop of sour cream and a sprinkle of fresh cilantro for an extra kick. Next time, try adding a layer of corn for a sweet crunch!
Spinach and Artichoke Pasta Casserole
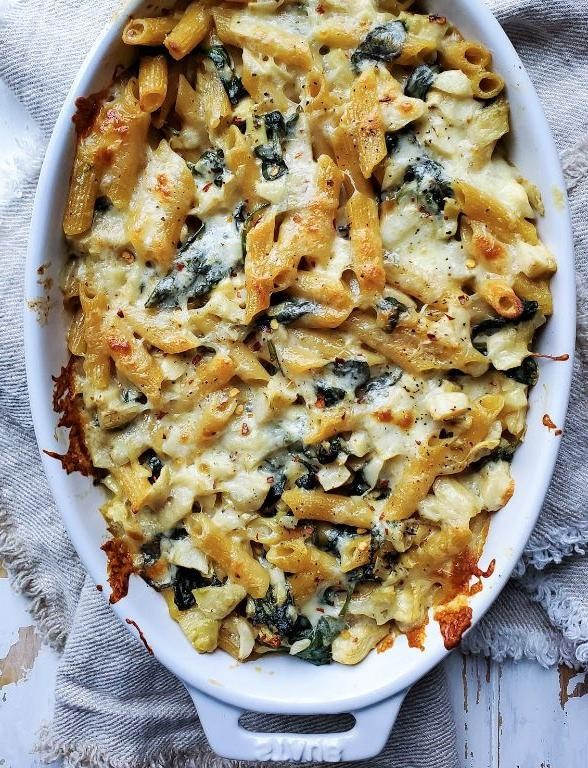
Now, I don’t know about you, but there’s something incredibly comforting about a pasta casserole that’s loaded with creamy spinach and artichokes. It’s like a hug in a dish, perfect for those nights when you need a little extra comfort.
Ingredients
- 8 oz pasta (I’m partial to penne for its ability to hold onto the sauce)
- 1 tbsp extra virgin olive oil (my kitchen staple for almost everything)
- 1 cup chopped onion (because everything good starts with onion)
- 2 cloves garlic, minced (fresh is best, but I won’t judge if you use pre-minced)
- 10 oz frozen spinach, thawed and drained (squeeze out as much water as you can)
- 14 oz artichoke hearts, drained and chopped (I love the tang they add)
- 8 oz cream cheese, softened (room temp blends smoother)
- 1/2 cup sour cream (for that extra creaminess)
- 1/2 cup grated Parmesan cheese (plus more for topping)
- 1/2 tsp salt (adjust to your liking, but this is my sweet spot)
- 1/4 tsp black pepper (freshly ground, if you have it)
- 1/4 tsp red pepper flakes (optional, but I like a little heat)
Instructions
- Preheat your oven to 375°F (190°C) and lightly grease a 9×13 inch baking dish.
- Cook the pasta according to package instructions until al dente, then drain and set aside.
- In a large skillet, heat the olive oil over medium heat. Add the onion and cook until translucent, about 5 minutes.
- Add the garlic and cook for another minute, until fragrant. Tip: Don’t let the garlic burn, or it’ll turn bitter.
- Stir in the spinach and artichoke hearts, cooking until heated through, about 3 minutes.
- Reduce the heat to low and add the cream cheese, sour cream, Parmesan, salt, pepper, and red pepper flakes. Stir until the cream cheese is fully melted and the mixture is smooth.
- Combine the pasta with the spinach and artichoke mixture, then transfer to the prepared baking dish. Sprinkle with additional Parmesan cheese.
- Bake for 20-25 minutes, until the top is golden and bubbly. Tip: For an extra crispy top, broil for the last 2 minutes.
- Let the casserole sit for 5 minutes before serving. This helps it set and makes it easier to serve.
Velvety and rich, this casserole is a crowd-pleaser with its creamy texture and the slight tang from the artichokes. Serve it straight from the dish with a side of crusty bread to soak up all that deliciousness.
Turkey and Sweet Potato Casserole
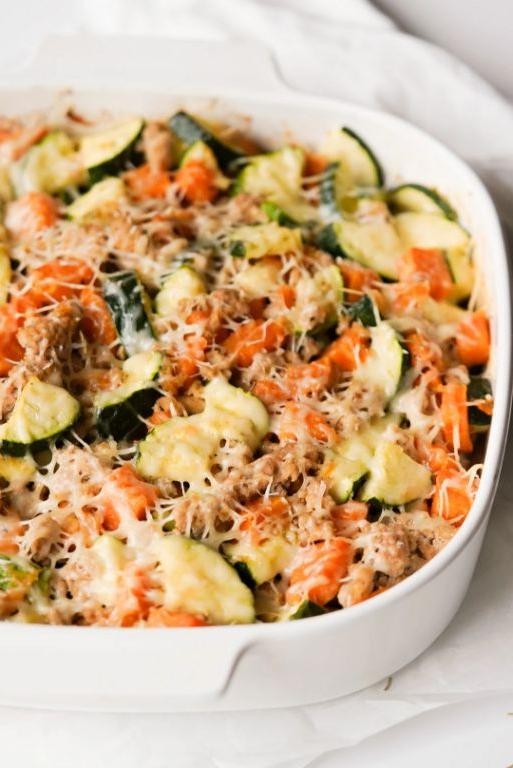
Unbelievably cozy and packed with flavor, this Turkey and Sweet Potato Casserole has become my go-to dish for chilly evenings. It’s a hearty, comforting meal that brings together the sweetness of potatoes and the savory depth of turkey in a way that’s just irresistible.
Ingredients
- 2 cups shredded cooked turkey (I love using leftovers from Thanksgiving for this!)
- 3 medium sweet potatoes, peeled and cubed (about 4 cups)
- 1 cup heavy cream (for that rich, velvety texture)
- 1/2 cup grated Parmesan cheese (the real deal, please)
- 2 tbsp unsalted butter (I always go for unsalted to control the dish’s saltiness)
- 1 tsp garlic powder (because everything’s better with garlic)
- 1/2 tsp smoked paprika (for a subtle smoky kick)
- Salt and pepper to taste (but be generous with the pepper!)
Instructions
- Preheat your oven to 375°F (190°C) and grease a 9×13 inch baking dish with butter.
- In a large pot, boil the sweet potatoes in salted water until fork-tender, about 15 minutes. Drain well.
- Mash the sweet potatoes with heavy cream, 1 tbsp of butter, garlic powder, smoked paprika, salt, and pepper until smooth. Tip: For extra creaminess, warm the cream before adding it to the potatoes.
- Layer the shredded turkey at the bottom of the prepared baking dish, then spread the sweet potato mixture evenly over the top.
- Dot the remaining 1 tbsp of butter over the sweet potato layer and sprinkle with Parmesan cheese.
- Bake for 25-30 minutes, or until the top is golden and bubbly. Tip: For a crispier top, broil for the last 2 minutes.
- Let the casserole sit for 5 minutes before serving. This allows the layers to set, making it easier to slice.
Mmm, the contrast between the creamy sweet potato and the savory turkey is just divine. Serve it with a side of steamed greens for a pop of color and freshness, or enjoy it as is for the ultimate comfort food experience.
Vegetable Lasagna Casserole
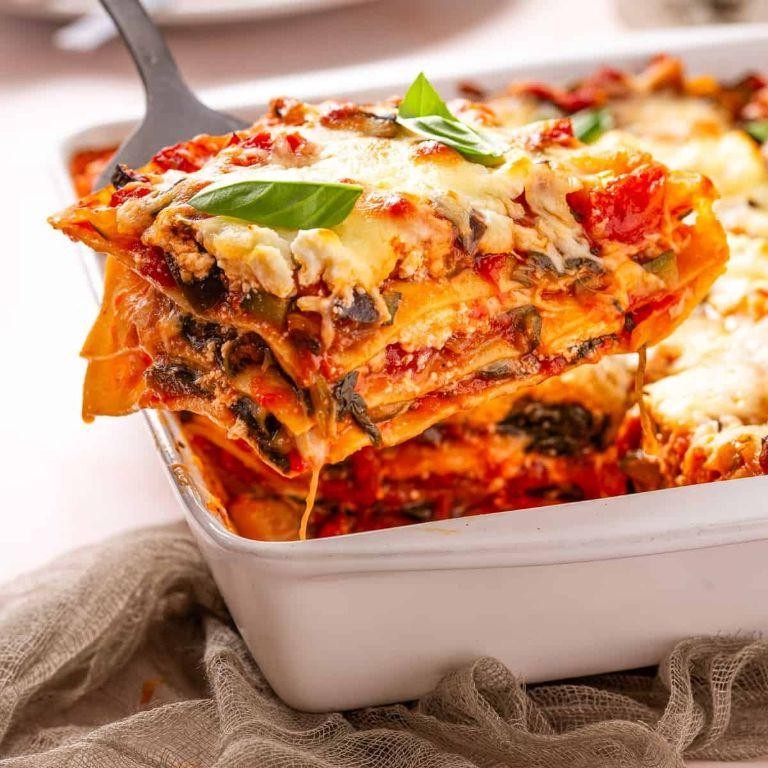
Every time I think about comfort food, my mind immediately goes to this vegetable lasagna casserole. It’s the dish I turn to when I need something hearty yet healthy, and it never fails to impress at potlucks. Plus, it’s a great way to sneak in those veggies for picky eaters!
Ingredients
- 9 lasagna noodles (I like to use whole wheat for a nuttier flavor)
- 2 cups ricotta cheese (full-fat gives the creamiest texture)
- 1 egg (room temperature blends smoother with the ricotta)
- 3 cups marinara sauce (homemade or your favorite store-bought brand)
- 2 cups shredded mozzarella cheese (because more cheese is always better)
- 1 cup grated Parmesan cheese (the real deal, not the powdered stuff)
- 2 cups spinach, chopped (I swear, it disappears into the layers)
- 1 zucchini, thinly sliced (a mandoline makes this step a breeze)
- 1 yellow squash, thinly sliced (adds a nice color contrast)
- 1 tbsp extra virgin olive oil (my go-to for sautéing)
- 2 cloves garlic, minced (fresh is best for that punch of flavor)
- 1 tsp dried basil (or fresh if you have it on hand)
- 1/2 tsp salt (I prefer sea salt for its cleaner taste)
- 1/4 tsp black pepper (freshly ground makes all the difference)
Instructions
- Preheat your oven to 375°F (190°C) and lightly grease a 9×13 inch baking dish with olive oil.
- Bring a large pot of salted water to a boil and cook the lasagna noodles according to package instructions until al dente, about 8-10 minutes. Drain and set aside.
- In a medium bowl, mix together the ricotta cheese, egg, minced garlic, dried basil, salt, and pepper until well combined.
- Heat 1 tbsp of olive oil in a skillet over medium heat and sauté the zucchini and yellow squash until just tender, about 3-4 minutes. Tip: Don’t overcrowd the pan to ensure even cooking.
- Spread 1 cup of marinara sauce at the bottom of the prepared baking dish. Layer 3 lasagna noodles over the sauce.
- Spread half of the ricotta mixture over the noodles, followed by half of the sautéed vegetables, and a third of the mozzarella and Parmesan cheeses. Repeat the layers once more.
- Top with the remaining 3 lasagna noodles, the rest of the marinara sauce, and the remaining cheeses.
- Cover with foil and bake for 25 minutes. Then, remove the foil and bake for an additional 10-15 minutes until the cheese is bubbly and golden. Tip: Let it sit for 10 minutes before slicing to set perfectly.
- For a crispy top, broil for the last 2-3 minutes, but watch closely to prevent burning.
After baking, this vegetable lasagna casserole emerges with layers of tender noodles, creamy ricotta, and perfectly cooked veggies, all enveloped in a rich, cheesy sauce. Serve it with a crisp green salad and garlic bread for a meal that’s sure to satisfy any crowd. And if you’re feeling adventurous, a sprinkle of red pepper flakes adds a nice kick!
Tuna Noodle Casserole with Peas
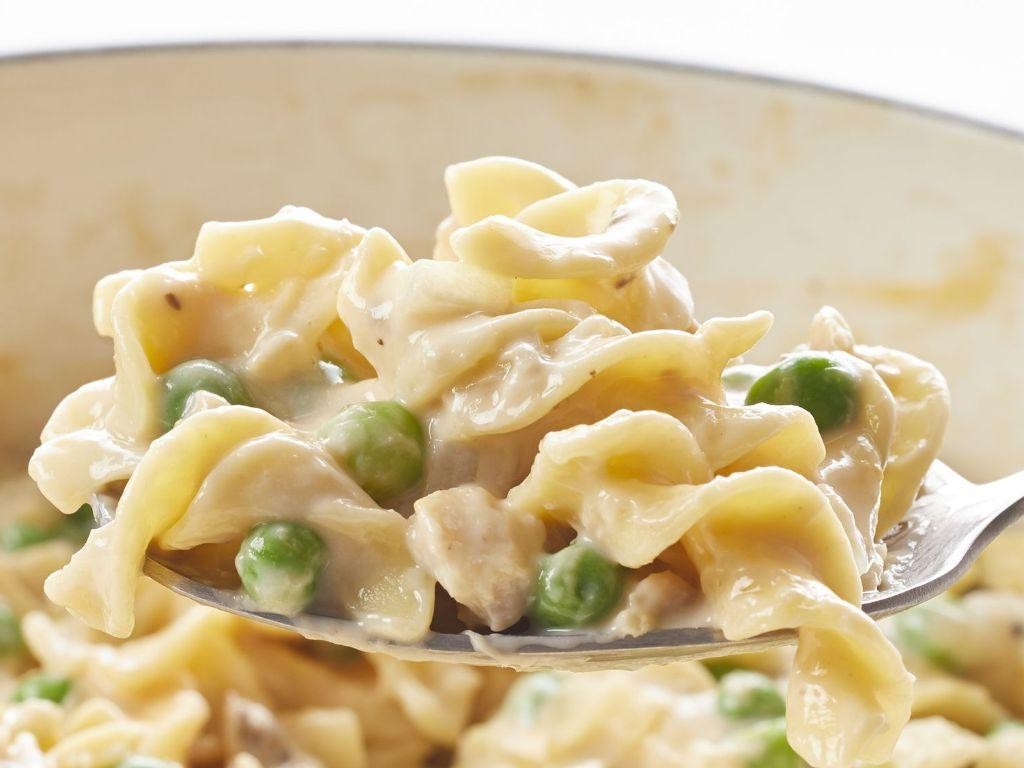
Just when I think I’ve tried every comfort food out there, I stumble upon a classic that brings me right back to my childhood. Tuna Noodle Casserole with Peas is that dish for me—simple, hearty, and utterly satisfying. It’s the kind of meal that fills the kitchen with warmth and the air with anticipation.
Ingredients
- 8 oz wide egg noodles (I love the texture they bring to the dish)
- 2 tbsp unsalted butter (because everything’s better with butter)
- 1 small yellow onion, diced (it’s amazing how much flavor this adds)
- 2 cloves garlic, minced (fresh is best, but I won’t judge if you use pre-minced)
- 1 cup frozen peas (no need to thaw, they’ll cook perfectly in the casserole)
- 2 cans (5 oz each) tuna in water, drained (I prefer chunk light for its mild flavor)
- 1 can (10.5 oz) condensed cream of mushroom soup (the secret to creamy perfection)
- 1/2 cup milk (whole milk makes it extra rich)
- 1/2 cup shredded cheddar cheese (plus a little extra for topping, because cheese)
- 1/4 tsp black pepper (freshly ground if you have it)
- 1/4 tsp salt (adjust to your liking, but remember the soup and cheese add saltiness)
Instructions
- Preheat your oven to 375°F (190°C) and lightly grease a 2-quart baking dish.
- Cook the egg noodles according to package instructions until al dente, then drain and set aside.
- In a large skillet over medium heat, melt the butter and sauté the onion until translucent, about 5 minutes. Tip: Don’t rush this step—caramelizing the onions slightly adds depth.
- Add the garlic and cook for another minute until fragrant.
- Stir in the frozen peas, tuna, cream of mushroom soup, milk, cheddar cheese, black pepper, and salt. Mix well until everything is evenly combined.
- Fold in the cooked egg noodles gently to avoid breaking them.
- Transfer the mixture to the prepared baking dish and sprinkle the extra cheddar cheese on top.
- Bake for 20-25 minutes, or until the cheese is bubbly and golden. Tip: For an extra crispy top, broil for the last 2 minutes.
- Let the casserole sit for 5 minutes before serving to allow it to set. Tip: This waiting period is tough, but it makes serving so much easier.
Mmm, the first bite is always a revelation—creamy, cheesy, with just the right amount of bite from the noodles and a pop of sweetness from the peas. Serve it straight from the dish for a family-style meal that’s sure to gather everyone around the table.
Sausage and Egg Breakfast Casserole
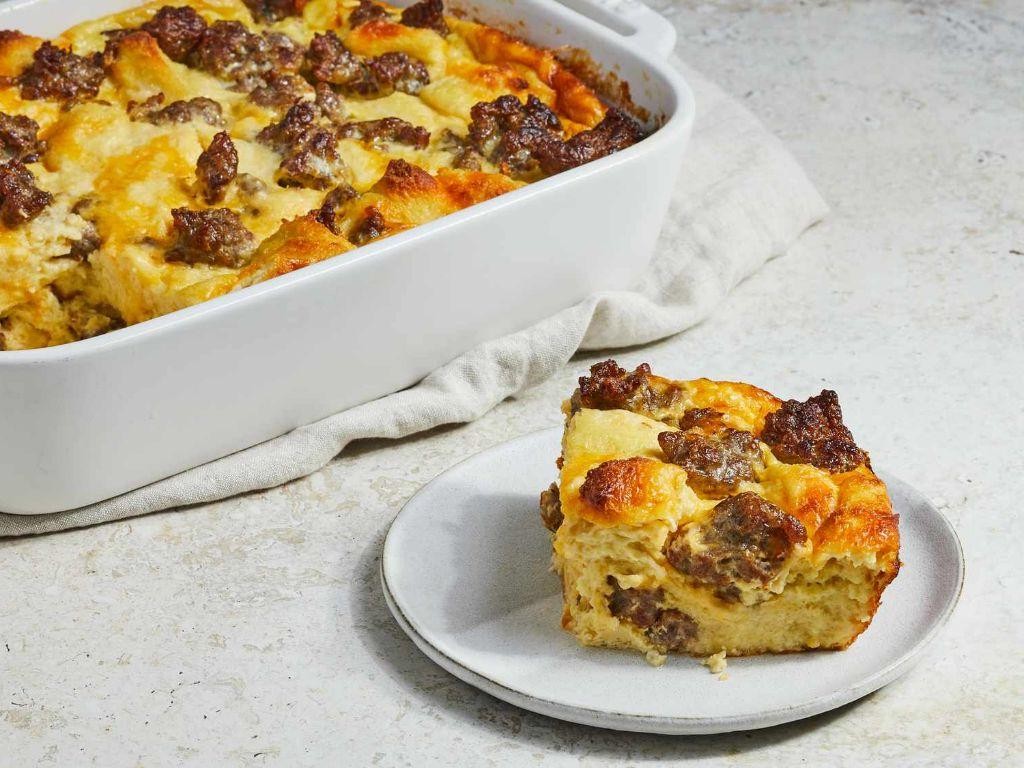
Breakfast in our house is a big deal, especially on weekends when we have a little more time to savor the morning. This Sausage and Egg Breakfast Casserole has become a staple, blending the heartiness of sausage with the comfort of eggs and bread in a dish that’s as easy to make as it is delicious.
Ingredients
- 1 lb breakfast sausage (I love using a spicy variety for an extra kick)
- 6 large eggs (room temperature eggs blend more smoothly, in my experience)
- 2 cups whole milk (the richer, the better for this dish)
- 6 slices of white bread, cubed (stale bread works wonderfully here)
- 1 cup shredded cheddar cheese (sharp cheddar adds a nice depth of flavor)
- 1 tsp salt (I always use sea salt for its cleaner taste)
- 1/2 tsp black pepper (freshly ground makes all the difference)
- 1 tbsp extra virgin olive oil (my go-to for greasing the pan)
Instructions
- Preheat your oven to 350°F (175°C) and grease a 9×13 inch baking dish with olive oil.
- In a skillet over medium heat, cook the sausage until it’s no longer pink, breaking it into crumbles as it cooks, about 8-10 minutes.
- While the sausage cooks, whisk together the eggs, milk, salt, and pepper in a large bowl until well combined.
- Spread the cubed bread evenly in the prepared baking dish, then sprinkle the cooked sausage and shredded cheese over the top.
- Pour the egg mixture over the bread, sausage, and cheese, making sure to cover everything evenly.
- Let the casserole sit for 10 minutes to allow the bread to soak up the egg mixture—this ensures every bite is moist and flavorful.
- Bake in the preheated oven for 45 minutes, or until the top is golden brown and the center is set.
- Let it cool for 5 minutes before serving to allow the layers to set properly.
This casserole comes out perfectly fluffy with a crispy top, and the flavors meld together beautifully. Try serving it with a side of fresh fruit or a drizzle of hot sauce for an extra zing.
Mexican Quinoa Casserole

Sometimes, the best dishes come from throwing together what’s in your pantry and hoping for the best. That’s exactly how this Mexican Quinoa Casserole came to be in my kitchen last week, and let me tell you, it was a hit with the whole family.
Ingredients
- 1 cup quinoa (I always rinse mine for a fluffier texture)
- 2 cups vegetable broth (homemade if you have it, but store-bought works just fine)
- 1 tbsp extra virgin olive oil (my go-to for almost everything)
- 1 medium onion, diced (I like yellow for sweetness)
- 2 cloves garlic, minced (fresh is best here)
- 1 bell pepper, diced (any color works, but I love red for color)
- 1 can black beans, drained and rinsed (don’t skip rinsing to reduce sodium)
- 1 cup corn kernels (fresh off the cob is amazing, but frozen is convenient)
- 1 tsp cumin (toasted and ground yourself if you’re feeling fancy)
- 1 tsp chili powder (adjust based on your heat preference)
- 1/2 tsp salt (I use sea salt for a cleaner taste)
- 1 cup shredded cheese (I’m a fan of a Mexican blend for this)
- Fresh cilantro for garnish (because it makes everything better)
Instructions
- Preheat your oven to 375°F (190°C) and lightly grease a baking dish with olive oil.
- In a medium saucepan, bring the quinoa and vegetable broth to a boil, then reduce heat to low, cover, and simmer for 15 minutes. Tip: Let it sit covered for 5 minutes off the heat for perfect fluffiness.
- While the quinoa cooks, heat olive oil in a large skillet over medium heat. Add onion and garlic, sautéing until translucent, about 5 minutes.
- Add the bell pepper to the skillet and cook for another 3 minutes until slightly softened.
- Stir in the black beans, corn, cumin, chili powder, and salt, cooking for 2 minutes just to warm through.
- Fluff the quinoa with a fork and mix it into the skillet with the vegetables and spices until well combined.
- Transfer the mixture to the prepared baking dish and sprinkle evenly with shredded cheese.
- Bake for 20 minutes, or until the cheese is bubbly and slightly golden. Tip: For a crispier top, broil for the last 2 minutes.
- Garnish with fresh cilantro before serving. Tip: Let it cool for 5 minutes to set for easier serving.
With its hearty texture and vibrant flavors, this casserole is a crowd-pleaser. I love serving it with a dollop of sour cream and a side of avocado slices for extra creaminess.
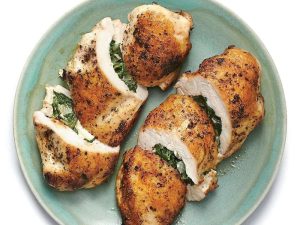
Chicken Parmesan Casserole
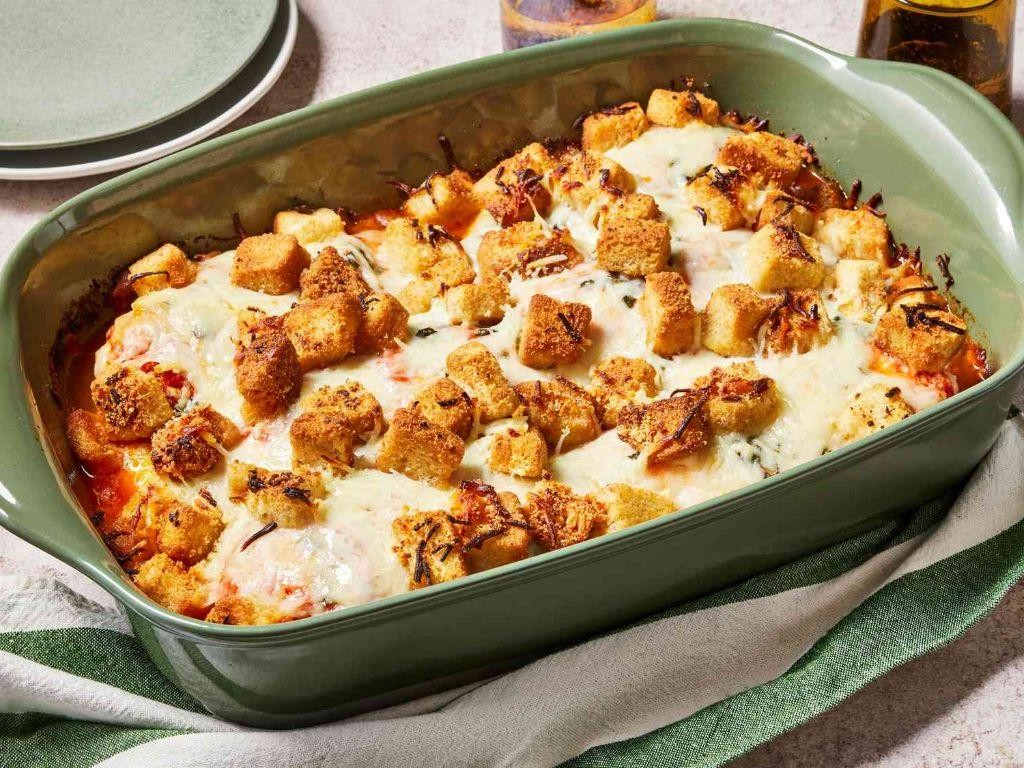
My kitchen smells like an Italian trattoria right now, and it’s all thanks to this Chicken Parmesan Casserole I whipped up. It’s the kind of dish that brings everyone to the table, no matter how busy their day was.
Ingredients
- 2 cups shredded cooked chicken (I love using leftovers from last night’s roast chicken)
- 1 cup marinara sauce (homemade or your favorite jarred brand)
- 1 cup shredded mozzarella cheese (because more cheese is always better)
- 1/2 cup grated Parmesan cheese (the real deal, please)
- 1/2 cup breadcrumbs (I like panko for that extra crunch)
- 2 tbsp olive oil (extra virgin is my go-to for its fruity notes)
- 1 tsp garlic powder (for that unmistakable aroma)
- 1 tsp dried basil (fresh is great, but dried works in a pinch)
- Salt and pepper to taste (I’m generous with the pepper)
Instructions
- Preheat your oven to 375°F (190°C) to ensure it’s ready when you are.
- In a mixing bowl, combine the shredded chicken and marinara sauce, ensuring each piece is lovingly coated.
- Transfer the chicken mixture into a greased casserole dish, spreading it evenly. Tip: A spatula works wonders here.
- Sprinkle the mozzarella and Parmesan cheeses over the chicken mixture, covering it like a cozy blanket.
- In a small bowl, mix the breadcrumbs, olive oil, garlic powder, dried basil, salt, and pepper. Tip: This is where you can adjust the seasoning to your liking.
- Evenly distribute the breadcrumb mixture over the cheese layer, pressing lightly to adhere. Tip: For extra crunch, don’t press too hard.
- Bake in the preheated oven for 20-25 minutes, or until the top is golden and bubbly.
Unbelievable how this casserole turns the humble chicken into a showstopper. The top is irresistibly crispy, while the inside stays juicy and flavorful. Serve it over a bed of spaghetti or with a side of garlic bread to soak up all that saucy goodness.
Eggplant and Zucchini Casserole
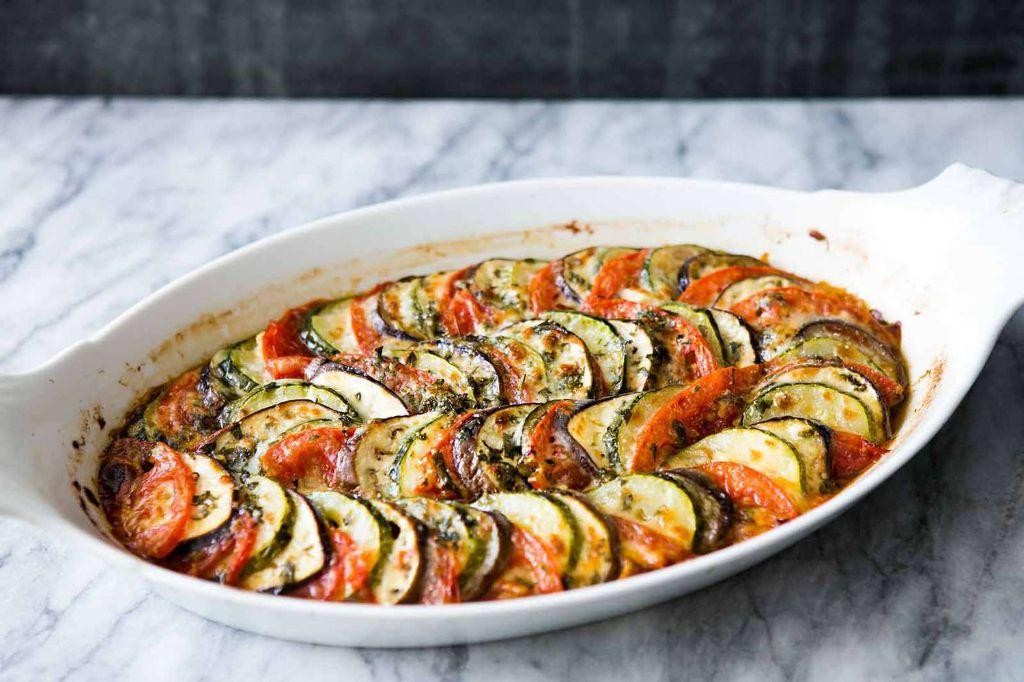
Having just harvested some eggplants and zucchinis from my garden, I was inspired to create a dish that celebrates these summer vegetables in all their glory. This Eggplant and Zucchini Casserole is my go-to for a hearty, comforting meal that’s packed with flavors and textures.
Ingredients
- 2 medium eggplants, sliced into 1/2-inch rounds (I like to leave the skin on for extra texture)
- 2 medium zucchinis, sliced into 1/2-inch rounds (fresh from the garden if you have them)
- 1 cup marinara sauce (homemade or your favorite store-bought brand)
- 1 cup shredded mozzarella cheese (I always go for the whole milk version for that extra creaminess)
- 1/4 cup grated Parmesan cheese (the real deal, none of that powdered stuff)
- 2 tbsp extra virgin olive oil (my kitchen staple)
- 1 tsp dried oregano (fresh is great, but dried works perfectly here)
- Salt and pepper to taste (I’m generous with the pepper for a little kick)
Instructions
- Preheat your oven to 375°F (190°C) and lightly grease a 9×13 inch baking dish with olive oil.
- Arrange the eggplant and zucchini slices in the prepared baking dish, overlapping slightly if necessary.
- Drizzle the vegetables with the remaining olive oil and sprinkle with oregano, salt, and pepper.
- Spread the marinara sauce evenly over the vegetables, then top with the mozzarella and Parmesan cheeses.
- Bake in the preheated oven for 25-30 minutes, or until the cheese is bubbly and golden brown.
- Let the casserole sit for 5 minutes before serving to allow the flavors to meld together beautifully.
Delightfully cheesy with a perfect balance of tender vegetables, this casserole is a testament to simple ingredients coming together to create something extraordinary. Serve it with a crisp green salad or a slice of crusty bread to soak up all the delicious sauce.
Pumpkin and Sage Rigatoni Casserole
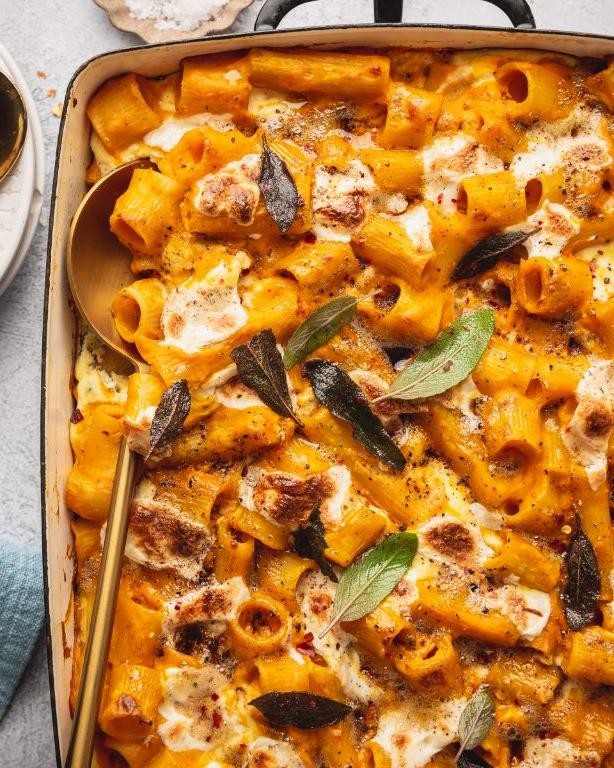
Last fall, I found myself with an abundance of pumpkin and a craving for something cozy yet sophisticated. That’s when this Pumpkin and Sage Rigatoni Casserole was born, a dish that perfectly marries the earthy sweetness of pumpkin with the aromatic punch of sage.
Ingredients
- 1 lb rigatoni pasta (I always go for the ridged kind—it holds the sauce better.)
- 2 cups pumpkin puree (Homemade or canned, but make sure it’s pure pumpkin, not pie filling.)
- 1/2 cup heavy cream (This is where I splurge—the richer, the better.)
- 1/4 cup extra virgin olive oil (My go-to for its fruity notes.)
- 2 tbsp fresh sage, finely chopped (Fresh is key here; dried just doesn’t bring the same magic.)
- 1 cup grated Parmesan cheese (Plus extra for sprinkling on top—because more cheese is always better.)
- 1/2 tsp nutmeg (A little goes a long way to warm up the dish.)
- Salt and pepper to taste (I like to grind the pepper fresh for that extra zing.)
Instructions
- Preheat your oven to 375°F (190°C). This ensures a perfectly golden top without drying out the casserole.
- Bring a large pot of salted water to a boil. Add the rigatoni and cook until al dente, about 10-12 minutes. Tip: Stir occasionally to prevent sticking.
- While the pasta cooks, heat the olive oil in a large skillet over medium heat. Add the sage and sauté for about 1 minute until fragrant. Tip: Don’t let the sage burn—it turns bitter.
- Stir in the pumpkin puree, heavy cream, nutmeg, salt, and pepper. Cook for 3-4 minutes until the mixture is well combined and heated through.
- Drain the pasta and return it to the pot. Pour the pumpkin sauce over the pasta and toss to coat evenly.
- Transfer the pasta to a greased casserole dish. Sprinkle the top with Parmesan cheese.
- Bake for 20-25 minutes, until the cheese is melted and bubbly. Tip: For an extra crispy top, broil for the last 2 minutes.
Mmm, the first bite reveals a creamy interior with a slight crunch from the baked cheese top. Serve this casserole with a crisp green salad to cut through the richness, or enjoy it as is for the ultimate comfort food experience.
Black Bean and Corn Casserole
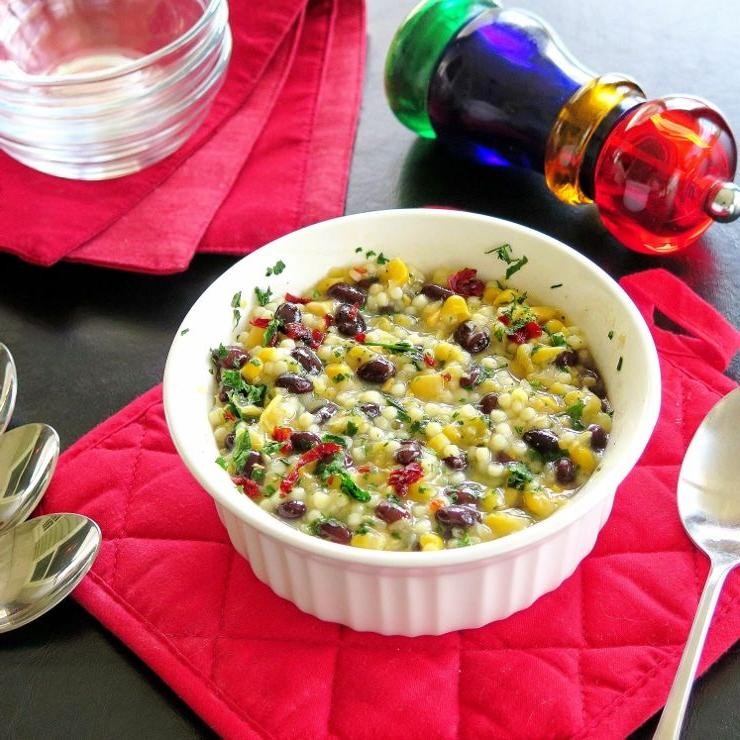
Sometimes, all you need is a dish that’s as hearty as it is easy to make, and this Black Bean and Corn Casserole is just that. I remember whipping this up on a chilly evening when I wanted something comforting yet simple, and it’s been a favorite ever since.
Ingredients
- 1 cup black beans (I always rinse them well to remove any excess sodium)
- 1 cup corn kernels (fresh or frozen, but I love the sweetness of fresh corn in summer)
- 1 cup shredded cheddar cheese (sharp cheddar gives the best flavor)
- 1/2 cup sour cream (full-fat for that creamy texture)
- 1/4 cup chopped cilantro (adds a fresh pop of color and flavor)
- 1 tbsp olive oil (extra virgin is my go-to for its fruity notes)
- 1 tsp cumin (toasted and ground for maximum aroma)
- 1/2 tsp chili powder (adjust based on your heat preference)
- Salt to taste (I use sea salt for its clean taste)
Instructions
- Preheat your oven to 375°F (190°C) to ensure it’s ready for baking.
- Heat 1 tbsp olive oil in a skillet over medium heat, perfect for sautéing without burning.
- Add the black beans and corn to the skillet, stirring occasionally for about 5 minutes until they’re slightly toasted.
- Mix in the cumin and chili powder, stirring well to coat the beans and corn evenly. Tip: Toasting the spices with the beans and corn enhances their flavors.
- Remove the skillet from heat and stir in the sour cream and half of the cheddar cheese until well combined. Tip: Letting the mixture cool slightly prevents the sour cream from curdling.
- Transfer the mixture to a baking dish, spreading it evenly. Sprinkle the remaining cheddar cheese on top.
- Bake for 20 minutes, or until the cheese is bubbly and golden. Tip: For a crispier top, broil for the last 2 minutes.
- Garnish with chopped cilantro before serving.
Now, this casserole comes out creamy with a slight crunch from the corn, and the melted cheese adds a comforting richness. It’s fantastic served with a side of avocado slices or over a bed of greens for a lighter meal.
Ham and Cheese Potato Casserole
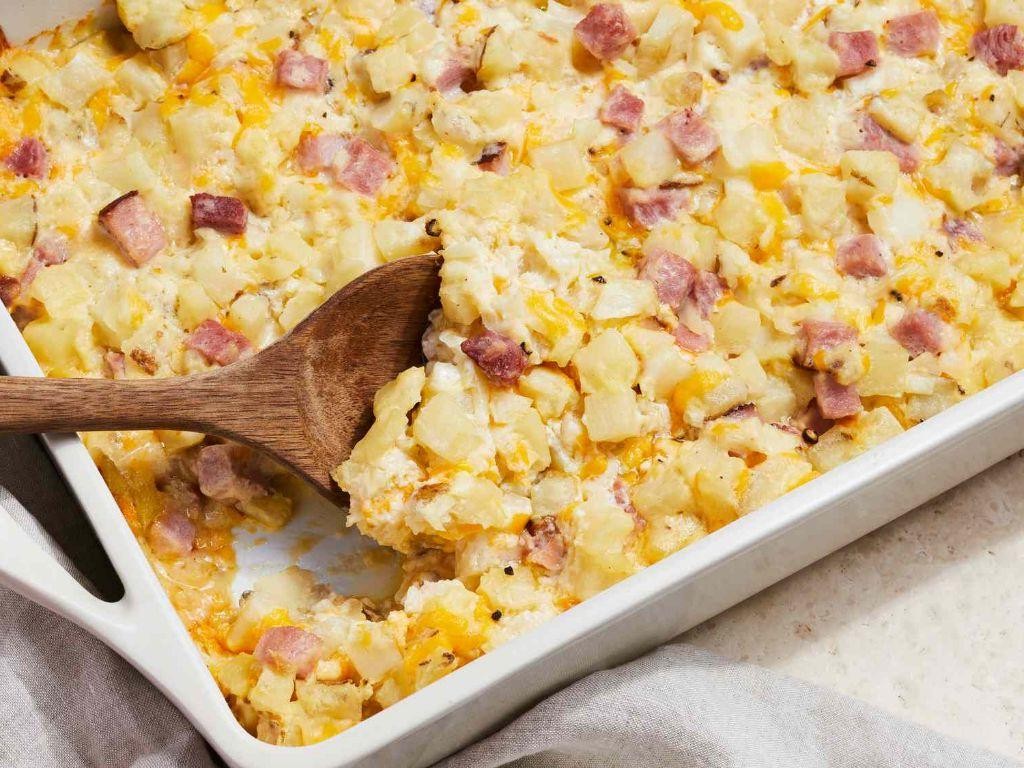
Remember those chilly evenings when all you crave is something hearty and comforting? That’s exactly when this Ham and Cheese Potato Casserole comes to the rescue in my kitchen. It’s a dish that reminds me of family gatherings and the joy of sharing a meal that feels like a warm hug.
Ingredients
- 4 cups peeled and diced potatoes (I like Yukon Gold for their buttery texture)
- 2 cups diced ham (leftover holiday ham works wonders here)
- 1.5 cups shredded cheddar cheese (sharp cheddar adds a nice kick)
- 1/2 cup heavy cream (for that rich, velvety sauce)
- 2 tbsp unsalted butter (I always use unsalted to control the dish’s saltiness)
- 1 tsp garlic powder (a little goes a long way in enhancing flavors)
- Salt and pepper to taste (freshly ground pepper is my preference)
Instructions
- Preheat your oven to 375°F (190°C) to ensure it’s ready for baking.
- In a large pot, boil the diced potatoes in salted water until fork-tender, about 10 minutes. Tip: Don’t overcook them to avoid mushy casserole.
- Drain the potatoes and return them to the pot. Add the butter, garlic powder, salt, and pepper, gently stirring to coat the potatoes evenly.
- Layer half of the potatoes in a greased baking dish, followed by half of the ham and half of the cheese. Repeat the layers. Tip: Layering ensures every bite is packed with flavor.
- Pour the heavy cream evenly over the top layer. Tip: The cream helps to bind the ingredients and adds moisture.
- Bake uncovered for 25 minutes, or until the cheese is bubbly and slightly golden.
The casserole emerges from the oven with a golden cheese crust that gives way to creamy potatoes and savory ham beneath. Try serving it with a side of crisp green salad to balance the richness, or enjoy it as is for the ultimate comfort food experience.
Wild Rice and Mushroom Casserole

Finally, a dish that feels like a warm hug on a chilly evening—this Wild Rice and Mushroom Casserole has been my go-to comfort food for years. It’s hearty, flavorful, and surprisingly easy to whip up, even on those nights when cooking feels like the last thing you want to do.
Ingredients
- 1 cup wild rice (I love the nutty flavor it brings, but you can swap for brown rice if you’re in a pinch)
- 2 cups vegetable broth (homemade is best, but store-bought works fine too)
- 1 tbsp extra virgin olive oil (my kitchen staple for almost everything)
- 8 oz cremini mushrooms, sliced (baby bellas work great here too)
- 1 small onion, diced (I prefer yellow for sweetness)
- 2 cloves garlic, minced (because what’s a dish without garlic?)
- 1/2 cup heavy cream (it adds a luxurious richness)
- 1/2 cup grated Parmesan cheese (the real deal, please)
- Salt and pepper to taste (I’m generous with both)
Instructions
- Preheat your oven to 375°F (190°C) and lightly grease a casserole dish.
- In a medium saucepan, combine the wild rice and vegetable broth. Bring to a boil, then reduce heat to low, cover, and simmer for 45 minutes, or until the rice is tender and the liquid is absorbed.
- While the rice cooks, heat the olive oil in a large skillet over medium heat. Add the onions and mushrooms, sautéing until the mushrooms are golden and the onions are translucent, about 5-7 minutes.
- Stir in the garlic and cook for another minute, until fragrant. Tip: Don’t let the garlic burn, or it’ll turn bitter.
- Once the rice is done, fluff it with a fork and mix in the mushroom mixture, heavy cream, and Parmesan cheese. Season with salt and pepper. Tip: Taste as you go to adjust the seasoning perfectly.
- Transfer the mixture to the prepared casserole dish and bake for 20 minutes, or until the top is lightly golden. Tip: For an extra crispy top, broil for the last 2 minutes.
The casserole comes out creamy with a slight chew from the wild rice, and the mushrooms add an earthy depth that’s simply irresistible. Serve it with a crisp green salad or as a side to roasted chicken for a meal that’s sure to impress.
Lentil and Vegetable Casserole

Yesterday, as I was rummaging through my pantry, I stumbled upon a bag of lentils that had been sitting there, forgotten. It was the perfect excuse to whip up my comforting Lentil and Vegetable Casserole, a dish that never fails to warm the soul.
Ingredients
- 1 cup dried green lentils (I always rinse them under cold water to remove any debris)
- 2 tbsp extra virgin olive oil (my go-to for its rich flavor)
- 1 medium onion, diced (I like yellow onions for their sweetness)
- 2 carrots, peeled and diced (adds a lovely color and sweetness)
- 2 celery stalks, diced (for that essential crunch)
- 3 garlic cloves, minced (because garlic makes everything better)
- 4 cups vegetable broth (homemade if you have it, but store-bought works fine)
- 1 tsp dried thyme (rubbed between my fingers to release the oils)
- Salt and pepper to taste (I’m generous with the pepper for a bit of heat)
- 1 cup shredded cheddar cheese (for that irresistible cheesy top)
Instructions
- Preheat your oven to 375°F (190°C) to get it ready for baking.
- Heat the olive oil in a large oven-safe skillet over medium heat. Add the onion, carrots, and celery, cooking until softened, about 5 minutes.
- Stir in the garlic and cook for another minute until fragrant. Tip: Don’t let the garlic burn, or it’ll turn bitter.
- Add the lentils, vegetable broth, thyme, salt, and pepper. Bring to a boil, then reduce heat to simmer, covered, for 25 minutes. Tip: Stir occasionally to prevent sticking.
- Once the lentils are tender and most of the liquid is absorbed, sprinkle the cheddar cheese on top. Tip: For a golden crust, place the skillet under the broiler for the last 2 minutes.
- Bake in the preheated oven for 10 minutes, or until the cheese is bubbly and slightly golden.
Golden and inviting, this casserole boasts a hearty texture with a melty cheese topping that’s downright irresistible. Serve it with a side of crusty bread to soak up all the deliciousness, or over a bed of greens for a lighter meal.
Shrimp and Grits Casserole

Every time I think about comfort food, my mind immediately goes to this Shrimp and Grits Casserole. It’s a dish that brings back memories of lazy Sunday mornings and family gatherings, where the aroma of cheese and shrimp filled the air. I’ve tweaked the recipe over the years to make it just right, and now, it’s a staple in my home.
Ingredients
- 1 cup stone-ground grits (I swear by the texture they provide)
- 4 cups water (for boiling the grits)
- 1 tsp salt (to season the grits)
- 2 cups shredded cheddar cheese (sharp cheddar gives the best flavor)
- 1 lb shrimp, peeled and deveined (I prefer wild-caught for their sweetness)
- 2 tbsp unsalted butter (for sautéing the shrimp)
- 1 clove garlic, minced (because garlic makes everything better)
- 1/2 tsp smoked paprika (for that hint of smokiness)
- 1/4 cup green onions, chopped (for a fresh finish)
Instructions
- Preheat your oven to 375°F (190°C) to get it ready for baking the casserole.
- In a medium saucepan, bring 4 cups of water to a boil over high heat. Tip: A rolling boil ensures the grits cook evenly.
- Slowly whisk in 1 cup of stone-ground grits and 1 tsp of salt. Reduce the heat to low and simmer, stirring occasionally, for about 20 minutes until thickened. Tip: Constant stirring prevents lumps.
- Remove the grits from heat and stir in 2 cups of shredded cheddar cheese until melted and smooth.
- In a skillet, melt 2 tbsp of unsalted butter over medium heat. Add 1 lb of shrimp, 1 clove of minced garlic, and 1/2 tsp of smoked paprika. Sauté for 3-4 minutes until the shrimp are pink and opaque. Tip: Don’t overcook the shrimp; they’ll finish baking in the oven.
- Combine the cheesy grits and sautéed shrimp in a greased casserole dish, mixing gently.
- Bake in the preheated oven for 15 minutes until bubbly and slightly golden on top.
- Garnish with 1/4 cup of chopped green onions before serving.
Fresh out of the oven, this casserole is a creamy, cheesy delight with perfectly cooked shrimp that adds a sweet, smoky flavor. Serve it straight from the dish for a rustic presentation, or plate it individually for a more refined look. Either way, it’s bound to disappear quickly.
BBQ Chicken and Cornbread Casserole
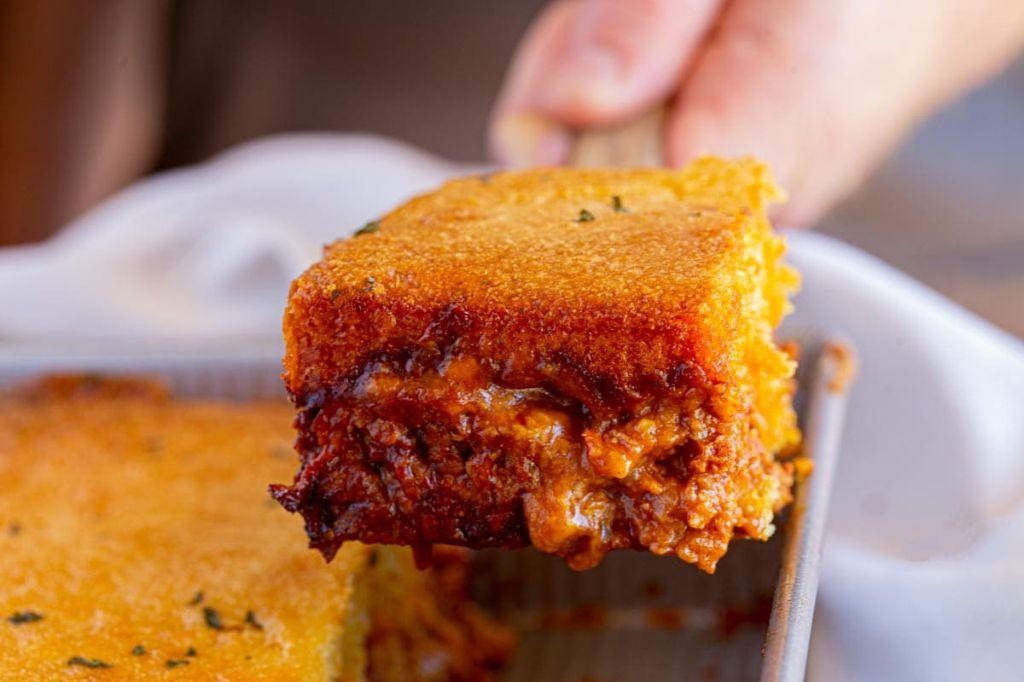
Diving into the heart of comfort food, I stumbled upon this BBQ Chicken and Cornbread Casserole during a summer potluck, and it’s been a staple in my kitchen ever since. The combination of smoky BBQ chicken with the sweet, crumbly cornbread topping is a match made in heaven, especially when you’re craving something hearty yet easy to whip up.
Ingredients
- 2 cups shredded cooked chicken (I love using leftover rotisserie chicken for this)
- 1 cup BBQ sauce (go for your favorite brand, but I swear by the smoky ones)
- 1 cup cornmeal (the finer, the better for a smooth texture)
- 1 cup all-purpose flour (I always sift mine to avoid lumps)
- 1/4 cup sugar (a little sweetness balances the BBQ sauce perfectly)
- 1 tbsp baking powder (freshness is key here, so check the date)
- 1/2 tsp salt (I use sea salt for a cleaner taste)
- 1 cup milk (whole milk makes the cornbread extra moist)
- 1 large egg (room temperature eggs mix in more evenly)
- 1/4 cup melted butter (unsalted, so you can control the saltiness)
Instructions
- Preheat your oven to 375°F (190°C) and lightly grease a 9×13 inch baking dish.
- In a large bowl, mix the shredded chicken with BBQ sauce until well coated, then spread evenly in the prepared dish.
- In another bowl, whisk together cornmeal, flour, sugar, baking powder, and salt.
- Add milk, egg, and melted butter to the dry ingredients, stirring just until combined (overmixing leads to tough cornbread).
- Pour the cornbread batter over the BBQ chicken layer, spreading it gently to cover completely.
- Bake for 25-30 minutes, or until the cornbread is golden and a toothpick inserted comes out clean.
- Let it cool for 5 minutes before serving to allow the layers to set.
Now, the magic of this dish lies in the contrast between the tender, saucy chicken and the crisp, sweet cornbread topping. Serve it straight from the dish with a side of coleslaw for that perfect crunch, or dollop some extra BBQ sauce on top for the ultimate flavor bomb.
Apple and Cinnamon French Toast Casserole
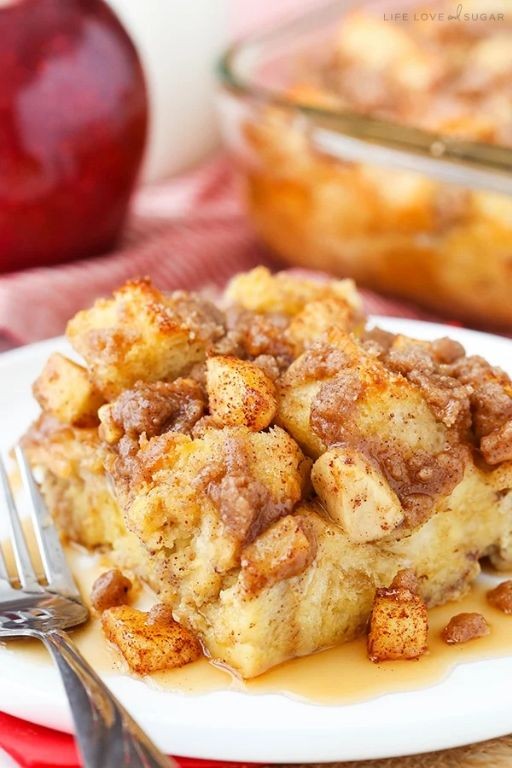
This morning, as the crisp autumn air whispered through my kitchen window, I found myself craving something warm, sweet, and utterly comforting. That’s when I remembered my grandmother’s Apple and Cinnamon French Toast Casserole—a dish that turns simple ingredients into a cozy, crowd-pleasing breakfast.
Ingredients
- 6 cups of day-old French bread, cubed (I love using a rustic loaf for extra texture)
- 4 large eggs, room temperature (they blend more smoothly into the mixture)
- 1 1/2 cups whole milk (for richness, though 2% works in a pinch)
- 1/4 cup granulated sugar (I sometimes swap in brown sugar for a deeper flavor)
- 1 tbsp pure vanilla extract (the real stuff makes all the difference)
- 2 medium apples, peeled and thinly sliced (Honeycrisp are my go-to for their perfect balance of sweet and tart)
- 1 tsp ground cinnamon (because what’s French toast without it?)
- 2 tbsp unsalted butter, melted (for that golden, buttery finish)
Instructions
- Preheat your oven to 350°F (175°C) and grease a 9×13 inch baking dish with butter or non-stick spray.
- In a large bowl, whisk together the eggs, milk, sugar, vanilla extract, and cinnamon until well combined. Tip: Letting this mixture sit for a minute helps the flavors meld.
- Add the cubed bread to the bowl, gently pressing down to ensure all pieces are soaked in the egg mixture. Let it sit for 10 minutes, stirring occasionally.
- Meanwhile, toss the apple slices with a pinch of cinnamon and arrange half of them in the bottom of the prepared baking dish.
- Pour the bread mixture over the apples, then top with the remaining apple slices. Drizzle with melted butter. Tip: For extra crunch, sprinkle a little sugar on top before baking.
- Bake for 45-50 minutes, or until the top is golden brown and the center is set. Tip: Cover with foil if the top starts browning too quickly.
Bursting with the warmth of cinnamon and the sweet tenderness of baked apples, this casserole is a hug in dish form. Serve it straight from the oven with a drizzle of maple syrup or a dollop of whipped cream for an extra indulgent touch.
Conclusion
Uncover the ease and joy of meal prep with our roundup of 18 delicious make-ahead casserole recipes! Perfect for busy home cooks across North America, these dishes promise convenience without sacrificing flavor. We’d love to hear which recipes become your favorites—drop us a comment below. Loved what you saw? Share the love and this article on Pinterest for fellow cooking enthusiasts to enjoy!