Who says indulging in cake means abandoning your health goals? Not us! Dive into our roundup of 20 Delicious Healthy Cake Recipes for Every Occasion, where flavor and wellness go hand in hand. From birthdays to quiet nights in, we’ve got a guilt-free treat for every moment. Ready to bake your way to happiness? Let’s get started—your sweet tooth (and waistline) will thank you!
Avocado Chocolate Cake
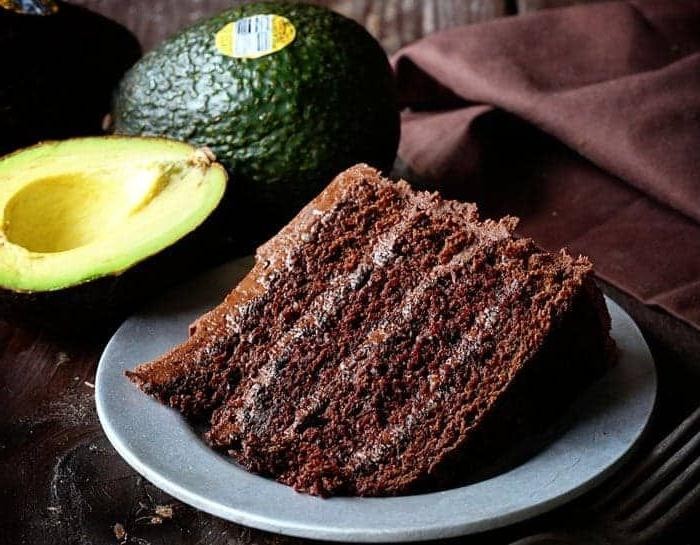
Avocado chocolate cake is a delightful surprise, blending the creamy richness of avocado with the deep, luxurious flavors of cocoa for a dessert that’s as nutritious as it is indulgent.
Ingredients
- 1 1/2 cups all-purpose flour (I always sift mine for a lighter texture)
- 3/4 cup unsweetened cocoa powder (the darker, the better for that intense chocolate flavor)
- 1 tsp baking soda
- 1/2 tsp salt
- 1 ripe avocado, mashed (about 1/2 cup, and make sure it’s perfectly ripe for smoothness)
- 1 cup granulated sugar (I sometimes reduce this to 3/4 cup for a less sweet version)
- 2 large eggs (room temperature eggs blend more easily)
- 1/2 cup buttermilk (this adds a lovely tang and moisture)
- 1/2 cup vegetable oil (I use avocado oil for an extra avocado kick)
- 1 tsp vanilla extract (pure vanilla makes all the difference)
Instructions
- Preheat your oven to 350°F (175°C) and grease a 9-inch round cake pan, lining the bottom with parchment paper for easy removal.
- In a medium bowl, whisk together the flour, cocoa powder, baking soda, and salt until well combined.
- In a large bowl, beat the mashed avocado and sugar together until smooth and creamy, about 2 minutes.
- Add the eggs one at a time to the avocado mixture, beating well after each addition.
- Stir in the buttermilk, oil, and vanilla extract until the mixture is uniform.
- Gradually fold the dry ingredients into the wet ingredients, mixing just until combined to avoid overworking the batter.
- Pour the batter into the prepared pan and smooth the top with a spatula.
- Bake for 25-30 minutes, or until a toothpick inserted into the center comes out clean.
- Allow the cake to cool in the pan for 10 minutes before transferring to a wire rack to cool completely.
Great for those who adore chocolate but seek a healthier alternative, this cake boasts a moist, dense texture and a rich chocolate flavor that’s subtly enhanced by the avocado. Serve it with a dusting of powdered sugar or a dollop of whipped cream for an extra touch of elegance.
Banana Oatmeal Cake
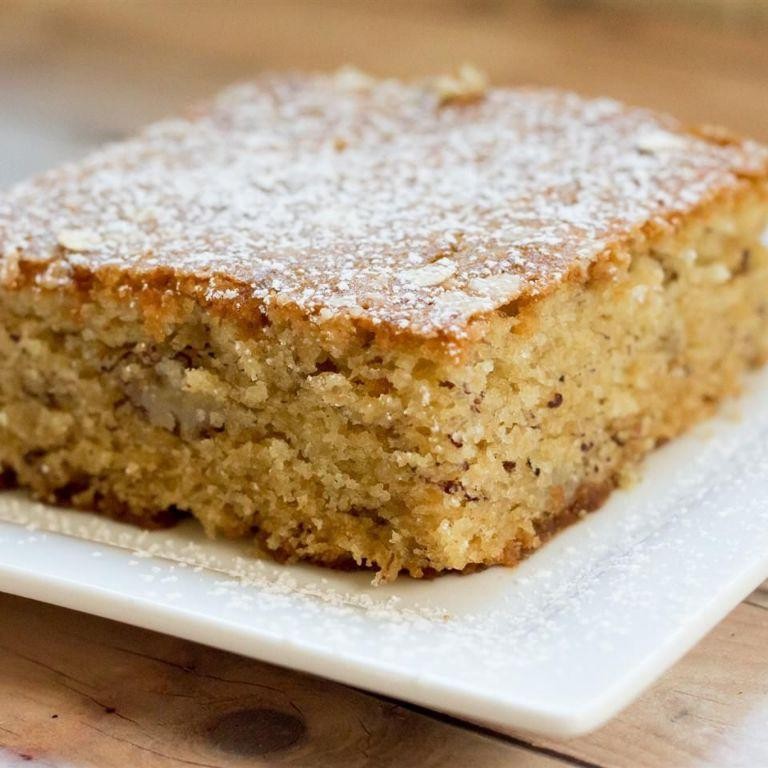
Venture into the realm of comforting desserts with this Banana Oatmeal Cake, a harmonious blend of ripe bananas and hearty oats that promises a moist, flavorful experience with every bite. Perfect for those seeking a wholesome yet indulgent treat, this cake is a testament to the beauty of simple ingredients coming together to create something extraordinary.
Ingredients
- 2 cups mashed ripe bananas (about 4 medium bananas, the spottier, the better for sweetness)
- 1 cup old-fashioned oats (I love the texture they add, but quick oats work in a pinch)
- 1/2 cup unsalted butter, melted (extra virgin olive oil can be a delightful substitute for a fruity note)
- 3/4 cup brown sugar (packed, for that deep molasses flavor)
- 2 large eggs, room temperature (they blend more smoothly into the batter)
- 1 tsp vanilla extract (pure vanilla elevates the flavor profile immensely)
- 1 1/2 cups all-purpose flour (for a lighter cake, you can substitute half with whole wheat flour)
- 1 tsp baking soda (freshness is key for the perfect rise)
- 1/2 tsp salt (just a pinch to balance the sweetness)
Instructions
- Preheat your oven to 350°F (175°C) and grease a 9-inch round cake pan, ensuring every nook is covered for easy release.
- In a large bowl, combine the mashed bananas, melted butter, brown sugar, eggs, and vanilla extract, whisking until the mixture is smooth and homogenous.
- Gradually fold in the oats, flour, baking soda, and salt, mixing just until the dry ingredients are incorporated to avoid overworking the batter.
- Pour the batter into the prepared pan, smoothing the top with a spatula for an even bake.
- Bake for 35-40 minutes, or until a toothpick inserted into the center comes out clean, signaling the cake is perfectly done.
- Allow the cake to cool in the pan for 10 minutes before transferring to a wire rack to cool completely, ensuring it sets properly for slicing.
Fluffy yet dense, this Banana Oatmeal Cake boasts a moist crumb and a rich banana flavor, complemented by the subtle chewiness of oats. Serve it warm with a dollop of whipped cream or a drizzle of caramel for an extra decadent touch, making it a versatile dessert that transitions beautifully from breakfast to dessert.
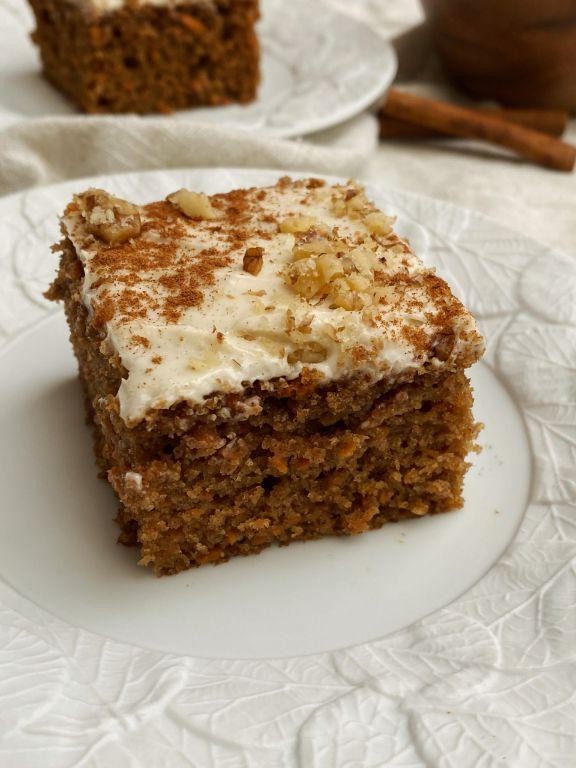
Carrot Cake with Greek Yogurt Frosting

Lusciously moist and warmly spiced, this carrot cake paired with a tangy Greek yogurt frosting is a delightful twist on the classic dessert. Perfect for any occasion, it’s a testament to how simple ingredients can create something extraordinarily comforting and elegant.
Ingredients
- 2 cups all-purpose flour (I always sift mine for a lighter texture)
- 2 tsp baking powder (aluminum-free gives a cleaner taste)
- 1 tsp baking soda
- 1 tsp ground cinnamon (a bit more if you love warmth)
- 1/2 tsp ground nutmeg
- 1/2 tsp salt
- 1 cup granulated sugar
- 1/2 cup packed brown sugar (dark brown for deeper flavor)
- 1 cup vegetable oil (or melted coconut oil for a subtle twist)
- 4 large eggs (room temperature blends better)
- 3 cups grated carrots (about 4 medium, I prefer organic for sweetness)
- 1 cup plain Greek yogurt (full-fat for creaminess)
- 1/4 cup honey (local if possible, for the frosting)
- 1 tsp vanilla extract (pure, for the best aroma)
Instructions
- Preheat your oven to 350°F (175°C) and grease a 9×13 inch baking pan. Lining it with parchment paper makes removal a breeze.
- In a large bowl, whisk together the flour, baking powder, baking soda, cinnamon, nutmeg, and salt until well combined.
- In another bowl, beat the granulated sugar, brown sugar, and oil until smooth. Add eggs one at a time, ensuring each is fully incorporated before adding the next.
- Gradually mix the dry ingredients into the wet ingredients, stirring just until combined. Overmixing can lead to a dense cake.
- Fold in the grated carrots until evenly distributed throughout the batter.
- Pour the batter into the prepared pan and smooth the top. Bake for 35-40 minutes, or until a toothpick inserted into the center comes out clean.
- While the cake cools, prepare the frosting by whisking together the Greek yogurt, honey, and vanilla extract until smooth and spreadable.
- Once the cake is completely cool, spread the frosting evenly over the top. For best results, chill the cake for an hour before serving to set the frosting.
The cake boasts a tender crumb and a harmonious blend of spices, while the Greek yogurt frosting adds a refreshing contrast. Serve it chilled with a sprinkle of toasted walnuts for an added crunch and nutty flavor.
Chia Seed Lemon Cake
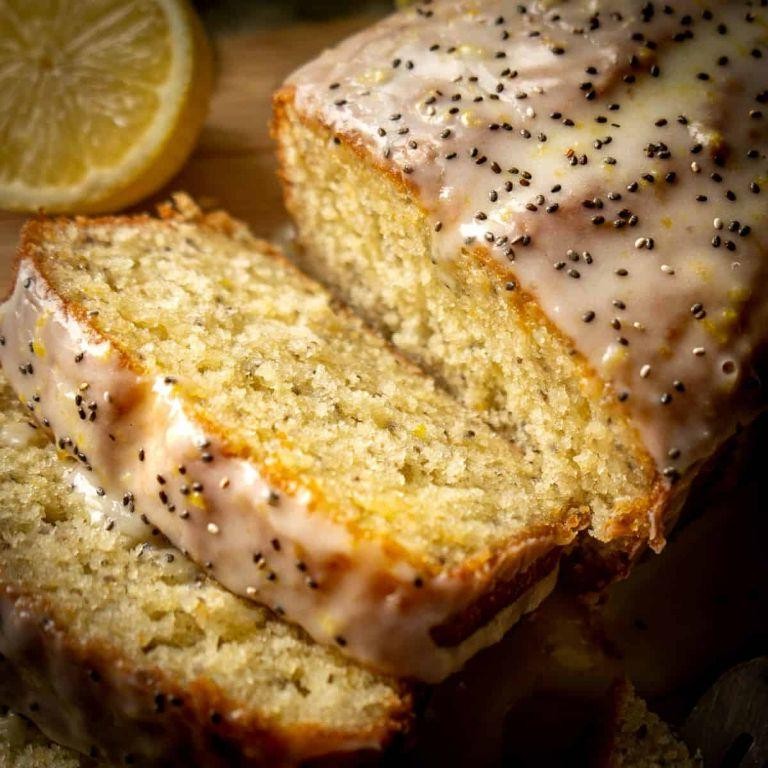
Zesty and refreshing, this Chia Seed Lemon Cake is a delightful twist on the classic dessert, offering a moist texture and a vibrant citrus flavor that’s perfectly balanced with the subtle crunch of chia seeds. Ideal for afternoon tea or a summer gathering, it’s a testament to how simple ingredients can create something truly extraordinary.
Ingredients
- 1 1/2 cups all-purpose flour (I always sift mine for a lighter cake)
- 1/2 cup chia seeds (soaked in 1 cup water for 15 minutes until gel-like)
- 1 cup granulated sugar (for that perfect sweetness)
- 1/2 cup unsalted butter, room temperature (softened to ensure a smooth batter)
- 3 large eggs, room temperature (they incorporate better when not cold)
- Zest and juice of 2 lemons (the zest is where the magic lies)
- 1 tsp baking powder (the rise of the cake depends on it)
- 1/4 tsp salt (just a pinch to balance the flavors)
- 1/2 cup whole milk (for moisture and richness)
Instructions
- Preheat your oven to 350°F (175°C) and grease a 9-inch round cake pan, lining the bottom with parchment paper for easy removal.
- In a medium bowl, whisk together the sifted flour, baking powder, and salt, setting aside for later use.
- In a large bowl, cream the softened butter and sugar together until light and fluffy, about 3 minutes. Tip: Scrape the bowl sides to ensure even mixing.
- Beat in the eggs one at a time, then stir in the lemon zest and juice, blending until fully incorporated.
- Alternately add the dry ingredients and milk to the butter mixture, starting and ending with the dry ingredients. Fold in the soaked chia seeds last. Tip: Do not overmix to keep the cake tender.
- Pour the batter into the prepared pan, smoothing the top with a spatula. Bake for 35-40 minutes, or until a toothpick inserted into the center comes out clean. Tip: Check at 30 minutes to avoid overbaking.
- Allow the cake to cool in the pan for 10 minutes, then transfer to a wire rack to cool completely.
Every bite of this cake offers a harmonious blend of tangy lemon and the unique texture of chia seeds, making it a refreshing departure from the ordinary. Serve it with a dollop of whipped cream or a sprinkle of powdered sugar for an extra touch of elegance.
Coconut Flour Vanilla Cake
On a day like today, where the air carries a hint of summer’s promise, there’s nothing quite as comforting as the subtle sweetness of a Coconut Flour Vanilla Cake. This gluten-free delight, with its tender crumb and aromatic vanilla essence, is a testament to the beauty of simple ingredients coming together in perfect harmony.
Ingredients
- 1 cup coconut flour (I find that sifting it first prevents any lumps, ensuring a smoother batter)
- 6 large eggs, at room temperature (they blend more evenly into the batter this way)
- 1/2 cup melted coconut oil (extra virgin gives the cake a richer flavor)
- 3/4 cup maple syrup (for a natural sweetness that complements the coconut)
- 1 tbsp pure vanilla extract (the real deal makes all the difference)
- 1/2 tsp sea salt (just a pinch to balance the flavors)
- 1 tsp baking powder (for that perfect rise)
Instructions
- Preheat your oven to 350°F (175°C) and grease a 9-inch round cake pan with a bit of coconut oil, lining the bottom with parchment paper for easy removal.
- In a large mixing bowl, whisk together the coconut flour, baking powder, and sea salt until well combined.
- In another bowl, beat the eggs lightly before adding the melted coconut oil, maple syrup, and vanilla extract, whisking until the mixture is smooth and homogenous.
- Gradually fold the wet ingredients into the dry ingredients, mixing gently to avoid overworking the batter, which can lead to a dense cake.
- Pour the batter into the prepared cake pan, smoothing the top with a spatula for an even bake.
- Bake for 30-35 minutes, or until the cake is golden and a toothpick inserted into the center comes out clean. Tip: Avoid opening the oven door too early, as sudden temperature changes can cause the cake to sink.
- Allow the cake to cool in the pan for 10 minutes before transferring it to a wire rack to cool completely. Tip: This patience ensures the cake sets properly and doesn’t crumble when sliced.
Celebrate the delicate texture and fragrant vanilla notes of this cake by serving it with a dollop of whipped coconut cream and a sprinkle of toasted coconut flakes for added crunch. The result is a dessert that’s as pleasing to the eye as it is to the palate, perfect for any occasion that calls for a touch of sweetness.
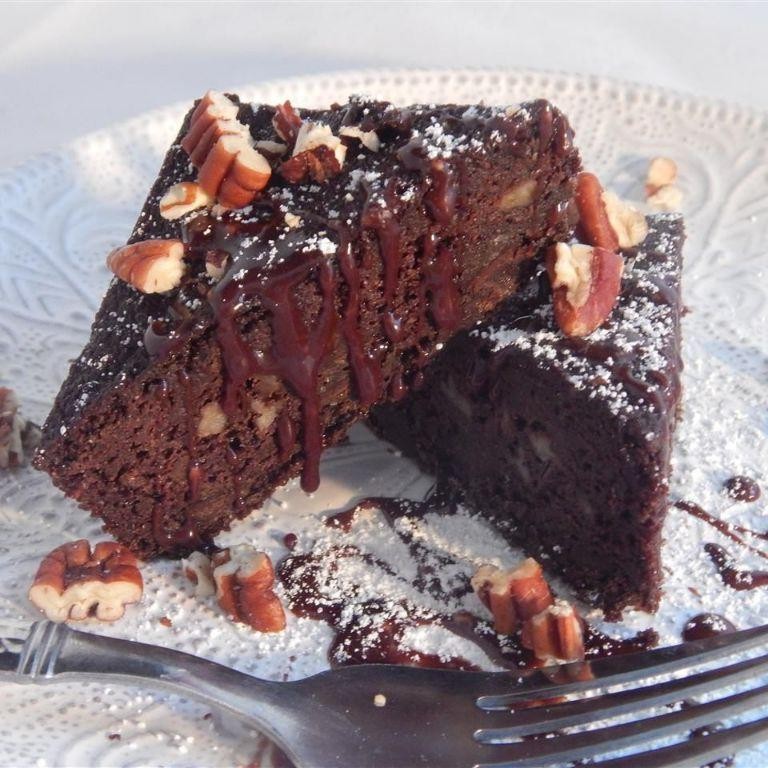
Dark Chocolate Beetroot Cake
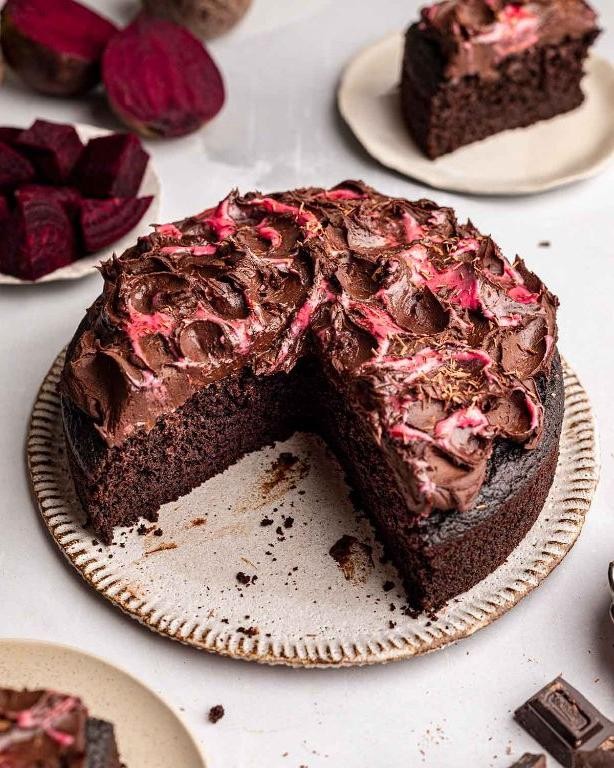
Bold and beautifully unconventional, this Dark Chocolate Beetroot Cake marries the earthy sweetness of beets with the rich depth of dark chocolate, creating a dessert that’s as nutritious as it is indulgent. Perfect for those who adore a touch of sophistication in their baking, this cake promises a moist crumb and a vibrant hue that’s sure to impress.
Ingredients
- 1 1/2 cups all-purpose flour (I always sift mine for a lighter texture)
- 1/2 cup unsweetened cocoa powder (the darker, the better for that intense chocolate flavor)
- 1 tsp baking soda (freshness is key here, so check the date)
- 1/2 tsp salt (I prefer fine sea salt for its subtle minerality)
- 3 large eggs, room temperature (they blend more smoothly when not cold)
- 1 cup granulated sugar (for just the right amount of sweetness)
- 3/4 cup vegetable oil (a neutral oil lets the other flavors shine)
- 2 cups grated beetroot (about 2 medium beets, peeled and finely grated)
- 1 tsp vanilla extract (pure extract makes all the difference)
- 1/2 cup dark chocolate chips (for those irresistible molten pockets)
Instructions
- Preheat your oven to 350°F (175°C) and grease a 9-inch round cake pan, lining the bottom with parchment paper for easy removal.
- In a medium bowl, whisk together the flour, cocoa powder, baking soda, and salt until well combined.
- In a large bowl, beat the eggs and sugar together on medium speed until pale and slightly thickened, about 3 minutes.
- Gradually add the oil to the egg mixture, beating continuously until fully incorporated.
- Fold in the grated beetroot and vanilla extract with a spatula, mixing until evenly distributed.
- Gently fold the dry ingredients into the wet mixture in two additions, being careful not to overmix.
- Stir in the dark chocolate chips, then pour the batter into the prepared pan, smoothing the top with a spatula.
- Bake for 40-45 minutes, or until a toothpick inserted into the center comes out clean. Tip: Rotate the pan halfway through baking for even cooking.
- Allow the cake to cool in the pan for 10 minutes, then transfer to a wire rack to cool completely. Tip: For extra moisture, wrap the cooled cake in plastic wrap and let it sit overnight before serving.
Heavenly in its moistness and rich in flavor, this Dark Chocolate Beetroot Cake is a testament to the magic of combining simple ingredients with a bit of creativity. Serve it with a dollop of crème fraîche or a sprinkle of powdered sugar for an elegant finish that highlights its deep, chocolatey essence.
Gluten-Free Apple Cinnamon Cake
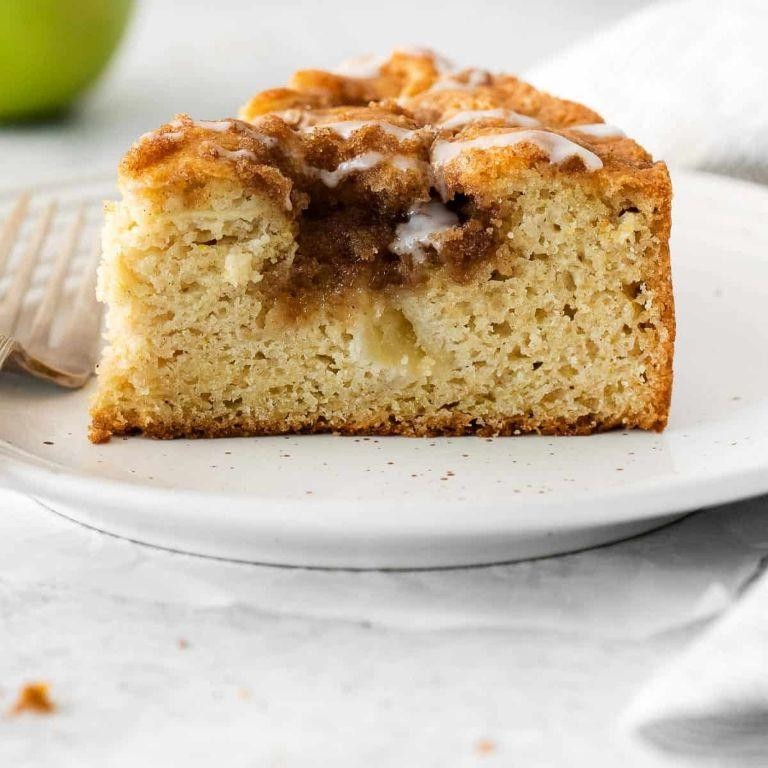
Delightfully moist and warmly spiced, this Gluten-Free Apple Cinnamon Cake is a testament to the joy of baking without compromise. Perfect for autumn gatherings or a cozy weekend treat, it’s a dessert that promises to enchant with every bite.
Ingredients
- 2 cups gluten-free all-purpose flour (I swear by Bob’s Red Mill for its perfect texture)
- 1 tsp baking soda (make sure it’s fresh for the best rise)
- 1/2 tsp salt (a pinch of sea salt enhances the flavors beautifully)
- 1 tbsp ground cinnamon (the heart of this recipe, don’t skimp!)
- 1/2 cup unsalted butter, softened (I prefer European-style for its richness)
- 1 cup granulated sugar (organic cane sugar adds a lovely depth)
- 2 large eggs, room temperature (they incorporate better when not cold)
- 1 tsp pure vanilla extract (splurge on the good stuff)
- 1/2 cup buttermilk (adds a subtle tang and tenderness)
- 2 cups diced apples (I love Honeycrisp for their sweetness and crunch)
Instructions
- Preheat your oven to 350°F (175°C) and grease a 9-inch round cake pan. Tip: Use butter for greasing to add extra flavor.
- In a medium bowl, whisk together the gluten-free flour, baking soda, salt, and cinnamon. Tip: Sifting the flour can prevent lumps for a smoother batter.
- In a large bowl, cream the softened butter and sugar until light and fluffy, about 3 minutes. Tip: Scrape down the sides of the bowl to ensure even mixing.
- Beat in the eggs one at a time, then stir in the vanilla extract.
- Alternately add the dry ingredients and buttermilk to the butter mixture, beginning and ending with the dry ingredients. Mix until just combined.
- Fold in the diced apples gently to distribute evenly throughout the batter.
- Pour the batter into the prepared pan and smooth the top with a spatula.
- Bake for 40-45 minutes, or until a toothpick inserted into the center comes out clean. Tip: Check at 40 minutes to avoid overbaking.
- Let the cake cool in the pan for 10 minutes, then transfer to a wire rack to cool completely.
This cake boasts a tender crumb, punctuated by juicy apple pieces and a ribbon of cinnamon warmth. Serve it dusted with powdered sugar or alongside a dollop of whipped cream for an extra indulgent touch.
Healthy Red Velvet Cake
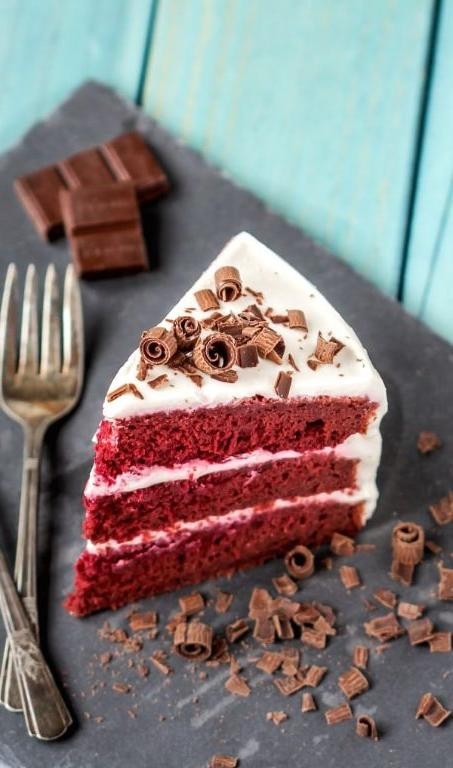
Perfectly balancing indulgence with wellness, this Healthy Red Velvet Cake reimagines the classic dessert with a nourishing twist, offering a guilt-free pleasure that doesn’t skimp on flavor or texture.
Ingredients
- 1 1/2 cups almond flour – for a moist, dense crumb that’s gluten-free.
- 1/4 cup cocoa powder – I prefer Dutch-processed for its deep color and smooth flavor.
- 1 tsp baking soda – ensure it’s fresh for the best rise.
- 1/4 tsp salt – just a pinch to balance the sweetness.
- 1/2 cup maple syrup – my go-to natural sweetener that adds a subtle richness.
- 2 large eggs – room temperature eggs blend more smoothly into the batter.
- 1/4 cup coconut oil – melted and slightly cooled for easy mixing.
- 1 tbsp apple cider vinegar – a secret ingredient that enhances the red velvet’s signature tang.
- 1 tsp vanilla extract – pure extract makes all the difference.
- 1 tbsp red food coloring – for that iconic vibrant hue.
Instructions
- Preheat your oven to 350°F (175°C) and lightly grease an 8-inch round cake pan, lining the bottom with parchment paper for easy removal.
- In a large bowl, whisk together the almond flour, cocoa powder, baking soda, and salt until no lumps remain.
- In a separate bowl, beat the eggs, then mix in the maple syrup, coconut oil, apple cider vinegar, vanilla extract, and red food coloring until fully combined.
- Gradually add the dry ingredients to the wet, stirring until just incorporated to avoid overmixing.
- Pour the batter into the prepared pan, smoothing the top with a spatula for an even bake.
- Bake for 25-30 minutes, or until a toothpick inserted into the center comes out clean. Tip: Avoid opening the oven door too early to prevent the cake from sinking.
- Allow the cake to cool in the pan for 10 minutes, then transfer to a wire rack to cool completely. Tip: This patience ensures the cake sets properly without crumbling.
- Once cooled, slice and serve. For an extra touch, dust with powdered erythritol or top with a dollop of Greek yogurt frosting. Tip: The cake’s texture is best enjoyed the same day but can be stored airtight for up to 3 days.
Yield a cake that’s remarkably tender with a velvety crumb, its cocoa notes perfectly complemented by the subtle tang. Serve each slice with a side of fresh berries for a refreshing contrast or enjoy it as is for a simple, satisfying treat.
Honey Sweetened Spice Cake
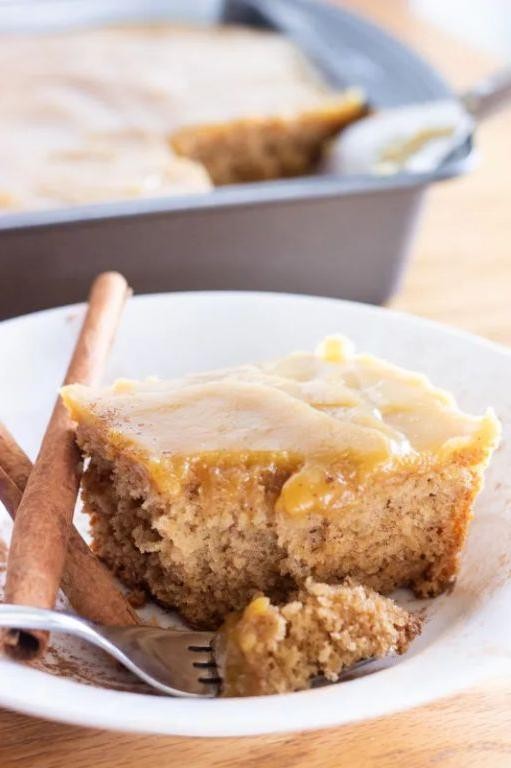
Whisking together the warmth of honey and the aromatic embrace of spices, this cake is a testament to the cozy, indulgent side of baking. Perfect for those moments when you crave something sweet yet sophisticated, it’s a delightful balance of flavors that sings of home and heart.
Ingredients
- 1 1/2 cups all-purpose flour (I always sift mine for that extra lightness)
- 1/2 cup honey (local, if you can find it, for that deep floral note)
- 1/4 cup unsalted butter, softened (room temperature blends smoother)
- 2 large eggs (room temperature, as they incorporate better)
- 1 tsp baking soda (freshness is key for the perfect rise)
- 1 tsp ground cinnamon (the heart of the spice profile)
- 1/2 tsp ground ginger (for a subtle kick)
- 1/4 tsp ground cloves (just a whisper, but it makes all the difference)
- 1/2 cup whole milk (the richness adds to the cake’s tender crumb)
Instructions
- Preheat your oven to 350°F (175°C) and grease an 8-inch round cake pan, lining the bottom with parchment paper for easy removal.
- In a medium bowl, whisk together the flour, baking soda, cinnamon, ginger, and cloves until well combined.
- In a large bowl, beat the softened butter and honey together until light and fluffy, about 3 minutes. Tip: Scrape down the sides of the bowl to ensure everything is evenly mixed.
- Add the eggs one at a time to the butter mixture, beating well after each addition. Tip: Room temperature eggs blend more smoothly, preventing the batter from curdling.
- Alternately add the dry ingredients and milk to the butter mixture, beginning and ending with the dry ingredients. Mix until just combined. Tip: Overmixing can lead to a dense cake, so fold gently.
- Pour the batter into the prepared pan and smooth the top with a spatula. Bake for 25-30 minutes, or until a toothpick inserted into the center comes out clean.
- Allow the cake to cool in the pan for 10 minutes, then transfer to a wire rack to cool completely.
Yielding a moist, fragrant cake with a tender crumb, this honey-sweetened spice cake is a celebration of simplicity and flavor. Serve it with a dollop of whipped cream or a drizzle of extra honey for an extra touch of indulgence.
Low-Carb Almond Flour Cake

Savory yet subtly sweet, this Low-Carb Almond Flour Cake is a testament to the beauty of simplicity in baking, offering a guilt-free indulgence that doesn’t compromise on flavor or texture.
Ingredients
- 2 cups almond flour – I find that blanched almond flour gives the cake a finer texture.
- 1/2 cup unsalted butter, softened – Room temperature butter blends more smoothly for a uniform batter.
- 3/4 cup granulated erythritol – A personal favorite for its zero-carb sweetness without the aftertaste.
- 3 large eggs – Always at room temperature to ensure they incorporate well into the batter.
- 1 tsp vanilla extract – Pure vanilla extract elevates the flavor profile significantly.
- 1/2 tsp baking powder – For that perfect rise.
- 1/4 tsp salt – Just a pinch to balance the sweetness.
Instructions
- Preheat your oven to 350°F (175°C) and grease an 8-inch round cake pan, lining the bottom with parchment paper for easy removal.
- In a large bowl, cream together the softened butter and erythritol until light and fluffy, about 3 minutes. Tip: Scrape down the sides of the bowl occasionally to ensure even mixing.
- Beat in the eggs one at a time, then stir in the vanilla extract. Tip: Adding eggs one at a time prevents the batter from curdling.
- In a separate bowl, whisk together the almond flour, baking powder, and salt. Gradually add this to the wet ingredients, mixing until just combined. Tip: Overmixing can lead to a dense cake, so fold gently.
- Pour the batter into the prepared pan, smoothing the top with a spatula. Bake for 25-30 minutes, or until the cake is golden and a toothpick inserted into the center comes out clean.
- Allow the cake to cool in the pan for 10 minutes before transferring to a wire rack to cool completely.
Keenly balanced between moist and fluffy, this cake boasts a rich almond flavor that pairs wonderfully with a dollop of whipped cream or fresh berries for a refreshing contrast.
Maple Syrup Pumpkin Cake
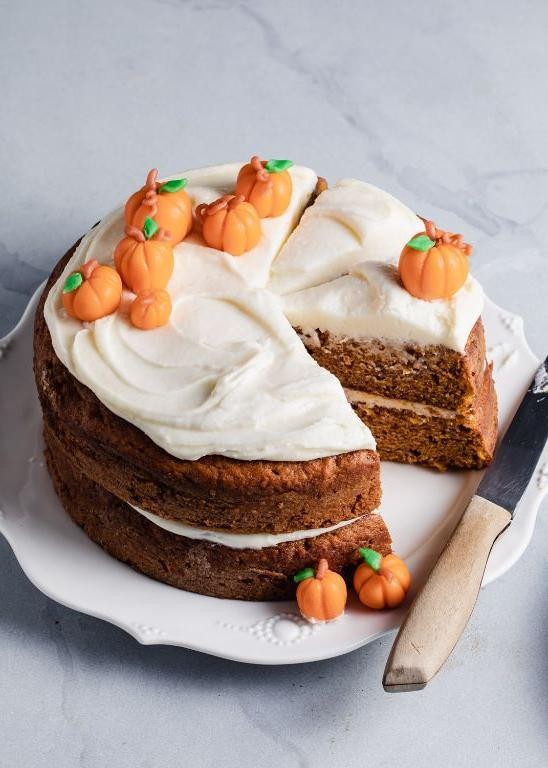
Perfectly blending the warmth of autumn spices with the rich, velvety sweetness of maple syrup, this Maple Syrup Pumpkin Cake is a celebration of fall flavors in every bite. Its moist crumb and aromatic spices make it an irresistible treat for any occasion.
Ingredients
- 1 1/2 cups all-purpose flour (I always sift mine for a lighter texture)
- 1 tsp baking powder (aluminum-free gives a cleaner taste)
- 1/2 tsp baking soda
- 1/2 tsp salt
- 1 tsp ground cinnamon (I love a bit extra for more warmth)
- 1/2 tsp ground ginger
- 1/4 tsp ground nutmeg
- 1/4 tsp ground cloves
- 1/2 cup pure maple syrup (the darker, the richer the flavor)
- 1/2 cup pumpkin puree (homemade or canned, both work beautifully)
- 1/3 cup vegetable oil (I use canola for its neutral taste)
- 2 large eggs (room temperature blends more smoothly)
- 1 tsp vanilla extract (pure extract makes all the difference)
Instructions
- Preheat your oven to 350°F (175°C) and grease an 8-inch round cake pan, lining the bottom with parchment paper for easy removal.
- In a medium bowl, whisk together the flour, baking powder, baking soda, salt, cinnamon, ginger, nutmeg, and cloves until well combined.
- In a separate large bowl, whisk the maple syrup, pumpkin puree, vegetable oil, eggs, and vanilla extract until smooth.
- Gradually add the dry ingredients to the wet ingredients, stirring just until combined to avoid overmixing.
- Pour the batter into the prepared cake pan, smoothing the top with a spatula.
- Bake for 30-35 minutes, or until a toothpick inserted into the center comes out clean.
- Allow the cake to cool in the pan for 10 minutes, then transfer to a wire rack to cool completely.
Lusciously moist with a tender crumb, this cake is a harmonious blend of sweet maple and spiced pumpkin. Serve it dusted with powdered sugar or drizzled with extra maple syrup for an extra indulgent touch.
Matcha Green Tea Cake
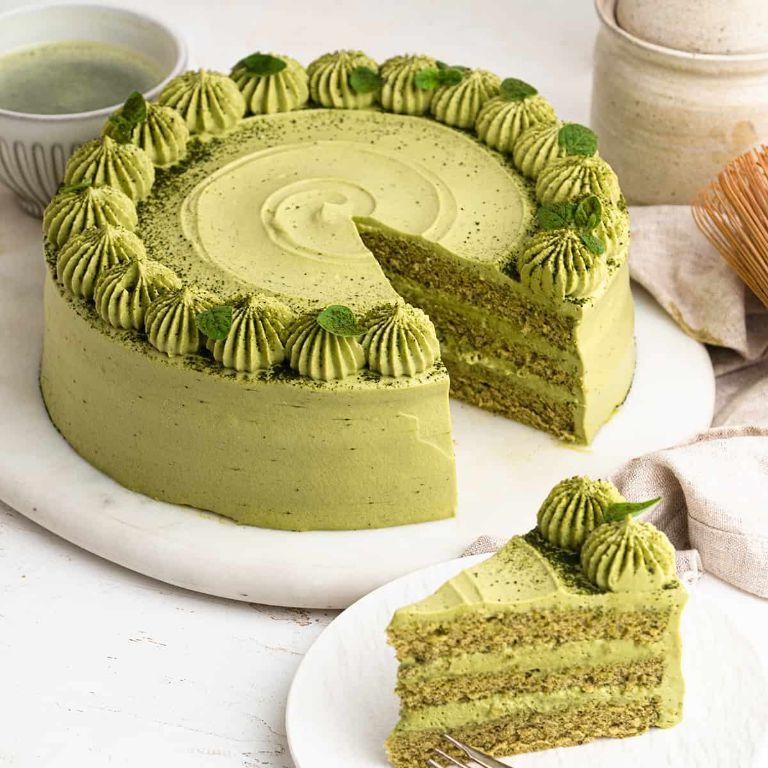
Gracefully blending the earthy tones of matcha with the delicate sweetness of cake, this Matcha Green Tea Cake is a sublime treat that marries tradition with a touch of modern flair. Perfect for afternoon tea or as a refined dessert, its vibrant hue and unique flavor profile are sure to captivate.
Ingredients
- 1 1/2 cups all-purpose flour (I always sift mine for a lighter texture)
- 1 tbsp matcha green tea powder (opt for ceremonial grade for the best flavor)
- 1/2 cup unsalted butter, softened (room temperature blends smoother)
- 1 cup granulated sugar (I find this amount perfectly balances the matcha’s bitterness)
- 2 large eggs (room temperature eggs incorporate better)
- 1/2 cup whole milk (for richness, though almond milk works in a pinch)
- 1 tsp vanilla extract (pure extract makes all the difference)
- 1 1/2 tsp baking powder (ensure it’s fresh for optimal rise)
- 1/4 tsp salt (just a pinch to enhance all flavors)
Instructions
- Preheat your oven to 350°F (175°C) and grease an 8-inch round cake pan, lining the bottom with parchment paper for easy removal.
- In a medium bowl, whisk together the sifted flour, matcha powder, baking powder, and salt until well combined.
- In a large bowl, beat the softened butter and sugar together on medium speed until light and fluffy, about 3 minutes.
- Add the eggs one at a time to the butter mixture, beating well after each addition, then stir in the vanilla extract.
- Alternately add the dry ingredients and milk to the butter mixture, beginning and ending with the dry ingredients, mixing just until combined after each addition. Tip: Overmixing can lead to a dense cake, so fold gently.
- Pour the batter into the prepared pan and smooth the top with a spatula. Tip: Tap the pan lightly on the counter to remove any air bubbles.
- Bake for 25-30 minutes, or until a toothpick inserted into the center comes out clean. Tip: Check at the 25-minute mark to prevent overbaking.
- Allow the cake to cool in the pan for 10 minutes, then transfer to a wire rack to cool completely.
Silky with a tender crumb, this cake boasts a harmonious balance of sweet and earthy notes. Serve it with a dusting of matcha powder or alongside a scoop of vanilla ice cream for a delightful contrast.
Oat Flour Blueberry Cake
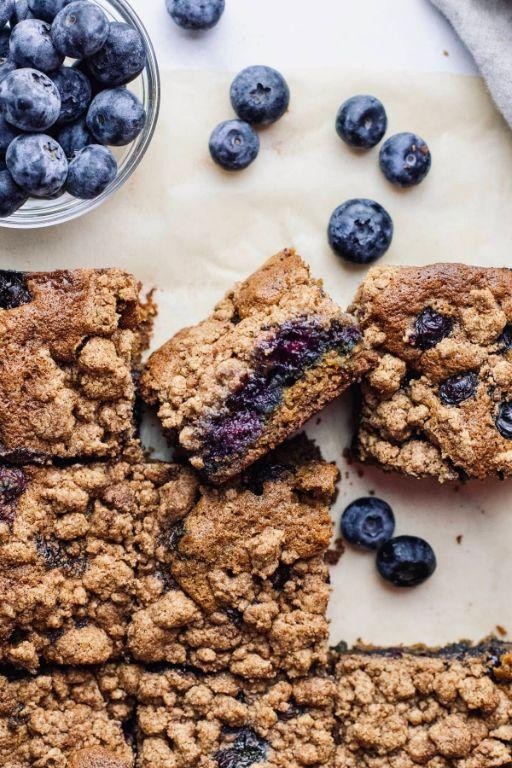
Whisking together the delicate flavors of summer, this oat flour blueberry cake is a testament to simplicity meeting sophistication. With each bite, the juicy burst of blueberries complements the tender, subtly nutty crumb, making it a perfect companion for your morning coffee or an elegant dessert.
Ingredients
- 1 1/2 cups oat flour (I love the texture it brings, plus it’s a great gluten-free option)
- 1/2 cup granulated sugar (for just the right amount of sweetness)
- 1/4 cup unsalted butter, melted (extra virgin olive oil is my go-to for a lighter version)
- 2 large eggs, room temperature (they blend more smoothly when not cold)
- 1 tsp vanilla extract (the real deal makes all the difference)
- 1/2 tsp baking powder (for that perfect rise)
- 1/4 tsp salt (to balance the sweetness)
- 1 cup fresh blueberries (tossed in a tbsp of oat flour to prevent sinking)
Instructions
- Preheat your oven to 350°F (175°C) and grease an 8-inch round cake pan, lining the bottom with parchment paper for easy removal.
- In a large bowl, whisk together the oat flour, sugar, baking powder, and salt until well combined.
- In another bowl, beat the eggs lightly, then stir in the melted butter and vanilla extract until smooth.
- Gradually add the wet ingredients to the dry ingredients, stirring just until combined to avoid overmixing.
- Gently fold in the blueberries coated with oat flour, ensuring they’re evenly distributed throughout the batter.
- Pour the batter into the prepared pan, smoothing the top with a spatula for an even bake.
- Bake for 25-30 minutes, or until a toothpick inserted into the center comes out clean and the edges are lightly golden.
- Allow the cake to cool in the pan for 10 minutes, then transfer to a wire rack to cool completely.
Moist and fluffy, this cake boasts a delightful texture that’s both light and satisfying. The blueberries offer a fresh, tangy contrast to the sweet, buttery cake, making it a versatile treat that’s as suitable for a brunch table as it is for an after-dinner indulgence. Serve it with a dollop of whipped cream or a drizzle of honey for an extra touch of elegance.
Peanut Butter Protein Cake
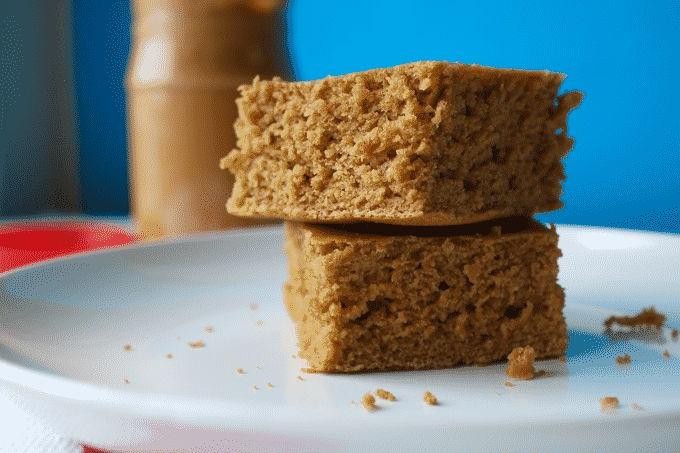
Beyond the ordinary, this Peanut Butter Protein Cake marries the rich, nutty essence of peanut butter with the wholesome goodness of protein, creating a dessert that’s as nourishing as it is indulgent. Perfect for those who seek a balance between health and decadence, this cake promises a moist, fluffy texture with every bite.
Ingredients
- 1 cup creamy peanut butter (I swear by the natural, unsweetened kind for its pure flavor)
- 1/2 cup honey (local, if you can find it, for a subtle floral note)
- 4 large eggs (room temperature eggs blend more smoothly into the batter)
- 1/2 cup almond flour (for a gluten-free base that’s wonderfully nutty)
- 1 scoop vanilla protein powder (choose a high-quality brand to avoid any chalky aftertaste)
- 1 tsp baking soda (the secret to that perfect rise)
- 1/4 tsp salt (just a pinch to balance the sweetness)
Instructions
- Preheat your oven to 350°F (177°C) and line an 8-inch cake pan with parchment paper for easy removal.
- In a large bowl, whisk together the peanut butter and honey until smooth and well combined.
- Add the eggs one at a time, ensuring each is fully incorporated before adding the next for a uniform batter.
- Gently fold in the almond flour, protein powder, baking soda, and salt, mixing just until combined to keep the cake light and airy.
- Pour the batter into the prepared pan and smooth the top with a spatula for an even bake.
- Bake for 25-30 minutes, or until a toothpick inserted into the center comes out clean and the edges are lightly golden.
- Allow the cake to cool in the pan for 10 minutes before transferring to a wire rack to cool completely, ensuring it sets properly.
This cake boasts a dense yet tender crumb, with the peanut butter’s richness beautifully complemented by the subtle sweetness of honey. For an extra touch of elegance, serve each slice with a dollop of whipped coconut cream and a sprinkle of crushed peanuts.
Quinoa Chocolate Cake
Rarely does a dessert come along that marries health and indulgence as seamlessly as this Quinoa Chocolate Cake. With its rich, moist texture and deep cocoa flavor, it’s a guilt-free pleasure that’s as nutritious as it is decadent.
Ingredients
- 1 cup cooked quinoa, cooled (I find that rinsing it well before cooking removes any bitterness)
- 1/3 cup milk (almond milk works beautifully for a dairy-free version)
- 4 large eggs, room temperature (they incorporate better when not cold)
- 1 tsp vanilla extract (pure vanilla adds a depth of flavor that imitation can’t match)
- 1/2 cup unsalted butter, melted (I prefer European-style butter for its richer taste)
- 1 1/2 cups granulated sugar (organic cane sugar lends a slight caramel note)
- 1 cup unsweetened cocoa powder (Dutch-processed gives a smoother chocolate flavor)
- 1 1/2 tsp baking powder
- 1/2 tsp salt
- 1/2 cup dark chocolate chips (70% cacao for a sophisticated bitterness)
Instructions
- Preheat your oven to 350°F (175°C) and grease a 9-inch round cake pan, lining the bottom with parchment paper for easy removal.
- In a blender, combine the cooked quinoa, milk, eggs, and vanilla extract. Blend on high until the mixture is completely smooth, about 1 minute.
- Pour the quinoa mixture into a large bowl and whisk in the melted butter until fully incorporated.
- Sift together the sugar, cocoa powder, baking powder, and salt directly into the bowl to avoid lumps. Gently fold the dry ingredients into the wet until just combined.
- Fold in the dark chocolate chips, reserving a handful to sprinkle on top before baking for a beautiful finish.
- Pour the batter into the prepared pan, smoothing the top with a spatula. Sprinkle the reserved chocolate chips evenly over the surface.
- Bake for 30-35 minutes, or until a toothpick inserted into the center comes out clean. Allow the cake to cool in the pan for 10 minutes before transferring to a wire rack to cool completely.
Glory in the cake’s moist, fudgy texture and the way the melted chocolate chips create pockets of gooey richness. Serve it slightly warm with a dusting of powdered sugar or a dollop of whipped cream for an extra touch of elegance.
Raspberry Chia Jam Cake
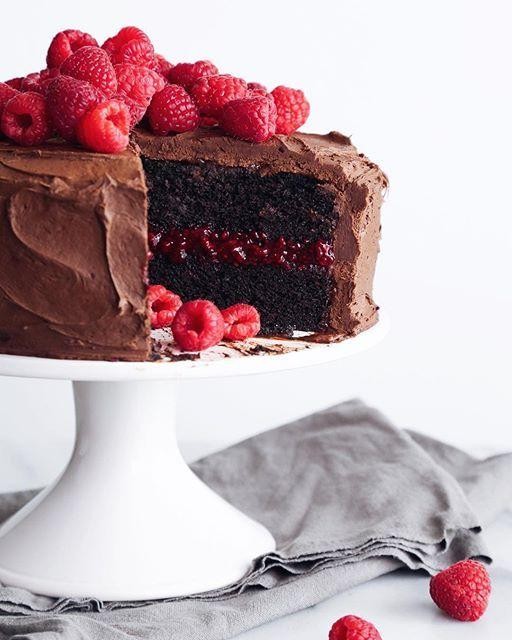
Whisking together the delicate balance of tart raspberries and the subtle crunch of chia seeds, this Raspberry Chia Jam Cake is a testament to the beauty of simple ingredients transforming into something extraordinary. Perfect for afternoon tea or a celebratory dessert, its layers whisper of summer and sophistication.
Ingredients
- 1 1/2 cups all-purpose flour (I always sift mine for a lighter crumb)
- 1 cup granulated sugar (for that just-right sweetness)
- 1/2 cup unsalted butter, softened (room temperature blends smoother)
- 2 large eggs (I prefer room temp eggs here for even mixing)
- 1 tsp vanilla extract (the real deal makes all the difference)
- 1/2 cup buttermilk (adds a lovely tang and tenderness)
- 1 tsp baking powder (the lift in every bite)
- 1/4 tsp salt (to balance the flavors)
- 1 cup raspberry chia jam (homemade or your favorite store-bought)
Instructions
- Preheat your oven to 350°F (175°C) and grease a 9-inch round cake pan, lining the bottom with parchment paper for easy removal.
- In a large bowl, cream together the softened butter and sugar until light and fluffy, about 3 minutes. Tip: Scrape the bowl sides occasionally for even mixing.
- Beat in the eggs one at a time, then stir in the vanilla extract. Tip: Adding eggs one by one ensures a smoother batter.
- Alternately add the sifted flour mixture and buttermilk to the butter mixture, beginning and ending with the flour. Mix until just combined. Tip: Overmixing can lead to a dense cake, so fold gently.
- Pour half the batter into the prepared pan, spread evenly, then dollop with half the raspberry chia jam. Repeat with remaining batter and jam, using a knife to swirl gently.
- Bake for 35-40 minutes, or until a toothpick inserted into the center comes out clean. The top should be golden and spring back when lightly touched.
- Allow the cake to cool in the pan for 10 minutes, then transfer to a wire rack to cool completely.
This cake boasts a moist, tender crumb with pockets of jam that burst with berry goodness. Serve it with a dollop of whipped cream or a sprinkle of powdered sugar for an extra touch of elegance.
Spelt Flour Carrot Cake
Yielded by the humble carrot, this spelt flour carrot cake is a testament to how simple ingredients can transform into something extraordinarily moist and flavorful. Its rustic charm and wholesome goodness make it a perennial favorite for both casual gatherings and elegant affairs alike.
Ingredients
- 2 cups spelt flour (I love its nutty flavor and how it lends a tender crumb)
- 1 cup granulated sugar (for just the right sweetness)
- 1/2 cup packed brown sugar (adds depth and moisture)
- 1 tsp baking soda (the rise is everything)
- 1/2 tsp salt (balances the sweetness)
- 1 tsp cinnamon (a warm spice that’s non-negotiable)
- 1/2 cup extra virgin olive oil (my go-to for its fruity notes)
- 3 large eggs, room temperature (they incorporate better when not cold)
- 2 cups finely grated carrots (the star of the show, obviously)
- 1/2 cup chopped walnuts (for a delightful crunch)
- 1 tsp vanilla extract (pure, for that aromatic touch)
Instructions
- Preheat your oven to 350°F (175°C) and grease a 9-inch round cake pan, lining the bottom with parchment paper for easy release.
- In a large bowl, whisk together the spelt flour, granulated sugar, brown sugar, baking soda, salt, and cinnamon until well combined.
- Add the olive oil, eggs, and vanilla extract to the dry ingredients, mixing until just incorporated—overmixing can lead to a dense cake.
- Fold in the grated carrots and chopped walnuts with a spatula, ensuring they’re evenly distributed throughout the batter.
- Pour the batter into the prepared pan, smoothing the top with the spatula for an even bake.
- Bake for 35-40 minutes, or until a toothpick inserted into the center comes out clean. The edges should be lightly golden and pulling away from the pan slightly.
- Allow the cake to cool in the pan for 10 minutes, then transfer to a wire rack to cool completely. This patience ensures the cake sets properly.
Delightfully moist with a tender crumb, this carrot cake is a harmonious blend of sweet and earthy flavors. Serve it as is for a rustic appeal, or dress it up with a dollop of cream cheese frosting for an extra indulgent treat.
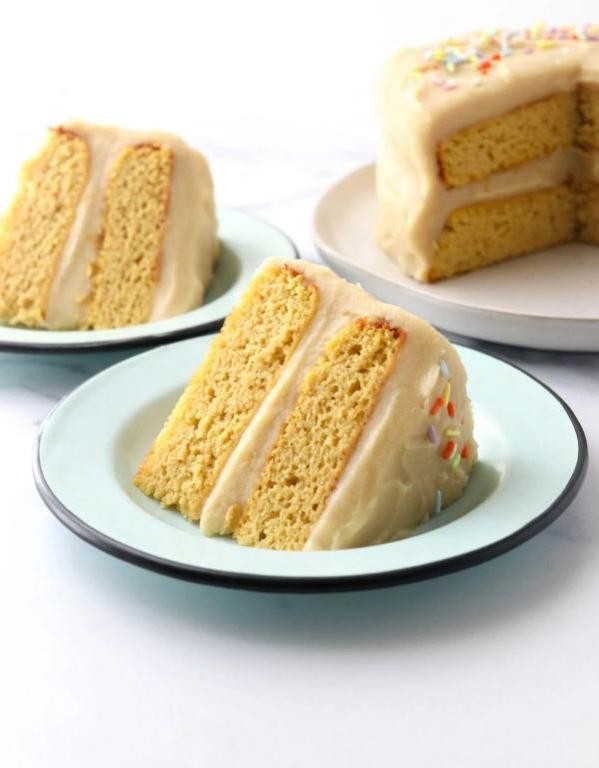
Stevia Sweetened Vanilla Cake
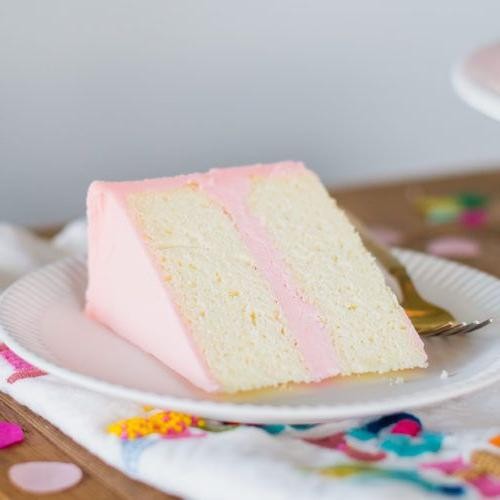
Flourishing in the realm of guilt-free indulgence, this Stevia Sweetened Vanilla Cake is a testament to the fact that health-conscious choices need not compromise on flavor or elegance. Its delicate crumb and aromatic vanilla essence make it a perfect companion for your afternoon tea or a sophisticated dessert option for dinner parties.
Ingredients
- 1 1/2 cups all-purpose flour (I always sift mine for a lighter texture)
- 1/2 cup unsalted butter, softened (room temperature blends more smoothly)
- 1/2 cup stevia sweetener (for that perfect sweetness without the guilt)
- 3 large eggs (room temperature eggs incorporate better)
- 1/2 cup whole milk (adds richness to the batter)
- 2 tsp pure vanilla extract (the real deal makes all the difference)
- 1 1/2 tsp baking powder (for that essential rise)
- 1/4 tsp salt (just a pinch to balance the flavors)
Instructions
- Preheat your oven to 350°F (175°C) and grease an 8-inch round cake pan, lining the bottom with parchment paper for easy removal.
- In a medium bowl, whisk together the sifted flour, baking powder, and salt until well combined.
- In a large bowl, beat the softened butter and stevia sweetener together on medium speed until light and fluffy, about 3 minutes.
- Add the eggs one at a time to the butter mixture, beating well after each addition, and then stir in the vanilla extract.
- Alternately add the flour mixture and milk to the butter mixture, beginning and ending with the flour mixture, mixing just until combined after each addition.
- Pour the batter into the prepared cake pan and smooth the top with a spatula for an even bake.
- Bake for 25-30 minutes, or until a toothpick inserted into the center comes out clean.
- Allow the cake to cool in the pan for 10 minutes, then transfer to a wire rack to cool completely.
Just as you’d expect, this cake boasts a moist, tender crumb with a subtle sweetness that’s perfectly balanced by the rich vanilla flavor. For an extra touch of elegance, serve it with a dusting of powdered stevia and fresh berries on the side.
Sweet Potato Chocolate Cake
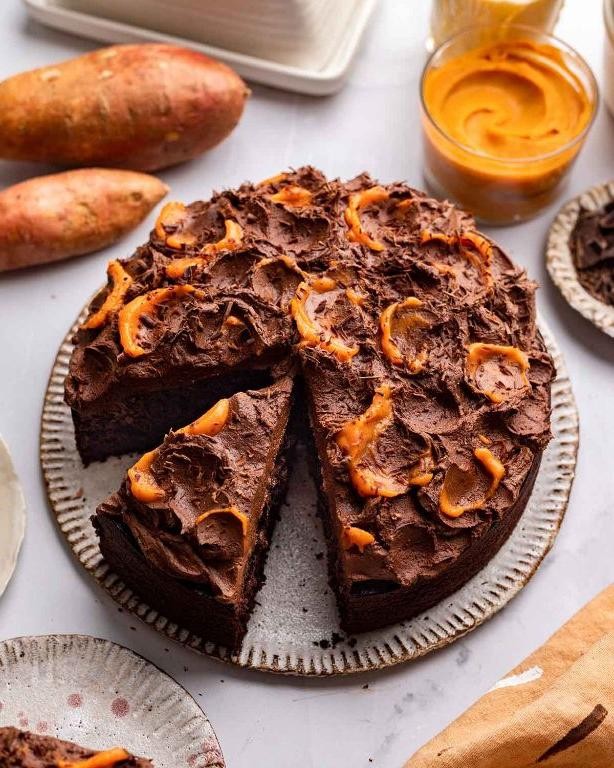
Oozing with rich, velvety chocolate and the subtle sweetness of sweet potatoes, this cake is a masterpiece of flavor and texture, perfect for those who cherish the art of baking.
Ingredients
- 1 cup mashed sweet potatoes (I love using freshly baked sweet potatoes for their natural sweetness)
- 1 1/2 cups all-purpose flour (for a lighter texture, I sometimes swap half with almond flour)
- 3/4 cup cocoa powder (Dutch-processed cocoa gives a deeper chocolate flavor)
- 1 cup granulated sugar (adjust to your sweetness preference)
- 1/2 cup unsalted butter, melted (I find that using melted butter incorporates better)
- 2 large eggs, room temperature (they blend more smoothly when not cold)
- 1 tsp vanilla extract (pure extract makes all the difference)
- 1/2 tsp baking powder
- 1/4 tsp salt
- 1/2 cup whole milk (for a richer cake, substitute with buttermilk)
Instructions
- Preheat your oven to 350°F (175°C) and grease a 9-inch round cake pan, lining the bottom with parchment paper for easy removal.
- In a large bowl, whisk together the mashed sweet potatoes, melted butter, sugar, eggs, and vanilla extract until smooth.
- Sift in the flour, cocoa powder, baking powder, and salt, gently folding into the wet ingredients to avoid overmixing.
- Gradually add the milk, stirring until just combined. The batter should be thick but pourable.
- Pour the batter into the prepared pan, smoothing the top with a spatula for an even bake.
- Bake for 35-40 minutes, or until a toothpick inserted into the center comes out clean. Tip: Avoid opening the oven door too early to prevent the cake from sinking.
- Allow the cake to cool in the pan for 10 minutes before transferring to a wire rack to cool completely. Tip: This patience ensures the cake sets properly.
- For an extra touch, dust with powdered sugar or drizzle with chocolate ganache before serving. Tip: A sprinkle of sea salt on top enhances the chocolate flavor.
Best enjoyed slightly warm, this cake boasts a moist crumb and a harmonious blend of sweet potato and chocolate flavors. Serve it with a scoop of vanilla ice cream for a delightful contrast or enjoy it as is for a simple yet sophisticated dessert.
Zucchini Walnut Cake
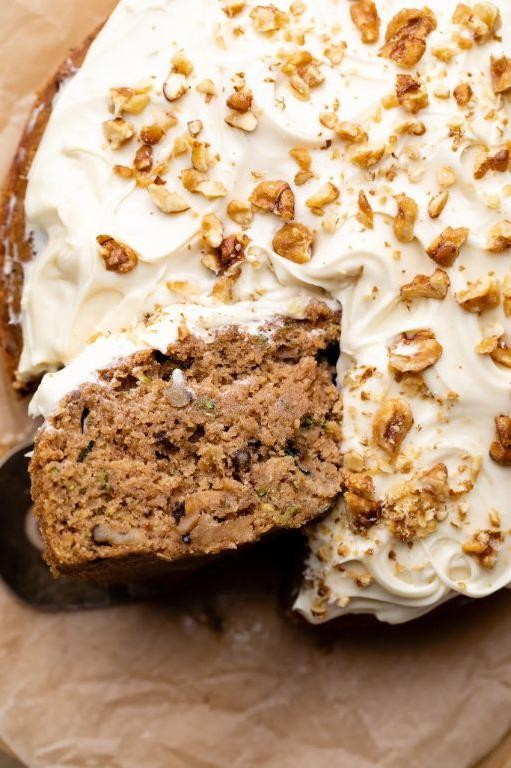
Whisking together the essence of summer gardens and the warmth of home baking, this Zucchini Walnut Cake is a delightful symphony of moist textures and nutty undertones, perfect for any gathering or a quiet afternoon treat.
Ingredients
- 2 cups all-purpose flour (I always sift mine for a lighter cake)
- 1 teaspoon baking soda (make sure it’s fresh for the best rise)
- 1/2 teaspoon baking powder
- 1/2 teaspoon salt
- 1 teaspoon ground cinnamon (I adore the depth it adds)
- 1/2 cup unsalted butter, softened (room temperature blends smoother)
- 1 cup granulated sugar
- 2 large eggs (room temperature eggs incorporate better)
- 1 teaspoon vanilla extract (pure vanilla makes all the difference)
- 2 cups grated zucchini (squeeze out excess moisture for the perfect texture)
- 1/2 cup chopped walnuts (toasted lightly for an enhanced crunch)
Instructions
- Preheat your oven to 350°F (175°C) and grease a 9-inch round cake pan, lining the bottom with parchment paper for easy removal.
- In a medium bowl, whisk together the flour, baking soda, baking powder, salt, and cinnamon until well combined.
- In a large bowl, beat the softened butter and granulated sugar together on medium speed until light and fluffy, about 3 minutes.
- Add the eggs one at a time to the butter mixture, beating well after each addition, then stir in the vanilla extract.
- Gradually mix in the dry ingredients to the wet ingredients, alternating with the grated zucchini, until just combined. Fold in the chopped walnuts.
- Pour the batter into the prepared cake pan and smooth the top with a spatula.
- Bake for 40-45 minutes, or until a toothpick inserted into the center comes out clean. Let the cake cool in the pan for 10 minutes before transferring to a wire rack to cool completely.
Generously moist with a tender crumb, this cake is a testament to the magic of zucchini in baking. Serve it dusted with powdered sugar or alongside a dollop of whipped cream for an extra indulgent touch.
Conclusion
We hope this roundup of 20 delicious, healthy cake recipes inspires your next baking adventure! Whether you’re celebrating a special occasion or just treating yourself, there’s something here for everyone. Don’t forget to try your favorites, share your thoughts in the comments, and pin this article on Pinterest to spread the joy of healthy baking. Happy baking, friends!


