Now, who says eating your greens has to be boring? Dive into our vibrant collection of 19 Delicious Green Vegetable Recipes Healthy that promise to turn the humble green into the star of your plate. Whether you’re craving something quick, comforting, or bursting with seasonal flavors, we’ve got you covered. Let’s make every bite count with these irresistible, nutrient-packed dishes!
Spinach and Feta Stuffed Mushrooms
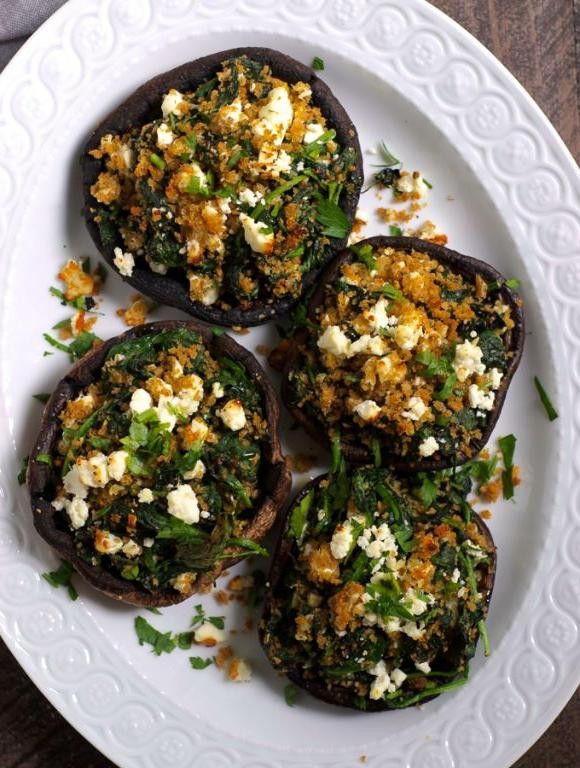
Oh, the joys of biting into something so delightfully cheesy and earthy that you momentarily forget about your laundry piling up! These Spinach and Feta Stuffed Mushrooms are here to save your snack game with minimal fuss and maximum flavor.
Ingredients
- Large mushrooms – 12
- Spinach – 1 cup, chopped
- Feta cheese – ½ cup, crumbled
- Garlic – 2 cloves, minced
- Olive oil – 1 tbsp
- Salt – ¼ tsp
- Black pepper – ⅛ tsp
Instructions
- Preheat your oven to 375°F. This ensures your mushrooms get perfectly tender without turning into mush.
- Clean the mushrooms with a damp paper towel and remove the stems. Pro tip: Save those stems! They’re great in soups or omelets.
- Heat olive oil in a pan over medium heat. Add garlic and sauté for 30 seconds until fragrant.
- Add spinach to the pan, sprinkle with salt and pepper, and cook until wilted, about 2 minutes. Let it cool slightly.
- Mix the spinach with feta cheese in a bowl. Here’s a tip: If the mixture feels too wet, blot the spinach with a paper towel before mixing.
- Stuff each mushroom cap with the spinach and feta mixture. Pack it in there—no shyness allowed!
- Bake for 20 minutes until the mushrooms are tender and the filling is lightly golden. Watch them closely after 15 minutes to avoid over-browning.
Fantastically tender mushrooms give way to a creamy, tangy filling that’s downright addictive. Serve these bad boys on a platter with a sprinkle of extra feta, or go rogue and pop them on top of a salad for a warm twist.
Garlic Sauteed Green Beans
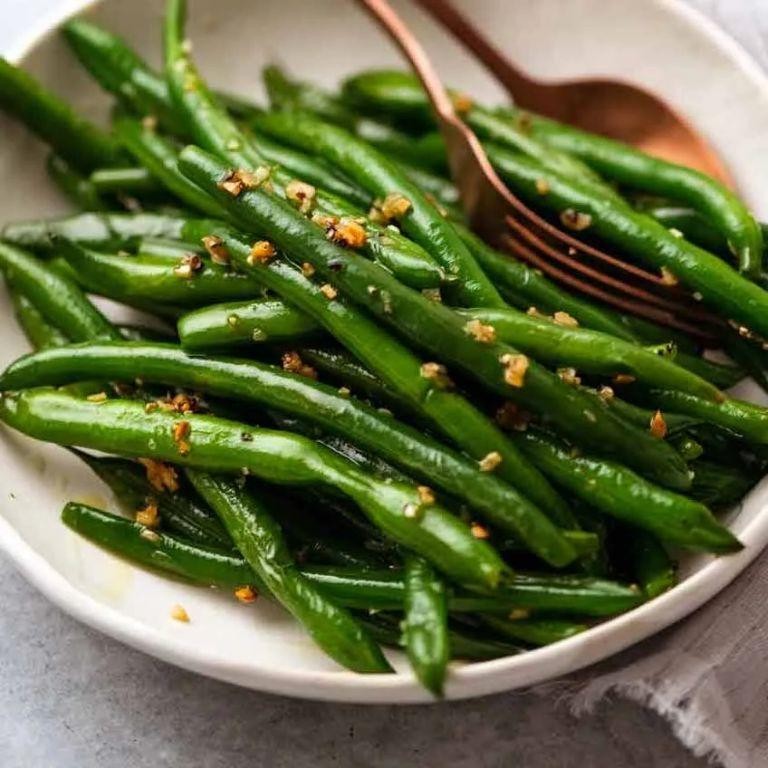
Ready to turn those humble green beans into the star of your dinner table? With just a few cloves of garlic and a splash of oil, you’re on your way to a side dish that’s bursting with flavor and crunch. Let’s get sautéing!
Ingredients
- Green beans – 1 lb
- Garlic – 3 cloves, minced
- Olive oil – 2 tbsp
- Salt – ½ tsp
Instructions
- Wash the green beans under cold water and pat them dry with a clean towel. Tip: Dry beans ensure a better sear and less oil splatter.
- Heat olive oil in a large skillet over medium-high heat until shimmering, about 1 minute.
- Add the green beans to the skillet, spreading them out in a single layer. Let them cook undisturbed for 2 minutes to get a nice char.
- Stir the green beans and add the minced garlic. Cook for another 2 minutes, stirring frequently to prevent the garlic from burning. Tip: Burnt garlic tastes bitter, so keep an eye on it!
- Sprinkle salt over the green beans and toss to combine. Cook for an additional 1 minute, then remove from heat. Tip: Adding salt at the end preserves the beans’ vibrant green color.
These garlic sautéed green beans come out perfectly crisp-tender with a punch of garlicky goodness. Serve them alongside a juicy steak or toss them into a salad for an extra crunch. Either way, they’re sure to steal the spotlight.
Broccoli and Cheddar Soup

Just when you thought broccoli couldn’t get any cozier, we’re throwing it into a velvety, cheese-laden hug of a soup. This Broccoli and Cheddar Soup is the culinary equivalent of your favorite sweatpants—comforting, reliable, and secretly fancy.
Ingredients
- Broccoli – 4 cups
- Cheddar cheese – 2 cups
- Butter – ¼ cup
- Flour – ¼ cup
- Milk – 2 cups
- Chicken broth – 2 cups
- Salt – 1 tsp
- Pepper – ½ tsp
Instructions
- Melt butter in a large pot over medium heat.
- Whisk in flour until smooth, cooking for 1 minute to remove the raw flour taste.
- Gradually add milk, whisking constantly to prevent lumps.
- Stir in chicken broth and bring the mixture to a simmer.
- Add broccoli, salt, and pepper, then cover and simmer for 10 minutes, or until broccoli is tender.
- Reduce heat to low and stir in cheddar cheese until melted and smooth.
- Use an immersion blender to puree the soup to your desired consistency, or leave it chunky for texture.
You’ll love the creamy texture and the sharp, cheesy flavor that makes this soup a standout. Try serving it in a bread bowl for an edible dish that’s as fun as it is delicious.
Avocado and Kale Smoothie
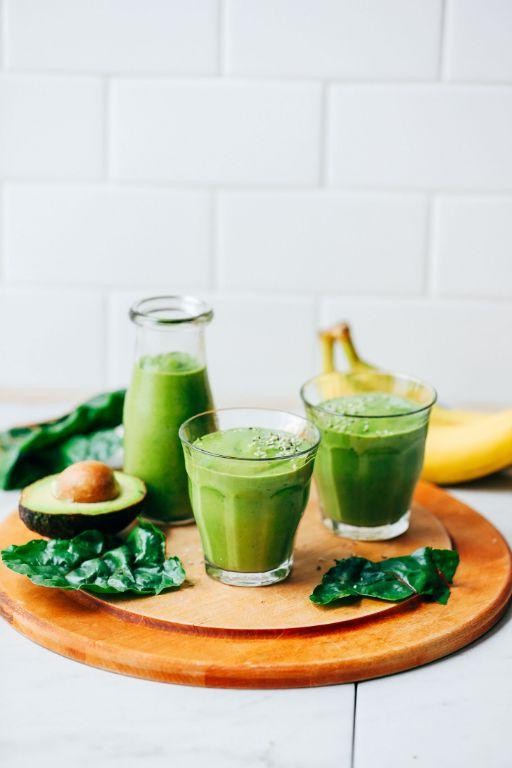
Ever tried to convince yourself that eating healthy is a breeze, only to be betrayed by the sheer boredom of it all? Well, buckle up, because this Avocado and Kale Smoothie is about to turn your blender into a magic wand that transforms ‘ugh’ into ‘more, please!’
Ingredients
- Avocado – 1
- Kale – 1 cup
- Banana – 1
- Almond milk – 1 cup
- Honey – 1 tbsp
- Ice cubes – ½ cup
Instructions
- Peel the avocado and banana, then chop them into chunks.
- Wash the kale thoroughly under cold water, then tear the leaves into smaller pieces, discarding the stems.
- Add the avocado, kale, banana, almond milk, honey, and ice cubes to the blender.
- Blend on high for 45 seconds, or until the mixture is completely smooth. Tip: If the smoothie is too thick, add a splash more almond milk to reach your desired consistency.
- Pour the smoothie into a glass and serve immediately. Tip: For an extra chill, place your glass in the freezer for 5 minutes before pouring.
Velvety smooth with a hint of sweetness from the honey and banana, this smoothie is like a hug in a glass. Try topping it with a sprinkle of chia seeds for a crunchy contrast, or enjoy it as a post-workout refresher that actually tastes like a treat.
Zucchini Noodles with Pesto

Get ready to twist up your dinner routine with a dish that’s as fun to make as it is to eat! Zucchini noodles with pesto is the superhero of weeknight meals—quick, healthy, and packed with flavor.
Ingredients
- Zucchini – 4 medium
- Basil leaves – 2 cups
- Pine nuts – ¼ cup
- Garlic – 2 cloves
- Parmesan cheese – ½ cup, grated
- Olive oil – ½ cup
- Salt – ½ tsp
- Pepper – ¼ tsp
Instructions
- Using a spiralizer, turn the zucchini into noodles. Tip: If you don’t have a spiralizer, a vegetable peeler can create wide, flat noodles.
- In a food processor, combine basil, pine nuts, garlic, Parmesan, olive oil, salt, and pepper. Blend until smooth. Tip: For a nut-free version, swap pine nuts with sunflower seeds.
- Heat a large skillet over medium heat. Add the zucchini noodles and sauté for 2-3 minutes, just until they’re warm but still crisp. Tip: Overcooking will make them mushy, so keep an eye on the clock.
- Remove from heat and toss with the pesto until evenly coated.
Kick back and enjoy the vibrant, fresh flavors of this dish, where the zucchini noodles offer a satisfying crunch against the creamy, herby pesto. Serve it up in a bowl with a sprinkle of extra Parmesan, or get fancy and plate it like the gourmet masterpiece it is.
Grilled Asparagus with Lemon Butter
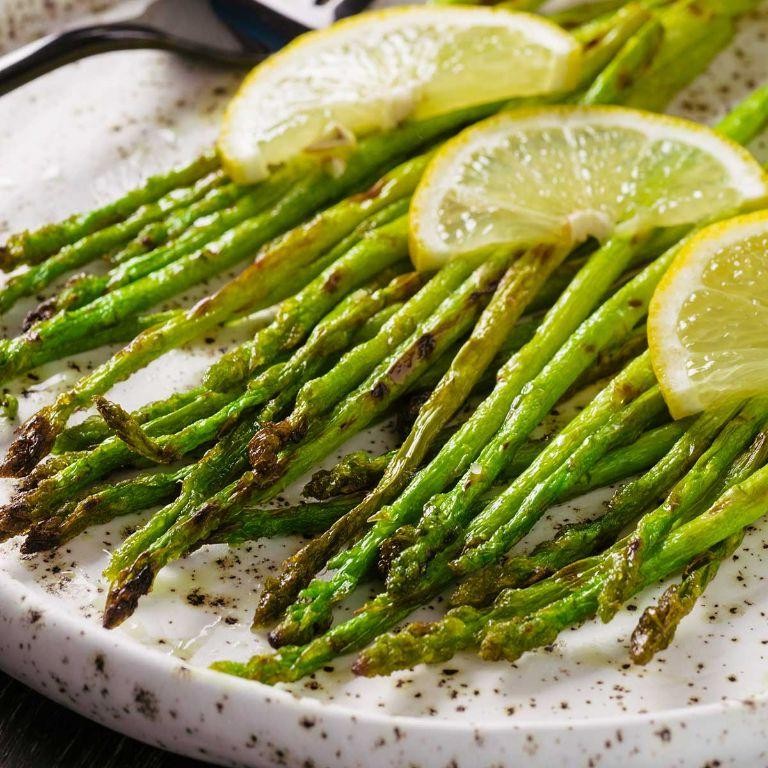
Zesty doesn’t even begin to cover it—this Grilled Asparagus with Lemon Butter is the side dish that’s about to steal the spotlight at your next BBQ. With a punch of citrus and the smoky char of the grill, it’s a simple yet show-stopping addition to any meal.
Ingredients
- Asparagus – 1 lb
- Butter – 4 tbsp
- Lemon – 1, juiced
- Salt – ½ tsp
Instructions
- Preheat your grill to medium-high heat, aiming for about 400°F—this ensures those beautiful grill marks without incinerating your spears.
- While the grill heats, snap off the woody ends of the asparagus; they’ll naturally break where the tough part begins.
- Melt the butter in a small saucepan over low heat, then whisk in the lemon juice and salt for a tangy, rich sauce.
- Toss the asparagus lightly in half of the lemon butter, saving the rest for drizzling post-grill—because everything’s better with a buttery finish.
- Place the asparagus on the grill perpendicular to the grates to prevent them from falling through, and grill for 3-4 minutes per side until tender but still crisp.
- Transfer the grilled asparagus to a serving platter, drizzle with the remaining lemon butter, and serve immediately for maximum flavor impact.
Amazingly crisp with a smoky undertone and a bright, buttery finish, this dish pairs perfectly with grilled meats or can be jazzed up with a sprinkle of parmesan for an extra indulgent twist.
Pea and Mint Soup
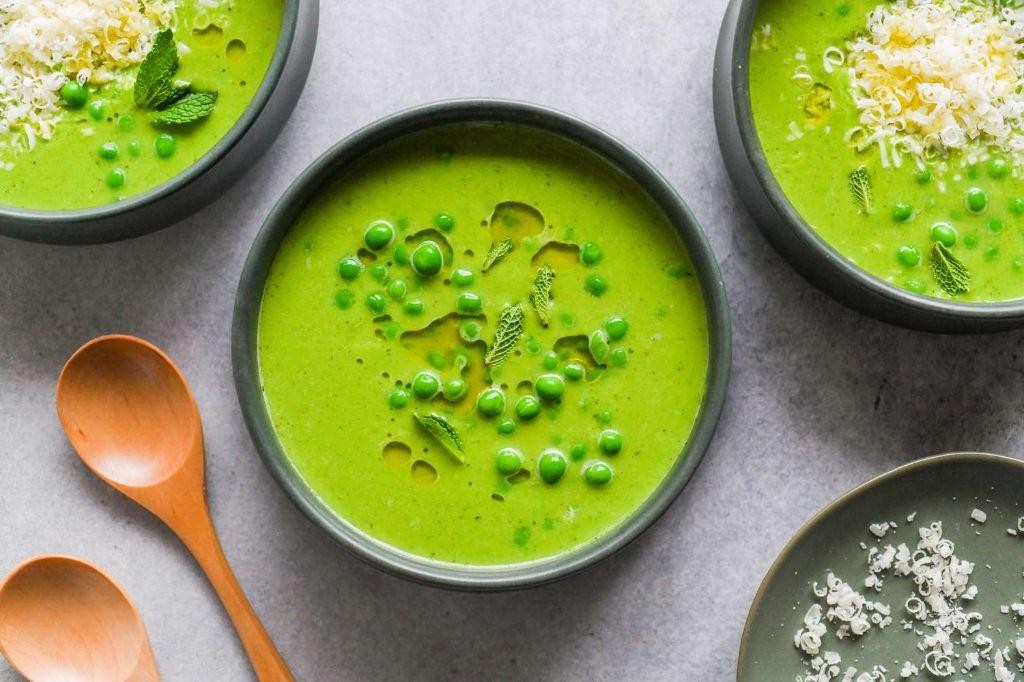
Now, let’s dive into a bowl of vibrant green goodness that’s as refreshing as a summer breeze and as easy as pie—well, easier actually, because who has time for crust? This Pea and Mint Soup is your ticket to a quick, delicious escape from the mundane, blending the sweetness of peas with the zesty kick of mint in a way that’ll make your taste buds do a happy dance.
Ingredients
- Frozen peas – 4 cups
- Fresh mint leaves – ½ cup
- Vegetable stock – 4 cups
- Heavy cream – ½ cup
- Salt – 1 tsp
- Black pepper – ½ tsp
Instructions
- In a large pot, bring the vegetable stock to a boil over high heat.
- Add the frozen peas to the boiling stock and cook for 3 minutes, or until the peas are bright green and tender.
- Remove the pot from heat and stir in the fresh mint leaves, allowing the residual heat to wilt them.
- Using an immersion blender, puree the soup until smooth. Tip: For an extra silky texture, strain the soup through a fine-mesh sieve.
- Stir in the heavy cream, salt, and black pepper until well combined. Tip: Adjust the seasoning gradually to avoid over-salting.
- Return the pot to low heat and warm the soup for 2 minutes, ensuring it doesn’t boil. Tip: Boiling can cause the cream to separate, so keep an eye on the temperature.
- Serve hot, garnished with a swirl of cream and a few mint leaves for a pop of color.
Marvel at the soup’s velvety texture and the harmonious blend of sweet and herbal notes. For a playful twist, serve it chilled on a hot day or with a side of crusty bread for dipping into this liquid gold.
Brussels Sprouts with Bacon and Balsamic
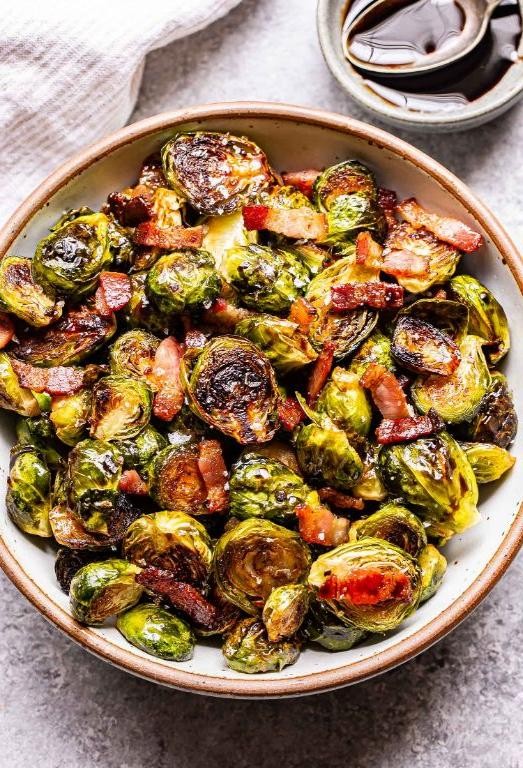
Hold onto your hats, folks, because we’re about to turn the most misunderstood veggie into the star of your dinner table. Brussels sprouts with bacon and balsamic is the dish that’ll make even the pickiest eaters beg for seconds.
Ingredients
- Brussels sprouts – 1 lb
- Bacon – 4 slices
- Balsamic vinegar – 2 tbsp
- Olive oil – 1 tbsp
- Salt – ½ tsp
- Black pepper – ¼ tsp
Instructions
- Preheat your oven to 400°F. This ensures your sprouts get crispy, not soggy.
- Chop the bacon into ½-inch pieces. Tip: Partially freeze the bacon for easier slicing.
- Trim the stems off the Brussels sprouts and cut them in half. Smaller sprouts can stay whole.
- Toss the sprouts with olive oil, salt, and pepper in a large bowl. Every leaf should glisten like it’s ready for its close-up.
- Spread the sprouts on a baking sheet in a single layer. Crowding leads to steaming, and we’re not about that life.
- Scatter the bacon pieces over the sprouts. Because everything’s better with bacon.
- Roast for 20 minutes, then stir. This is your chance to ensure even browning.
- Drizzle with balsamic vinegar and roast for another 5 minutes. The vinegar will reduce into a sweet, tangy glaze.
- Remove from the oven when the sprouts are caramelized and the bacon is crispy. Tip: Let them sit for a minute; they’re hotter than they look.
You’ll love the contrast of crispy, caramelized edges with tender centers, all wrapped up in that smoky bacon goodness. Serve them straight from the pan for a rustic vibe, or fancy them up on a platter for your next dinner party.
Green Goddess Salad
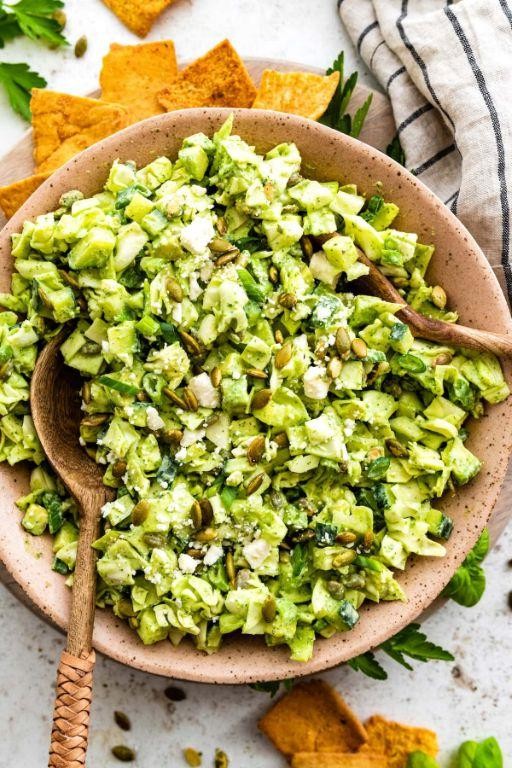
Ever had a salad so divine it could make a kale skeptic weep tears of joy? Our Green Goddess Salad is here to do just that, packing a punch of freshness with a side of sass.
Ingredients
- Avocado – 1, ripe
- Spinach – 2 cups
- Greek yogurt – ½ cup
- Lemon juice – 1 tbsp
- Garlic – 1 clove
- Salt – ½ tsp
- Pepper – ¼ tsp
Instructions
- Peel and pit the avocado, then mash it in a bowl until smooth.
- Add Greek yogurt, lemon juice, and minced garlic to the mashed avocado, mixing well to combine.
- Season the mixture with salt and pepper, stirring until evenly distributed.
- Toss the spinach in the dressing until each leaf is lightly coated.
- Let the salad sit for 5 minutes to allow the flavors to meld together.
- Serve immediately for the best texture and flavor.
Velvety smooth dressing clings to each spinach leaf, creating a salad that’s as luxurious as it is healthy. Try serving it in a hollowed-out avocado half for an Instagram-worthy presentation that’ll have your followers green with envy.
Stuffed Bell Peppers with Quinoa and Spinach
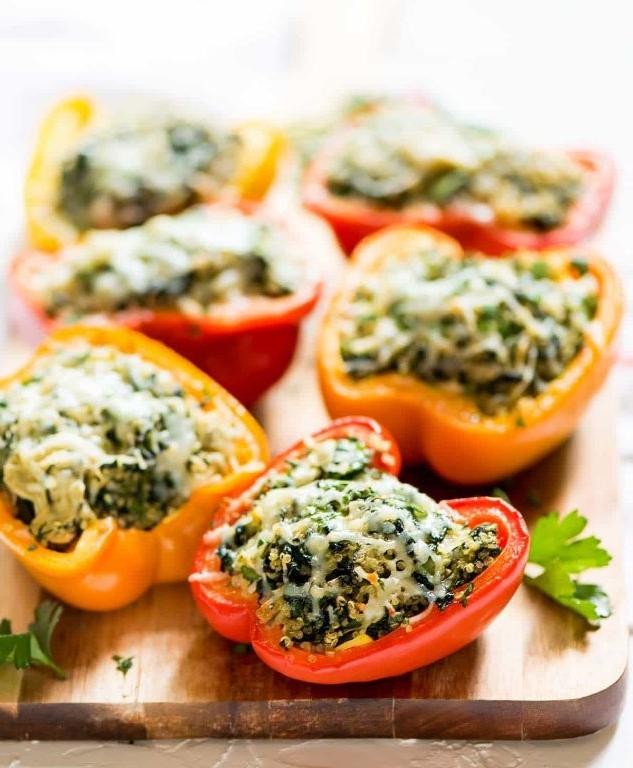
Zesty and zingy, these stuffed bell peppers are here to jazz up your dinner routine without demanding a standing ovation. Packed with quinoa and spinach, they’re the perfect blend of nutritious and delicious, proving that healthy eating doesn’t have to be a snooze fest.
Ingredients
- Bell peppers – 4
- Quinoa – 1 cup
- Spinach – 2 cups
- Olive oil – 2 tbsp
- Garlic – 2 cloves
- Salt – ½ tsp
- Black pepper – ¼ tsp
- Water – 2 cups
Instructions
- Preheat your oven to 375°F and lightly grease a baking dish with olive oil.
- Cut the tops off the bell peppers and remove the seeds and membranes. Tip: Choose peppers that can stand upright for easier stuffing.
- Rinse the quinoa under cold water until the water runs clear to remove any bitterness.
- In a saucepan, heat 1 tbsp olive oil over medium heat. Add minced garlic and sauté for 1 minute until fragrant.
- Add the quinoa, water, salt, and black pepper to the saucepan. Bring to a boil, then reduce heat to low, cover, and simmer for 15 minutes. Tip: Don’t peek! Letting the steam do its thing is key to fluffy quinoa.
- Remove the saucepan from heat and let it sit, covered, for 5 minutes. Then, fluff the quinoa with a fork.
- Stir in the spinach until it wilts from the residual heat. Tip: Fresh spinach works best for a vibrant color and texture.
- Stuff the bell peppers with the quinoa and spinach mixture, packing it down lightly.
- Place the stuffed peppers in the prepared baking dish and drizzle with the remaining olive oil.
- Bake for 25-30 minutes until the peppers are tender and the edges are slightly charred.
Outrageously good, these stuffed peppers offer a delightful contrast between the tender pepper and the fluffy, savory filling. Serve them atop a bed of greens for an extra pop of color or alongside a crisp white wine to elevate your meal from simple to spectacular.
Cucumber and Avocado Sushi Rolls
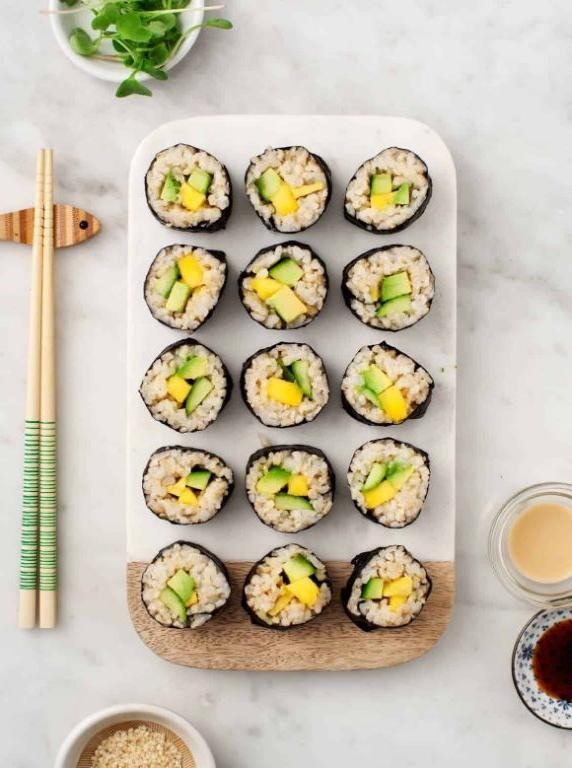
Hold onto your chopsticks, folks, because we’re about to dive into the world of homemade sushi that’s so easy, you’ll laugh in the face of takeout menus. These Cucumber and Avocado Sushi Rolls are your ticket to a fresh, crunchy, and creamy delight that’s as fun to make as it is to eat.
Ingredients
- Sushi rice – 1 cup
- Water – 1 ¼ cups
- Rice vinegar – 2 tbsp
- Sugar – 1 tbsp
- Salt – ½ tsp
- Nori sheets – 4
- Cucumber – 1, julienned
- Avocado – 1, sliced
Instructions
- Rinse the sushi rice under cold water until the water runs clear, then drain well.
- Combine the rice and water in a rice cooker or pot, bring to a boil, then reduce heat to low, cover, and cook for 20 minutes. Tip: Resist the urge to peek; keeping the lid on ensures perfectly steamed rice.
- While the rice cooks, mix rice vinegar, sugar, and salt in a small bowl until dissolved. Tip: Warming the mixture slightly can help the sugar dissolve faster.
- Spread the cooked rice on a flat surface, drizzle with the vinegar mixture, and fold gently to combine without mashing the rice. Let it cool to room temperature. Tip: Fanning the rice can speed up the cooling process.
- Place a nori sheet on a bamboo mat, spread a thin layer of rice over the nori, leaving a 1-inch border at the top.
- Arrange cucumber and avocado slices along the bottom edge of the rice-covered nori.
- Roll the sushi tightly from the bottom, using the mat to help shape it. Wet the top border with a bit of water to seal the roll.
- Repeat with the remaining nori sheets and filling.
- Use a sharp knife to slice each roll into 8 pieces. Tip: Wetting the knife between cuts prevents sticking and ensures clean slices.
Who knew rolling your own sushi could be this simple? The contrast between the crisp cucumber and buttery avocado wrapped in slightly tangy rice is a texture and flavor dream. Serve these beauties with a side of soy sauce or get fancy with a drizzle of sriracha mayo for an extra kick.
Kale and Apple Salad with Walnuts
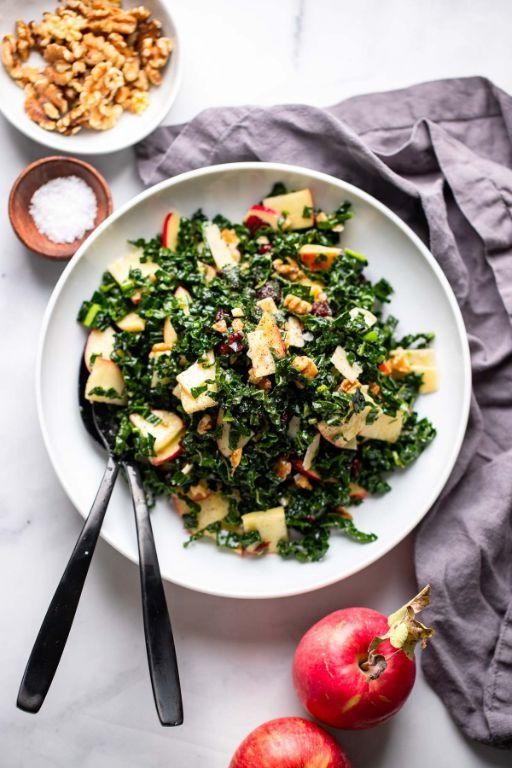
Get ready to toss your way to happiness with this kale and apple salad that’s crunchier than your last relationship. Packed with walnuts for that extra oomph, it’s the kind of dish that makes you forget you’re eating something healthy.
Ingredients
- Kale – 4 cups
- Apple – 1, sliced
- Walnuts – ½ cup
- Olive oil – 2 tbsp
- Lemon juice – 1 tbsp
- Salt – ½ tsp
Instructions
- Wash the kale thoroughly under cold water, then pat dry with a clean towel.
- Remove the stems from the kale and tear the leaves into bite-sized pieces.
- In a large bowl, massage the kale with olive oil and salt for 2 minutes until it starts to soften.
- Add the sliced apple and walnuts to the bowl with the kale.
- Drizzle lemon juice over the salad and toss everything together until well combined.
- Let the salad sit for 5 minutes before serving to allow the flavors to meld together.
Crisp, refreshing, and with a delightful crunch, this salad is a textural dream. Serve it as a side or pile it high for a satisfying main—either way, it’s a winner.
Green Bean Almondine
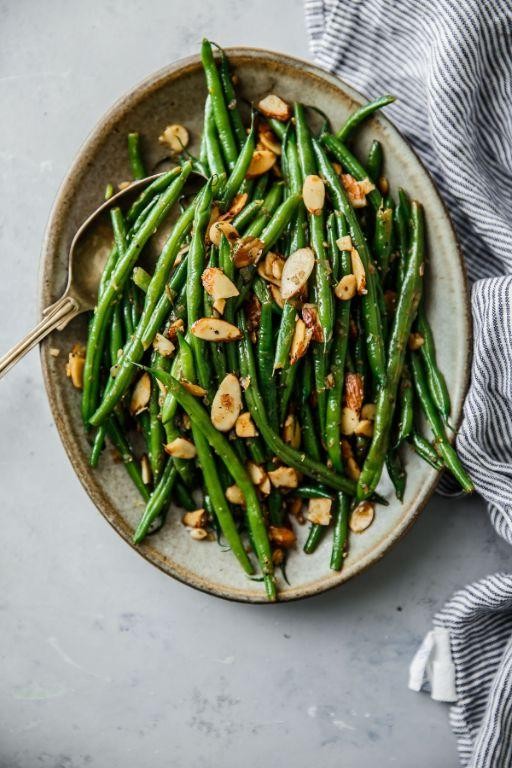
Ever find yourself staring into the abyss of your fridge, wondering how to turn those sad green beans into something that’ll make your taste buds do a happy dance? Enter the stage: Green Bean Almondine, the dish that’s about to upgrade your veggie game from ‘meh’ to ‘more, please!’
Ingredients
- Green beans – 1 lb
- Butter – 2 tbsp
- Almonds – ½ cup
- Lemon juice – 1 tbsp
- Salt – ½ tsp
Instructions
- Bring a large pot of salted water to a boil over high heat.
- Add the green beans and blanch for 3 minutes until bright green and slightly tender.
- Drain the beans and immediately plunge them into ice water to stop the cooking process. Tip: This keeps them crisp and vibrant!
- In a large skillet, melt the butter over medium heat until it starts to foam.
- Add the almonds to the skillet and toast for 2 minutes, stirring constantly, until golden and fragrant. Tip: Keep a close eye to avoid burning!
- Drain the green beans and add them to the skillet, tossing to coat in the buttery almonds.
- Sprinkle with lemon juice and salt, then cook for another 2 minutes until everything is heated through. Tip: A squeeze of lemon at the end brightens the whole dish!
Unbelievably simple, yet the crunch of the almonds against the tender green beans, all tied together with a buttery, lemony kiss, is nothing short of magic. Serve it as a side that steals the show or toss in some grilled chicken to make it a meal that’ll have everyone asking for seconds.
Spinach Artichoke Dip
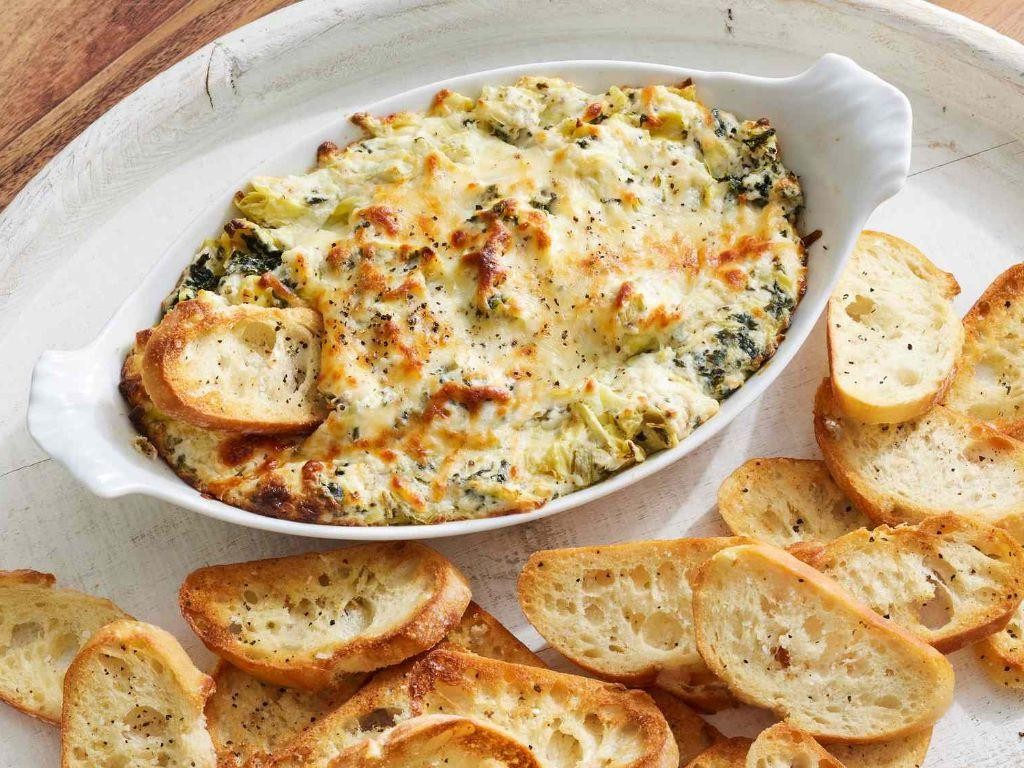
Alright, let’s dive into the creamy, dreamy world of Spinach Artichoke Dip, where every bite is a little hug for your taste buds. This dish is the life of the party, the MVP of appetizers, and let’s be honest, the reason we all hover around the snack table.
Ingredients
- Cream cheese – 8 oz
- Mayonnaise – 1/2 cup
- Parmesan cheese – 1/2 cup, grated
- Mozzarella cheese – 1/2 cup, shredded
- Garlic – 2 cloves, minced
- Spinach – 10 oz, frozen and thawed
- Artichoke hearts – 14 oz, canned and drained
Instructions
- Preheat your oven to 350°F because we’re about to turn up the heat on this dip.
- In a large bowl, mix the cream cheese and mayonnaise until smooth. Tip: Soften the cream cheese first to avoid arm workout.
- Stir in the Parmesan, mozzarella, and minced garlic. This is where the magic starts.
- Squeeze the thawed spinach to remove excess water, then chop it finely. Tip: Dry spinach means a thicker, creamier dip.
- Chop the artichoke hearts into bite-sized pieces and add them to the bowl along with the spinach.
- Mix everything until well combined. Tip: A little elbow grease here ensures every scoop is packed with flavor.
- Transfer the mixture to a baking dish and bake for 20-25 minutes, or until bubbly and golden on top.
Unbelievable how this dip comes out creamy, cheesy, and packed with flavor. Serve it with crusty bread, tortilla chips, or be bold—spoon it straight into your mouth. No judgment here.
Roasted Brussels Sprouts with Parmesan
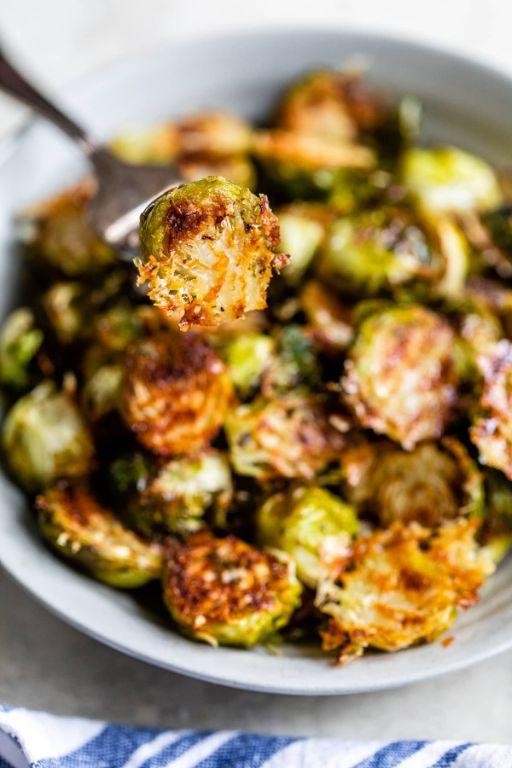
Alright, let’s turn those often-overlooked Brussels sprouts into the star of your dinner table with a dish that’s crispy, cheesy, and downright addictive. Who knew these little green guys could steal the show?
Ingredients
- Brussels sprouts – 1 lb
- Olive oil – 2 tbsp
- Salt – ½ tsp
- Black pepper – ¼ tsp
- Parmesan cheese – ¼ cup, grated
Instructions
- Preheat your oven to 400°F (200°C) to get it nice and toasty for those sprouts.
- Trim the stems off the Brussels sprouts and cut them in half. Tip: Don’t toss the loose leaves—they crisp up into delicious little chips!
- Toss the Brussels sprouts with olive oil, salt, and black pepper in a large bowl until they’re evenly coated. Tip: Use your hands for this—it’s messy but ensures every sprout gets its fair share of flavor.
- Spread the sprouts out on a baking sheet in a single layer, cut side down. This is the secret to maximum crispiness.
- Roast in the preheated oven for 20-25 minutes, until the sprouts are golden brown and crispy on the edges.
- Sprinkle the grated Parmesan cheese over the hot sprouts right after they come out of the oven. Tip: The residual heat will melt the cheese into gooey perfection.
Perfectly crispy on the outside, tender on the inside, and with a salty, cheesy kick from the Parmesan, these Brussels sprouts are a game-changer. Serve them as a side that outshines the main or toss them into a salad for a crunchy twist.
Avocado Toast with Poached Egg
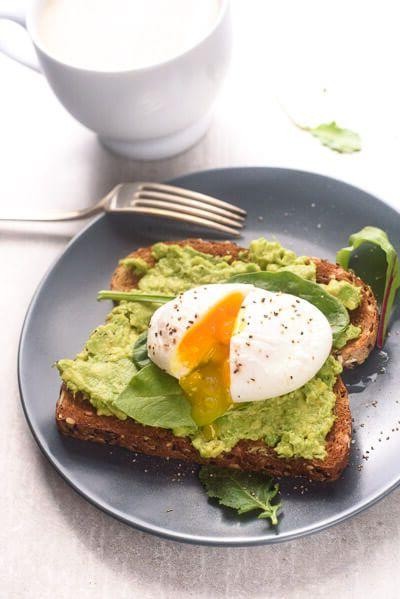
Kickstart your morning with a dish that’s as Instagram-worthy as it is delicious—Avocado Toast with Poached Egg. It’s the perfect blend of creamy, crunchy, and downright dreamy, proving that sometimes, the simplest ingredients make the most memorable meals.
Ingredients
- Bread – 1 slice
- Avocado – ½
- Egg – 1
- White vinegar – 1 tbsp
- Salt – ¼ tsp
- Pepper – ¼ tsp
- Red pepper flakes – ¼ tsp
Instructions
- Toast the bread until golden and crisp, about 3 minutes in a toaster set to medium.
- While the bread toasts, bring a small pot of water to a gentle simmer over medium heat and add the white vinegar.
- Crack the egg into a small bowl, then gently slide it into the simmering water. Poach for 4 minutes for a runny yolk or 5 minutes for a firmer yolk.
- Halve the avocado, remove the pit, and scoop the flesh into a bowl. Mash lightly with a fork, leaving some chunks for texture.
- Spread the mashed avocado evenly over the toasted bread.
- Using a slotted spoon, carefully lift the poached egg from the water, letting excess water drain off, and place it on top of the avocado.
- Season with salt, pepper, and red pepper flakes to finish.
Buttery avocado meets the silky poached egg in a harmony of textures that’s simply irresistible. Serve it with a side of sass or a freshly squeezed orange juice for that extra zing in your morning routine.
Stir-Fried Bok Choy with Garlic
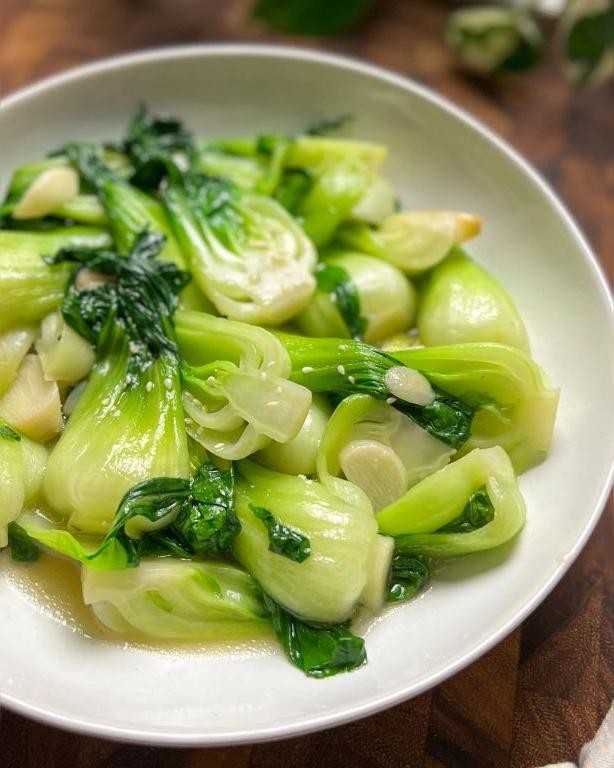
Ready to turn your kitchen into a stir-fry sensation station? Let’s dive into the world of crispy, garlicky bok choy that’s so easy, you’ll wonder why you ever ordered takeout.
Ingredients
- Bok choy – 1 lb
- Garlic – 3 cloves, minced
- Vegetable oil – 2 tbsp
- Soy sauce – 1 tbsp
- Sesame oil – 1 tsp
Instructions
- Wash the bok choy thoroughly under cold water, then pat dry. Tip: Wet leaves can make your stir-fry soggy, so dry them well.
- Heat vegetable oil in a large skillet or wok over medium-high heat until shimmering, about 1 minute.
- Add minced garlic to the skillet, stirring constantly for 30 seconds until fragrant but not browned. Tip: Burnt garlic tastes bitter, so keep it moving!
- Toss in the bok choy, stirring frequently for 2-3 minutes until the leaves are wilted and the stems are crisp-tender.
- Drizzle with soy sauce and sesame oil, tossing to coat evenly. Cook for another 30 seconds. Tip: A splash of water can help deglaze the pan and create a light sauce.
- Remove from heat and serve immediately.
This dish boasts a perfect crunch with a punch of garlic, ideal as a side or piled high over steamed rice for a quick, flavorful meal. Try topping it with toasted sesame seeds for an extra nutty flair.
Pea and Basil Risotto
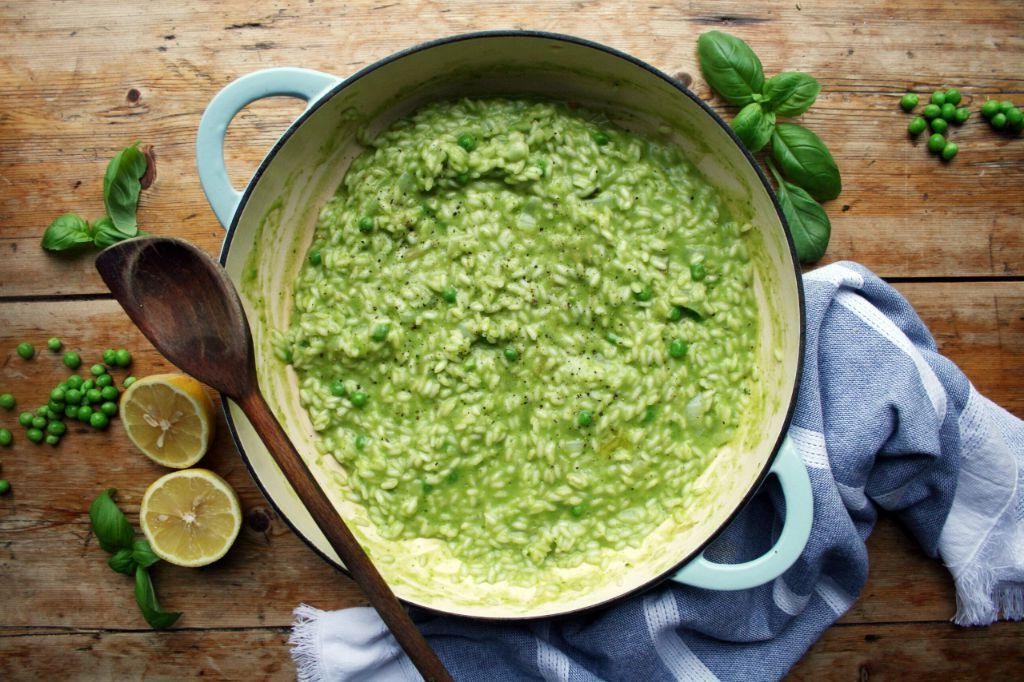
Oh, the joys of risotto—creamy, dreamy, and oh-so-satisfying. Our Pea and Basil Risotto is like a hug in a bowl, with a fresh twist that’ll make your taste buds do a happy dance.
Ingredients
- Arborio rice – 1 cup
- Vegetable broth – 4 cups
- Fresh peas – 1 cup
- Fresh basil – ¼ cup, chopped
- Butter – 2 tbsp
- Parmesan cheese – ½ cup, grated
- Salt – ½ tsp
Instructions
- Heat the vegetable broth in a saucepan over medium heat until simmering, then reduce to low to keep warm.
- Melt 1 tbsp of butter in a large pan over medium heat. Add the Arborio rice, stirring for 2 minutes until slightly translucent.
- Add ½ cup of the warm broth to the rice, stirring constantly until fully absorbed. Tip: Patience is key—wait for each addition of broth to be absorbed before adding more.
- Repeat the process, adding broth ½ cup at a time, stirring frequently. This should take about 18-20 minutes.
- When the rice is al dente and creamy, stir in the fresh peas and cook for 2 minutes. Tip: Frozen peas work too—just thaw them first!
- Remove from heat. Stir in the remaining 1 tbsp of butter, Parmesan cheese, and chopped basil. Season with salt. Tip: The risotto should be loose enough to flow—add a splash of broth if needed.
Buttery, bright, and bursting with spring flavors, this risotto is a showstopper. Serve it in shallow bowls with extra basil on top for a pop of color, or alongside grilled chicken for a heartier meal.
Grilled Zucchini with Herb Dressing
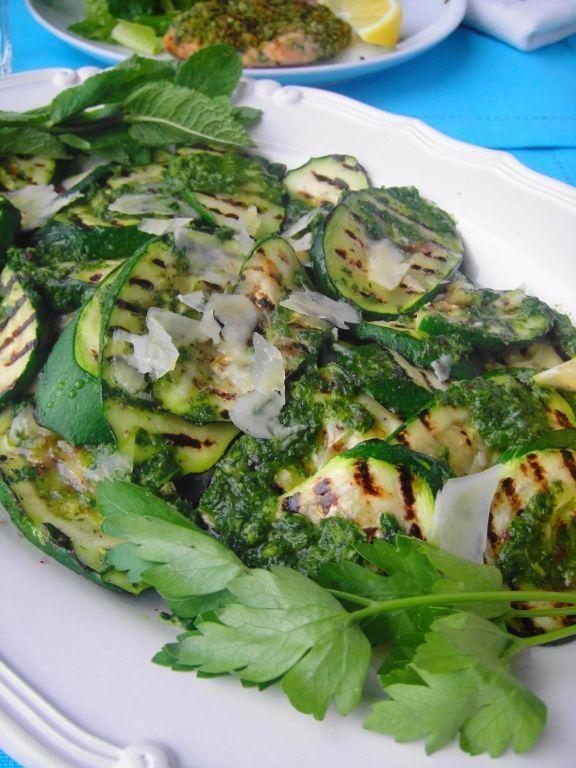
Craving something that’s both ridiculously easy and embarrassingly delicious? Let’s talk grilled zucchini with a herb dressing that’ll make your taste buds do a happy dance. Perfect for those ‘I can’t even’ days when you want gourmet without the guilt.
Ingredients
- Zucchini – 2 medium
- Olive oil – 2 tbsp
- Salt – ½ tsp
- Black pepper – ¼ tsp
- Fresh basil – ¼ cup, chopped
- Fresh parsley – ¼ cup, chopped
- Lemon juice – 1 tbsp
- Garlic – 1 clove, minced
Instructions
- Preheat your grill to medium-high heat, about 400°F. Tip: A clean grill is a happy grill—give those grates a quick brush to prevent sticking.
- Slice the zucchini into ½-inch thick rounds. Uniformity is key here for even cooking.
- Toss zucchini rounds with olive oil, salt, and black pepper. Tip: Use your hands to ensure each slice is lovingly coated.
- Grill zucchini for 3-4 minutes per side, or until you see those sexy grill marks and the zucchini is tender. Tip: Don’t play flip-flop—let each side cook undisturbed for the best marks.
- While the zucchini grills, whisk together chopped basil, parsley, lemon juice, and minced garlic in a small bowl.
- Arrange grilled zucchini on a platter and drizzle with the herb dressing. Serve immediately.
Now, that first bite? You’ll get the smoky char from the grill, the zing from the lemon, and the fresh herby goodness that makes this dish a summer superstar. Try stacking them high for a fancy tower or keep it casual straight off the platter—no judgment here.
Conclusion
Delightful as they are nutritious, these 19 green vegetable recipes offer a treasure trove of healthy options for every home cook. Whether you’re looking to spice up your meal routine or embrace a greener plate, there’s something here for everyone. We’d love to hear which recipes become your favorites—drop us a comment below! And don’t forget to share the love by pinning this article on Pinterest. Happy cooking!