Diving into the kitchen shouldn’t feel like a daunting task, especially when you’re just starting out! Whether you’re craving quick dinners, seasonal favorites, or just some good old comfort food, we’ve got you covered. Our roundup of 20 Delicious Fast and Easy Recipes for Beginners is your ticket to stress-free cooking. So, grab your apron, and let’s turn those kitchen jitters into joyful cooking adventures!
Quick Garlic Butter Pasta
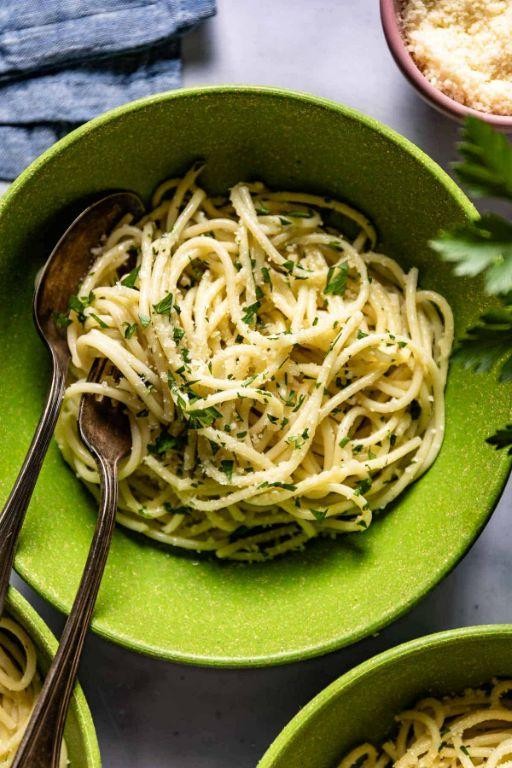
Beneath the soft glow of the kitchen light, there’s something profoundly comforting about stirring together a simple pasta dish. This Quick Garlic Butter Pasta is a testament to the beauty of minimal ingredients coming together to create something unexpectedly delightful.
Ingredients
- 8 oz spaghetti (or any pasta of choice)
- 4 tbsp unsalted butter (for a richer flavor, use European-style butter)
- 4 garlic cloves, minced (adjust to taste)
- 1/4 tsp red pepper flakes (optional, for a slight kick)
- 1/2 cup pasta water (reserved before draining)
- 1/4 cup grated Parmesan cheese (plus more for serving)
- Salt, to taste (start with 1/2 tsp for the pasta water)
- Fresh parsley, chopped (for garnish, optional)
Instructions
- Bring a large pot of salted water to a boil over high heat. Add the spaghetti and cook according to package instructions until al dente, about 8-10 minutes.
- Reserve 1/2 cup of pasta water, then drain the spaghetti and set aside.
- In the same pot, melt the butter over medium heat. Add the minced garlic and red pepper flakes, sautéing until fragrant, about 1 minute. Be careful not to burn the garlic.
- Return the drained spaghetti to the pot with the garlic butter. Toss to coat evenly, adding the reserved pasta water a little at a time to create a silky sauce that clings to the pasta.
- Remove from heat and stir in the grated Parmesan cheese until melted and well combined. Taste and adjust seasoning if necessary.
- Garnish with chopped fresh parsley and additional Parmesan cheese before serving.
Golden strands of pasta, each coated in a glossy, garlic-infused butter sauce, offer a dish that’s both elegant and effortlessly simple. Serve it with a crisp green salad or a slice of crusty bread to soak up every last bit of sauce.
Easy 5-Minute Avocado Toast
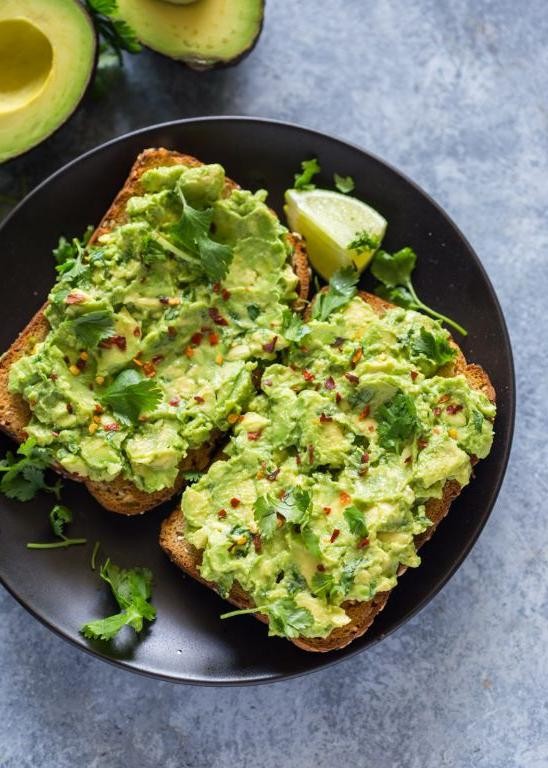
On quiet mornings when time seems to stretch endlessly before me, I find solace in the simplicity of preparing a meal that feels both nourishing and effortless. Easy 5-Minute Avocado Toast is my go-to, a dish that marries creamy textures with a crisp finish, perfect for those moments when you crave something wholesome without the fuss.
Ingredients
- 1 ripe avocado (look for slight give when pressed)
- 2 slices of whole grain bread (or your preferred type)
- 1 tbsp extra virgin olive oil (or any neutral oil)
- 1/4 tsp sea salt (adjust to taste)
- 1/4 tsp red pepper flakes (optional for a slight kick)
- 1 tsp lemon juice (freshly squeezed for brightness)
Instructions
- Toast the bread slices in a toaster or on a skillet over medium heat until golden and crisp, about 2-3 minutes.
- While the bread toasts, halve the avocado, remove the pit, and scoop the flesh into a small bowl.
- Add the lemon juice, sea salt, and red pepper flakes to the avocado. Mash with a fork until creamy but still slightly chunky.
- Drizzle the toasted bread with olive oil, then evenly spread the mashed avocado on top.
- For an extra layer of flavor, sprinkle with additional red pepper flakes or a pinch of salt if desired.
Unassuming yet utterly satisfying, this avocado toast offers a delightful contrast between the creamy avocado and the crunchy toast. The lemon juice adds a subtle tang that brightens each bite, making it a versatile base for toppings like a poached egg or smoked salmon for those mornings when you’re feeling a bit more indulgent.
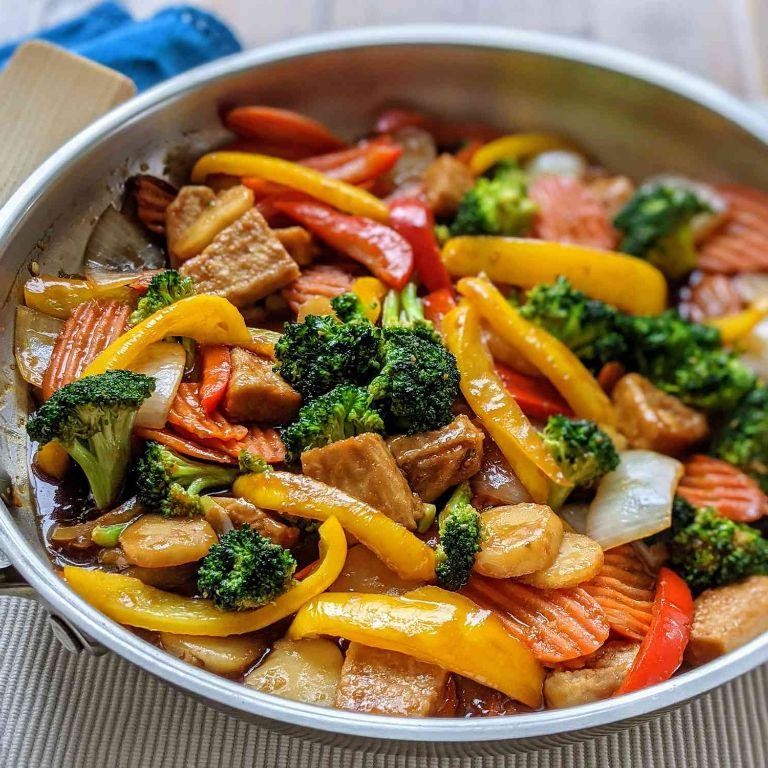
Simple Stir-Fry Vegetables
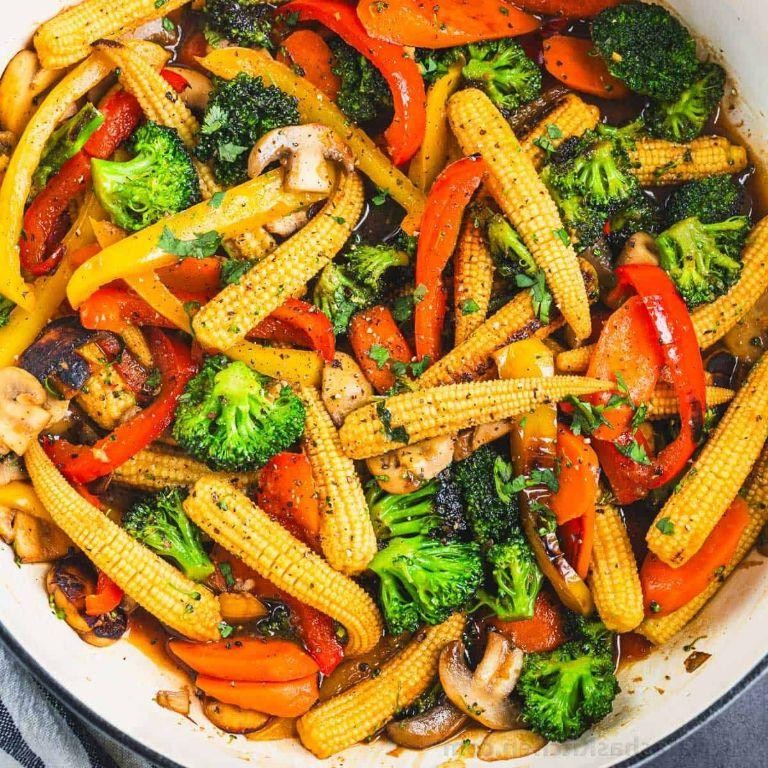
Just like the quiet moments of early morning, this simple stir-fry vegetables recipe brings a sense of calm and satisfaction. It’s a dish that doesn’t rush, allowing each ingredient to shine in its own time, perfect for those evenings when you need a gentle nudge back to the present.
Ingredients
- 2 tbsp vegetable oil (or any neutral oil)
- 1 cup broccoli florets (fresh or frozen, no need to thaw)
- 1 cup sliced carrots (about 1/4 inch thick for even cooking)
- 1 cup snap peas (trimmed if necessary)
- 2 cloves garlic, minced (adjust to taste)
- 1 tbsp soy sauce (low sodium preferred)
- 1/2 tsp sesame oil (for a nutty finish)
Instructions
- Heat a large skillet or wok over medium-high heat (about 375°F) and add the vegetable oil, swirling to coat the pan.
- Add the broccoli and carrots to the pan, stirring occasionally, for about 3 minutes until they start to soften but still retain some crunch.
- Tip: Keep the heat high enough to get a slight char on the vegetables for added flavor.
- Introduce the snap peas and minced garlic to the pan, stirring constantly for 1 minute to prevent the garlic from burning.
- Tip: Adding the garlic later ensures it doesn’t become bitter.
- Drizzle the soy sauce and sesame oil over the vegetables, tossing to combine evenly. Cook for another 1 minute to let the flavors meld.
- Tip: A quick toss with the sauces at the end keeps the vegetables vibrant and crisp.
Gently spoon the stir-fry onto a warm plate, noticing how the colors contrast and the aromas mingle. The vegetables should be tender yet crisp, with a savory depth from the soy sauce and a hint of nuttiness from the sesame oil. Try serving it over a bed of fluffy jasmine rice or alongside grilled tofu for a complete meal.
Fast Homemade Pizza

Just like the quiet moments before the house stirs, making pizza at home can be a peaceful, almost meditative process. It’s about simplicity, the joy of creating something delicious from scratch, and the warmth that comes from sharing it.
Ingredients
- 2 cups all-purpose flour (or bread flour for a chewier crust)
- 1 tbsp sugar (helps the yeast activate)
- 1 tsp salt (adjust to taste)
- 1 packet instant yeast (about 2 1/4 tsp)
- 3/4 cup warm water (110°F, perfect for yeast)
- 2 tbsp olive oil (or any neutral oil)
- 1/2 cup pizza sauce (homemade or store-bought)
- 2 cups shredded mozzarella cheese (freshly grated melts better)
- Toppings of your choice (keep it simple for the best flavor)
Instructions
- In a large bowl, whisk together the flour, sugar, salt, and instant yeast until well combined.
- Add the warm water and olive oil to the dry ingredients, stirring until a shaggy dough forms.
- Turn the dough onto a lightly floured surface and knead for about 5 minutes, until smooth and elastic. Tip: If the dough sticks to your hands, add a little more flour, but avoid adding too much to keep the crust tender.
- Place the dough in a greased bowl, cover with a damp cloth, and let it rise in a warm place for 1 hour, or until doubled in size.
- Preheat your oven to 475°F (245°C) with a pizza stone or inverted baking sheet inside to heat up.
- Punch down the risen dough and roll it out on a floured surface to your desired thickness. Tip: For a crispier crust, roll it thinner; for a thicker, bread-like crust, leave it a bit thicker.
- Transfer the rolled-out dough to a piece of parchment paper, then spread the pizza sauce evenly over the surface, leaving a small border for the crust.
- Sprinkle the shredded mozzarella cheese over the sauce, then add your chosen toppings.
- Carefully slide the pizza (on the parchment paper) onto the preheated pizza stone or baking sheet. Bake for 12-15 minutes, or until the crust is golden and the cheese is bubbly and slightly browned. Tip: For an extra crispy crust, broil for the last 1-2 minutes, but watch closely to prevent burning.
As the pizza comes out of the oven, the aroma fills the kitchen, a promise of the crispy crust and melty cheese that awaits. Serve it straight from the oven, perhaps with a sprinkle of fresh basil or a drizzle of olive oil for an extra touch of flavor.
Easy Chicken Quesadillas

Dusk settles softly outside, and the kitchen beckons with the promise of something simple yet satisfying. Tonight, it’s about turning humble ingredients into a meal that feels like a warm hug, easy chicken quesadillas that come together with little fuss but deliver big on flavor.
Ingredients
- 2 cups shredded cooked chicken (rotisserie chicken works wonderfully)
- 1 cup shredded Monterey Jack cheese (or a blend for more complexity)
- 1/2 cup diced red bell pepper (for a sweet crunch)
- 1/4 cup chopped cilantro (omit if you’re not a fan)
- 4 large flour tortillas (burrito-size for easier folding)
- 2 tbsp unsalted butter (or any neutral oil for frying)
- 1 tsp ground cumin (toast lightly for deeper flavor)
- 1/2 tsp garlic powder (adjust to taste)
- Salt to taste
Instructions
- In a large bowl, combine the shredded chicken, Monterey Jack cheese, diced red bell pepper, chopped cilantro, ground cumin, garlic powder, and salt. Mix gently to distribute the ingredients evenly.
- Heat a large skillet over medium heat. Add 1/2 tbsp of butter, letting it melt and coat the bottom of the skillet.
- Place one tortilla in the skillet. Spread half of the chicken mixture evenly over one half of the tortilla, leaving a small border around the edge.
- Fold the tortilla over the filling, pressing down gently with a spatula. Cook for 2-3 minutes on each side, or until golden brown and the cheese is melted. Repeat with the remaining tortillas and filling, adding more butter as needed.
- Transfer the cooked quesadillas to a cutting board. Let them rest for a minute before slicing into wedges. This helps the cheese set slightly for cleaner cuts.
Perfectly golden and crisp on the outside, these quesadillas reveal a gooey, flavorful center with each bite. Serve them with a dollop of sour cream or a vibrant salsa for dipping, turning a simple meal into a festive occasion.
Quick and Easy Pancakes

Whispering the morning into existence, there’s something profoundly comforting about the ritual of making pancakes. It’s a simple pleasure, a quiet moment to savor before the day unfolds, offering warmth and sweetness in every bite.
Ingredients
- 1 cup all-purpose flour (for lighter pancakes, substitute half with whole wheat flour)
- 2 tablespoons sugar (adjust to taste)
- 1 tablespoon baking powder (ensure it’s fresh for fluffier pancakes)
- 1/2 teaspoon salt
- 1 cup milk (any kind, though whole milk adds richness)
- 1 large egg (room temperature blends more smoothly)
- 2 tablespoons unsalted butter, melted (or any neutral oil)
- 1 teaspoon vanilla extract (optional, for a hint of warmth)
Instructions
- In a large bowl, whisk together the flour, sugar, baking powder, and salt until well combined.
- In another bowl, beat the milk, egg, melted butter, and vanilla extract until smooth.
- Pour the wet ingredients into the dry ingredients, stirring gently until just combined. A few lumps are okay; overmixing leads to tough pancakes.
- Heat a non-stick skillet or griddle over medium heat (350°F if using an electric griddle) and lightly grease with butter or oil.
- For each pancake, pour 1/4 cup of batter onto the skillet. Cook until bubbles form on the surface and the edges look set, about 2-3 minutes.
- Flip the pancake and cook until golden brown on the other side, about 1-2 minutes more.
- Repeat with the remaining batter, adjusting the heat as necessary to prevent burning.
Relishing these pancakes reveals their tender interior and golden, slightly crisp exterior. Drizzle with maple syrup for classic comfort, or top with fresh berries and a dollop of yogurt for a bright, tangy contrast.
Simple Beef Tacos

Venturing into the kitchen on a quiet evening, the thought of crafting something both comforting and simple led me to these beef tacos. There’s a humble beauty in the way the spices meld with the meat, a reminder of the joy found in uncomplicated meals.
Ingredients
- 1 lb ground beef (80/20 blend for juiciness)
- 1 tbsp olive oil (or any neutral oil)
- 1 small onion, finely diced (about 1/2 cup)
- 2 cloves garlic, minced
- 1 tbsp chili powder (adjust to taste)
- 1 tsp ground cumin
- 1/2 tsp salt
- 1/4 tsp black pepper
- 1/2 cup water
- 8 small corn tortillas (warmed for flexibility)
- 1 cup shredded lettuce (for crunch)
- 1/2 cup diced tomatoes (fresh is best)
- 1/4 cup chopped cilantro (optional, for freshness)
- 1/2 cup shredded cheddar cheese (or any meltable cheese)
Instructions
- Heat olive oil in a large skillet over medium heat until shimmering, about 1 minute.
- Add the diced onion to the skillet, cooking until translucent, about 3 minutes, stirring occasionally.
- Stir in the minced garlic, cooking until fragrant, about 30 seconds.
- Add the ground beef, breaking it apart with a spoon, and cook until no longer pink, about 5 minutes.
- Sprinkle the chili powder, cumin, salt, and black pepper over the beef, stirring to coat evenly.
- Pour in the water, reducing the heat to low, and simmer for 5 minutes to let the flavors meld.
- While the beef simmers, warm the tortillas in a dry skillet over medium heat for about 30 seconds per side, keeping them pliable.
- Assemble the tacos by spooning the beef mixture onto each tortilla, then topping with shredded lettuce, diced tomatoes, cilantro, and cheese.
Perfectly balanced, these tacos offer a delightful contrast between the savory beef and the fresh toppings. Serve them with a wedge of lime on the side for an extra zing, or pile the toppings high for a more vibrant bite.
Fast Lemon Garlic Shrimp
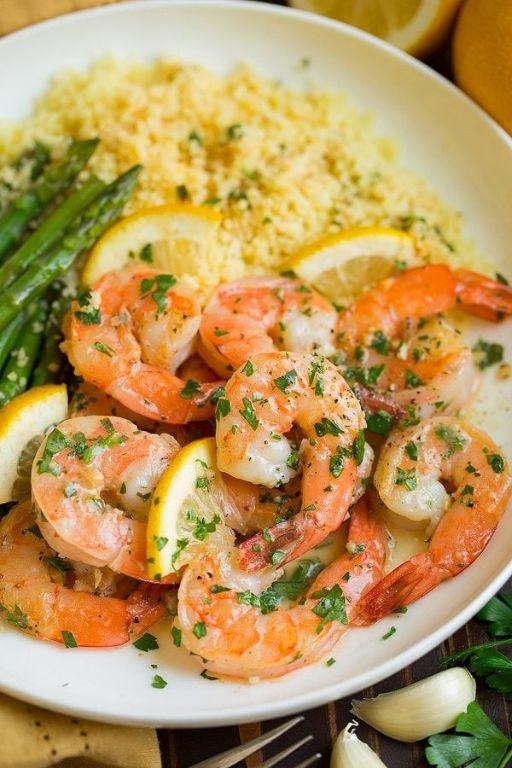
Under the soft glow of the kitchen light, the simplicity of this dish brings a moment of calm to the bustling rhythm of life. Fast Lemon Garlic Shrimp is a melody of flavors that dances lightly on the palate, offering a quick yet deeply satisfying meal.
Ingredients
- 1 lb large shrimp, peeled and deveined (for quicker cooking)
- 2 tbsp olive oil (or any neutral oil)
- 3 cloves garlic, minced (fresh is best for vibrant flavor)
- 1/4 cup fresh lemon juice (about 2 lemons, adjust to taste)
- 1/4 tsp red pepper flakes (optional for a slight kick)
- Salt, to taste (start with 1/4 tsp)
- 2 tbsp unsalted butter (for richness)
- 2 tbsp chopped parsley (for garnish)
Instructions
- In a large skillet, heat olive oil over medium heat until shimmering, about 1 minute.
- Add minced garlic and red pepper flakes, sautéing until fragrant, 30 seconds, being careful not to burn.
- Increase heat to medium-high, add shrimp in a single layer, seasoning with salt. Cook for 2 minutes per side until pink and opaque.
- Reduce heat to low, stir in lemon juice and butter until butter melts and coats the shrimp, about 1 minute.
- Remove from heat, sprinkle with chopped parsley for a fresh contrast.
The shrimp are tender with a bright, garlicky lemon sauce that clings beautifully. Try serving over a bed of creamy polenta or alongside crusty bread to soak up every last drop.
Easy Omelette with Cheese

Sometimes, the simplest dishes bring the most comfort, especially when they’re as effortlessly delicious as this easy omelette with cheese. It’s a humble meal that feels like a warm hug on a quiet morning, perfect for those moments when you crave something satisfying yet uncomplicated.
Ingredients
- 2 large eggs (room temperature for fluffier omelette)
- 1/4 cup shredded cheddar cheese (or any meltable cheese you prefer)
- 1 tbsp unsalted butter (or any neutral oil)
- Salt and pepper (adjust to taste)
Instructions
- Crack the eggs into a bowl, adding a pinch of salt and pepper, then whisk until fully blended and slightly frothy.
- Heat a non-stick skillet over medium-low heat (about 300°F) and add the butter, swirling to coat the pan evenly.
- Pour the whisked eggs into the skillet, tilting to spread them into an even layer. Let cook undisturbed for about 30 seconds.
- As the edges begin to set, gently lift them with a spatula, allowing the uncooked eggs to flow underneath. Repeat this process around the edges until the top is mostly set but still slightly runny, about 1-2 minutes.
- Sprinkle the shredded cheese evenly over one half of the omelette, then carefully fold the other half over the cheese with the spatula.
- Cook for another 30 seconds to 1 minute, just until the cheese begins to melt, then slide the omelette onto a plate.
Perfectly fluffy with pockets of gooey cheese, this omelette is a testament to the beauty of simplicity. Serve it with a side of fresh avocado or a sprinkle of chives for a touch of color and freshness.
Quick Chocolate Mug Cake

Sometimes, the simplest pleasures come from the most unassuming recipes, like this quick chocolate mug cake that whispers comfort with every bite. It’s a humble dessert that feels like a warm hug on a quiet evening, ready in minutes yet rich in flavor.
Ingredients
- 4 tbsp all-purpose flour (spooned and leveled)
- 2 tbsp granulated sugar (adjust to taste)
- 2 tbsp unsweetened cocoa powder
- 1/4 tsp baking powder
- 3 tbsp milk (any kind)
- 2 tbsp vegetable oil (or any neutral oil)
- 1/4 tsp vanilla extract
- 1 tbsp chocolate chips (optional, for extra richness)
Instructions
- In a 12-ounce microwave-safe mug, whisk together the flour, sugar, cocoa powder, and baking powder until no lumps remain.
- Add the milk, vegetable oil, and vanilla extract to the dry ingredients. Stir until just combined, being careful not to overmix.
- If using, sprinkle the chocolate chips on top of the batter. They’ll melt into gooey pockets as the cake cooks.
- Microwave on high for 70-90 seconds. Start checking at 70 seconds; the cake is done when it’s risen and the top looks set but still slightly moist.
- Let the cake cool for a minute before eating. It will be very hot right out of the microwave.
Velvety and moist, this mug cake is a delightful solo treat, but it’s also lovely with a scoop of vanilla ice cream melting on top. The chocolate chips add little surprises of molten chocolate, making each spoonful a small celebration.
Simple Caprese Salad
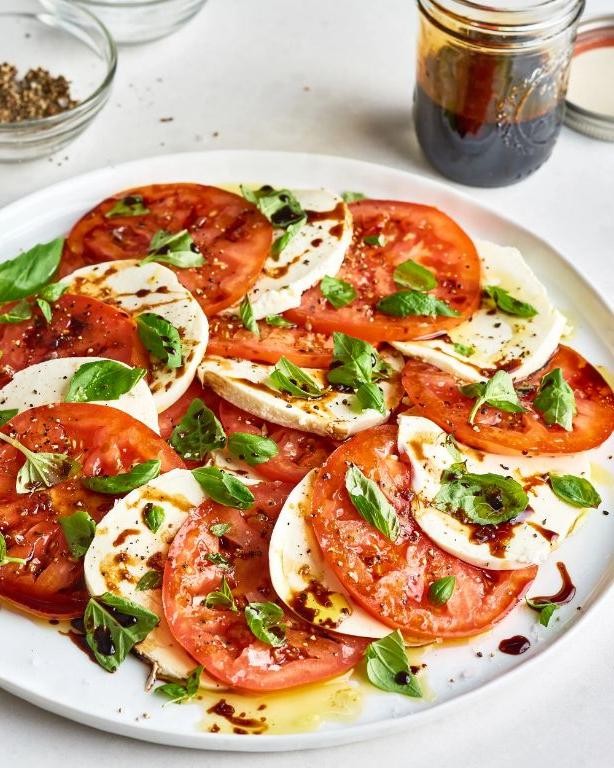
Gently, as the summer breeze whispers through the kitchen window, the Simple Caprese Salad comes together, a testament to the beauty of simplicity and the richness of fresh ingredients. It’s a dish that doesn’t rush, inviting you to savor each step, each flavor, as if time itself had slowed down just for this moment.
Ingredients
- 2 large ripe tomatoes, sliced 1/4 inch thick (look for firm yet juicy varieties)
- 8 ounces fresh mozzarella cheese, sliced 1/4 inch thick (buffalo mozzarella adds a creamy depth)
- 1/4 cup fresh basil leaves (tear large leaves for easier eating)
- 2 tablespoons extra virgin olive oil (or any high-quality olive oil for a fruity note)
- 1 tablespoon balsamic glaze (reduce balsamic vinegar for a homemade version)
- 1/2 teaspoon sea salt (flaky salt enhances texture)
- 1/4 teaspoon freshly ground black pepper (adjust to taste)
Instructions
- Arrange the tomato slices on a large serving plate, slightly overlapping for a beautiful presentation.
- Place a slice of mozzarella on top of each tomato slice, ensuring each bite has both ingredients.
- Tuck fresh basil leaves between the tomato and mozzarella slices, distributing them evenly across the plate.
- Drizzle the olive oil over the arranged slices, using the back of a spoon to spread it gently if needed.
- Repeat the drizzling with the balsamic glaze, aiming for a decorative pattern that complements the dish’s colors.
- Sprinkle the sea salt and freshly ground black pepper over the top, adjusting the amounts to suit your preference.
- Let the salad sit at room temperature for 5 minutes before serving, allowing the flavors to meld together slightly.
Yielded by this simple assembly is a salad where the juiciness of the tomatoes contrasts delightfully with the creamy mozzarella, while the basil adds a fragrant freshness. For an unforgettable presentation, serve it on a slate board or a vibrant ceramic plate to highlight its colors.
Fast and Easy Fried Rice
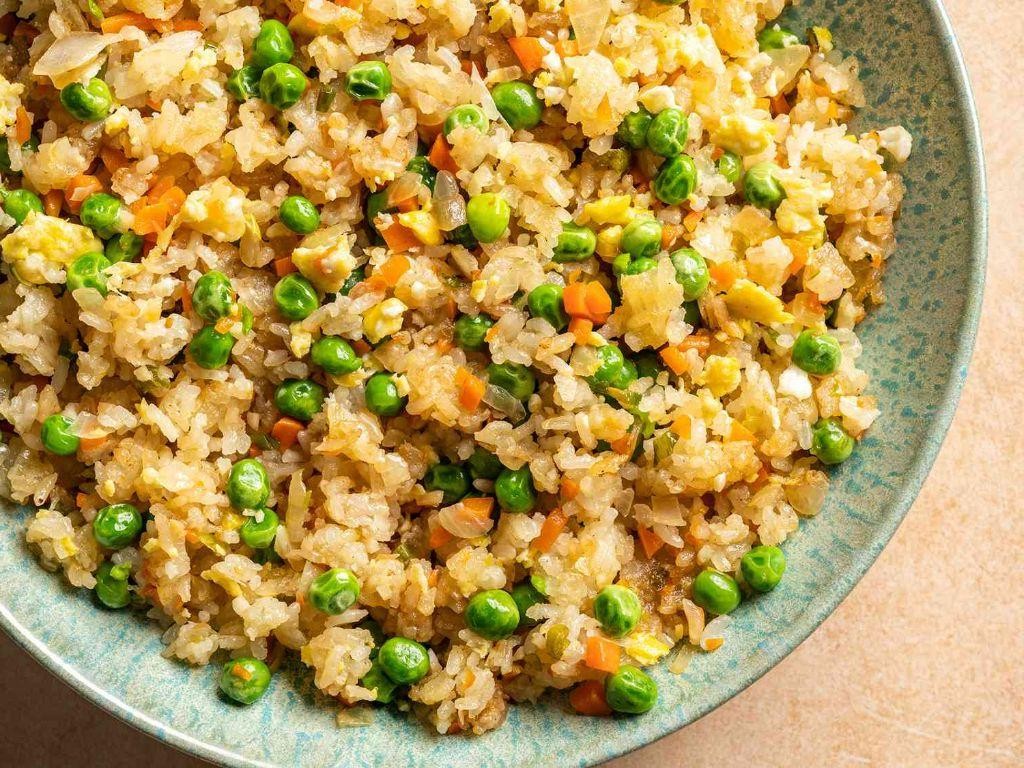
On quiet evenings like this, when the world seems to pause, I find solace in the simplicity of cooking. Fast and Easy Fried Rice is my go-to, a dish that whispers comfort with every bite, blending the familiar with the faintest hint of adventure.
Ingredients
- 2 cups cooked rice (day-old works best for texture)
- 2 tbsp vegetable oil (or any neutral oil)
- 2 eggs, lightly beaten (room temperature for even cooking)
- 1 cup mixed vegetables (peas, carrots, and corn recommended)
- 2 tbsp soy sauce (adjust to taste)
- 1 tsp sesame oil (for aroma)
- 2 green onions, sliced (for garnish)
Instructions
- Heat a large skillet or wok over medium-high heat for 2 minutes until hot.
- Add 1 tbsp of vegetable oil, swirling to coat the pan evenly.
- Pour the beaten eggs into the pan, stirring gently until just set, about 1 minute. Remove and set aside.
- Add the remaining 1 tbsp of oil to the pan, followed by the mixed vegetables. Stir-fry for 3 minutes until vibrant and slightly tender.
- Introduce the cooked rice to the pan, breaking any clumps with a spatula. Cook for 2 minutes, stirring occasionally.
- Drizzle the soy sauce and sesame oil over the rice, tossing to combine thoroughly.
- Return the scrambled eggs to the pan, mixing gently to distribute evenly.
- Garnish with sliced green onions, remove from heat, and serve immediately.
Here, the fried rice emerges with a delightful contrast of textures—soft grains punctuated by crisp vegetables and fluffy eggs. The sesame oil lends a whisper of nuttiness, elevating the humble to something memorable. Try serving it in a hollowed-out pineapple for a playful twist that delights the senses.
Easy Grilled Cheese Sandwich

Just like the quiet moments of a lazy Sunday morning, there’s something deeply comforting about the simplicity of a grilled cheese sandwich. It’s a humble dish that speaks volumes in its crispy, buttery exterior and the gooey, melted heart within.
Ingredients
- 2 slices of bread (white or whole wheat for a healthier option)
- 2 tbsp butter (softened for easy spreading)
- 1 cup shredded cheddar cheese (sharp for more flavor, or mix with mozzarella for extra meltiness)
Instructions
- Heat a non-stick skillet over medium-low heat (about 300°F) to ensure the bread toasts slowly and evenly without burning.
- Butter one side of each bread slice lightly but thoroughly, covering the edges to prevent dryness.
- Place one slice, buttered side down, in the skillet. Sprinkle the shredded cheese evenly over the bread, avoiding the edges to prevent spillage.
- Top with the second slice of bread, buttered side up, pressing down gently to help the sandwich adhere.
- Cook for 3-4 minutes until the bottom is golden brown and the cheese begins to melt. Tip: Cover the skillet with a lid for the last minute to steam the sandwich slightly, ensuring the cheese melts perfectly.
- Flip the sandwich carefully using a spatula. Cook for another 3-4 minutes until the second side is equally golden and the cheese is fully melted.
- Remove from heat and let it sit for a minute before cutting. This allows the cheese to set slightly, making the sandwich easier to slice.
Unbelievably simple yet irresistibly delicious, this grilled cheese sandwich offers a crispy, buttery crunch with every bite, giving way to a soft, cheesy center. Serve it with a side of tomato soup for a classic comfort meal, or add slices of apple inside for a sweet and savory twist.
Quick Banana Smoothie
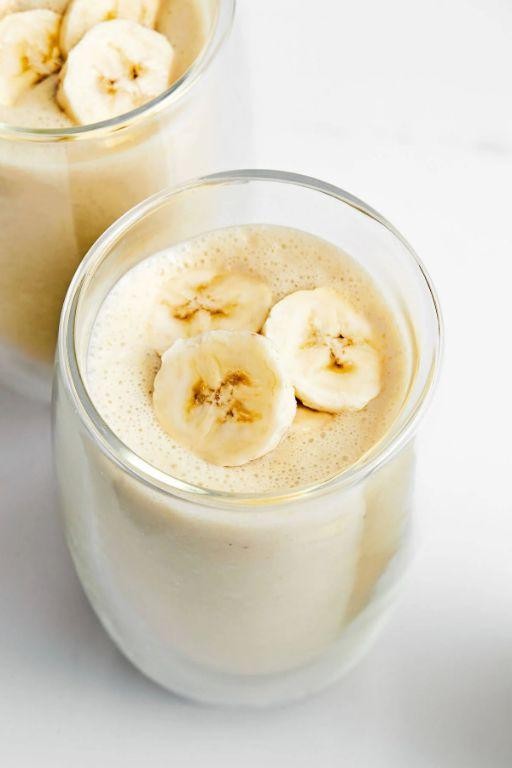
Sometimes, the simplest things bring the most comfort, like this quick banana smoothie that feels like a gentle hug in a glass. It’s a humble blend that turns ripe bananas into something creamy and dreamy, perfect for those quiet mornings or lazy afternoons.
Ingredients
- 2 ripe bananas (the spottier, the sweeter)
- 1 cup milk (dairy or any plant-based alternative)
- 1 tbsp honey (adjust to taste, or skip if bananas are very ripe)
- 1/2 tsp vanilla extract (for a warm, aromatic touch)
- Ice cubes (optional, for a colder sip)
Instructions
- Peel the bananas and break them into chunks directly into the blender.
- Pour in the milk, ensuring it covers the banana pieces for easier blending.
- Drizzle the honey and add the vanilla extract to the mix.
- If using, add a handful of ice cubes to chill the smoothie instantly.
- Blend on high speed for about 30 seconds, or until the mixture is completely smooth and no banana chunks remain.
- Pause to scrape down the sides if needed, ensuring every bit is perfectly incorporated.
- Pour into a glass and serve immediately for the best texture and flavor.
Light and frothy, this smoothie carries the natural sweetness of bananas, elevated by a hint of vanilla. Try it with a sprinkle of cinnamon on top or a side of toasted nuts for a delightful contrast.
Simple Spaghetti Aglio e Olio
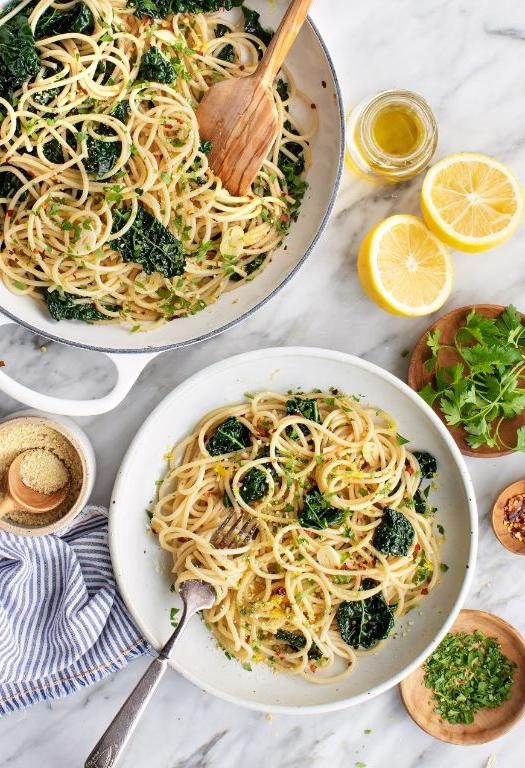
Just like the quiet moments before dawn, this Simple Spaghetti Aglio e Olio recipe is a gentle reminder of how beauty lies in simplicity. It’s a dish that whispers rather than shouts, perfect for those nights when you crave something uncomplicated yet deeply satisfying.
Ingredients
- 8 oz spaghetti (use high-quality for best texture)
- 1/3 cup extra virgin olive oil (or any neutral oil)
- 4 garlic cloves, thinly sliced (adjust to taste)
- 1/2 tsp red pepper flakes (or less for milder heat)
- 1/4 cup fresh parsley, finely chopped (for a bright finish)
- Salt, to taste (start with 1 tsp for pasta water)
- 1/4 cup pasta water (reserved before draining)
Instructions
- Bring a large pot of salted water to a boil over high heat. Add spaghetti and cook until al dente, about 8-10 minutes, stirring occasionally to prevent sticking.
- While pasta cooks, heat olive oil in a large skillet over medium-low heat. Add garlic and red pepper flakes, cooking until garlic is golden, about 2 minutes, stirring constantly to avoid burning.
- Reserve 1/4 cup of pasta water, then drain spaghetti and add it directly to the skillet with the garlic oil. Toss to coat evenly, adding reserved pasta water as needed to loosen the sauce.
- Remove from heat and stir in chopped parsley. Taste and adjust seasoning with salt if necessary.
Might you find comfort in the silky strands of pasta, each bite infused with the warmth of garlic and the subtle kick of red pepper. Serve it with a sprinkle of extra parsley or a side of crusty bread to soak up the flavorful oil.
Fast Chicken Stir Fry
Evenings like these call for something quick yet comforting, a dish that bridges the gap between the day’s chaos and the night’s peace. This fast chicken stir fry is just that—a simple, flavorful escape that comes together in minutes, leaving more time to savor the quiet.
Ingredients
- 1 lb boneless, skinless chicken breasts, thinly sliced (for quicker cooking)
- 2 tbsp vegetable oil (or any neutral oil)
- 1 cup broccoli florets (fresh or frozen, no need to thaw)
- 1 red bell pepper, sliced (adds a sweet crunch)
- 2 cloves garlic, minced (for a fragrant kick)
- 1 tbsp soy sauce (adjust to taste)
- 1 tsp sesame oil (for depth of flavor)
- 1/2 tsp red pepper flakes (optional, for heat)
Instructions
- Heat the vegetable oil in a large skillet over medium-high heat until shimmering, about 1 minute.
- Add the thinly sliced chicken to the skillet, spreading it out in a single layer. Cook undisturbed for 2 minutes to allow it to sear, then stir and cook until no longer pink, about 3 more minutes. Tip: Don’t overcrowd the pan to ensure each piece gets a nice sear.
- Push the chicken to one side of the skillet. Add the broccoli and red bell pepper to the other side. Stir the vegetables occasionally, cooking until they’re bright in color and slightly tender, about 4 minutes. Tip: High heat is key here to keep the veggies crisp.
- Mix the chicken and vegetables together in the skillet. Add the minced garlic, soy sauce, sesame oil, and red pepper flakes if using. Stir everything well to combine and cook for another minute until the garlic is fragrant. Tip: Adding the garlic last prevents it from burning and becoming bitter.
Light and vibrant, this stir fry brings a delightful contrast of textures—tender chicken, crisp vegetables, and a sauce that’s just rich enough. Serve it over a bed of steamed rice or noodles, or for a low-carb option, try it with cauliflower rice.
Easy Peanut Butter Cookies

Dusk settles softly outside, and here in the kitchen, the simple act of baking becomes a quiet meditation. Today, we’re embracing the humble peanut butter cookie, a recipe so straightforward it feels like a warm hug.
Ingredients
- 1 cup creamy peanut butter (for a smoother texture, or crunchy for bits of nut)
- 1 cup granulated sugar (adjust to sweetness preference)
- 1 large egg (room temperature blends more evenly)
- 1 tsp vanilla extract (pure for the best flavor)
Instructions
- Preheat your oven to 350°F (175°C), ensuring even baking.
- In a mixing bowl, combine 1 cup peanut butter, 1 cup sugar, 1 egg, and 1 tsp vanilla extract. Stir until the mixture is smooth and uniform. Tip: If the dough feels too sticky, chilling it for 30 minutes makes handling easier.
- Roll the dough into 1-inch balls, placing them 2 inches apart on a parchment-lined baking sheet. Tip: Flatten each ball with a fork in a crisscross pattern for classic peanut butter cookies.
- Bake for 10-12 minutes, until the edges are just golden. Tip: Cookies will firm up as they cool, so don’t overbake for a softer texture.
- Let the cookies cool on the baking sheet for 5 minutes before transferring to a wire rack to cool completely.
As you bite into these cookies, the edges give way to a tender, chewy center, with the rich peanut butter flavor shining through. Try sandwiching them with a dollop of jam or a slice of banana for a playful twist.
Quick Veggie Wrap
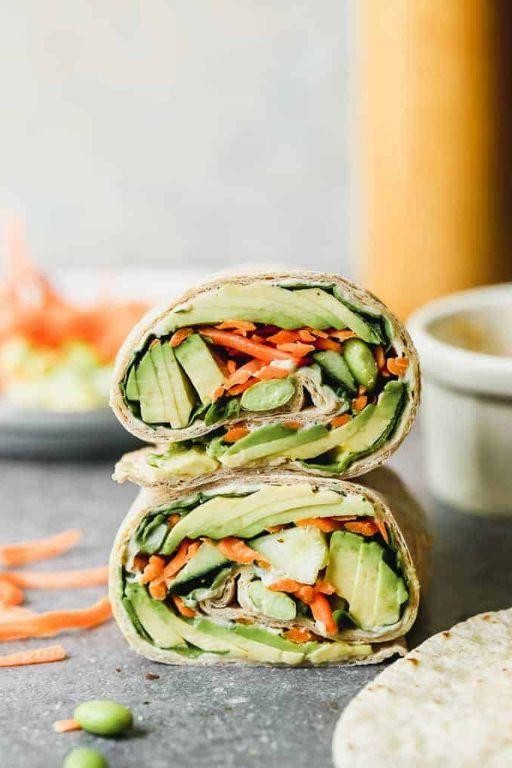
Kindly imagine a quiet afternoon where the sun filters through the kitchen window, and the only sound is the crisp rustle of fresh vegetables being prepared. This Quick Veggie Wrap is a humble yet vibrant meal, perfect for those moments when you crave something light, nutritious, and effortlessly put together.
Ingredients
- 1 large whole wheat tortilla (or any wrap of choice)
- 1/2 cup hummus (homemade or store-bought)
- 1/2 cup shredded carrots (for a sweet crunch)
- 1/2 cup thinly sliced cucumber (peeled if preferred)
- 1/4 cup sliced red bell pepper (adds a pop of color)
- 1/4 cup baby spinach leaves (packed for freshness)
- 1 tbsp olive oil (or any neutral oil)
- 1/2 tsp garlic powder (adjust to taste)
- Salt and pepper (just a pinch to enhance flavors)
Instructions
- Lay the whole wheat tortilla flat on a clean surface.
- Spread the hummus evenly over the tortilla, leaving a 1-inch border around the edges.
- Layer the shredded carrots, sliced cucumber, red bell pepper, and baby spinach leaves on top of the hummus.
- Sprinkle the garlic powder, salt, and pepper over the vegetables.
- Drizzle the olive oil lightly over the vegetables for added moisture.
- Starting from one end, tightly roll the tortilla, tucking in the sides as you go, to form a wrap.
- Heat a non-stick pan over medium heat (about 350°F) and lightly toast the wrap for 1-2 minutes on each side, or until golden brown and slightly crispy.
- Remove from the pan and let it cool for a minute before slicing in half diagonally.
Crunchy, fresh, and satisfyingly wholesome, this wrap is a testament to the beauty of simple ingredients coming together. Serve it with a side of sweet potato fries or a light salad for a complete meal that delights the senses.
Simple Tomato Soup

Amidst the quiet hum of the kitchen, there’s something profoundly comforting about stirring a pot of tomato soup, its aroma weaving through the air like a gentle reminder of simpler times. This version, stripped down to its essence, invites you to slow down and savor each step, each ingredient speaking softly but surely.
Ingredients
- 2 tbsp olive oil (or any neutral oil)
- 1 medium onion, diced (about 1 cup)
- 2 cloves garlic, minced
- 28 oz canned whole tomatoes (preferably San Marzano)
- 2 cups vegetable broth (adjust for desired thickness)
- 1 tsp sugar (to balance acidity)
- 1/2 tsp salt (adjust to taste)
- 1/4 tsp black pepper (freshly ground preferred)
- 1/4 cup heavy cream (optional, for richness)
Instructions
- Heat olive oil in a large pot over medium heat until shimmering, about 2 minutes.
- Add diced onion, stirring occasionally, until translucent, about 5 minutes.
- Stir in minced garlic, cooking until fragrant, about 30 seconds.
- Pour in canned tomatoes with their juices, breaking them apart gently with a spoon.
- Add vegetable broth, sugar, salt, and pepper, bringing the mixture to a simmer.
- Reduce heat to low, cover, and let simmer for 20 minutes to meld flavors.
- Using an immersion blender, puree the soup until smooth. (Tip: For a chunkier texture, blend only half.)
- Stir in heavy cream if using, and heat through for 2 minutes. (Tip: A splash of cream adds a velvety finish.)
- Adjust seasoning with salt and pepper if needed before serving.
Just as the soup reaches your bowl, its velvety texture and deep, tangy-sweet flavor promise warmth from the inside out. Consider topping with a drizzle of cream or a handful of crispy croutons for a contrast in textures that elevates the humble to the extraordinary.
Fast and Easy Scrambled Eggs

Whisking the morning silence away, this recipe for fast and easy scrambled eggs brings a comforting simplicity to your breakfast table, perfect for those serene, slow-starting days.
Ingredients
- 4 large eggs (fresh for best flavor)
- 2 tbsp unsalted butter (or any neutral oil)
- 1/4 tsp salt (adjust to taste)
- 1/8 tsp black pepper (freshly ground preferred)
- 2 tbsp milk (optional, for creamier texture)
Instructions
- Crack the eggs into a medium bowl, ensuring no shell fragments fall in.
- Add the milk, salt, and pepper to the eggs, then whisk until the mixture is fully blended and slightly frothy.
- Heat a non-stick skillet over medium-low heat (about 275°F) and add the butter, swirling to coat the pan evenly.
- Pour the egg mixture into the skillet. Let it sit undisturbed for 20 seconds to start setting.
- Using a spatula, gently push the eggs from the edges toward the center, allowing the uncooked parts to flow to the edges. Repeat this process every 20 seconds for about 2 minutes.
- Remove the skillet from the heat when the eggs are softly set and slightly runny in places, as they will continue to cook from residual heat.
- Serve immediately on a warm plate to enjoy the creamy, delicate texture at its best.
Offering a velvety texture with a rich, buttery flavor, these scrambled eggs can be elevated with a sprinkle of fresh herbs or a side of toasted artisan bread for a satisfying meal.
Conclusion
We hope this roundup of 20 delicious, fast, and easy recipes inspires your next kitchen adventure! Perfect for beginners, each dish is a stepping stone to becoming a more confident cook. Don’t forget to try them out, share your favorites in the comments, and pin this article on Pinterest for your next culinary quest. Happy cooking!


