Ever thought you’d have to give up desserts to stay healthy? Think again! Our roundup of 17 Delicious Easy Sugar-Free Dessert Recipes proves you can indulge your sweet tooth without the guilt. From creamy cheesecakes to rich chocolate treats, these recipes are not only simple to make but also packed with wholesome ingredients. Ready to satisfy your cravings the healthy way? Let’s dive in!
Chocolate Avocado Mousse
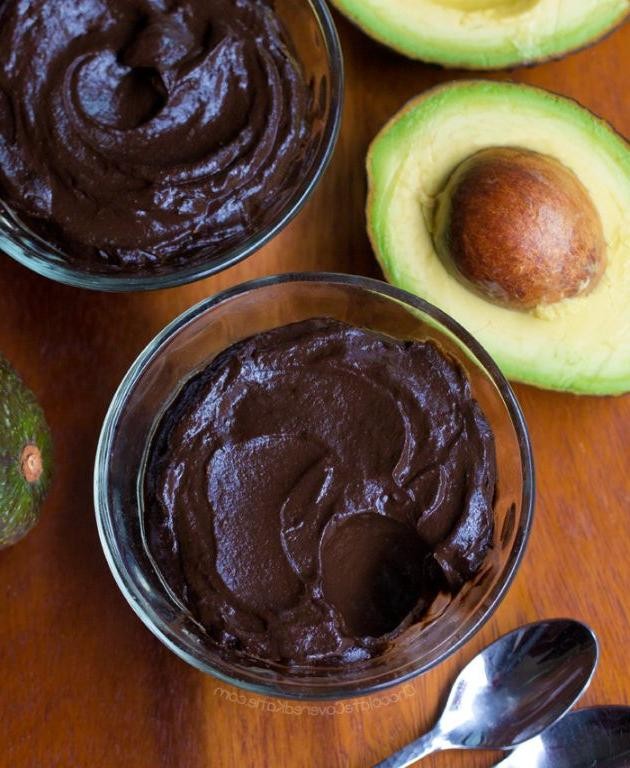
Get ready to dive spoon-first into the creamiest, dreamiest dessert that’s secretly healthy—because, yes, we’re magicians in the kitchen. Chocolate Avocado Mousse is here to blow your mind and satisfy your sweet tooth without the guilt.
Ingredients
- 2 ripe avocados (the kind that practically begs to be smooshed)
- 1/4 cup cocoa powder (go for the dark, mysterious kind)
- 1/4 cup maple syrup (because we’re sweet but not too sweet)
- 1 tsp vanilla extract (the good stuff, none of that imitation nonsense)
- A pinch of salt (to make all the flavors pop like a confetti cannon)
- 1/2 cup heavy cream (chilled, because we’re not savages)
Instructions
- Scoop the avocados into a blender or food processor—no pit, no skin, just the green gold.
- Add cocoa powder, maple syrup, vanilla extract, and that pinch of salt. Blend until smoother than your pickup lines.
- In a separate bowl, whip the heavy cream until it forms stiff peaks. This is your arm workout for the day.
- Gently fold the whipped cream into the avocado mixture until fully combined. Think of it as a delicate dance, not a mosh pit.
- Divide the mousse into serving dishes and chill for at least 1 hour. Patience is a virtue, especially in dessert-making.
Rich, velvety, and with a depth of flavor that’ll have you questioning all your life choices, this mousse is a game-changer. Serve it with a sprinkle of sea salt or fresh berries for a touch of elegance—or just eat it straight from the bowl, we won’t judge.
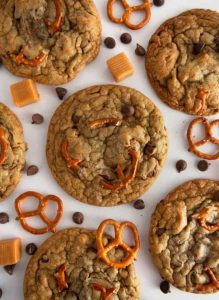
Banana Oat Cookies
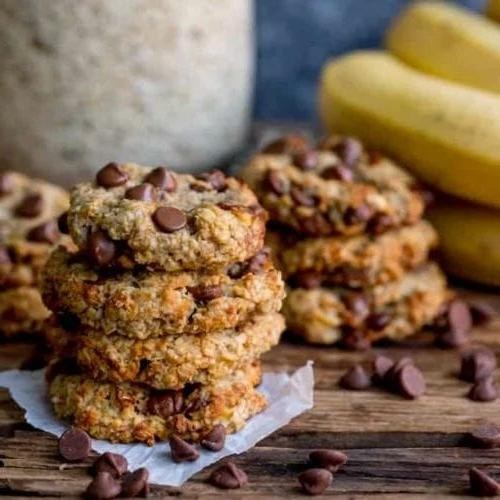
Ready to turn those sad, overripe bananas on your counter into something spectacular? These Banana Oat Cookies are your ticket to a guilt-free snack that’s as fun to make as it is to eat—no fancy skills required!
Ingredients
- 2 overripe bananas (the spottier, the better for sweetness)
- 1 cup rolled oats (not instant, unless you enjoy mush)
- 1/4 cup peanut butter (creamy or chunky, your call)
- 1 tbsp honey (because life’s too short for bland cookies)
- 1/2 tsp vanilla extract (the good stuff, please)
- A pinch of salt (to make all the flavors pop)
Instructions
- Preheat your oven to 350°F (175°C) and line a baking sheet with parchment paper. No parchment? A light grease will do, but don’t skip this unless you enjoy scraping.
- In a bowl, mash the bananas with a fork until smooth. A few lumps are okay—we’re not making baby food here.
- Stir in the oats, peanut butter, honey, vanilla extract, and salt. Mix until everything is well combined. Tip: If the mixture seems too wet, add a few more oats. Too dry? A splash of milk will save the day.
- Drop tablespoon-sized portions of the mixture onto the prepared baking sheet, spacing them about 2 inches apart. They won’t spread much, but nobody likes a cookie conglomerate.
- Bake for 12-15 minutes, or until the edges are golden brown. Tip: They’ll firm up as they cool, so resist the urge to overbake.
- Let them cool on the baking sheet for 5 minutes before transferring to a wire rack. Tip: If you can wait that long.
Absolutely delightful, these cookies are chewy, slightly crisp on the edges, and packed with banana goodness. Serve them with a dollop of yogurt for breakfast or dunk them in milk for a midnight snack—no judgment here.
Strawberry Chia Pudding
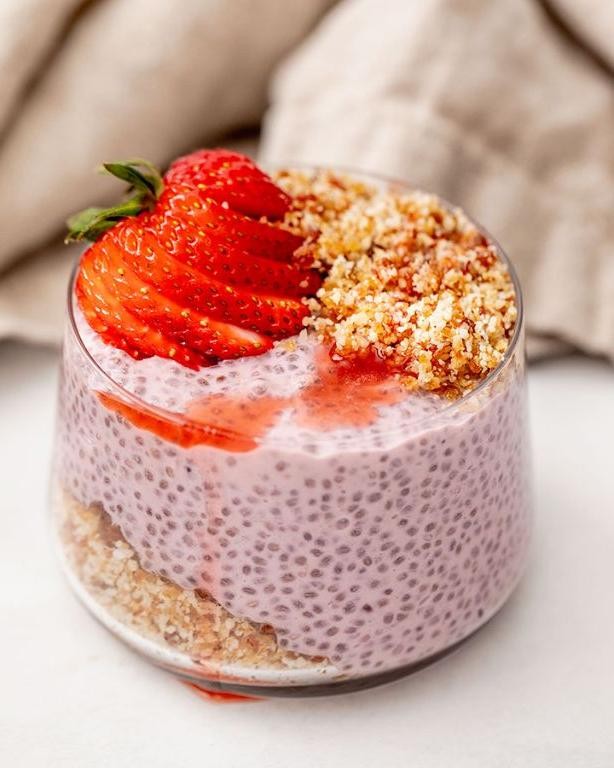
Craving something sweet but secretly healthy? Let me introduce you to Strawberry Chia Pudding, the dessert that’s basically a hug in a bowl—if hugs were pink and packed with omega-3s.
Ingredients
- 1 cup almond milk (unsweetened, because we’re sweet enough)
- 3 tbsp chia seeds (the tiny but mighty stars of the show)
- 1 cup fresh strawberries (hull them like you mean it)
- 1 tbsp honey (or maple syrup, if you’re vegan and fancy)
- 1/2 tsp vanilla extract (the good stuff, none of that imitation nonsense)
Instructions
- In a medium bowl, whisk together almond milk, chia seeds, honey, and vanilla extract until well combined. Tip: Let it sit for 5 minutes, then whisk again to prevent chia clumps—nobody likes a clumpy pudding.
- Cover the bowl and refrigerate for at least 4 hours, or overnight. Tip: Overnight is best; it’s like the chia seeds are throwing a slumber party in your fridge.
- While the pudding sets, mash the strawberries with a fork until they’re saucy but still a bit chunky. Tip: If you’re feeling lazy, a quick pulse in the blender works too—just don’t turn them into soup.
- Once the chia pudding has thickened to your liking, layer it with the strawberry mash in serving glasses. Tip: For Instagram-worthy layers, spoon carefully and pretend you’re an artist.
- Serve chilled, topped with extra strawberries if you’re extra. Tip: A mint leaf on top makes you look like a professional chef, even if you’re in pajamas.
Velvety smooth with a hint of crunch from the chia seeds, this pudding is a textural dream. Serve it in clear glasses to show off those pretty layers, or just eat it straight from the bowl—no judgment here.
Almond Flour Brownies
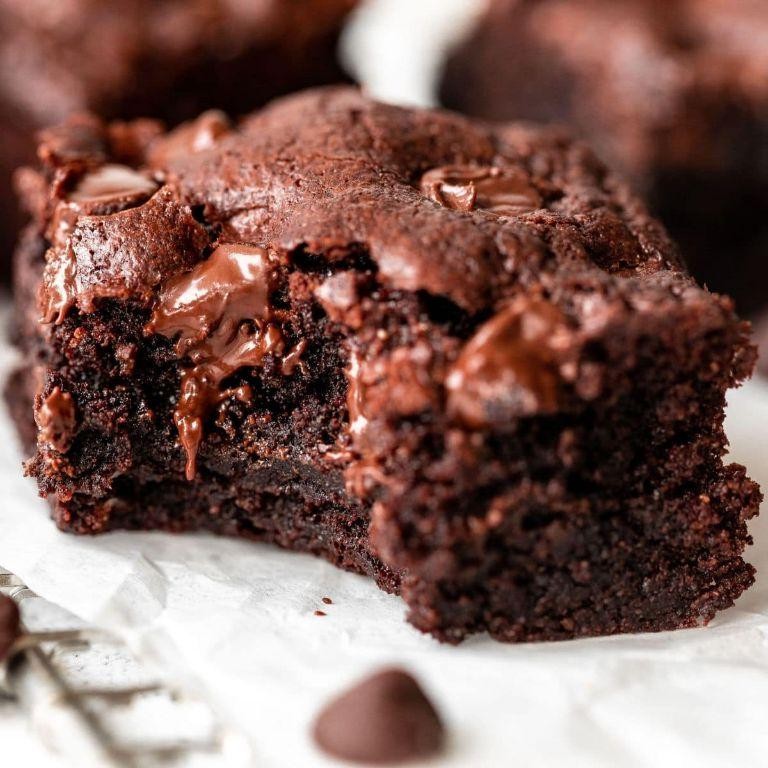
So, you’ve decided to dive into the world of gluten-free baking, and let me tell you, these almond flour brownies are the perfect place to start. They’re fudgy, they’re decadent, and they’re so easy to make, you’ll wonder why you ever bothered with the boxed stuff.
Ingredients
- 1 cup almond flour (because who needs gluten when you’ve got nuts?)
- 1/2 cup cocoa powder (the darker, the better—I’m looking at you, midnight snackers)
- 1/2 cup melted butter (salted, because life’s too short for unsalted)
- 2 large eggs (room temp, unless you enjoy the thrill of cold eggs in warm batter)
- 3/4 cup sugar (because sweetness is non-negotiable)
- 1 tsp vanilla extract (the good stuff, none of that imitation nonsense)
- 1/4 tsp salt (just a pinch to make the chocolate sing)
- 1/2 cup chocolate chips (because more chocolate is always the answer)
Instructions
- Preheat your oven to 350°F (175°C) and line an 8×8 inch baking pan with parchment paper, because nobody likes a sticky situation.
- In a large bowl, whisk together the almond flour, cocoa powder, and salt until they’re best friends.
- In another bowl, mix the melted butter and sugar until they’re smoother than your pickup lines.
- Add the eggs one at a time to the butter mixture, whisking well after each addition. This is where the magic (and the arm workout) happens.
- Stir in the vanilla extract, because vanilla makes everything better.
- Gently fold the dry ingredients into the wet ingredients until just combined. Overmixing is the enemy of fudgy brownies.
- Toss in the chocolate chips and give it one last stir, because we’re not monsters—we share the chocolate.
- Pour the batter into the prepared pan and smooth the top with a spatula. Pretend you’re a baker on a cooking show.
- Bake for 20-25 minutes, or until the edges are set but the center is still a bit gooey. A toothpick should come out with a few moist crumbs, not clean.
- Let the brownies cool in the pan for at least 10 minutes before cutting into them. I know, the wait is torture.
Get ready to sink your teeth into the most gloriously fudgy brownies you’ve ever had. Serve them warm with a scoop of vanilla ice cream, or enjoy them cold straight from the fridge—no judgment here.
Coconut Flour Pancakes
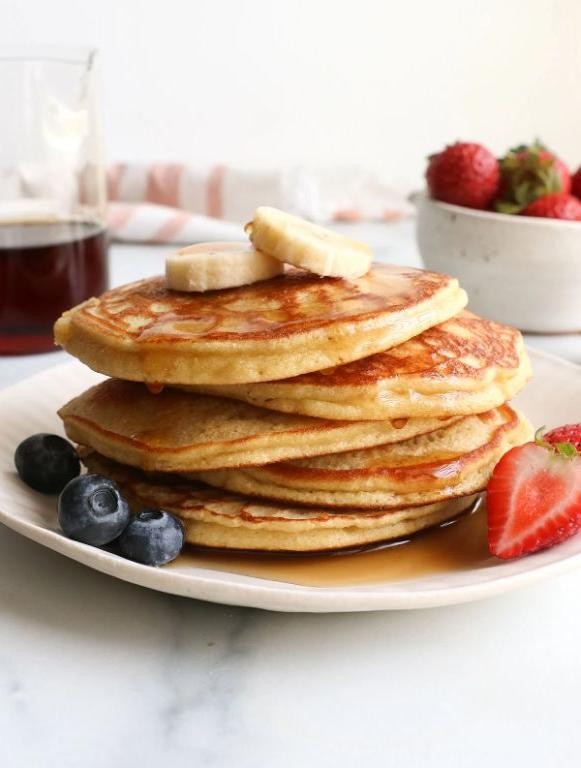
Pancakes that pack a punch without the guilt? Yes, please! These coconut flour pancakes are your ticket to a fluffy, flavorful breakfast that’ll have you doing a happy dance in your pajamas.
Ingredients
- 1/2 cup coconut flour (because who doesn’t love a tropical twist?)
- 4 large eggs (room temp eggs blend smoother, trust me)
- 1 cup almond milk (or any milk that makes your heart sing)
- 2 tbsp honey (for that sweet, sweet love)
- 1 tsp vanilla extract (the secret whisper of flavor)
- 1/2 tsp baking soda (the lift in your pancake’s step)
- A pinch of salt (to balance the sweetness)
- Coconut oil for frying (extra virgin olive oil is my go-to, but coconut oil keeps it in the family)
Instructions
- In a large bowl, whisk together the coconut flour, baking soda, and salt. This is where the magic starts.
- In another bowl, beat the eggs, then mix in the almond milk, honey, and vanilla extract. Pro tip: Whisk until it’s as smooth as your morning playlist.
- Combine the wet and dry ingredients, stirring until just mixed. Overmixing is the enemy of fluffiness—consider yourself warned.
- Heat a skillet over medium heat (think 350°F) and melt a dab of coconut oil. Your pancakes deserve a non-stick hug.
- Pour 1/4 cup of batter for each pancake. Watch for bubbles to form and edges to set, about 2-3 minutes, then flip with the confidence of a pancake-flipping champion.
- Cook for another 1-2 minutes until golden brown. No peeking too often—patience is a virtue, especially in pancake land.
Boom! You’ve just made pancakes that are as light as a cloud with a subtle coconutty vibe. Serve them stacked high with a drizzle of honey and a side of fresh berries for a breakfast that’s basically a vacation on a plate.
Pumpkin Spice Energy Balls
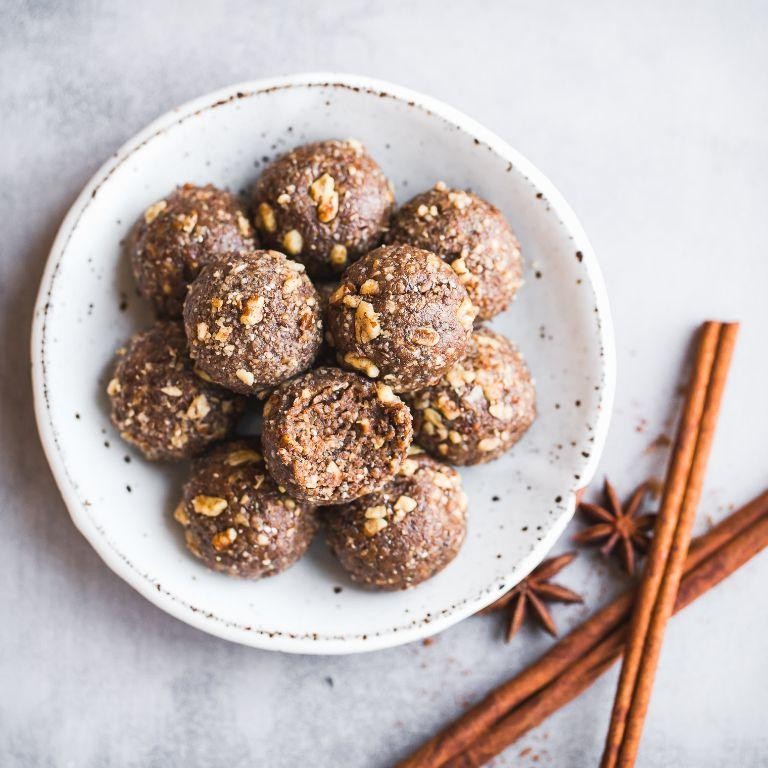
Mmm, let’s talk about these little bites of joy that are about to become your new obsession—Pumpkin Spice Energy Balls. Perfect for when you need a quick pick-me-up or a sneaky way to get your pumpkin spice fix without judgment.
Ingredients
- 1 cup old-fashioned oats (because quick oats are just not the same, trust me)
- 1/2 cup pumpkin puree (not pie filling, unless you’re into that sort of surprise)
- 1/4 cup almond butter (smooth or crunchy, I won’t judge)
- 2 tbsp maple syrup (the real deal, please)
- 1 tsp pumpkin spice (because fall feelings all year round)
- 1/2 tsp vanilla extract (the good stuff)
- A pinch of salt (to make all those flavors pop)
Instructions
- In a large bowl, mix together the oats, pumpkin puree, almond butter, maple syrup, pumpkin spice, vanilla extract, and salt until well combined. Tip: If the mixture feels too wet, add a bit more oats; too dry, a splash of maple syrup.
- Roll the mixture into 1-inch balls. This is the perfect time to recruit tiny hands if you have them—kids love this part!
- Place the balls on a baking sheet lined with parchment paper and chill in the fridge for at least 30 minutes. Tip: They firm up better if you give them some alone time in the fridge.
- Once chilled, transfer to an airtight container. They’ll keep in the fridge for up to a week—if they last that long. Tip: For a fun twist, roll them in cinnamon or crushed nuts before chilling.
Now, these little guys are like a hug in ball form—soft, chewy, and packed with flavor. Try serving them on a fancy plate at your next gathering, or just hoard them all for yourself; no one’s judging here.
Vanilla Almond Butter Fudge
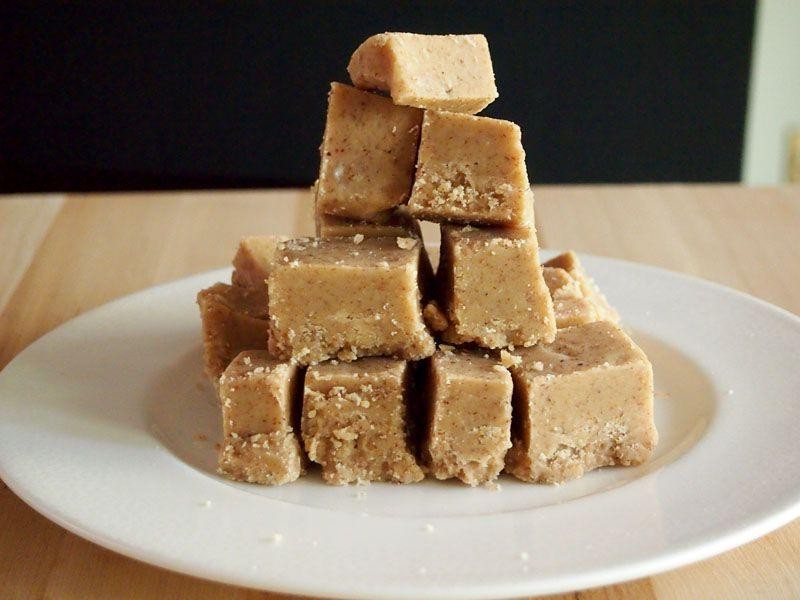
Ladies and gentlemen, prepare to have your taste buds dazzled by a creation so divine, it’s like a hug for your soul—Vanilla Almond Butter Fudge. This isn’t just any fudge; it’s a creamy, dreamy concoction that’ll have you questioning why you ever settled for the store-bought stuff.
Ingredients
- 1 cup almond butter (the creamy kind, because we’re not savages)
- 1/2 cup coconut oil (unrefined for that extra coconutty whisper)
- 1/4 cup maple syrup (the real deal, none of that pancake syrup imposter)
- 1 tsp vanilla extract (pure, because imitation is the sincerest form of flattery but tastes terrible)
- A pinch of salt (to make all those flavors pop like fireworks)
Instructions
- Line an 8×8 inch baking dish with parchment paper, because nobody likes a sticky situation.
- In a medium saucepan over low heat, melt the coconut oil until it’s as smooth as your pickup lines.
- Add the almond butter, maple syrup, vanilla extract, and salt to the saucepan. Stir until everything is combined like the ultimate superhero team.
- Pour the mixture into the prepared baking dish, spreading it evenly with the back of a spoon—think of it as frosting a cake, but easier.
- Pop it in the freezer for at least 2 hours, or until it’s set harder than your New Year’s resolutions.
- Once set, lift the fudge out by the parchment paper and cut into squares. Pro tip: Warm the knife under hot water for cleaner cuts.
Mmm, what you’ve got here is a fudge that’s rich, velvety, and packed with nutty goodness. Serve these little squares of joy at your next gathering, or keep them all to yourself—we won’t judge. Either way, they’re bound to disappear faster than your motivation to go to the gym.
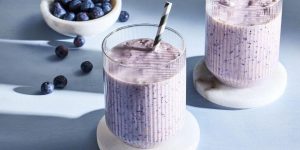
Blueberry Coconut Ice Cream
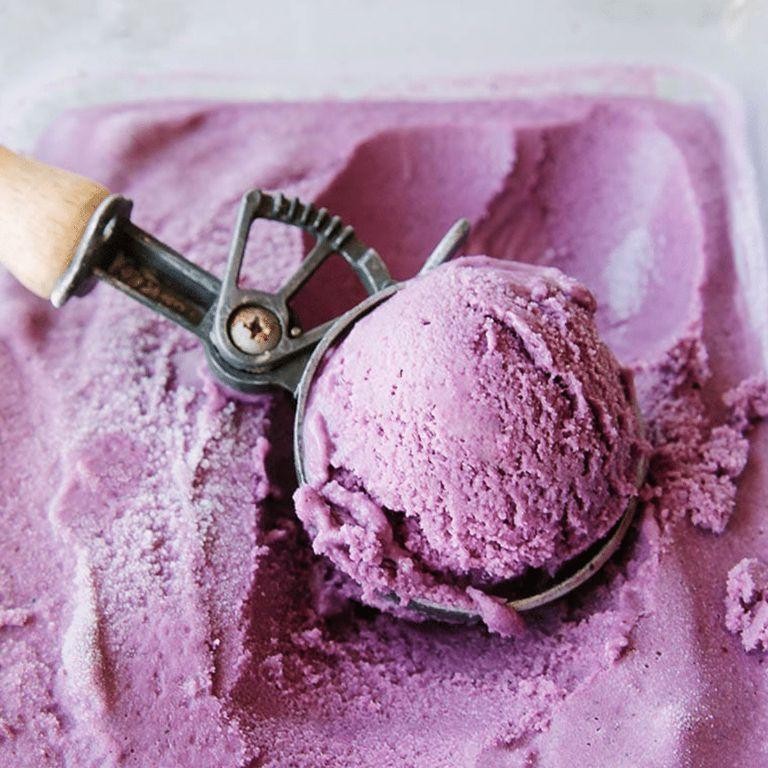
Alright, let’s dive into the creamy, dreamy world of homemade ice cream that’ll make your taste buds do a happy dance. Blueberry Coconut Ice Cream is not just a dessert; it’s a summer love story in a bowl, blending the tartness of blueberries with the tropical vibes of coconut. And the best part? No fancy ice cream maker needed—just a freezer and a bit of patience (which, let’s be honest, is the hardest ingredient to measure).
Ingredients
- 2 cups fresh blueberries (frozen works in a pinch, but fresh is the MVP here)
- 1 can (13.5 oz) full-fat coconut milk (shake it like a polaroid picture before opening)
- 1/2 cup granulated sugar (because life’s too short for unsweetened desserts)
- 1 tsp pure vanilla extract (the good stuff—none of that imitation nonsense)
- A pinch of salt (to make all the flavors pop like confetti)
Instructions
- In a medium saucepan, combine the blueberries, coconut milk, and sugar. Cook over medium heat, stirring occasionally, until the blueberries burst and the mixture thickens slightly, about 10 minutes. Tip: Smash some berries against the side of the pan for extra flavor.
- Remove from heat and stir in the vanilla extract and salt. Let the mixture cool to room temperature, then cover and refrigerate for at least 4 hours, or overnight. Tip: Patience is key here—the colder the mix, the creamier the ice cream.
- Pour the chilled mixture into a freezer-safe container. Freeze for 1 hour, then stir vigorously with a fork to break up ice crystals. Repeat every 30 minutes for about 3-4 hours, or until the ice cream is firm. Tip: This step is your arm workout for the day—embrace it.
Boom! You’ve just made ice cream that’s smoother than a jazz playlist. The blueberries bring a juicy burst, while the coconut milk adds a silky richness that’s downright addictive. Serve it in a coconut shell for extra flair, or just eat it straight from the container—we won’t judge.
Peanut Butter Protein Bars
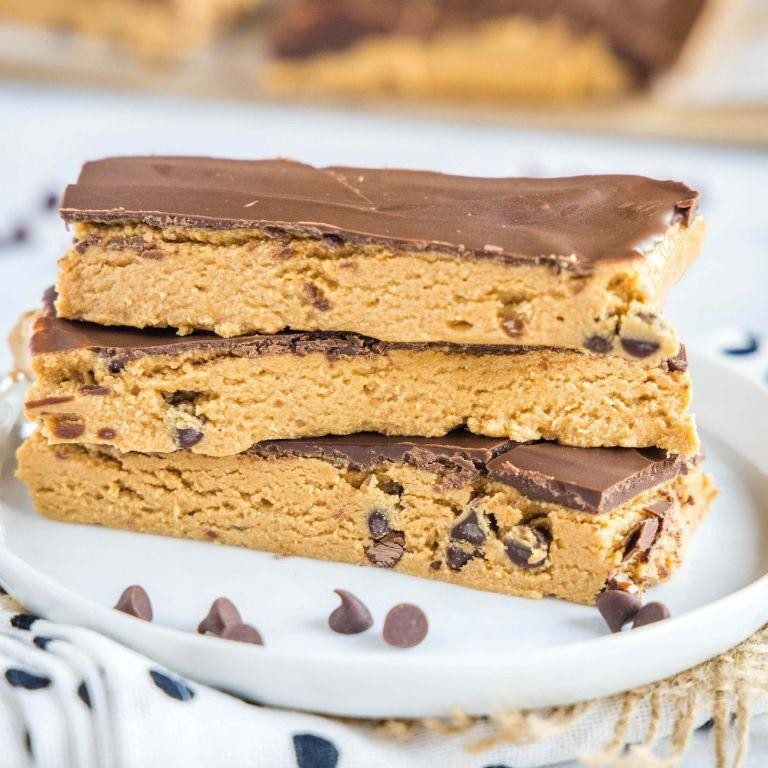
Zesty and packed with punch, these Peanut Butter Protein Bars are the superhero snack your lunchbox has been dreaming of. Perfect for when you’re too busy saving the world to sit down for a meal, these bars are a no-bake, no-fuss, all-yum solution.
Ingredients
- 1 cup creamy peanut butter (the kind that sticks to the roof of your mouth is a must)
- 1/2 cup honey (because life’s too short for bland sweeteners)
- 2 cups rolled oats (not the instant kind, we’re making bars here, not porridge)
- 1/2 cup vanilla protein powder (choose your favorite brand, but make it snappy)
- 1/4 cup mini chocolate chips (for that mandatory chocolate fix)
- 1 tsp vanilla extract (the real deal, none of that imitation stuff)
Instructions
- Line an 8×8 inch baking dish with parchment paper, leaving some overhang for easy removal. Trust me, this step is a game-changer.
- In a large bowl, mix together the peanut butter and honey until they’re best friends. Microwave for 30 seconds if they’re being stubborn.
- Stir in the rolled oats, protein powder, and vanilla extract until the mixture looks like it could bench press a small car.
- Fold in the mini chocolate chips with the finesse of a chocolate chip folding champion.
- Press the mixture firmly into the prepared baking dish. Use the back of a spoon or your clean hands to make it compact and even.
- Chill in the refrigerator for at least 2 hours, or until it’s firm enough to cut into bars without falling apart like your last diet attempt.
Who knew something so simple could taste like a peanut butter cup and a protein shake had a delicious baby? These bars are chewy, nutty, and just sweet enough to trick you into thinking you’re eating dessert. Serve them straight from the fridge for a firm texture, or let them sit out for a bit if you prefer them a tad softer.
Lemon Raspberry Cheesecake Bites
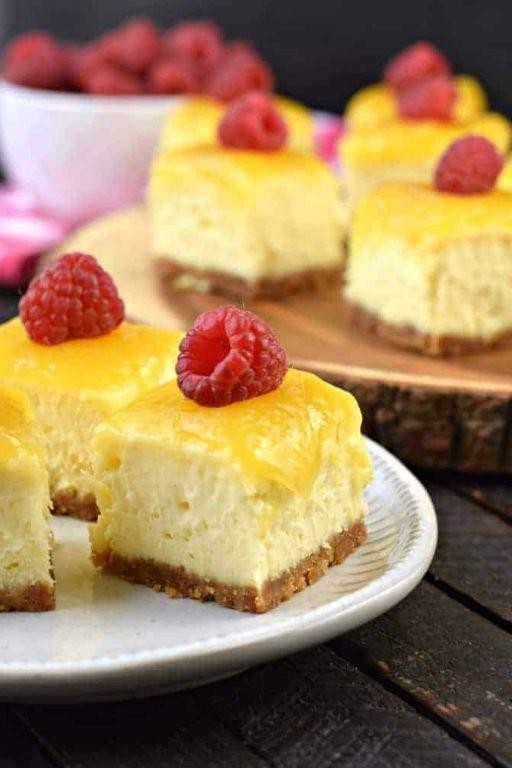
Get ready to dazzle your taste buds with these Lemon Raspberry Cheesecake Bites—tiny, tangy, and terrifically easy to pop in your mouth (maybe too easy). Perfect for when you want to impress without the stress, these bites are the life of any party, even if it’s just a party of one.
Ingredients
- 1 1/2 cups graham cracker crumbs (because who has time to crush them? Not me.)
- 1/4 cup melted butter (salted, because life’s too short for unsalted)
- 16 oz cream cheese, softened (I leave it out overnight, but 30 seconds in the microwave works in a pinch)
- 1/2 cup granulated sugar (because we’re sweet, but not too sweet)
- 2 large eggs, room temp (they mix better, trust me)
- 1 tbsp lemon zest (freshly zested, unless you’re into sad, flavorless desserts)
- 1/4 cup lemon juice (see above re: sad desserts)
- 1 tsp vanilla extract (the good stuff, none of that imitation nonsense)
- 1/2 cup raspberry jam (seedless if you’re fancy, seedy if you’re fun)
Instructions
- Preheat your oven to 325°F—no rushing, it’s not a race.
- Mix graham cracker crumbs and melted butter until it feels like wet sand. Press firmly into a lined mini muffin tin. Tip: Use a shot glass to press down for uniform crusts.
- Bake the crusts for 5 minutes. Let them cool like they’re sunbathing.
- Beat cream cheese and sugar until smooth—no lumps allowed. Add eggs one at a time, then lemon zest, juice, and vanilla. Tip: Scrape the bowl often; hidden lumps are the enemy.
- Pour filling over crusts, filling each cup 3/4 full. Drop a tiny dollop of raspberry jam on top and swirl with a toothpick. Tip: Less is more with the jam unless you’re a rebel.
- Bake for 15 minutes or until the centers are just set. They’ll firm up as they cool, so don’t overbake.
- Chill for at least 2 hours—patience is a virtue, especially in cheesecake.
Kick back and enjoy the creamy, dreamy texture with a zesty lemon punch and sweet raspberry swirls. Serve these bites on a fancy platter or straight from the tin—no judgment here.
Apple Cinnamon Mug Cake
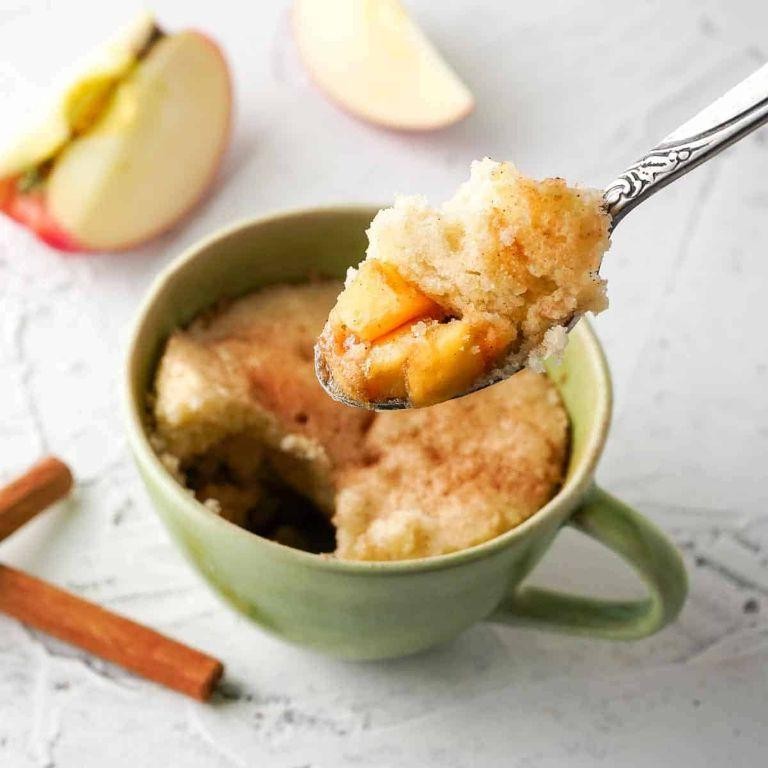
Zesty and zippy, this Apple Cinnamon Mug Cake is your ticket to a quick dessert that feels like a warm hug from the inside out. Perfect for those ‘I need cake now’ moments, it’s a single-serving miracle that’s ready before your next TikTok scroll.
Ingredients
- 1/4 cup all-purpose flour (because who has time to measure grams?)
- 2 tbsp brown sugar (for that deep, molasses-y sweetness)
- 1/4 tsp baking powder (the tiny but mighty leavener)
- 1/4 tsp cinnamon (plus a sneaky extra pinch because why not?)
- 1/8 tsp salt (just a whisper to balance the sweet)
- 3 tbsp milk (any kind, but whole milk makes it extra luxurious)
- 1 tbsp melted butter (unsalted, unless you’re living on the edge)
- 1/4 cup finely chopped apple (go for Granny Smith for a tart contrast)
Instructions
- Grab your favorite mug—this is a no-judgment zone, so pick the one that makes you happy.
- In the mug, whisk together the flour, brown sugar, baking powder, cinnamon, and salt until no lumps remain.
- Pour in the milk and melted butter, stirring until just combined. Tip: Overmixing is the enemy of fluffy cake.
- Fold in the chopped apple gently, distributing it evenly throughout the batter.
- Microwave on high for 1 minute and 10 seconds. Tip: Microwaves vary, so start checking at 1 minute—it’s done when the top looks set but still slightly moist.
- Let it sit for a minute (if you can resist), then dig in. Tip: A scoop of vanilla ice cream on top turns it into a next-level dessert.
This mug cake is a delightful mix of moist, fluffy, and packed with juicy apple bits. The cinnamon adds a warm spice that plays beautifully with the sweet brown sugar. Try serving it with a drizzle of caramel sauce for an extra indulgent twist.
Dark Chocolate Truffles
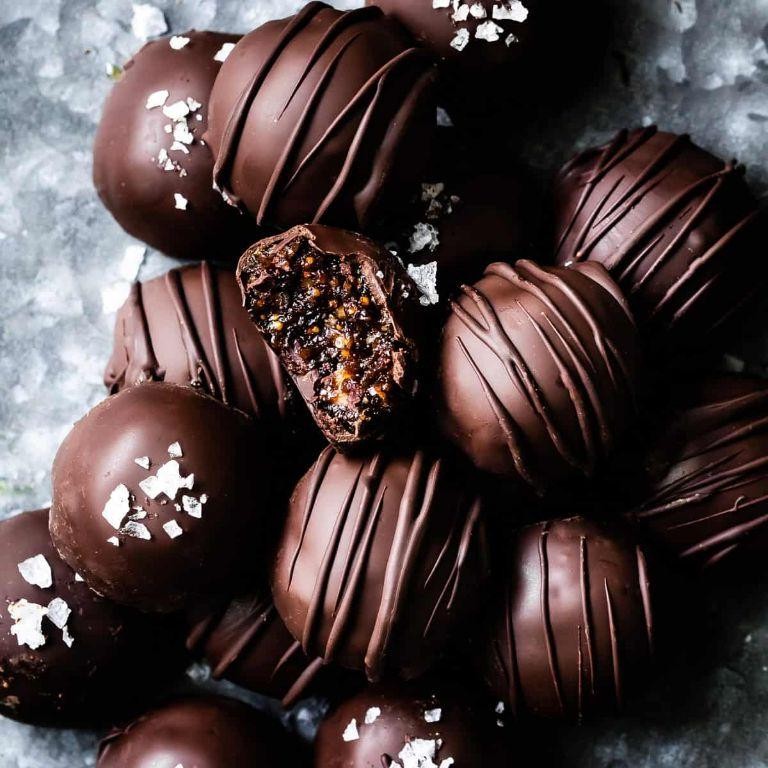
Buckle up, chocolate lovers! We’re diving fork-first into the decadent world of Dark Chocolate Truffles, where every bite is a mini vacation to blissville. These little spheres of joy are surprisingly simple to make, yet they pack a punch of sophistication that’ll have your guests thinking you’ve got a secret pastry degree.
Ingredients
- 8 oz high-quality dark chocolate (the darker, the better—I’m talking 70% cacao or higher for that deep, rich flavor)
- 1/2 cup heavy cream (because we’re not skimping on indulgence today)
- 2 tbsp unsalted butter (room temp, please—it’s all about that smooth blend)
- 1 tsp vanilla extract (the secret whisper of flavor that makes everything better)
- Cocoa powder, for dusting (because we’re fancy like that)
Instructions
- Chop the dark chocolate into fine pieces—the smaller, the better for melting. Think of it as prepping for a chocolate spa day.
- Heat the heavy cream in a small saucepan over medium heat until it just begins to simmer. Watch it like a hawk; we’re aiming for warm, not boiling.
- Pour the hot cream over the chopped chocolate and let it sit for 2 minutes. This is the ‘patience is a virtue’ step.
- Add the butter and vanilla extract, then stir until smooth and glossy. If you hit a few lumps, a quick zap in the microwave for 10 seconds can save the day.
- Cover the mixture and refrigerate for at least 2 hours, or until firm enough to roll. This is the perfect time to ponder life’s great mysteries, like why we don’t eat chocolate for every meal.
- Using a small scoop or your hands, form the mixture into 1-inch balls. Pro tip: lightly oil your hands to prevent sticking—it’s a game-changer.
- Roll each truffle in cocoa powder until fully coated. Think of it as giving them a little chocolate hug.
- Refrigerate the truffles for another 30 minutes to set. They’re worth the wait, promise.
Now, these truffles are the epitome of rich, velvety perfection with a melt-in-your-mouth texture that’s downright magical. Serve them on a fancy platter, or—let’s be real—straight from the fridge at midnight. No judgment here.
Zucchini Bread Muffins
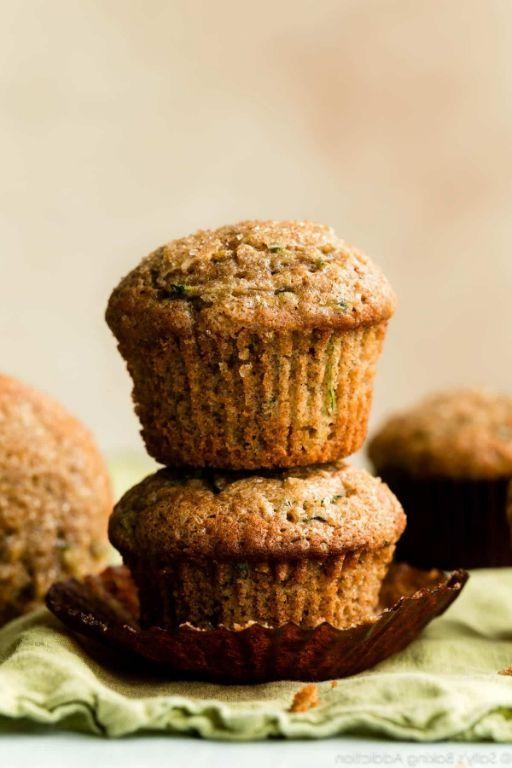
Now, let’s talk about turning those garden zucchinis into something that’ll make your taste buds do a happy dance—Zucchini Bread Muffins. These little guys are the perfect excuse to eat cake for breakfast, and I’m here for it.
Ingredients
- 2 cups grated zucchini (squeeze out the water like you’re wringing out a tiny towel)
- 1 1/2 cups all-purpose flour (because we’re keeping it classic)
- 1/2 cup vegetable oil (extra virgin olive oil works too, but let’s not start a debate)
- 2 large eggs (room temp, unless you enjoy the suspense of cold eggs in batter)
- 3/4 cup sugar (because life’s too short for unsweetened muffins)
- 1 tsp vanilla extract (the secret whisper of flavor)
- 1 tsp baking soda (the lift in our little clouds)
- 1/2 tsp salt (to balance the sweet, like a good friendship)
- 1 tsp cinnamon (for that warm hug feeling)
- 1/2 cup chopped walnuts (optional, but highly recommended for crunch lovers)
Instructions
- Preheat your oven to 350°F (175°C), because patience is a virtue, especially in baking.
- In a large bowl, whisk together the eggs, oil, sugar, and vanilla until it’s as smooth as your morning coffee.
- Gently fold in the grated zucchini. Think of it as tucking it into bed.
- In another bowl, mix the flour, baking soda, salt, and cinnamon. This is where the magic dry ingredients party happens.
- Combine the wet and dry ingredients, stirring just until they’re friends. Overmixing is the enemy of fluffy muffins.
- Fold in the walnuts if you’re using them, because texture is everything.
- Pour the batter into a greased muffin tin, filling each cup about 3/4 full. They need room to rise and shine.
- Bake for 20-25 minutes, or until a toothpick comes out clean. No one likes a soggy muffin.
- Let them cool in the tin for 5 minutes, then transfer to a wire rack. Resist the urge to eat them immediately—they’re worth the wait.
These muffins are moist, subtly sweet, and have just the right amount of spice. Try serving them warm with a smear of butter or a dollop of cream cheese for an extra indulgent treat.
Matcha Green Tea Fat Bombs
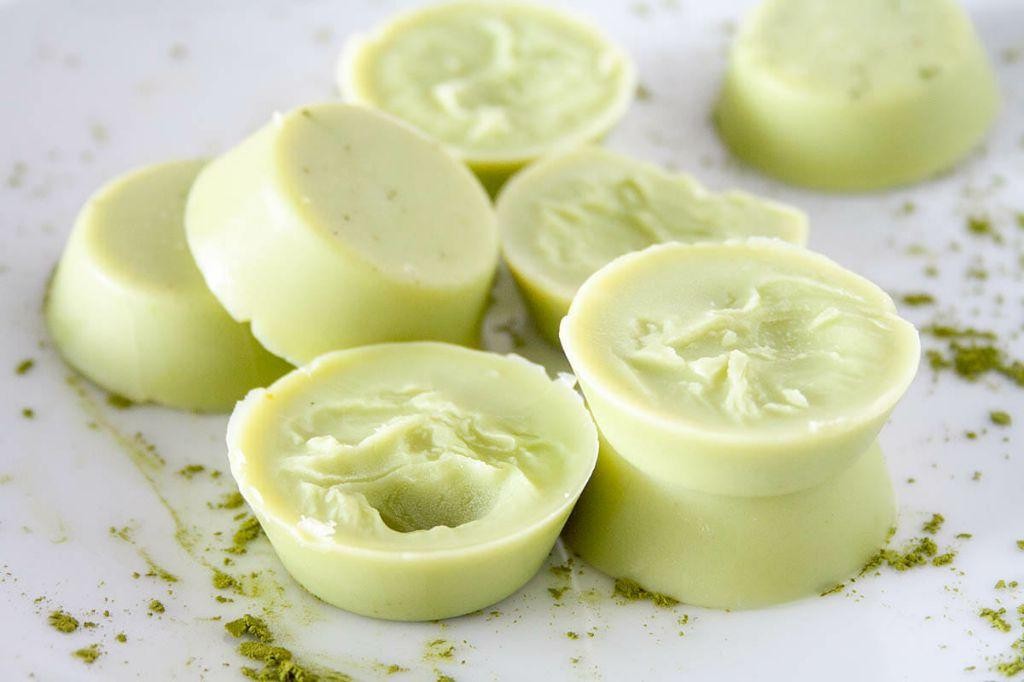
Kickstart your day with these bite-sized bursts of energy that’ll make you forget they’re actually good for you. Matcha Green Tea Fat Bombs are the perfect blend of creamy, dreamy, and just a tad bit cheeky, proving that healthy fats can indeed be the life of the party.
Ingredients
- 1/2 cup coconut oil (the kind that’s solid at room temp, because we’re not making soup here)
- 1/4 cup almond butter (smooth or crunchy, but let’s be real, smooth is the way to go)
- 2 tbsp matcha green tea powder (go for ceremonial grade if you’re feeling fancy)
- 2 tbsp honey (because even fat bombs need a sweet talk)
- 1 tsp vanilla extract (the real deal, not that imitation stuff)
- A pinch of salt (to make all those flavors pop like fireworks)
Instructions
- Line a mini muffin tin with paper liners or give it a light spray with coconut oil. Nobody likes a sticky situation.
- In a medium bowl, combine the coconut oil, almond butter, matcha powder, honey, vanilla extract, and salt. Pro tip: If your coconut oil is too solid, a quick 10-second zap in the microwave will do the trick.
- Whisk everything together until it’s smoother than your morning playlist. No lumps allowed here.
- Pour the mixture into the prepared muffin tin, filling each cup about 3/4 full. They’re small but mighty.
- Pop the tin into the freezer for at least 30 minutes, or until the bombs are firm to the touch. Patience is a virtue, especially when dessert is involved.
- Once set, transfer the fat bombs to an airtight container. They’ll keep in the freezer for up to 2 weeks, if they last that long.
Zesty and vibrant, these Matcha Green Tea Fat Bombs are like a hug for your taste buds, with a texture that’s irresistibly creamy and a flavor that’s boldly green tea with a sweet undertone. Serve them straight from the freezer for a cool treat, or let them sit for a minute if you prefer a softer bite. Either way, they’re bound to disappear faster than you can say ‘matcha madness.’
Carrot Cake Energy Balls
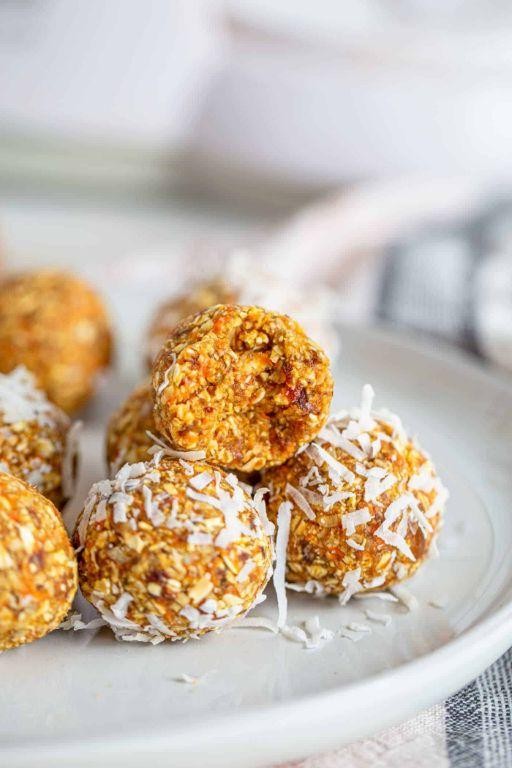
Look, we’ve all been there—craving something sweet but wanting to keep it on the healthier side. Enter these Carrot Cake Energy Balls, your new go-to snack that’s as nutritious as it is delicious, and let’s be honest, they’re way more fun to eat than a plain old carrot.
Ingredients
- 1 cup rolled oats (because quick oats are for the impatient, and we’re better than that)
- 1/2 cup almond butter (the creamy kind, unless you’re into that extra crunch)
- 1/4 cup honey (local if you’re fancy, or whatever’s in your pantry)
- 1/2 cup finely grated carrots (yes, you have to grate them, no, baby carrots don’t count)
- 1 tsp cinnamon (because what’s carrot cake without it?)
- 1/4 tsp nutmeg (a little goes a long way, trust me)
- 1/4 cup raisins (or chopped dates if you’re feeling adventurous)
- 1/4 cup shredded coconut (for that tropical vibe)
Instructions
- In a large mixing bowl, combine the rolled oats, almond butter, and honey. Stir until they’re best friends.
- Add the grated carrots, cinnamon, and nutmeg to the bowl. Mix until everything is evenly distributed—no carrot left behind.
- Fold in the raisins and shredded coconut. This is where the magic happens.
- Roll the mixture into 1-inch balls. Pro tip: wet your hands slightly to prevent sticking.
- Place the balls on a baking sheet lined with parchment paper and chill in the fridge for at least 30 minutes. They need time to think about what they’ve become.
Unbelievably, these little guys pack all the flavors of carrot cake into a bite-sized snack. They’re chewy, slightly sweet, and have just the right amount of spice. Serve them at your next brunch or hoard them all for yourself—no judgment here.
Raspberry Coconut Macaroons
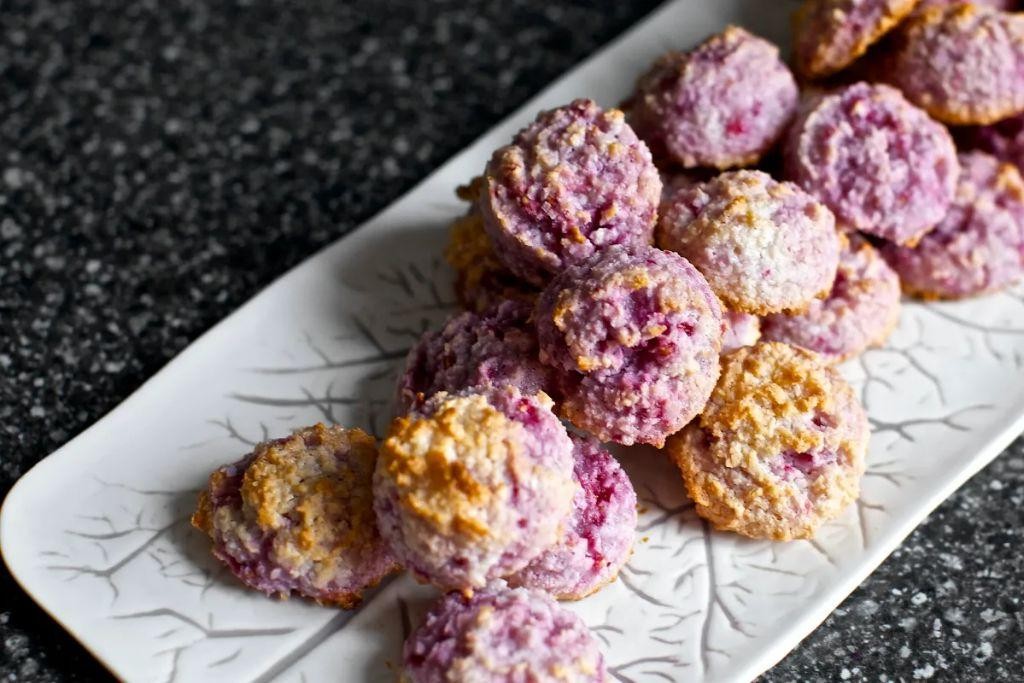
Now, let’s dive into the world of these little clouds of joy that are as easy to make as they are to devour. Raspberry Coconut Macaroons are the perfect blend of tart and sweet, with a texture that’s chewy on the inside and slightly crispy on the outside. Trust me, your taste buds are in for a treat!
Ingredients
- 2 cups sweetened shredded coconut (because life’s too short for unsweetened)
- 2/3 cup granulated sugar (the sweet soul of the macaroon)
- 3 large egg whites (room temp, please—they whip up nicer)
- 1/2 teaspoon vanilla extract (the secret whisper of flavor)
- 1/4 teaspoon salt (just a pinch to balance the sweetness)
- 1/2 cup fresh raspberries (for that pop of color and tartness)
Instructions
- Preheat your oven to 325°F (163°C) and line a baking sheet with parchment paper. No sticking allowed!
- In a large bowl, combine the shredded coconut, sugar, egg whites, vanilla extract, and salt. Mix until everything is well acquainted.
- Gently fold in the raspberries, being careful not to overmix. We want ribbons of raspberry, not a pink batter.
- Using a tablespoon, scoop the mixture onto the prepared baking sheet, spacing them about 2 inches apart. They like their personal space.
- Bake for 20-25 minutes, or until the edges are golden brown and the tops are slightly firm to the touch. Patience is key here.
- Let them cool on the baking sheet for 5 minutes before transferring to a wire rack. They need a moment to collect themselves.
Unbelievably, these macaroons strike the perfect balance between chewy and crispy, with the raspberries adding a delightful tartness that cuts through the sweetness. Serve them on a platter with a dusting of powdered sugar for a touch of elegance, or just eat them straight off the rack—no judgment here.
Pistachio Dark Chocolate Bark

Ever had one of those days where only chocolate will do, but you’re feeling fancy enough to not just eat it straight from the wrapper? Enter: Pistachio Dark Chocolate Bark, the sophisticated snack that’s surprisingly simple to whip up.
Ingredients
- 12 oz high-quality dark chocolate (I’m a fan of the 70% cocoa kind—it strikes the perfect balance between bitter and sweet.)
- 1/2 cup shelled pistachios, roughly chopped (Because who has time to chop them finely? We’re making bark, not a mosaic.)
- 1 tbsp coconut oil (This little secret makes the chocolate extra silky.)
- A pinch of sea salt (Trust me, it’s the sprinkle of magic that elevates the whole thing.)
Instructions
- Line a baking sheet with parchment paper. This isn’t the time for improvisation—parchment is your best friend here.
- Break the dark chocolate into chunks and melt it with the coconut oil in a double boiler over medium heat, stirring occasionally until smooth. Tip: If you don’t have a double boiler, a heatproof bowl over a pot of simmering water works just as well.
- Once melted, pour the chocolate onto the prepared baking sheet, spreading it into an even layer about 1/4 inch thick. Tip: A spatula works wonders here for getting that perfect thickness.
- Sprinkle the chopped pistachios evenly over the melted chocolate, then finish with a light dusting of sea salt. Tip: Don’t skimp on the salt—it’s what makes the flavors pop.
- Chill in the refrigerator for at least 30 minutes, or until the bark is completely set.
- Once set, break the bark into uneven pieces. Because perfection is overrated, and rustic is in.
What you’ve got now is a crunchy, creamy, salty-sweet masterpiece that’s as fun to make as it is to eat. Serve it on a fancy plate to impress your friends, or keep it all to yourself—no judgment here.
Conclusion
Absolutely delightful! This roundup of 17 sugar-free dessert recipes proves healthy eating doesn’t mean sacrificing flavor. Whether you’re a seasoned baker or new to sugar-free sweets, there’s something here for everyone. We’d love to hear which recipes become your favorites—drop us a comment below. Loved this collection? Share the sweetness by pinning this article on Pinterest for others to discover. Happy baking!