Snack time just got a whole lot tastier! Whether you’re craving something sweet, salty, or a little bit of both, we’ve rounded up 17 delicious and easy snack recipes that are quick to whip up. Perfect for busy weeknights, lazy weekends, or anytime hunger strikes, these treats are sure to satisfy. So, grab your apron and let’s dive into these irresistible bites that everyone will love!
Avocado Toast with Chili Flakes
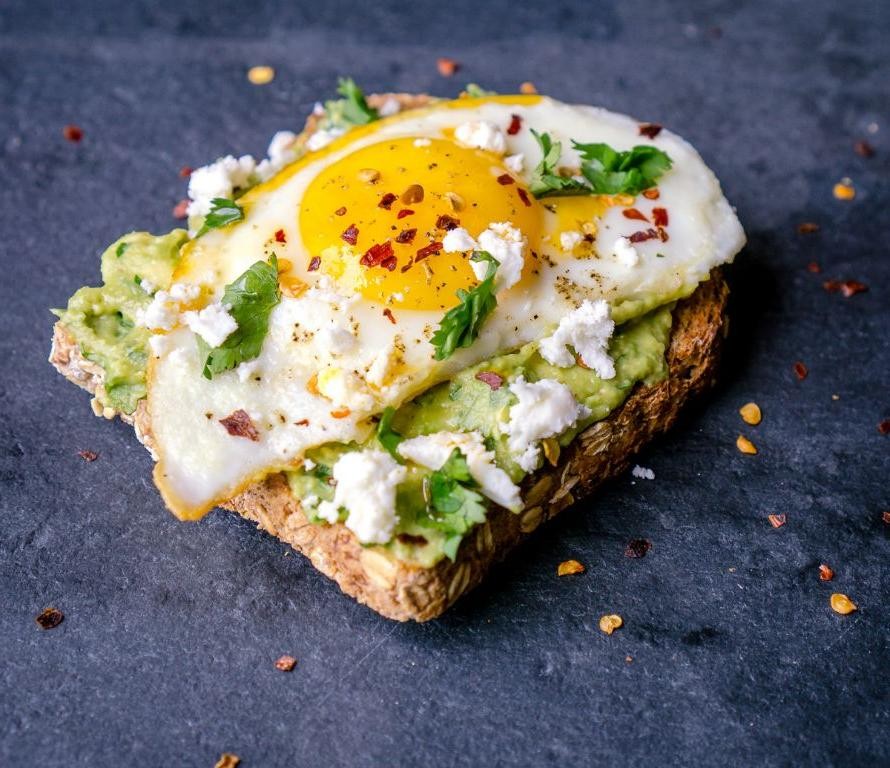
Remember those quiet mornings when the world seems to pause, and all you crave is something simple yet profoundly satisfying? Avocado toast with chili flakes is that humble dish, offering a creamy, spicy kick to start your day with a whisper of warmth.
Ingredients
- 1 ripe Hass avocado, halved and pitted
- 2 slices of artisan sourdough bread, 1/2 inch thick
- 1 tbsp extra-virgin olive oil
- 1/2 tsp red chili flakes
- 1/4 tsp flaky sea salt
- 1 pasture-raised egg, lightly beaten
- 1 tbsp clarified butter
Instructions
- Preheat a cast-iron skillet over medium heat for 2 minutes until evenly heated.
- Brush both sides of the sourdough slices with extra-virgin olive oil. Toast in the skillet for 2 minutes per side, or until golden brown and crisp.
- While the bread toasts, scoop the avocado flesh into a small bowl. Mash lightly with a fork, leaving some chunks for texture.
- In the same skillet, melt the clarified butter over medium heat. Add the lightly beaten egg, stirring gently with a silicone spatula for 1 minute, or until softly scrambled.
- Spread the mashed avocado evenly over the toasted sourdough. Top with the scrambled egg, then sprinkle with red chili flakes and flaky sea salt.
- Serve immediately, pairing with a drizzle of olive oil for added richness. Tip: For an extra layer of flavor, a squeeze of fresh lime juice brightens the dish beautifully.
Delight in the contrast of creamy avocado against the crisp toast, with the chili flakes adding a gentle heat that lingers. This dish shines when served alongside a soft-boiled egg for dipping, or with a side of microgreens for a fresh, peppery bite.
Greek Yogurt with Honey and Walnuts

Years have a way of softening the edges of our memories, but some flavors remain as vivid as the moment they first touched our tongues. This simple yet profound combination of Greek yogurt, honey, and walnuts is one such flavor, a testament to the beauty of minimalism in cooking.
Ingredients
- 1 cup full-fat Greek yogurt
- 2 tbsp raw, unfiltered honey
- 1/4 cup walnuts, lightly toasted and roughly chopped
Instructions
- Measure 1 cup of full-fat Greek yogurt into a serving bowl, ensuring it’s at room temperature to enhance its creamy texture.
- Drizzle 2 tbsp of raw, unfiltered honey over the yogurt, allowing it to pool slightly in the center for a visually appealing presentation.
- Sprinkle 1/4 cup of lightly toasted and roughly chopped walnuts evenly over the top, creating a contrast in textures.
- Let the dish sit for 5 minutes before serving to allow the honey to slightly soften the walnuts, melding the flavors together.
Light as a whisper yet rich in flavor, this dish offers a delightful interplay of creamy, crunchy, and sweet. Serve it in a clear glass to showcase the layers, or pair it with fresh figs for an added dimension of taste.
Caprese Skewers with Balsamic Glaze
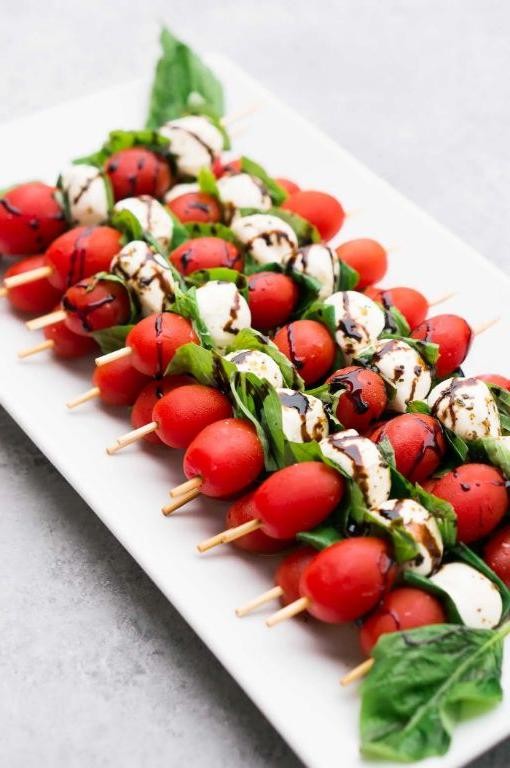
Zestfully simple yet elegantly sophisticated, these Caprese Skewers with Balsamic Glaze invite a moment of pause in our bustling lives, offering a bite-sized celebration of summer’s bounty. Each skewer is a miniature canvas, painting the classic flavors of Italy in vibrant strokes of red, white, and green.
Ingredients
- 1 pint cherry tomatoes, halved
- 8 ounces fresh mozzarella pearls, drained
- 1/4 cup extra-virgin olive oil
- 1/4 cup aged balsamic vinegar
- 1 tablespoon honey
- 1/2 teaspoon sea salt
- 1/4 teaspoon freshly ground black pepper
- 1/4 cup fresh basil leaves, chiffonade
- 12 (6-inch) wooden skewers, soaked in water for 30 minutes
Instructions
- Preheat a small saucepan over medium heat. Combine balsamic vinegar and honey, stirring until honey dissolves completely.
- Reduce heat to low and simmer the mixture for 5-7 minutes, until it thickens to a glaze consistency that coats the back of a spoon. Remove from heat and set aside to cool slightly.
- In a large bowl, gently toss halved cherry tomatoes and mozzarella pearls with olive oil, sea salt, and black pepper until evenly coated.
- Thread one tomato half, one mozzarella pearl, and a small basil leaf onto each skewer, repeating the pattern until all ingredients are used.
- Arrange skewers on a serving platter and drizzle with the balsamic glaze just before serving to maintain the freshness of the basil.
Lusciously creamy mozzarella pearls burst with freshness against the sweet acidity of cherry tomatoes, while the balsamic glaze adds a velvety depth. For an unexpected twist, serve these skewers atop a bed of arugula lightly dressed with lemon juice and olive oil, turning appetizers into a light meal.
Peanut Butter Banana Smoothie
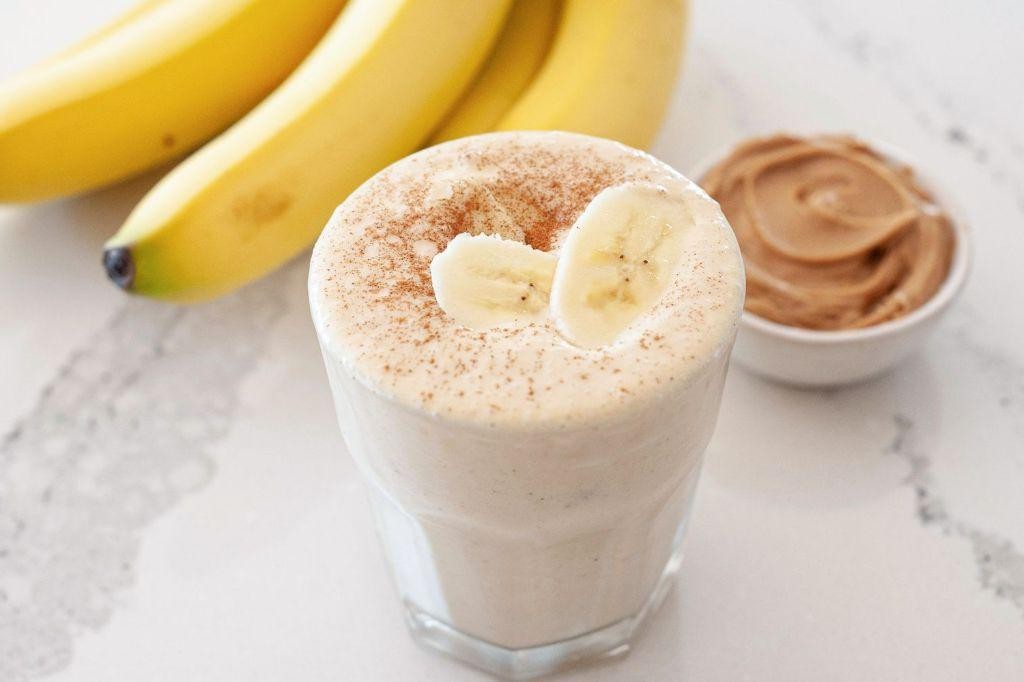
Calmly, as the morning light filters through the kitchen window, there’s something deeply comforting about blending a Peanut Butter Banana Smoothie. It’s a simple pleasure, a creamy concoction that feels both nourishing and indulgent, a perfect start to any day.
Ingredients
- 1 cup unsweetened almond milk, chilled
- 1 large ripe banana, previously frozen
- 2 tablespoons creamy natural peanut butter, unsalted
- 1 tablespoon pure maple syrup, grade A
- 1/2 teaspoon vanilla extract, pure
- 1 cup ice cubes
Instructions
- In a high-speed blender, combine the chilled unsweetened almond milk and the previously frozen large ripe banana.
- Add the creamy natural peanut butter, pure maple syrup, and pure vanilla extract to the blender.
- Blend on high speed for 30 seconds, or until the mixture is smooth and the banana is fully incorporated.
- Add the ice cubes to the blender and pulse until the ice is completely crushed and the smoothie reaches a thick, creamy consistency.
- Pour the smoothie into a tall glass and serve immediately for the best texture and flavor.
Delightfully creamy with a perfect balance of sweet and nutty flavors, this smoothie is a testament to simplicity. For an extra touch, drizzle a little extra peanut butter on top or sprinkle with crushed peanuts for added texture.
Homemade Granola Bars
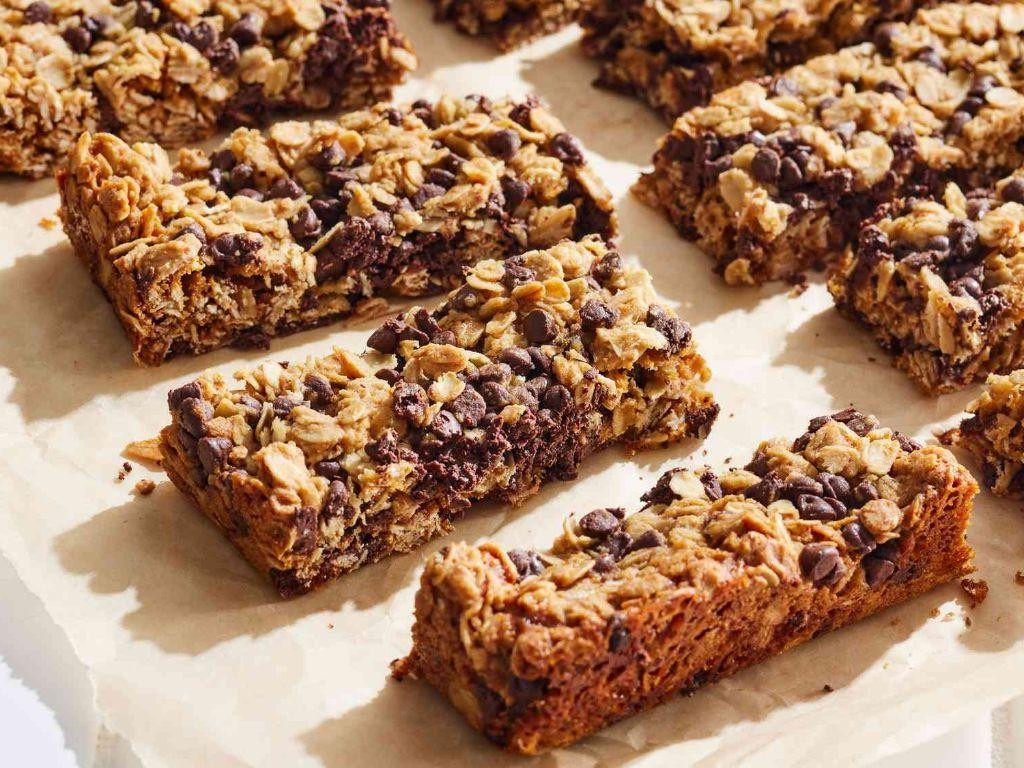
Gently, the morning light filters through the kitchen window, casting a warm glow over the counter where today’s project awaits. Homemade granola bars, a simple yet deeply satisfying endeavor, promise both nourishment and a moment of quiet creativity.
Ingredients
- 2 cups old-fashioned rolled oats
- 1/2 cup creamy almond butter
- 1/3 cup pure maple syrup
- 1/4 cup coconut oil, melted
- 1/2 tsp vanilla extract
- 1/4 tsp sea salt
- 1/2 cup chopped almonds
- 1/4 cup dried cranberries
- 1/4 cup dark chocolate chips
Instructions
- Preheat the oven to 350°F (175°C). Line an 8-inch square baking dish with parchment paper, allowing excess to hang over the sides for easy removal.
- Spread the rolled oats evenly on a baking sheet. Toast in the preheated oven for 10 minutes, stirring halfway through, until fragrant and lightly golden.
- In a medium saucepan over low heat, combine the almond butter, maple syrup, and melted coconut oil. Stir continuously until the mixture is smooth and fully incorporated, about 3 minutes.
- Remove the saucepan from the heat. Stir in the vanilla extract and sea salt until well blended.
- Transfer the toasted oats to a large mixing bowl. Add the chopped almonds, dried cranberries, and dark chocolate chips, tossing to combine.
- Pour the warm almond butter mixture over the oat mixture. Using a rubber spatula, fold until all the dry ingredients are evenly coated.
- Press the mixture firmly into the prepared baking dish, using the back of a spoon or a piece of parchment paper to compact it evenly.
- Refrigerate for at least 2 hours, or until set. Lift the granola bars out of the dish using the parchment overhang. Cut into 12 equal bars.
Rich in texture and flavor, these granola bars offer a delightful crunch with each bite, thanks to the toasted oats and almonds. For an extra touch of indulgence, drizzle melted dark chocolate over the top before serving.
Cheese and Crackers Platter

Gently, as the morning light filters through the kitchen window, the simplicity of a cheese and crackers platter invites a moment of pause. This assembly, humble yet elegant, becomes a canvas for flavors both sharp and subtle, a testament to the beauty of minimalism in cooking.
Ingredients
- 8 oz aged cheddar cheese, thinly sliced
- 4 oz creamy goat cheese, at room temperature
- 1/4 cup fig jam
- 1/2 cup Marcona almonds, lightly toasted
- 1 tbsp fresh thyme leaves
- 1 baguette, sliced into 1/4-inch thick rounds
- 2 tbsp extra virgin olive oil
- 1/2 tsp flaky sea salt
Instructions
- Preheat the oven to 350°F. Arrange the baguette slices on a baking sheet in a single layer.
- Lightly brush each slice with extra virgin olive oil and sprinkle with flaky sea salt. Toast in the oven for 8-10 minutes, or until the edges are golden and crisp.
- While the bread toasts, spread a thin layer of fig jam on half of the cooled baguette slices for a sweet contrast to the savory cheeses.
- Layer the aged cheddar slices on the remaining plain baguette slices, allowing the cheese to slightly overlap the edges for visual appeal.
- Dollop small amounts of creamy goat cheese atop the fig jam-covered slices, using the back of a spoon to create slight peaks.
- Scatter the toasted Marcona almonds and fresh thyme leaves over the entire platter, ensuring an even distribution for texture and aroma.
- Serve immediately, allowing the contrasting temperatures of the cool cheeses and warm bread to delight the palate.
Zesty yet balanced, this platter offers a play of textures from the crisp bread to the creamy cheeses, with the jam and almonds adding bursts of sweetness and crunch. Consider drizzling a touch of honey over the goat cheese for an extra layer of flavor, or pairing with a crisp white wine for an elevated experience.
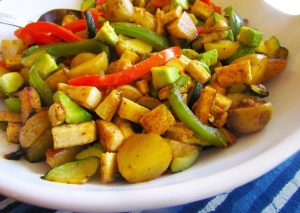
Roasted Chickpeas

Wandering through the kitchen on a quiet afternoon, the simplicity of transforming humble chickpeas into a crispy, flavorful snack feels like a small, personal triumph. This recipe for roasted chickpeas is a testament to the beauty of minimal ingredients yielding maximum satisfaction.
Ingredients
- 2 cups cooked chickpeas, thoroughly dried
- 1 tablespoon extra-virgin olive oil
- 1 teaspoon smoked paprika
- 1/2 teaspoon sea salt, finely ground
- 1/4 teaspoon freshly ground black pepper
Instructions
- Preheat your oven to 400°F (204°C) and line a baking sheet with parchment paper for easy cleanup.
- In a medium bowl, toss the dried chickpeas with extra-virgin olive oil until evenly coated, ensuring each bean glistens lightly.
- Sprinkle the smoked paprika, sea salt, and black pepper over the chickpeas, tossing again to distribute the spices uniformly.
- Spread the chickpeas in a single layer on the prepared baking sheet, avoiding overcrowding to ensure crispiness.
- Roast in the preheated oven for 25-30 minutes, shaking the pan gently every 10 minutes for even browning, until the chickpeas are golden and crisp.
- Remove from the oven and let cool on the baking sheet for 5 minutes; they will crisp up further as they cool.
Perfectly roasted chickpeas offer a delightful crunch with a smoky, slightly spicy flavor profile. Serve them atop a vibrant salad for added texture or enjoy them as a standalone snack with a dusting of nutritional yeast for a cheesy twist.
Vegetable Spring Rolls

Yesterday, as the evening light faded, I found myself craving something light yet satisfying, a dish that could bridge the gap between the seasons. Vegetable spring rolls, with their crisp exterior and tender, flavorful filling, seemed like the perfect answer.
Ingredients
- 8 rice paper wrappers, 8.5-inch diameter
- 1 cup shredded Napa cabbage
- 1/2 cup julienned carrots
- 1/2 cup thinly sliced red bell pepper
- 1/4 cup fresh cilantro leaves, whole
- 1/4 cup fresh mint leaves, whole
- 2 tbsp smooth peanut butter
- 1 tbsp soy sauce
- 1 tbsp rice vinegar
- 1 tsp toasted sesame oil
- 1/2 cup warm water (for softening wrappers)
Instructions
- In a small bowl, whisk together peanut butter, soy sauce, rice vinegar, and sesame oil until smooth to create the dipping sauce. Set aside.
- Prepare all vegetables and herbs, ensuring they are dry to prevent soggy spring rolls.
- Fill a large, shallow dish with warm water. Submerge one rice paper wrapper for 10 seconds until pliable but still slightly firm.
- Lay the softened wrapper on a clean, damp kitchen towel. Arrange a small handful of cabbage, carrots, bell pepper, cilantro, and mint in the lower third of the wrapper.
- Fold the bottom edge over the filling, then fold in the sides, and roll tightly upwards to enclose the filling completely.
- Repeat with remaining wrappers and filling, keeping completed rolls under a damp towel to prevent drying.
- Serve immediately with the prepared dipping sauce, or store rolls in an airtight container lined with a damp paper towel for up to 2 hours before serving.
Crunchy, fresh, and vibrant, these vegetable spring rolls offer a delightful contrast of textures and flavors. For an extra touch, serve them alongside a spicy mango salsa to elevate the dish further.
Dark Chocolate Covered Strawberries

Darkness settles around me as I ponder the simple yet profound pleasure of dark chocolate covered strawberries, a dessert that marries the earthiness of cocoa with the bright, tangy sweetness of fresh berries.
Ingredients
- 1 pound fresh strawberries, hulled and dried
- 8 ounces high-quality dark chocolate (70% cocoa), finely chopped
- 1 tablespoon coconut oil, refined
Instructions
- Line a baking sheet with parchment paper and set aside.
- In a double boiler over medium heat, melt the dark chocolate and coconut oil together, stirring constantly until smooth and fully combined, about 5 minutes.
- Tip: Ensure no water gets into the chocolate mixture to prevent seizing.
- Holding each strawberry by the stem, dip it into the melted chocolate, swirling to coat three-quarters of the berry. Allow excess chocolate to drip off.
- Tip: For a professional finish, twist the strawberry slightly as you lift it from the chocolate.
- Place the coated strawberries on the prepared baking sheet. Repeat with remaining berries.
- Refrigerate the strawberries for 30 minutes, or until the chocolate is set and firm to the touch.
- Tip: For added elegance, drizzle the strawberries with white chocolate before the dark chocolate sets.
With each bite, the crisp shell of dark chocolate gives way to the juicy strawberry beneath, a contrast that delights the senses. Serve these beauties on a slate board for a rustic yet sophisticated presentation.
Pita Bread with Hummus
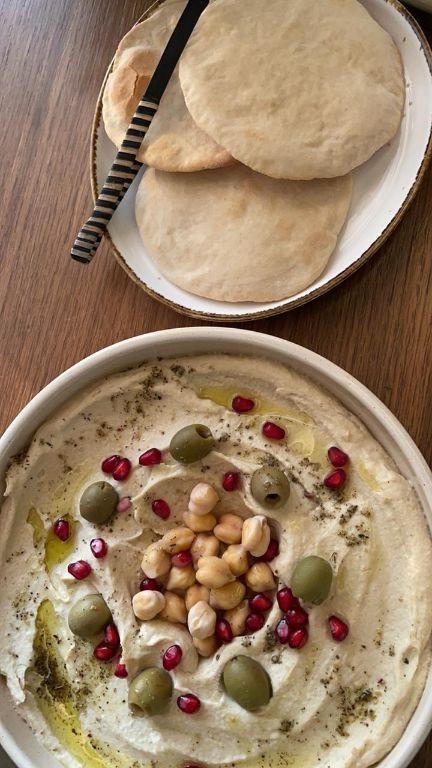
Zephyrs of the early morning bring a quiet that’s perfect for savoring the simple pleasures, like the creamy embrace of hummus paired with the warm, pillowy softness of freshly made pita bread. It’s a dish that whispers of comfort and the joy of sharing, a humble yet profound delight that bridges meals and moments.
Ingredients
- 1 1/2 cups dried chickpeas, soaked overnight
- 1/2 cup tahini, well-stirred
- 1/4 cup extra-virgin olive oil, plus more for drizzling
- 3 tbsp freshly squeezed lemon juice
- 2 garlic cloves, minced
- 1 tsp ground cumin
- 1/2 tsp sea salt
- 1/4 tsp freshly ground black pepper
- 1 cup warm water (110°F)
- 2 1/4 tsp active dry yeast
- 1 tbsp granulated sugar
- 3 cups all-purpose flour, plus more for dusting
- 1 tsp kosher salt
- 2 tbsp clarified butter, melted
Instructions
- Drain the soaked chickpeas and transfer them to a large pot. Cover with water by 2 inches and bring to a boil over high heat. Reduce heat to low and simmer, uncovered, until chickpeas are tender, about 90 minutes. Tip: Skim off any foam that rises to the surface during cooking for a cleaner flavor.
- While the chickpeas cook, prepare the pita dough. In a small bowl, combine warm water, yeast, and sugar. Let stand until frothy, about 5 minutes.
- In a large mixing bowl, whisk together flour and kosher salt. Make a well in the center and pour in the yeast mixture and melted clarified butter. Stir until a shaggy dough forms.
- Turn the dough onto a lightly floured surface and knead until smooth and elastic, about 10 minutes. Tip: The dough is ready when it springs back slowly after being poked.
- Place the dough in a lightly oiled bowl, cover with a damp towel, and let rise in a warm place until doubled in size, about 1 hour.
- Preheat the oven to 475°F with a baking stone or inverted baking sheet inside. Punch down the dough and divide into 8 equal pieces. Roll each piece into a ball, then flatten into a 6-inch circle.
- Bake the pitas on the preheated stone until puffed and lightly golden, about 3 minutes. Tip: For extra puff, spritz the oven with water before closing the door.
- Drain the cooked chickpeas, reserving 1/4 cup of the cooking liquid. In a food processor, combine chickpeas, tahini, olive oil, lemon juice, garlic, cumin, sea salt, and pepper. Process until smooth, adding reserved cooking liquid as needed to reach desired consistency.
- Serve the hummus drizzled with olive oil and sprinkled with additional cumin, alongside the warm pita bread. Oftentimes, the simplest dishes carry the most depth, their textures and flavors a testament to the beauty of basic ingredients transformed with care. The creamy hummus, with its nutty undertones, pairs exquisitely with the charred edges and soft interior of the pita, inviting you to tear, dip, and savor each bite.
Apple Slices with Almond Butter
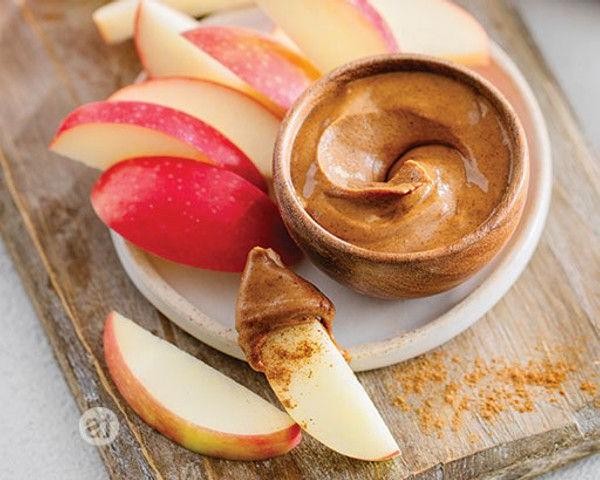
Venturing into the simplicity of nature’s sweetness, this dish combines the crisp freshness of apples with the rich, nutty depth of almond butter, creating a harmony of textures and flavors that soothe the soul.
Ingredients
- 2 medium organic apples, thinly sliced
- 1/4 cup smooth almond butter, preferably raw and unsalted
- 1 tbsp pure maple syrup
- 1/2 tsp ground cinnamon
- 1 tbsp crushed almonds, for garnish
Instructions
- Wash the apples under cold running water, then pat dry with a clean kitchen towel.
- Using a sharp knife, slice the apples into 1/4-inch thick pieces, removing the core and seeds.
- In a small bowl, gently warm the almond butter in the microwave for 15 seconds to make it more pliable.
- Drizzle the maple syrup over the almond butter and stir until fully incorporated.
- Arrange the apple slices on a serving plate in a single layer.
- Using a butter knife, spread a thin layer of the almond butter mixture onto each apple slice.
- Sprinkle the ground cinnamon evenly over the almond butter-covered apple slices.
- Garnish with crushed almonds for an added crunch and visual appeal.
Whispering of autumn’s embrace, these apple slices offer a crisp bite followed by the creamy richness of almond butter, with a hint of cinnamon warmth. Serve them as a light dessert or a midday snack, perhaps alongside a cup of herbal tea for a moment of quiet indulgence.
Microwave Popcorn with Nutritional Yeast

Mornings like this, when the world outside is just beginning to stir, call for something simple yet deeply satisfying. Microwave popcorn with nutritional yeast is that rare treat that feels both indulgent and wholesome, a snack that whispers of lazy afternoons and the joy of uncomplicated pleasures.
Ingredients
- 1/4 cup organic popcorn kernels
- 1 tablespoon clarified butter, melted
- 1 tablespoon nutritional yeast
- 1/4 teaspoon fine sea salt
Instructions
- Place the popcorn kernels in a large microwave-safe bowl. Cover the bowl with a microwave-safe plate to allow steam to escape while containing the popped kernels.
- Microwave on high for 2 to 3 minutes, or until the popping slows to about 2 seconds between pops. Listen carefully to avoid burning.
- Remove the bowl from the microwave carefully, as it will be hot. Tip: Let it sit for a minute to allow any unpopped kernels to settle at the bottom.
- Drizzle the melted clarified butter over the popcorn, using a spoon to toss gently and ensure even coating.
- Sprinkle the nutritional yeast and fine sea salt over the popcorn, tossing again to distribute the flavors evenly. Tip: For a more intense flavor, add the nutritional yeast in two batches, tossing between each addition.
- Serve immediately while warm. Tip: For an extra crunch, spread the popcorn on a baking sheet and place it under the broiler for 30 seconds, watching closely to prevent burning.
With its buttery richness and the umami depth of nutritional yeast, this popcorn offers a satisfying crunch that’s hard to resist. Try serving it in a large, shallow bowl for sharing, or pack it into individual paper cones for a playful twist on movie night.
Cucumber Sandwiches
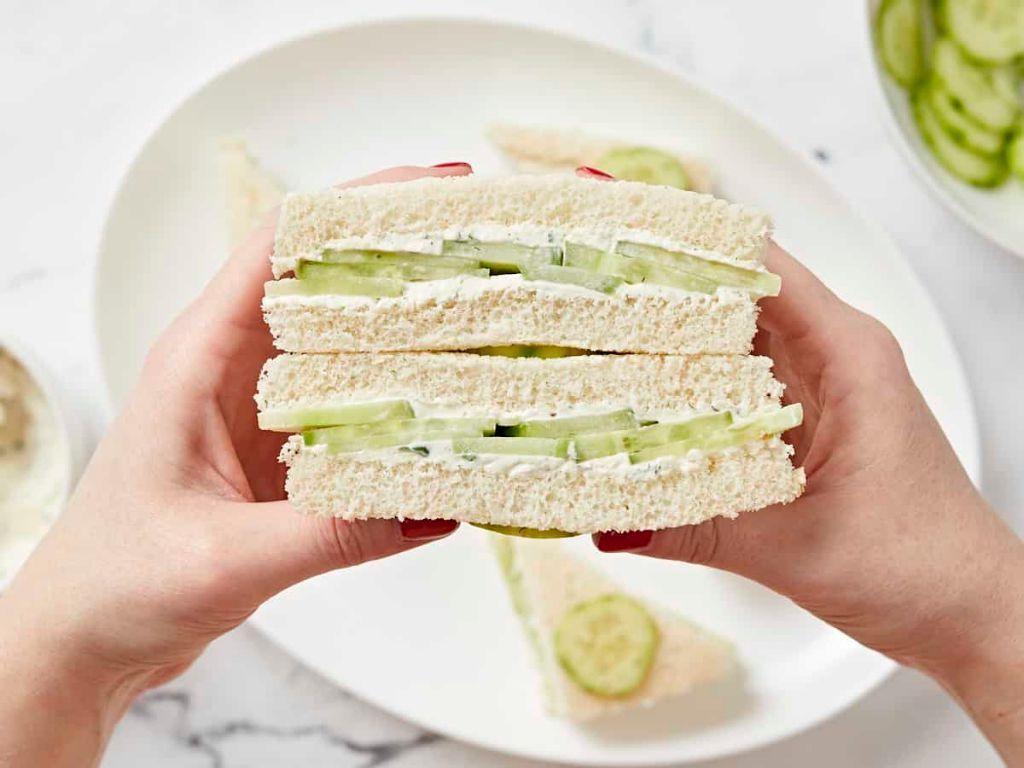
Beneath the quiet hum of the morning, there’s something profoundly comforting about the simplicity of cucumber sandwiches. They whisper of garden parties and lazy afternoons, a delicate balance of crisp freshness and soft, yielding bread.
Ingredients
- 8 slices of high-quality white bread, crusts removed
- 1 large English cucumber, thinly sliced to 1/8-inch thickness
- 1/2 cup unsalted butter, softened to room temperature
- 1/4 cup fresh dill, finely chopped
- 1 tablespoon lemon zest, finely grated
- 1/2 teaspoon sea salt
- 1/4 teaspoon freshly ground black pepper
Instructions
- Lay out the slices of bread on a clean, flat surface. Using a butter knife, evenly spread a thin layer of softened butter on one side of each slice.
- In a small bowl, combine the finely chopped dill, lemon zest, sea salt, and black pepper. Sprinkle this mixture evenly over the buttered sides of the bread.
- Arrange the cucumber slices in a single, slightly overlapping layer on half of the bread slices. The key is to cover the bread entirely without piling too high, ensuring each bite is balanced.
- Top the cucumber-covered slices with the remaining bread slices, buttered side down, pressing gently to adhere.
- Using a sharp knife, cut each sandwich diagonally into quarters, creating four small triangles from each sandwich. This not only makes for elegant presentation but also ensures easy, bite-sized portions.
- Serve immediately, or cover with a damp paper towel and refrigerate for up to an hour to allow the flavors to meld slightly. Avoid longer storage as the bread may become soggy.
Yielded by the gentle crunch of cucumber against the whisper-soft bread, these sandwiches are a study in contrasts. For a whimsical twist, serve them on a tiered stand alongside a pot of Earl Grey tea, the steam curling into the afternoon light.
Trail Mix with Nuts and Dried Fruit

Many evenings, I find myself craving something sweet yet wholesome, a snack that feels like a hug in a bowl. Trail mix with nuts and dried fruit is my go-to, a simple pleasure that balances crunch and chew with every bite.
Ingredients
- 1 cup raw almonds
- 1 cup raw walnuts
- 1/2 cup raw cashews
- 1/2 cup dried cranberries
- 1/2 cup dried apricots, finely chopped
- 1/4 cup pure maple syrup
- 1 tbsp clarified butter
- 1/2 tsp sea salt
- 1/2 tsp ground cinnamon
Instructions
- Preheat your oven to 300°F (150°C) and line a baking sheet with parchment paper.
- In a large mixing bowl, combine the almonds, walnuts, and cashews.
- Warm the clarified butter in a small saucepan over low heat until just melted, then stir in the maple syrup, sea salt, and ground cinnamon.
- Pour the maple syrup mixture over the nuts, tossing gently to ensure even coating.
- Spread the nuts in a single layer on the prepared baking sheet, ensuring they are not overlapping for even roasting.
- Bake for 20 minutes, stirring halfway through, until the nuts are golden and fragrant.
- Remove from the oven and let cool completely on the baking sheet, about 30 minutes.
- Once cooled, transfer the nuts to a large bowl and mix in the dried cranberries and chopped apricots.
Kindly note how the maple syrup caramelizes the nuts, offering a subtle sweetness that contrasts beautifully with the tartness of the dried fruit. Serve this trail mix in small mason jars for a portable snack, or sprinkle over yogurt for a delightful breakfast twist.
Deviled Eggs

There’s something quietly comforting about deviled eggs, a dish that carries the simplicity of ingredients transformed into something unexpectedly elegant. Today, let’s revisit this classic, allowing its creamy texture and tangy depth to remind us of gatherings both big and small.
Ingredients
- 6 pasture-raised eggs, large
- 1/4 cup mayonnaise, full-fat
- 1 tsp Dijon mustard
- 1/2 tsp white vinegar
- 1/8 tsp smoked paprika
- Salt, finely ground, to precise taste
- Fresh chives, finely minced, for garnish
Instructions
- Place the eggs in a single layer in a saucepan and cover with water by 1 inch. Bring to a rolling boil over high heat.
- Once boiling, cover the pan and remove from heat. Let stand for 12 minutes for perfectly set yolks.
- Transfer the eggs to an ice water bath for 15 minutes to stop the cooking process and ease peeling.
- Gently peel the eggs under cool running water, ensuring the whites remain intact for a smooth presentation.
- Slice each egg in half lengthwise with a sharp knife, wiping the blade clean between cuts for neat edges.
- Carefully remove the yolks and place them in a fine-mesh sieve over a bowl. Press through the sieve for a silky-smooth texture.
- To the sieved yolks, add mayonnaise, Dijon mustard, white vinegar, and a pinch of salt. Whisk until the mixture is homogenous and creamy.
- Spoon or pipe the yolk mixture back into the egg white halves, creating a slight mound for visual appeal.
- Lightly dust the filled eggs with smoked paprika and garnish with minced chives for a pop of color and flavor.
Light as air yet rich in flavor, these deviled eggs offer a delightful contrast between the creamy filling and the tender whites. Serve them on a slate board for a rustic touch, or alongside crisp greens for a refreshing bite.
Stuffed Dates with Goat Cheese

Often, the simplest ingredients come together to create something unexpectedly delightful. Today, let’s explore the harmony of sweet and savory with stuffed dates, a dish that whispers of comfort and elegance in every bite.
Ingredients
- 12 Medjool dates, pitted
- 4 oz goat cheese, at room temperature
- 1/4 cup walnuts, finely chopped
- 1 tbsp honey
- 1/2 tsp orange zest
- 1/8 tsp sea salt
- 1 tbsp extra virgin olive oil
Instructions
- Preheat your oven to 350°F (175°C) to toast the walnuts, enhancing their flavor.
- Spread the chopped walnuts on a baking sheet and toast in the preheated oven for 5-7 minutes, until fragrant and lightly golden. Tip: Stir halfway through to ensure even toasting.
- In a small bowl, combine the goat cheese, toasted walnuts, honey, orange zest, and sea salt. Mix until well incorporated. Tip: Letting the goat cheese soften at room temperature makes it easier to blend.
- Carefully make a lengthwise slit in each date, ensuring not to cut all the way through, to create a pocket for the filling.
- Using a small spoon or piping bag, fill each date with the goat cheese mixture, gently pressing the edges to close. Tip: A piping bag offers more precision and less mess.
- Drizzle the stuffed dates with extra virgin olive oil just before serving to add a glossy finish and a hint of richness.
Lusciously creamy with a crunch, these stuffed dates offer a play of textures that’s as pleasing as their flavor balance. Serve them on a wooden board for a rustic appeal or atop a bed of arugula for a refreshing contrast.
Mini Pizza Bagels

Lately, I’ve found myself craving the comforting embrace of something both nostalgic and effortlessly delightful, leading me to the humble yet irresistible mini pizza bagels. There’s something profoundly satisfying about their crispy edges and melty centers, a perfect canvas for endless creativity.
Ingredients
- 6 mini bagels, halved
- 1/2 cup marinara sauce, preferably San Marzano tomato-based
- 1 cup whole milk mozzarella, freshly grated
- 1/4 cup pepperoni slices, nitrate-free
- 1 tbsp extra virgin olive oil
- 1/2 tsp dried oregano
- 1/4 tsp crushed red pepper flakes
Instructions
- Preheat your oven to 375°F (190°C), ensuring the rack is positioned in the center for even cooking.
- Lightly brush each bagel half with extra virgin olive oil, focusing on the cut side to achieve a golden crust.
- Spread a generous teaspoon of marinara sauce over each oiled bagel half, leaving a small border to prevent excessive bubbling.
- Evenly distribute the freshly grated mozzarella over the sauce, allowing some to spill over the edges for crispy cheese bits.
- Artfully place pepperoni slices atop the cheese, folding some for texture and ensuring coverage.
- Sprinkle dried oregano and crushed red pepper flakes over the assembled bagels for a fragrant kick.
- Bake on a parchment-lined baking sheet for 12-15 minutes, or until the cheese is bubbly and the edges are crisp.
- Allow to cool for 2 minutes before serving, ensuring the cheese sets slightly for the perfect pull.
Fresh from the oven, these mini pizza bagels offer a delightful contrast of textures—crispy, chewy, and irresistibly cheesy. For an unexpected twist, drizzle with a touch of hot honey before serving, marrying sweetness with spice in every bite.
Conclusion
These 17 delicious, easy snack recipes are your ticket to quick, tasty treats any day of the week! Whether you’re craving something sweet, savory, or a bit of both, there’s something here for everyone. We’d love to hear which recipes become your favorites—drop us a comment below. And if you found this roundup helpful, don’t forget to share the love on Pinterest for fellow snack lovers to enjoy!