Ever find yourself staring into the fridge after a long day, wondering what to cook that’s quick, easy, and just for you? You’re not alone! We’ve rounded up 18 Quick Dinner Recipes for One that are as delicious as they are simple. From cozy comfort foods to light and fresh options, these meals are perfect for those nights when you want something satisfying without the fuss. Let’s dive in!
Garlic Butter Steak with Asparagus
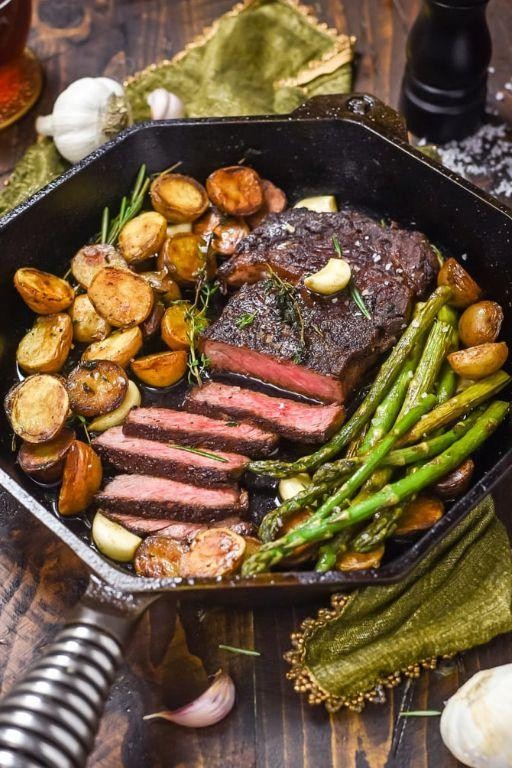
Delight in the harmonious blend of rich, buttery flavors and the crisp freshness of asparagus with this exquisite dish. Perfect for a sophisticated dinner, it promises to elevate your culinary experience with minimal effort.
Ingredients
- 1.5 lbs of ribeye steak, about 1.5 inches thick
- A couple of tablespoons of unsalted butter
- 3 garlic cloves, minced
- A splash of olive oil
- 1 bunch of asparagus, trimmed
- Salt and freshly ground black pepper, to season
Instructions
- Preheat your skillet over medium-high heat until it’s smoking hot, about 2 minutes.
- Season the steak generously with salt and pepper on both sides.
- Add a splash of olive oil to the skillet, then place the steak in the center. Sear for 3 minutes without moving it to get a perfect crust.
- Flip the steak, add the butter and minced garlic around it. Tilt the skillet slightly and spoon the melted butter over the steak for 2 minutes for extra flavor.
- Remove the steak from the skillet and let it rest on a plate. Tip: Covering it loosely with foil keeps it warm.
- In the same skillet, add the asparagus. Cook for 2-3 minutes, until bright green and slightly tender, tossing occasionally.
- Slice the steak against the grain and serve with the asparagus. Tip: Letting the steak rest before slicing ensures juicy results.
Unveil a dish where the steak’s succulence meets the asparagus’s crispness, creating a balance of textures and flavors. Consider serving it over a bed of creamy mashed potatoes for a decadent twist.
One-Pan Lemon Garlic Chicken and Rice
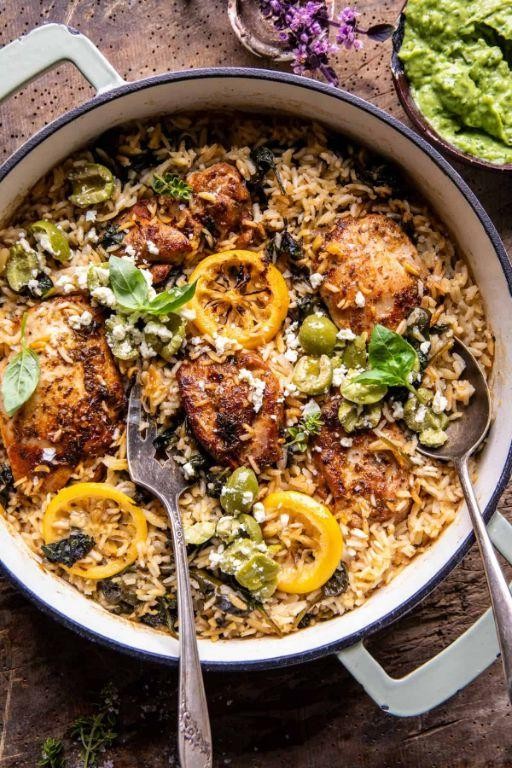
Nothing elevates a weeknight dinner quite like the bright, zesty flavors of lemon and garlic, perfectly paired with tender chicken and fluffy rice, all cooked to perfection in a single pan. This One-Pan Lemon Garlic Chicken and Rice is a testament to the beauty of simplicity, offering a dish that’s as effortless to make as it is delightful to savor.
Ingredients
- 4 boneless, skinless chicken thighs
- A couple of tablespoons of olive oil
- 3 cloves of garlic, minced
- The zest and juice of 1 large lemon
- A splash of chicken broth (about 1.5 cups)
- 1 cup of long-grain white rice
- A pinch of salt and freshly ground black pepper
- A handful of fresh parsley, chopped
Instructions
- Heat the olive oil in a large skillet over medium-high heat. Season the chicken thighs with salt and pepper, then sear them for about 4 minutes on each side, until golden brown. Remove and set aside.
- In the same skillet, add the minced garlic and lemon zest, sautéing for about 30 seconds until fragrant. Tip: Be careful not to burn the garlic to keep the flavor sweet and mellow.
- Pour in the chicken broth and lemon juice, scraping up any browned bits from the bottom of the pan for extra flavor.
- Stir in the rice, then nestle the chicken thighs back into the skillet. Bring to a simmer, then cover and reduce the heat to low. Cook for 20 minutes, or until the rice is tender and the chicken is cooked through. Tip: Resist the urge to peek under the lid to ensure the rice cooks evenly.
- Once done, let the dish rest off the heat for 5 minutes. This allows the rice to absorb any remaining liquid and the flavors to meld beautifully.
- Garnish with chopped parsley before serving. Tip: For an extra burst of freshness, add a few thin lemon slices on top.
Golden and aromatic, this dish boasts a harmonious blend of tangy lemon and savory garlic, with the rice absorbing all the delicious pan juices. Serve it straight from the skillet for a rustic presentation, or plate it up with a side of steamed greens for a complete meal.
Caprese Stuffed Chicken Breast
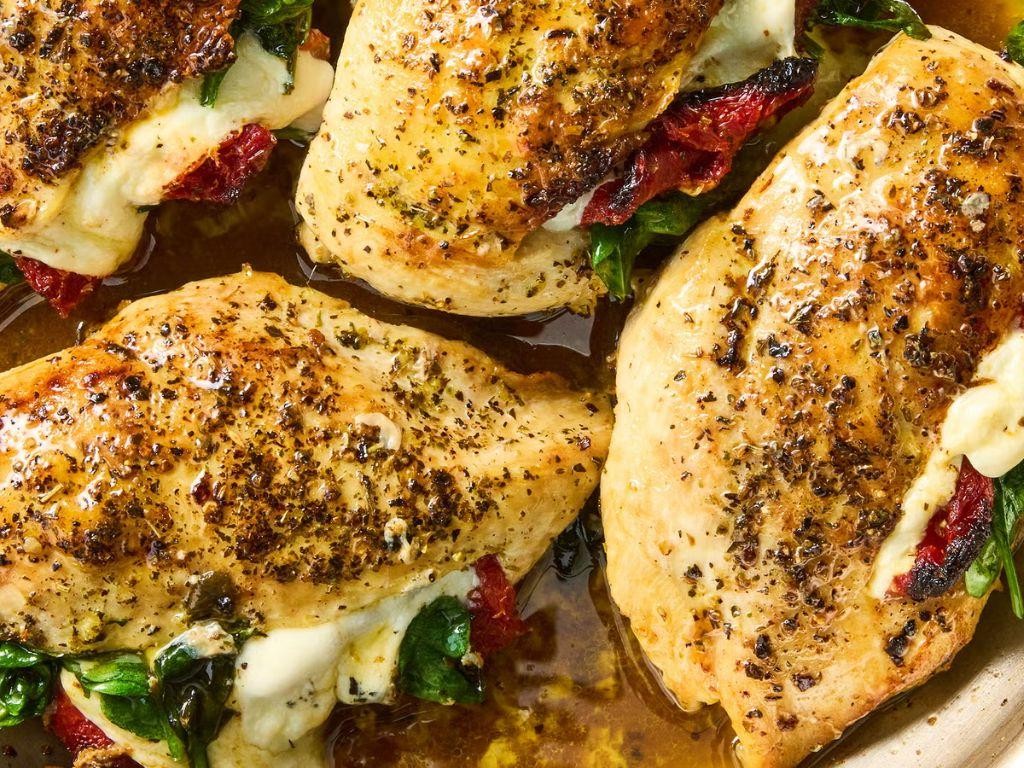
Amidst the bustling rhythm of everyday life, there’s something profoundly comforting about a dish that marries simplicity with elegance. Caprese Stuffed Chicken Breast does just that, blending the classic flavors of ripe tomatoes, fresh basil, and creamy mozzarella into a succulent chicken breast, creating a meal that’s as visually stunning as it is delicious.
Ingredients
- 2 boneless, skinless chicken breasts
- A couple of slices of fresh mozzarella
- A handful of fresh basil leaves
- 1 medium tomato, sliced
- A splash of balsamic glaze
- A drizzle of olive oil
- A pinch of salt and pepper
Instructions
- Preheat your oven to 375°F (190°C) to ensure it’s ready for baking.
- Carefully slice a pocket into each chicken breast, being mindful not to cut all the way through. Tip: A sharp knife makes this step easier and safer.
- Layer a slice of mozzarella, a couple of basil leaves, and a slice of tomato inside each pocket. Tip: Overstuffing can lead to leaks, so keep it balanced.
- Secure the openings with toothpicks to keep the filling inside during cooking.
- Drizzle the stuffed chicken breasts with olive oil and season with salt and pepper. Tip: For an extra flavor boost, rub the seasoning into the chicken.
- Bake in the preheated oven for 25-30 minutes, or until the chicken’s internal temperature reaches 165°F (74°C).
- Remove from the oven and let rest for 5 minutes before serving to allow the juices to redistribute.
- Finish with a splash of balsamic glaze over the top for a sweet and tangy contrast.
The chicken emerges juicy and tender, with the melted mozzarella and aromatic basil creating a harmonious blend. Serve it atop a bed of arugula for a refreshing contrast, or alongside roasted vegetables to round out the meal.
Easy Shrimp Scampi with Zucchini Noodles
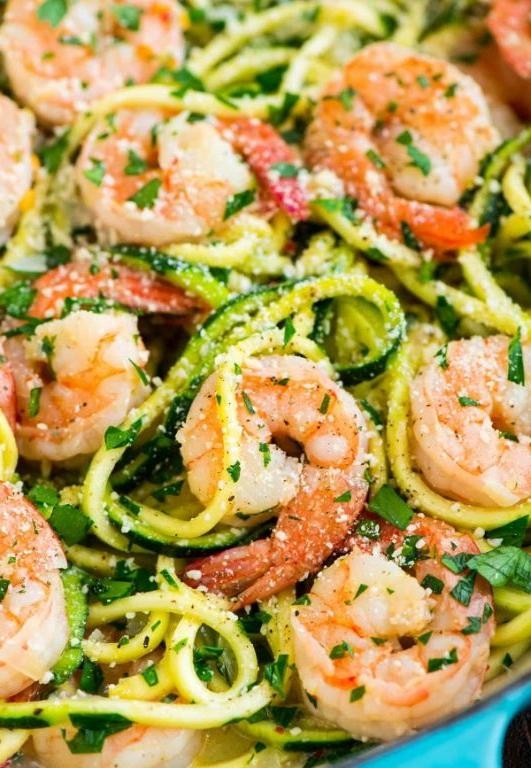
Vibrant and effortlessly sophisticated, this Easy Shrimp Scampi with Zucchini Noodles is a light yet indulgent dish that marries the succulence of shrimp with the fresh, crisp texture of zucchini noodles, all bathed in a garlicky, buttery sauce.
Ingredients
- 1 lb large shrimp, peeled and deveined
- 4 medium zucchinis, spiralized into noodles
- 3 tbsp unsalted butter
- 2 tbsp olive oil
- 4 cloves garlic, minced
- a splash of dry white wine
- the juice of 1 lemon
- a couple of tbsp chopped fresh parsley
- salt and freshly ground black pepper, to your liking
- a pinch of red pepper flakes (optional for a bit of heat)
Instructions
- In a large skillet, heat the olive oil and 1 tbsp of butter over medium heat until the butter is melted and bubbling.
- Add the shrimp to the skillet, seasoning with salt and pepper, and cook for about 2 minutes per side, until they’re just pink and opaque. Remove the shrimp from the skillet and set aside.
- In the same skillet, add the remaining butter and minced garlic, cooking for about 1 minute until fragrant but not browned. Tip: Keeping the heat medium prevents the garlic from burning.
- Pour in the white wine and lemon juice, letting the mixture simmer for 2 minutes to reduce slightly. This step concentrates the flavors beautifully.
- Add the zucchini noodles to the skillet, tossing them in the sauce for about 2 minutes until they’re just tender but still have a bit of crunch. Tip: Overcooking the zucchini noodles can make them soggy.
- Return the shrimp to the skillet, adding the chopped parsley and red pepper flakes if using, and toss everything together for another minute to warm through.
- Season with additional salt and pepper if needed, and serve immediately. Tip: For an extra touch of elegance, garnish with lemon wedges and a sprinkle of parsley.
Kaleidoscopic in flavor, this dish offers a delightful contrast between the tender shrimp and the al dente zucchini noodles, all enveloped in a rich, aromatic sauce. Serve it straight from the skillet for a rustic presentation or plate it over a bed of fresh greens for a lighter meal.
Beef and Broccoli Stir Fry
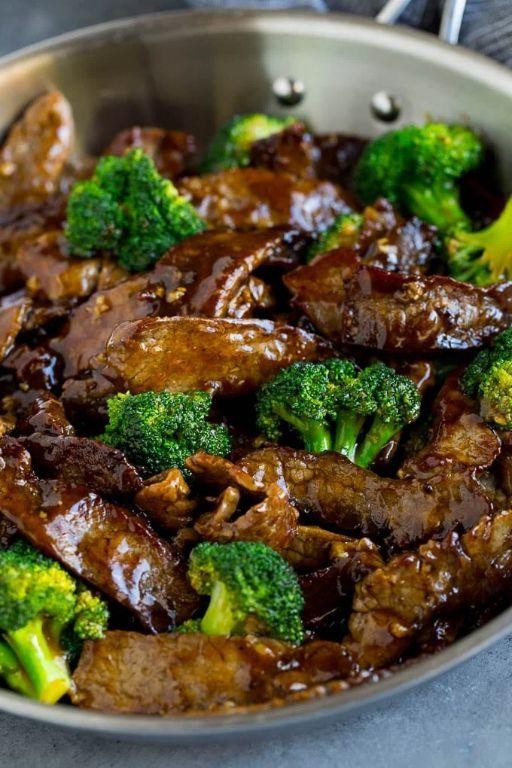
Nothing quite compares to the harmonious blend of tender beef and crisp broccoli in a stir fry, a dish that marries simplicity with sophistication. This Beef and Broccoli Stir Fry is a testament to the beauty of balancing textures and flavors, offering a quick yet utterly satisfying meal.
Ingredients
- 1 pound of flank steak, sliced thin against the grain
- 3 cups of broccoli florets
- 2 tablespoons of vegetable oil
- a splash of soy sauce
- a couple of garlic cloves, minced
- 1 teaspoon of ginger, grated
- a drizzle of sesame oil
- a pinch of red pepper flakes
- 1 tablespoon of cornstarch
- 1/2 cup of beef broth
Instructions
- In a small bowl, whisk together the soy sauce, beef broth, and cornstarch until smooth. Set aside.
- Heat 1 tablespoon of vegetable oil in a large skillet or wok over high heat until shimmering.
- Add the beef slices in a single layer, letting them sear undisturbed for about 2 minutes for a perfect crust. Flip and cook for another minute, then transfer to a plate.
- In the same skillet, add the remaining tablespoon of oil, then toss in the broccoli florets. Stir fry for about 3 minutes until bright green but still crisp.
- Push the broccoli to the side, add the minced garlic, grated ginger, and red pepper flakes to the center, and sauté for 30 seconds until fragrant.
- Return the beef to the skillet, pour the sauce over everything, and stir well to coat. Cook for another 2 minutes until the sauce thickens.
- Finish with a drizzle of sesame oil, give it one final stir, and remove from heat.
Delight in the contrast of the velvety beef against the crunchy broccoli, all enveloped in a glossy, savory sauce. Serve it over a bed of steamed rice or alongside a crisp Asian slaw for a meal that’s as visually appealing as it is delicious.
Pesto Pasta with Cherry Tomatoes and Mozzarella
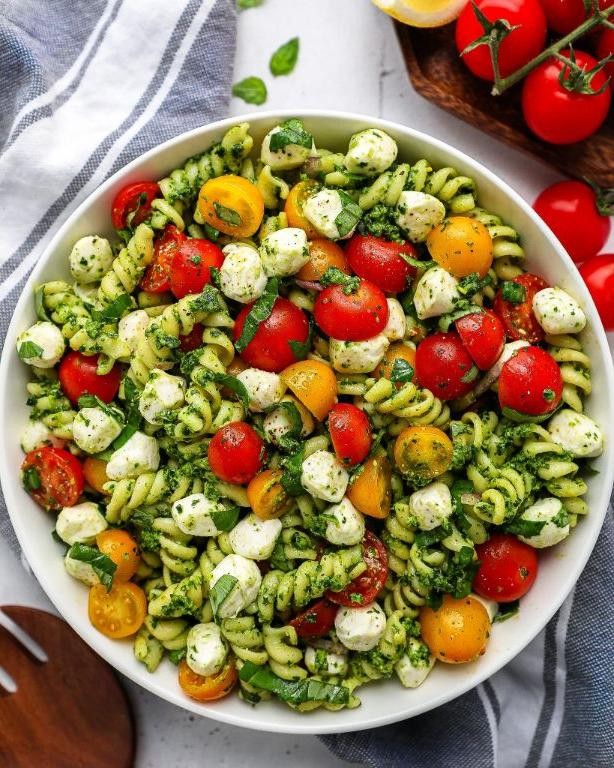
Bursting with the vibrant flavors of summer, this pesto pasta dish combines the freshness of cherry tomatoes and the creamy richness of mozzarella for a meal that’s as delightful to the palate as it is to the eye. Perfect for a quick weeknight dinner or a leisurely weekend lunch, it’s a testament to the beauty of simple ingredients coming together in harmony.
Ingredients
- 12 oz of your favorite pasta
- A couple of cups of fresh basil leaves
- A splash of extra virgin olive oil
- 1/4 cup of pine nuts
- A couple of cloves of garlic
- 1/2 cup of grated Parmesan cheese
- 1 cup of cherry tomatoes, halved
- 1 cup of fresh mozzarella balls, halved
- Salt and freshly ground black pepper, to your liking
Instructions
- Bring a large pot of salted water to a boil over high heat. Add the pasta and cook according to package instructions until al dente, about 8-10 minutes. Tip: Reserve a cup of pasta water before draining for adjusting the sauce consistency later.
- While the pasta cooks, make the pesto. In a food processor, combine the basil, olive oil, pine nuts, garlic, and Parmesan. Blend until smooth. Tip: For a brighter pesto, add a squeeze of lemon juice.
- Drain the pasta and return it to the pot. Toss with the pesto until evenly coated, adding a splash of reserved pasta water if needed to loosen the sauce.
- Gently fold in the cherry tomatoes and mozzarella. Season with salt and pepper to taste. Tip: Let the dish sit for a minute off the heat to allow the mozzarella to soften slightly.
Velvety pesto clings to each strand of pasta, punctuated by the juicy pop of cherry tomatoes and the soft, milky bites of mozzarella. Serve it with a crisp white wine and a sprinkle of extra Parmesan for an extra touch of indulgence.
Baked Salmon with Dill and Lemon
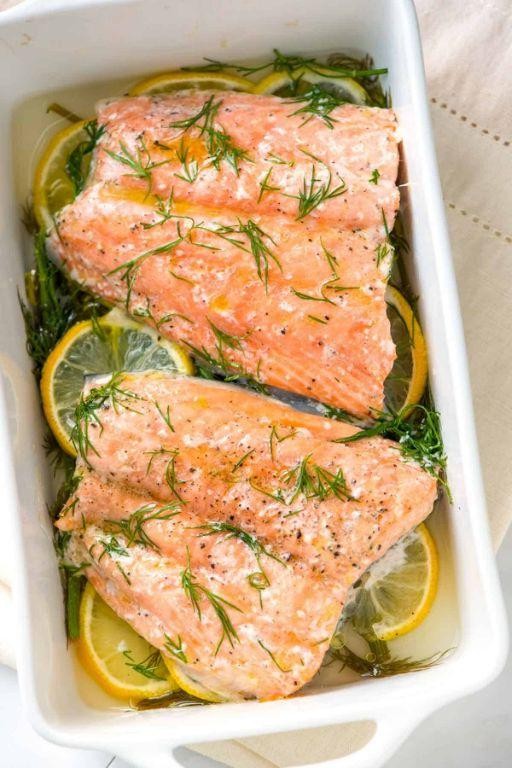
Perfectly poised between simplicity and sophistication, this Baked Salmon with Dill and Lemon is a testament to the beauty of minimalism in cooking. The dish marries the rich, buttery texture of salmon with the bright, aromatic flavors of fresh dill and zesty lemon, creating a harmonious balance that’s both refreshing and deeply satisfying.
Ingredients
- 1.5 lbs of fresh salmon fillet
- A couple of tablespoons of olive oil
- A handful of fresh dill, roughly chopped
- 1 lemon, thinly sliced
- A splash of white wine (optional)
- Salt and freshly ground black pepper, to season
Instructions
- Preheat your oven to 375°F (190°C) and lightly grease a baking dish with a bit of the olive oil.
- Place the salmon fillet in the prepared dish, skin-side down if it has skin. Drizzle the remaining olive oil over the top.
- Season the salmon generously with salt and pepper, then sprinkle the chopped dill over it, pressing lightly to adhere.
- Arrange the lemon slices on top of the salmon, overlapping slightly for full coverage.
- If using, pour a splash of white wine around the salmon in the dish to keep it moist during baking.
- Bake in the preheated oven for about 12-15 minutes, or until the salmon flakes easily with a fork but is still moist inside.
- Let the salmon rest for a couple of minutes before serving to allow the juices to redistribute.
Yielded from the oven, the salmon is succulent and flaky, with the dill and lemon infusing each bite with a burst of freshness. Serve it atop a bed of quinoa or alongside roasted vegetables for a meal that’s as nutritious as it is elegant.
Vegetable Stir Fry with Tofu
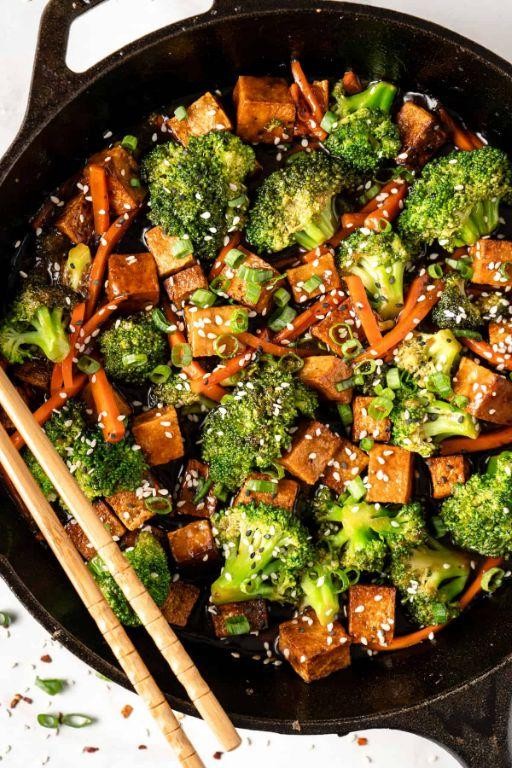
Whisking together the vibrant hues and crisp textures of fresh vegetables with the subtle, creamy richness of tofu, this stir-fry is a symphony of flavors that dances on the palate.
Ingredients
- 1 block of firm tofu, pressed and cubed
- 2 cups of broccoli florets
- 1 red bell pepper, sliced
- 1 carrot, julienned
- a couple of cloves of garlic, minced
- a splash of soy sauce
- 1 tbsp of sesame oil
- a pinch of red pepper flakes
- 1 tsp of grated ginger
- a handful of snap peas
- 2 tbsp of vegetable oil
Instructions
- Heat the vegetable oil in a large wok or skillet over medium-high heat until shimmering.
- Add the cubed tofu and cook until golden brown on all sides, about 5 minutes. Tip: Pressing the tofu beforehand removes excess water, ensuring a crispier texture.
- Remove the tofu from the wok and set aside.
- In the same wok, add a bit more oil if needed, then toss in the garlic and ginger, stirring for about 30 seconds until fragrant.
- Add the broccoli, bell pepper, carrot, and snap peas, stirring frequently for about 4 minutes until the vegetables are bright and slightly tender. Tip: Keeping the heat high ensures the veggies stay crisp.
- Return the tofu to the wok, drizzle with soy sauce and sesame oil, and sprinkle with red pepper flakes. Stir everything together for another 2 minutes. Tip: A splash of water can help deglaze the pan and mix the flavors.
- Serve immediately, garnished with sesame seeds if desired.
Not only does this dish boast a delightful crunch from the vegetables and a satisfying bite from the tofu, but its layers of flavor also make it a versatile centerpiece for any meal. Try serving it over a bed of jasmine rice or alongside a crisp, chilled glass of white wine for an elevated dining experience.
Cheesy Mushroom and Spinach Quesadilla

Perfectly balancing the earthy depth of mushrooms with the fresh vibrancy of spinach, this Cheesy Mushroom and Spinach Quesadilla is a testament to the beauty of simple ingredients coming together in harmony. Paired with the gooey richness of melted cheese, it’s a dish that promises comfort and sophistication in every bite.
Ingredients
- 2 large flour tortillas
- A couple of cups of sliced mushrooms
- A handful of fresh spinach leaves
- 1 cup of shredded Monterey Jack cheese
- A splash of olive oil
- A pinch of salt
- A dash of black pepper
Instructions
- Heat a splash of olive oil in a large skillet over medium heat until shimmering, about 2 minutes.
- Add the sliced mushrooms to the skillet, seasoning with a pinch of salt and a dash of black pepper. Cook, stirring occasionally, until the mushrooms are golden and have released their moisture, about 5 minutes.
- Toss in the fresh spinach leaves, stirring just until wilted, which should take about 1 minute. Remove the skillet from the heat.
- Lay one flour tortilla flat on a clean surface. Sprinkle half of the shredded Monterey Jack cheese evenly over the tortilla.
- Spread the mushroom and spinach mixture over the cheese, then top with the remaining cheese.
- Place the second tortilla on top, pressing down gently to adhere.
- Return the skillet to medium heat and carefully transfer the assembled quesadilla into it. Cook for about 3 minutes on each side, or until the tortilla is golden brown and the cheese is melted.
- Transfer the quesadilla to a cutting board, let it sit for a minute to set, then slice into wedges.
Every bite of this quesadilla offers a delightful contrast between the crispy exterior and the soft, cheesy interior, with the mushrooms and spinach adding layers of flavor. Serve it with a side of salsa or a dollop of sour cream for an extra touch of indulgence.
Spaghetti Aglio e Olio with Chili Flakes
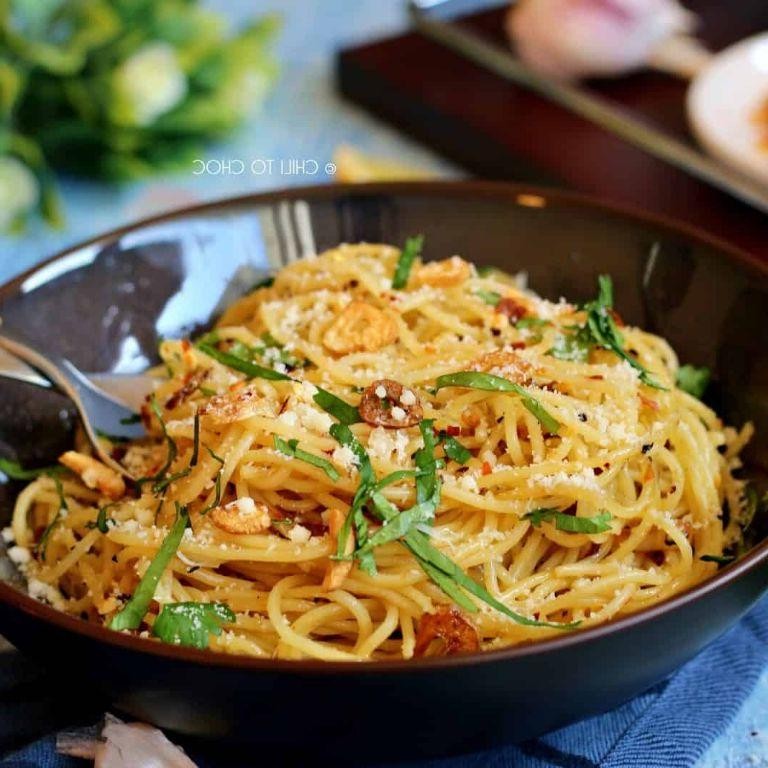
Perfectly simple yet undeniably flavorful, Spaghetti Aglio e Olio with Chili Flakes is a testament to the beauty of Italian cuisine, where a few quality ingredients come together to create something truly magical. This dish, with its golden garlic-infused oil and a gentle heat from chili flakes, is a quick yet sophisticated option for any night of the week.
Ingredients
- 8 oz of spaghetti
- 1/3 cup of extra virgin olive oil
- 4 cloves of garlic, thinly sliced
- 1/2 tsp of chili flakes (or more if you like it spicy)
- A couple of tablespoons of pasta water
- Salt, to season
- A handful of fresh parsley, chopped
Instructions
- Bring a large pot of salted water to a boil over high heat. Add the spaghetti and cook according to package instructions until al dente, about 8-10 minutes. Tip: Reserve a couple of tablespoons of pasta water before draining.
- While the pasta cooks, heat the olive oil in a large skillet over medium heat. Add the sliced garlic and chili flakes, cooking until the garlic is golden and fragrant, about 2 minutes. Tip: Keep an eye on the garlic to prevent it from burning.
- Drain the pasta and add it directly to the skillet with the garlic oil. Toss well to coat, adding a splash of the reserved pasta water to help the sauce cling to the spaghetti.
- Remove from heat and stir in the chopped parsley. Season with salt if needed. Tip: The pasta water adds saltiness, so taste before adding extra salt.
Unbelievably simple, this dish boasts a silky texture with a punch of heat from the chili flakes and a fresh finish from the parsley. Serve it with a sprinkle of Parmesan or alongside a crisp green salad for a complete meal.
Grilled Cheese with Tomato Soup
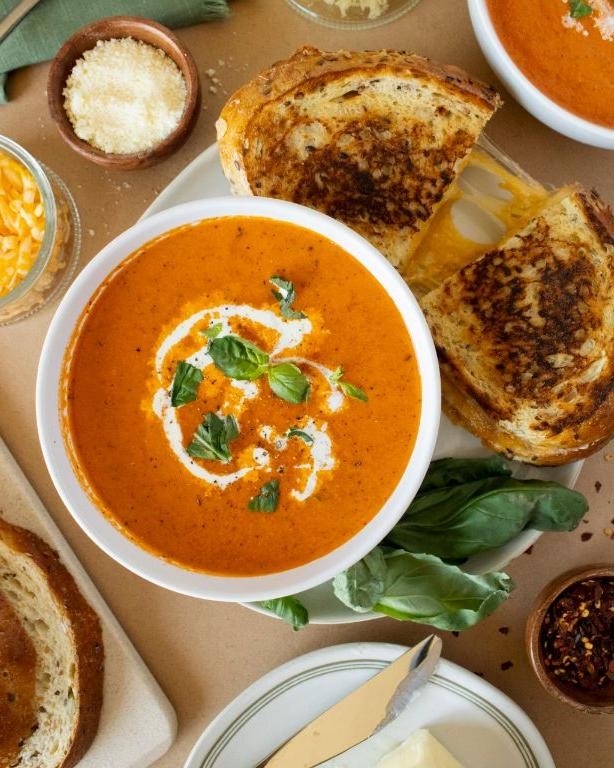
Venerated as the quintessential comfort food duo, grilled cheese paired with tomato soup offers a symphony of creamy, tangy, and crispy textures that delight the senses. This classic combination, with its golden, buttery bread and rich, velvety soup, is a testament to the beauty of simplicity in cooking.
Ingredients
- 4 slices of your favorite bread (sourdough works wonders here)
- 2 cups of shredded sharp cheddar cheese (because meltability matters)
- 2 tbsp of unsalted butter (for that golden crunch)
- 1 can (28 oz) of crushed tomatoes (the base of our soul-warming soup)
- 1 small onion, diced (for a hint of sweetness)
- 2 cloves of garlic, minced (because garlic makes everything better)
- 2 cups of chicken or vegetable broth (for depth of flavor)
- A splash of heavy cream (for that luxurious finish)
- A couple of fresh basil leaves, torn (for a fresh, herby pop)
- Salt and pepper (to season to perfection)
Instructions
- Heat a large pot over medium heat and sauté the diced onion until translucent, about 5 minutes. Tip: Stir occasionally to prevent burning.
- Add the minced garlic and cook for another minute until fragrant. This builds the flavor base of your soup.
- Pour in the crushed tomatoes and broth, then bring the mixture to a simmer. Let it cook for 15 minutes to meld the flavors together.
- While the soup simmers, butter one side of each bread slice. Tip: Softened butter spreads more evenly.
- Heat a skillet over medium-low heat. Place two slices of bread, buttered side down, in the skillet.
- Sprinkle a generous amount of shredded cheddar cheese on each slice, then top with the remaining bread slices, buttered side up.
- Cook the sandwiches for 3-4 minutes on each side, or until the bread is golden brown and the cheese is melted. Tip: Covering the skillet helps the cheese melt faster.
- Finish the soup by stirring in the heavy cream and torn basil leaves. Season with salt and pepper to taste.
Golden and crispy on the outside with a gooey, cheesy center, the grilled cheese is the perfect dunking companion for the smooth, tangy tomato soup. For an extra touch of elegance, serve the soup in warmed bowls with a drizzle of cream and a basil leaf on top.
Chicken Parmesan with a Side Salad
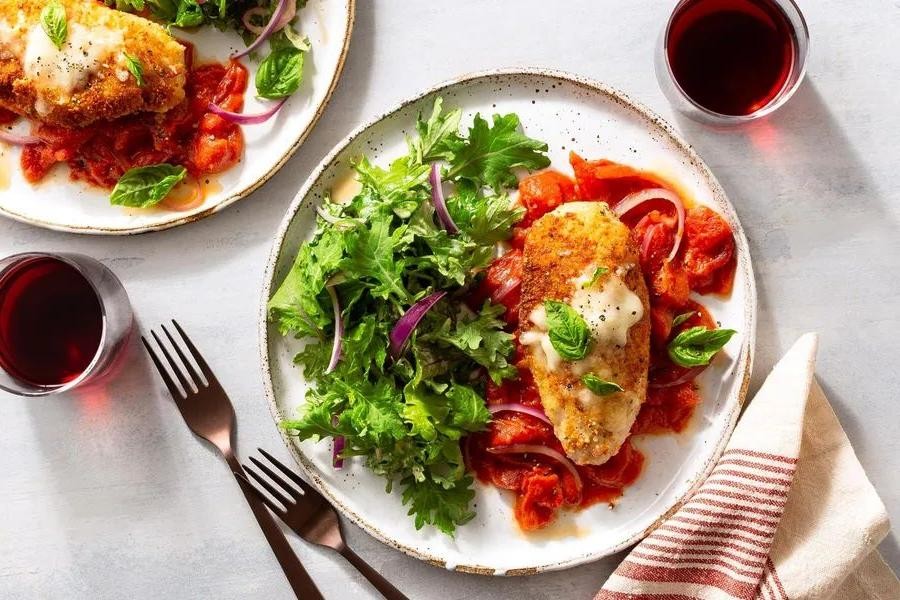
Venturing into the realm of classic Italian-American cuisine, this Chicken Parmesan paired with a crisp side salad offers a harmonious blend of crispy, cheesy, and fresh flavors that are sure to delight. Perfectly golden chicken cutlets, smothered in marinara and melted mozzarella, rest atop a bed of vibrant greens for a meal that’s as visually appealing as it is delicious.
Ingredients
- 2 boneless, skinless chicken breasts
- A cup of all-purpose flour
- A couple of eggs, beaten
- A cup of breadcrumbs
- A splash of olive oil
- A cup of marinara sauce
- A cup of shredded mozzarella cheese
- A handful of fresh basil leaves
- A couple of cups of mixed greens
- A drizzle of balsamic vinaigrette
Instructions
- Preheat your oven to 375°F and line a baking sheet with parchment paper.
- Pound the chicken breasts to an even thickness of about 1/2 inch for uniform cooking.
- Dredge each chicken breast in flour, shaking off the excess, then dip into the beaten eggs, and finally coat with breadcrumbs.
- Heat a splash of olive oil in a large skillet over medium heat and cook the chicken until golden brown, about 3-4 minutes per side.
- Transfer the chicken to the prepared baking sheet, spoon marinara sauce over each piece, and sprinkle with mozzarella cheese.
- Bake in the preheated oven for about 15 minutes, or until the cheese is bubbly and golden.
- While the chicken bakes, toss the mixed greens with a drizzle of balsamic vinaigrette in a large bowl.
- Garnish the baked chicken with fresh basil leaves before serving.
Succulent and crispy, the Chicken Parmesan offers a delightful contrast to the fresh, tangy side salad. Serve this dish with a slice of crusty bread to soak up any remaining marinara sauce for an extra touch of indulgence.
Avocado and Egg Toast
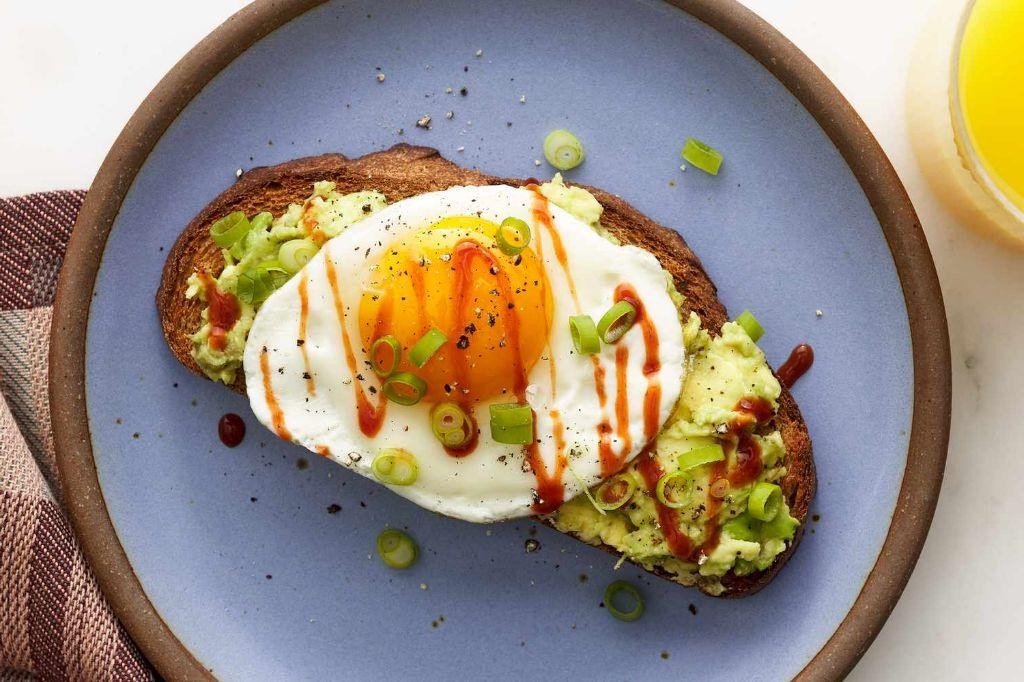
Yearning for a breakfast that marries simplicity with sophistication? Avocado and Egg Toast is your answer, blending creamy textures with the richness of perfectly cooked eggs atop a crisp slice of artisan bread.
Ingredients
- a couple of slices of your favorite artisan bread
- one ripe avocado
- a couple of eggs
- a splash of olive oil
- a pinch of salt and pepper
- a sprinkle of red pepper flakes (optional)
Instructions
- Heat a non-stick skillet over medium heat and add a splash of olive oil.
- Once the oil is warm, crack the eggs into the skillet, being careful not to break the yolks.
- Cook the eggs for about 3 minutes for runny yolks or until the whites are fully set, covering the skillet for the last minute to ensure even cooking.
- While the eggs cook, toast the bread slices until golden and crisp.
- Halve the avocado, remove the pit, and scoop the flesh into a bowl. Mash lightly with a fork, leaving some chunks for texture.
- Spread the mashed avocado evenly over the toasted bread slices.
- Season the avocado with a pinch of salt and pepper, and a sprinkle of red pepper flakes if you like a bit of heat.
- Once the eggs are done, gently place them on top of the avocado toast.
Outstanding in its simplicity, this dish offers a delightful contrast between the creamy avocado and the silky egg yolk, with the crunch of toast tying it all together. For an extra touch of elegance, garnish with microgreens or a drizzle of balsamic glaze.
Teriyaki Glazed Salmon with Steamed Vegetables
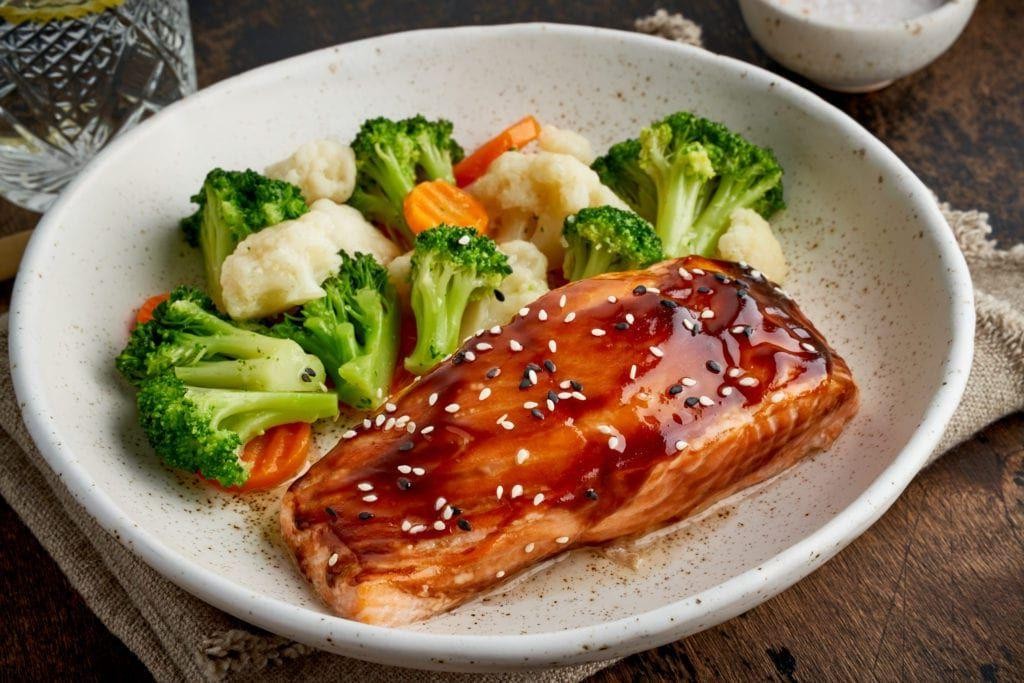
Lusciously glazed with a homemade teriyaki sauce, this salmon dish pairs perfectly with a medley of steamed vegetables for a meal that’s as nutritious as it is delicious. The harmony of sweet and savory flavors, combined with the tender texture of the fish, makes this recipe a standout for any occasion.
Ingredients
- 4 salmon fillets, about 6 oz each
- A splash of soy sauce
- A couple of tablespoons of honey
- A teaspoon of grated ginger
- A clove of garlic, minced
- A cup of broccoli florets
- A cup of carrot slices
- A tablespoon of sesame oil
- A sprinkle of sesame seeds
Instructions
- Preheat your oven to 375°F (190°C) to ensure it’s ready for baking the salmon.
- In a small bowl, whisk together the soy sauce, honey, ginger, and garlic to create the teriyaki glaze. Tip: For a smoother glaze, heat the mixture slightly to dissolve the honey completely.
- Place the salmon fillets on a baking sheet lined with parchment paper and brush them generously with the teriyaki glaze.
- Bake the salmon in the preheated oven for 12-15 minutes, or until the fish flakes easily with a fork. Tip: Avoid overcooking to keep the salmon moist and tender.
- While the salmon bakes, heat the sesame oil in a pan over medium heat and sauté the broccoli and carrot slices for 5-7 minutes until they’re just tender. Tip: Adding a splash of water can help steam the vegetables evenly.
- Once everything is cooked, plate the salmon alongside the steamed vegetables, drizzle with any remaining teriyaki glaze, and sprinkle with sesame seeds for a bit of crunch.
Juxtaposing the rich, umami-packed salmon with the crisp, fresh vegetables creates a delightful contrast in every bite. Serve this dish over a bed of fluffy jasmine rice or with a side of quinoa for an extra layer of texture and heartiness.
Beef Taco with All the Fixings

Hearty and bursting with flavor, this beef taco recipe is a celebration of textures and tastes, perfect for a lively dinner table. Each bite offers a harmonious blend of savory, spicy, and fresh, encased in a crisp shell for that satisfying crunch.
Ingredients
- 1 lb ground beef
- A couple of cloves of garlic, minced
- A splash of olive oil
- 1 packet of taco seasoning
- 1/2 cup of water
- 8 taco shells
- A handful of shredded lettuce
- A couple of diced tomatoes
- A dollop of sour cream
- A sprinkle of shredded cheddar cheese
- A few slices of avocado
- A squeeze of lime juice
Instructions
- Heat a splash of olive oil in a large skillet over medium heat until shimmering.
- Add the minced garlic and sauté for about 30 seconds, just until fragrant, to unlock its flavor.
- Introduce the ground beef to the skillet, breaking it apart with a spoon, and cook until no pink remains, about 5-7 minutes.
- Sprinkle the taco seasoning over the beef, followed by 1/2 cup of water, stirring well to combine. Simmer for 5 minutes until the mixture thickens slightly.
- While the beef simmers, warm the taco shells according to package instructions, usually about 5 minutes in a 350°F oven, for that perfect crispness.
- Assemble the tacos by spooning the beef mixture into each shell, then layering with shredded lettuce, diced tomatoes, a dollop of sour cream, a sprinkle of cheddar cheese, and a few slices of avocado.
- Finish each taco with a squeeze of lime juice for a bright, citrusy note that cuts through the richness.
Offering a delightful contrast between the crispy shell and the tender, flavorful beef, these tacos are a feast for the senses. Serve them with an extra lime wedge on the side for those who love an extra zing, or pair with a chilled beer to elevate the dining experience.
Margherita Pizza with a Crispy Crust

Venturing into the realm of classic Italian cuisine, this Margherita Pizza with a Crispy Crust is a testament to the beauty of simplicity. With its vibrant toppings and golden, crackling base, it’s a dish that sings with freshness and flavor.
Ingredients
- 2 cups of all-purpose flour, plus a little extra for dusting
- A pinch of salt
- A teaspoon of sugar
- A packet of active dry yeast
- A splash of warm water
- A couple of tablespoons of olive oil
- Half a cup of your favorite tomato sauce
- A handful of fresh basil leaves
- A ball of fresh mozzarella, sliced
Instructions
- In a large bowl, mix the flour, salt, and sugar. Sprinkle the yeast over a splash of warm water and let it sit for 5 minutes until frothy.
- Make a well in the center of the dry ingredients, pour in the yeast mixture and olive oil. Stir until a dough forms.
- Knead the dough on a floured surface for about 10 minutes until smooth and elastic. Tip: The dough should spring back when poked.
- Place the dough in a greased bowl, cover with a damp cloth, and let it rise in a warm spot for 1 hour or until doubled in size.
- Preheat your oven to 475°F with a pizza stone or baking sheet inside to get it piping hot.
- Roll out the dough on a floured surface to your desired thickness. For a crispier crust, roll it thinner.
- Spread the tomato sauce over the dough, leaving a small border for the crust. Arrange the mozzarella slices and basil leaves on top.
- Bake on the preheated stone or sheet for 10-12 minutes until the crust is golden and the cheese is bubbly. Tip: Rotate the pizza halfway through for even cooking.
- Let the pizza cool for a couple of minutes before slicing. Tip: This helps the cheese set and makes slicing cleaner.
With its crispy crust giving way to a soft, chewy interior, this Margherita Pizza is a delightful contrast of textures. The fresh basil adds a peppery kick, making it perfect for a summer evening paired with a crisp white wine.
Lemon Butter Shrimp with Quinoa

Amidst the hustle of everyday life, there’s something undeniably comforting about a dish that marries simplicity with sophistication. Lemon Butter Shrimp with Quinoa is just that—a vibrant, flavorful meal that’s as nourishing as it is delightful, perfect for those evenings when you crave something special without the fuss.
Ingredients
- 1 cup quinoa, rinsed
- 2 cups water
- A pinch of salt
- 1 lb large shrimp, peeled and deveined
- A couple of tablespoons olive oil
- 3 cloves garlic, minced
- A splash of white wine (about 1/4 cup)
- 4 tablespoons unsalted butter
- The zest and juice of 1 lemon
- A handful of fresh parsley, chopped
Instructions
- In a medium saucepan, combine the quinoa, water, and a pinch of salt. Bring to a boil over high heat, then reduce the heat to low, cover, and simmer for 15 minutes, or until the water is absorbed and the quinoa is fluffy. Tip: Let it sit covered for 5 minutes off the heat for the perfect texture.
- While the quinoa cooks, heat olive oil in a large skillet over medium-high heat. Add the shrimp in a single layer and cook for 2 minutes per side, until just pink. Remove and set aside.
- In the same skillet, add the garlic and sauté for about 30 seconds until fragrant. Pour in the white wine to deglaze the pan, scraping up any browned bits.
- Reduce the heat to medium and stir in the butter, lemon zest, and lemon juice until the butter is melted and the sauce is slightly thickened, about 2 minutes. Tip: The sauce should coat the back of a spoon.
- Return the shrimp to the skillet, tossing to coat in the sauce, and cook for another minute to heat through. Sprinkle with fresh parsley.
With its buttery, citrus-kissed shrimp atop fluffy quinoa, this dish offers a delightful contrast of textures and a bright, rich flavor profile. Consider serving it with a side of steamed asparagus or a crisp green salad for a complete, visually appealing meal.
Homemade Hamburger with Sweet Potato Fries

Just imagine the perfect bite: a juicy, flavorful homemade hamburger paired with crispy, golden sweet potato fries. This classic American duo gets a gourmet twist with simple, quality ingredients and a few chef-approved techniques.
Ingredients
- 1 lb ground beef (80/20 blend for the best flavor)
- a couple of hamburger buns, lightly toasted
- a splash of Worcestershire sauce
- a pinch of salt and freshly ground black pepper
- 2 large sweet potatoes, cut into fries
- a drizzle of olive oil
- a sprinkle of paprika
- a handful of your favorite burger toppings (lettuce, tomato, onion, pickles)
- a dollop of ketchup and mustard
Instructions
- Preheat your oven to 425°F and line a baking sheet with parchment paper for the fries.
- Toss the sweet potato fries with olive oil and paprika, then spread them out on the baking sheet. Bake for 25-30 minutes, flipping halfway, until crispy and golden.
- While the fries bake, mix the ground beef with Worcestershire sauce, salt, and pepper. Form into patties slightly larger than your buns (they’ll shrink as they cook).
- Heat a skillet or grill over medium-high heat. Cook the patties for about 4 minutes per side for medium-rare, or until your desired doneness.
- Toast the buns lightly in the skillet or on the grill for about 30 seconds per side, just until they’re golden and slightly crispy.
- Assemble your burgers with your favorite toppings and a dollop of ketchup and mustard.
- Serve the burgers hot with the sweet potato fries on the side.
With each bite, the burger’s juiciness contrasts beautifully with the fries’ crisp exterior and soft interior. For an extra touch, serve with a side of aioli or a cold craft beer to elevate this meal to restaurant-quality.
Conclusion
We hope these 18 quick dinner recipes for one bring both ease and deliciousness to your kitchen! Perfect for busy weeknights or when you’re simply craving something tasty, there’s a dish here for every palate. Don’t forget to share your favorites in the comments and pin the recipes you love to your Pinterest boards. Happy cooking!