Ready to transform your Dash waffle maker into the star of your kitchen? Whether you’re craving quick weeknight dinners, dreaming of seasonal delights, or in need of some serious comfort food, we’ve got you covered. Dive into our roundup of 20 Delicious Dash Waffle Maker Recipes that promise to surprise, delight, and inspire your next meal. Let’s get cooking—your waffle maker is waiting!
Classic Belgian Waffles
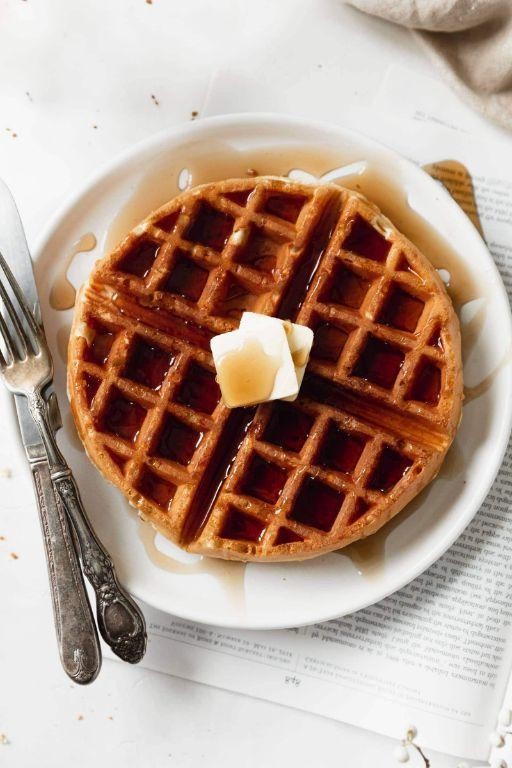
Unbelievably, the first time I tried making Classic Belgian Waffles, I was convinced I needed a fancy waffle iron from Belgium itself. Turns out, my trusty old waffle maker did the trick just fine, and now these golden, crispy-on-the-outside, fluffy-on-the-inside waffles are a weekend staple in my house.
Ingredients
- 2 cups all-purpose flour (for a lighter texture, you can substitute half with cake flour)
- 1/4 cup granulated sugar (adjust to taste)
- 1 tbsp baking powder (ensure it’s fresh for maximum rise)
- 1/2 tsp salt
- 2 large eggs, separated (room temperature eggs whip better)
- 1/2 cup unsalted butter, melted (or any neutral oil)
- 2 cups whole milk (for richer waffles, substitute with buttermilk)
- 1 tsp vanilla extract (pure extract for the best flavor)
Instructions
- Preheat your waffle iron to 375°F; a properly heated iron ensures a crispy exterior.
- In a large bowl, whisk together the flour, sugar, baking powder, and salt until well combined.
- In another bowl, beat the egg yolks, melted butter, milk, and vanilla extract until smooth.
- Gradually add the wet ingredients to the dry ingredients, stirring until just combined; overmixing leads to tough waffles.
- In a clean bowl, beat the egg whites until stiff peaks form; gently fold into the batter to keep the waffles light.
- Lightly grease the waffle iron with butter or oil, then pour 1/2 cup of batter onto the center of the iron.
- Close the lid and cook for about 4-5 minutes, or until the waffles are golden brown and crisp.
- Serve immediately with your favorite toppings, or keep warm in a 200°F oven if making a batch.
Classic Belgian Waffles are all about that perfect contrast between a crispy exterior and a soft, airy interior. Drizzle them with maple syrup and a dollop of whipped cream, or get creative with fresh berries and a dusting of powdered sugar for a breakfast that feels like a celebration.
Chocolate Chip Waffles
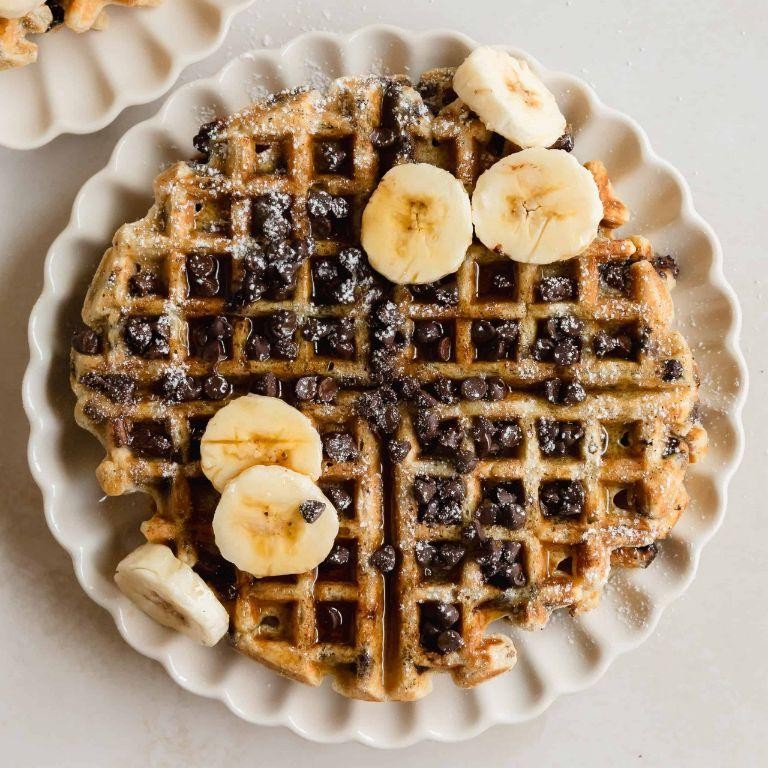
How many times have I found myself standing in the kitchen at odd hours, craving something sweet yet comforting? Too many to count, and that’s exactly how these Chocolate Chip Waffles came to be—a midnight experiment turned family favorite.
Ingredients
- 2 cups all-purpose flour (for a lighter texture, you can substitute half with cake flour)
- 1/4 cup granulated sugar (adjust to taste if you prefer less sweet)
- 1 tbsp baking powder (ensure it’s fresh for the best rise)
- 1/2 tsp salt (I like using sea salt for a slight crunch)
- 1 3/4 cups milk (whole milk gives richness, but any milk works)
- 1/3 cup vegetable oil (or any neutral oil like canola)
- 2 large eggs (room temperature blends better)
- 1 tsp vanilla extract (pure extract makes a difference)
- 1/2 cup chocolate chips (mini chips distribute more evenly)
Instructions
- Preheat your waffle iron to 375°F; a properly heated iron ensures crispy edges.
- In a large bowl, whisk together the flour, sugar, baking powder, and salt to avoid lumps.
- In another bowl, beat the milk, oil, eggs, and vanilla until fully combined.
- Pour the wet ingredients into the dry ingredients and stir until just combined; overmixing leads to tough waffles.
- Gently fold in the chocolate chips, saving a few to sprinkle on top before closing the iron.
- Lightly grease the waffle iron with oil or non-stick spray, even if it’s non-stick, for extra assurance.
- Pour 1/2 cup of batter onto the center of the iron, close, and cook for about 5 minutes or until golden and crisp.
- Repeat with remaining batter, keeping finished waffles warm in a 200°F oven if not serving immediately.
Ready to dive in? These waffles strike the perfect balance between fluffy and crisp, with melty chocolate in every bite. Try stacking them high with a dollop of whipped cream and a drizzle of caramel for an over-the-top breakfast treat.
Blueberry Waffles
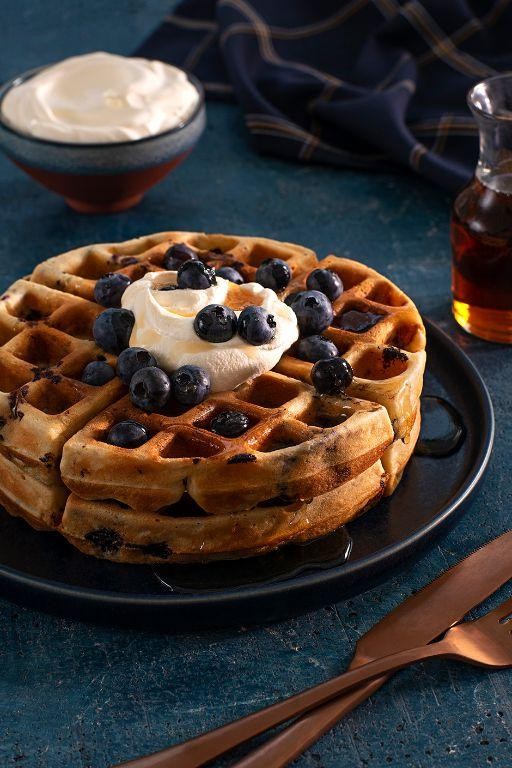
Remember those lazy Sunday mornings when the smell of something sweet wafting from the kitchen was enough to get you out of bed? That’s exactly what these blueberry waffles bring to mind for me. I love making them not just for their burst of fruity flavor but also because they’re a fantastic way to use up any blueberries that are about to turn.
Ingredients
- 2 cups all-purpose flour (for a lighter texture, you can substitute half with cake flour)
- 1 tbsp baking powder (make sure it’s fresh for the best rise)
- 1/2 tsp salt
- 2 tbsp sugar (adjust to taste, especially if your blueberries are very sweet)
- 2 large eggs (room temperature eggs mix more evenly)
- 1 3/4 cups milk (whole milk gives the richest flavor, but any will do)
- 1/2 cup vegetable oil (or any neutral oil)
- 1 tsp vanilla extract
- 1 cup fresh blueberries (frozen can be used, but don’t thaw them first to prevent color bleed)
Instructions
- Preheat your waffle iron according to the manufacturer’s instructions, usually to medium-high heat (about 375°F).
- In a large bowl, whisk together the flour, baking powder, salt, and sugar until well combined.
- In another bowl, beat the eggs lightly, then add the milk, oil, and vanilla extract, whisking until smooth.
- Pour the wet ingredients into the dry ingredients and stir until just combined. A few lumps are okay; overmixing leads to tough waffles.
- Gently fold in the blueberries to distribute them evenly throughout the batter.
- Lightly grease the waffle iron with oil or non-stick spray, even if it’s non-stick, to ensure easy removal.
- Pour enough batter onto the iron to cover the grid, close the lid, and cook until the waffle is golden brown and crisp, about 4-5 minutes, depending on your iron.
- Serve immediately with your favorite toppings, or keep warm in a 200°F oven if making a batch.
Delightfully crisp on the outside and tender within, these waffles are a perfect canvas for maple syrup, a dollop of whipped cream, or even a scoop of vanilla ice cream for an indulgent breakfast-for-dessert twist.
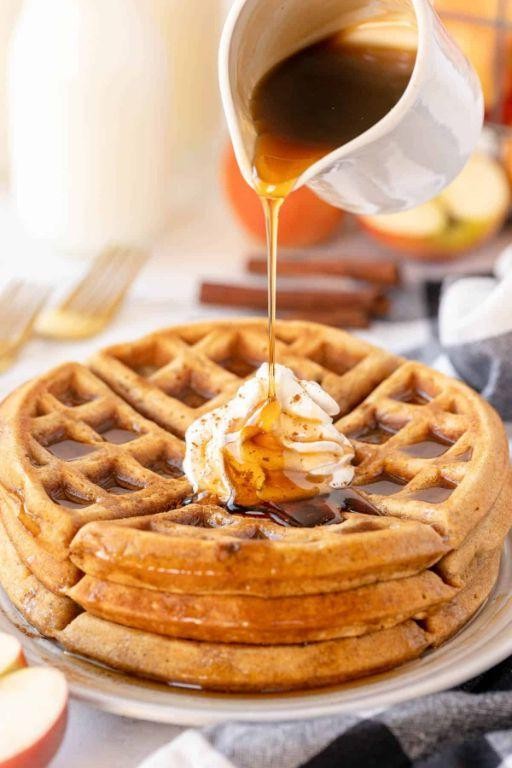
Pumpkin Spice Waffles
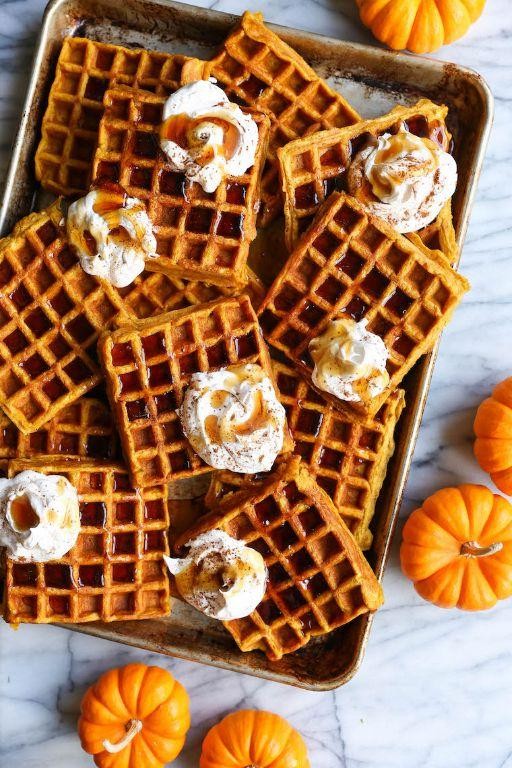
Perfect for those crisp fall mornings or whenever you’re craving a cozy breakfast, these Pumpkin Spice Waffles have become a staple in my kitchen. I remember the first time I whipped them up, the aroma of pumpkin and spices filling the air, and knew they were something special.
Ingredients
- 1 1/2 cups all-purpose flour (for a lighter texture, you can substitute half with whole wheat flour)
- 2 tsp baking powder
- 1/2 tsp salt
- 1 tsp ground cinnamon
- 1/2 tsp ground ginger
- 1/4 tsp ground nutmeg
- 1/4 tsp ground cloves
- 1 cup pumpkin puree (not pumpkin pie filling)
- 2 large eggs
- 1/4 cup packed brown sugar (adjust to taste)
- 1 cup milk (any kind will work)
- 4 tbsp unsalted butter, melted (or any neutral oil)
- 1 tsp vanilla extract
Instructions
- Preheat your waffle iron to medium-high heat (about 375°F) to ensure it’s ready when your batter is.
- In a large bowl, whisk together the flour, baking powder, salt, cinnamon, ginger, nutmeg, and cloves until well combined.
- In another bowl, mix the pumpkin puree, eggs, brown sugar, milk, melted butter, and vanilla extract until smooth.
- Gently fold the wet ingredients into the dry ingredients until just combined; avoid overmixing to keep the waffles light and fluffy.
- Lightly grease the waffle iron with butter or oil, then pour about 1/2 cup of batter onto the center of the iron, spreading it slightly.
- Close the lid and cook for about 5 minutes, or until the waffles are golden brown and crisp.
- Serve immediately with your favorite toppings, like maple syrup, whipped cream, or a sprinkle of extra cinnamon.
So there you have it—waffles that are wonderfully spiced, with a tender interior and a crispy exterior. They’re fantastic with a dollop of whipped cream and a drizzle of maple syrup, but honestly, they’re just as good straight off the iron.
Banana Bread Waffles
There’s something about the smell of banana bread wafting through the house that feels like a warm hug, and turning that comfort into waffles? Pure genius. I stumbled upon this idea one lazy Sunday when my bananas were too ripe for my usual loaf but just perfect for something a little more exciting.
Ingredients
- 1 1/2 cups all-purpose flour (for a lighter texture, you can substitute half with whole wheat flour)
- 2 tsp baking powder (ensure it’s fresh for the best rise)
- 1/2 tsp salt
- 1/2 tsp ground cinnamon (add a pinch more if you love cinnamon)
- 2 large eggs, at room temperature
- 1/4 cup granulated sugar (adjust based on the sweetness of your bananas)
- 1/4 cup packed light brown sugar
- 1/3 cup vegetable oil (or any neutral oil like canola)
- 3 very ripe bananas, mashed (about 1 1/2 cups)
- 1/2 cup whole milk (any milk works, but whole gives richness)
- 1 tsp pure vanilla extract
Instructions
- Preheat your waffle iron to medium-high heat (about 375°F) to ensure it’s ready when your batter is.
- In a large bowl, whisk together the flour, baking powder, salt, and cinnamon until well combined.
- In another bowl, beat the eggs, then mix in the granulated sugar, brown sugar, and oil until smooth.
- Add the mashed bananas, milk, and vanilla to the wet ingredients, stirring until fully incorporated.
- Gently fold the wet ingredients into the dry ingredients until just combined; a few lumps are okay to avoid overmixing.
- Lightly grease the waffle iron with oil or non-stick spray, then pour about 1/2 cup of batter onto the center of the iron.
- Close the lid and cook until the waffles are golden brown and crisp, about 4-5 minutes, depending on your waffle iron.
- Repeat with the remaining batter, keeping finished waffles warm in a 200°F oven if necessary.
Kind of magical how these waffles capture all the cozy flavors of banana bread but with a delightful crispness that’s irresistible. Serve them with a dollop of whipped cream and a drizzle of caramel for a decadent twist, or keep it simple with a pat of butter and a sprinkle of cinnamon sugar.
Cinnamon Roll Waffles
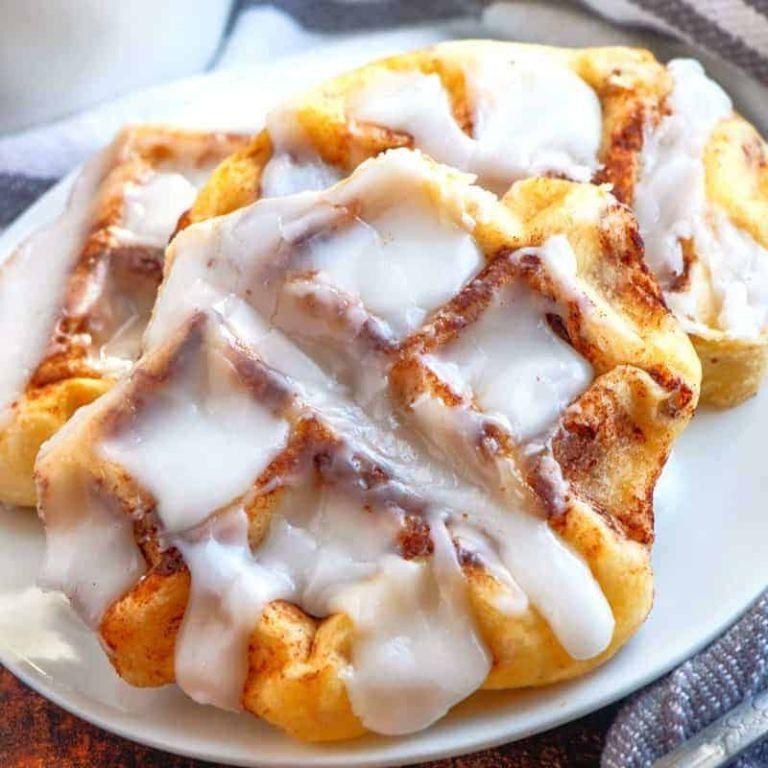
Nothing says weekend brunch like the sweet, comforting aroma of cinnamon wafting through the kitchen. I stumbled upon this Cinnamon Roll Waffles recipe during a lazy Sunday morning experiment, and it’s been a game-changer for my brunch spreads ever since. The best part? It combines the ease of waffle-making with the irresistible flavor of cinnamon rolls.
Ingredients
- 1 cup all-purpose flour (for a lighter texture, you can use pastry flour)
- 2 tbsp granulated sugar (adjust to taste)
- 1 tsp baking powder (ensure it’s fresh for maximum rise)
- 1/2 tsp salt (I prefer sea salt for its subtle flavor)
- 1 cup milk (any kind works, but whole milk gives a richer taste)
- 1 large egg (room temperature blends better)
- 2 tbsp unsalted butter, melted (or any neutral oil)
- 1 tsp vanilla extract (pure extract makes a difference)
- 2 tbsp cinnamon (for that signature spice kick)
- 1/4 cup brown sugar (packed for that gooey texture)
Instructions
- Preheat your waffle iron to 375°F. This ensures a crispy exterior.
- In a large bowl, whisk together the flour, granulated sugar, baking powder, and salt. Tip: Sifting the flour can prevent lumps.
- In another bowl, mix the milk, egg, melted butter, and vanilla extract until well combined.
- Pour the wet ingredients into the dry ingredients and stir until just combined. Tip: Overmixing can lead to tough waffles.
- In a small bowl, mix the cinnamon and brown sugar for the filling.
- Pour half of the batter onto the preheated waffle iron, sprinkle half of the cinnamon-sugar mixture over the batter, then top with the remaining batter. Tip: Don’t overfill the waffle iron to avoid spills.
- Close the waffle iron and cook for about 4-5 minutes, or until the waffles are golden brown and crisp.
- Repeat with the remaining batter and cinnamon-sugar mixture.
These Cinnamon Roll Waffles come out with a perfect balance of crispy edges and soft, fluffy centers, packed with swirls of cinnamon sugar in every bite. Serve them warm with a drizzle of cream cheese glaze or a scoop of vanilla ice cream for an extra indulgent treat.
Red Velvet Waffles
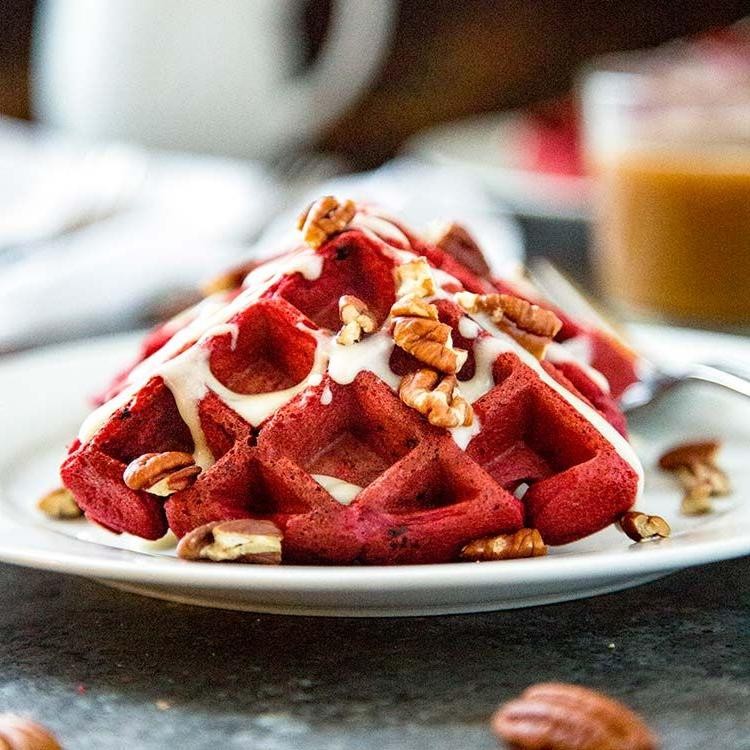
Remember those lazy Sunday mornings when you just want something special to kickstart your day? That’s exactly how I felt when I first whipped up these Red Velvet Waffles. They’re not just a treat for the eyes but a decadent start to any morning, combining the classic red velvet flavor with the crispy, fluffy texture we all love in a waffle.
Ingredients
- 1 1/2 cups all-purpose flour (for a lighter texture, you can substitute half with cake flour)
- 1/4 cup cocoa powder (use Dutch-processed for a richer color and flavor)
- 1 teaspoon baking powder (ensure it’s fresh for the best rise)
- 1/2 teaspoon baking soda
- 1/4 teaspoon salt
- 1/2 cup granulated sugar (adjust to taste if you prefer less sweetness)
- 2 large eggs (room temperature for better incorporation)
- 1 cup buttermilk (or make your own by adding 1 tbsp vinegar to 1 cup milk)
- 1/4 cup unsalted butter, melted (or any neutral oil)
- 1 tablespoon red food coloring (gel preferred for vibrant color)
- 1 teaspoon vanilla extract
Instructions
- Preheat your waffle iron to 375°F. This ensures a crispy exterior.
- In a large bowl, whisk together the flour, cocoa powder, baking powder, baking soda, salt, and sugar until well combined.
- In another bowl, beat the eggs lightly, then add the buttermilk, melted butter, red food coloring, and vanilla extract. Mix until smooth.
- Pour the wet ingredients into the dry ingredients. Stir until just combined; a few lumps are okay to avoid overmixing.
- Lightly grease the waffle iron with butter or oil spray. Pour about 1/2 cup of batter onto the center of the iron, close, and cook for about 3-4 minutes or until the waffle is crispy and easily releases from the iron.
- Repeat with the remaining batter, keeping cooked waffles warm in a 200°F oven if not serving immediately.
What makes these waffles stand out is their perfect balance between the slight tang from the buttermilk and the deep cocoa flavor, all wrapped up in that signature red velvet hue. Serve them stacked high with a dollop of cream cheese frosting and fresh berries for an extra special touch.
Apple Cinnamon Waffles
Very few things compare to the cozy aroma of apple cinnamon wafting through the kitchen on a lazy weekend morning. It’s a recipe that holds a special place in my heart, reminding me of autumn mornings at my grandma’s house, where the scent of cinnamon was as much a part of the decor as the vintage wallpaper.
Ingredients
- 2 cups all-purpose flour (for a lighter texture, you can substitute half with whole wheat flour)
- 2 tbsp granulated sugar (adjust to taste)
- 1 tbsp baking powder (ensure it’s fresh for the best rise)
- 1 tsp ground cinnamon (or more, for a stronger flavor)
- 1/2 tsp salt
- 2 large eggs (room temperature blends better)
- 1 3/4 cups milk (any kind works, but whole milk adds richness)
- 1/2 cup unsalted butter, melted (or any neutral oil)
- 1 tsp vanilla extract
- 1 cup finely chopped apples (peeled or unpeeled, your choice)
Instructions
- Preheat your waffle iron to medium-high heat (about 375°F) to ensure it’s ready when your batter is.
- In a large bowl, whisk together the flour, sugar, baking powder, cinnamon, and salt until well combined.
- In another bowl, beat the eggs lightly, then add the milk, melted butter, and vanilla extract, whisking until smooth.
- Pour the wet ingredients into the dry ingredients, stirring just until combined. Overmixing can lead to tough waffles.
- Gently fold in the chopped apples, distributing them evenly throughout the batter.
- Lightly grease the waffle iron with butter or oil, then pour the batter onto the iron, using about 1/2 cup for each waffle.
- Close the lid and cook until the waffles are golden brown and crisp, about 4-5 minutes, depending on your waffle iron.
Serve these waffles warm, with a drizzle of maple syrup and a sprinkle of cinnamon for an extra touch of sweetness. The texture is perfectly crisp on the outside, fluffy on the inside, with little bursts of apple in every bite. For a creative twist, top with a dollop of whipped cream and a handful of toasted walnuts for added crunch.
Peanut Butter Waffles
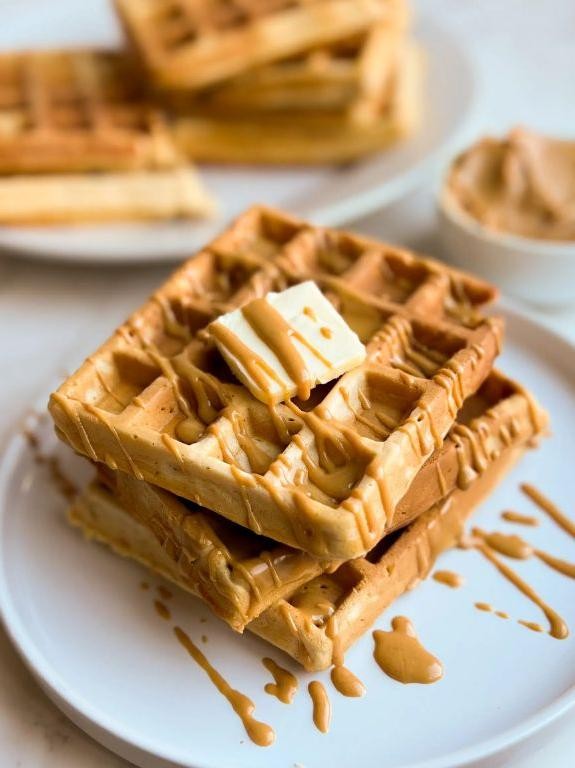
Nothing beats the smell of peanut butter waffles wafting through the kitchen on a lazy Sunday morning. I remember the first time I tried adding peanut butter to my waffle batter; it was a game-changer, turning the ordinary into something irresistibly nutty and rich. Now, it’s a staple in my weekend breakfast rotation, and I’m excited to share how you can make them too.
Ingredients
- 1 1/2 cups all-purpose flour (for a lighter texture, you can substitute half with whole wheat flour)
- 2 tbsp sugar (adjust to taste)
- 1 tbsp baking powder
- 1/2 tsp salt
- 1 1/4 cups milk (any kind works, but whole milk makes them extra rich)
- 1/2 cup creamy peanut butter (if using natural, stir well before measuring)
- 1 large egg
- 2 tbsp melted butter (or any neutral oil)
- 1 tsp vanilla extract
Instructions
- Preheat your waffle iron to medium-high heat (about 375°F) according to the manufacturer’s instructions.
- In a large bowl, whisk together the flour, sugar, baking powder, and salt until well combined.
- In another bowl, mix the milk, peanut butter, egg, melted butter, and vanilla extract until smooth. Tip: If the peanut butter is too thick, warm it slightly to make mixing easier.
- Pour the wet ingredients into the dry ingredients and stir until just combined. Don’t overmix; a few lumps are okay. Tip: Overmixing can make the waffles tough.
- Lightly grease the waffle iron with butter or oil spray. Pour the batter onto the hot iron, using about 1/2 cup for each waffle. Close the lid and cook until golden brown and crisp, about 3-4 minutes. Tip: Avoid opening the iron too soon to prevent the waffles from tearing.
- Serve immediately with your favorite toppings, like maple syrup, banana slices, or a dollop of extra peanut butter.
Out of the waffle iron, these peanut butter waffles come out perfectly crisp on the outside and fluffy on the inside, with a deep, nutty flavor that’s not too sweet. For an extra indulgent twist, try sandwiching a scoop of vanilla ice cream between two waffles for a decadent dessert.
Lemon Poppy Seed Waffles
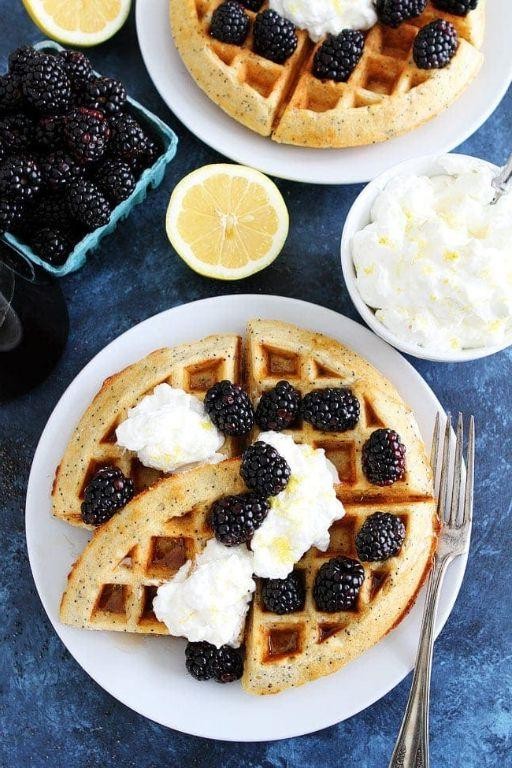
Kicking off the weekend with a batch of Lemon Poppy Seed Waffles is my idea of a perfect morning. There’s something about the zesty lemon and the subtle crunch of poppy seeds that makes these waffles irresistibly delicious. I remember the first time I made them; the aroma filled the kitchen, and my family knew breakfast was going to be special.
Ingredients
- 2 cups all-purpose flour (for a lighter texture, you can substitute half with cake flour)
- 1/4 cup granulated sugar (adjust to taste)
- 1 tbsp baking powder (ensure it’s fresh for the best rise)
- 1/2 tsp salt
- 2 large eggs (room temperature blends better)
- 1 3/4 cups milk (whole milk recommended for richness)
- 1/2 cup unsalted butter, melted (or any neutral oil)
- 2 tbsp lemon zest (from about 2 lemons)
- 2 tbsp fresh lemon juice
- 1 tbsp poppy seeds
- 1 tsp vanilla extract (pure for the best flavor)
Instructions
- Preheat your waffle iron to medium-high heat (about 375°F) to ensure a crispy exterior.
- In a large bowl, whisk together the flour, sugar, baking powder, and salt until well combined.
- In another bowl, beat the eggs lightly, then add the milk, melted butter, lemon zest, lemon juice, poppy seeds, and vanilla extract. Mix until just combined.
- Pour the wet ingredients into the dry ingredients and stir gently until the batter comes together. Tip: Overmixing can lead to tough waffles, so a few lumps are okay.
- Lightly grease the waffle iron with butter or oil spray, then pour the batter onto the iron, using about 1/2 cup for each waffle. Tip: The amount may vary depending on your waffle iron size, so adjust accordingly.
- Close the lid and cook until the waffles are golden brown and crisp, about 3-4 minutes. Tip: Avoid opening the iron too soon to prevent the waffles from tearing.
- Serve immediately with your favorite toppings, such as fresh berries, whipped cream, or a drizzle of maple syrup.
Golden and crisp on the outside with a tender, fluffy interior, these Lemon Poppy Seed Waffles are a delightful twist on the classic. The lemon adds a refreshing brightness, while the poppy seeds offer a slight nuttiness. For an extra special touch, try serving them with a dollop of lemon curd on top.
Strawberry Shortcake Waffles
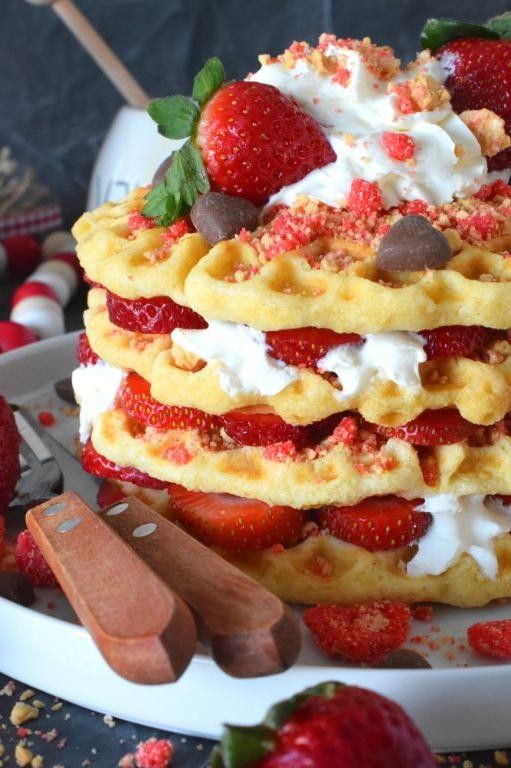
This morning, I found myself craving something sweet yet comforting, and that’s when the idea of Strawberry Shortcake Waffles popped into my head. There’s something magical about combining the fluffy texture of waffles with the fresh, juicy burst of strawberries and the creamy richness of whipped cream.
Ingredients
- 1 1/2 cups all-purpose flour (for a lighter texture, you can substitute half with cake flour)
- 2 tbsp granulated sugar (adjust to taste if you prefer sweeter waffles)
- 1 tbsp baking powder (ensure it’s fresh for maximum rise)
- 1/2 tsp salt
- 1 1/4 cups milk (whole milk recommended for richness, but any will do)
- 1/3 cup melted butter (cooled slightly, or any neutral oil)
- 1 large egg (room temperature blends more smoothly)
- 1 tsp vanilla extract (pure extract for the best flavor)
- 1 cup fresh strawberries, sliced (plus extra for garnish)
- 1/2 cup whipped cream (homemade or store-bought)
Instructions
- Preheat your waffle iron to 375°F (medium-high setting) to ensure it’s hot enough for a crispy exterior.
- In a large bowl, whisk together the flour, sugar, baking powder, and salt until well combined.
- In another bowl, mix the milk, melted butter, egg, and vanilla extract until smooth. Tip: Mixing wet ingredients separately prevents overworking the flour, leading to fluffier waffles.
- Pour the wet ingredients into the dry ingredients and stir until just combined. A few lumps are okay; overmixing makes waffles tough.
- Lightly grease the waffle iron with butter or oil spray, then pour 1/2 cup of batter onto the center. Close the lid and cook for about 4-5 minutes or until golden brown and crisp. Tip: Avoid opening the waffle iron too soon to prevent splitting.
- Repeat with the remaining batter, keeping finished waffles warm in a 200°F oven if necessary.
- Top each waffle with sliced strawberries and a dollop of whipped cream. For an extra touch, drizzle with strawberry syrup or sprinkle with powdered sugar.
Ready to dive in, these Strawberry Shortcake Waffles offer a delightful contrast between the crispy edges and soft, airy centers, with the strawberries adding a fresh, tangy balance to the sweetness. Serve them with a side of extra strawberries for dipping or a scoop of vanilla ice cream for an indulgent breakfast-for-dessert twist.
Carrot Cake Waffles
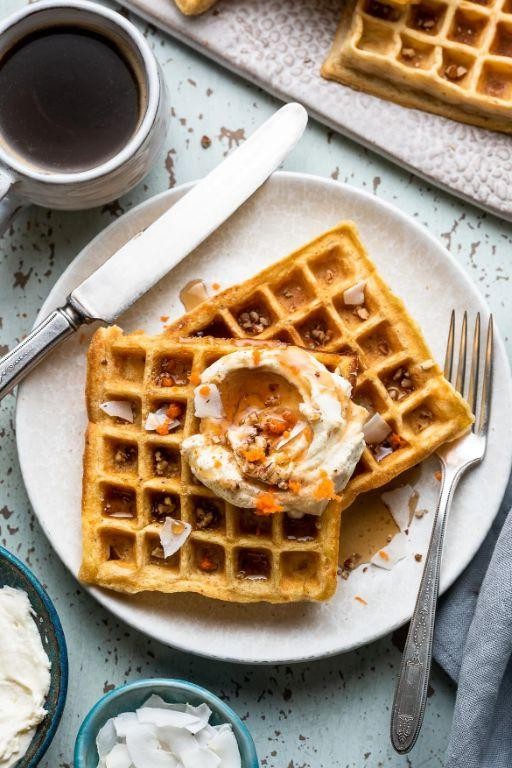
Every now and then, I stumble upon a recipe that feels like a hug in the form of food, and these Carrot Cake Waffles are just that. Inspired by my love for carrot cake and lazy weekend brunches, this recipe is a game-changer for anyone looking to spice up their breakfast routine.
Ingredients
- 1 1/2 cups all-purpose flour (for a lighter texture, you can substitute half with whole wheat flour)
- 2 tsp baking powder (ensure it’s fresh for the best rise)
- 1/2 tsp salt
- 1 tsp ground cinnamon (add a pinch more if you love cinnamon)
- 1/4 tsp ground nutmeg
- 1/4 cup granulated sugar (adjust to your sweetness preference)
- 1 large egg (room temperature blends better)
- 1 cup milk (any kind works, but whole milk makes it richer)
- 1/4 cup melted butter (or any neutral oil)
- 1 tsp vanilla extract
- 1 cup finely grated carrots (packed tightly for more carrot flavor)
- 1/4 cup chopped walnuts (optional, for crunch)
Instructions
- Preheat your waffle iron to medium-high heat (about 375°F) to ensure a crispy exterior.
- In a large bowl, whisk together the flour, baking powder, salt, cinnamon, and nutmeg until well combined.
- In another bowl, beat the egg, then mix in the sugar, milk, melted butter, and vanilla extract until smooth.
- Pour the wet ingredients into the dry ingredients and stir until just combined. Overmixing can lead to tough waffles.
- Fold in the grated carrots and walnuts (if using) gently into the batter.
- Lightly grease the waffle iron with butter or oil spray, then pour about 1/2 cup of batter onto the center of the iron. Close the lid and cook until golden brown and crisp, about 4-5 minutes.
- Repeat with the remaining batter, keeping finished waffles warm in a 200°F oven if not serving immediately.
Unbelievably moist and packed with the warm spices of carrot cake, these waffles are a delightful twist on the classic. Serve them with a dollop of cream cheese frosting or a drizzle of maple syrup for an extra indulgent treat.
Oreo Waffles
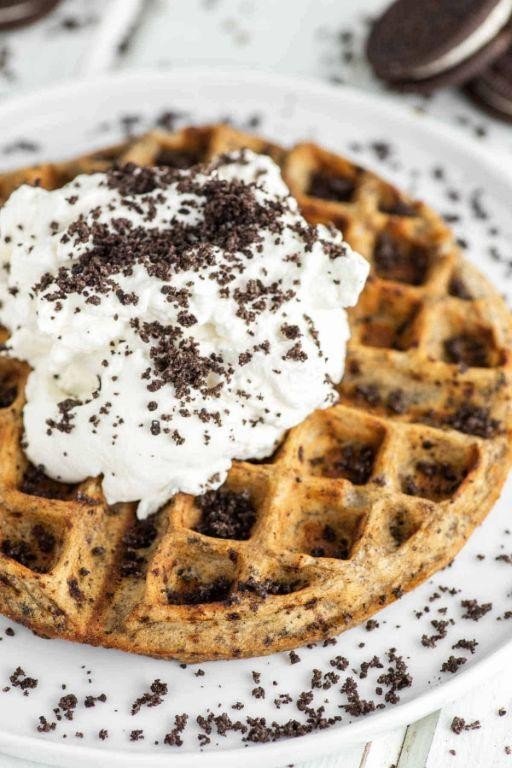
Sometimes, the best breakfast ideas come from those lazy Sunday mornings when you’re craving something sweet but don’t want to put in too much effort. That’s exactly how these Oreo Waffles came to be in my kitchen—a delightful twist on the classic waffle that’s sure to impress anyone with a sweet tooth.
Ingredients
- 1 cup all-purpose flour (for a lighter texture, you can use cake flour)
- 2 tbsp granulated sugar (adjust to taste)
- 1 tsp baking powder (ensure it’s fresh for the best rise)
- 1/2 tsp salt
- 1 cup milk (any type works, but whole milk gives a richer flavor)
- 1 large egg (room temperature blends better)
- 2 tbsp melted butter (or any neutral oil)
- 1 tsp vanilla extract (pure extract for the best flavor)
- 6 Oreo cookies, crushed (plus extra for garnish)
Instructions
- Preheat your waffle iron to 375°F. This ensures a crispy exterior.
- In a large bowl, whisk together the flour, sugar, baking powder, and salt.
- In another bowl, beat the milk, egg, melted butter, and vanilla extract until well combined.
- Pour the wet ingredients into the dry ingredients and stir until just combined. Tip: Overmixing leads to tough waffles.
- Gently fold in the crushed Oreo cookies. The batter will be thick.
- Lightly grease the waffle iron with butter or oil spray. Pour 1/2 cup of batter onto the center of the iron.
- Close the lid and cook for about 3-4 minutes, or until the waffle is golden brown and crisp. Tip: Don’t peek too early; it can cause the waffle to split.
- Carefully remove the waffle and repeat with the remaining batter. Tip: Keep cooked waffles warm in a 200°F oven while you finish the batch.
These Oreo Waffles come out with a perfect crunch on the outside, fluffy on the inside, and packed with those iconic Oreo flavors. Serve them stacked high with a dollop of whipped cream and a sprinkle of extra crushed Oreos for an over-the-top breakfast treat.
Matcha Green Tea Waffles

Just when I thought my waffle game couldn’t get any better, I stumbled upon the magic of matcha. These Matcha Green Tea Waffles are not just a feast for the eyes with their vibrant green hue but also pack a delightful, earthy flavor that pairs perfectly with a drizzle of honey or a dollop of whipped cream. I remember the first time I made them; the aroma filled my kitchen, and I knew I had found my new weekend breakfast staple.
Ingredients
- 1 1/2 cups all-purpose flour (for a lighter texture, you can substitute half with cake flour)
- 2 tbsp matcha green tea powder (ensure it’s culinary grade for the best flavor)
- 1/4 cup granulated sugar (adjust to taste)
- 1 tbsp baking powder
- 1/2 tsp salt
- 1 1/4 cups milk (any type works, but whole milk gives a richer taste)
- 1/4 cup unsalted butter, melted (or any neutral oil)
- 1 large egg
- 1 tsp vanilla extract (pure extract recommended for depth of flavor)
Instructions
- Preheat your waffle iron to 375°F. This ensures a crispy exterior.
- In a large bowl, whisk together the flour, matcha powder, sugar, baking powder, and salt until well combined.
- In another bowl, mix the milk, melted butter, egg, and vanilla extract until smooth. Tip: Let the melted butter cool slightly to avoid cooking the egg.
- Pour the wet ingredients into the dry ingredients and stir until just combined. Tip: Overmixing leads to tough waffles; a few lumps are okay.
- Lightly grease the waffle iron with butter or oil spray. Pour 1/2 cup of batter onto the center of the iron, close, and cook for about 3-4 minutes or until steam stops escaping from the sides. Tip: Avoid opening the iron too soon to prevent sticking.
- Serve immediately for the best texture. These waffles are wonderfully fluffy inside with a slight crisp on the outside. Try them with fresh berries and a sprinkle of powdered sugar for an extra special touch.
Now, these Matcha Green Tea Waffles have a unique balance of sweetness and the subtle bitterness of matcha, making them irresistibly delicious. For an adventurous twist, sandwich a scoop of vanilla ice cream between two waffles for a decadent dessert.
Sweet Potato Waffles
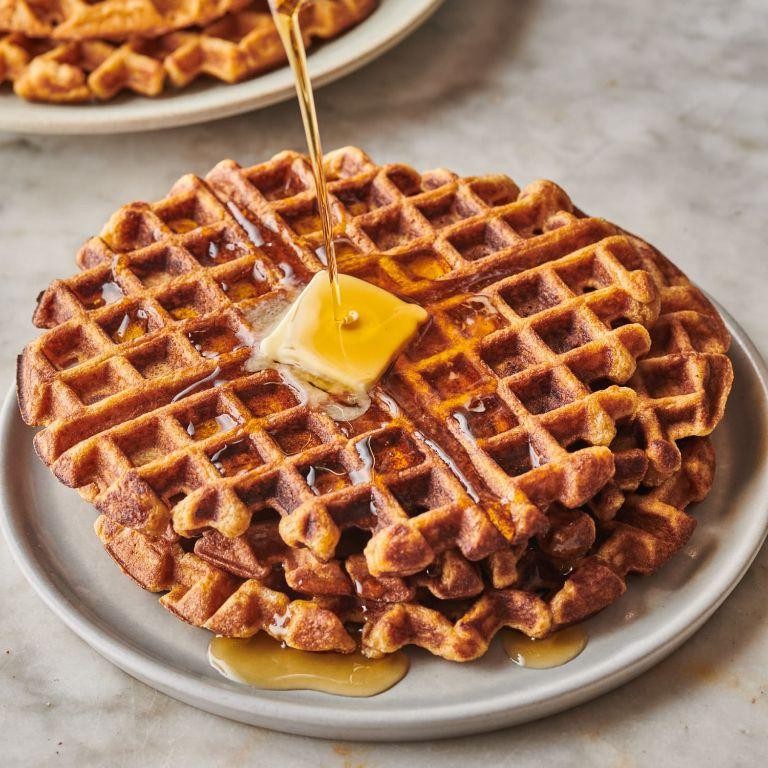
Finally, a weekend morning where I had the luxury of time to experiment in the kitchen led me to create these Sweet Potato Waffles. There’s something about the combination of sweet potatoes and cinnamon that feels like a hug in food form, perfect for those leisurely breakfasts.
Ingredients
- 1 cup mashed sweet potato (cooled, about 1 medium)
- 1 1/2 cups all-purpose flour (or gluten-free blend for a GF option)
- 2 tsp baking powder (ensure it’s fresh for maximum rise)
- 1/2 tsp salt
- 1 tsp ground cinnamon (add a pinch more if you love cinnamon)
- 2 large eggs (room temperature blends better)
- 1 1/4 cups milk (any kind, I used almond for a lighter version)
- 1/4 cup melted butter (or coconut oil for dairy-free)
- 2 tbsp maple syrup (plus extra for serving)
Instructions
- Preheat your waffle iron to medium-high heat (about 375°F) to ensure it’s ready when your batter is.
- In a large bowl, whisk together the flour, baking powder, salt, and cinnamon. This ensures your dry ingredients are evenly distributed.
- In another bowl, mix the mashed sweet potato, eggs, milk, melted butter, and maple syrup until smooth. Tip: If your sweet potato is lumpy, a quick blend with a hand mixer can smooth it out.
- Pour the wet ingredients into the dry ingredients and stir until just combined. Overmixing can lead to tough waffles, so a few lumps are okay.
- Lightly grease the waffle iron with butter or oil spray. Pour 1/2 cup of batter onto the center of the iron, close, and cook until golden brown and crisp, about 4-5 minutes. Tip: Resist the urge to open the iron too soon; steam is what helps the waffles rise.
- Serve immediately with extra maple syrup and a pat of butter. For a creative twist, top with toasted pecans and a dollop of whipped cream.
Here’s the magic of these waffles: they’re crispy on the outside, fluffy on the inside, with a subtle sweetness that doesn’t overpower. How about serving them with a side of crispy bacon for that perfect sweet and salty combo?
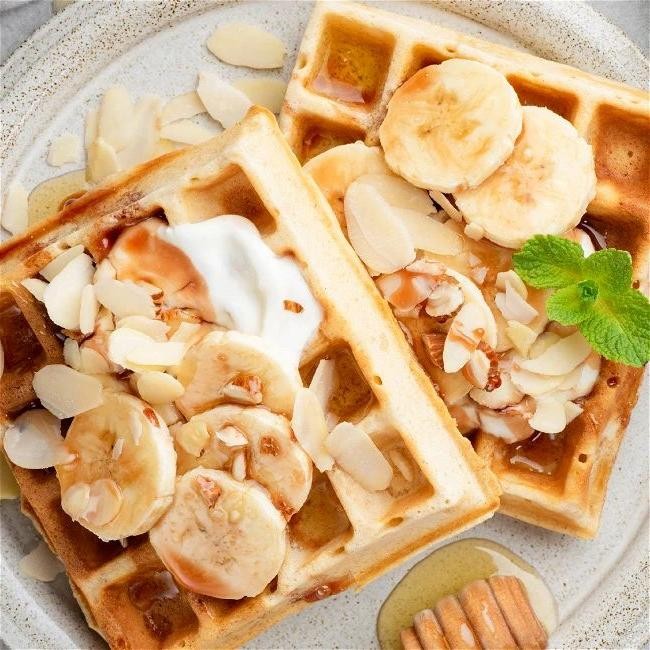
Almond Joy Waffles
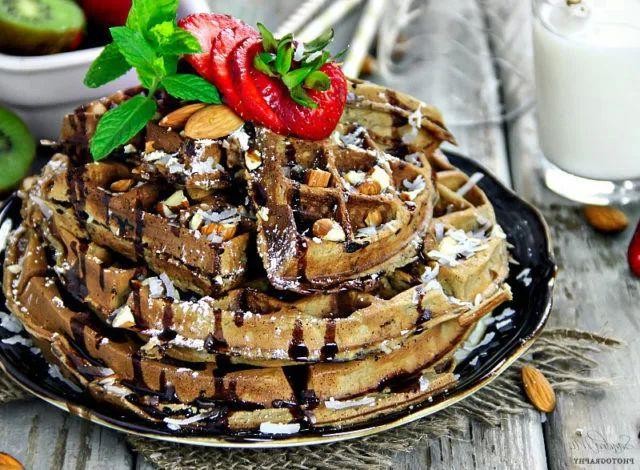
Good morning, fellow food enthusiasts! There’s something magical about starting the day with a breakfast that feels like a dessert, and these Almond Joy Waffles are just that. Inspired by the classic candy bar, they’re a delightful twist on your morning routine that’ll have you jumping out of bed.
Ingredients
- 2 cups all-purpose flour (for a lighter texture, you can substitute half with cake flour)
- 1 tbsp baking powder (ensure it’s fresh for the best rise)
- 1/2 tsp salt
- 2 tbsp granulated sugar (adjust to taste)
- 1 3/4 cups milk (any kind works, but almond milk enhances the flavor)
- 2 large eggs (room temperature blends better)
- 1/2 cup melted coconut oil (or any neutral oil, but coconut adds flavor)
- 1 tsp vanilla extract
- 1/2 cup shredded coconut (toasted for extra crunch)
- 1/2 cup chopped almonds
- 1/2 cup chocolate chips (dark or milk, depending on preference)
Instructions
- Preheat your waffle iron to 375°F. This ensures a crispy exterior.
- In a large bowl, whisk together the flour, baking powder, salt, and sugar. A quick tip: sifting the flour can make your waffles fluffier.
- In another bowl, beat the eggs, then mix in the milk, melted coconut oil, and vanilla extract until well combined.
- Pour the wet ingredients into the dry ingredients and stir until just combined. Overmixing leads to tough waffles, so a few lumps are okay.
- Gently fold in the shredded coconut, chopped almonds, and chocolate chips. This distributes the goodies evenly.
- Lightly grease the waffle iron with coconut oil or non-stick spray. Pour 1/2 cup of batter onto the iron and cook for about 4-5 minutes, or until golden brown and crispy.
- Repeat with the remaining batter, keeping finished waffles warm in a 200°F oven if necessary.
These waffles are a perfect balance of crispy on the outside and tender on the inside, with the delightful crunch of almonds and the sweetness of chocolate and coconut. Try serving them with a drizzle of chocolate syrup and a sprinkle of toasted coconut for an extra indulgent breakfast.
Zucchini Bread Waffles

Goodness, have I got a treat for you today! Imagine the cozy, spiced aroma of zucchini bread meeting the crisp, golden edges of a waffle. That’s right, we’re making Zucchini Bread Waffles, and let me tell you, they’re a game-changer for breakfast or brunch. I stumbled upon this idea one summer when my garden was overflowing with zucchini, and now it’s a staple in my kitchen.
Ingredients
- 1 1/2 cups all-purpose flour (for a healthier twist, try whole wheat flour)
- 1/2 cup granulated sugar (adjust to taste)
- 1 tsp baking soda
- 1/2 tsp salt
- 1 tsp ground cinnamon
- 1/4 tsp ground nutmeg
- 1 cup grated zucchini (squeeze out excess moisture)
- 1/2 cup milk (any kind works)
- 1/4 cup vegetable oil (or any neutral oil)
- 1 large egg
- 1 tsp vanilla extract
Instructions
- Preheat your waffle iron to 375°F. This ensures a crispy exterior.
- In a large bowl, whisk together the flour, sugar, baking soda, salt, cinnamon, and nutmeg.
- In another bowl, mix the grated zucchini, milk, oil, egg, and vanilla extract until well combined.
- Pour the wet ingredients into the dry ingredients and stir until just combined. Overmixing leads to tough waffles.
- Lightly grease the waffle iron with oil or cooking spray. Pour 1/2 cup of batter onto the iron and close the lid.
- Cook for 4-5 minutes or until the waffle is golden brown and crisp. Tip: Don’t peek too early; let the steam do its work.
- Repeat with the remaining batter. Serve warm with your favorite toppings.
Mmm, these waffles are a delightful mix of moist, spiced zucchini bread and crispy waffle texture. Try them with a dollop of Greek yogurt and a drizzle of maple syrup for an extra special touch.
Gingerbread Waffles

Oh, the cozy aroma of gingerbread waffles on a lazy Sunday morning—it’s like a hug in food form! I remember the first time I tweaked my grandma’s recipe to make these; now, they’re a staple in my winter breakfast rotation.
Ingredients
- 2 cups all-purpose flour (for a lighter texture, you can substitute half with cake flour)
- 1/4 cup brown sugar (packed, for that deep molasses flavor)
- 1 tbsp baking powder (ensure it’s fresh for the fluffiest waffles)
- 1 tsp ground ginger (or more if you love a spicy kick)
- 1/2 tsp ground cinnamon (adds warmth)
- 1/4 tsp ground cloves (just a pinch for complexity)
- 1/4 tsp salt (balances the sweetness)
- 1 3/4 cups milk (whole milk makes them richer)
- 1/2 cup molasses (not blackstrap, unless you prefer a bitter edge)
- 1/4 cup melted butter (cooled slightly, or use coconut oil for a dairy-free version)
- 1 large egg (room temperature blends better)
Instructions
- Preheat your waffle iron to medium-high (about 375°F) to ensure a crispy exterior.
- In a large bowl, whisk together the flour, brown sugar, baking powder, ginger, cinnamon, cloves, and salt until well combined.
- In another bowl, beat the milk, molasses, melted butter, and egg until smooth. Tip: If the molasses is too thick, warm it slightly for easier mixing.
- Pour the wet ingredients into the dry ingredients and stir until just combined. A few lumps are okay; overmixing leads to tough waffles.
- Lightly grease the waffle iron with butter or non-stick spray. Pour 1/2 cup of batter onto the center of the iron, close, and cook for about 4 minutes, or until the waffle is golden brown and steam stops escaping.
- Repeat with the remaining batter, keeping finished waffles warm in a 200°F oven if needed. Tip: Don’t stack them straight out of the iron to maintain crispiness.
Rich with molasses and spice, these waffles have a delightful chew inside with crispy edges. Serve them with a dollop of whipped cream and a drizzle of maple syrup for a decadent twist, or keep it simple with a dusting of powdered sugar.
Cornbread Waffles
Yesterday, I stumbled upon the most delightful twist to my breakfast routine—cornbread waffles. There’s something about the crispy edges and fluffy interior that makes me forget all about traditional pancakes. Plus, it’s a fantastic way to use up that leftover buttermilk sitting in your fridge.
Ingredients
- 1 cup cornmeal (fine or medium grind works best)
- 1 cup all-purpose flour (for a lighter texture)
- 1 tbsp sugar (adjust to taste)
- 1 tsp baking powder (ensure it’s fresh for maximum rise)
- 1/2 tsp baking soda (the secret to fluffy waffles)
- 1/2 tsp salt (balances the sweetness)
- 1 cup buttermilk (or milk with 1 tbsp vinegar as a substitute)
- 1/4 cup melted butter (or any neutral oil)
- 1 large egg (room temperature blends better)
Instructions
- Preheat your waffle iron to 375°F. A hot iron ensures crispy waffles.
- In a large bowl, whisk together cornmeal, flour, sugar, baking powder, baking soda, and salt.
- In another bowl, mix buttermilk, melted butter, and egg until well combined.
- Pour the wet ingredients into the dry ingredients. Stir until just combined; lumps are okay.
- Lightly grease the waffle iron with butter or oil. Pour 1/2 cup batter onto the center of the iron.
- Close the lid and cook for 4-5 minutes, or until golden brown and crispy.
- Repeat with the remaining batter, keeping cooked waffles warm in a 200°F oven.
Perfectly golden and irresistibly crispy, these cornbread waffles are a game-changer. Serve them with a drizzle of honey and a pat of butter for a sweet start, or top with chili for a savory twist. Either way, they’re bound to disappear fast.
S’mores Waffles
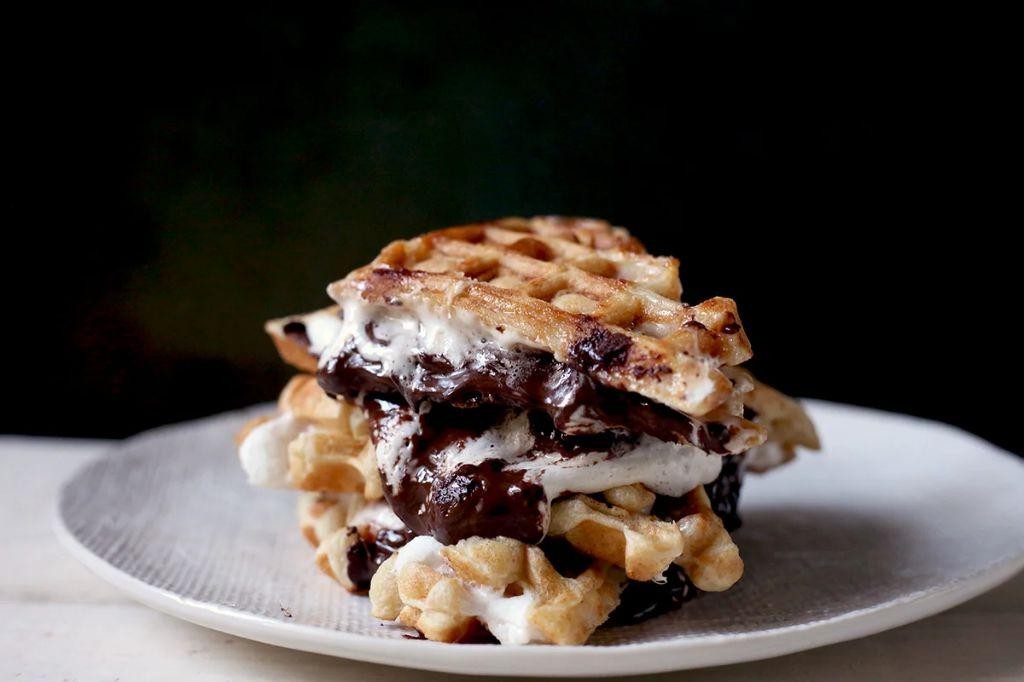
My love for s’mores knows no bounds, and when I discovered how to bring that campfire favorite into my kitchen with these S’mores Waffles, it was a game-changer. Perfect for a lazy weekend breakfast or a fun dessert, these waffles are a hit with both kids and adults alike.
Ingredients
- 1 cup all-purpose flour (for a lighter texture, you can use half all-purpose and half whole wheat flour)
- 1 tbsp granulated sugar (adjust to taste)
- 1 tsp baking powder (ensure it’s fresh for the best rise)
- 1/2 tsp salt
- 1 cup milk (any kind will work, but whole milk gives a richer flavor)
- 1 large egg (room temperature blends more easily)
- 2 tbsp melted butter (or any neutral oil)
- 1/2 cup mini marshmallows (plus extra for topping)
- 1/4 cup chocolate chips (dark or milk, according to preference)
- 1/4 cup graham cracker crumbs (for that classic s’mores crunch)
Instructions
- Preheat your waffle iron to 375°F (190°C) according to the manufacturer’s instructions.
- In a large bowl, whisk together the flour, sugar, baking powder, and salt until well combined.
- In another bowl, beat the milk, egg, and melted butter together before gently folding into the dry ingredients until just combined. Tip: Overmixing can lead to tough waffles.
- Fold in the mini marshmallows, chocolate chips, and graham cracker crumbs into the batter. Tip: Reserve some of each for topping if you like extra gooeyness and crunch.
- Pour the batter onto the preheated waffle iron, using about 1/2 cup for each waffle. Close the lid and cook until golden brown and crispy, about 4-5 minutes. Tip: Avoid opening the waffle iron too soon to prevent sticking.
- Serve immediately, topped with additional marshmallows, chocolate chips, and a sprinkle of graham cracker crumbs for that authentic s’mores experience.
Zesty and indulgent, these S’mores Waffles are a delightful twist on breakfast. The crispy edges give way to a soft, fluffy interior packed with melty chocolate and marshmallows, while the graham cracker crumbs add a satisfying crunch. Try serving them with a drizzle of chocolate syrup or a scoop of vanilla ice cream for an extra special treat.
Conclusion
We hope this roundup of 20 delicious Dash waffle maker recipes inspires your next kitchen adventure! From sweet to savory, there’s something for everyone to enjoy. Don’t forget to try these recipes, share your favorites in the comments, and pin this article on Pinterest to spread the waffle love. Happy cooking!