Unlock the secret to making irresistibly healthy snacks right in your kitchen with these 17 delicious Cosori dehydrator recipes! Whether you’re craving sweet, savory, or something in between, our roundup has got you covered. Perfect for home cooks looking to add a nutritious twist to their snack game, these recipes are sure to inspire. Keep reading to discover your next favorite dehydrator creation!
Homemade Beef Jerky
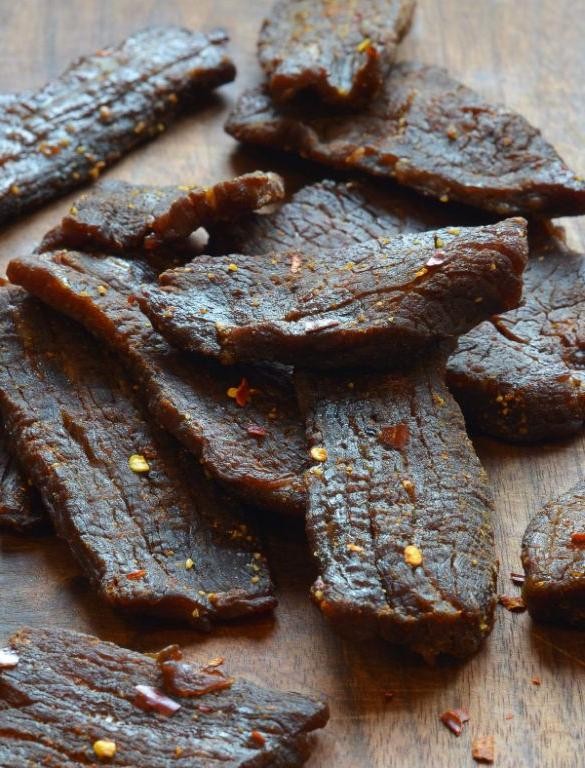
Alright, let’s dive into making your own Homemade Beef Jerky—because store-bought just doesn’t hit the same.
Ingredients
- 2 lbs lean beef top round, thinly sliced against the grain
- 1/2 cup soy sauce, low-sodium for balanced flavor
- 1/4 cup Worcestershire sauce, tangy and robust
- 2 tbsp honey, for a touch of sweetness
- 1 tbsp smoked paprika, adding deep, smoky notes
- 2 tsp garlic powder, finely ground for even distribution
- 1 tsp onion powder, for a subtle sharpness
- 1/2 tsp black pepper, freshly cracked for heat
- 1/2 tsp red pepper flakes, optional for a spicy kick
Instructions
- In a large bowl, whisk together soy sauce, Worcestershire sauce, honey, smoked paprika, garlic powder, onion powder, black pepper, and red pepper flakes until fully combined.
- Add the thinly sliced beef to the marinade, ensuring each piece is thoroughly coated. Cover and refrigerate for at least 6 hours, or overnight for deeper flavor.
- Preheat your oven to 175°F and line baking sheets with parchment paper for easy cleanup.
- Remove the beef from the marinade, letting excess drip off, and arrange the slices in a single layer on the prepared baking sheets.
- Bake for 4-6 hours, flipping the slices halfway through, until the jerky is dry but still slightly pliable.
- Let the jerky cool completely on the baking sheets—it’ll crisp up as it cools.
Every bite of this jerky packs a punch—chewy, smoky, and just the right amount of sweet. Perfect for road trips or as a protein-packed snack straight from the jar.
Sweet Potato Chips
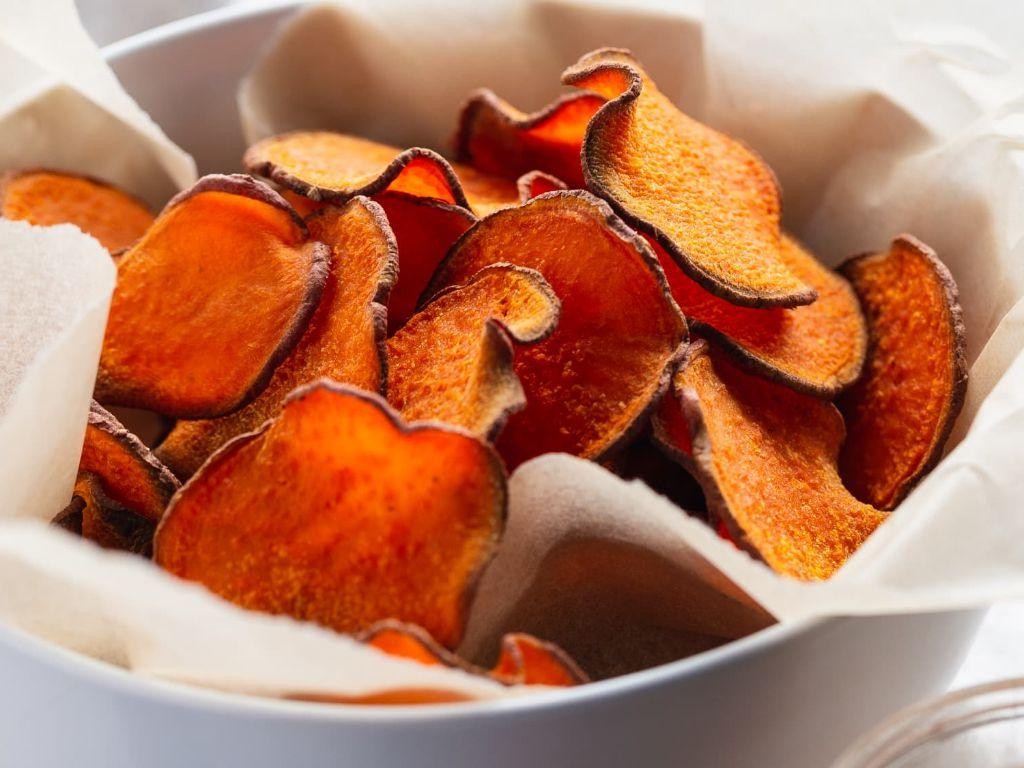
Perfectly crispy, subtly sweet, and utterly addictive—these homemade sweet potato chips are your next snack obsession.
Ingredients
- 2 large sweet potatoes, peeled and thinly sliced
- 2 cups of cold water, for soaking
- 1/4 cup of rich extra virgin olive oil
- 1 tsp of finely ground sea salt
- 1/2 tsp of smoky paprika
- 1/4 tsp of freshly ground black pepper
Instructions
- Preheat your oven to 375°F and line two baking sheets with parchment paper.
- Soak the thinly sliced sweet potatoes in cold water for 30 minutes to remove excess starch, then pat dry thoroughly with a clean kitchen towel.
- Toss the dried sweet potato slices with olive oil, sea salt, paprika, and black pepper in a large bowl until evenly coated.
- Arrange the slices in a single layer on the prepared baking sheets, ensuring they don’t overlap for maximum crispiness.
- Bake for 15 minutes, then flip each chip and rotate the trays for even cooking. Bake for another 10-15 minutes until golden and crisp.
- Let the chips cool on the baking sheets for 5 minutes—they’ll crisp up even more as they cool.
Crispy on the outside with a tender bite, these sweet potato chips are a game-changer. Serve them with a creamy avocado dip or sprinkle with cinnamon for a sweet twist.
Banana Chips
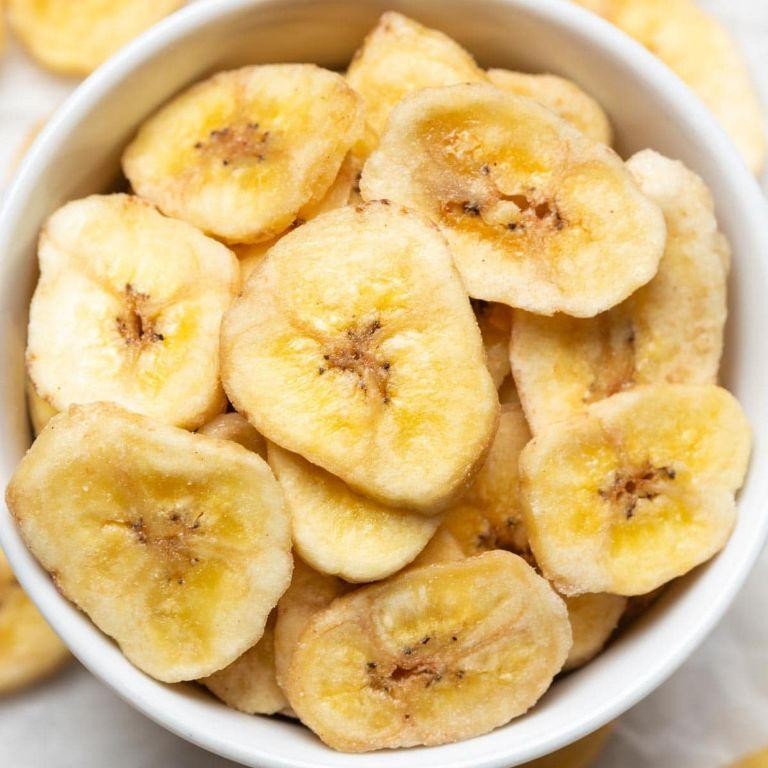
Let’s turn those ripe bananas into crispy, golden Banana Chips—your snack game will never be the same.
Ingredients
- 4 medium ripe bananas, firm but sweet
- 1 tbsp freshly squeezed lemon juice, bright and tangy
- 1 cup cold water, for soaking
- 1/2 cup granulated sugar, for a subtle sweetness
- 1 tsp ground cinnamon, warm and aromatic
- 2 cups vegetable oil, for deep frying
Instructions
- Peel the bananas and slice them into 1/8-inch thick rounds using a sharp knife for even cooking.
- In a bowl, mix the lemon juice with cold water. Soak the banana slices for 10 minutes to prevent browning and add a slight tang.
- Drain the bananas and pat them dry with a clean kitchen towel to ensure they fry up crispy.
- Heat the vegetable oil in a deep fryer or large pot to 350°F, using a thermometer for accuracy.
- Fry the banana slices in small batches for 2-3 minutes until golden brown, stirring occasionally for even color.
- Remove the chips with a slotted spoon and drain on paper towels to absorb excess oil.
- While still warm, toss the chips in a mix of granulated sugar and ground cinnamon for a sweet and spicy coating.
Zesty and crunchy, these Banana Chips are a perfect blend of sweet and spicy. Serve them as a standalone snack or crumble over yogurt for a textured breakfast twist.
Apple Rings

Whip up these crispy, golden Apple Rings for a snack that’s equal parts nostalgic and Instagram-worthy. Perfect for dipping or devouring solo, they’re a sweet twist on classic fruit.
Ingredients
- 2 large, crisp Honeycrisp apples
- 1 cup all-purpose flour, sifted
- 1 tsp ground cinnamon, aromatic and warm
- 1/2 cup granulated sugar, fine and sparkling
- 1 cup buttermilk, tangy and thick
- 1 cup panko breadcrumbs, golden and crunchy
- 1 quart vegetable oil, for deep frying
- 1/2 tsp sea salt, flaky and bright
Instructions
- Core the apples and slice them into 1/2-inch rings, ensuring uniformity for even cooking.
- In a shallow bowl, whisk together the flour, cinnamon, and sugar. This blend will give your rings a sweet, spiced coating.
- Pour the buttermilk into another bowl. Its acidity tenderizes the apples while helping the coating stick.
- Place the panko breadcrumbs in a third bowl. They’re your ticket to that irresistible crunch.
- Heat the vegetable oil in a deep fryer or large pot to 375°F. A candy thermometer is your best friend here for precision.
- Dip each apple ring first in the flour mixture, then the buttermilk, and finally the panko, pressing lightly to adhere.
- Fry the rings in batches for 2-3 minutes or until golden brown. Don’t overcrowd the pot to maintain the oil’s temperature.
- Transfer to a paper towel-lined plate and sprinkle immediately with sea salt. The salt enhances the sweetness and adds complexity.
Zesty and satisfying, these Apple Rings offer a delightful contrast between the juicy fruit and the crispy exterior. Serve them stacked high with a side of caramel sauce for dipping, or crumble them over vanilla ice cream for a decadent dessert twist.
Zucchini Chips

Make your snack game unbeatable with these crispy, golden zucchini chips. They’re the perfect crunch without the guilt, and yes, they’re as addictive as they sound.
Ingredients
- 2 medium zucchinis, thinly sliced into 1/8-inch rounds
- 1 cup panko breadcrumbs, finely ground for extra crunch
- 1/2 cup grated Parmesan cheese, sharp and savory
- 1 tsp garlic powder, for a punch of flavor
- 1/2 tsp sea salt, finely ground
- 1/4 tsp black pepper, freshly cracked
- 2 large eggs, farm-fresh and beaten
- 1 tbsp water, to thin the egg wash
- 1/4 cup all-purpose flour, for dredging
- Olive oil spray, for a light and even coat
Instructions
- Preheat your oven to 425°F and line a baking sheet with parchment paper.
- Slice the zucchinis into 1/8-inch thick rounds using a mandoline for uniform thickness.
- Set up three bowls: one with flour, one with beaten eggs and water, and one with a mix of panko, Parmesan, garlic powder, salt, and pepper.
- Dredge each zucchini round in flour, shaking off excess, then dip in egg wash, and finally coat in the panko mixture. Press gently to adhere.
- Arrange the coated zucchini rounds on the prepared baking sheet in a single layer. Lightly spray with olive oil.
- Bake for 15 minutes, then flip each chip and bake for another 10-15 minutes until golden and crispy.
- Let cool on the baking sheet for 5 minutes to crisp up further.
Just out of the oven, these zucchini chips are irresistibly crispy with a savory, cheesy flavor. Serve them with a side of spicy aioli or ranch for dipping, or sprinkle with extra Parmesan right after baking for an extra flavor boost.
Tomato Leather

Forget everything you know about snacks—Tomato Leather is here to **revolutionize** your pantry. This sun-dried delight packs a punch of umami and a chewy texture that’s **irresistibly** snackable.
Ingredients
- 6 cups ripe, juicy tomatoes (halved)
- 2 tbsp rich extra virgin olive oil
- 1 tsp finely ground sea salt
- 1 tbsp aromatic dried oregano
- 1 tsp cracked black pepper
Instructions
- Preheat your oven to **170°F**—low and slow is key for perfect dehydration.
- Blend tomatoes until smooth, then strain through a fine mesh to remove seeds for a silky puree.
- Whisk in olive oil, sea salt, oregano, and black pepper until fully combined.
- Line a baking sheet with parchment paper, then pour the mixture in, spreading it evenly with a spatula.
- Bake for **6-8 hours**, checking every hour after the 5th—the edges should lift easily when done.
- Cool completely on the sheet, then peel and cut into strips or roll for storage.
Bold in flavor and versatile in use, Tomato Leather is your new go-to for hiking snacks or as a gourmet pizza topping. Store rolled in parchment for up to a month—if it lasts that long.
Mango Slices
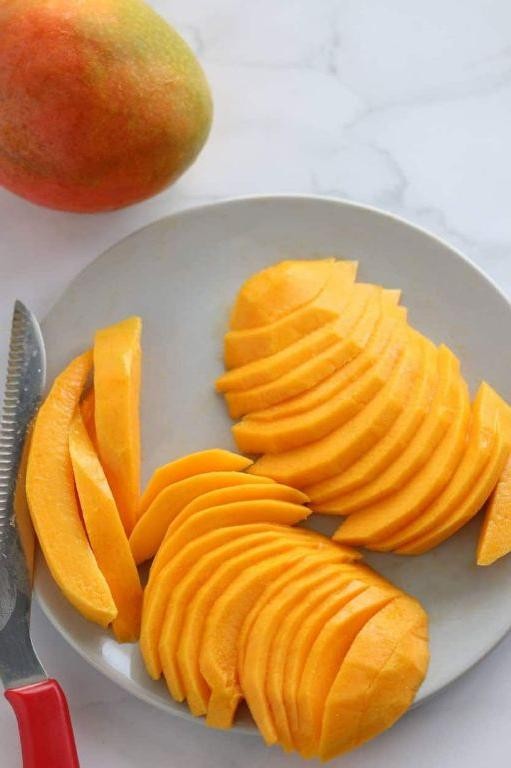
Let’s dive into making these juicy, sun-kissed mango slices that scream summer. Perfect for snacking, desserts, or even jazzing up your cocktails!
Ingredients
- 2 ripe, fragrant mangoes
- 1 tbsp freshly squeezed lime juice
- 1 tsp finely grated lime zest
- 1/4 cup granulated sugar
- 1/2 tsp chili powder (optional, for a spicy kick)
Instructions
- Wash and pat dry the mangoes. Slice off both ends to create a flat surface.
- Stand the mango upright and carefully slice down the sides, avoiding the pit, to get two large cheeks.
- Score the flesh of each cheek in a crosshatch pattern without cutting through the skin.
- Gently push the skin side up to invert the mango, creating a hedgehog effect. Slice off the cubes close to the skin.
- In a small bowl, whisk together lime juice, lime zest, and sugar until the sugar dissolves.
- Drizzle the lime-sugar mixture over the mango slices. For an extra zing, sprinkle with chili powder.
- Let the mango slices sit for 5 minutes to absorb the flavors before serving.
Mango slices are a burst of tropical sweetness with a tangy lime twist. Serve them chilled over ice cream or alongside grilled seafood for a refreshing contrast.
Pineapple Tidbits
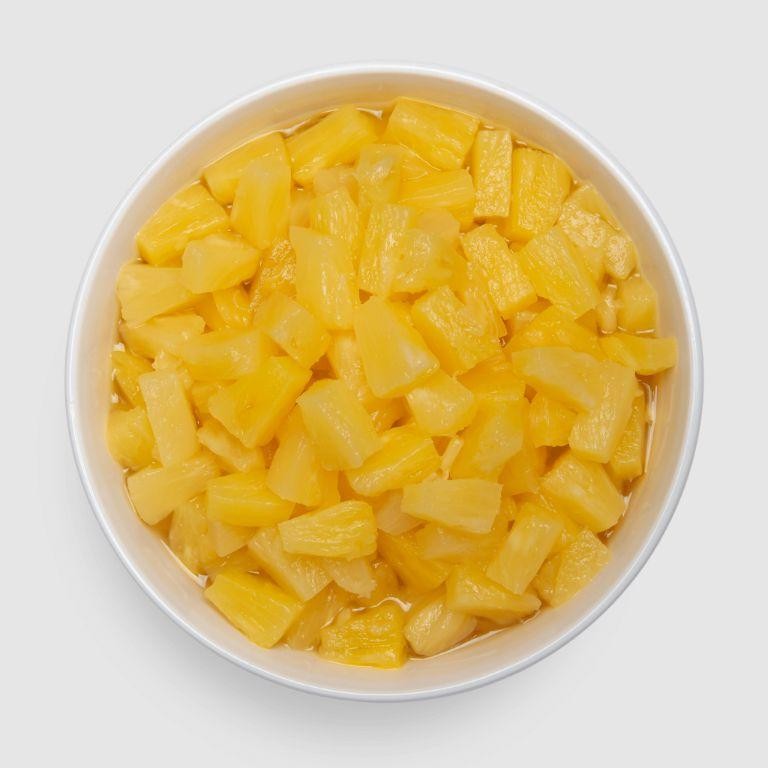
Unlock the tropical vibes with these juicy, sunshine-sweet pineapple tidbits—perfect for snacking, salads, or a vibrant dessert topper.
Ingredients
- 1 ripe pineapple, peeled and cored (look for golden-yellow skin and a sweet, fragrant aroma)
- 2 tbsp honey (preferably raw and unfiltered for a deep, floral sweetness)
- 1 tbsp fresh lime juice (from a plump, juicy lime)
- 1/4 tsp finely ground sea salt (to enhance the pineapple’s natural flavors)
Instructions
- Preheat your oven to 375°F (190°C) and line a baking sheet with parchment paper for easy cleanup.
- Cut the peeled and cored pineapple into 1-inch chunks, ensuring each piece is uniform for even roasting.
- In a large bowl, gently toss the pineapple chunks with honey, lime juice, and sea salt until each piece is lightly coated.
- Spread the pineapple in a single layer on the prepared baking sheet, avoiding overcrowding to ensure they roast, not steam.
- Roast for 20-25 minutes, flipping halfway through, until the edges are caramelized and the pineapple is tender.
- Let cool for 5 minutes on the baking sheet to allow the juices to thicken slightly.
Relish the contrast of sticky, caramelized edges against the tender, juicy centers. Serve warm over vanilla ice cream, or chill and add to morning yogurt for a tropical twist.
Strawberry Fruit Leather
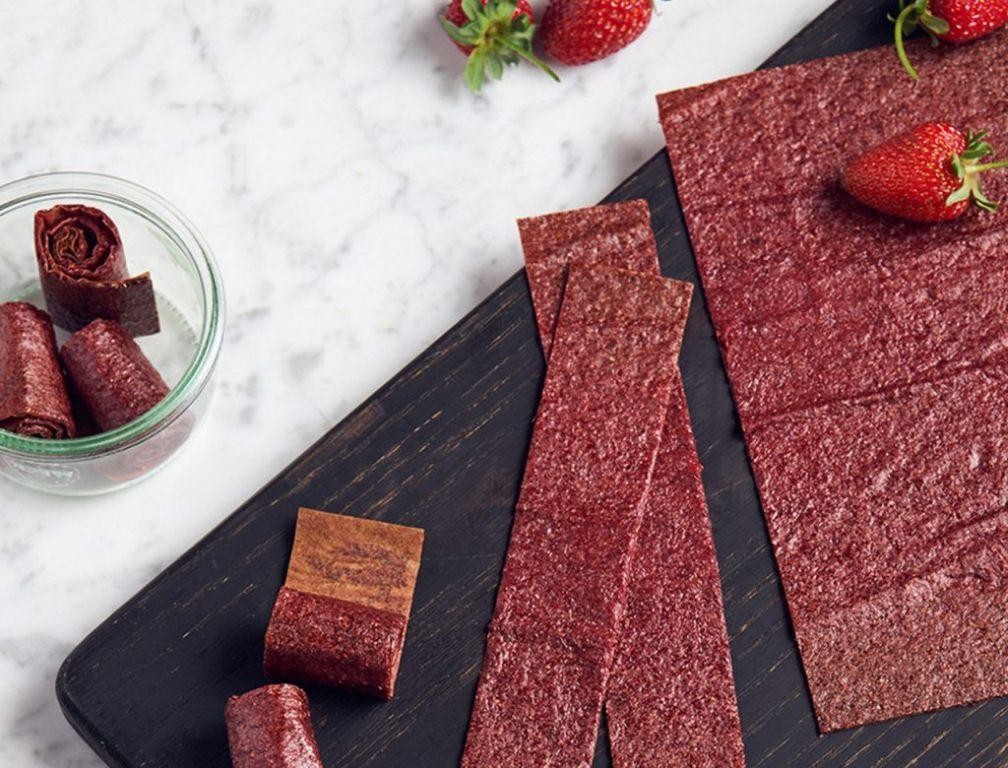
Alright, let’s roll into this sweet, chewy goodness—Strawberry Fruit Leather is your next kitchen win. A snack that’s all-natural, kid-approved, and ridiculously easy to make.
Ingredients
- 2 cups ripe strawberries, hulled and sliced
- 1 tbsp fresh lemon juice, zesty and bright
- 1 tbsp honey, golden and smooth
Instructions
- Preheat your oven to 170°F (the lowest setting) and line a baking sheet with parchment paper.
- In a blender, puree the strawberries, lemon juice, and honey until completely smooth.
- Pour the puree onto the prepared baking sheet, spreading it evenly with a spatula to about 1/8-inch thickness.
- Bake for 4-6 hours, checking occasionally. The leather is ready when it’s slightly tacky but peels away easily.
- Let it cool completely, then cut into strips or shapes. Roll them up in parchment for storage.
Tip: For an extra flavor kick, add a pinch of cinnamon to the puree. Tip: If your puree has seeds, strain it for a smoother texture. Tip: Speed up drying by propping the oven door open with a wooden spoon.
Result? A tangy, sweet leather with a satisfying chew. Roll it up for lunchboxes or layer it with yogurt for a parfait twist.
Carrot Chips
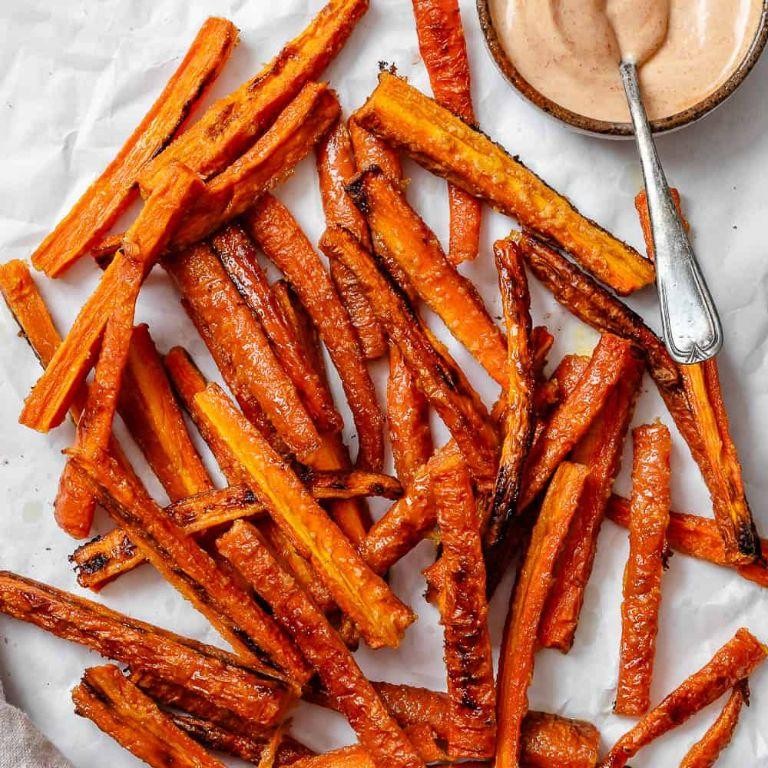
Make snack time crunch time with these irresistible carrot chips. Thin, crispy, and packed with flavor, they’re your new go-to for guilt-free munching.
Ingredients
- 4 large, crisp carrots, peeled and thinly sliced
- 2 tablespoons of golden extra virgin olive oil
- 1 teaspoon of coarse sea salt
- 1/2 teaspoon of smoky paprika
- 1/4 teaspoon of freshly ground black pepper
Instructions
- Preheat your oven to 375°F and line a baking sheet with parchment paper for easy cleanup.
- In a large bowl, toss the thinly sliced carrots with golden extra virgin olive oil until evenly coated.
- Sprinkle the carrots with coarse sea salt, smoky paprika, and freshly ground black pepper, tossing again to ensure each slice is seasoned.
- Arrange the carrot slices in a single layer on the prepared baking sheet, ensuring they don’t overlap for maximum crispiness.
- Bake for 15 minutes, then flip each chip carefully to promote even cooking.
- Continue baking for another 10-15 minutes, watching closely in the last 5 minutes to prevent burning, until the edges are golden and the centers are crisp.
- Remove from the oven and let cool on the baking sheet for 5 minutes; they’ll crisp up even more as they cool.
Zesty and light, these carrot chips offer a satisfying crunch with a hint of smokiness. Serve them solo for a quick snack or alongside your favorite dip for an extra flavor kick.
Kale Chips
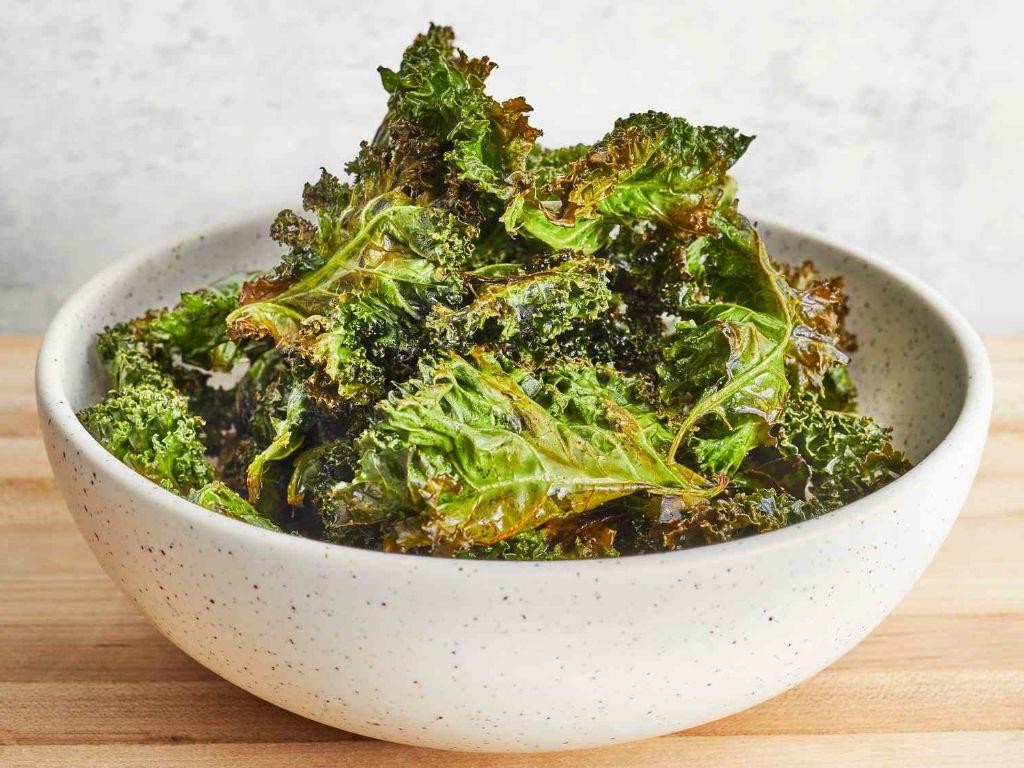
Whip up your snack game with these crispy, guilt-free kale chips—perfect for when you’re craving something crunchy without the calorie overload.
Ingredients
- 1 bunch of fresh kale, stems removed and leaves torn into bite-sized pieces
- 2 tablespoons of rich extra virgin olive oil
- 1/2 teaspoon of finely ground sea salt
- 1/4 teaspoon of smoked paprika for a subtle kick
Instructions
- Preheat your oven to 300°F (150°C) to ensure even cooking without burning.
- In a large bowl, massage the kale pieces with olive oil until each leaf is lightly coated but not soggy.
- Sprinkle the sea salt and smoked paprika over the kale, tossing gently to distribute the flavors evenly.
- Arrange the kale in a single layer on a baking sheet lined with parchment paper, ensuring no overlaps for maximum crispiness.
- Bake for 10 minutes, then rotate the pan and bake for another 10-15 minutes until the edges are just starting to brown but not burn.
- Remove from the oven and let cool on the pan for 5 minutes; they’ll crisp up even more as they sit.
Ultra-crispy with a smoky hint, these kale chips are a snack-time hero. Serve them straight from the oven for a warm treat or pack them for a crunchy lunchbox surprise.
Pear Chips

Let’s crunch into pear chips—your new obsession. Thin, crispy, and sweet, they’re the snack you didn’t know you needed.
Ingredients
- 2 large, firm-ripe pears (like Bosc or Anjou)
- 1 tbsp fresh lemon juice (bright and tangy)
- 1/4 cup granulated sugar (fine and sparkling)
- 1/2 tsp ground cinnamon (warm and aromatic)
Instructions
- Preheat your oven to 225°F and line two baking sheets with parchment paper.
- Wash and dry the pears thoroughly, then slice them as thinly as possible (about 1/8 inch) using a mandoline for evenness.
- Toss the pear slices in a bowl with lemon juice to prevent browning and add a subtle zing.
- In a small bowl, mix the sugar and cinnamon. Sprinkle this over the pears, tossing gently to coat each slice.
- Arrange the slices in a single layer on the prepared baking sheets, ensuring they don’t overlap.
- Bake for 1 hour, then flip each slice carefully for even drying. Bake for another 1 to 1.5 hours until they’re golden and crisp.
- Let them cool on the baking sheets—they’ll crisp up even more as they sit.
Get ready for a snack that’s all about the crunch. These pear chips shine with a caramelized sweetness and a hint of spice. Serve them atop yogurt or crush them over ice cream for a gourmet twist.
Blueberry Fruit Leather
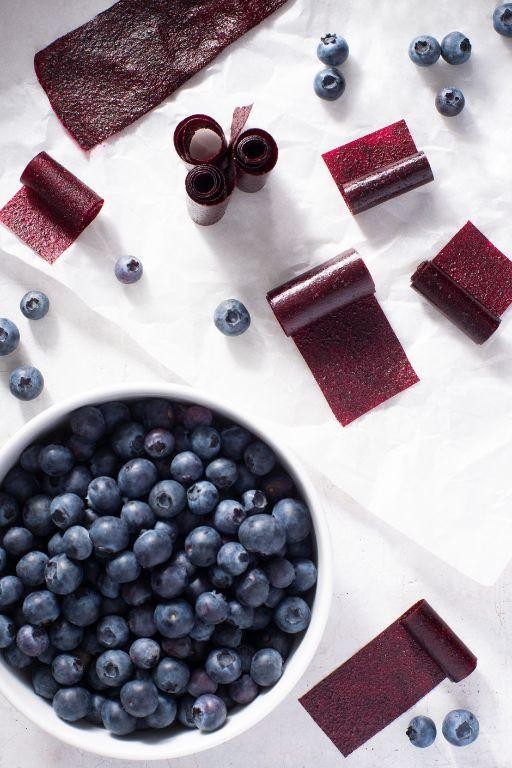
Overripe blueberries? Transform them into a chewy, sweet snack that’s perfect for on-the-go energy. This Blueberry Fruit Leather is a no-waste wonder, bursting with natural flavors and easy to make.
Ingredients
- 4 cups ripe blueberries, washed and stems removed
- 1/4 cup granulated sugar, for a touch of sweetness
- 1 tbsp fresh lemon juice, to brighten the flavor
Instructions
- Preheat your oven to 170°F, the low temperature ensures even drying without cooking.
- In a blender, puree the blueberries, sugar, and lemon juice until completely smooth. Tip: Strain through a fine mesh sieve for a silky texture.
- Line a baking sheet with a silicone mat or parchment paper, spreading the puree evenly into a thin layer. Tip: Use an offset spatula for precision.
- Bake for 4-6 hours, checking periodically. The leather is ready when it’s tacky but not sticky. Tip: Prop the oven door slightly open with a wooden spoon to allow moisture to escape.
- Cool completely on the baking sheet, then peel and cut into strips or shapes.
Fruit leather offers a delightful chew with a concentrated blueberry punch. Roll up strips for a fun presentation or layer between wax paper for easy storage.
Cherry Tomatoes
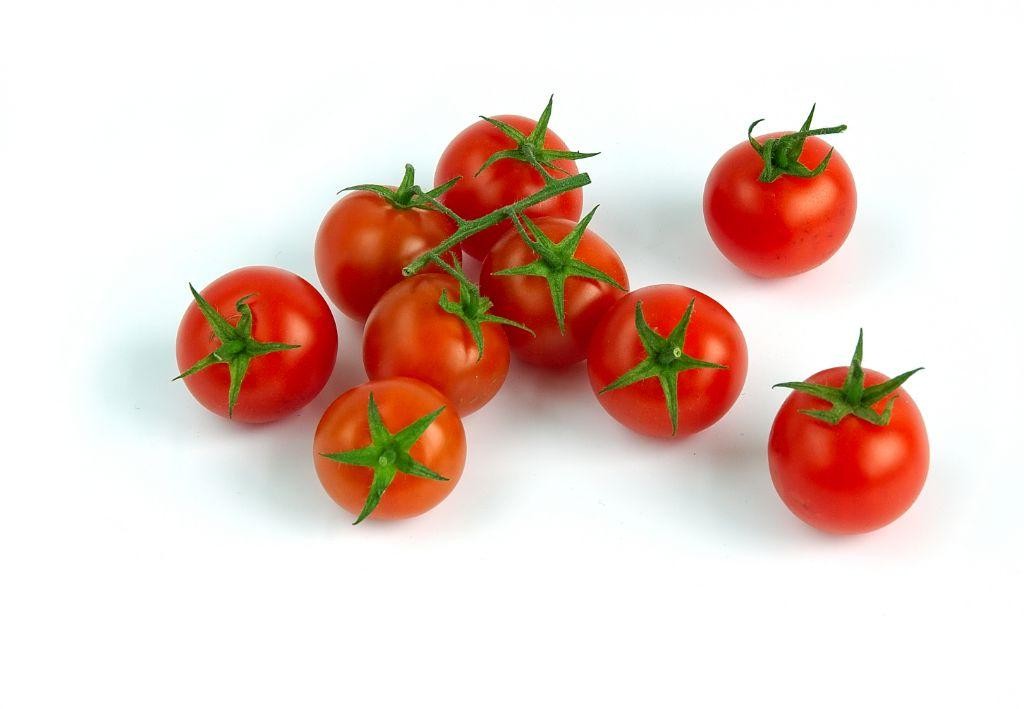
Yum, cherry tomatoes are the ultimate summer snack—bursting with juicy sweetness and a pop of color that brightens any dish.
Ingredients
- 2 cups ripe cherry tomatoes, halved
- 1 tbsp rich extra virgin olive oil
- 1/2 tsp finely ground sea salt
- 1/4 tsp freshly cracked black pepper
- 1 tbsp chopped fresh basil leaves
- 1/2 cup crumbled feta cheese
Instructions
- Preheat your oven to 400°F (204°C) to ensure it’s hot enough for roasting.
- Toss the halved cherry tomatoes with olive oil, sea salt, and black pepper in a large bowl until evenly coated.
- Spread the tomatoes in a single layer on a baking sheet for even roasting.
- Roast in the preheated oven for 15 minutes, or until the tomatoes are slightly wrinkled and caramelized at the edges.
- Remove from the oven and let cool for 5 minutes to allow the flavors to meld.
- Sprinkle the roasted tomatoes with chopped fresh basil and crumbled feta cheese before serving.
Roasted cherry tomatoes offer a delightful contrast of textures—soft and jammy with a hint of crispness. Serve them over creamy polenta or alongside grilled chicken for a meal that sings with summer flavors.
Peach Slices

Bite into summer with these juicy peach slices—no fancy skills needed, just ripe fruit and a sprinkle of magic.
Ingredients
- 2 large, ripe peaches (firm yet yielding to gentle pressure)
- 1 tbsp fresh lemon juice (bright and tangy)
- 1 tsp granulated sugar (fine, like beach sand)
- 1/4 tsp ground cinnamon (warm and aromatic)
Instructions
- Wash the peaches under cool running water to remove any dirt or residue.
- Pat the peaches dry with a clean kitchen towel to ensure a good grip while slicing.
- Using a sharp knife, slice each peach in half around the pit, then twist to separate the halves.
- Remove the pit and slice each half into 1/4-inch thick wedges for even, bite-sized pieces.
- In a medium bowl, gently toss the peach slices with lemon juice to prevent browning and add a zesty kick.
- Sprinkle the sugar and cinnamon over the peaches, tossing lightly to coat each slice evenly.
- Let the peaches sit at room temperature for 10 minutes to macerate, allowing the flavors to meld and the sugar to dissolve.
Here’s the scoop: these peach slices are a symphony of sweet and tangy, with a hint of spice that dances on your tongue. Serve them over vanilla ice cream for a decadent twist, or layer them into morning yogurt for a sunny start.
Eggplant Chips
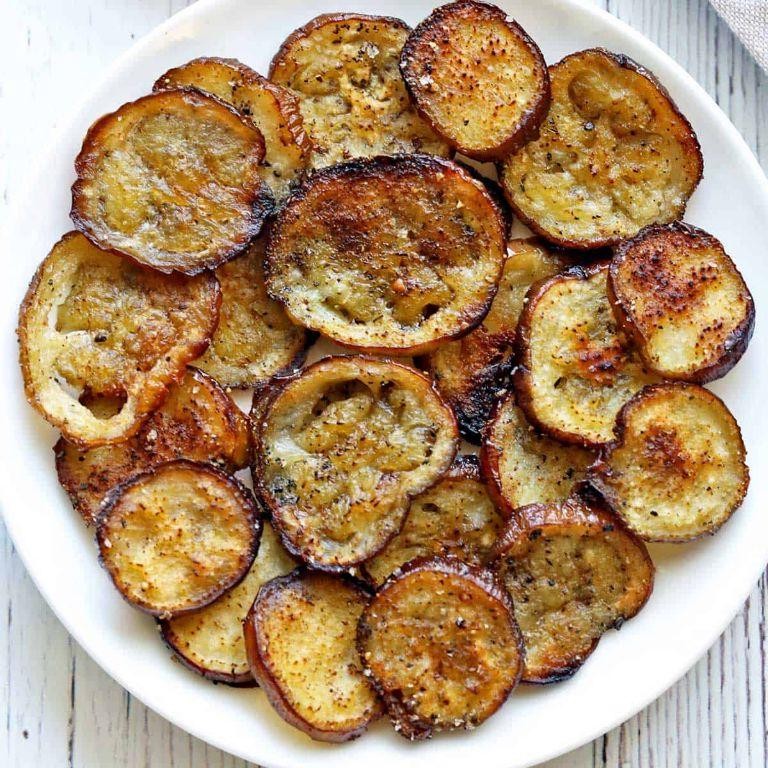
Absolutely nobody saw this coming—eggplant chips are the crispy, savory snack you’ve been missing. Thinly sliced, seasoned, and baked to perfection, they’re a game-changer for your snack drawer.
Ingredients
- 1 large eggplant, firm and glossy
- 2 tbsp rich extra virgin olive oil
- 1 tsp sea salt, finely ground
- 1/2 tsp smoked paprika, for a subtle kick
- 1/4 tsp garlic powder, for depth
Instructions
- Preheat your oven to 250°F—low and slow is the key to crispiness.
- Slice the eggplant into 1/8-inch rounds—uniformity ensures even cooking.
- Toss the slices with olive oil, sea salt, smoked paprika, and garlic powder until evenly coated.
- Arrange the slices in a single layer on a baking sheet lined with parchment paper—no overlapping!
- Bake for 2 hours, flipping halfway through, until golden and crisp.
- Let them cool on the baking sheet—they’ll crisp up even more as they sit.
Light as air with a satisfying crunch, these eggplant chips bring a smoky, garlicky flavor that’s irresistible. Serve them with a creamy dip or crumble over salads for an unexpected twist.
Kiwi Leather
Zesty and vibrant, this Kiwi Leather is your go-to snack for a burst of tropical flavor. Whip it up in no time and enjoy the chewy, sweet goodness anytime.
Ingredients
- 6 ripe kiwis, peeled and sliced
- 1/4 cup granulated sugar
- 1 tbsp fresh lemon juice
- 1/2 tsp pure vanilla extract
Instructions
- Preheat your oven to 170°F and line a baking sheet with parchment paper.
- In a blender, puree the peeled kiwis until smooth. Tip: For a smoother leather, strain the puree to remove seeds.
- Pour the kiwi puree into a bowl and stir in the granulated sugar, fresh lemon juice, and pure vanilla extract until well combined.
- Spread the mixture evenly onto the prepared baking sheet, aiming for a thickness of about 1/8 inch. Tip: Use a spatula to smooth the surface for even drying.
- Bake in the preheated oven for 4-6 hours, or until the leather is dry to the touch but still slightly tacky. Tip: Check every hour after the 4-hour mark to prevent over-drying.
- Once done, remove from the oven and let it cool completely on the baking sheet.
- Peel the leather off the parchment paper and cut into strips or desired shapes using scissors or a pizza cutter.
Kick back and savor the tangy-sweet flavor of your homemade Kiwi Leather. Perfect for on-the-go snacking or as a colorful addition to your dessert platter.
Conclusion
Craving something tasty and healthy? Our roundup of 17 Cosori dehydrator recipes offers a treasure trove of delicious options to explore. From savory snacks to sweet treats, there’s something for every palate. We’d love to hear which recipes you try and adore—drop us a comment below! And if you found this article helpful, don’t forget to share the love on Pinterest. Happy dehydrating!