Craving something that packs a punch? You’re in the right place! Our roundup of 21 Spicy Chislick Recipes for Every Occasion is here to turn up the heat in your kitchen. Whether you’re planning a cozy family dinner or a lively weekend barbecue, these fiery favorites will add excitement to any meal. Ready to spice things up? Let’s dive into these mouthwatering recipes that promise to delight your taste buds!
Classic Garlic Butter Chislick
Zesty and full of flavor, this Classic Garlic Butter Chislick is your go-to for a quick, delicious meal that feels like a hug in a dish. You’ll love how simple it is to whip up, yet how impressive it tastes every single time.
Ingredients
- 1 lb of your favorite chislick cut
- 4 tbsp of butter, because everything’s better with butter
- A couple of garlic cloves, minced (more if you’re a garlic lover)
- A splash of olive oil, just to get things going
- Salt and pepper, to make everything pop
Instructions
- Heat a splash of olive oil in a pan over medium heat until it’s shimmering but not smoking.
- Add the chislick to the pan, seasoning it with salt and pepper right away for that flavor from the get-go.
- Cook for about 4 minutes on each side, or until you’ve got a nice golden crust. Tip: Don’t overcrowd the pan, or you’ll steam the meat instead of searing it.
- Push the chislick to one side of the pan and toss in the butter and minced garlic on the other side. Tip: Let the butter melt slowly to avoid burning the garlic.
- Once the butter’s melted and the garlic’s fragrant, mix everything together in the pan and cook for another minute. Tip: This is the perfect time to baste the chislick with that garlic butter for extra flavor.
- Remove from heat and let it rest for a couple of minutes before serving to keep all those juicy flavors locked in.
Juicy, buttery, and with just the right amount of garlic punch, this chislick is a dream served over a bed of fluffy rice or with some crusty bread to soak up all that delicious sauce.
Spicy BBQ Chislick Skewers
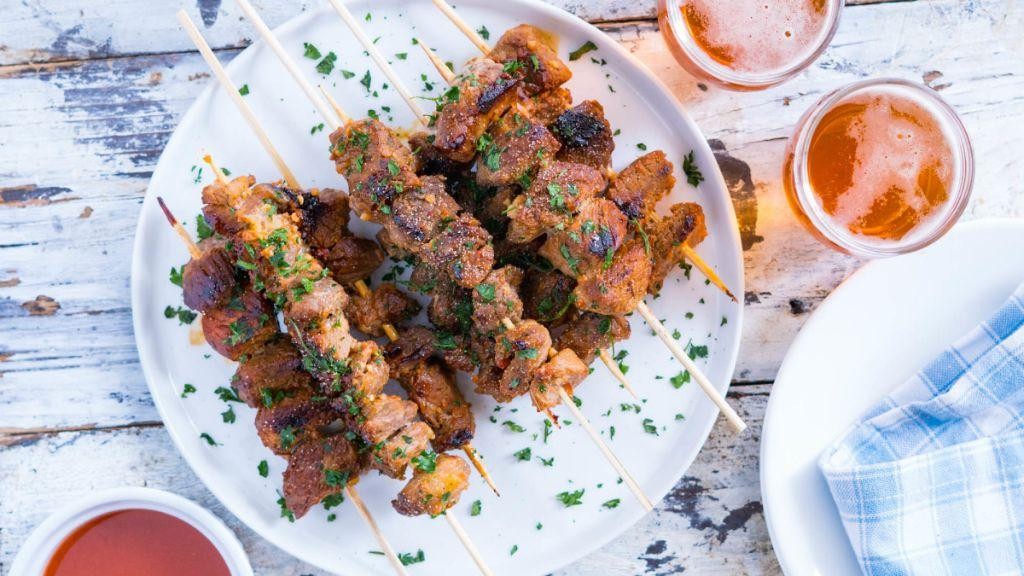
Unbelievably tasty and perfect for your next BBQ, these Spicy BBQ Chislick Skewers are a game-changer. You’ll love the kick of heat paired with the smoky BBQ flavor.
Ingredients
- 1.5 lbs of beef chuck, cut into 1-inch cubes
- A couple of tablespoons of your favorite BBQ rub
- A splash of olive oil
- 1/4 cup of spicy BBQ sauce
- Wooden skewers, soaked in water for 30 minutes
Instructions
- Preheat your grill to medium-high heat, about 400°F.
- Toss the beef cubes with the BBQ rub and a splash of olive oil until evenly coated.
- Thread the beef onto the soaked skewers, leaving a little space between each piece for even cooking.
- Place the skewers on the grill. Cook for about 4 minutes on each side for medium-rare, or longer if you prefer your meat more done.
- Brush the skewers with the spicy BBQ sauce during the last 2 minutes of cooking. This prevents the sugar in the sauce from burning.
- Remove the skewers from the grill and let them rest for a couple of minutes before serving. This keeps the juices locked in.
Deliciously juicy with a perfect char, these skewers are a must-try. Serve them over a bed of rice or with a side of cool coleslaw to balance the heat.
Honey Glazed Chislick Bites

Ready to whip up something sweet and savory that’ll have everyone asking for seconds? These Honey Glazed Chislick Bites are the perfect mix of sticky, sweet, and a little bit spicy—ideal for your next game night or as a fancy appetizer.
Ingredients
- 1 lb of chicken breast, cut into bite-sized pieces
- A good glug of olive oil
- 3 tbsp of honey
- A couple of garlic cloves, minced
- A splash of soy sauce
- 1 tsp of smoked paprika
- A pinch of red pepper flakes
- Salt and pepper, just enough to season
Instructions
- Heat a large skillet over medium heat and add that glug of olive oil.
- Toss in the chicken pieces, seasoning them with salt and pepper right in the pan. Cook until they’re golden brown, about 5-7 minutes.
- While the chicken cooks, mix the honey, minced garlic, soy sauce, smoked paprika, and red pepper flakes in a bowl. Tip: Warm the honey for a few seconds in the microwave to make it easier to mix.
- Once the chicken is browned, pour the honey mixture over it. Stir well to coat every piece.
- Let it simmer for another 5 minutes, stirring occasionally, until the sauce thickens and clings to the chicken. Tip: If the sauce thickens too much, add a teaspoon of water to loosen it up.
- Serve hot, garnished with a little extra sprinkle of red pepper flakes if you like it spicy. Tip: These bites are great on toothpicks for easy serving.
Vibrant and packed with flavor, these Honey Glazed Chislick Bites offer a delightful crunch on the outside while staying juicy inside. Try serving them over a bed of greens for a sweet and spicy salad twist.
Herb Marinated Chislick with Rosemary
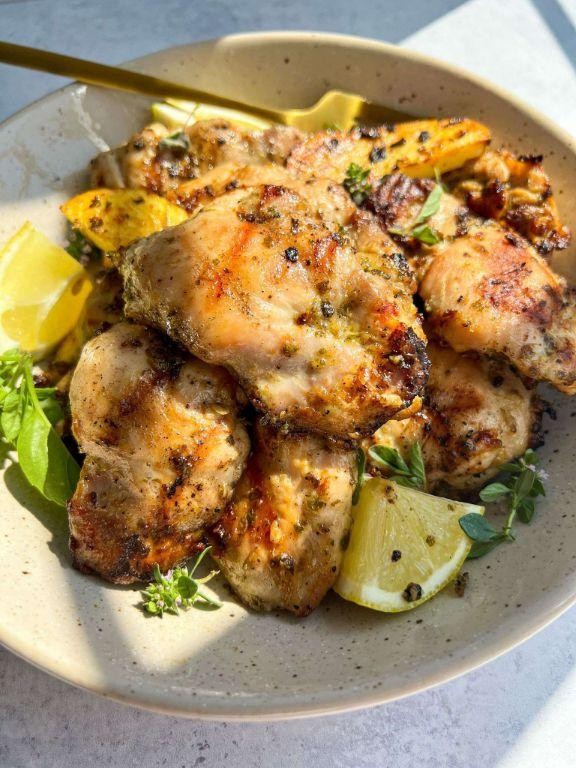
Zesty and full of flavor, this Herb Marinated Chislick with Rosemary is your next go-to dish for a cozy night in or a lively gathering. You’ll love how the herbs bring out the meat’s natural savoriness, making every bite a delight.
Ingredients
- 2 lbs of chislick (lamb or beef cubes)
- A couple of sprigs of fresh rosemary, finely chopped
- 3 cloves of garlic, minced
- A splash of olive oil (about 1/4 cup)
- 1 tbsp of lemon juice
- A pinch of salt and black pepper
Instructions
- In a large bowl, mix the chislick cubes with the chopped rosemary, minced garlic, olive oil, lemon juice, salt, and black pepper. Tip: Let the meat marinate for at least 2 hours, or overnight for deeper flavor.
- Preheat your grill or skillet to medium-high heat (about 375°F). Tip: If using a skillet, a light coat of oil will prevent sticking.
- Thread the marinated chislick onto skewers if you’re grilling. Tip: Soak wooden skewers in water for 30 minutes beforehand to avoid burning.
- Cook the chislick for about 4-5 minutes on each side, or until they’re nicely browned and reach an internal temperature of 145°F for medium-rare.
- Let the meat rest for a couple of minutes before serving. This keeps it juicy.
Every bite of this Herb Marinated Chislick with Rosemary is a burst of herby goodness, with the meat being tender and slightly charred on the edges. Serve it over a bed of fluffy couscous or with a side of roasted veggies for a complete meal.
Sweet and Sour Chislick Stir Fry
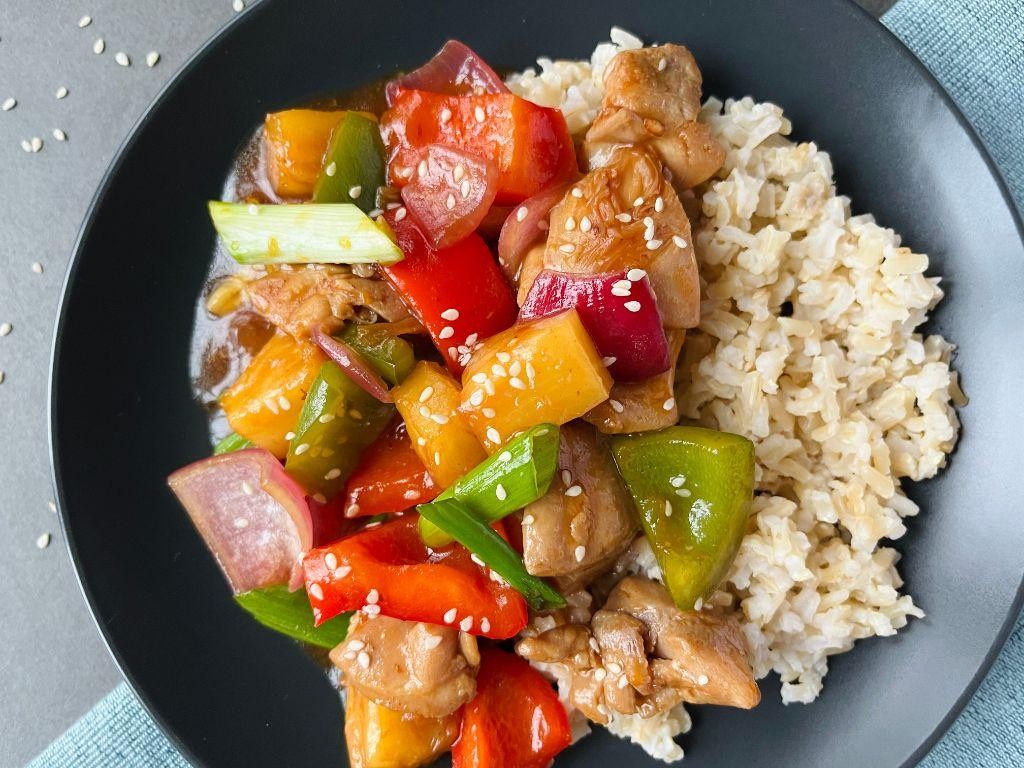
Wow, have you ever craved something that’s both tangy and sweet, with a bit of a kick? This Sweet and Sour Chislick Stir Fry hits all the right notes, and it’s surprisingly easy to whip up on a busy weeknight.
Ingredients
- 1 lb chislick (or your favorite protein), cut into bite-sized pieces
- 2 cups bell peppers, sliced (go for a mix of colors for a pop)
- 1 cup pineapple chunks (fresh or canned, but drain if using canned)
- 1/2 cup onion, thinly sliced
- 2 cloves garlic, minced
- A splash of soy sauce
- A couple of tablespoons of ketchup
- 1 tablespoon apple cider vinegar
- 1 tablespoon brown sugar
- A pinch of red pepper flakes (optional, for heat)
- 2 tablespoons vegetable oil
Instructions
- Heat the vegetable oil in a large skillet or wok over medium-high heat until it shimmers.
- Add the chislick to the skillet, spreading it out in a single layer. Let it sear for about 2 minutes without stirring to get a nice crust. Tip: Don’t overcrowd the pan, or you’ll steam the meat instead of searing it.
- Flip the chislick pieces and sear the other side for another 2 minutes. Then, remove them from the skillet and set aside.
- In the same skillet, add the bell peppers, onion, and garlic. Stir-fry for about 3 minutes until they start to soften but still have a bit of crunch.
- Throw in the pineapple chunks and stir-fry for another minute. Tip: The pineapple will caramelize slightly, adding a deeper sweetness to the dish.
- Return the chislick to the skillet. Add the soy sauce, ketchup, apple cider vinegar, brown sugar, and red pepper flakes if using. Stir everything together until well coated and heated through, about 2 minutes. Tip: Taste and adjust the sweetness or tanginess by adding a bit more sugar or vinegar if needed.
You’ll love how the tender chislick pairs with the crisp veggies and juicy pineapple, all coated in that irresistible sweet and sour sauce. Try serving it over a bed of fluffy rice or even wrapped in warm tortillas for a fun twist.
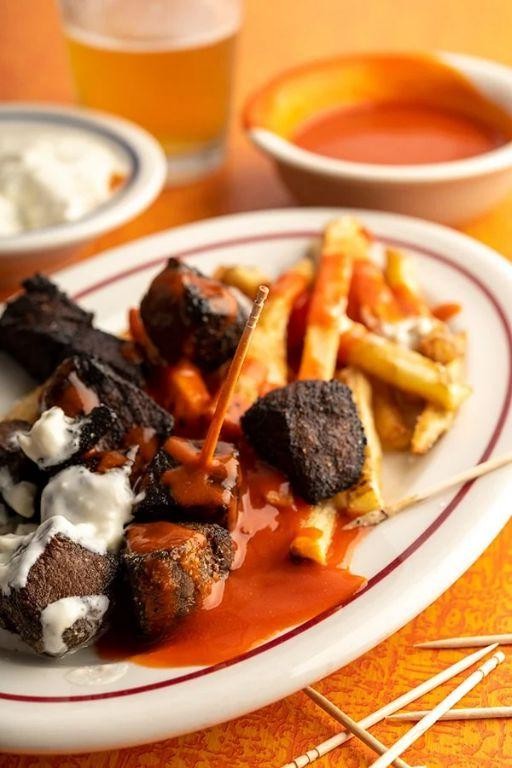
Crispy Fried Chislick with Dipping Sauce
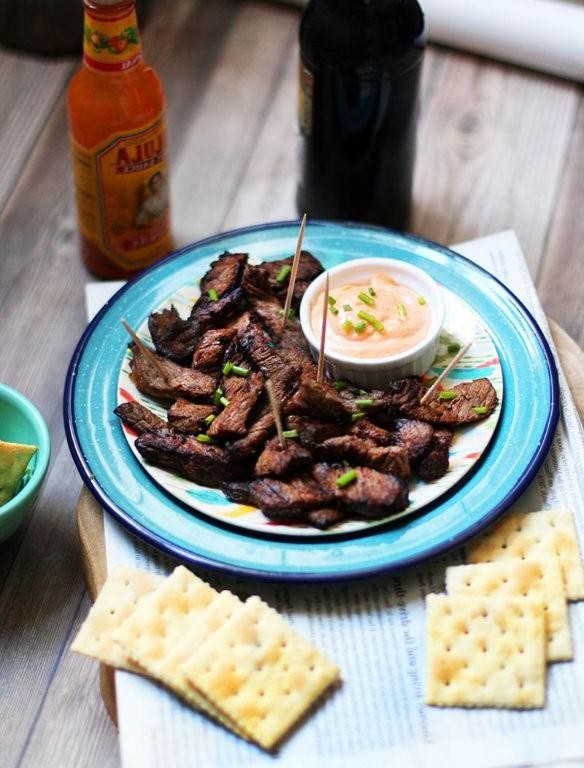
Mmm, you’re going to love this Crispy Fried Chislick with Dipping Sauce—it’s the perfect mix of crunchy and juicy, with a sauce that’ll have you licking your fingers clean.
Ingredients
- 1 pound of chislick, cut into bite-sized pieces
- A couple of cups of all-purpose flour
- A splash of buttermilk
- 2 eggs, beaten
- A pinch of salt and pepper
- 1 teaspoon of garlic powder
- 1 teaspoon of paprika
- Enough vegetable oil to fill your frying pan about an inch deep
- For the dipping sauce: a half cup of mayonnaise, a tablespoon of honey, and a dash of hot sauce
Instructions
- Start by heating your vegetable oil in a deep frying pan over medium heat until it reaches 375°F. Use a thermometer to check—it’s key for that perfect crisp.
- While the oil heats, mix the flour, salt, pepper, garlic powder, and paprika in a bowl. This is your dry mix.
- In another bowl, whisk together the buttermilk and eggs. This is your wet mix.
- Dip each piece of chislick into the wet mix, then dredge in the dry mix. Make sure it’s fully coated for maximum crunch.
- Carefully place the coated chislick into the hot oil. Don’t overcrowd the pan—fry in batches if needed.
- Fry each batch for about 4 minutes, turning once, until golden brown and crispy. Drain on paper towels to keep them crunchy.
- For the dipping sauce, just stir together the mayonnaise, honey, and hot sauce until smooth. Adjust the hot sauce to your liking.
Crunchy on the outside, tender on the inside, and that dipping sauce? It’s a game-changer. Try serving these with a cold beer for the ultimate snack experience.
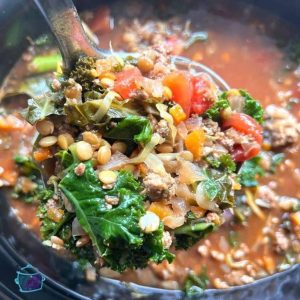
Slow Cooker Chislick in Rich Gravy
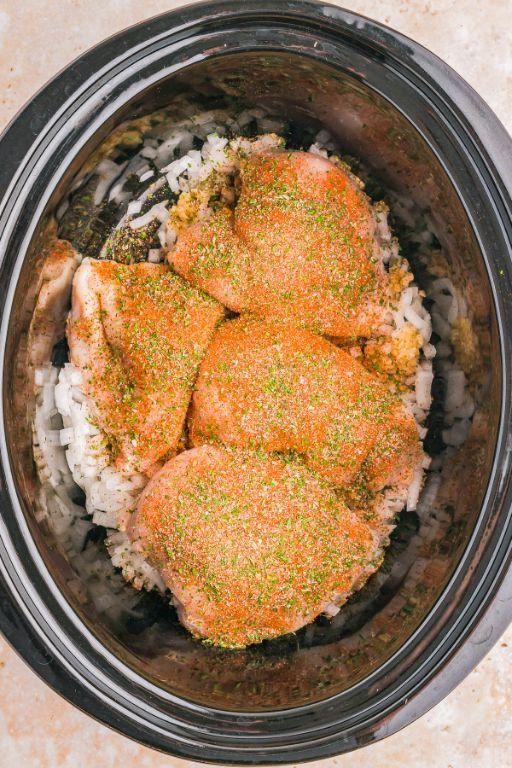
Hey, you know those days when you crave something hearty but don’t want to spend hours in the kitchen? This slow cooker chislick in rich gravy is your answer. It’s all about tossing everything in and letting the magic happen.
Ingredients
- 2 lbs of beef chislick, cut into bite-sized pieces
- A couple of carrots, sliced
- 2 potatoes, cubed
- 1 onion, chopped
- A splash of olive oil
- 2 cups of beef broth
- 1 tbsp of tomato paste
- A pinch of salt and pepper
- 1 tsp of garlic powder
- 1 tsp of paprika
Instructions
- Heat a splash of olive oil in a pan over medium heat. Brown the beef chislick pieces on all sides, about 5 minutes. This locks in the flavors.
- Transfer the beef to your slow cooker. Add the carrots, potatoes, and onion on top.
- In a bowl, whisk together the beef broth, tomato paste, salt, pepper, garlic powder, and paprika. Pour this over the ingredients in the slow cooker.
- Cover and cook on low for 8 hours or on high for 4 hours. The longer it cooks, the more tender the beef gets.
- Once done, give it a gentle stir. The gravy should be thick and rich. If it’s too thin, let it cook uncovered for another 30 minutes.
Now, the beef is so tender it practically melts in your mouth, and the gravy? Absolutely divine. Serve it over a bed of mashed potatoes or with crusty bread to soak up all that goodness.
Chislick Tacos with Fresh Salsa

Ready to spice up your taco night? These Chislick Tacos with Fresh Salsa are a game-changer, blending juicy, flavorful meat with a bright, homemade salsa that’ll have you coming back for seconds.
Ingredients
- 1 lb of chislick (or your favorite cut of beef, diced into small pieces)
- A couple of tablespoons of olive oil
- A pinch of salt and pepper
- 1 teaspoon of cumin
- 1 teaspoon of smoked paprika
- 2 cloves of garlic, minced
- A splash of lime juice
- 1 cup of diced tomatoes
- 1/2 cup of diced red onion
- A handful of chopped cilantro
- 1 jalapeño, finely chopped (seeds removed if you’re not into heat)
- 8 small tortillas
Instructions
- Heat the olive oil in a large skillet over medium-high heat until it’s shimmering.
- Add the diced chislick to the skillet, spreading it out so it cooks evenly. Tip: Don’t overcrowd the pan, or the meat will steam instead of sear.
- Sprinkle the salt, pepper, cumin, and smoked paprika over the meat. Stir to coat evenly.
- Cook for about 5-7 minutes, stirring occasionally, until the meat is nicely browned on all sides.
- Add the minced garlic and cook for another minute, just until fragrant. Tip: Garlic burns quickly, so keep an eye on it.
- Remove the skillet from the heat and drizzle with lime juice. Stir to combine.
- In a bowl, mix together the diced tomatoes, red onion, cilantro, and jalapeño to make the fresh salsa. Tip: Let the salsa sit for a few minutes to let the flavors meld.
- Warm the tortillas in a dry skillet over medium heat for about 30 seconds on each side, or until they’re soft and pliable.
- Assemble the tacos by spooning the chislick onto the tortillas and topping with the fresh salsa.
You’ll love the contrast between the tender, spiced chislick and the crisp, refreshing salsa. Try serving these tacos with an extra squeeze of lime and a cold beer for the ultimate experience.
Grilled Chislick with Chimichurri Sauce
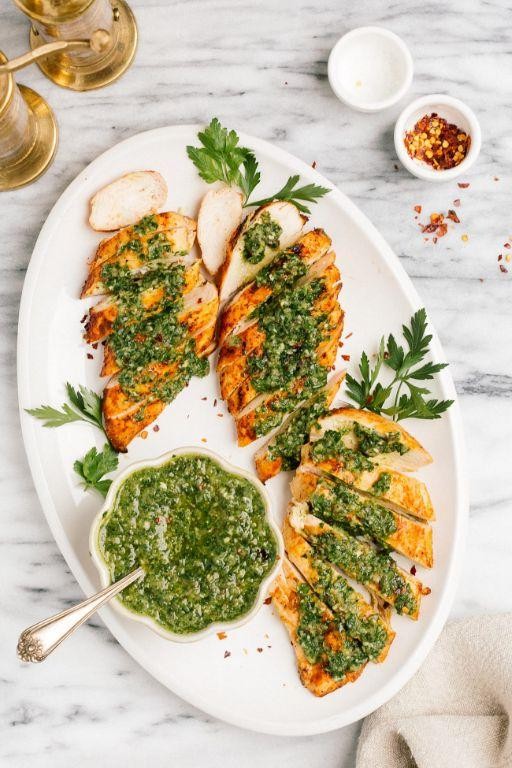
Zesty and full of flavor, this Grilled Chislick with Chimichurri Sauce is your next go-to for a quick, delicious meal. You’ll love how the smoky meat pairs with the fresh, herby sauce.
Ingredients
- 1.5 lbs of chislick (lamb or beef cubes)
- A couple of cloves of garlic, minced
- A splash of olive oil
- 1/2 cup of fresh parsley, finely chopped
- 1/4 cup of fresh cilantro, finely chopped
- 2 tbsp of red wine vinegar
- 1/2 tsp of red pepper flakes
- Salt, just a pinch
Instructions
- Preheat your grill to medium-high, about 400°F, to get those perfect grill marks.
- While the grill heats, toss the chislick cubes with a splash of olive oil and a pinch of salt in a bowl. Tip: Letting the meat sit at room temperature for 10 minutes ensures even cooking.
- Grill the chislick for about 3-4 minutes per side for medium-rare. Tip: Don’t overcrowd the grill to avoid steaming the meat.
- For the chimichurri, mix the minced garlic, parsley, cilantro, red wine vinegar, red pepper flakes, and a splash of olive oil in a bowl. Tip: Let the sauce sit for at least 10 minutes to let the flavors meld.
- Serve the grilled chislick hot with the chimichurri sauce on the side or drizzled on top.
Wow, the contrast between the charred, juicy chislick and the bright, tangy chimichurri is unreal. Try skewering the meat with veggies for a fun twist on presentation.
Chislick and Vegetable Kebabs
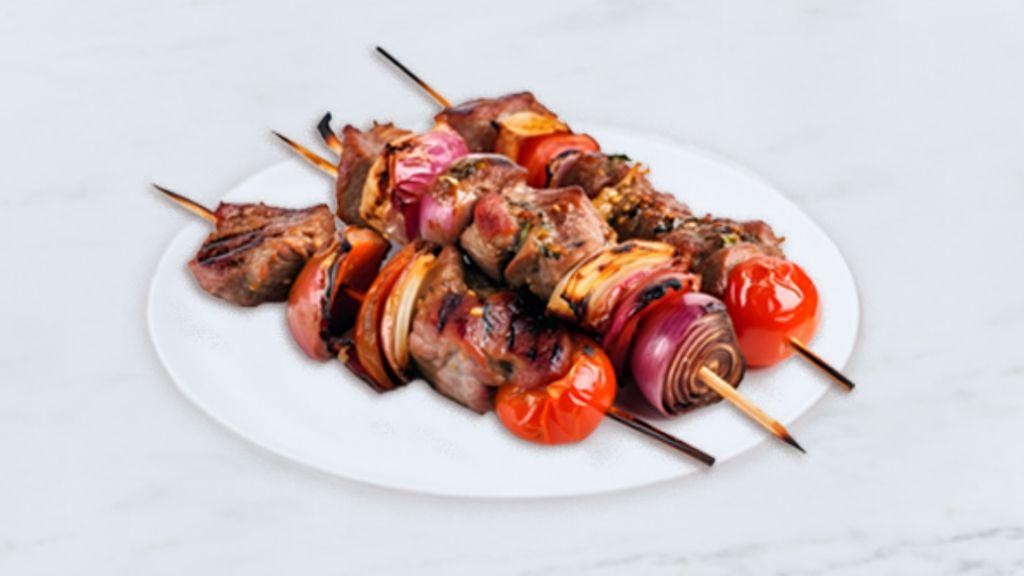
Craving something that’s both hearty and a breeze to whip up? These Chislick and Vegetable Kebabs are your go-to for a flavorful, fuss-free meal that’ll have everyone asking for seconds.
Ingredients
- 1.5 lbs of chislick, cut into 1-inch cubes
- 2 bell peppers, any color, cut into chunks
- 1 large red onion, cut into chunks
- a couple of zucchinis, sliced into rounds
- a splash of olive oil
- 2 tbsp of your favorite BBQ rub
- a handful of cherry tomatoes
Instructions
- Preheat your grill to medium-high, about 400°F.
- Thread the chislick, bell peppers, red onion, zucchinis, and cherry tomatoes onto skewers, alternating between meat and veggies.
- Drizzle the kebabs with a splash of olive oil and sprinkle them evenly with the BBQ rub. Tip: If using wooden skewers, soak them in water for 30 minutes first to prevent burning.
- Place the kebabs on the grill. Cook for about 4 minutes on each side for medium-rare, or until the chislick reaches your desired doneness. Tip: Don’t overcrowd the grill to ensure even cooking.
- Let the kebabs rest for a couple of minutes off the grill before serving. Tip: This lets the juices redistribute, making every bite succulent.
Zesty and smoky, these kebabs are a knockout with their charred edges and tender insides. Serve them over a bed of fluffy couscous or with a side of cool tzatziki for a meal that’s anything but ordinary.
Asian Style Chislick Lettuce Wraps
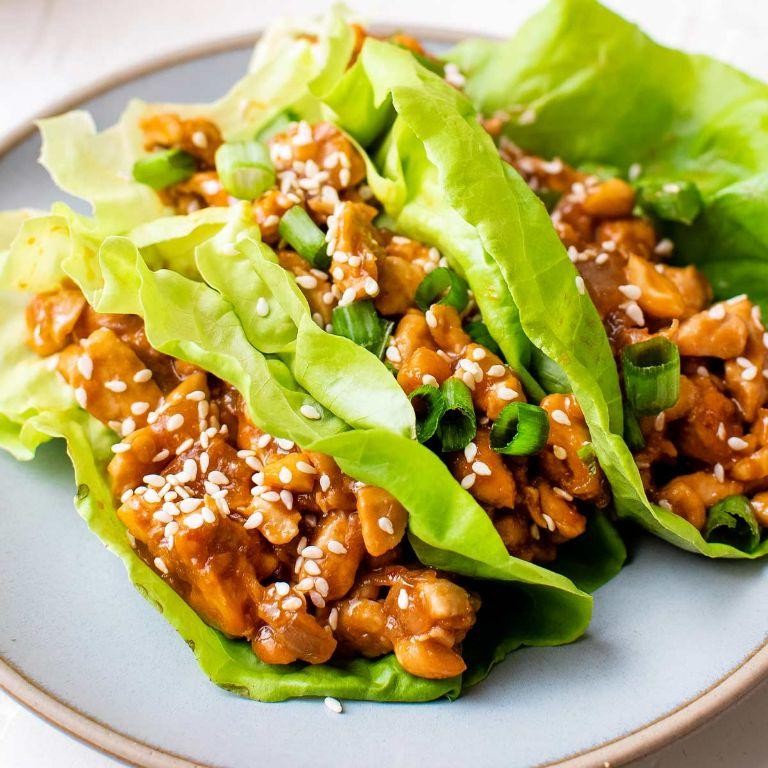
Delicious doesn’t even begin to describe these Asian Style Chislick Lettuce Wraps. You’re going to love how the flavors come together in this easy-to-make dish that’s perfect for any night of the week.
Ingredients
- 1 lb ground chicken
- a splash of soy sauce
- a couple of cloves garlic, minced
- 1 tbsp ginger, grated
- a handful of green onions, chopped
- 1 tbsp sesame oil
- a dash of red pepper flakes
- 1 head of butter lettuce, leaves separated
- a sprinkle of sesame seeds for garnish
Instructions
- Heat a large skillet over medium heat and add the sesame oil.
- Once the oil is shimmering, add the ground chicken. Break it apart with a spoon and cook until no longer pink, about 5 minutes.
- Tip: Don’t overcrowd the pan to ensure the chicken browns nicely.
- Add the minced garlic, grated ginger, and a dash of red pepper flakes. Stir and cook for another minute until fragrant.
- Pour in a splash of soy sauce and toss in the chopped green onions. Stir everything together and cook for another 2 minutes.
- Tip: Taste as you go and adjust the seasoning if needed, but remember the soy sauce is already salty.
- Remove from heat and let it cool slightly.
- Tip: Letting the mixture cool a bit makes it easier to handle when assembling the wraps.
- To serve, spoon the chicken mixture into the butter lettuce leaves. Sprinkle with sesame seeds for a little crunch.
Perfect for a light dinner or as an appetizer, these wraps are bursting with flavor. The crisp lettuce contrasts beautifully with the savory, slightly spicy filling. Try serving them with a side of steamed rice for a more filling meal.
Chislick Pizza with Mozzarella and Basil

Unbelievable how a simple twist can turn your pizza night into something extraordinary. This Chislick Pizza with Mozzarella and Basil is your ticket to a deliciously different kind of pie.
Ingredients
- 1 pre-made pizza dough (or homemade if you’re feeling ambitious)
- A couple of tablespoons of olive oil
- 1 cup of tomato sauce (the chunkier, the better)
- 2 cups of shredded mozzarella (because more cheese is always better)
- A handful of fresh basil leaves (torn, not chopped, for that rustic look)
- A pinch of salt (to bring out all those flavors)
- A splash of balsamic glaze (for that fancy finish)
Instructions
- Preheat your oven to 475°F. A hot oven means a crispy crust.
- Roll out your dough on a floured surface. Aim for about 12 inches in diameter.
- Brush the dough with olive oil. This keeps the sauce from making it soggy.
- Spread the tomato sauce evenly, leaving a small border for the crust.
- Sprinkle the mozzarella all over the sauce. Don’t skimp!
- Toss the basil leaves on top. They’ll crisp up nicely in the oven.
- Bake for 12-15 minutes. Look for golden cheese and a bubbly surface.
- Drizzle with balsamic glaze right after baking. It adds a sweet tang.
Light, crispy, and packed with flavor, this pizza is a game-changer. Try serving it with a side of garlic knots for the ultimate carb feast.
Baked Chislick with Parmesan Crust
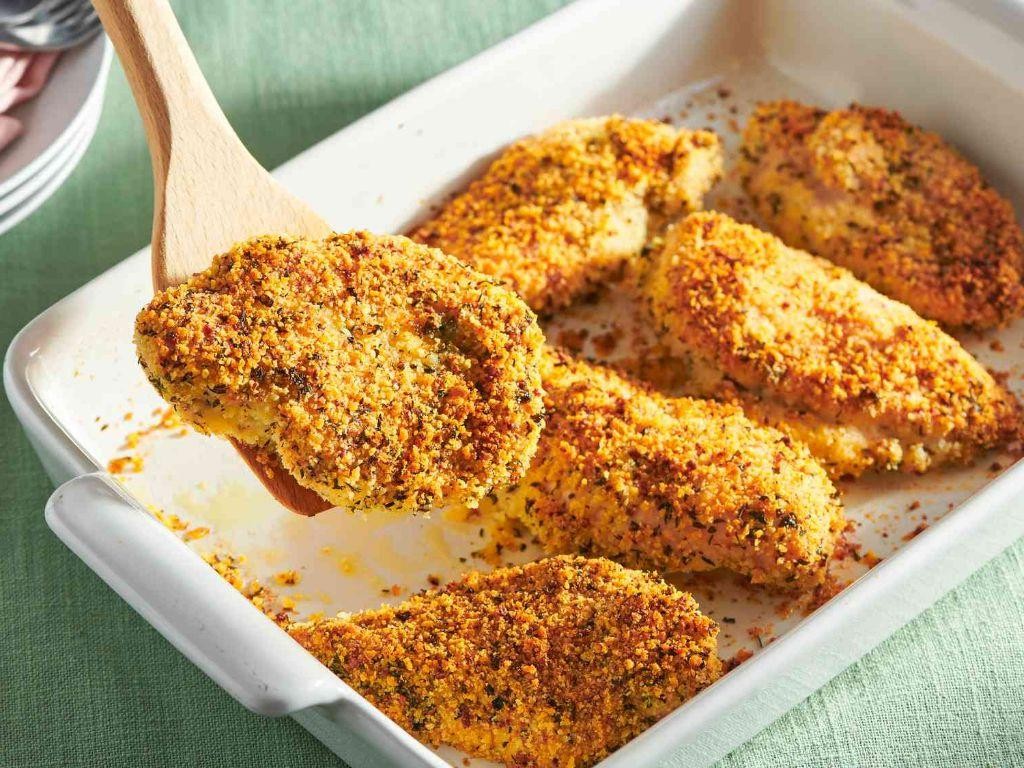
Zesty and utterly comforting, this Baked Chislick with Parmesan Crust is your next go-to for a cozy night in. You’ll love how the crispy parmesan crust gives way to tender, flavorful chislick underneath.
Ingredients
- 1.5 lbs of chislick, cut into bite-sized pieces
- A good glug of olive oil
- A couple of garlic cloves, minced
- A splash of soy sauce
- 1 cup of grated parmesan cheese
- 1/2 cup of breadcrumbs
- A pinch of salt and pepper
- A handful of fresh parsley, chopped
Instructions
- Preheat your oven to 375°F and grab a baking dish.
- Toss the chislick pieces with olive oil, minced garlic, and soy sauce in a bowl. Tip: Let it sit for 10 minutes to marinate for extra flavor.
- Mix the grated parmesan, breadcrumbs, salt, and pepper in another bowl.
- Dredge each chislick piece in the parmesan mixture, pressing lightly to adhere. Tip: Use one hand for wet and one for dry to keep things tidy.
- Arrange the coated chislick in the baking dish without crowding. Tip: A little space between pieces ensures even crisping.
- Bake for 25 minutes or until the crust is golden and the chislick is cooked through.
- Sprinkle with chopped parsley right before serving.
Absolutely irresistible, the parmesan crust adds a crunchy contrast to the juicy chislick. Try serving these over a bed of greens for a light meal or as a hearty appetizer with your favorite dip.
Chislick Sliders with Caramelized Onions
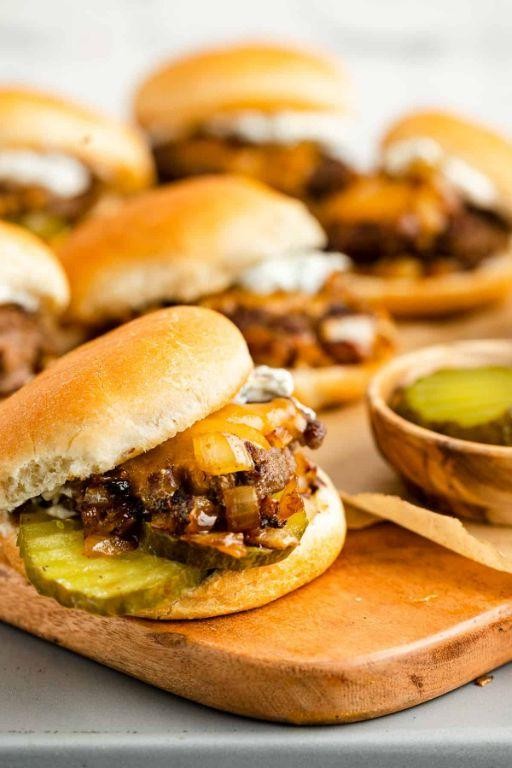
Just imagine biting into a juicy, flavorful slider that’s packed with a unique twist. These Chislick Sliders with Caramelized Onions are your next favorite party snack or weeknight dinner, easy to make and even easier to love.
Ingredients
- 1 lb ground beef (80/20 blend for the best flavor)
- 1 large onion, thinly sliced
- 2 tbsp butter
- 1 tbsp olive oil
- a splash of balsamic vinegar
- a couple of slider buns
- salt and pepper to season
- a handful of your favorite cheese slices
Instructions
- Heat a large skillet over medium heat and add the olive oil and butter.
- Once the butter melts, add the sliced onions. Cook them slowly, stirring occasionally, until they’re golden and sweet, about 20 minutes. Tip: A splash of balsamic vinegar added halfway through will deepen the flavor.
- While the onions cook, season the ground beef with salt and pepper and form into small patties, slightly larger than your buns since they’ll shrink.
- In another skillet over medium-high heat, cook the patties for about 3 minutes per side for medium doneness. Tip: Don’t press down on the patties; you’ll lose all those tasty juices.
- Toast the slider buns lightly if you like a bit of crunch.
- Assemble the sliders: bun, patty, a slice of cheese, and a generous topping of caramelized onions. Tip: Let the cheese melt a bit from the heat of the patty before adding the onions for extra gooeyness.
Rich in flavor with a perfect balance of savory and sweet, these sliders are a hit. Serve them with a side of crispy fries or a fresh salad for a complete meal that’s sure to impress.
Chislick Pasta in Creamy Alfredo Sauce
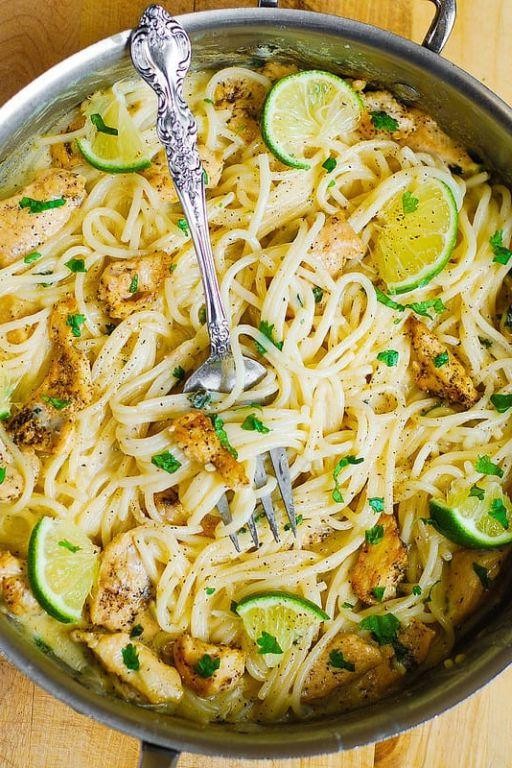
Unbelievable how a simple pasta dish can feel like a hug in a bowl, right? This Chislick Pasta in Creamy Alfredo Sauce is your next comfort food obsession, blending tender pasta with a rich, velvety sauce that’s surprisingly easy to whip up.
Ingredients
- 8 oz of your favorite pasta (like fettuccine or penne)
- 2 cups of heavy cream
- 1/2 cup of unsalted butter
- 1 cup of freshly grated Parmesan cheese
- A couple of garlic cloves, minced
- A pinch of salt
- A splash of olive oil
- Freshly ground black pepper, just a dash
Instructions
- Bring a large pot of salted water to a boil over high heat. Tip: Salt the water like the sea to flavor the pasta from the inside out.
- Add the pasta and cook according to package instructions until al dente, about 8-10 minutes. Drain and set aside, saving a cup of pasta water.
- In a large skillet, heat a splash of olive oil over medium heat. Add the minced garlic and sauté for about 30 seconds until fragrant. Tip: Don’t let the garlic brown or it’ll turn bitter.
- Lower the heat and add the butter, stirring until melted. Slowly pour in the heavy cream, stirring constantly to combine.
- Gradually whisk in the grated Parmesan until the sauce is smooth and creamy. If it’s too thick, loosen it with a bit of the reserved pasta water. Tip: Freshly grated Parmesan melts better than pre-shredded.
- Toss the cooked pasta in the sauce until evenly coated. Season with a pinch of salt and a dash of black pepper.
Mmm, the pasta is luxuriously creamy with a perfect bite, and the Alfredo sauce clings to every strand. Serve it with a sprinkle of extra Parmesan and a side of garlic bread for the ultimate comfort meal.
Chislick Salad with Avocado and Lime Dressing
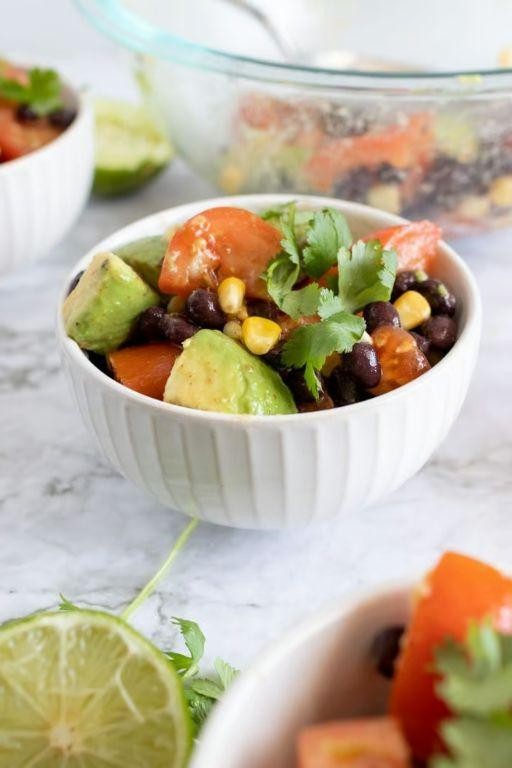
Ready to shake up your salad game? This Chislick Salad with Avocado and Lime Dressing is a fresh, zesty twist that’s perfect for those hot summer days. You’ll love how the creamy avocado pairs with the tangy lime dressing.
Ingredients
- 2 cups of chislick, thinly sliced
- 1 ripe avocado, diced
- A couple of cups of mixed greens
- A splash of olive oil
- Juice of 1 lime
- A pinch of salt
- A handful of cherry tomatoes, halved
- A sprinkle of cilantro, chopped
Instructions
- Start by heating a splash of olive oil in a pan over medium heat. Add the chislick and cook for about 5 minutes, until it’s nicely browned. Tip: Don’t overcrowd the pan to get that perfect sear.
- While the chislick cooks, whisk together the lime juice and a pinch of salt in a small bowl. Slowly drizzle in a bit more olive oil while whisking to create a smooth dressing.
- Toss the mixed greens, diced avocado, and cherry tomatoes in a large bowl. Tip: Adding the avocado last helps prevent it from getting too mushy.
- Once the chislick is done, let it cool for a minute before adding it to the salad. This keeps the greens crisp.
- Drizzle the lime dressing over the salad and gently toss everything together. Tip: Use your hands to toss the salad for a more even distribution of dressing.
- Finish with a sprinkle of chopped cilantro for an extra burst of flavor.
Out of the ordinary, this salad brings a delightful crunch from the chislick, balanced by the creaminess of the avocado. Serve it in a hollowed-out avocado half for a fun, edible bowl that’ll impress your guests.
Chislick Curry with Coconut Milk

Tired of the same old dinner routine? You’re in for a treat with this Chislick Curry with Coconut Milk—it’s creamy, flavorful, and just the thing to spice up your weeknight. Plus, it’s easier to make than you might think.
Ingredients
– 1.5 lbs of chislick (or any tender cut of beef), cut into bite-sized pieces
– A can of coconut milk (about 13.5 oz)
– A couple of tablespoons of curry powder
– A splash of vegetable oil
– 1 onion, chopped
– 2 garlic cloves, minced
– A pinch of salt
– A handful of fresh cilantro, chopped
Instructions
1. Heat a splash of vegetable oil in a large pan over medium heat until it shimmers.
2. Toss in the chopped onion and minced garlic, sautéing until they’re soft and golden, about 5 minutes. Tip: Don’t rush this step—the flavor base is key!
3. Sprinkle in the curry powder, stirring for about 30 seconds until it’s fragrant. Tip: Toasting the curry powder unlocks its full flavor.
4. Add the chislick pieces to the pan, browning them on all sides. This should take about 5 minutes.
5. Pour in the coconut milk, stirring to combine everything. Bring the mixture to a gentle simmer.
6. Let it cook uncovered for about 20 minutes, or until the chislick is tender and the sauce has thickened slightly. Tip: Stir occasionally to prevent sticking.
7. Finish with a pinch of salt and a handful of chopped cilantro, stirring through.
You’ll love how the coconut milk makes the curry luxuriously creamy, while the curry powder brings just the right amount of warmth. Serve it over steamed rice or with some naan bread to soak up all that delicious sauce.
Chislick Wrapped in Bacon with Maple Glaze
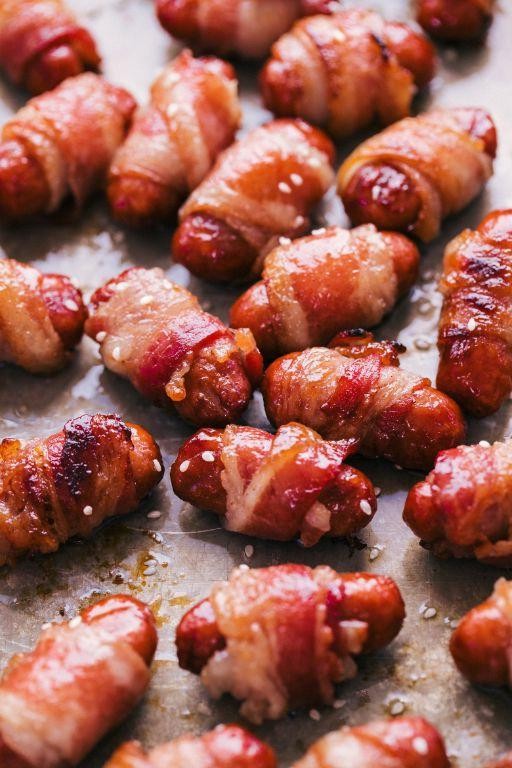
Now, imagine biting into a juicy piece of chislick, wrapped in crispy bacon, all glazed with a sweet maple touch. It’s the kind of dish that turns a regular dinner into something special.
Ingredients
- 1 lb chislick (or your favorite cut of meat, cubed)
- 8 slices of bacon
- A couple of tablespoons of maple syrup
- A splash of soy sauce
- A pinch of black pepper
Instructions
- Preheat your oven to 375°F. This ensures everything cooks evenly.
- Wrap each cube of chislick with a slice of bacon. Secure with a toothpick if needed. Tip: Partially cooking the bacon for a couple of minutes makes it easier to wrap.
- Mix the maple syrup and soy sauce in a small bowl. Brush this glaze over the bacon-wrapped chislick. Tip: Double brushing gives an extra layer of flavor.
- Place them on a baking sheet lined with parchment paper. Sprinkle a pinch of black pepper over the top.
- Bake for 20-25 minutes, or until the bacon is crispy and the chislick is cooked through. Tip: Flipping them halfway through ensures even crispiness.
The result? A perfect balance of savory and sweet, with a texture that’s crispy on the outside and tender inside. Serve them on skewers for a fun appetizer or alongside a fresh salad for a hearty meal.
Chislick and Mushroom Stroganoff
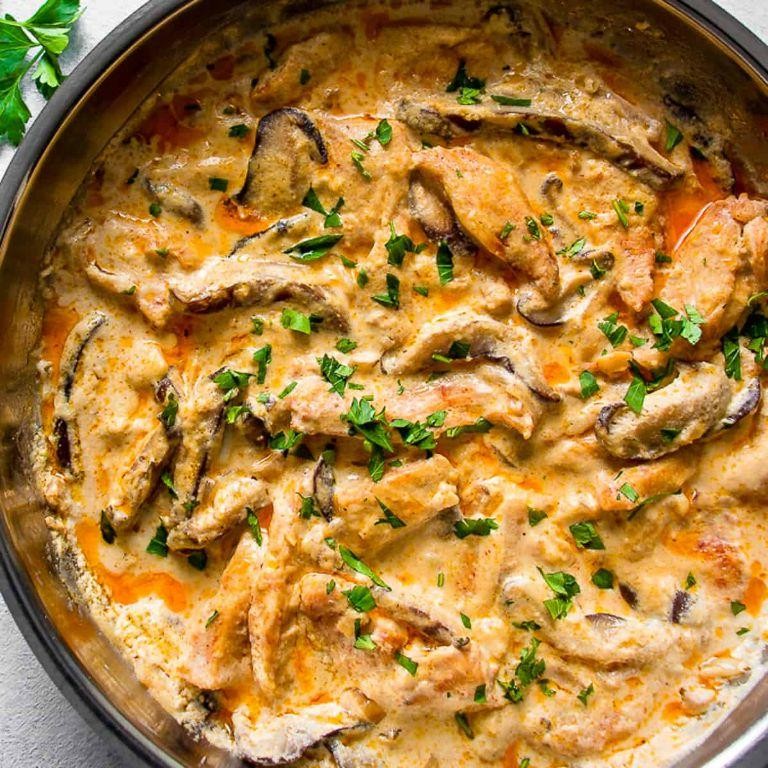
Oh, you’re going to love this twist on a classic comfort dish. It’s hearty, creamy, and packed with flavors that’ll make your taste buds dance.
Ingredients
- 1 lb of chislick, cut into bite-sized pieces
- 2 cups of sliced mushrooms
- 1 onion, finely chopped
- 2 cloves of garlic, minced
- A splash of olive oil
- 1 cup of beef broth
- A couple of tablespoons of sour cream
- 1 tbsp of flour
- A pinch of salt and pepper
- 1 tsp of paprika
- Fresh parsley for garnish
Instructions
- Heat a splash of olive oil in a large pan over medium heat. Add the chislick and cook until browned, about 5 minutes. Tip: Don’t overcrowd the pan to get a nice sear.
- Throw in the onions and garlic, sautéing until soft, about 3 minutes. Tip: Keep stirring to prevent burning.
- Add the mushrooms and cook until they release their juices, roughly 4 minutes.
- Sprinkle the flour over everything, stirring well to coat. This’ll thicken your sauce later.
- Pour in the beef broth, stirring constantly to avoid lumps. Bring to a simmer.
- Mix in the sour cream, paprika, salt, and pepper. Reduce heat and let it simmer for 10 minutes. Tip: Keep the heat low to prevent the sour cream from curdling.
- Garnish with fresh parsley before serving.
Creamy and rich, this stroganoff pairs perfectly with egg noodles or mashed potatoes. The chislick adds a unique texture that’s sure to impress.
Chislick Fried Rice with Vegetables
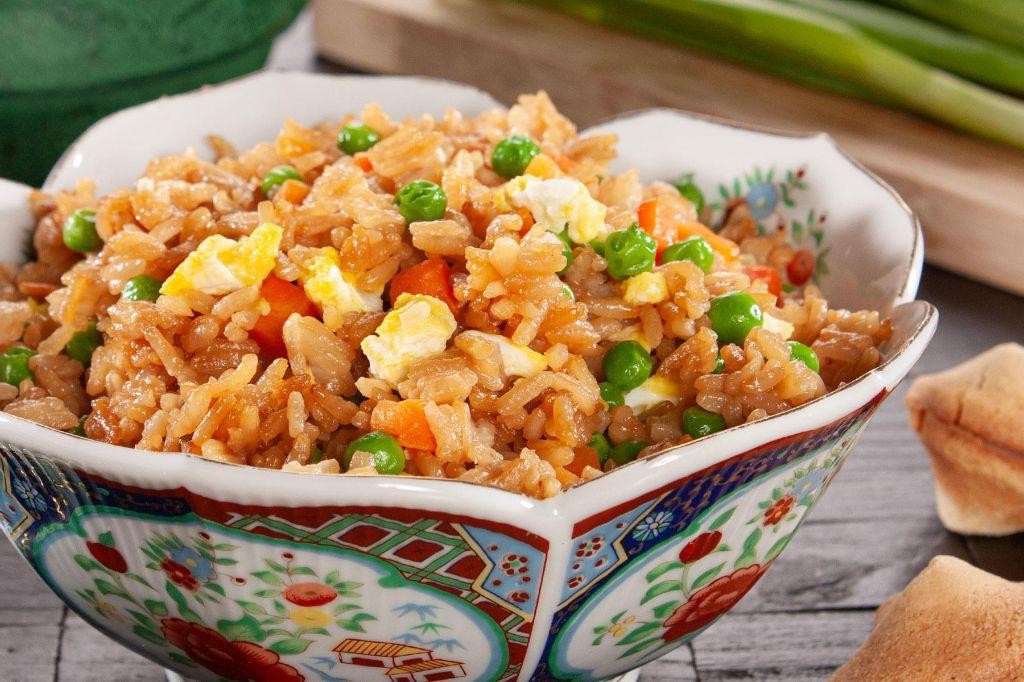
Craving something hearty yet easy to whip up? You’re in luck because this Chislick Fried Rice with Vegetables is your ticket to a flavorful meal that’s as fun to make as it is to eat.
Ingredients
- 2 cups of cooked rice, chilled overnight
- 1 cup of chislick, diced
- A couple of carrots, chopped
- A handful of green beans, sliced
- 2 eggs, beaten
- A splash of soy sauce
- 1 tbsp of vegetable oil
- A pinch of salt
- A dash of black pepper
Instructions
- Heat the vegetable oil in a large pan over medium-high heat.
- Add the diced chislick and cook until it’s nicely browned, about 5 minutes. Tip: Don’t overcrowd the pan to ensure even browning.
- Toss in the chopped carrots and sliced green beans. Stir-fry for another 3 minutes until they’re just tender.
- Push the veggies and chislick to one side of the pan. Pour the beaten eggs into the other side. Scramble them until fully cooked, then mix everything together.
- Add the chilled rice to the pan. Break any clumps with your spatula. Tip: Chilled rice fries better and doesn’t turn mushy.
- Drizzle the soy sauce over the rice. Season with a pinch of salt and a dash of black pepper. Stir-fry for another 2 minutes until everything is well combined and heated through. Tip: Taste as you go to adjust the seasoning.
Just like that, you’ve got a dish that’s bursting with textures and flavors. Serve it up with a side of pickled veggies for an extra crunch or top it with a fried egg for a richer meal.
Chislick Soup with Noodles and Herbs
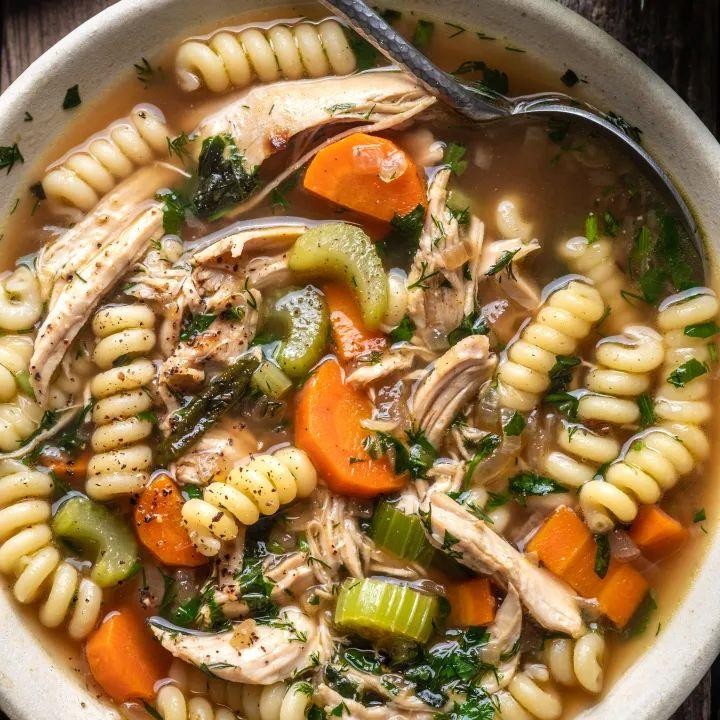
Unbelievable how a simple bowl of soup can warm your soul, right? This Chislick Soup with Noodles and Herbs is your next cozy meal, packed with flavors that hug you from the inside. Perfect for those chilly evenings or when you’re just craving something hearty.
Ingredients
- 2 cups of chislick, cubed
- 4 cups of chicken broth
- a couple of garlic cloves, minced
- a splash of olive oil
- 1 cup of egg noodles
- a handful of fresh herbs (think parsley, dill, or cilantro)
- salt and pepper, just enough to season
Instructions
- Heat a splash of olive oil in a large pot over medium heat. Tip: Let the oil get hot but not smoking to avoid burning the garlic.
- Add the minced garlic and sauté for about 30 seconds until fragrant. Tip: Stir constantly to prevent the garlic from browning too much.
- Toss in the cubed chislick and cook until lightly browned, about 5 minutes. Tip: Don’t overcrowd the pot to ensure even browning.
- Pour in the chicken broth and bring to a boil. Then, reduce the heat to a simmer.
- Add the egg noodles and cook according to package instructions, usually about 8 minutes.
- Stir in the fresh herbs and season with salt and pepper right before serving.
Absolutely delightful, this soup boasts a silky texture with the noodles perfectly al dente and the chislick adding a meaty depth. Serve it with a sprinkle of extra herbs on top for a pop of color and freshness.
Conclusion
Now that you’ve explored these 21 fiery chislick recipes, there’s a flavor for every gathering and taste bud! We hope this collection inspires your next meal with a kick. Don’t forget to try your favorites, share your thoughts in the comments, and spread the spice by pinning this article on Pinterest. Happy cooking!