Missing those comforting, carb-loaded dishes but trying to keep it low-carb? You’re in luck! Our roundup of 17 Delicious Carbquik Recipes Easy to Make is here to save the day. From fluffy pancakes to hearty casseroles, these recipes prove you don’t have to sacrifice flavor for health. Perfect for busy weeknights or lazy weekends, let’s dive into these mouthwatering meals that’ll keep everyone at the table happy!
Carbquik Pancakes
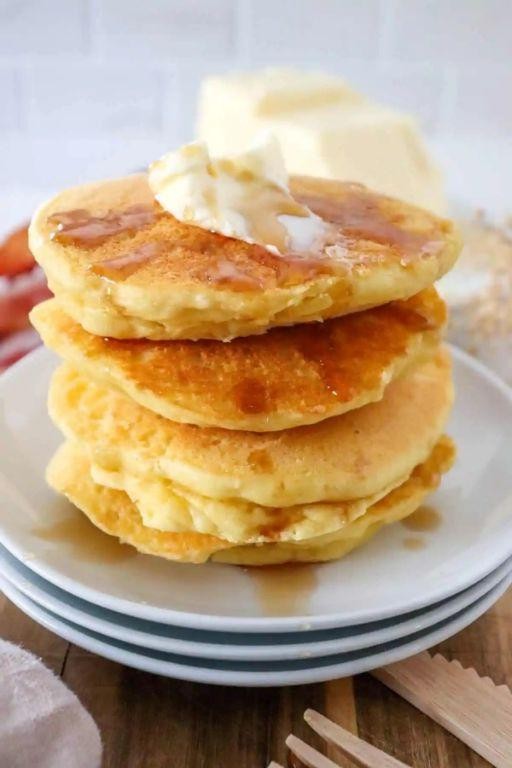
You’ve probably heard of Carbquik, the low-carb baking mix that’s a game-changer for anyone watching their carb intake. Well, let me tell you, it makes some of the fluffiest pancakes you’ll ever taste—no guilt included.
Ingredients
- 2 cups Carbquik baking mix
- 1 cup water (adjust for desired thickness)
- 2 large eggs
- 1/4 cup melted butter (or any neutral oil)
- 1 tsp vanilla extract (optional for extra flavor)
- 1/2 tsp cinnamon (adjust to taste)
Instructions
- In a large mixing bowl, combine the Carbquik baking mix, water, eggs, melted butter, vanilla extract, and cinnamon. Whisk until the batter is smooth with no lumps.
- Heat a non-stick skillet or griddle over medium heat (350°F) and lightly grease with butter or oil.
- Pour 1/4 cup of batter onto the skillet for each pancake. Cook until bubbles form on the surface and the edges look set, about 2-3 minutes.
- Flip the pancakes carefully and cook for another 1-2 minutes until golden brown and cooked through.
- Serve hot with your favorite low-carb syrup or toppings.
Enjoy these pancakes that are surprisingly light and fluffy, with a subtle buttery flavor that pairs perfectly with a drizzle of sugar-free syrup. For a fun twist, try adding a handful of blueberries or a sprinkle of sugar-free chocolate chips to the batter before cooking.
Carbquik Biscuits

Ready to whip up something quick and delicious? These Carbquik biscuits are your go-to for a low-carb treat that doesn’t skimp on flavor or fluffiness.
Ingredients
- 2 cups Carbquik baking mix (ensure it’s fresh for best results)
- 2/3 cup heavy cream (cold, to keep the biscuits tender)
- 1/4 cup water (ice-cold, helps in creating flaky layers)
- 1/4 cup unsalted butter (cold and cubed, for that perfect crumb)
Instructions
- Preheat your oven to 450°F (232°C) and line a baking sheet with parchment paper.
- In a large bowl, combine the Carbquik baking mix and cold, cubed butter. Use a pastry cutter or your fingers to blend until the mixture resembles coarse crumbs.
- Make a well in the center of the mixture and pour in the cold heavy cream and ice-cold water. Stir just until the dough comes together; avoid overmixing to keep the biscuits light.
- Turn the dough onto a lightly floured surface and gently pat it into a 1-inch thick circle. Use a biscuit cutter to cut out biscuits, pressing straight down without twisting for even rises.
- Place the biscuits on the prepared baking sheet, leaving about 1 inch apart. Bake for 10-12 minutes, or until golden brown on top.
- Remove from the oven and let cool on a wire rack for a couple of minutes before serving.
These biscuits come out wonderfully fluffy with a buttery richness that’s hard to resist. Try splitting them warm and slathering with your favorite sugar-free jam for a delightful twist.
Carbquik Waffles
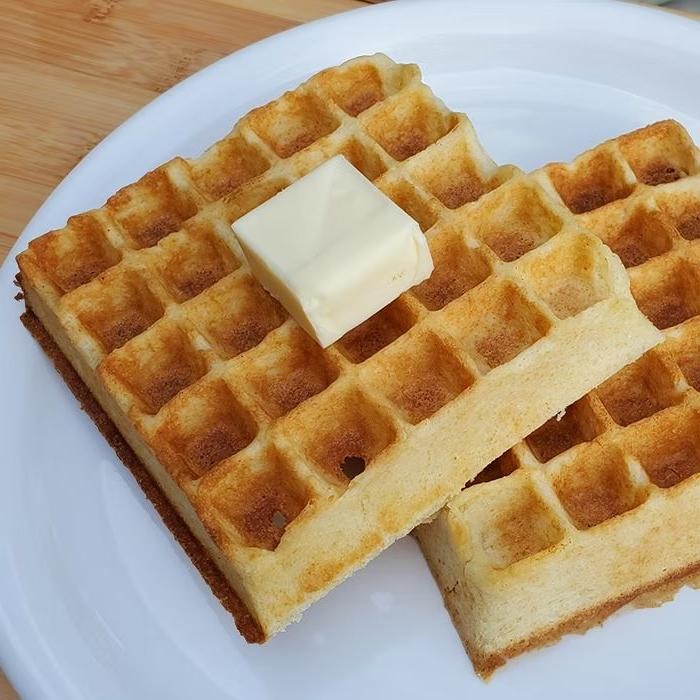
Good morning! If you’re looking for a low-carb breakfast that doesn’t skimp on flavor, you’ve got to try these Carbquik waffles. They’re fluffy, golden, and totally satisfying—perfect for those mornings when you want something hearty but healthy.
Ingredients
- 2 cups Carbquik baking mix (scoop and level for accuracy)
- 1 1/3 cups water (adjust if batter seems too thick)
- 1/4 cup vegetable oil (or melted butter for richer flavor)
- 2 large eggs (room temperature blends better)
- Non-stick cooking spray (for the waffle iron)
Instructions
- Preheat your waffle iron to 375°F for even cooking.
- In a large bowl, whisk together the Carbquik baking mix and water until just combined. Tip: Overmixing can make the waffles tough.
- Add the vegetable oil and eggs to the bowl, stirring until the batter is smooth. Tip: Let the batter sit for 5 minutes to thicken slightly for fluffier waffles.
- Lightly coat the waffle iron with non-stick cooking spray to prevent sticking.
- Pour 1/2 cup of batter onto the center of the waffle iron, close the lid, and cook for about 5 minutes or until golden brown and crispy. Tip: Don’t peek too early—wait until the steam stops for the best results.
- Carefully remove the waffle and repeat with the remaining batter.
Light and crispy on the outside with a soft, bread-like inside, these waffles are a game-changer. Serve them with a dollop of whipped cream and fresh berries for a decadent twist.
Carbquik Pizza Crust
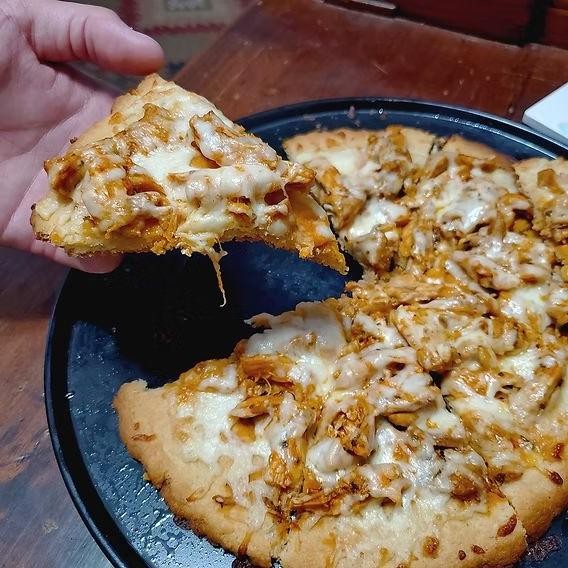
You’ve probably been on the hunt for a low-carb pizza crust that doesn’t skimp on flavor or texture, and guess what? Carbquik is here to save your pizza night. This recipe is a game-changer for anyone looking to indulge without the guilt.
Ingredients
- 2 cups Carbquik baking mix (scoop and level for accuracy)
- 1/2 cup water (adjust as needed for dough consistency)
- 1/4 cup olive oil (or any neutral oil you prefer)
- 1 tsp garlic powder (for a flavor boost)
- 1/2 tsp salt (adjust to taste)
Instructions
- Preheat your oven to 375°F (190°C) to ensure it’s ready when your dough is.
- In a large mixing bowl, combine the Carbquik baking mix, garlic powder, and salt. Whisk them together to distribute the seasonings evenly.
- Add the olive oil and water to the dry ingredients. Stir until a dough forms. If the dough feels too sticky, add a little more Carbquik; if it’s too dry, add water a tablespoon at a time.
- Place the dough on a piece of parchment paper and roll it out to your desired thickness. For a crispier crust, aim for about 1/4 inch thick.
- Transfer the parchment paper with the rolled-out dough onto a baking sheet. This makes it easy to move and prevents sticking.
- Bake in the preheated oven for 10-12 minutes, or until the edges start to turn golden brown. This pre-baking step ensures your crust won’t get soggy once you add toppings.
- Remove from the oven, add your favorite pizza toppings, and bake for another 10-12 minutes, or until the toppings are heated through and the cheese is bubbly.
Kick back and enjoy your Carbquik pizza crust—it’s surprisingly close to the real deal, with a satisfying crunch and a flavor that’ll make you forget it’s low-carb. Try serving it with a side of garlic butter for dipping, and watch it disappear.
Carbquik Chocolate Chip Cookies

Mmm, who doesn’t love a good chocolate chip cookie? Especially when they’re made with Carbquik, giving them a low-carb twist that doesn’t skimp on flavor. Perfect for when you’re craving something sweet but want to keep it a bit healthier.
Ingredients
- 2 cups Carbquik baking mix (scoop and level for accuracy)
- 1/2 cup unsalted butter, softened (or coconut oil for a dairy-free option)
- 1/2 cup granulated erythritol (adjust to taste)
- 1 large egg (room temperature blends better)
- 1 tsp vanilla extract (pure extract for best flavor)
- 1/2 cup sugar-free chocolate chips (or dark chocolate chips if you prefer)
Instructions
- Preheat your oven to 350°F (175°C) and line a baking sheet with parchment paper.
- In a large bowl, cream together the softened butter and erythritol until light and fluffy, about 2 minutes.
- Beat in the egg and vanilla extract until well combined.
- Gradually mix in the Carbquik baking mix until a dough forms. Tip: Don’t overmix to keep the cookies tender.
- Fold in the chocolate chips evenly throughout the dough.
- Scoop tablespoon-sized balls of dough onto the prepared baking sheet, spacing them about 2 inches apart.
- Bake for 10-12 minutes, or until the edges are just starting to turn golden. Tip: They’ll firm up as they cool, so don’t overbake.
- Let the cookies cool on the baking sheet for 5 minutes before transferring to a wire rack to cool completely. Tip: For extra gooey cookies, slightly underbake by 1 minute.
Now, these cookies come out with a delightful crisp edge and a soft, chewy center, packed with melty chocolate in every bite. Try serving them warm with a scoop of sugar-free vanilla ice cream for an irresistible treat.
Carbquik Cinnamon Rolls
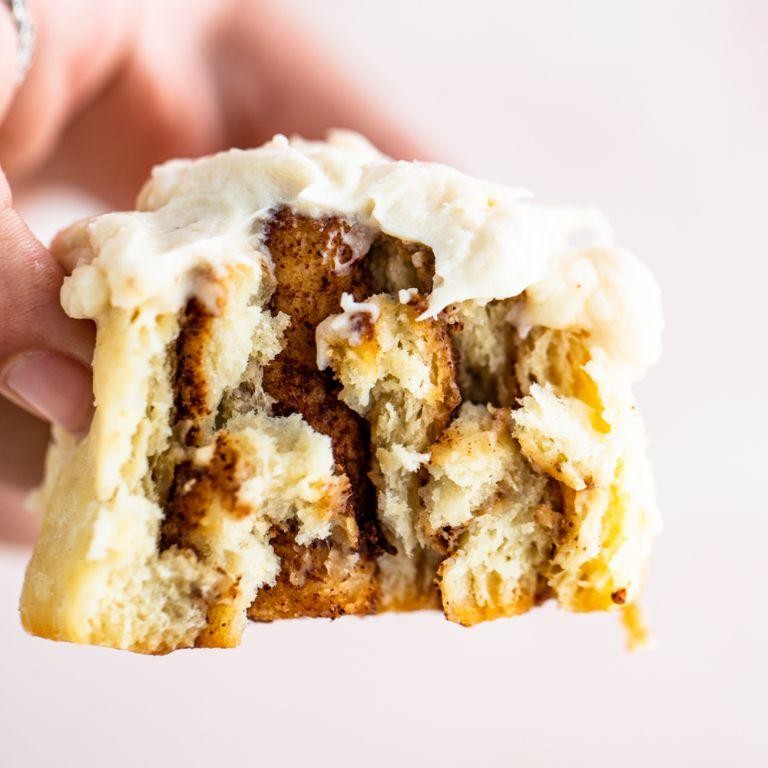
These Carbquik cinnamon rolls are a game-changer for anyone looking to indulge without the guilt. They’re fluffy, sweet, and packed with cinnamon goodness, making them the perfect treat for any time of day.
Ingredients
- 2 cups Carbquik baking mix (for a low-carb alternative)
- 1/4 cup butter, melted (plus extra for greasing)
- 1/2 cup water (adjust as needed for dough consistency)
- 1/4 cup granulated sweetener (like erythritol, adjust to taste)
- 1 tbsp cinnamon (for that classic flavor)
- 1/4 cup heavy cream (for the glaze, optional)
Instructions
- Preheat your oven to 375°F (190°C) and grease a baking dish with butter.
- In a large bowl, mix the Carbquik baking mix with water until a soft dough forms. Tip: If the dough is too sticky, add a little more Carbquik.
- Roll out the dough on a lightly Carbquik-dusted surface into a rectangle about 1/4 inch thick.
- Brush the melted butter evenly over the dough, then sprinkle with sweetener and cinnamon. Tip: For extra flavor, add a pinch of nutmeg.
- Roll the dough tightly from the long side, then cut into 8 equal pieces. Tip: Use a sharp knife or dental floss for clean cuts.
- Place the rolls in the prepared baking dish, leaving space between each for expansion.
- Bake for 20-25 minutes, or until golden brown. Tip: Check at 20 minutes to avoid overbaking.
- While the rolls bake, whisk together heavy cream and a little sweetener for a simple glaze, if desired.
- Once baked, let the rolls cool for 5 minutes before drizzling with glaze.
Out of the oven, these rolls are irresistibly soft with a perfect cinnamon swirl. Serve them warm with a cup of coffee for a cozy breakfast, or enjoy them as a sweet snack any time.
Carbquik Breadsticks
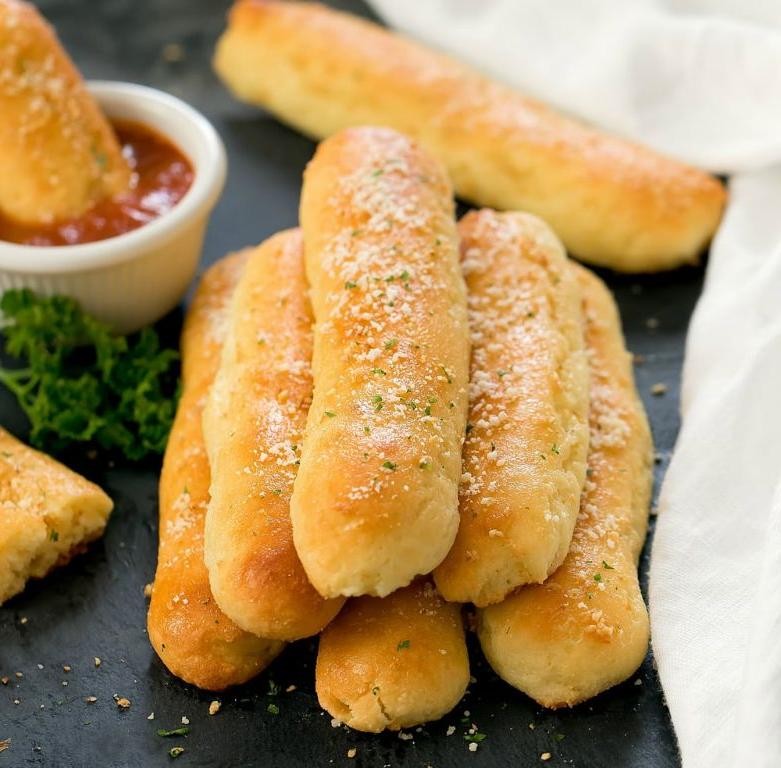
Very few things beat the smell of freshly baked breadsticks wafting through your kitchen, especially when they’re this easy to make with Carbquik. You’re about to whip up something that’s not only delicious but also fits into your low-carb lifestyle without sacrificing flavor or texture.
Ingredients
- 2 cups Carbquik baking mix
- 1/2 cup water (adjust as needed for consistency)
- 1/4 cup melted butter (or olive oil for a lighter version)
- 1 tsp garlic powder (adjust to taste)
- 1/2 tsp salt
- 1/4 cup grated Parmesan cheese (optional for extra flavor)
Instructions
- Preheat your oven to 375°F (190°C) and line a baking sheet with parchment paper.
- In a large bowl, mix the Carbquik baking mix, garlic powder, and salt until well combined.
- Gradually add water to the dry ingredients, stirring until a dough forms. Tip: The dough should be soft but not sticky. Adjust water or Carbquik as needed.
- Divide the dough into 8 equal parts and roll each into a 6-inch stick. Tip: Wet your hands slightly to prevent sticking.
- Place the breadsticks on the prepared baking sheet, brush with melted butter, and sprinkle with Parmesan cheese if using.
- Bake for 12-15 minutes or until golden brown. Tip: Keep an eye on them after 10 minutes to avoid overbaking.
Crunchy on the outside and soft on the inside, these Carbquik breadsticks are perfect on their own or paired with your favorite dip. Try serving them warm with a side of marinara sauce for an extra kick.
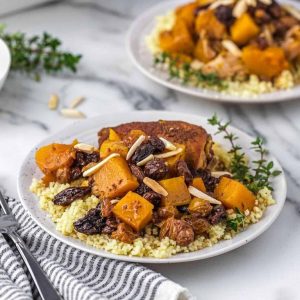
Carbquik Dumplings
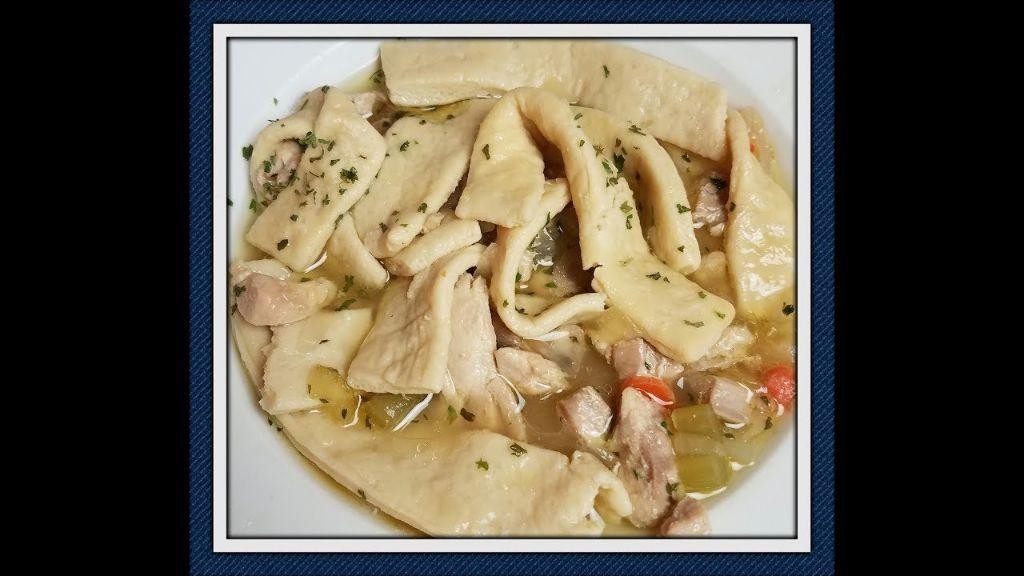
Believe it or not, these Carbquik dumplings are about to become your go-to comfort food. They’re fluffy, easy to make, and perfect for those cozy nights in.
Ingredients
- 2 cups Carbquik baking mix (for a low-carb option)
- 2/3 cup milk (whole milk for extra richness, or almond milk for dairy-free)
- 1 tbsp butter, melted (adds flavor and tenderness)
- 1/2 tsp salt (adjust to taste)
- 1/4 tsp garlic powder (optional, for a savory twist)
Instructions
- In a large mixing bowl, combine the Carbquik baking mix and salt. Whisk them together to ensure even distribution.
- Add the melted butter and milk to the dry ingredients. Stir until just combined; avoid overmixing to keep the dumplings light.
- Let the dough rest for 5 minutes. This allows the baking mix to fully hydrate, making the dough easier to handle.
- Bring a large pot of salted water to a gentle boil over medium-high heat. The water should be simmering, not rolling, to cook the dumplings evenly.
- Using a tablespoon, drop spoonfuls of the dough into the boiling water. Work in batches to avoid overcrowding.
- Cover the pot and let the dumplings cook for 10-12 minutes. They’re done when they float to the top and are firm to the touch.
- Remove the dumplings with a slotted spoon and drain well. Serve immediately for the best texture.
Perfectly tender with a slight chew, these dumplings are a dream in soups or smothered in gravy. Try them with a sprinkle of fresh herbs for a pop of color and flavor.
Carbquik Cheese Biscuits

Now, if you’re craving something cheesy, fluffy, and downright irresistible, these Carbquik Cheese Biscuits are about to become your new best friend. Perfect for breakfast, brunch, or just because, they’re a low-carb dream come true.
Ingredients
- 2 cups Carbquik baking mix (for a low-carb alternative to flour)
- 1/2 cup cold butter, cubed (keep it cold for flaky layers)
- 1 cup shredded cheddar cheese (sharp for more flavor)
- 2/3 cup milk (any kind works, but whole milk adds richness)
- 1/4 tsp garlic powder (optional, for a savory kick)
Instructions
- Preheat your oven to 450°F. A hot oven is key to getting those biscuits nice and tall.
- In a large bowl, mix the Carbquik baking mix and garlic powder if using. This ensures even flavor distribution.
- Add the cold, cubed butter to the dry ingredients. Use your fingers or a pastry cutter to blend until the mixture resembles coarse crumbs. Tip: The butter should be visible in small pieces for flakiness.
- Stir in the shredded cheddar cheese until evenly distributed throughout the mixture.
- Pour in the milk and stir just until the dough comes together. Overmixing leads to tough biscuits, so stop when there are no dry spots left.
- Drop the dough by 1/4 cupfuls onto an ungreased baking sheet, leaving space between each for expansion.
- Bake for 8-10 minutes, or until the biscuits are golden brown on top. Keep an eye on them; they can go from perfect to overdone quickly.
Warm from the oven, these biscuits are a marvel—crisp on the outside, tender and cheesy inside. Try splitting them open and slathering with butter or using them as the base for a breakfast sandwich. Either way, they’re bound to disappear fast.
Carbquik Blueberry Muffins
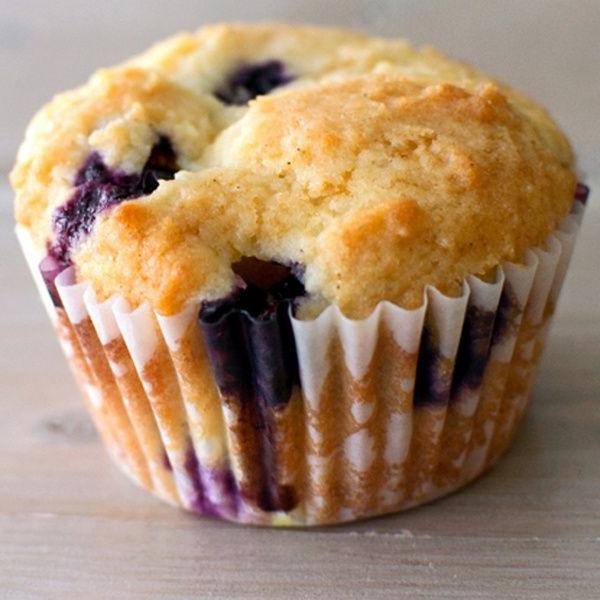
Let’s bake something that’ll make your morning extra special. These Carbquik Blueberry Muffins are fluffy, lightly sweet, and packed with juicy blueberries—perfect for a quick breakfast or snack.
Ingredients
- 2 cups Carbquik baking mix (scoop and level for accuracy)
- 1/2 cup granulated sugar (or your favorite sweetener)
- 1 cup fresh blueberries (frozen works too, no need to thaw)
- 1/2 cup unsweetened almond milk (any milk will do)
- 1 large egg (room temperature blends better)
- 1/4 cup melted butter (or any neutral oil)
- 1 tsp vanilla extract (pure for best flavor)
Instructions
- Preheat your oven to 350°F and line a muffin tin with paper liners or grease well.
- In a large bowl, whisk together the Carbquik and sugar until well combined.
- Gently fold in the blueberries to coat them in the dry mix, preventing sinking.
- In another bowl, mix the almond milk, egg, melted butter, and vanilla until smooth.
- Pour the wet ingredients into the dry and stir until just combined; don’t overmix.
- Divide the batter evenly among the muffin cups, filling each about 2/3 full.
- Bake for 20-25 minutes, or until a toothpick comes out clean and tops are golden.
- Let the muffins cool in the pan for 5 minutes, then transfer to a wire rack.
So there you have it—muffins that are tender with a slight crumb, bursting with berry goodness. Try them warm with a dab of butter or alongside your afternoon coffee for a real treat.
Carbquik Pumpkin Bread
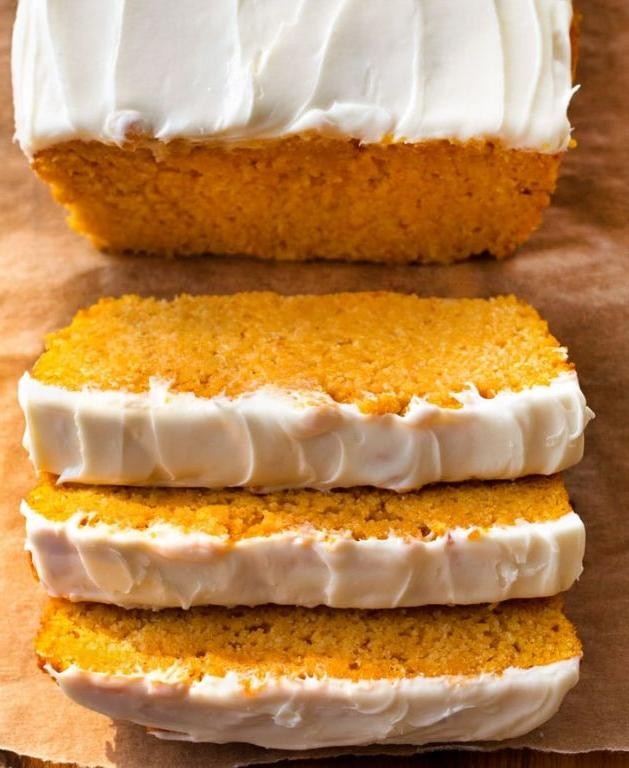
Unbelievably moist and packed with flavor, this Carbquik Pumpkin Bread is your go-to for a guilt-free treat. You’ll love how easy it is to whip up, especially when that pumpkin spice craving hits.
Ingredients
- 2 cups Carbquik baking mix (sifted for best results)
- 1 cup pumpkin puree (not pumpkin pie filling)
- 1/2 cup granulated sweetener (adjust to taste)
- 1/4 cup melted butter (or any neutral oil)
- 2 large eggs (room temperature blends better)
- 1 tsp vanilla extract (pure for best flavor)
- 1 tsp pumpkin pie spice (homemade or store-bought)
- 1/2 tsp baking soda (helps with rise)
Instructions
- Preheat your oven to 350°F (175°C) and grease a 9×5 inch loaf pan.
- In a large bowl, whisk together the Carbquik, sweetener, pumpkin pie spice, and baking soda.
- In another bowl, mix the pumpkin puree, melted butter, eggs, and vanilla until smooth.
- Combine the wet and dry ingredients, stirring just until mixed to avoid a tough bread.
- Pour the batter into the prepared loaf pan and smooth the top with a spatula.
- Bake for 50-60 minutes, or until a toothpick inserted in the center comes out clean.
- Let the bread cool in the pan for 10 minutes, then transfer to a wire rack to cool completely.
Zesty with a perfect balance of sweetness and spice, this bread is fantastic toasted with a smear of cream cheese. The texture is wonderfully dense yet moist, making it a satisfying snack any time of day.
Carbquik Banana Nut Bread

Very few things beat the comforting aroma of banana nut bread wafting through your kitchen. This Carbquik version keeps it low-carb without skimping on the cozy, homemade feel you love.
Ingredients
- 2 cups Carbquik baking mix (scoop and level for accuracy)
- 3 ripe bananas, mashed (the spottier, the sweeter)
- 1/2 cup chopped walnuts (toast them for extra flavor)
- 1/2 cup unsweetened almond milk (or any milk you prefer)
- 1/4 cup melted butter (cooled slightly)
- 2 large eggs (room temperature blends better)
- 1/2 cup granulated sweetener (adjust to your sweetness preference)
- 1 tsp vanilla extract (pure for best flavor)
- 1 tsp baking powder (ensure it’s fresh for rise)
Instructions
- Preheat your oven to 350°F (175°C) and grease a 9×5 inch loaf pan.
- In a large bowl, mix the mashed bananas, almond milk, melted butter, eggs, and vanilla extract until well combined.
- Add the Carbquik baking mix, sweetener, and baking powder to the wet ingredients. Stir until just combined; don’t overmix.
- Fold in the chopped walnuts gently to distribute evenly throughout the batter.
- Pour the batter into the prepared loaf pan and smooth the top with a spatula.
- Bake for 50-60 minutes, or until a toothpick inserted into the center comes out clean.
- Let the bread cool in the pan for 10 minutes, then transfer to a wire rack to cool completely.
Perfectly moist with a tender crumb, this banana nut bread is a guilt-free pleasure. Try it toasted with a smear of almond butter for a next-level breakfast treat.
Carbquik Garlic Knots
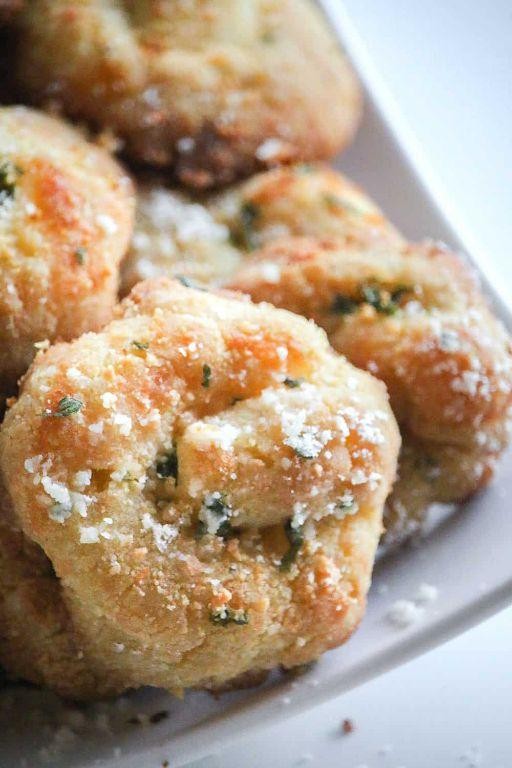
Oh, you’re going to love these Carbquik Garlic Knots. They’re the perfect blend of fluffy and flavorful, with just the right amount of garlicky goodness to make them irresistible.
Ingredients
- 2 cups Carbquik baking mix (for a low-carb option)
- 1/2 cup water (adjust as needed for dough consistency)
- 3 tbsp melted butter (or olive oil for a lighter version)
- 2 cloves garlic, minced (more if you love garlic)
- 1/2 tsp garlic powder (for extra flavor)
- 1/4 tsp salt (adjust to taste)
- 1 tbsp grated Parmesan cheese (optional, for topping)
Instructions
- Preheat your oven to 375°F (190°C) and line a baking sheet with parchment paper.
- In a large bowl, mix the Carbquik baking mix and water until a soft dough forms. Tip: If the dough is too sticky, add a little more Carbquik.
- Divide the dough into 8 equal pieces and roll each into a rope about 6 inches long.
- Tie each rope into a knot and place on the prepared baking sheet. Tip: Make sure the knots are evenly spaced to allow for even baking.
- In a small bowl, mix the melted butter, minced garlic, garlic powder, and salt.
- Brush the garlic butter mixture generously over each knot. Tip: Save some of the mixture for after baking for extra flavor.
- Bake for 12-15 minutes, or until the knots are golden brown.
- Remove from the oven and brush with the remaining garlic butter mixture. Sprinkle with Parmesan cheese if using.
Mmm, these Carbquik Garlic Knots are best served warm, with the garlic butter glistening on top. They’re perfect as a side to your favorite pasta dish or just on their own for a tasty snack.
Carbquik Cornbread
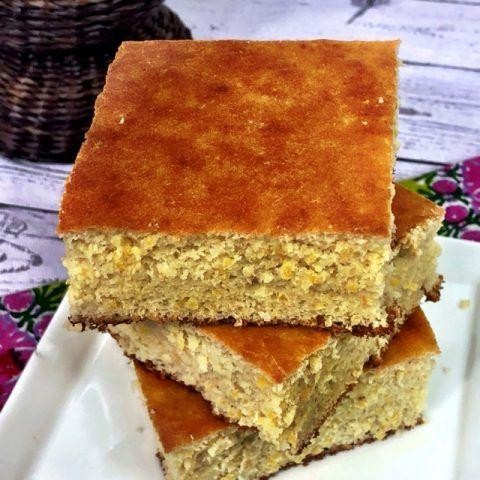
So, you’re craving something cozy and comforting, right? This Carbquik Cornbread is your answer—easy to whip up and totally satisfying.
Ingredients
- 1 1/2 cups Carbquik baking mix (scoop and level for accuracy)
- 1/2 cup granulated sweetener (like erythritol, adjust to sweetness preference)
- 1/2 cup unsweetened almond milk (or any milk you prefer)
- 1/4 cup melted butter (cooled slightly)
- 1 large egg (room temperature blends better)
- 1/2 tsp salt (enhances flavor)
Instructions
- Preheat your oven to 375°F (190°C) and grease an 8-inch square baking pan. Tip: Use butter for greasing to add extra flavor.
- In a large bowl, whisk together the Carbquik baking mix, sweetener, and salt until well combined.
- Add the almond milk, melted butter, and egg to the dry ingredients. Stir until just mixed. Tip: Don’t overmix to keep the cornbread tender.
- Pour the batter into the prepared pan and smooth the top with a spatula.
- Bake for 20-25 minutes, or until the top is golden and a toothpick inserted in the center comes out clean. Tip: Check at 20 minutes to avoid overbaking.
Now, this cornbread comes out wonderfully moist with a slight crumb. It’s subtly sweet, making it perfect alongside a bowl of chili or slathered with butter for a simple treat.
Carbquik Peanut Butter Cookies
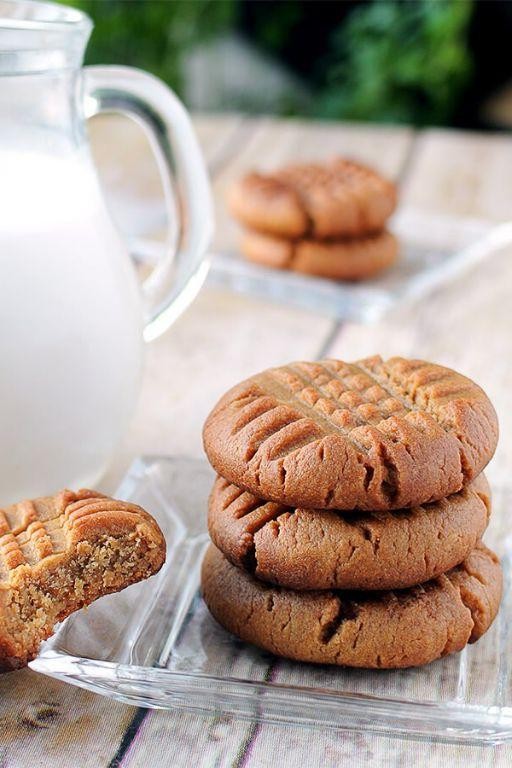
Now, who doesn’t love a good peanut butter cookie? Especially when it’s made with Carbquik, giving you that classic taste without all the carbs. These cookies are soft, chewy, and packed with peanut butter goodness—perfect for when you’re craving something sweet but want to keep it low-carb.
Ingredients
- 1 cup Carbquik baking mix
- 1 cup creamy peanut butter (use natural for a healthier option)
- 1/2 cup granulated erythritol (or your favorite low-carb sweetener)
- 1 large egg
- 1 tsp vanilla extract (pure for best flavor)
- 1/4 tsp salt (adjust to taste)
Instructions
- Preheat your oven to 350°F (175°C) and line a baking sheet with parchment paper for easy cleanup.
- In a large bowl, mix together the Carbquik, peanut butter, erythritol, egg, vanilla extract, and salt until well combined. Tip: If the dough is too sticky, chill it for 10 minutes to make it easier to handle.
- Roll the dough into 1-inch balls and place them on the prepared baking sheet, spacing them about 2 inches apart.
- Flatten each ball with a fork, making a crisscross pattern. Tip: Dip the fork in water between presses to prevent sticking.
- Bake for 10-12 minutes, or until the edges are lightly golden. Tip: Don’t overbake; the cookies will firm up as they cool.
- Let the cookies cool on the baking sheet for 5 minutes before transferring them to a wire rack to cool completely.
Delightfully soft with a rich peanut butter flavor, these cookies are a dream. Try serving them with a glass of almond milk for the ultimate low-carb treat.
Carbquik Donuts

Kickstart your morning with these easy Carbquik donuts that’ll make you forget they’re low-carb. Perfect for those on a keto diet or anyone looking for a healthier donut option, they’re fluffy, delicious, and ready in no time.
Ingredients
- 2 cups Carbquik baking mix (scoop and level for accuracy)
- 1/2 cup granulated erythritol (or your favorite sugar substitute)
- 1/2 cup unsweetened almond milk (any milk works)
- 1 large egg (room temperature for best results)
- 2 tbsp melted butter (or any neutral oil)
- 1 tsp vanilla extract (adjust to taste)
- 1/2 tsp nutmeg (freshly grated if possible)
- Oil for frying (enough to fill 2 inches in your pot)
Instructions
- In a large bowl, whisk together the Carbquik baking mix, erythritol, and nutmeg until well combined.
- Add the almond milk, egg, melted butter, and vanilla extract to the dry ingredients. Stir until a soft dough forms. Tip: Don’t overmix to keep the donuts tender.
- Heat oil in a deep pot to 350°F over medium heat. Use a thermometer for accuracy.
- Roll the dough out on a lightly Carbquik-dusted surface to 1/2 inch thickness. Cut into donut shapes using a donut cutter or two round cutters.
- Fry the donuts in batches, about 1-2 minutes per side, until golden brown. Tip: Keep an eye on the temperature to avoid burning.
- Remove with a slotted spoon and drain on paper towels. Tip: Let them cool slightly before glazing or dusting with sweetener.
Best enjoyed warm, these Carbquik donuts have a delightful texture that’s surprisingly close to traditional donuts. Try them with a cinnamon erythritol sprinkle or a sugar-free glaze for extra indulgence.
Carbquik Apple Pie
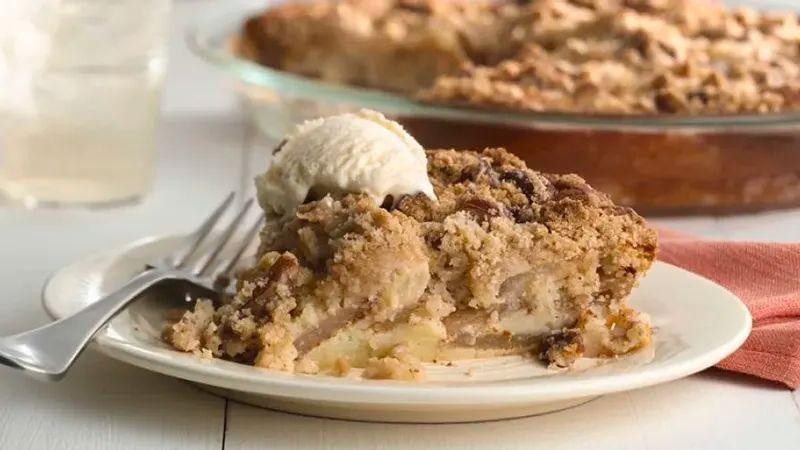
Did you know that making a delicious apple pie doesn’t have to be a guilt trip? With Carbquik, you can enjoy all the flavors of a classic apple pie without the carb overload. Let’s dive into how you can whip up this comforting dessert in no time.
Ingredients
- 2 cups Carbquik baking mix (a low-carb alternative to flour)
- 1/2 cup cold butter, cubed (keeps the crust flaky)
- 4-6 tbsp ice water (just enough to bring the dough together)
- 4 large apples, peeled and sliced (Granny Smith for tartness or Honeycrisp for sweetness)
- 1/2 cup granulated sweetener (adjust based on apple sweetness)
- 1 tsp cinnamon (or more for a spicier kick)
- 1/4 tsp nutmeg (adds depth to the flavor)
- 1 tbsp lemon juice (keeps the apples from browning)
- 1 egg, beaten (for a shiny crust)
Instructions
- Preheat your oven to 375°F (190°C) to ensure it’s ready for baking.
- In a large bowl, mix Carbquik and cold butter until the mixture resembles coarse crumbs. Tip: Use a pastry cutter or your fingers for best results.
- Gradually add ice water, 1 tbsp at a time, until the dough comes together. Be careful not to overwork it.
- Divide the dough in half. Roll out one half to fit a 9-inch pie dish. Tip: Roll between two sheets of parchment paper to prevent sticking.
- In another bowl, toss apple slices with sweetener, cinnamon, nutmeg, and lemon juice until evenly coated.
- Pour the apple mixture into the pie crust. Roll out the second half of the dough and place it over the apples. Seal and crimp the edges.
- Brush the top crust with beaten egg for a golden finish. Cut a few slits on top to vent.
- Bake for 45-50 minutes, or until the crust is golden and the filling is bubbly. Tip: Place a baking sheet underneath to catch any drips.
After baking, the Carbquik Apple Pie emerges with a flaky crust and a sweet, spiced apple filling that’s irresistibly comforting. Serve it warm with a scoop of low-carb vanilla ice cream for an extra treat.
Conclusion
Absolutely packed with tasty options, this roundup proves Carbquik can transform your low-carb cooking into something extraordinary. Whether you’re craving breakfast, dinner, or a sweet treat, there’s a recipe here to delight. We’d love to hear which ones become your favorites—drop us a comment below! And if you found this list helpful, why not share the love? Pin this article on Pinterest to spread the carb-smart joy!