Who can resist the creamy, dreamy allure of homemade fudge? Whether you’re a seasoned chocolatier or a beginner looking to sweeten your skills, our roundup of 18 Delicious Best Fudge Recipes is your golden ticket to dessert heaven. From classic chocolate to inventive twists that’ll surprise your taste buds, these recipes promise to be as fun to make as they are to eat. Let’s dive into the sweetness!
Classic Chocolate Fudge
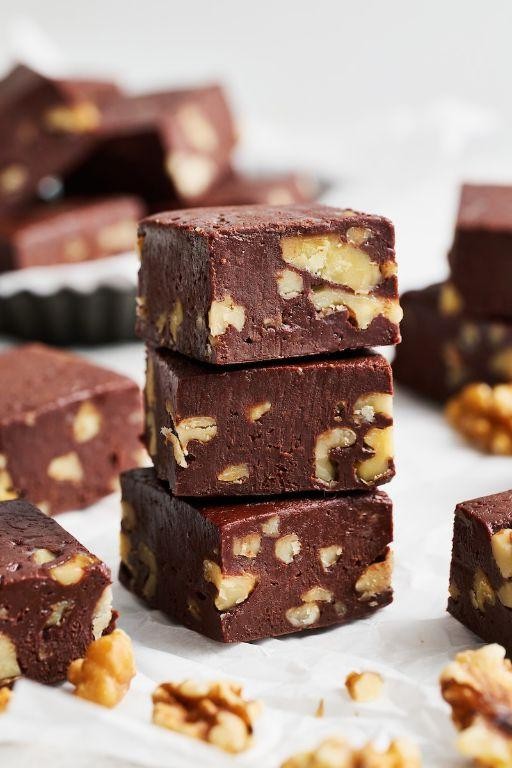
For those who cherish the rich, velvety embrace of chocolate, making Classic Chocolate Fudge is a rewarding endeavor. Follow these steps to create a dessert that’s as satisfying to make as it is to eat.
Ingredients
- 2 cups granulated sugar – I find that using organic sugar gives a slightly deeper flavor.
- 1/2 cup unsalted butter – Always go for high-quality butter; it makes a difference.
- 1/2 cup whole milk – The richness of whole milk contributes to the fudge’s creamy texture.
- 1/4 cup cocoa powder – A dark cocoa powder will intensify the chocolate flavor.
- 1 tsp vanilla extract – Pure vanilla extract is my preference for its robust flavor.
- 1/8 tsp salt – Just a pinch to balance the sweetness.
Instructions
- Line an 8-inch square baking pan with parchment paper, leaving an overhang on the sides for easy removal.
- In a medium saucepan, combine sugar, butter, milk, cocoa powder, and salt. Stir over medium heat until the butter melts and the mixture is smooth.
- Bring the mixture to a boil, then reduce the heat to low. Cook without stirring until the temperature reaches 238°F on a candy thermometer, about 5 minutes. Tip: Avoid stirring to prevent sugar crystals from forming.
- Remove the saucepan from the heat and stir in the vanilla extract. Let it cool for 5 minutes without stirring.
- After cooling, beat the mixture with a wooden spoon until it thickens and loses its gloss, about 5 minutes. Tip: This step is crucial for achieving the right texture.
- Pour the fudge into the prepared pan and smooth the top with a spatula. Let it set at room temperature for at least 2 hours before cutting into squares. Tip: For cleaner cuts, dip your knife in hot water before slicing.
How delightful it is to bite into a piece of this Classic Chocolate Fudge, with its smooth texture and deep chocolate flavor. Serve it alongside a cup of strong coffee for a truly indulgent experience.
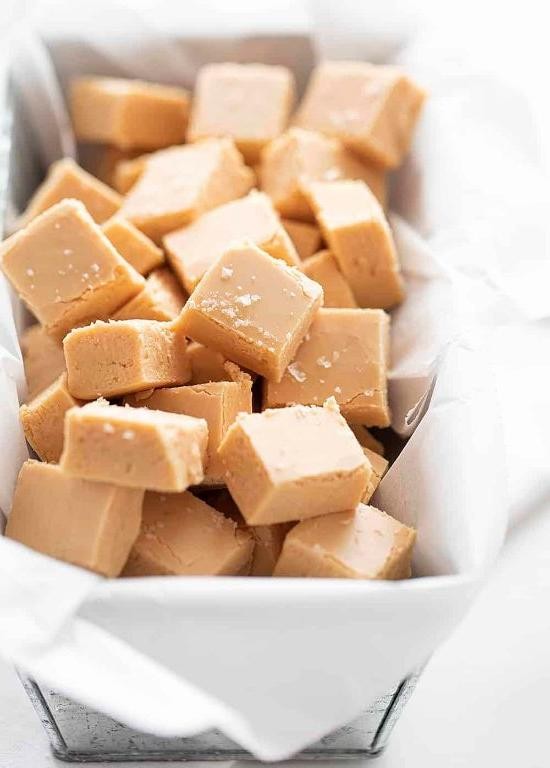
Peanut Butter Fudge
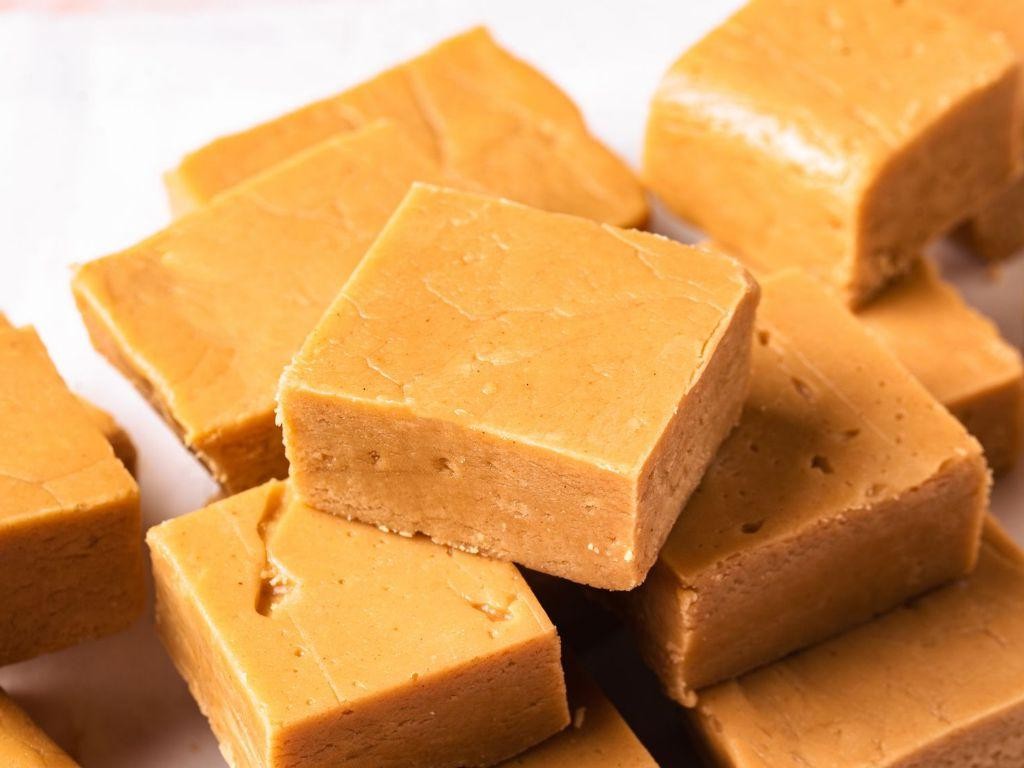
Kicking off our culinary adventure today, we’re diving into the creamy, dreamy world of homemade Peanut Butter Fudge. This no-fuss recipe is perfect for beginners, offering a foolproof path to sweet, nutty bliss.
Ingredients
- 1 cup creamy peanut butter (I swear by the natural, unsweetened kind for a richer flavor)
- 1/2 cup unsalted butter (room temperature makes it blend smoother)
- 1/4 tsp salt (just a pinch to balance the sweetness)
- 1 tsp pure vanilla extract (the real deal, not imitation)
- 3 1/2 cups powdered sugar (sifted to avoid lumps)
Instructions
- Line an 8×8 inch baking pan with parchment paper, leaving some overhang for easy removal later.
- In a medium saucepan over low heat, melt the peanut butter and butter together, stirring constantly until smooth—about 3 minutes. Tip: Keep the heat low to prevent scorching.
- Remove the saucepan from heat. Stir in the salt and vanilla extract until fully incorporated.
- Gradually add the powdered sugar to the saucepan, mixing well after each addition. Tip: Sifting the sugar beforehand ensures a smoother fudge.
- Once all the powdered sugar is mixed in and the mixture is thick and cohesive, transfer it to the prepared pan. Use a spatula to press it evenly into the corners. Tip: Wetting the spatula slightly can prevent sticking.
- Chill the fudge in the refrigerator for at least 2 hours, or until firm.
- Using the parchment overhang, lift the fudge out of the pan. Cut into 1-inch squares with a sharp knife.
Lusciously creamy with a deep peanut butter flavor, this fudge is a crowd-pleaser. Try topping the squares with a sprinkle of sea salt or a drizzle of melted chocolate for an extra touch of decadence.
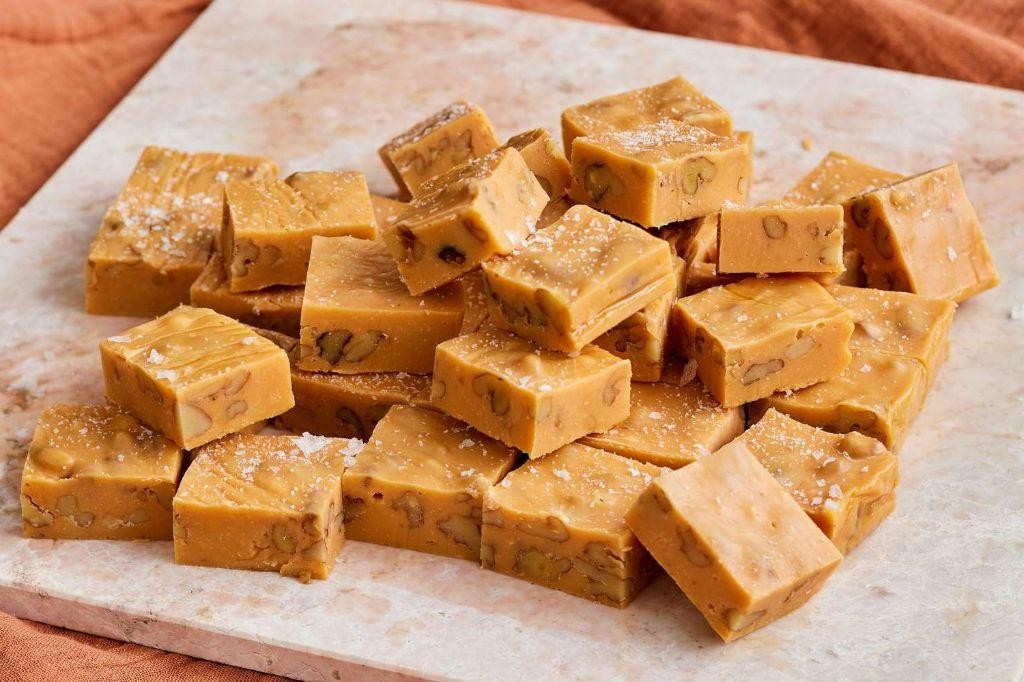
Maple Walnut Fudge
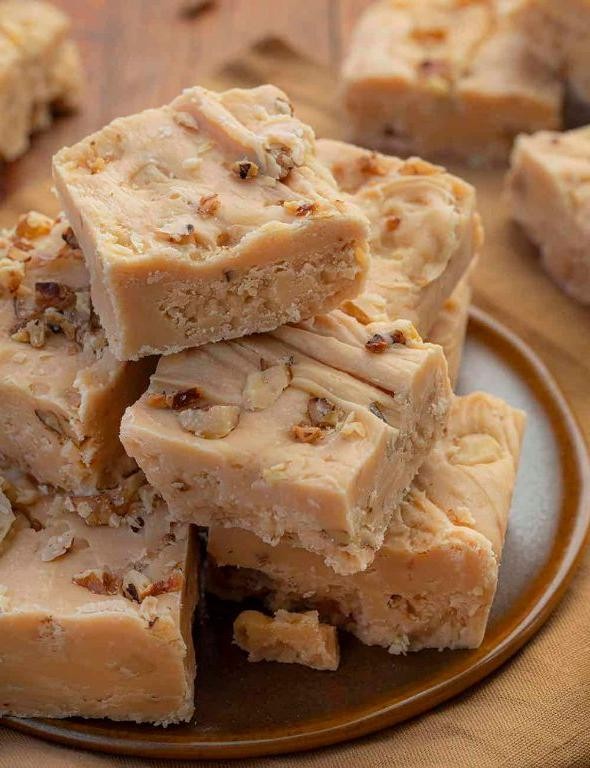
Every now and then, a recipe comes along that’s both a joy to make and a delight to eat, and this Maple Walnut Fudge is just that. It’s a perfect blend of sweet and nutty, with a texture that’s irresistibly smooth.
Ingredients
- 2 cups pure maple syrup (the darker, the better for a robust flavor)
- 1 cup heavy cream (I always go for organic for the richest taste)
- 1/2 cup unsalted butter (cut into chunks for easier melting)
- 1/4 tsp salt (just a pinch to balance the sweetness)
- 1 tsp vanilla extract (pure extract makes all the difference)
- 1 1/2 cups walnuts, chopped (toasted for extra crunch)
Instructions
- Line an 8-inch square baking dish with parchment paper, leaving some overhang for easy removal later.
- In a heavy-bottomed saucepan, combine the maple syrup, heavy cream, butter, and salt over medium heat. Stir constantly until the butter is fully melted.
- Once the mixture starts to boil, attach a candy thermometer to the side of the pan. Cook, stirring occasionally, until the temperature reaches 235°F (soft-ball stage). This should take about 10-15 minutes. Tip: Keep a close eye on the thermometer to avoid overcooking.
- Remove the pan from the heat and let it sit undisturbed for 5 minutes. Then, add the vanilla extract and stir gently to combine.
- Using a wooden spoon, beat the mixture vigorously until it thickens and loses its gloss, about 5-7 minutes. Tip: This step is crucial for achieving the perfect fudge texture, so don’t rush it.
- Fold in the chopped walnuts until evenly distributed, then quickly pour the mixture into the prepared baking dish. Smooth the top with a spatula. Tip: Work fast here as the fudge sets quickly.
- Let the fudge cool at room temperature for at least 2 hours, or until firm. Then, lift it out using the parchment overhang and cut into squares.
Kneading this fudge results in a creamy, melt-in-your-mouth texture with a delightful crunch from the walnuts. Serve it as a sweet treat after dinner or package it beautifully for a heartfelt homemade gift.
Rocky Road Fudge
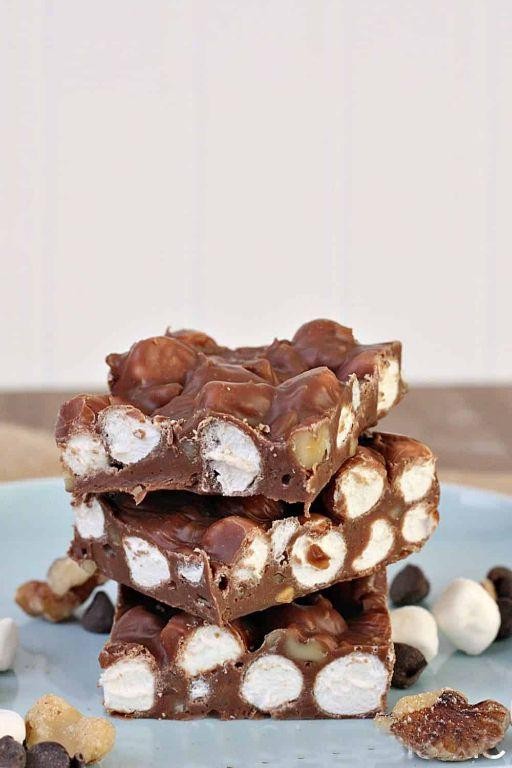
Rocky road fudge is a delightful treat that combines the rich flavors of chocolate with the crunch of nuts and the chewiness of marshmallows, perfect for satisfying your sweet tooth. Ready to dive into making this irresistible dessert? Let’s get started with a method that ensures creamy, dreamy results every time.
Ingredients
- 3 cups semi-sweet chocolate chips (I find these melt smoother than bars)
- 1 can (14 oz) sweetened condensed milk (this is the secret to creamy fudge)
- 1 cup mini marshmallows (they distribute better than large ones)
- 1/2 cup chopped walnuts (toasted for extra flavor, if you like)
- 1 tsp vanilla extract (pure extract makes all the difference)
- A pinch of salt (to balance the sweetness)
Instructions
- Line an 8-inch square baking pan with parchment paper, leaving some overhang for easy removal later.
- In a medium saucepan over low heat, combine the chocolate chips and sweetened condensed milk. Stir constantly until the chocolate is completely melted and the mixture is smooth, about 5 minutes.
- Remove the saucepan from the heat. Quickly stir in the vanilla extract and a pinch of salt to enhance the chocolate flavor.
- Fold in the mini marshmallows and chopped walnuts until evenly distributed throughout the fudge mixture.
- Pour the mixture into the prepared pan, spreading it evenly with a spatula. Tap the pan lightly on the counter to remove any air bubbles.
- Refrigerate the fudge for at least 2 hours, or until it’s firm enough to cut into squares.
- Using the parchment paper overhang, lift the fudge out of the pan. Cut into 1-inch squares with a sharp knife for clean edges.
Best enjoyed chilled, this rocky road fudge offers a perfect contrast between the smooth chocolate base and the crunchy, chewy mix-ins. For an extra special touch, serve it on a platter with a drizzle of melted white chocolate or alongside a scoop of vanilla ice cream.
White Chocolate Raspberry Fudge
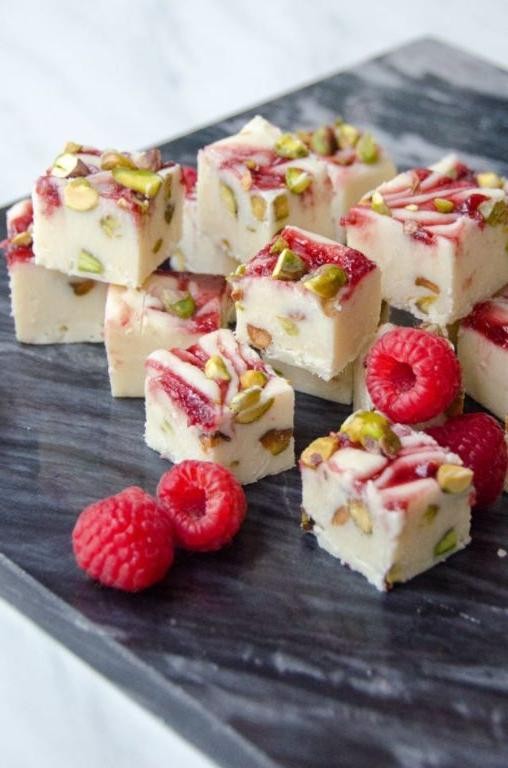
Ready to dive into the sweet, creamy world of homemade fudge? This White Chocolate Raspberry Fudge is a delightful treat that combines the richness of white chocolate with the tartness of fresh raspberries, creating a perfect balance of flavors.
Ingredients
- 3 cups white chocolate chips (I find Ghirardelli melts the smoothest)
- 1 can (14 oz) sweetened condensed milk (stick to the name brands for best results)
- 1/4 cup unsalted butter (cut into chunks for easier melting)
- 1 tsp pure vanilla extract (the real deal makes a difference)
- 1 cup fresh raspberries (lightly mashed, plus extra for garnish)
- A pinch of salt (to balance the sweetness)
Instructions
- Line an 8×8 inch baking pan with parchment paper, leaving some overhang for easy removal later.
- In a medium saucepan over low heat, combine the white chocolate chips, sweetened condensed milk, and butter. Stir constantly until fully melted and smooth, about 5 minutes.
- Remove the saucepan from heat and quickly stir in the vanilla extract and a pinch of salt.
- Gently fold in the mashed raspberries until just combined; don’t overmix to keep those beautiful swirls.
- Pour the mixture into the prepared pan, smoothing the top with a spatula. Scatter a few whole raspberries on top for a decorative touch.
- Refrigerate for at least 2 hours, or until the fudge is completely set. Tip: For cleaner cuts, dip your knife in hot water before slicing.
- Once set, lift the fudge out of the pan using the parchment overhang and cut into 1-inch squares.
Delightfully creamy with bursts of raspberry freshness, this fudge is a showstopper on any dessert table. Try serving it alongside a cup of hot coffee to contrast its sweetness, or gift it in a pretty box for a homemade touch.
Salted Caramel Fudge
Unveiling the secrets to making the most indulgent salted caramel fudge, this recipe is a game-changer for anyone with a sweet tooth. Follow these steps carefully, and you’ll be rewarded with a rich, creamy treat that’s perfectly balanced with a hint of salt.
Ingredients
- 2 cups granulated sugar (I find that organic sugar gives a deeper flavor)
- 1/2 cup heavy cream (make sure it’s cold for best results)
- 3/4 cup unsalted butter (I prefer European-style for its richness)
- 1 tsp pure vanilla extract (the real deal makes all the difference)
- 1 tsp sea salt flakes (Maldon is my go-to for that perfect crunch)
- 1 cup semi-sweet chocolate chips (a high-quality brand ensures smooth melting)
Instructions
- Line an 8-inch square baking pan with parchment paper, leaving an overhang on the sides for easy removal.
- In a medium saucepan, combine the sugar, heavy cream, and butter over medium heat. Stir constantly until the butter melts and the sugar dissolves, about 5 minutes.
- Increase the heat to medium-high and bring the mixture to a boil. Cook without stirring until it reaches 240°F on a candy thermometer, about 5-7 minutes. Tip: Swirl the pan occasionally to ensure even cooking.
- Remove from heat and quickly stir in the vanilla extract and sea salt. The mixture will bubble vigorously, so be careful.
- Immediately pour the hot caramel over the chocolate chips in a heatproof bowl. Let sit for 2 minutes to melt the chocolate, then stir until smooth and fully combined.
- Pour the mixture into the prepared pan, smoothing the top with a spatula. Sprinkle with additional sea salt if desired.
- Refrigerate for at least 2 hours, or until set. Tip: For cleaner cuts, let the fudge sit at room temperature for 10 minutes before slicing.
- Use the parchment overhang to lift the fudge out of the pan. Cut into 1-inch squares with a sharp knife. Tip: Wiping the knife with a hot, damp cloth between cuts ensures smooth edges.
The fudge should be irresistibly creamy with a deep caramel flavor, punctuated by bursts of sea salt. Try serving it atop vanilla ice cream for an extra decadent dessert, or package it in pretty boxes for a homemade gift that’s sure to impress.
Mint Chocolate Fudge
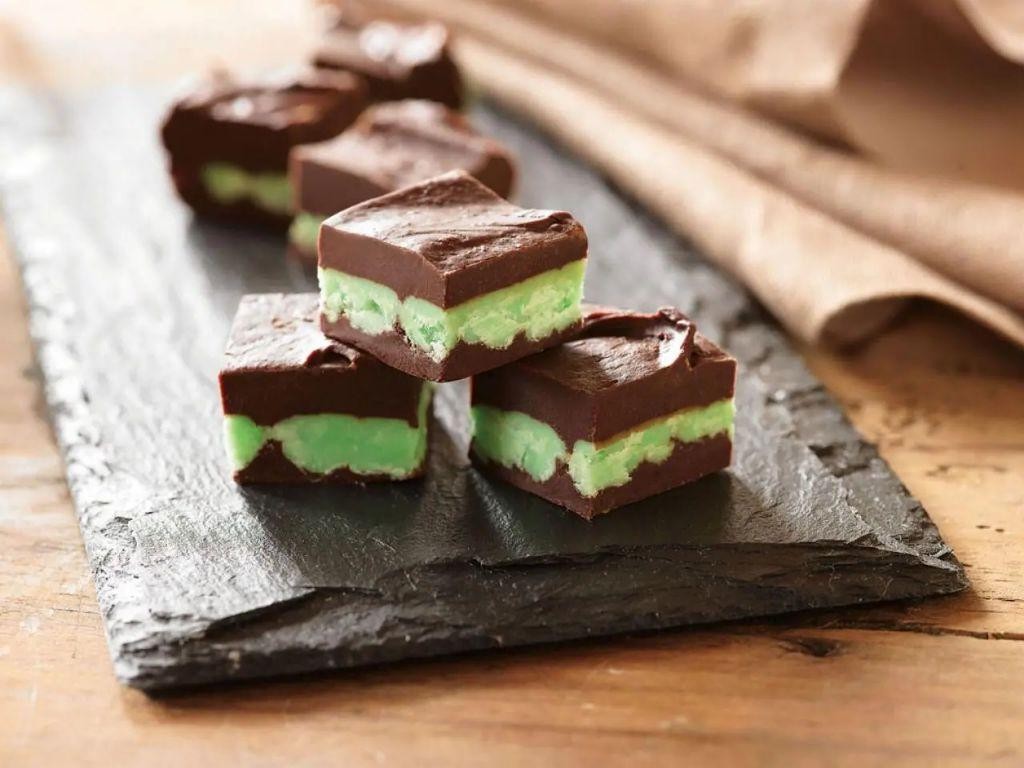
Whipping up a batch of Mint Chocolate Fudge is a delightful way to indulge in a classic flavor combination that’s both refreshing and rich. This recipe is perfect for beginners, guiding you through each step to ensure a smooth, creamy fudge that’s bursting with minty chocolate goodness.
Ingredients
- 3 cups semi-sweet chocolate chips (I find these melt more evenly than bars)
- 1 can (14 oz) sweetened condensed milk (the secret to creamy fudge)
- 1/4 cup unsalted butter (cut into pieces for easier melting)
- 1 tsp peppermint extract (for that unmistakable minty kick)
- 1/2 tsp vanilla extract (a dash enhances all the flavors)
- Green food coloring (optional, but it adds a fun minty hue)
Instructions
- Line an 8-inch square baking pan with parchment paper, leaving some overhang for easy removal later.
- In a medium saucepan, combine the chocolate chips, sweetened condensed milk, and butter. Heat over low heat, stirring constantly, until everything is melted and smooth. Tip: Keep the heat low to prevent the chocolate from seizing.
- Remove the saucepan from the heat. Stir in the peppermint extract, vanilla extract, and a few drops of green food coloring if using, until well combined. Tip: Add the food coloring gradually to achieve your desired shade of green.
- Pour the mixture into the prepared pan, spreading it evenly with a spatula. Tap the pan lightly on the counter to remove any air bubbles.
- Refrigerate the fudge for at least 2 hours, or until set. Tip: For clean cuts, use a sharp knife dipped in hot water and wiped dry between slices.
Velvety smooth with a refreshing mint flavor, this fudge is a crowd-pleaser. Serve it chilled for a firmer texture, or let it sit at room temperature for a softer bite. For an extra touch, sprinkle crushed candy canes on top before the fudge sets for a festive look and added crunch.
Cookies and Cream Fudge
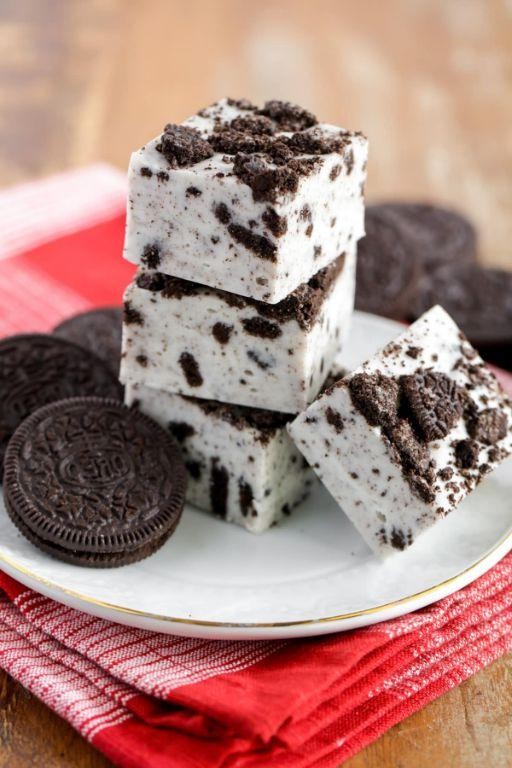
Out of all the sweet treats to whip up in your kitchen, Cookies and Cream Fudge stands out for its simplicity and crowd-pleasing flavor. Let’s dive into making this creamy, dreamy dessert that’s perfect for any occasion.
Ingredients
- 3 cups white chocolate chips (I find Ghirardelli melts the smoothest)
- 1 can (14 oz) sweetened condensed milk (stick with the classic, no substitutes here)
- 1 tsp pure vanilla extract (the real deal makes a difference)
- 1/8 tsp salt (just a pinch to balance the sweetness)
- 15 Oreo cookies, coarsely chopped (leave some big chunks for texture)
Instructions
- Line an 8-inch square baking dish with parchment paper, leaving an overhang on the sides for easy removal.
- In a medium saucepan, combine the white chocolate chips and sweetened condensed milk. Heat over low heat, stirring constantly, until the chocolate is completely melted and the mixture is smooth, about 5 minutes.
- Remove the saucepan from the heat. Stir in the vanilla extract and salt until well combined.
- Gently fold in the chopped Oreo cookies, reserving a handful for topping. Tip: Don’t overmix to keep those delightful cookie chunks intact.
- Pour the fudge mixture into the prepared baking dish, spreading it evenly with a spatula. Sprinkle the reserved Oreo chunks on top, pressing them lightly into the fudge.
- Refrigerate the fudge for at least 2 hours, or until set. Tip: For cleaner cuts, let the fudge sit at room temperature for 10 minutes before slicing.
- Use the parchment overhang to lift the fudge out of the dish. Cut into 1-inch squares with a sharp knife. Tip: Wipe the knife clean between cuts for neat edges.
Creamy with a satisfying crunch from the Oreo pieces, this fudge is a textural delight. Serve it on a platter at your next gathering or package it in cute boxes for a sweet homemade gift.
Dark Chocolate Orange Fudge
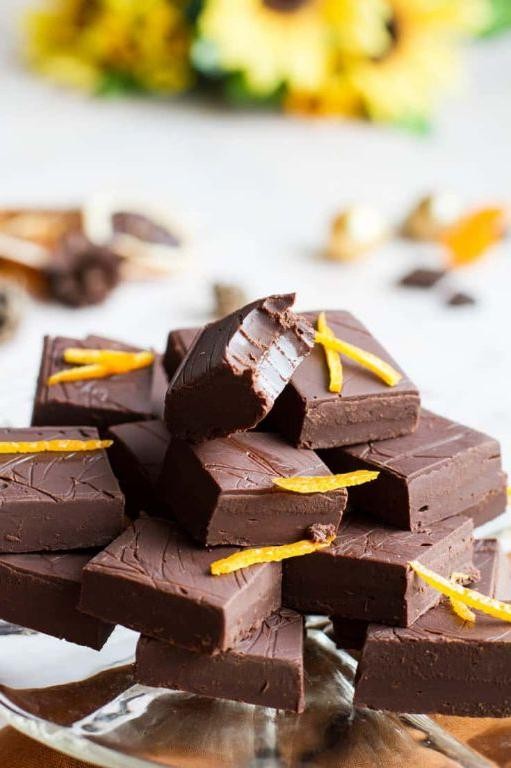
Ready to dive into the rich, velvety world of homemade fudge? This Dark Chocolate Orange Fudge combines the deep, luxurious flavors of dark chocolate with the bright, citrusy zing of orange, creating a dessert that’s as sophisticated as it is simple to make.
Ingredients
- 2 cups of dark chocolate chips (I love the extra dark ones for a more intense flavor)
- 1 can (14 oz) of sweetened condensed milk (the secret to creamy fudge)
- 1 tsp of pure vanilla extract (always opt for pure for the best flavor)
- 1 tbsp of orange zest (freshly grated makes all the difference)
- 2 tbsp of unsalted butter (room temperature blends more smoothly)
Instructions
- Line an 8×8 inch baking pan with parchment paper, leaving some overhang for easy removal later.
- In a medium saucepan, combine the dark chocolate chips, sweetened condensed milk, and butter. Heat over low heat, stirring constantly, until the mixture is smooth and fully combined, about 5 minutes.
- Remove the saucepan from the heat and stir in the vanilla extract and orange zest until well incorporated.
- Pour the fudge mixture into the prepared baking pan, spreading it evenly with a spatula.
- Let the fudge cool at room temperature for about 2 hours, then refrigerate for another 2 hours until it’s firm to the touch.
- Once set, use the parchment paper overhang to lift the fudge out of the pan. Cut into 1-inch squares with a sharp knife for clean edges.
Now this fudge boasts a smooth, melt-in-your-mouth texture with a perfect balance of dark chocolate bitterness and orange freshness. Try serving these squares atop a scoop of vanilla ice cream for an decadent twist.
Coconut Almond Fudge
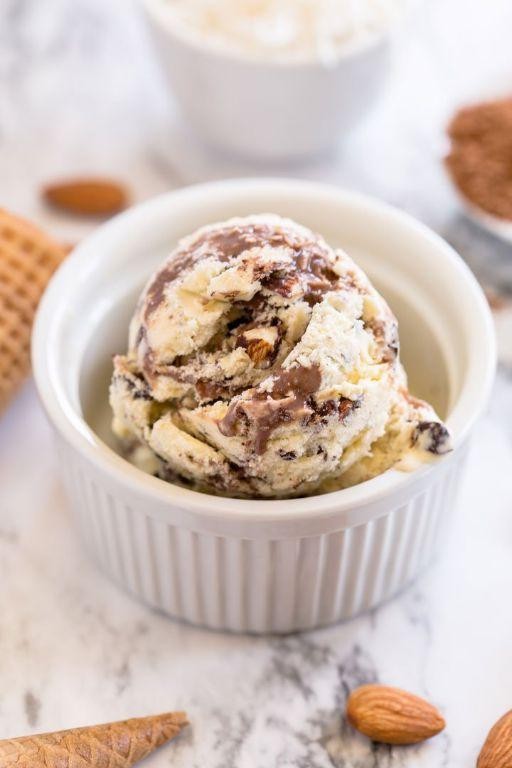
Before we dive into the creamy world of Coconut Almond Fudge, let’s gather our ingredients and prepare for a delightful cooking journey. This recipe is perfect for beginners, offering a straightforward path to a decadent treat.
Ingredients
- 1 cup coconut milk (full-fat for that rich texture)
- 2 cups granulated sugar (I find organic sugar blends beautifully)
- 1/2 cup unsalted butter (room temperature makes it easier to mix)
- 1 tsp vanilla extract (pure extract elevates the flavor)
- 1 cup almond pieces (toasted for an extra crunch)
- 1/4 tsp salt (just a pinch to balance the sweetness)
Instructions
- Line an 8×8 inch baking pan with parchment paper, leaving some overhang for easy removal later.
- In a medium saucepan, combine coconut milk, sugar, and butter over medium heat. Stir continuously until the butter melts and the sugar dissolves, about 5 minutes.
- Bring the mixture to a boil, then reduce heat to low. Cook for 10 minutes, stirring occasionally, until it reaches 235°F on a candy thermometer. Tip: Don’t rush this step; the right temperature is key for perfect fudge.
- Remove from heat and stir in vanilla extract and salt. Let it cool for 5 minutes without stirring to allow the flavors to meld.
- After cooling, beat the mixture with a wooden spoon until it thickens and loses its gloss, about 5 minutes. Tip: This is your arm workout for the day, but it’s worth it!
- Fold in the toasted almond pieces quickly but gently to distribute them evenly.
- Pour the mixture into the prepared pan, smoothing the top with a spatula. Let it set at room temperature for at least 2 hours. Tip: For quicker setting, you can refrigerate, but room temp gives the best texture.
- Once set, lift the fudge out using the parchment overhang and cut into 1-inch squares.
Decadent and rich, this Coconut Almond Fudge boasts a creamy texture with a satisfying crunch from the almonds. Serve it as a luxurious treat with coffee or gift it in a pretty box for a homemade touch.
Pumpkin Spice Fudge
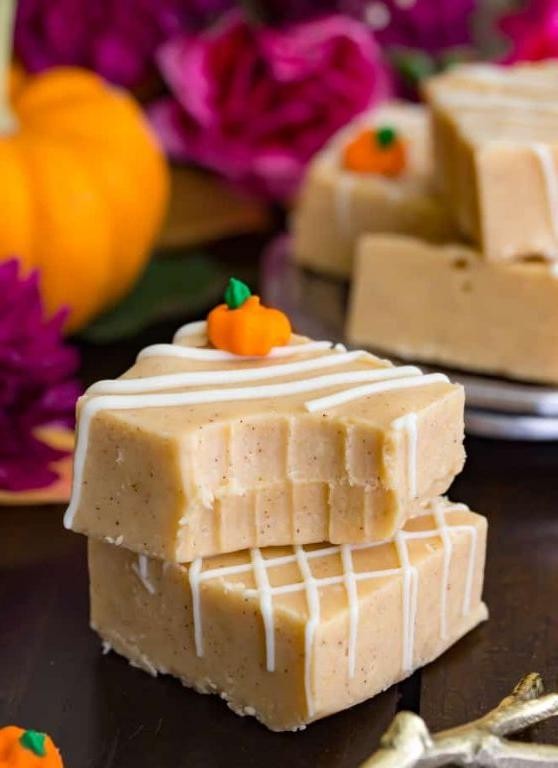
Now, let’s dive into making Pumpkin Spice Fudge, a delightful treat that combines the warmth of pumpkin spice with the creamy richness of fudge. Perfect for beginners, this recipe is straightforward and rewarding.
Ingredients
- 3 cups white sugar (I find using organic sugar adds a deeper flavor)
- 3/4 cup unsalted butter (room temperature for easier mixing)
- 2/3 cup evaporated milk (the richness it adds is unparalleled)
- 1 cup pumpkin puree (homemade or canned, but ensure it’s pure pumpkin)
- 1 tsp pumpkin pie spice (for that signature autumnal flavor)
- 1 tsp vanilla extract (pure extract makes all the difference)
- 1 1/2 cups white chocolate chips (I prefer Ghirardelli for their meltability)
Instructions
- Line an 8×8 inch baking pan with parchment paper, leaving an overhang for easy removal later.
- In a medium saucepan over medium heat, combine sugar, butter, and evaporated milk, stirring constantly until the mixture comes to a full boil.
- Once boiling, continue to cook and stir for exactly 5 minutes to reach the soft-ball stage (235°F on a candy thermometer). Tip: Avoid scraping the sides of the pan to prevent sugar crystals from forming.
- Remove from heat and quickly stir in the pumpkin puree, pumpkin pie spice, and vanilla extract until fully incorporated.
- Add the white chocolate chips, stirring until completely melted and the mixture is smooth. Tip: The residual heat should be enough to melt the chips, but if needed, return to low heat briefly.
- Pour the fudge into the prepared pan, smoothing the top with a spatula. Let it cool at room temperature for 2 hours, then refrigerate for another 2 hours to set. Tip: For cleaner cuts, use a hot knife to slice the fudge.
What you’ll love about this Pumpkin Spice Fudge is its velvety texture and the perfect balance of sweetness and spice. Serve it on a platter with other fall treats or wrap individual pieces as thoughtful gifts.
Espresso Fudge
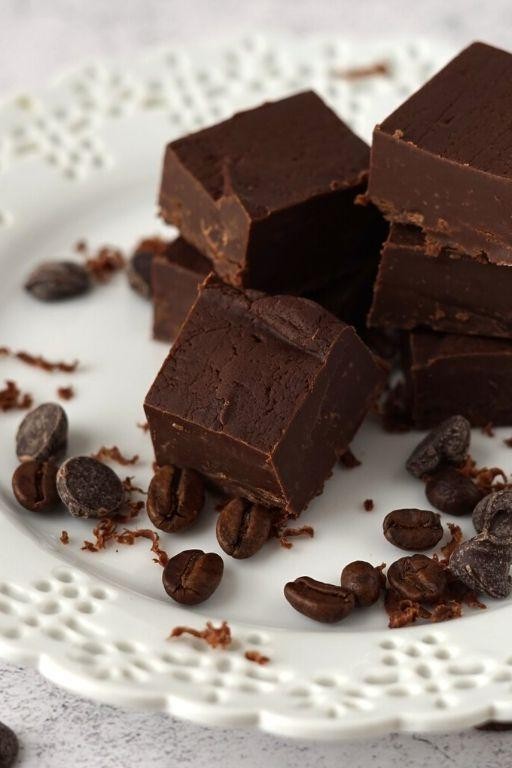
Creating the perfect Espresso Fudge is a delightful journey that combines the rich flavors of coffee with the creamy sweetness of fudge. Let’s dive into the process with precision and care to ensure your fudge turns out irresistibly smooth and packed with espresso goodness.
Ingredients
- 2 cups granulated sugar – for that perfect sweetness balance.
- 1/2 cup heavy cream – my secret to ultra-creamy texture.
- 1/2 cup unsalted butter – always unsalted to control the flavor.
- 1/4 cup espresso powder – the star ingredient, choose a high-quality brand for the best taste.
- 1 tsp vanilla extract – a dash of vanilla enhances all the flavors.
- 1/4 tsp salt – just a pinch to balance the sweetness.
Instructions
- Line an 8×8 inch baking pan with parchment paper, leaving some overhang for easy removal later.
- In a medium saucepan, combine the sugar, heavy cream, and butter. Cook over medium heat, stirring constantly until the butter is fully melted.
- Once the mixture starts to boil, stop stirring and let it cook until it reaches 238°F on a candy thermometer, about 5 minutes. Tip: Patience is key here; rushing this step can affect the texture.
- Remove the saucepan from the heat and gently stir in the espresso powder, vanilla extract, and salt until well combined.
- Pour the mixture into the prepared pan and let it cool at room temperature for at least 2 hours. Tip: Resist the urge to refrigerate as it can cause the fudge to become too hard.
- Once set, lift the fudge out of the pan using the parchment overhang and cut into 1-inch squares. Tip: For clean cuts, wipe your knife with a warm, damp cloth between slices.
Perfectly crafted Espresso Fudge offers a melt-in-your-mouth texture with a bold coffee kick that’s balanced by the sweetness of the fudge. Serve these decadent squares alongside a cup of coffee for an extra caffeine boost or gift them in a pretty box for a homemade touch that’s sure to impress.
Cherry Almond Fudge
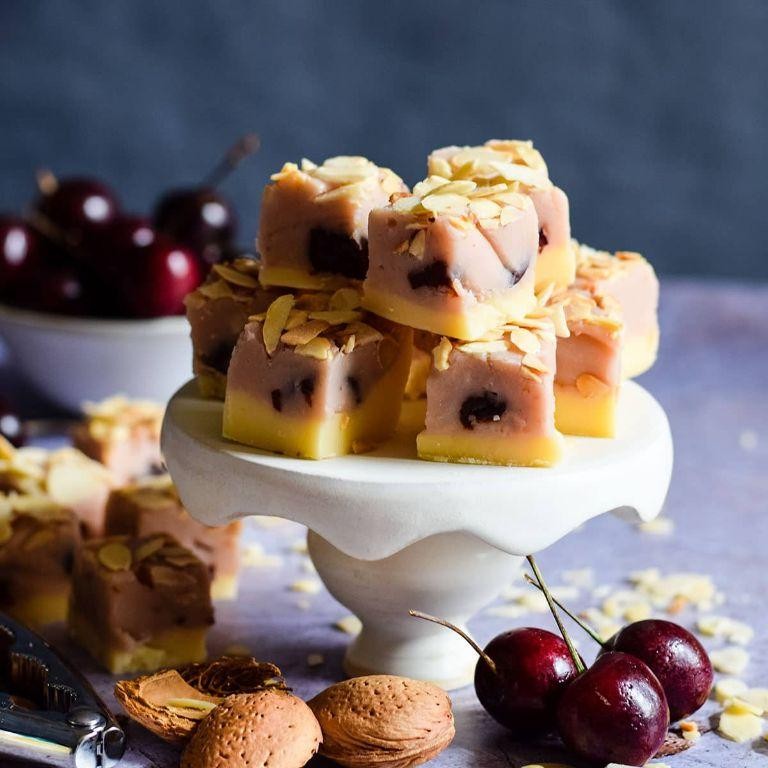
First, let’s dive into making this delightful Cherry Almond Fudge, a perfect blend of sweet and nutty flavors that’s surprisingly simple to whip up. Follow these steps carefully, and you’ll have a batch of creamy, dreamy fudge ready to impress.
Ingredients
- 2 cups granulated sugar (I find that organic sugar gives a smoother texture)
- 1/2 cup unsalted butter (room temperature for easier mixing)
- 1/2 cup heavy cream (the richer, the better for that creamy mouthfeel)
- 1/4 tsp salt (just a pinch to balance the sweetness)
- 1 tsp vanilla extract (pure extract makes all the difference)
- 1/2 cup dried cherries (chopped, for that burst of fruity flavor)
- 1/2 cup almonds (toasted and chopped, for a crunchy contrast)
Instructions
- Line an 8-inch square baking pan with parchment paper, leaving some overhang for easy removal later.
- In a medium saucepan over medium heat, combine sugar, butter, heavy cream, and salt. Stir constantly until the butter melts and the sugar dissolves, about 5 minutes.
- Bring the mixture to a boil, then reduce heat to low. Continue to cook, without stirring, until the mixture reaches 238°F on a candy thermometer, about 10 minutes. Tip: Swirl the pan occasionally to ensure even heating.
- Remove from heat and let sit undisturbed for 5 minutes to cool slightly. Then, add vanilla extract and beat with a wooden spoon until the mixture thickens and loses its gloss, about 5 minutes. Tip: This step is crucial for the right fudge texture, so don’t rush it.
- Fold in dried cherries and almonds quickly but gently, then pour into the prepared pan. Smooth the top with a spatula. Tip: Work fast here as the fudge sets quickly.
- Let cool at room temperature for at least 2 hours, then lift out using the parchment overhang and cut into squares.
You’ll love the creamy texture of this fudge, punctuated by the chewy cherries and crunchy almonds. Try serving it on a dessert cheese board for an elegant touch, or simply enjoy a square with your afternoon coffee.
Butterscotch Fudge
Unlock the secrets to making the creamiest butterscotch fudge with this foolproof recipe. Perfect for beginners, this guide will walk you through each step to ensure your fudge turns out perfectly every time.
Ingredients
- 2 cups granulated sugar (I find that using organic sugar gives a deeper flavor)
- 1/2 cup unsalted butter (room temperature for easier mixing)
- 3/4 cup heavy cream (the higher the fat content, the creamier your fudge)
- 1 tsp pure vanilla extract (a splash more if you love vanilla like I do)
- 1 cup butterscotch chips (these melt beautifully for a smooth texture)
Instructions
- Line an 8-inch square baking pan with parchment paper, leaving some overhang for easy removal later.
- In a medium saucepan, combine the sugar, butter, and heavy cream over medium heat. Stir constantly until the butter is fully melted.
- Bring the mixture to a boil, then reduce the heat to low. Continue to cook, stirring occasionally, until the mixture reaches 235°F on a candy thermometer. This is the soft-ball stage, crucial for perfect fudge texture.
- Remove the saucepan from the heat and stir in the vanilla extract and butterscotch chips until the chips are completely melted and the mixture is smooth.
- Pour the fudge into the prepared pan, smoothing the top with a spatula. Let it cool at room temperature for at least 2 hours before cutting into squares.
Silky smooth with a rich butterscotch flavor, this fudge is a dreamy treat. For an extra touch, sprinkle a pinch of sea salt on top before it sets to balance the sweetness.
Vanilla Bean Fudge
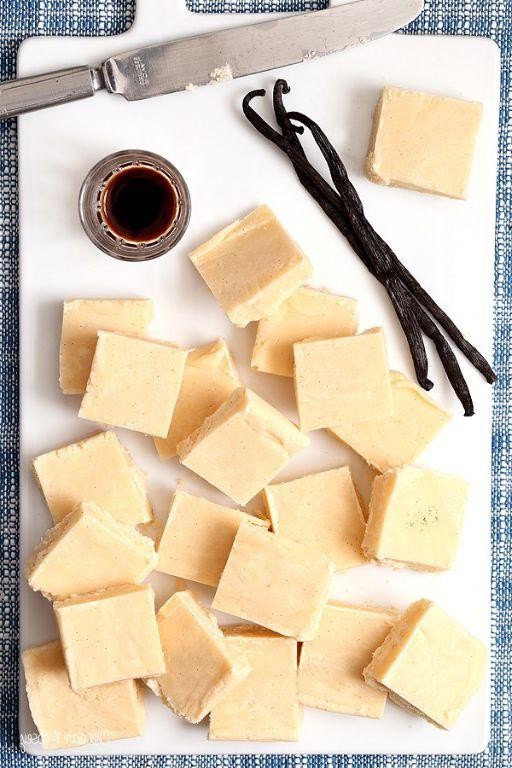
Zesty and sweet, vanilla bean fudge is a classic treat that’s surprisingly simple to make at home. Let’s walk through the process together, ensuring every step is clear and manageable, even for beginners.
Ingredients
- 2 cups granulated sugar (I find using organic sugar adds a deeper flavor)
- 1 cup heavy cream (for the creamiest texture, don’t skimp on the fat)
- 1/2 cup unsalted butter (cut into pieces for easier melting)
- 1 vanilla bean, split and scraped (or 1 tbsp pure vanilla extract if you’re in a pinch)
- 1/4 tsp salt (just a pinch to balance the sweetness)
Instructions
- Line an 8-inch square baking pan with parchment paper, leaving an overhang on the sides for easy removal later.
- In a medium saucepan, combine the sugar, heavy cream, and butter. Cook over medium heat, stirring constantly, until the butter is melted and the mixture is smooth.
- Insert a candy thermometer into the saucepan. Continue cooking, without stirring, until the mixture reaches 238°F (soft-ball stage). This should take about 10-15 minutes. Tip: Avoid scraping the sides of the pan to prevent sugar crystals from forming.
- Remove the saucepan from the heat. Stir in the vanilla bean seeds (or extract) and salt until fully incorporated.
- Let the mixture cool to 110°F without stirring. This patience ensures the fudge sets with the perfect texture.
- Once cooled, beat the mixture vigorously with a wooden spoon until it thickens and loses its gloss. This should take about 10 minutes. Tip: If the mixture becomes too hard to stir, it’s ready.
- Pour the fudge into the prepared pan, smoothing the top with a spatula. Let it set at room temperature for at least 2 hours before cutting into squares.
Glossy and rich, this vanilla bean fudge melts in your mouth with a velvety smoothness. For an extra touch, serve it alongside a cup of strong coffee or as a decadent topping for ice cream.
Chocolate Peanut Butter Swirl Fudge
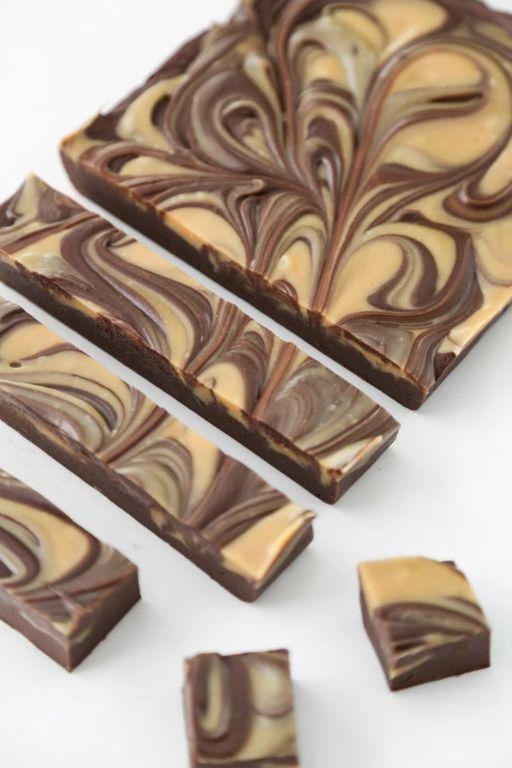
Whipping up a batch of Chocolate Peanut Butter Swirl Fudge is easier than you think, and the result is a decadent treat that combines two classic flavors in one creamy bite.
Ingredients
- 2 cups semi-sweet chocolate chips (I find Ghirardelli melts the smoothest)
- 1 cup creamy peanut butter (Jif or Skippy for that perfect swirl)
- 1 can (14 oz) sweetened condensed milk (Eagle Brand is my go-to for its creamy texture)
- 1 tsp vanilla extract (pure extract makes all the difference)
- A pinch of salt (to balance the sweetness)
Instructions
- Line an 8×8 inch baking pan with parchment paper, leaving some overhang for easy removal later.
- In a medium saucepan, combine the chocolate chips, sweetened condensed milk, and salt over low heat. Stir constantly until the chocolate is completely melted and the mixture is smooth, about 5 minutes.
- Remove the saucepan from the heat and stir in the vanilla extract. Pour the mixture into the prepared pan, spreading it evenly with a spatula.
- Drop dollops of peanut butter over the chocolate mixture. Use a knife to swirl the peanut butter into the chocolate, creating a marbled effect.
- Refrigerate the fudge for at least 2 hours, or until it’s firm to the touch. Tip: For cleaner cuts, let the fudge sit at room temperature for 10 minutes before slicing.
- Lift the fudge out of the pan using the parchment overhang. Cut into 1-inch squares with a sharp knife. Tip: Wiping the knife with a warm, damp cloth between cuts ensures neat edges.
Best enjoyed chilled, this fudge boasts a rich chocolate base with creamy peanut butter swirls that melt in your mouth. Try serving it atop vanilla ice cream for an extra indulgent dessert.
Toasted Marshmallow Fudge
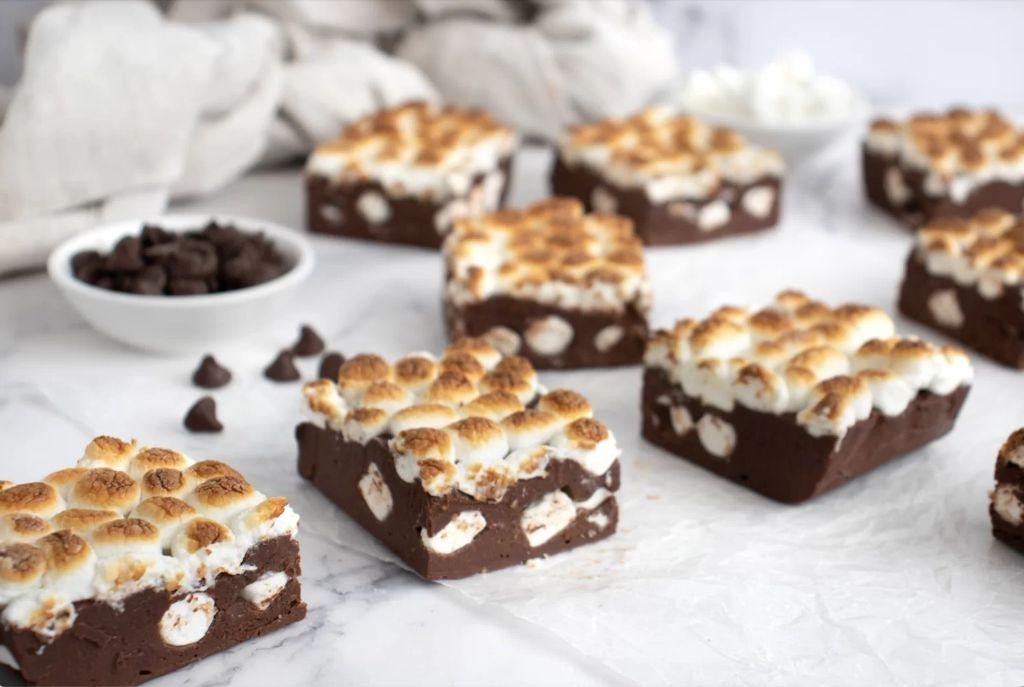
Baking this Toasted Marshmallow Fudge is like wrapping yourself in a warm, sweet hug. It’s a straightforward recipe that yields a decadent treat, perfect for sharing or savoring solo.
Ingredients
- 2 cups granulated sugar (I find using organic sugar adds a deeper flavor)
- 1/2 cup unsalted butter (room temperature for easier mixing)
- 1/2 cup heavy cream (the richer, the better for that creamy texture)
- 1 tsp vanilla extract (pure extract makes all the difference)
- 1 1/2 cups mini marshmallows (plus extra for topping)
- 1 cup semi-sweet chocolate chips (I love the balance they bring)
Instructions
- Line an 8×8 inch baking pan with parchment paper, leaving some overhang for easy removal.
- In a medium saucepan over medium heat, combine sugar, butter, and heavy cream. Stir constantly until the mixture reaches 235°F on a candy thermometer, about 5-7 minutes.
- Remove from heat and quickly stir in vanilla extract, marshmallows, and chocolate chips until fully melted and smooth. Tip: Work fast to prevent the mixture from setting too quickly.
- Pour the fudge into the prepared pan, smoothing the top with a spatula. Immediately sprinkle extra marshmallows on top.
- Let the fudge cool at room temperature for 2 hours, then refrigerate for another hour to set completely. Tip: Don’t rush the cooling process for the perfect texture.
- Once set, use the parchment overhang to lift the fudge out of the pan. Cut into 1-inch squares with a sharp knife. Tip: For clean cuts, wipe the knife with a warm, damp cloth between slices.
Rich and velvety, this fudge boasts a delightful contrast between the creamy base and the gooey toasted marshmallow topping. Serve it on a wooden board for a rustic touch or package it in cute boxes as a heartfelt gift.
Lemon Blueberry Fudge

Making Lemon Blueberry Fudge is a delightful way to combine the tangy zest of lemon with the sweet burst of blueberries in a creamy, dreamy treat. Let’s walk through the process together, ensuring every step is clear and manageable, even for beginners.
Ingredients
- 3 cups white chocolate chips (I find Ghirardelli melts the smoothest)
- 1 can (14 oz) sweetened condensed milk (stick to the name brands for consistency)
- 1 tbsp lemon zest (freshly grated for the brightest flavor)
- 1/4 cup lemon juice (squeezed from about 2 lemons, no seeds please)
- 1/2 cup dried blueberries (I prefer these over fresh for less moisture)
- 1 tsp vanilla extract (pure extract makes all the difference)
Instructions
- Line an 8×8 inch baking dish with parchment paper, leaving some overhang for easy removal later.
- In a medium saucepan, combine the white chocolate chips and sweetened condensed milk over low heat. Stir constantly until the chocolate is fully melted and the mixture is smooth, about 5 minutes.
- Remove the saucepan from the heat and immediately stir in the lemon zest, lemon juice, dried blueberries, and vanilla extract until well combined.
- Pour the mixture into the prepared baking dish, spreading it evenly with a spatula.
- Refrigerate the fudge for at least 2 hours, or until it’s firm to the touch.
- Once set, use the parchment paper overhang to lift the fudge out of the dish. Cut into 1-inch squares with a sharp knife.
Here’s how it turns out: the fudge is luxuriously creamy with a perfect balance of sweet and tart, dotted with juicy blueberries. For an extra special touch, serve these squares on a platter with a sprinkle of additional lemon zest or alongside a cup of Earl Grey tea.
Conclusion
We hope you’ve enjoyed exploring these 18 irresistible fudge recipes as much as we loved rounding them up for you! Whether you’re a seasoned pro or trying your hand at fudge-making for the first time, there’s something here for everyone. Don’t forget to share your favorites in the comments and pin your must-try recipes on Pinterest. Happy cooking, and may your treats be as sweet as your moments making them!