Just because you’re on a bariatric diet doesn’t mean you have to sacrifice flavor or variety! Dive into our roundup of 23 Delicious Bariatric Soft Food Recipes that are as nutritious as they are tasty. Whether you’re craving something sweet, savory, or somewhere in between, we’ve got you covered with easy-to-make dishes that’ll keep your meals exciting and your health on track. Let’s get cooking!
Creamy Butternut Squash Soup

Every time the leaves start to turn, I find myself craving the cozy embrace of a warm bowl of butternut squash soup. There’s something about its creamy texture and sweet, nutty flavor that feels like a hug from the inside out. I remember the first time I made it, thinking it would be complicated, but it’s surprisingly simple and forgiving, perfect for those days when you want something hearty without the fuss.
Ingredients
- Butternut squash – 1 medium, peeled and cubed
- Olive oil – 2 tbsp
- Onion – 1, chopped
- Garlic – 2 cloves, minced
- Vegetable broth – 4 cups
- Salt – 1 tsp
- Black pepper – ½ tsp
- Heavy cream – ½ cup
Instructions
- Preheat your oven to 400°F. Toss the cubed butternut squash with 1 tbsp olive oil, ½ tsp salt, and ¼ tsp black pepper on a baking sheet. Roast for 25 minutes or until fork-tender, stirring halfway through for even browning.
- While the squash roasts, heat the remaining 1 tbsp olive oil in a large pot over medium heat. Add the chopped onion and sauté until translucent, about 5 minutes. Tip: Don’t rush this step; caramelizing the onions slightly will add depth to your soup.
- Add the minced garlic to the pot and cook for another minute until fragrant.
- Pour in the vegetable broth and bring to a simmer. Add the roasted butternut squash to the pot.
- Use an immersion blender to puree the soup until smooth. If you don’t have an immersion blender, carefully transfer the soup in batches to a blender. Tip: Always leave the blender lid slightly ajar to let steam escape and prevent explosions.
- Stir in the heavy cream and remaining salt and pepper. Simmer for another 5 minutes to let the flavors meld. Tip: For a lighter version, you can substitute coconut milk for the heavy cream.
Perfectly velvety with a hint of sweetness, this soup is a canvas for your creativity. Try topping it with roasted pumpkin seeds for crunch or a drizzle of chili oil for heat. It’s the kind of dish that invites you to make it your own.
Soft Scrambled Eggs with Cheese

Zesty mornings call for something simple yet satisfying, and that’s where my soft scrambled eggs with cheese come into play. I’ve been perfecting this recipe for years, and it’s become my go-to for a quick, comforting breakfast that feels a little luxurious.
Ingredients
- Eggs – 4
- Butter – 1 tbsp
- Cheddar cheese – ½ cup, shredded
- Salt – ¼ tsp
- Pepper – ⅛ tsp
Instructions
- Crack the eggs into a medium bowl and whisk until the yolks and whites are fully combined.
- Heat a non-stick skillet over low heat and add the butter, letting it melt completely without browning.
- Pour the whisked eggs into the skillet. Tip: Keeping the heat low ensures the eggs cook gently and stay creamy.
- Using a spatula, gently stir the eggs continuously, scraping the bottom of the skillet to form soft curds.
- When the eggs are mostly set but still slightly runny, sprinkle the shredded cheddar cheese evenly over the top. Tip: Adding the cheese at this stage allows it to melt perfectly without clumping.
- Continue to stir gently until the cheese is melted and the eggs are softly set, about 1 more minute. Tip: Remove the eggs from the heat just before they’re fully done, as they’ll continue to cook from residual heat.
- Season with salt and pepper, then serve immediately.
Unbelievably creamy and rich, these scrambled eggs are a testament to the magic of low and slow cooking. The melted cheddar adds a delightful sharpness that elevates the dish, making it perfect for spreading on toast or enjoying as is for a protein-packed start to your day.
Pureed Chicken and Rice

Many of us have those days when we crave something comforting yet simple to make. That’s exactly how I felt last week, leading me to whip up this Pureed Chicken and Rice dish. It’s a humble recipe that reminds me of my grandmother’s kitchen, where simplicity always won over complexity.
Ingredients
- Chicken breast – 1 lb
- White rice – 1 cup
- Chicken broth – 2 cups
- Butter – 2 tbsp
- Salt – ½ tsp
Instructions
- Rinse the white rice under cold water until the water runs clear, to remove excess starch.
- In a medium pot, bring the chicken broth to a boil over high heat.
- Add the rinsed rice to the boiling broth, reduce heat to low, cover, and simmer for 18 minutes. Tip: Resist the urge to peek; keeping the lid on ensures even cooking.
- While the rice cooks, season the chicken breast with salt.
- In a separate pan, melt the butter over medium heat and cook the chicken breast for 6-7 minutes on each side, or until the internal temperature reaches 165°F. Tip: Letting the chicken rest for a few minutes after cooking keeps it juicy.
- Once both the rice and chicken are cooked, combine them in a blender or food processor and puree until smooth. Tip: For a smoother texture, add a little extra broth if needed.
Now, this Pureed Chicken and Rice is wonderfully smooth with a rich, buttery flavor that’s both comforting and satisfying. I love serving it with a drizzle of olive oil and a sprinkle of fresh herbs for an extra touch of elegance.
Silken Tofu Smoothie

Perfect for those mornings when you’re rushing out the door but still want a nutritious start, this Silken Tofu Smoothie is my go-to. I stumbled upon this recipe during a hectic week when blending speed and health was non-negotiable.
Ingredients
- Silken tofu – 1 cup
- Frozen mixed berries – 1 cup
- Almond milk – ½ cup
- Honey – 1 tbsp
Instructions
- Add 1 cup of silken tofu to your blender. Tip: Silken tofu blends smoother if it’s at room temperature.
- Pour in ½ cup of almond milk to help with blending.
- Add 1 cup of frozen mixed berries. Tip: Using frozen berries eliminates the need for ice, making your smoothie creamier.
- Drizzle 1 tbsp of honey for a touch of sweetness. Tip: Adjust the amount of honey based on the sweetness of your berries.
- Blend on high for 45 seconds or until completely smooth. The mixture should be thick but pourable.
Silky and rich, this smoothie feels like a dessert but fuels you like a meal. Try serving it in a bowl topped with granola for an extra crunch.
Avocado and Banana Mash
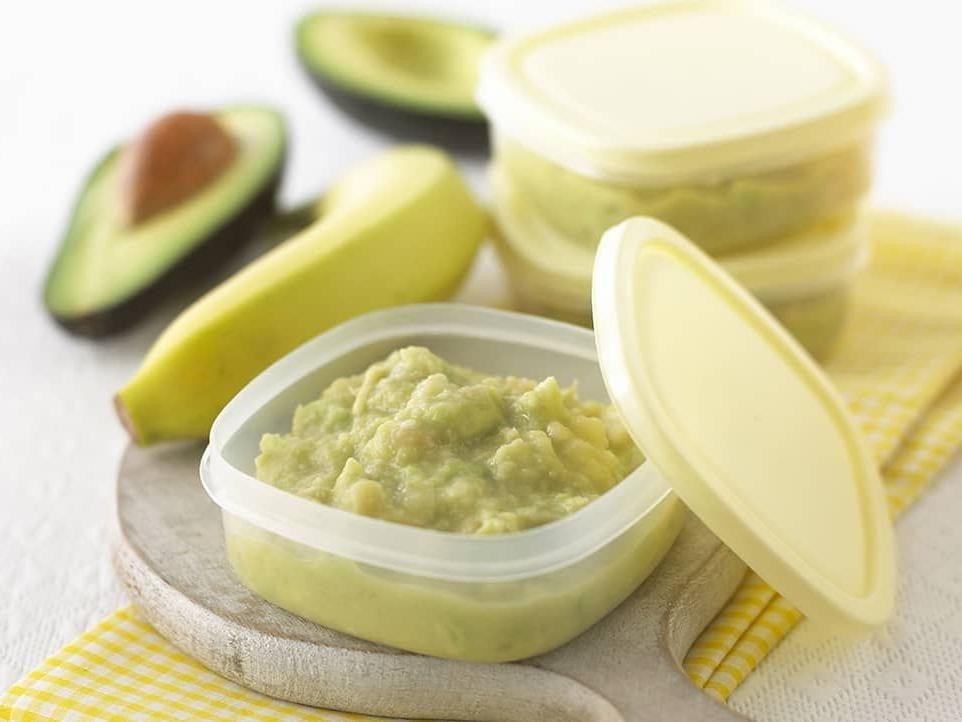
Craving something sweet yet healthy for breakfast? I stumbled upon this Avocado and Banana Mash one lazy Sunday morning when my fruit bowl was looking a bit sad, and it’s been a game-changer for my mornings. It’s incredibly simple, yet the combination of creamy avocado and sweet banana is surprisingly satisfying.
Ingredients
- Avocado – 1
- Banana – 1
- Honey – 1 tbsp
- Cinnamon – ½ tsp
Instructions
- Cut the avocado in half, remove the pit, and scoop the flesh into a bowl.
- Peel the banana and add it to the bowl with the avocado.
- Using a fork, mash the avocado and banana together until smooth. Tip: For a chunkier texture, mash less.
- Add the honey and cinnamon to the bowl. Tip: Adjust the amount of honey based on how sweet your banana is.
- Mix everything together until well combined. Tip: A squeeze of lemon juice can add a nice zing if you like.
What you’ll love about this mash is its velvety texture and the way the cinnamon brings out the flavors. Serve it on toast, with granola, or just eat it straight out of the bowl—it’s that good.
Soft Baked Apples with Cinnamon
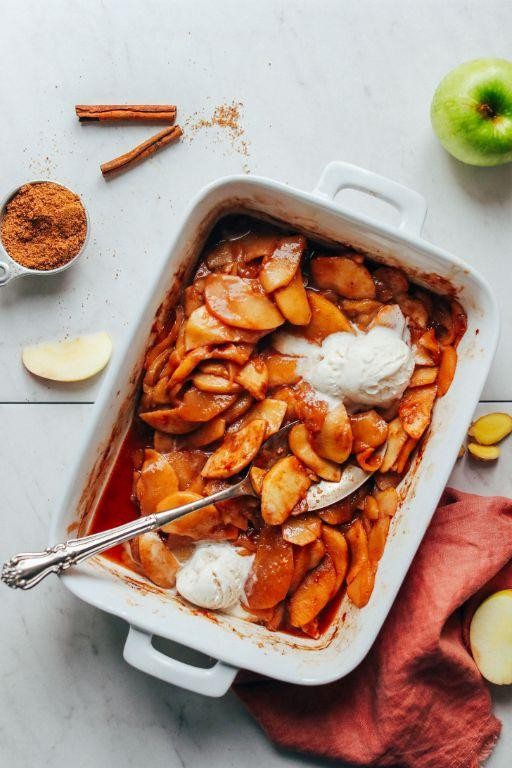
Fall is my favorite time to bake, and there’s nothing quite like the aroma of cinnamon and apples wafting through the house. This recipe for Soft Baked Apples with Cinnamon is a nostalgic throwback to my grandmother’s kitchen, where simplicity and warmth were the main ingredients.
Ingredients
- Apples – 4 medium
- Cinnamon – 1 tsp
- Brown sugar – ¼ cup
- Butter – 2 tbsp
- Water – ½ cup
Instructions
- Preheat your oven to 350°F (175°C). This ensures a consistent temperature for even baking.
- Core the apples carefully, leaving the bottom intact to hold the filling. A melon baller works wonders here.
- In a small bowl, mix the cinnamon and brown sugar. This combo not only adds sweetness but also a deep, spicy flavor.
- Stuff each apple with the cinnamon-sugar mixture. Pack it in tightly for maximum flavor in every bite.
- Top each apple with a pat of butter. This melts into the filling, adding richness.
- Pour the water into the baking dish around the apples. It creates steam, keeping the apples tender.
- Bake for 30-40 minutes, until the apples are soft but not collapsing. The skin will wrinkle slightly when they’re ready.
- Let them cool for 5 minutes before serving. They’re deceptively hot inside!
Out of the oven, these apples are tender with a slight bite, the cinnamon sugar caramelizing into a sticky, sweet glaze. Serve them with a scoop of vanilla ice cream for a contrast of temperatures, or enjoy them as is for a cozy, guilt-free dessert.
Pureed Lentil Soup

Last week, I found myself craving something hearty yet simple after a long day of work. That’s when I remembered my go-to Pureed Lentil Soup—a dish that’s as comforting as it is nutritious. It’s the kind of meal that feels like a warm hug, and today, I’m sharing my foolproof recipe with you.
Ingredients
- Lentils – 1 cup
- Vegetable broth – 4 cups
- Olive oil – 2 tbsp
- Garlic – 2 cloves, minced
- Salt – ½ tsp
Instructions
- Rinse the lentils under cold water until the water runs clear.
- In a large pot, heat the olive oil over medium heat for 1 minute.
- Add the minced garlic to the pot and sauté for 30 seconds, just until fragrant.
- Pour in the vegetable broth and bring to a boil.
- Add the rinsed lentils to the boiling broth.
- Reduce the heat to low, cover the pot, and let it simmer for 25 minutes. Tip: Stir occasionally to prevent sticking.
- After 25 minutes, check if the lentils are tender. If not, simmer for an additional 5 minutes.
- Once the lentils are cooked, remove the pot from the heat and let it cool slightly.
- Using an immersion blender, puree the soup until smooth. Tip: For a chunkier texture, blend half the soup and leave the rest as is.
- Season with salt and stir well. Tip: Taste and adjust the seasoning if necessary.
Zesty and velvety, this Pureed Lentil Soup is a delight on its own or paired with a slice of crusty bread. The smooth texture and rich flavor make it a versatile dish—try topping it with a drizzle of olive oil or a sprinkle of fresh herbs for an extra touch of elegance.
Scrambled Egg Whites with Spinach

Sometimes, the simplest dishes bring the most comfort, especially when they’re as nutritious as they are delicious. I stumbled upon this Scrambled Egg Whites with Spinach recipe during a hectic week when I needed something quick yet wholesome, and it’s been a staple in my kitchen ever since.
Ingredients
- Egg whites – 1 cup
- Fresh spinach – 2 cups
- Olive oil – 1 tbsp
- Salt – ¼ tsp
Instructions
- Heat a non-stick skillet over medium heat and add 1 tbsp of olive oil, swirling to coat the pan evenly.
- Add 2 cups of fresh spinach to the skillet, stirring occasionally until wilted, about 2 minutes. Tip: Spinach wilts quickly, so keep an eye on it to avoid overcooking.
- Pour 1 cup of egg whites into the skillet with the spinach, stirring gently to combine.
- Continue to stir the mixture every 30 seconds, allowing the egg whites to cook slowly and form soft curds. Tip: Low and slow is the key to fluffy scrambled eggs.
- Once the egg whites are fully set but still moist, about 3-4 minutes, sprinkle with ¼ tsp of salt and stir to incorporate. Tip: Adding salt at the end prevents the eggs from becoming watery.
Light and fluffy with a vibrant green hue, this dish is a testament to how minimal ingredients can yield maximum flavor. Serve it atop a slice of whole-grain toast for a satisfying breakfast or alongside a crisp salad for a light lunch.
Soft Cooked Quinoa with Pureed Vegetables
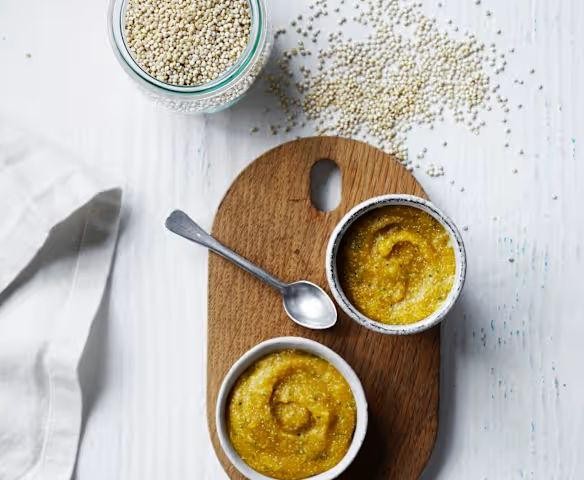
Having experimented with countless quinoa dishes over the years, I’ve found that the key to a truly memorable meal lies in the simplicity of its ingredients and the love put into its preparation. Today, I’m sharing my go-to recipe for Soft Cooked Quinoa with Pureed Vegetables, a dish that’s as nourishing as it is comforting, perfect for those busy weeknights when you crave something wholesome without the fuss.
Ingredients
- Quinoa – 1 cup
- Water – 2 cups
- Carrots – 2, medium
- Zucchini – 1, medium
- Olive oil – 1 tbsp
- Salt – ½ tsp
Instructions
- Rinse the quinoa under cold water for 1 minute to remove any bitterness.
- In a medium saucepan, combine the rinsed quinoa and water. Bring to a boil over high heat.
- Once boiling, reduce the heat to low, cover, and simmer for 15 minutes, or until the quinoa is soft and the water is absorbed. Tip: Letting it sit covered for 5 minutes off the heat fluffs it up perfectly.
- While the quinoa cooks, peel and chop the carrots and zucchini into small pieces.
- In a separate pan, heat the olive oil over medium heat. Add the chopped vegetables and sauté for 5 minutes, or until they start to soften.
- Transfer the sautéed vegetables to a blender, add the salt, and puree until smooth. Tip: A splash of water can help achieve a smoother consistency if needed.
- Fluff the cooked quinoa with a fork and gently fold in the pureed vegetables until well combined. Tip: For an extra flavor boost, a sprinkle of fresh herbs like parsley or cilantro works wonders.
This dish boasts a creamy texture with a subtle sweetness from the vegetables, making it a versatile base for your favorite protein or a stand-alone meal. Try serving it topped with a drizzle of tahini and a handful of toasted nuts for added crunch and depth of flavor.
Banana and Peanut Butter Smoothie
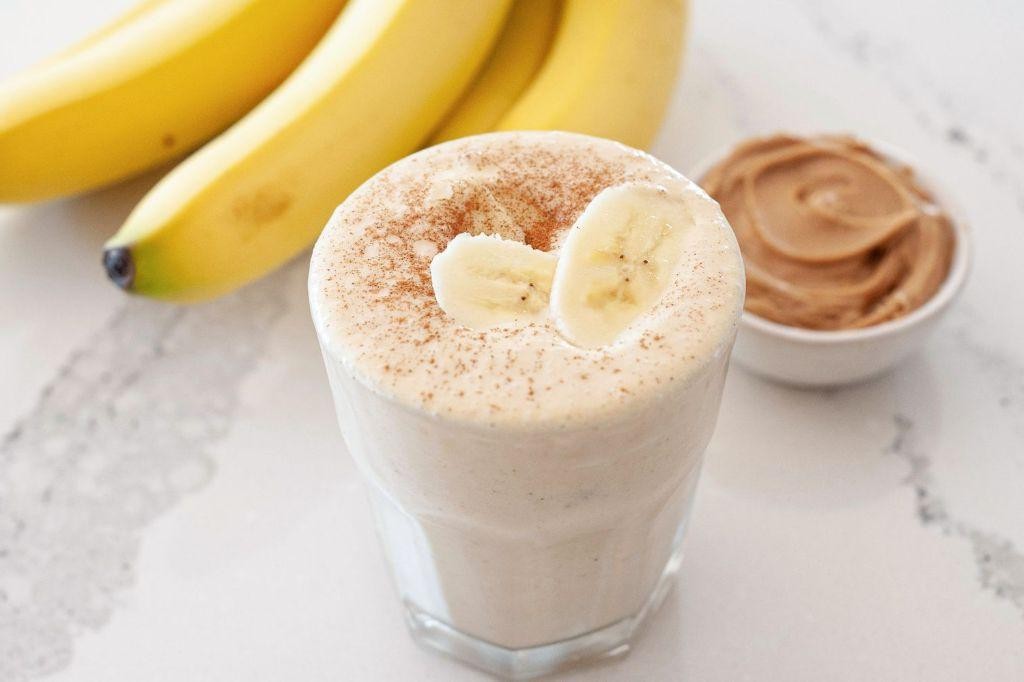
This morning, as I was rummaging through my kitchen for a quick breakfast, I stumbled upon the perfect duo: bananas and peanut butter. There’s something about their combination that feels like a warm hug on a busy morning. So, I decided to whip up a smoothie that’s not only nutritious but also incredibly satisfying.
Ingredients
- Banana – 1 large
- Peanut butter – 2 tbsp
- Milk – 1 cup
- Ice – ½ cup
Instructions
- Peel the banana and break it into chunks.
- Add the banana chunks, peanut butter, milk, and ice to a blender.
- Blend on high speed for 30 seconds, or until the mixture is smooth and creamy. Tip: If the smoothie is too thick, add a little more milk to reach your desired consistency.
- Pour the smoothie into a glass and serve immediately. Tip: For an extra touch, drizzle a little peanut butter on top before serving.
- Enjoy your smoothie right away for the best texture and flavor. Tip: If you prefer a colder smoothie, freeze the banana chunks before blending.
Great for those rushed mornings, this smoothie blends creamy peanut butter with the natural sweetness of bananas, creating a drink that’s both filling and delicious. Serve it in a chilled glass with a straw for that café-style experience at home.
Pureed Pumpkin with Cinnamon

Having just stumbled upon a treasure trove of pumpkins at my local farmer’s market, I couldn’t resist the urge to whip up something cozy and comforting. Pureed Pumpkin with Cinnamon is my go-to for those chilly evenings when all I crave is a bowl of warmth that tastes like autumn itself.
Ingredients
- Pumpkin – 2 cups, peeled and cubed
- Water – 1 cup
- Cinnamon – 1 tsp
- Butter – 2 tbsp
- Salt – ¼ tsp
Instructions
- Place the cubed pumpkin in a medium saucepan and add 1 cup of water.
- Bring to a boil over high heat, then reduce to a simmer and cover. Cook for 20 minutes, or until the pumpkin is tender when pierced with a fork.
- Drain the pumpkin, reserving ½ cup of the cooking water.
- Transfer the pumpkin to a blender or food processor. Add the reserved cooking water, cinnamon, butter, and salt.
- Blend until smooth, scraping down the sides as needed to ensure even pureeing.
- For a silkier texture, pass the puree through a fine-mesh sieve. This step is optional but recommended for the smoothest result.
- Return the puree to the saucepan and warm over low heat for 2-3 minutes, stirring constantly to prevent sticking.
Perfectly velvety with a hint of spice, this pureed pumpkin is a dream on its own or as a base for soups and sauces. Try swirling in a dollop of cream or topping with toasted pecans for an extra layer of flavor and crunch.
Soft Polenta with Parmesan

Craving something creamy, comforting, and utterly satisfying? Let me tell you about my go-to dish for those nights when only a bowl of pure comfort will do. Soft polenta with Parmesan is my culinary hug in a bowl, a dish that’s as versatile as it is delicious. Whether it’s a side or the star of the show, it never fails to impress.
Ingredients
- Water – 4 cups
- Polenta – 1 cup
- Salt – 1 tsp
- Butter – 2 tbsp
- Parmesan cheese – ½ cup, grated
Instructions
- Bring 4 cups of water to a boil in a medium saucepan over high heat.
- Add 1 tsp of salt to the boiling water.
- Slowly whisk in 1 cup of polenta to prevent clumping.
- Reduce heat to low and simmer, stirring frequently with a wooden spoon, for 25 minutes. Tip: Stirring frequently prevents the polenta from sticking to the bottom of the pan.
- Remove from heat and stir in 2 tbsp of butter until fully melted and incorporated.
- Add ½ cup of grated Parmesan cheese, stirring until the cheese is melted and the polenta is creamy. Tip: For an extra flavor boost, try adding the Parmesan in batches, tasting as you go.
- Let the polenta sit for 5 minutes before serving to thicken slightly. Tip: If the polenta becomes too thick upon standing, a splash of warm water or milk can bring it back to the desired consistency.
You’ll love the creamy texture and the rich, cheesy flavor of this polenta. Serve it under a hearty ragu or alongside roasted vegetables for a meal that feels both luxurious and homey.
Silken Tofu Chocolate Pudding
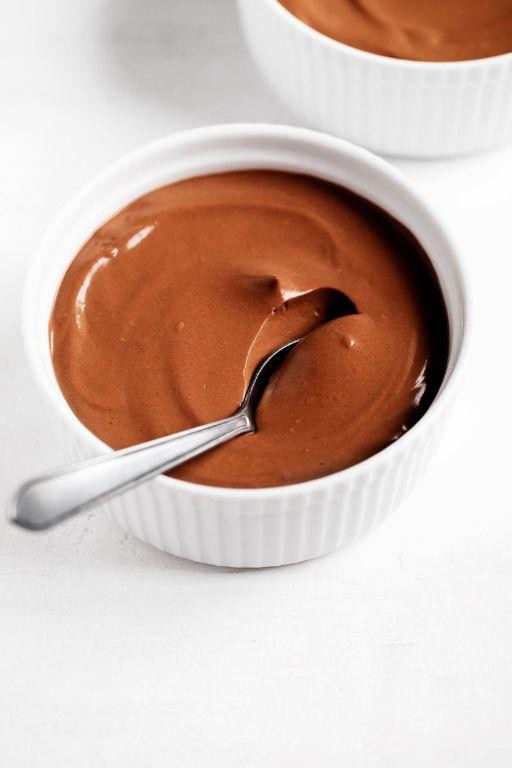
Sometimes, the best desserts come from the simplest ingredients, and this Silken Tofu Chocolate Pudding is no exception. I stumbled upon this recipe during a late-night fridge raid, and it’s been a game-changer for my sweet tooth cravings ever since.
Ingredients
- Silken tofu – 1 (12 oz) package
- Dark chocolate chips – 1 cup
- Maple syrup – ¼ cup
- Vanilla extract – 1 tsp
Instructions
- Drain the silken tofu and pat it dry with a paper towel to remove excess moisture.
- Melt the dark chocolate chips in a microwave-safe bowl in 30-second intervals, stirring between each, until smooth.
- Combine the melted chocolate, silken tofu, maple syrup, and vanilla extract in a blender.
- Blend on high speed for 1-2 minutes until the mixture is completely smooth and creamy.
- Pour the pudding into serving dishes and refrigerate for at least 2 hours, or until set.
After chilling, the pudding transforms into a velvety, rich dessert that’s surprisingly light. For an extra touch, top with fresh berries or a sprinkle of sea salt before serving.
Pureed White Fish with Dill

Whenever I’m in the mood for something light yet satisfying, I turn to this Pureed White Fish with Dill recipe. It’s a dish that reminds me of summer evenings by the lake, where the simplicity of ingredients speaks volumes.
Ingredients
- White fish fillets – 1 lb
- Fresh dill – 2 tbsp, chopped
- Butter – 2 tbsp
- Heavy cream – ½ cup
- Salt – ½ tsp
- Pepper – ¼ tsp
Instructions
- Preheat your oven to 375°F.
- Place the white fish fillets in a baking dish, ensuring they’re not overlapping.
- Season the fillets evenly with salt and pepper.
- Dot the top of the fillets with butter, then sprinkle the chopped dill over them.
- Pour the heavy cream around the fillets, not directly on top, to keep the dill in place.
- Bake for 20 minutes, or until the fish flakes easily with a fork.
- Transfer the fish and the cooking liquids to a blender.
- Puree until smooth, about 1 minute, scraping down the sides as needed.
This pureed white fish turns out velvety and rich, with the dill adding a fresh, aromatic touch. Try serving it over toasted baguette slices or as a sophisticated dip for vegetables at your next gathering.
Soft Cottage Cheese with Pineapple

Zesty mornings call for a refreshing yet comforting breakfast, and that’s exactly what inspired me to whip up this Soft Cottage Cheese with Pineapple recipe. It’s a breeze to make, and the combination of creamy cottage cheese with the tangy sweetness of pineapple is a match made in heaven.
Ingredients
- Cottage cheese – 1 cup
- Pineapple chunks – ½ cup
- Honey – 1 tbsp
Instructions
- In a medium bowl, combine 1 cup of cottage cheese with ½ cup of pineapple chunks. Tip: For extra creaminess, opt for full-fat cottage cheese.
- Drizzle 1 tbsp of honey over the mixture. Tip: Adjust the amount of honey based on the sweetness of your pineapple.
- Gently stir the ingredients until well combined. Tip: Let the mixture sit for 5 minutes before serving to allow the flavors to meld together.
After trying this dish, you’ll love the contrast between the soft, creamy texture of the cottage cheese and the juicy, vibrant bites of pineapple. It’s perfect on its own, or for an extra crunch, serve it with a sprinkle of granola on top.
Pureed Sweet Potato with Ginger

Yesterday, as I was rummaging through my pantry, I stumbled upon some sweet potatoes that were begging to be used. That’s when I decided to whip up this comforting Pureed Sweet Potato with Ginger, a dish that’s as nourishing as it is delicious.
Ingredients
- Sweet potatoes – 2 large
- Fresh ginger – 1 tbsp, grated
- Butter – 2 tbsp
- Salt – ½ tsp
- Water – ½ cup
Instructions
- Preheat your oven to 400°F. Pierce the sweet potatoes all over with a fork to allow steam to escape during baking.
- Place the sweet potatoes on a baking sheet and bake for 45-50 minutes, or until they’re tender all the way through when pierced with a fork.
- Once baked, let the sweet potatoes cool for about 10 minutes. Then, peel off the skins and transfer the flesh to a mixing bowl.
- Add the grated ginger, butter, and salt to the bowl with the sweet potato flesh.
- Using a hand mixer or a potato masher, puree the mixture until smooth. If the puree is too thick, gradually add water until you reach your desired consistency.
- For an extra smooth texture, pass the puree through a fine mesh sieve. This step is optional but recommended for a silky finish.
- Transfer the puree to a serving dish and serve warm. For a touch of elegance, garnish with a sprinkle of freshly grated ginger or a drizzle of melted butter.
Zesty and velvety, this puree is a perfect side dish that pairs wonderfully with roasted meats or as a standalone comfort food. The ginger adds a warm, spicy note that elevates the natural sweetness of the potatoes, making it a hit at any dinner table.
Soft Oatmeal with Almond Milk
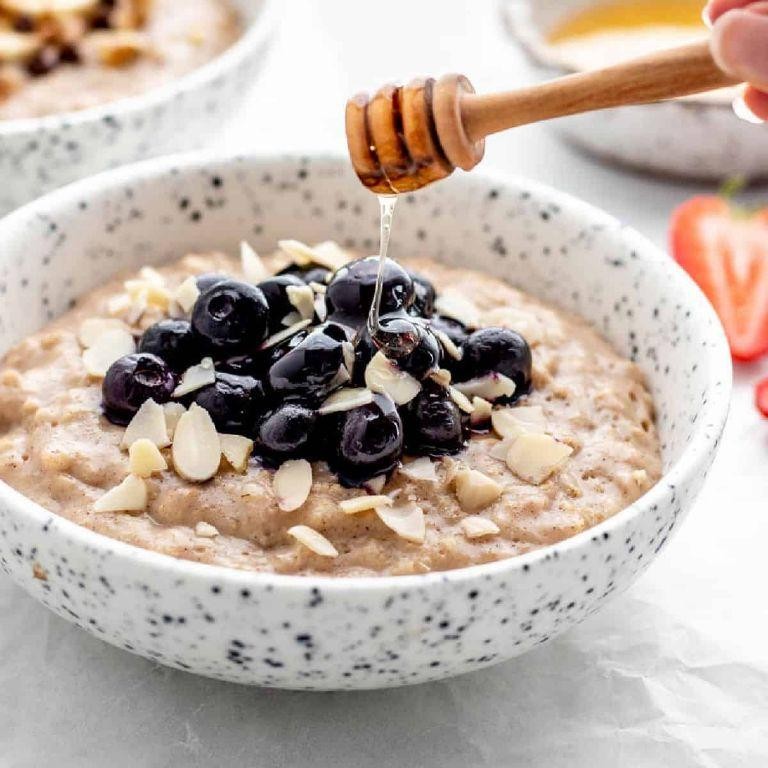
Kind of like a warm hug on a chilly morning, this Soft Oatmeal with Almond Milk has become my go-to breakfast. It’s not just about the ease of whipping it up; it’s the creamy texture and the subtle nuttiness that makes me look forward to waking up.
Ingredients
- Rolled oats – 1 cup
- Almond milk – 2 cups
- Maple syrup – 2 tbsp
- Salt – ¼ tsp
Instructions
- In a medium saucepan, combine the rolled oats, almond milk, and salt.
- Place the saucepan over medium heat and bring the mixture to a gentle boil, stirring occasionally to prevent sticking.
- Once boiling, reduce the heat to low and simmer for 5 minutes, stirring frequently. Tip: For creamier oatmeal, stir more often.
- After 5 minutes, remove the saucepan from the heat and let it sit covered for 2 minutes to thicken. Tip: This resting time allows the oats to absorb any remaining liquid.
- Stir in the maple syrup until fully incorporated. Tip: Adjust the sweetness by adding more syrup if desired, but remember, the almond milk adds its own subtle sweetness.
- Serve immediately while warm.
Delightfully creamy with a hint of sweetness, this oatmeal is perfect as is or topped with fresh berries for a burst of freshness. The almond milk not only makes it dairy-free but adds a layer of flavor that’s hard to resist.
Pureed Cauliflower with Cheese

Finally, a dish that’s as comforting as mashed potatoes but sneaks in some veggies without anyone noticing! I stumbled upon this Pureed Cauliflower with Cheese recipe during my quest for healthier comfort food, and it’s been a game-changer for my weeknight dinners.
Ingredients
- Cauliflower – 1 head
- Butter – 2 tbsp
- Heavy cream – ¼ cup
- Cheddar cheese – ½ cup, shredded
- Salt – ½ tsp
- Black pepper – ¼ tsp
Instructions
- Preheat your oven to 375°F (190°C).
- Cut the cauliflower into florets and steam them for 10 minutes, or until very tender. Tip: A fork should easily pierce the florets.
- Transfer the steamed cauliflower to a food processor. Add butter, heavy cream, salt, and black pepper.
- Puree the mixture until smooth, about 2 minutes. Tip: Scrape down the sides of the food processor halfway through to ensure even texture.
- Transfer the pureed cauliflower to a baking dish. Sprinkle shredded cheddar cheese evenly on top.
- Bake in the preheated oven for 15 minutes, or until the cheese is bubbly and slightly golden. Tip: For a crispier top, broil for the last 2 minutes.
Perfectly creamy with a cheesy golden crust, this pureed cauliflower is a dreamy side that pairs wonderfully with grilled chicken or roasted vegetables. Try topping it with crispy bacon bits for an extra flavor punch!
Soft Ricotta and Spinach Stuffed Shells

Every time I think about comfort food, my mind instantly goes to these Soft Ricotta and Spinach Stuffed Shells. There’s something about the creamy ricotta mixed with the earthy spinach, all tucked inside tender pasta shells, that feels like a warm hug. I remember making these for the first time during a snowy weekend, and now, they’re a staple in my kitchen for cozy nights in.
Ingredients
- Jumbo pasta shells – 12 oz
- Ricotta cheese – 15 oz
- Frozen spinach, thawed and drained – 10 oz
- Egg – 1
- Garlic powder – 1 tsp
- Salt – ½ tsp
- Marinara sauce – 24 oz
- Mozzarella cheese, shredded – 1 cup
Instructions
- Preheat your oven to 375°F.
- Boil the jumbo pasta shells in salted water for 9 minutes, then drain and set aside. Tip: Stir occasionally to prevent sticking.
- In a bowl, mix ricotta cheese, drained spinach, egg, garlic powder, and salt until well combined.
- Spread 1 cup of marinara sauce at the bottom of a baking dish.
- Fill each pasta shell with the ricotta mixture and place them seam side up in the dish. Tip: Use a spoon or piping bag for easier filling.
- Pour the remaining marinara sauce over the stuffed shells and sprinkle with mozzarella cheese.
- Bake for 25 minutes, or until the cheese is bubbly and slightly golden. Tip: Let it sit for 5 minutes before serving for easier handling.
Mmm, the first bite reveals the perfect harmony of creamy ricotta and spinach, with the marinara adding a tangy sweetness. Serve these shells with a crisp green salad and garlic bread for a meal that’s sure to impress.
Pureed Beetroot with Goat Cheese

Amidst the hustle of my week, I found solace in the vibrant hues of beetroot, deciding to whip up a dish that’s as nutritious as it is visually stunning. Pureed Beetroot with Goat Cheese became my go-to, blending earthy flavors with creamy tanginess, a testament to simplicity meeting elegance.
Ingredients
- Beetroot – 2 cups, peeled and diced
- Goat cheese – ½ cup
- Olive oil – 2 tbsp
- Salt – ½ tsp
- Water – 1 cup
Instructions
- Preheat your oven to 375°F. Toss the diced beetroot with 1 tbsp olive oil and ¼ tsp salt on a baking sheet.
- Roast the beetroot for 25 minutes, or until tender when pierced with a fork. Tip: Roasting enhances the beetroot’s natural sweetness.
- Transfer the roasted beetroot to a blender. Add 1 cup of water and blend until smooth. Tip: For a silkier texture, strain the puree through a fine mesh sieve.
- Heat the remaining 1 tbsp olive oil in a pan over medium heat. Add the beetroot puree and cook for 5 minutes, stirring constantly.
- Crumble the goat cheese into the puree, reserving a little for garnish. Stir until the cheese is just melted. Tip: Adding the goat cheese off the heat preserves its creamy texture.
- Season with the remaining ¼ tsp salt, adjusting if necessary.
Here’s the beauty of this dish: the puree’s velvety texture contrasts wonderfully with the crumbly goat cheese, creating a dance of flavors in every bite. Serve it warm, drizzled with olive oil and a sprinkle of goat cheese, or as a vibrant side to grilled meats.
Soft Baked Pear with Honey

Goodness, there’s something utterly comforting about the aroma of baked pears wafting through the kitchen, especially on a lazy afternoon. I remember the first time I tried this dish; it was at a friend’s potluck, and the simplicity of it blew me away. Now, it’s a staple in my home whenever pears are in season.
Ingredients
- Pears – 2
- Honey – 2 tbsp
- Cinnamon – ½ tsp
- Butter – 1 tbsp
Instructions
- Preheat your oven to 375°F (190°C). This ensures the pears bake evenly and get that perfect softness.
- Cut the pears in half lengthwise and scoop out the seeds with a small spoon. A melon baller works wonders here for a clean scoop.
- Place the pear halves cut side up in a baking dish. Drizzle each half with honey, ensuring it coats the surface evenly.
- Sprinkle cinnamon over the pears. The warmth of cinnamon complements the sweetness of honey beautifully.
- Dot each pear half with small pieces of butter. This adds a rich flavor and helps in caramelizing the honey.
- Bake in the preheated oven for 25 minutes, or until the pears are tender when pierced with a fork. The edges should start to caramelize slightly.
- Let the pears cool for 5 minutes before serving. This allows the flavors to meld together perfectly.
Kindly note how the pears transform into a melt-in-your-mouth delight, with the honey and butter creating a luscious glaze. Serve them warm with a scoop of vanilla ice cream for an indulgent twist, or enjoy them as is for a lighter treat.
Pureed Carrot and Coriander Soup

Unbelievably simple yet packed with flavor, this Pureed Carrot and Coriander Soup has become my go-to for chilly evenings. I remember the first time I whipped it up, thinking it would be just another soup, but the vibrant color and aromatic spices won me over instantly.
Ingredients
- Carrots – 4 cups, chopped
- Vegetable broth – 4 cups
- Fresh coriander – ½ cup, chopped
- Olive oil – 2 tbsp
- Garlic – 2 cloves, minced
- Salt – 1 tsp
Instructions
- Heat olive oil in a large pot over medium heat (350°F).
- Add minced garlic and sauté for 1 minute until fragrant, stirring constantly to prevent burning.
- Add chopped carrots to the pot, stirring to coat them in oil and garlic.
- Pour in vegetable broth, ensuring carrots are fully submerged. Bring to a boil.
- Reduce heat to low, cover, and simmer for 20 minutes until carrots are tender.
- Remove from heat and let cool slightly before blending to a smooth puree. Tip: Use an immersion blender for easier cleanup.
- Stir in chopped coriander and salt, blending again if necessary for a uniform texture. Tip: Fresh coriander adds a bright, herby flavor that’s irreplaceable.
- Return soup to the pot and warm over low heat for 5 minutes before serving. Tip: Adjust thickness with a bit more broth if desired.
Kick back and enjoy the creamy texture and sweet, earthy flavors of this soup. I love serving it with a dollop of Greek yogurt and a sprinkle of coriander on top for an extra touch of freshness.
Soft Egg Custard

Nothing beats the comfort of a warm, silky soft egg custard on a lazy afternoon. I remember my grandmother whisking eggs with such care, turning simple ingredients into a bowl of golden bliss. Here’s how I keep that tradition alive in my kitchen.
Ingredients
- Eggs – 4
- Milk – 2 cups
- Sugar – 1/2 cup
- Vanilla extract – 1 tsp
Instructions
- Preheat your oven to 325°F (163°C). A steady, moderate heat is key to achieving that perfect custard texture without curdling.
- In a large bowl, gently whisk the eggs until just combined. Over-whisking can introduce too much air, leading to bubbles in your custard.
- Heat the milk in a saucepan over medium heat until it’s warm but not boiling, about 3-4 minutes. This step ensures your custard cooks evenly.
- Gradually add the sugar to the warm milk, stirring until fully dissolved. This prevents the sugar from settling at the bottom.
- Slowly pour the sweetened milk into the eggs, whisking continuously to temper the eggs and prevent them from scrambling.
- Stir in the vanilla extract for that classic, comforting flavor.
- Pour the mixture through a fine-mesh sieve into a baking dish to remove any lumps, ensuring a silky smooth custard.
- Place the baking dish in a larger pan and fill the pan with hot water until it reaches halfway up the sides of the dish. This water bath method cooks the custard gently.
- Bake for 40-45 minutes, or until the custard is set but still jiggles slightly in the center. A knife inserted near the center should come out clean.
Unbelievably smooth and rich, this custard is a testament to the magic of simple ingredients. Serve it chilled with a sprinkle of nutmeg or fresh berries for a delightful contrast.
Conclusion
Valuable for anyone on a bariatric diet, this roundup offers 23 nutritious and delicious soft food recipes to keep meals exciting and healthy. We hope you find new favorites to enjoy and share with loved ones. Don’t forget to leave a comment with your top picks and pin this article on Pinterest to spread the joy of easy, tasty eating!