Unleash your inner chef with our roundup of 19 Delicious Savory Snack Recipes Easy to Make! Whether you’re hosting a last-minute gathering or simply craving something tasty, these quick and flavorful bites are sure to impress. From crispy delights to creamy dips, there’s something for every palate. So, grab your apron and let’s dive into these irresistible treats that promise to be the highlight of your snack time!
Cheesy Garlic Bread Sticks

These cheesy garlic bread sticks are your next obsession. Tear into them hot, and watch the cheese pull for miles.
Ingredients
- 1 lb pizza dough (store-bought or homemade, I love the convenience of store-bought)
- 4 tbsp unsalted butter, melted (go for the good stuff, it makes a difference)
- 3 garlic cloves, minced (fresh is best, no jarred stuff here)
- 1/2 tsp salt (I use sea salt for that extra crunch)
- 1/4 tsp black pepper (freshly ground, please)
- 1 1/2 cups shredded mozzarella cheese (the more, the merrier)
- 1/4 cup grated Parmesan cheese (for that salty, nutty kick)
- 1 tbsp chopped fresh parsley (adds a pop of color and freshness)
Instructions
- Preheat your oven to 425°F. A hot oven is key for that perfect golden crust.
- Roll out the pizza dough on a floured surface to about a 12×8 inch rectangle. Tip: If the dough springs back, let it rest for 5 minutes.
- Transfer the dough to a parchment-lined baking sheet. This prevents sticking and makes cleanup a breeze.
- Mix the melted butter, minced garlic, salt, and pepper in a small bowl. Brush this mixture evenly over the dough. Tip: Save a little for after baking for extra garlicky goodness.
- Sprinkle the mozzarella and Parmesan cheeses evenly over the dough. Don’t skimp—this is the cheesy part!
- Bake for 12-15 minutes, or until the edges are golden and the cheese is bubbly. Tip: Rotate the pan halfway through for even baking.
- Remove from the oven and brush with any remaining garlic butter. Sprinkle with fresh parsley.
- Let cool for a minute, then slice into sticks. Serve immediately.
Serve these bad boys with marinara for dipping, or go wild and drizzle with hot honey. The crust is crispy, the cheese is gooey, and the garlic flavor is out of this world.
Spicy Roasted Chickpeas
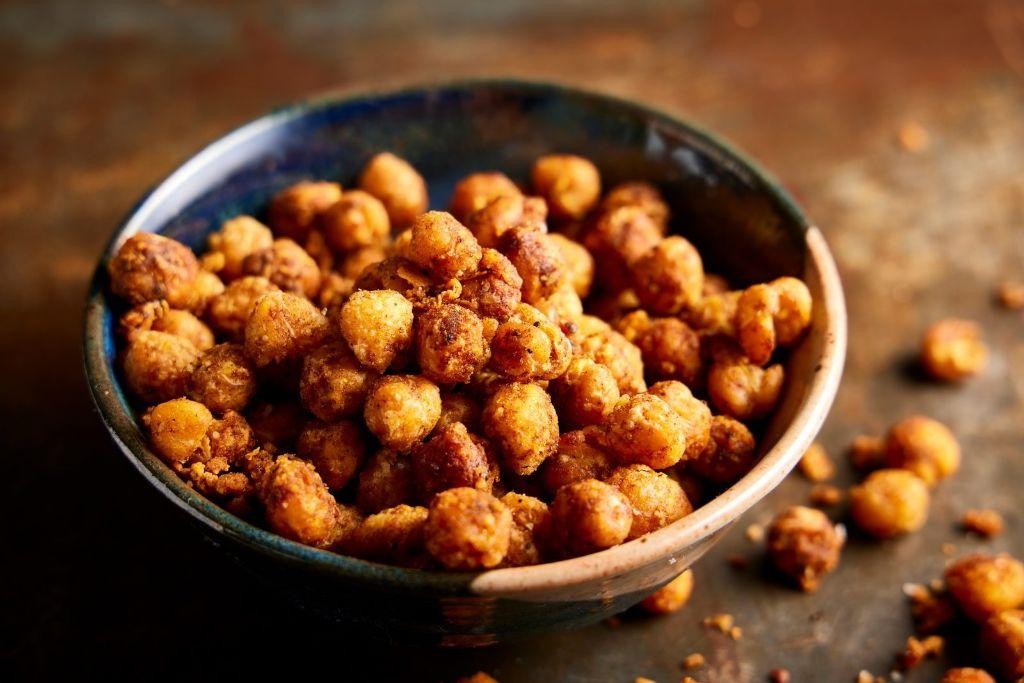
Get ready to crunch your way to flavor town with these Spicy Roasted Chickpeas—perfect for snacking, salads, or just because.
Ingredients
- 2 cans (15 oz each) chickpeas, drained and patted dry (trust me, dry chickpeas crisp up better)
- 2 tbsp extra virgin olive oil (my go-to for that rich flavor)
- 1 tsp smoked paprika (for that smoky kick)
- 1/2 tsp cayenne pepper (adjust if you’re not into too much heat)
- 1/2 tsp garlic powder (because garlic makes everything better)
- 1/2 tsp sea salt (I like it fine for even distribution)
Instructions
- Preheat your oven to 400°F (200°C) and line a baking sheet with parchment paper for easy cleanup.
- In a large bowl, toss the dried chickpeas with olive oil until they’re evenly coated.
- Sprinkle the smoked paprika, cayenne pepper, garlic powder, and sea salt over the chickpeas. Toss again to ensure every chickpea gets a bit of love.
- Spread the chickpeas in a single layer on the prepared baking sheet. Crowding leads to steaming, not crisping—give them space!
- Roast for 20 minutes, then give the pan a shake to flip the chickpeas for even browning.
- Continue roasting for another 15-20 minutes until they’re golden and crispy. Listen for the sound of them rattling like little maracas—that’s your cue they’re done.
- Let them cool on the baking sheet for 5 minutes; they’ll crisp up even more as they sit.
Now you’ve got a bowl of spicy, crunchy goodness. These chickpeas are a game-changer—toss them on avocado toast, mix into your favorite grain bowl, or just snack straight from the bowl. No matter how you serve them, they’re sure to disappear fast.
Homemade Pretzel Bites
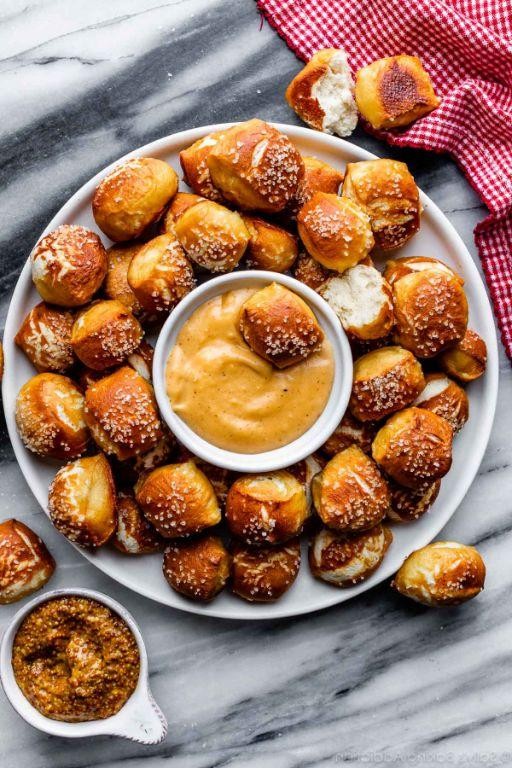
Ready to twist up your snack game? These Homemade Pretzel Bites are your ticket to chewy, salty perfection—no fancy equipment needed.
Ingredients
- 1 1/2 cups warm water (110°F—just like a cozy bath)
- 1 packet active dry yeast (trust me, check the expiration date)
- 1 tbsp sugar (the yeast’s favorite snack)
- 4 cups all-purpose flour (scooped and leveled, please)
- 2 tsp salt (plus more for topping)
- 4 tbsp unsalted butter, melted (because everything’s better with butter)
- 1/2 cup baking soda (yes, it’s a lot—pretzel magic!)
- 1 large egg, beaten (for that golden shine)
Instructions
- In a large bowl, mix warm water, yeast, and sugar. Let sit for 5 minutes until frothy—this is your yeast saying hello.
- Stir in flour and salt until a dough forms. Knead on a floured surface for 5 minutes until smooth and elastic.
- Place dough in a greased bowl, cover, and let rise in a warm spot for 1 hour—it should double in size. Tip: No warm spot? Preheat your oven to 200°F, turn it off, and let the dough rise inside.
- Preheat oven to 450°F and line a baking sheet with parchment paper.
- Divide dough into small balls, about 1-inch in diameter. Tip: Keep them uniform for even baking.
- Boil 6 cups of water with baking soda. Drop dough balls in batches for 30 seconds—they’ll puff up slightly. Tip: Don’t overcrowd the pot.
- Transfer boiled bites to the baking sheet, brush with beaten egg, and sprinkle with salt.
- Bake for 10-12 minutes until deep golden brown. Let cool slightly—they’re lava hot!
Zesty with a crackly crust and pillowy inside, these bites are begging for a cheese dip or a cinnamon sugar roll—your call.
Bacon Wrapped Jalapeno Poppers

Bacon Wrapped Jalapeno Poppers are the ultimate crowd-pleaser—crispy, creamy, and with just the right kick. Perfect for game day or any day you crave something indulgent.
Ingredients
- 12 fresh jalapenos (look for firm, glossy skins)
- 8 oz cream cheese (I swear by Philadelphia for its smooth texture)
- 1 cup shredded cheddar cheese (sharp for that extra flavor punch)
- 1 tsp garlic powder (because everything’s better with garlic)
- 12 slices bacon (thick-cut works best for wrapping)
- 1 tbsp olive oil (extra virgin is my kitchen staple)
Instructions
- Preheat your oven to 375°F and line a baking sheet with foil for easy cleanup.
- Slice each jalapeno in half lengthwise; scoop out the seeds and membranes with a spoon (wear gloves if you’re sensitive to heat).
- In a bowl, mix cream cheese, cheddar cheese, and garlic powder until well combined. Tip: Let the cream cheese sit out for 10 minutes to soften.
- Fill each jalapeno half with the cheese mixture, packing it in tightly.
- Wrap each stuffed jalapeno with a slice of bacon, securing it with a toothpick if needed. Tip: Stretch the bacon slightly for full coverage.
- Brush the tops lightly with olive oil to help the bacon crisp up.
- Bake for 25-30 minutes, until the bacon is crispy and the jalapenos are tender. Tip: Broil for the last 2 minutes for extra crispiness.
Warm, gooey cheese oozes out with every bite, balanced by the smoky bacon and spicy jalapeno. Serve these straight from the oven with a cold beer or a dollop of sour cream to cool the heat.
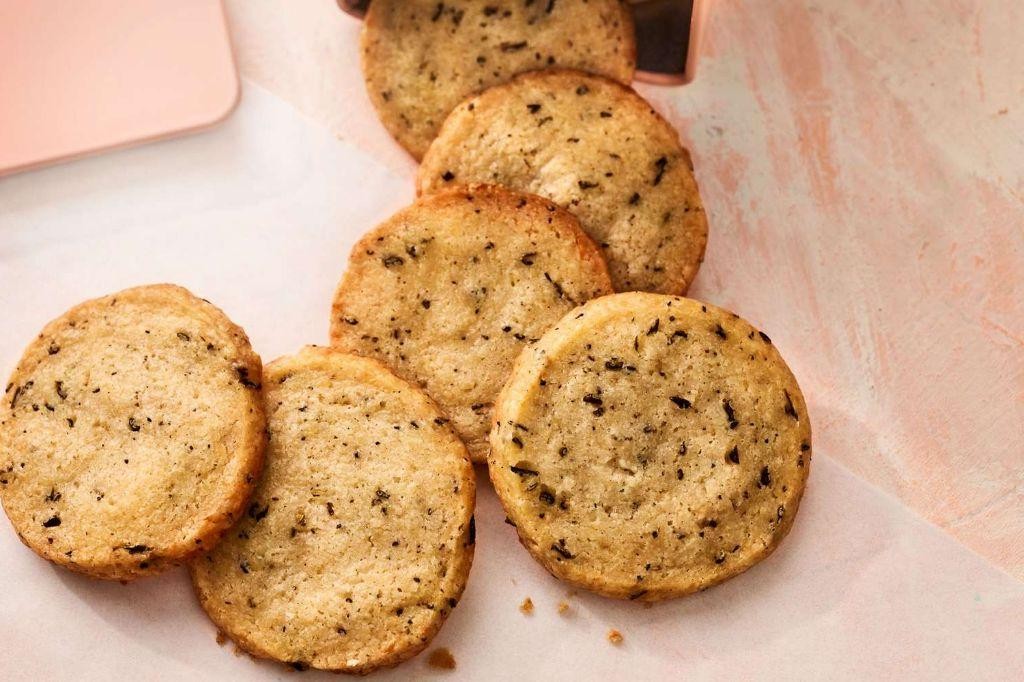
Savory Parmesan Shortbread Cookies
Zesty and unexpected, these Savory Parmesan Shortbread Cookies are your next snack obsession. Crisp, cheesy, and utterly addictive, they’re perfect for your next gathering or a solo treat.
Ingredients
- 1 cup unsalted butter, cold and cubed (I find European-style butter adds a richer flavor)
- 2 cups all-purpose flour (for a lighter texture, I sometimes swap half with cake flour)
- 1/2 tsp salt (I love using flaky sea salt for a bit of crunch)
- 1/4 tsp cayenne pepper (adjust to taste, but this amount gives a nice warmth)
- 1 cup finely grated Parmesan cheese (freshly grated makes all the difference)
- 1 tbsp fresh thyme leaves (dried works in a pinch, but fresh is fragrant and vibrant)
Instructions
- Preheat your oven to 325°F (163°C) and line a baking sheet with parchment paper.
- In a large bowl, whisk together the flour, salt, and cayenne pepper to ensure even distribution.
- Add the cold, cubed butter to the dry ingredients. Using your fingers, work the butter into the flour until the mixture resembles coarse crumbs. Tip: Keep your hands cold to prevent the butter from melting.
- Stir in the grated Parmesan and fresh thyme until just combined. The dough should hold together when pressed.
- Turn the dough onto a lightly floured surface and gently knead into a smooth ball. Flatten into a disc, wrap in plastic, and chill for 30 minutes. Tip: Chilling ensures the cookies hold their shape while baking.
- Roll the dough to 1/4-inch thickness and cut into desired shapes. Place on the prepared baking sheet, spacing about 1 inch apart.
- Bake for 18-20 minutes, or until the edges are golden and the cookies are firm to the touch. Tip: Rotate the baking sheet halfway through for even browning.
- Allow the cookies to cool on the baking sheet for 5 minutes before transferring to a wire rack to cool completely.
Amazingly versatile, these cookies boast a buttery crunch with a savory Parmesan punch. Serve them alongside a charcuterie board or crumbled over a creamy soup for an unexpected twist.
Crispy Baked Zucchini Chips
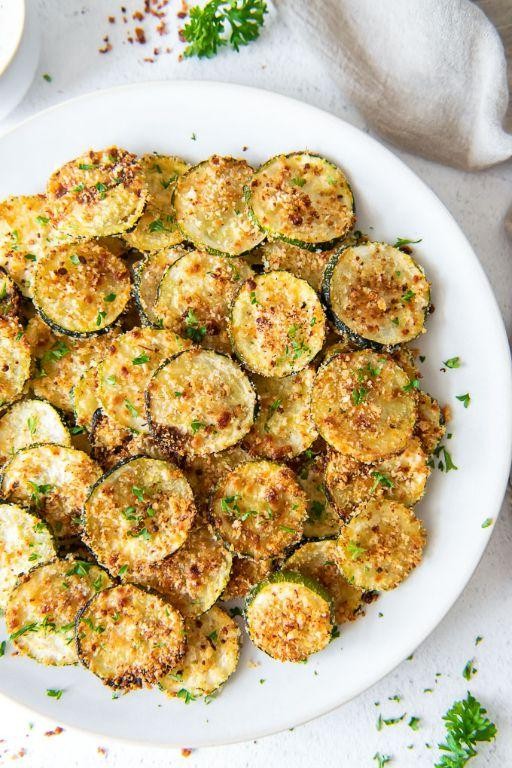
Perfect for snacking or spicing up your meal, these Crispy Baked Zucchini Chips are a game-changer. Packed with flavor and crunch, they’re your new go-to for a healthy twist on chips.
Ingredients
- 2 medium zucchinis, sliced into 1/4-inch rounds (go for firm ones—they crisp up better)
- 1/2 cup panko breadcrumbs (for that unbeatable crunch)
- 1/4 cup grated Parmesan cheese (the real deal, please)
- 1 tsp garlic powder (because everything’s better with garlic)
- 1/2 tsp salt (I like sea salt for its subtle texture)
- 1/4 tsp black pepper (freshly ground packs more punch)
- 2 tbsp extra virgin olive oil (my kitchen staple for baking)
- 1 large egg, beaten (room temp eggs mix more evenly)
Instructions
- Preheat your oven to 425°F and line a baking sheet with parchment paper.
- In a bowl, mix panko, Parmesan, garlic powder, salt, and pepper.
- Dip each zucchini round into the beaten egg, then coat with the panko mixture. Press gently to adhere.
- Arrange the coated rounds on the baking sheet in a single layer. Drizzle with olive oil.
- Bake for 20-25 minutes, flipping halfway, until golden and crispy. Tip: Keep an eye after 15 minutes to prevent burning.
- Let them cool on the sheet for 5 minutes—they’ll crisp up even more. Tip: Use a wire rack for extra crispiness.
- Serve immediately for the best texture. Tip: Pair with a spicy aioli or marinara for dipping.
Absolutely addictive, these chips offer a satisfying crunch with a savory, cheesy finish. Try them as a salad topper or alongside your favorite burger for a crunchy contrast.
Loaded Potato Skins

Every bite of these loaded potato skins is a crispy, cheesy, bacon-y dream. Perfect for game day or a cozy night in, they’re ridiculously easy to make and even easier to devour.
Ingredients
- 4 large russet potatoes (go for the ones with thick skins for extra crunch)
- 2 tbsp extra virgin olive oil (my go-to for that golden crisp)
- 1 tsp salt (don’t skimp, it’s key for flavor)
- 1 cup shredded cheddar cheese (sharp cheddar brings the best melt)
- 1/2 cup cooked bacon bits (because everything’s better with bacon)
- 1/4 cup sour cream (full-fat for that creamy dreamy texture)
- 2 green onions, thinly sliced (for a fresh pop of color and taste)
Instructions
- Preheat your oven to 400°F. This ensures your potatoes get perfectly crispy.
- Scrub the potatoes clean, then pat them dry. Dry skin = better crisp.
- Rub each potato with olive oil and sprinkle with salt. This combo is magic for the skin.
- Place potatoes directly on the oven rack and bake for 50-60 minutes, until tender when pierced with a fork.
- Let potatoes cool for 10 minutes. Handling hot potatoes is a no-go.
- Cut each potato in half lengthwise. Scoop out the flesh, leaving a 1/4-inch shell. Save the insides for another recipe.
- Brush the inside and outside of each shell with olive oil, then return to the oven for 10 minutes to crisp up.
- Flip the shells and bake another 10 minutes. Double crisp is double delicious.
- Sprinkle cheese and bacon bits inside each shell. Broil for 2-3 minutes until cheese is bubbly.
- Top with a dollop of sour cream and a sprinkle of green onions. Serve immediately for maximum enjoyment.
Serve these bad boys hot for that irresistible cheese pull. The contrast between the crispy shell and the creamy toppings is next-level. Try pairing with a cold beer for the ultimate experience.
Spinach and Feta Stuffed Mushrooms
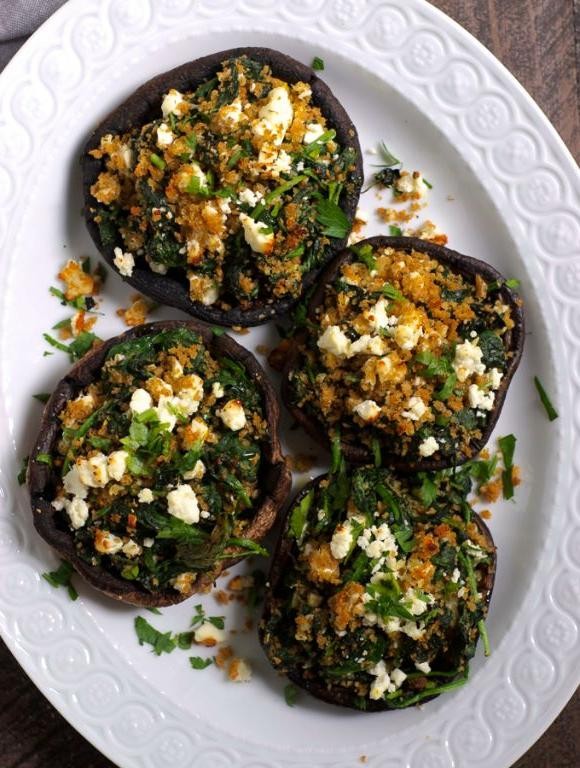
You won’t believe how these Spinach and Feta Stuffed Mushrooms steal the show at every gathering. **Bold** flavors, **easy** steps, and **zero** leftovers—promise.
Ingredients
- 12 large white mushrooms (go for the ones with deep caps for maximum stuffing)
- 1 cup fresh spinach, finely chopped (pack it in for that vibrant green hue)
- 1/2 cup feta cheese, crumbled (the salty tang is everything)
- 2 tbsp extra virgin olive oil (my kitchen staple for richness)
- 1/4 cup breadcrumbs (Panko gives that perfect crunch)
- 1 clove garlic, minced (fresh is best, no compromises)
- Salt to taste (but really, the feta does most of the work)
Instructions
- Preheat your oven to 375°F—no guessing, just set it and forget it.
- Clean the mushrooms with a damp paper towel, then gently remove the stems. Save those stems! Chop them fine for the filling.
- Heat olive oil in a pan over medium heat. Sauté the chopped mushroom stems and garlic until golden—about 3 minutes. Tip: Don’t rush this; golden means flavor.
- Add the spinach to the pan, stirring until just wilted—another 2 minutes. Tip: Overcooked spinach turns bitter, so keep it bright and lively.
- Remove from heat, mix in feta and breadcrumbs. Taste? Adjust? Now’s the time.
- Stuff each mushroom cap generously with the mixture. Tip: A small spoon works wonders for neat, even stuffing.
- Bake for 20 minutes until the tops are golden and the mushrooms are tender.
Let these beauties cool slightly—the feta gets molten hot. The contrast of the crispy top against the juicy mushroom is *chef’s kiss*. Serve them on a rustic platter with a sprinkle of fresh herbs, and watch them disappear.
Buffalo Cauliflower Bites
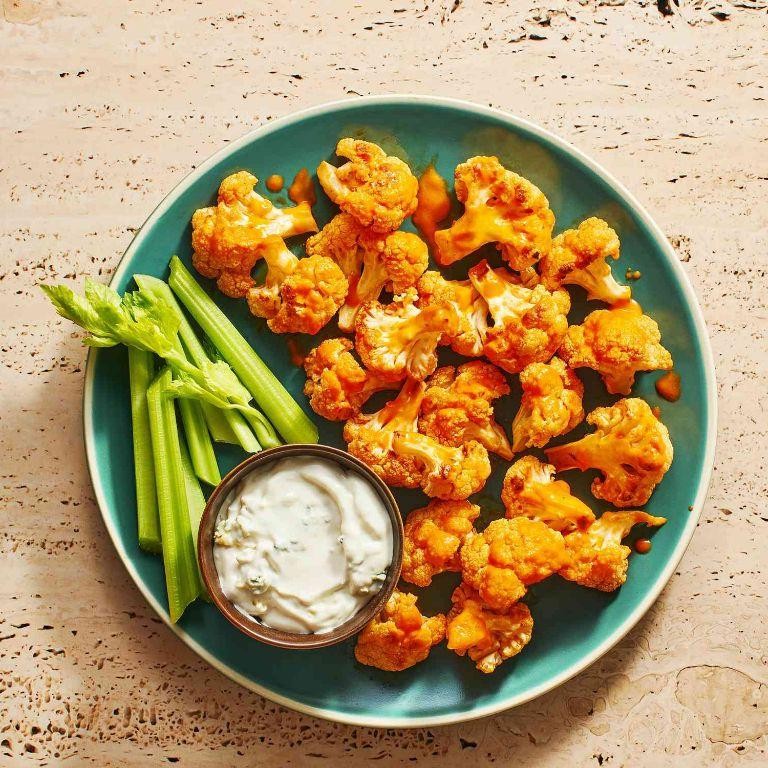
Whip up these fiery Buffalo Cauliflower Bites for a game-day snack that’s impossible to resist. They’re crispy, spicy, and totally addictive—no one will miss the wings!
Ingredients
- 1 large head cauliflower, cut into bite-sized florets (go for fresh, it makes all the difference)
- 1 cup all-purpose flour (I swear by King Arthur for the perfect crisp)
- 1 cup water (cold, to keep the batter light)
- 1 tsp garlic powder (the secret flavor booster)
- 1/2 tsp salt (I like sea salt for its clean taste)
- 1/2 cup hot sauce (Frank’s RedHot is my go-to for that authentic Buffalo kick)
- 2 tbsp unsalted butter, melted (salted works in a pinch, but unsalted lets you control the saltiness)
- 1 tbsp honey (a dash of sweetness to balance the heat)
Instructions
- Preheat your oven to 450°F and line a baking sheet with parchment paper for easy cleanup.
- In a large bowl, whisk together flour, water, garlic powder, and salt until smooth. Tip: Let the batter sit for 5 minutes to thicken slightly for better coating.
- Toss cauliflower florets in the batter until fully coated, then spread them out on the prepared baking sheet. Tip: Don’t overcrowd the pan, or they’ll steam instead of crisp.
- Bake for 20 minutes, flipping halfway through, until golden and crispy.
- While the cauliflower bakes, mix hot sauce, melted butter, and honey in a small bowl. Tip: Warm the mixture slightly if the honey is too thick to blend smoothly.
- Toss the baked cauliflower in the sauce until evenly coated, then return to the baking sheet and bake for another 5 minutes to set the sauce.
These bites come out with a satisfying crunch and a bold, tangy-spicy flavor that’s downright irresistible. Serve them with a side of cool ranch or blue cheese dressing to dial down the heat, or pile them high on a platter for a crowd-pleasing appetizer.
Herb and Cheese Crackers
Just when you thought crackers couldn’t get any better, these Herb and Cheese Crackers come along to prove you wrong. Crispy, cheesy, and herby—they’re the snack you didn’t know you needed.
Ingredients
- 1 cup all-purpose flour (I swear by King Arthur for the best texture)
- 4 tbsp cold unsalted butter, cubed (keep it cold for flaky layers)
- 1 cup sharp cheddar cheese, grated (the sharper, the better for that punchy flavor)
- 1 tbsp fresh thyme, chopped (fresh herbs make all the difference)
- 1/2 tsp garlic powder (for that subtle kick)
- 1/4 tsp salt (I like sea salt for its clean taste)
- 3-4 tbsp ice water (just enough to bring the dough together)
Instructions
- Preheat your oven to 375°F. Line a baking sheet with parchment paper.
- In a food processor, pulse the flour, butter, cheese, thyme, garlic powder, and salt until the mixture resembles coarse crumbs.
- Drizzle in the ice water, 1 tbsp at a time, pulsing until the dough just comes together. Tip: Stop as soon as it forms a ball to avoid overworking.
- Roll the dough out on a floured surface to 1/8-inch thickness. Tip: Use a ruler for even thickness—it’s a game-changer.
- Cut into 1-inch squares or use a cookie cutter for fun shapes. Transfer to the baking sheet.
- Bake for 12-15 minutes, or until golden and crisp. Tip: Rotate the pan halfway through for even baking.
- Let cool on the baking sheet for 5 minutes, then transfer to a wire rack to cool completely.
Unbelievably crunchy with a melt-in-your-mouth cheese finish, these crackers are perfect with a glass of wine or crumbled over soup for an extra crunch.
Sweet and Spicy Nuts
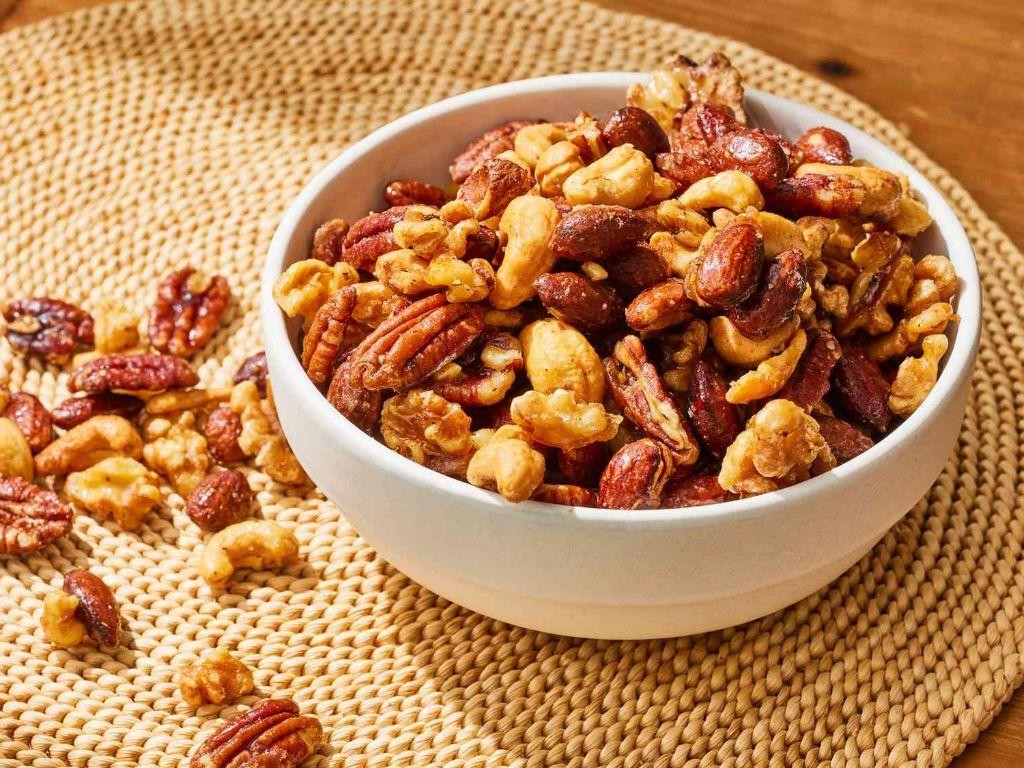
Ready to level up your snack game? These Sweet and Spicy Nuts are the perfect mix of crunchy, sweet, and fiery—ideal for munching or gifting. No fancy skills needed, just bold flavors and simple steps.
Ingredients
- 2 cups mixed nuts (I love almonds and cashews for their crunch)
- 1/4 cup honey (local honey adds a nice floral touch)
- 1 tbsp olive oil (extra virgin is my go-to for its fruity notes)
- 1 tsp cayenne pepper (adjust if you’re not into too much heat)
- 1/2 tsp sea salt (flaky salt makes all the difference)
- 1/2 tsp cinnamon (for that warm, sweet spice)
Instructions
- Preheat your oven to 350°F—no guessing, use an oven thermometer for accuracy.
- In a bowl, mix nuts with olive oil until evenly coated—this helps the spices stick.
- Add honey, cayenne, salt, and cinnamon to the nuts. Stir well—every nut should glisten.
- Spread the nuts on a parchment-lined baking sheet in a single layer—crowding leads to steaming, not roasting.
- Bake for 10 minutes, then stir. Bake another 5-10 minutes until golden—watch closely to avoid burning.
- Let cool completely on the sheet—they’ll crisp up as they cool, promise.
Zesty, crunchy, and with just the right kick, these nuts are addictively good. Serve them in little bags for a homemade gift or pile them high on a cheese board for instant party cred.
Mini Quiches with Bacon and Cheese

Oh, you’re gonna love these bite-sized beauties—perfect for brunch or a snack attack. Crispy bacon meets melty cheese in a buttery crust that’s impossible to resist.
Ingredients
- 1 cup all-purpose flour (I swear by King Arthur for the flakiest crust)
- 1/2 cup unsalted butter, chilled and cubed (keep it cold for the best texture)
- 4 large eggs (room temp eggs blend smoother, just sayin’)
- 1/2 cup whole milk (go full-fat for maximum creaminess)
- 1 cup shredded cheddar cheese (sharp cheddar adds a nice kick)
- 6 slices bacon, cooked and crumbled (thick-cut gives the best crunch)
- 1/4 tsp salt (don’t skip—it balances the richness)
- 1/4 tsp black pepper (freshly ground for that extra oomph)
Instructions
- Preheat your oven to 375°F (190°C) and grease a mini muffin tin. Tip: Use butter for extra flavor.
- In a bowl, mix flour and salt. Cut in butter until the mix resembles coarse crumbs. Tip: A pastry cutter works wonders here.
- Press 1 tbsp of the dough into each muffin cup, forming a small crust. Bake for 10 minutes until lightly golden.
- Whisk eggs, milk, salt, and pepper in a bowl. Stir in cheese and bacon. Tip: Let the mixture sit for 5 minutes to meld flavors.
- Pour the egg mixture into the pre-baked crusts, filling each 3/4 full. Bake for 15-20 minutes until set and slightly puffed.
- Let cool for 5 minutes before removing from the tin. Tip: Run a knife around the edges for easy release.
Just imagine: golden, flaky crust with a creamy, savory filling. Serve these warm with a drizzle of hot sauce or a dollop of sour cream for an extra kick.
Olive and Sun-Dried Tomato Tapenade

Oozing with bold flavors, this Olive and Sun-Dried Tomato Tapenade is your next party MVP. Smear it, dip it, or devour it straight—no judgment here.
Ingredients
- 1 cup pitted kalamata olives (the brinier, the better)
- 1/2 cup sun-dried tomatoes in oil (drained, but save that gold for drizzling)
- 2 tbsp capers (trust me, they’re the secret punch)
- 1 garlic clove (fresh only, please)
- 1/4 cup extra virgin olive oil (my kitchen staple)
- 1 tbsp lemon juice (freshly squeezed, no bottles)
- 1/2 tsp red pepper flakes (adjust if you’re spice-shy)
Instructions
- Roughly chop the kalamata olives, sun-dried tomatoes, and garlic clove for easier blending.
- Throw everything—olives, tomatoes, capers, garlic, olive oil, lemon juice, and red pepper flakes—into a food processor.
- Pulse 5-7 times until chunky, not smooth. Tip: Scrape down the sides once to ensure even mixing.
- Taste and adjust lemon or pepper flakes if needed. Tip: Let it sit for 10 minutes; flavors marry beautifully.
- Transfer to a bowl, drizzle with reserved sun-dried tomato oil for that Instagram glow. Tip: Room temp serving lets the oils shine.
Dive into this tapenade’s chunky, briny goodness with crusty bread or as a bold sandwich spread. Its vibrant color and zesty kick make it a crowd-pleaser every time.
Roasted Red Pepper Hummus
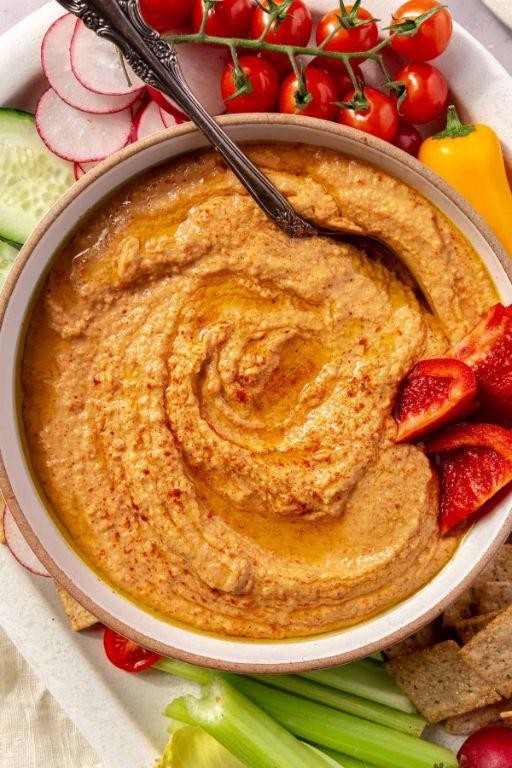
Unleash your snack game with this creamy, smoky roasted red pepper hummus—it’s a flavor bomb that’s ridiculously easy to whip up.
Ingredients
- 1 can (15 oz) chickpeas, drained but save that aquafaba for extra creaminess
- 1/2 cup tahini, my secret for that ultra-smooth texture
- 2 roasted red peppers from a jar (because who has time to roast them?)
- 2 cloves garlic, minced—go fresh, not jarred, for that punch
- 3 tbsp extra virgin olive oil, the good stuff makes a difference
- 1 tsp cumin, because it’s not hummus without it
- 1/2 tsp smoked paprika, for that deep, smoky vibe
- Juice of 1 lemon, freshly squeezed—bottled juice is a no-go
- Salt to taste, but start with 1/2 tsp
Instructions
- Drain the chickpeas, reserving 1/4 cup of aquafaba for later.
- In a food processor, blend the chickpeas, tahini, roasted red peppers, garlic, olive oil, cumin, smoked paprika, and lemon juice until smooth. Tip: Scrape down the sides halfway through for even blending.
- With the processor running, slowly drizzle in the aquafaba until the hummus is light and fluffy. Tip: This is the trick to getting that perfect texture.
- Taste and adjust salt as needed. Tip: Always taste before adding more salt—you can add, but you can’t take away!
- Transfer to a bowl, drizzle with a little more olive oil, and sprinkle with smoked paprika for serving.
Light, creamy, and packed with smoky sweetness, this hummus is a dream on warm pita or as a bold sandwich spread. Try it with a sprinkle of za’atar for an extra Middle Eastern kick.
Savory Scones with Cheddar and Chives

Just when you thought scones couldn’t get any better, these savory bites packed with cheddar and chives prove otherwise. Perfect for brunch or a snack, they’re irresistibly flaky and loaded with flavor.
Ingredients
- 2 cups all-purpose flour (I swear by King Arthur for consistent results)
- 1 tbsp baking powder (freshness is key—check the date!)
- 1/2 tsp salt (I like fine sea salt for even distribution)
- 1/2 cup unsalted butter, cold and cubed (keep it cold for flaky layers)
- 1/2 cup sharp cheddar, shredded (extra sharp gives a nice punch)
- 1/4 cup fresh chives, finely chopped (fresh is best for that bright flavor)
- 1/2 cup whole milk (room temp blends easier)
- 1 large egg (room temp eggs mix better, trust me)
Instructions
- Preheat your oven to 400°F (200°C) and line a baking sheet with parchment paper.
- In a large bowl, whisk together flour, baking powder, and salt.
- Add cold, cubed butter to the dry ingredients. Use your fingers to rub the butter into the flour until it resembles coarse crumbs. Tip: Work quickly to keep the butter cold.
- Stir in shredded cheddar and chopped chives until evenly distributed.
- In a small bowl, whisk together milk and egg. Pour into the dry ingredients and mix until just combined. Tip: Don’t overmix to keep the scones tender.
- Turn the dough onto a floured surface and gently pat into a 1-inch thick circle. Cut into 8 wedges.
- Transfer wedges to the prepared baking sheet, spacing them about 2 inches apart. Bake for 15-18 minutes, or until golden brown. Tip: Rotate the pan halfway for even baking.
Fresh out of the oven, these scones are golden, buttery, and speckled with melty cheddar and fresh chives. Serve them warm with a dollop of sour cream or alongside a hearty soup for dipping.
Stuffed Cherry Peppers with Cream Cheese
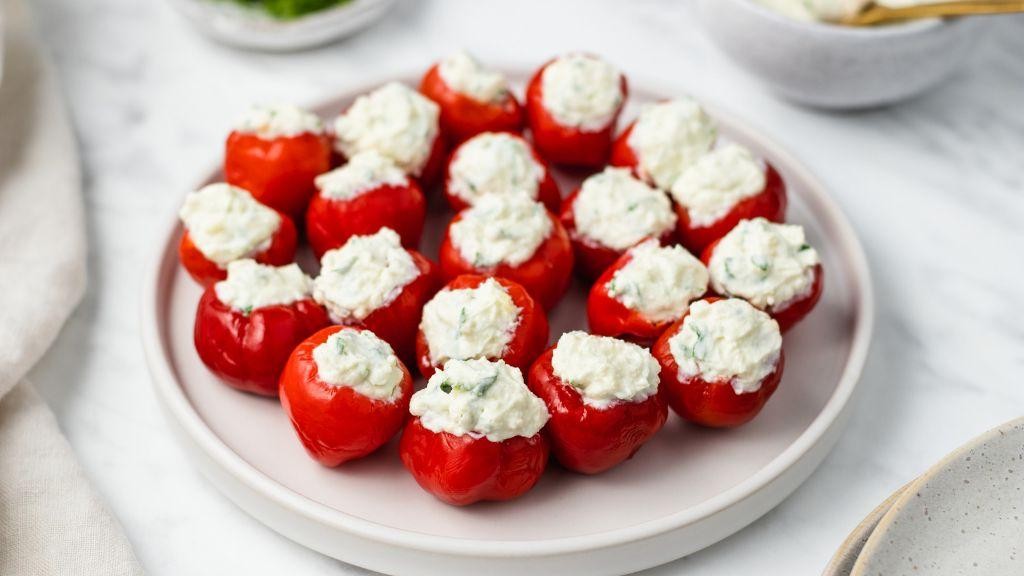
These stuffed cherry peppers are a game-changer for your appetizer game. Trust me, they’re as easy to make as they are addictive.
Ingredients
- 12 cherry peppers – look for firm, vibrant ones; they hold up better.
- 8 oz cream cheese – full-fat for the win, it melts smoother.
- 1/4 cup grated Parmesan – the sharper, the better in my book.
- 1 tbsp olive oil – extra virgin, because flavor matters.
- 1/2 tsp garlic powder – skip fresh garlic here; it’s all about ease.
- Salt to taste – I like a pinch, but you do you.
Instructions
- Preheat your oven to 375°F. This temp gets the peppers tender without turning them to mush.
- Slice the tops off the cherry peppers and remove the seeds. A small spoon works wonders here.
- In a bowl, mix the cream cheese, Parmesan, garlic powder, and salt until smooth. Pro tip: Let the cream cheese sit out for 10 minutes to soften.
- Stuff each pepper with the cream cheese mixture. Fill them just shy of overflowing for the perfect bite.
- Drizzle the stuffed peppers with olive oil. This adds a nice golden touch as they bake.
- Bake for 15-20 minutes, until the peppers are slightly soft and the filling is bubbly. Keep an eye on them after 15 minutes to avoid over-baking.
Expect a creamy, tangy filling with a slight kick from the peppers. Serve them warm with a drizzle of honey for a sweet contrast.
Garlic Herb Roasted Almonds
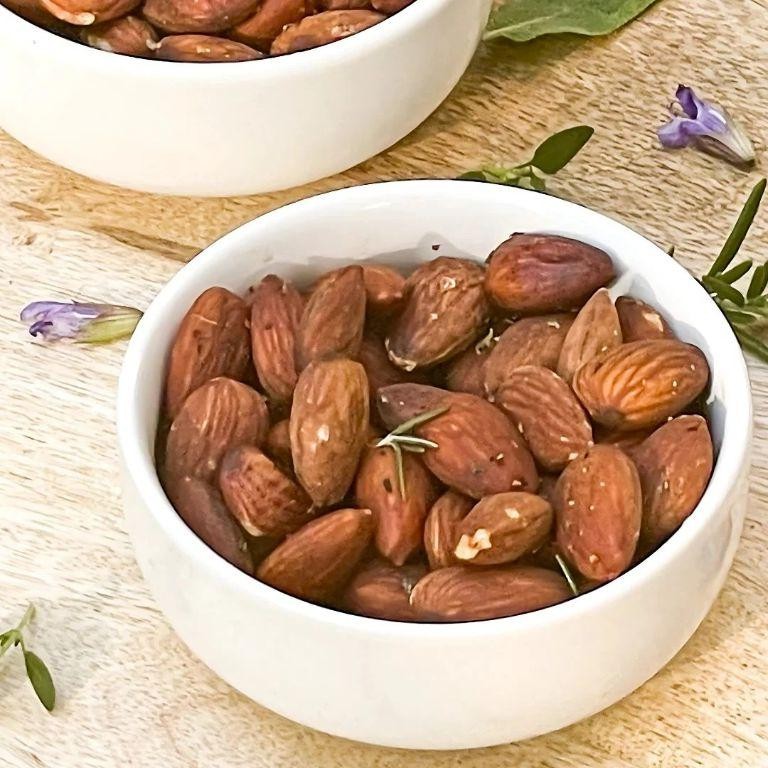
Packed with flavor and crunch, these Garlic Herb Roasted Almonds are your next snack obsession. Perfect for munching or gifting, they’re ridiculously easy to make.
Ingredients
- 2 cups raw almonds (I love the big, plump ones for extra crunch)
- 2 tbsp extra virgin olive oil (my go-to for its fruity notes)
- 1 tbsp garlic powder (not garlic salt—trust me on this)
- 1 tsp dried rosemary (crush it between your fingers to wake up the aroma)
- 1 tsp sea salt (flaky is my favorite for texture)
- 1/2 tsp black pepper (freshly ground, please)
Instructions
- Preheat your oven to 325°F. Line a baking sheet with parchment paper for easy cleanup.
- In a medium bowl, toss the almonds with olive oil until evenly coated. Tip: Make sure every almond gets some love.
- Sprinkle garlic powder, rosemary, salt, and pepper over the almonds. Toss again to distribute the spices evenly. Tip: A little extra tossing ensures no bland bites.
- Spread the almonds in a single layer on the prepared baking sheet. Tip: Crowding leads to steaming, not roasting—give them space.
- Roast for 15 minutes, then stir. Continue roasting for another 10-15 minutes until golden and fragrant. Watch closely to avoid burning.
- Let cool completely on the baking sheet—they’ll crisp up as they cool.
Fresh out of the oven, these almonds are irresistibly crispy with a bold garlic-herb punch. Serve them in a fancy bowl at your next gathering or pack them for a protein-packed snack on the go.
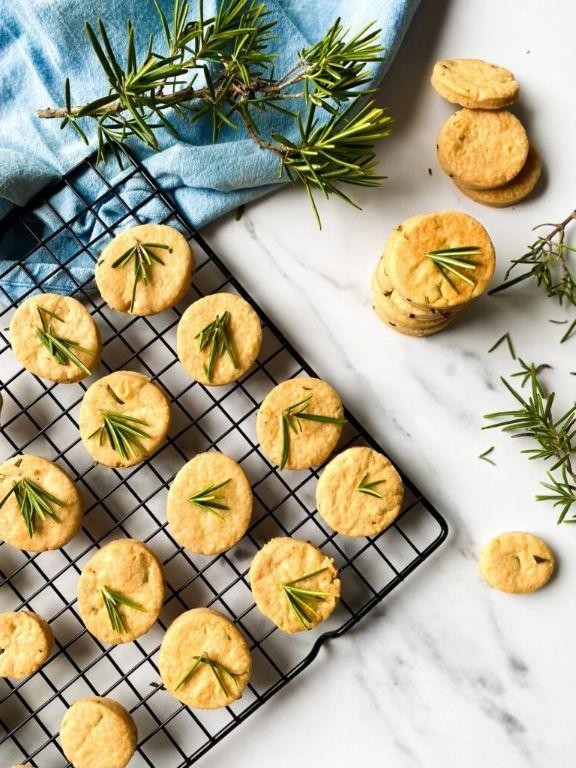
Parmesan Crisps with Rosemary
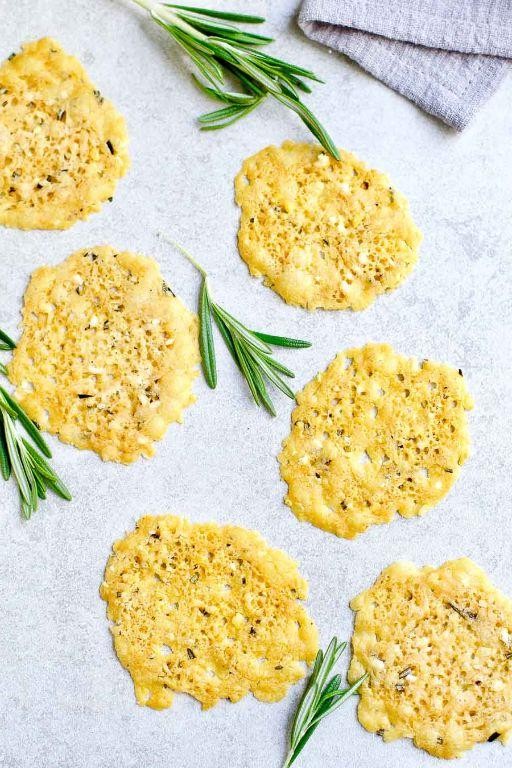
These Parmesan Crisps with Rosemary are your next obsession. They’re crunchy, herby, and ridiculously easy to make.
Ingredients
- 1 cup freshly grated Parmesan cheese (the pre-grated stuff won’t melt as nicely)
- 1 tbsp finely chopped fresh rosemary (trust me, fresh makes all the difference)
- 1/2 tsp garlic powder (for that extra kick)
- 1/4 tsp black pepper (freshly ground, if you’ve got it)
Instructions
- Preheat your oven to 400°F and line a baking sheet with parchment paper.
- In a small bowl, mix the Parmesan, rosemary, garlic powder, and black pepper until well combined.
- Drop tablespoon-sized mounds of the mixture onto the prepared baking sheet, spacing them about 2 inches apart.
- Flatten each mound slightly with the back of a spoon to ensure even cooking.
- Bake for 5-7 minutes, or until the edges are golden brown and the centers are bubbly.
- Let the crisps cool on the baking sheet for 2 minutes before transferring to a wire rack to cool completely.
Did you see how easy that was? These crisps are golden, crispy, and packed with flavor. Serve them as a snack, or crumble them over a salad for an instant upgrade.
Smoked Salmon Cucumber Bites

Fancy a bite-sized burst of freshness? These smoked salmon cucumber bites are your go-to for a quick, elegant snack that screams summer vibes.
Ingredients
- 1 large cucumber, sliced into 1/4-inch rounds (go for the seedless kind for a crunchier bite)
- 4 oz smoked salmon, thinly sliced (I love the wild-caught variety for its richer flavor)
- 1/2 cup cream cheese, softened (room temp blends smoother, trust me)
- 1 tbsp fresh dill, chopped (dried works in a pinch, but fresh is chef’s kiss)
- 1 tsp lemon zest (that pop of citrus? Yes, please)
- Salt and pepper to taste (I’m generous with the pepper for a little kick)
Instructions
- Lay out the cucumber slices on a serving platter—pat them dry with a paper towel to keep the toppings from sliding off.
- In a small bowl, mix the cream cheese, dill, and lemon zest until well combined. Season with salt and pepper.
- Using a small spoon or piping bag, dollop about 1 tsp of the cream cheese mixture onto each cucumber slice.
- Top each with a small piece of smoked salmon, folding it gently for a pretty presentation.
- Garnish with a tiny sprig of dill or a sprinkle of lemon zest for that extra flair.
Serve these beauties chilled for the best texture—the cool cucumber against the creamy, smoky salmon is a match made in heaven. Perfect for brunch spreads or as a fancy appetizer that’ll have everyone reaching for more.
Conclusion
Zesty flavors await in these 19 savory snack recipes, perfect for any occasion! Whether you’re hosting a party or just craving a tasty treat, there’s something here for everyone. We’d love to hear which recipes you try and love—drop us a comment below. Don’t forget to share your favorites on Pinterest so others can enjoy these easy-to-make delights too. Happy snacking!


