Unwrap the warmth of the kitchen with these 18 delicious old-school soul food recipes that promise to bring comfort and joy to your table. From crispy fried chicken to creamy mac and cheese, each dish is a tribute to the rich culinary traditions that have shaped North American comfort food. Ready to dive into a world of flavor? Let's get cooking!
Fried Chicken with Gravy
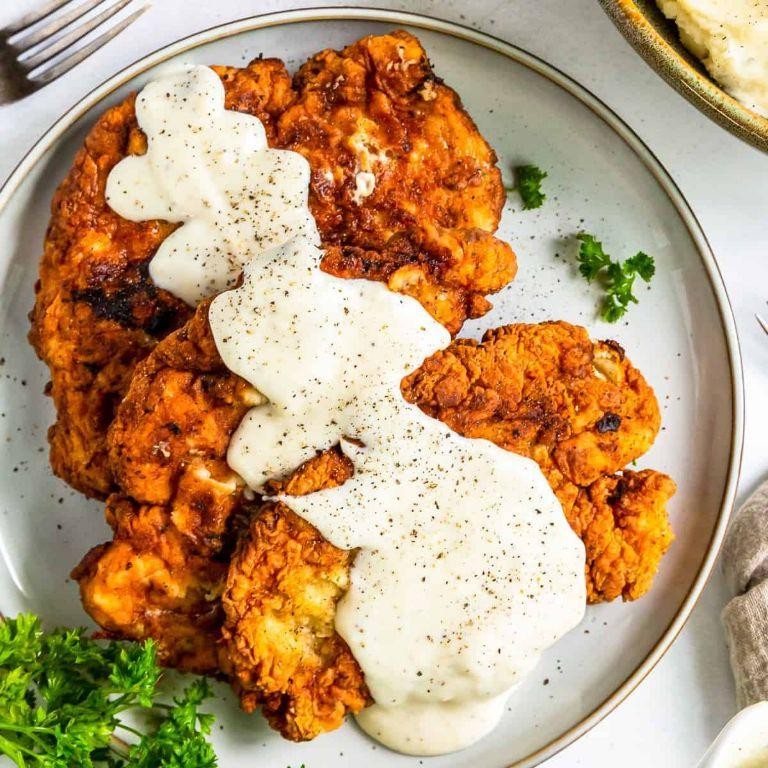
On a quiet evening, when the air carries the faintest hint of nostalgia, there’s something deeply comforting about the crispiness of fried chicken paired with the velvety smoothness of gravy. It’s a dish that whispers of home, of moments gathered around the table, sharing stories and savoring each bite.
Ingredients
- For the chicken:
- 4 chicken thighs, bone-in and skin-on
- 1 cup buttermilk
- 1 cup all-purpose flour
- 1 tsp salt
- 1 tsp black pepper
- 1 tsp paprika
- 1/2 tsp garlic powder
- 1/2 tsp onion powder
- Vegetable oil, for frying
- For the gravy:
- 2 tbsp unsalted butter
- 2 tbsp all-purpose flour
- 1 cup whole milk
- 1/2 tsp salt
- 1/4 tsp black pepper
Instructions
- In a large bowl, soak the chicken thighs in buttermilk for at least 4 hours, or overnight for best results. This tenderizes the chicken and adds moisture.
- In another bowl, mix together the flour, salt, black pepper, paprika, garlic powder, and onion powder. This will be your dredging mixture.
- Remove the chicken from the buttermilk, letting excess drip off, then dredge each piece thoroughly in the flour mixture, pressing gently to adhere.
- Heat vegetable oil in a deep skillet to 350°F. Carefully add the chicken thighs, frying in batches if necessary to avoid overcrowding.
- Fry the chicken for about 12-15 minutes, turning once, until golden brown and the internal temperature reaches 165°F. Drain on a wire rack set over a baking sheet.
- For the gravy, melt butter in a saucepan over medium heat. Whisk in flour and cook for 1 minute until golden.
- Gradually whisk in milk, ensuring no lumps form. Cook, stirring constantly, until the gravy thickens, about 5 minutes. Season with salt and pepper.
- Serve the fried chicken hot, drizzled with gravy. The contrast between the crunchy exterior and the tender, juicy meat, enveloped in creamy gravy, is sublime. Try serving it over a warm biscuit for an extra touch of comfort.
The crispy skin gives way to succulent meat, while the gravy adds a rich, creamy dimension that ties everything together. This dish is a testament to the beauty of simple ingredients transformed into something extraordinary.
Collard Greens with Smoked Turkey
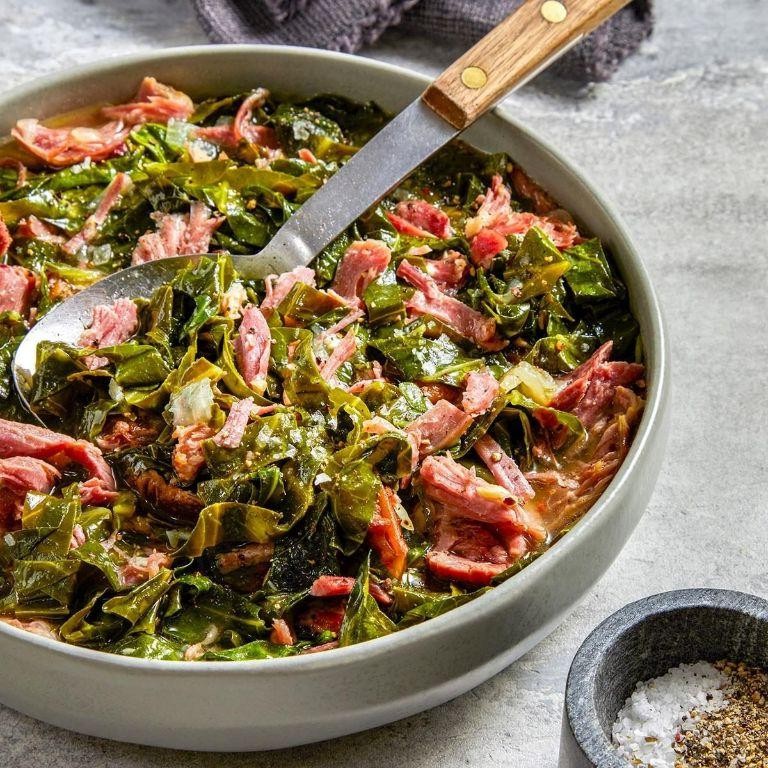
Mornings like these, when the light filters softly through the kitchen window, I find myself drawn to recipes that simmer slowly, filling the air with warmth and nostalgia. Collard greens with smoked turkey is one such dish, a humble yet deeply flavorful combination that speaks to the soul.
Ingredients
- For the greens:
- 2 large bunches collard greens, stems removed and leaves chopped
- 1 smoked turkey leg
- 4 cups chicken broth
- 1 onion, diced
- 2 cloves garlic, minced
- 1 tbsp apple cider vinegar
- 1 tsp red pepper flakes
- Salt to taste
Instructions
- In a large pot, combine the smoked turkey leg and chicken broth. Bring to a boil over high heat, then reduce to a simmer. Cover and cook for 1 hour, or until the turkey is tender.
- Remove the turkey leg from the pot and let it cool slightly. Shred the meat from the bone, discarding the bone and any excess fat.
- Return the shredded turkey to the pot. Add the diced onion, minced garlic, apple cider vinegar, and red pepper flakes. Stir to combine.
- Add the chopped collard greens to the pot, stirring gently to submerge them in the broth. Cover and simmer for 45 minutes to 1 hour, stirring occasionally, until the greens are tender.
- Season with salt to taste before serving. For an extra layer of flavor, let the greens sit for 10 minutes off the heat before serving.
Often, the simplest dishes carry the most comfort. These collard greens, tender and infused with the smoky richness of turkey, offer a texture that’s both hearty and soothing. Serve them alongside a slice of cornbread for a meal that feels like home.
Macaroni and Cheese
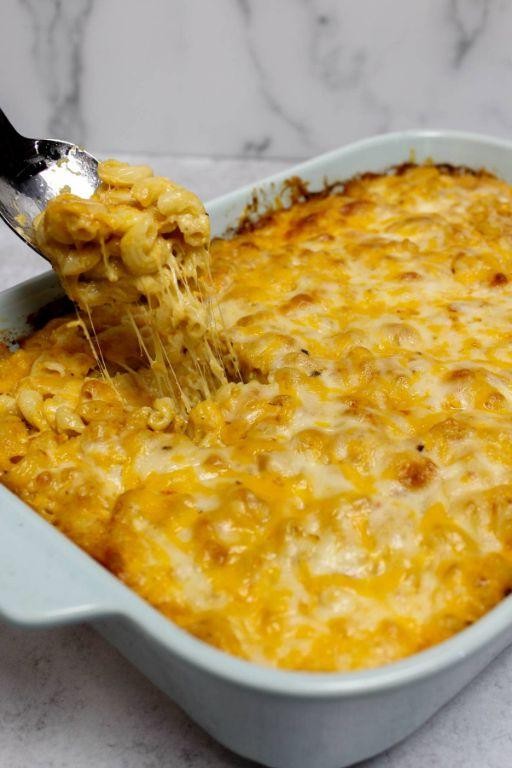
Venturing into the comfort of familiar flavors, macaroni and cheese stands as a timeless dish that wraps the soul in warmth. Its creamy texture and rich taste evoke memories of shared meals and quiet evenings, making it a beloved classic in homes across the nation.
Ingredients
- For the pasta:
- 8 oz elbow macaroni
- 4 quarts water
- 1 tbsp salt
- For the cheese sauce:
- 2 cups whole milk
- 2 tbsp unsalted butter
- 2 tbsp all-purpose flour
- 2 cups sharp cheddar cheese, shredded
- 1/2 tsp salt
- 1/4 tsp black pepper
- For the topping:
- 1/2 cup panko breadcrumbs
- 1 tbsp melted butter
Instructions
- Preheat your oven to 375°F (190°C) to ensure it’s ready for baking.
- Bring 4 quarts of water to a rolling boil in a large pot. Add 1 tbsp of salt and the elbow macaroni, cooking for 7 minutes until al dente. Tip: Stir occasionally to prevent sticking.
- Drain the macaroni and set aside. Do not rinse to keep the starch that helps the sauce adhere.
- In the same pot, melt 2 tbsp of butter over medium heat. Whisk in 2 tbsp of flour to create a roux, cooking for 1 minute until golden. Tip: Constant whisking prevents lumps.
- Gradually add 2 cups of milk, whisking continuously until the mixture thickens, about 5 minutes.
- Remove from heat and stir in 2 cups of shredded cheddar cheese, 1/2 tsp salt, and 1/4 tsp black pepper until smooth.
- Combine the cheese sauce with the cooked macaroni, transferring to a baking dish.
- Mix 1/2 cup panko breadcrumbs with 1 tbsp melted butter and sprinkle over the macaroni. Tip: For extra crunch, toast the breadcrumbs lightly before sprinkling.
- Bake for 20 minutes until the topping is golden and the sauce is bubbly.
Best enjoyed straight from the oven, this macaroni and cheese boasts a velvety sauce enveloping each noodle, crowned with a crisp, buttery topping. For a twist, serve alongside a crisp green salad or top with crispy bacon bits for added texture.
Cornbread
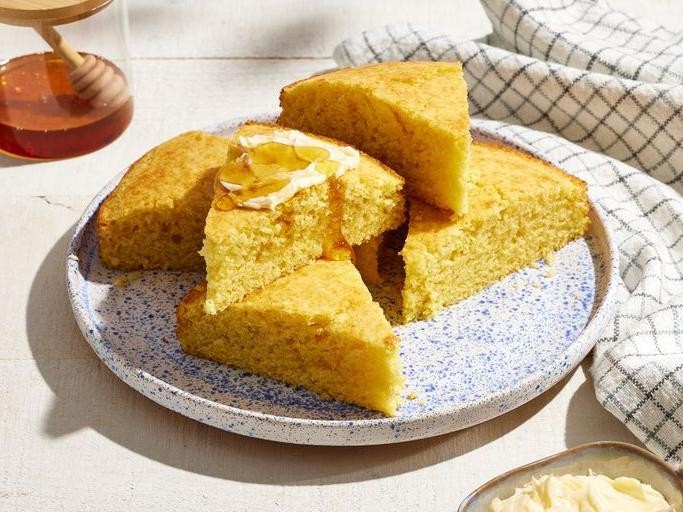
Yesterday, I found myself lost in the quiet of the kitchen, the golden hues of sunset painting the walls as I pondered the simplicity and warmth of cornbread. It’s a dish that whispers of home, of shared meals and the gentle crackle of a cast iron skillet.
Ingredients
- For the batter:
- 1 cup all-purpose flour
- 1 cup yellow cornmeal
- 1/4 cup granulated sugar
- 1 tbsp baking powder
- 1/2 tsp salt
- 1 cup milk
- 1/3 cup unsalted butter, melted
- 1 large egg
Instructions
- Preheat your oven to 400°F (200°C) and place a 9-inch cast iron skillet inside to heat up. This ensures a crispy crust.
- In a large bowl, whisk together the flour, cornmeal, sugar, baking powder, and salt until well combined.
- In another bowl, mix the milk, melted butter, and egg until smooth. Tip: Ensure the butter is cooled slightly to avoid cooking the egg.
- Pour the wet ingredients into the dry ingredients and stir until just combined. A few lumps are okay; overmixing leads to tough cornbread.
- Carefully remove the hot skillet from the oven and pour the batter into it. It should sizzle slightly, creating a perfect crust.
- Bake for 20-25 minutes, or until the top is golden and a toothpick inserted into the center comes out clean. Tip: Rotate the skillet halfway through for even baking.
- Let the cornbread cool in the skillet for 5 minutes before slicing. This allows it to set properly.
Zesty and comforting, this cornbread boasts a crispy exterior with a tender, moist interior. Serve it warm with a drizzle of honey or alongside a bowl of chili for a heartwarming meal.
Black-Eyed Peas

Gently simmering on the stove, black-eyed peas carry the warmth of Southern kitchens and the promise of comfort in every bite. This humble legume, with its creamy texture and earthy flavor, transforms into a soulful dish that’s both nourishing and deeply satisfying.
Ingredients
- For the peas:
- 1 pound dried black-eyed peas, rinsed and picked over
- 6 cups water
- 1 teaspoon salt
- For the seasoning:
- 2 tablespoons olive oil
- 1 medium onion, diced
- 2 cloves garlic, minced
- 1 teaspoon smoked paprika
- 1/2 teaspoon black pepper
Instructions
- In a large pot, combine the black-eyed peas and water. Bring to a boil over high heat, then reduce the heat to low and simmer uncovered for 45 minutes, or until the peas are tender but not mushy.
- While the peas are cooking, heat the olive oil in a skillet over medium heat. Add the onion and garlic, sautéing until they are soft and translucent, about 5 minutes.
- Stir in the smoked paprika and black pepper, cooking for another minute to release the spices’ aromas.
- Once the peas are tender, drain any excess water, then stir in the seasoned onion mixture and salt. Simmer together for 10 minutes to allow the flavors to meld.
- Tip: For extra flavor, add a ham hock or smoked turkey wing to the peas while they simmer.
- Tip: If the peas seem too dry after draining, reserve a cup of the cooking liquid to adjust the consistency.
- Tip: Let the dish sit for 10 minutes off the heat before serving to thicken slightly.
Soft yet firm, the black-eyed peas offer a delightful contrast to the smoky, aromatic seasoning. Serve them over a bed of steamed rice or with a side of cornbread for a complete meal that celebrates simplicity and depth of flavor.
Fried Catfish

Floating through the memories of Southern kitchens, fried catfish stands as a humble yet profound dish, its golden crust whispering tales of riverside picnics and family gatherings. The simplicity of its preparation belies the depth of flavor and texture that awaits, a testament to the beauty of traditional cooking.
Ingredients
- For the catfish:
- 4 catfish fillets (about 6 ounces each)
- 1 cup buttermilk
- 1 teaspoon salt
- For the crust:
- 1 cup cornmeal
- 1/2 cup all-purpose flour
- 1 teaspoon garlic powder
- 1 teaspoon paprika
- 1/2 teaspoon black pepper
- 1/2 teaspoon cayenne pepper
- For frying:
- Vegetable oil, enough to fill a skillet to 1/2 inch depth
Instructions
- In a shallow dish, combine the catfish fillets, buttermilk, and salt, ensuring each fillet is fully submerged. Let marinate in the refrigerator for at least 1 hour, or overnight for deeper flavor.
- In another shallow dish, whisk together the cornmeal, flour, garlic powder, paprika, black pepper, and cayenne pepper until well combined.
- Heat the vegetable oil in a large skillet over medium-high heat until it reaches 350°F, using a candy thermometer to check the temperature.
- Remove each fillet from the buttermilk, allowing excess to drip off, then dredge in the cornmeal mixture, pressing gently to adhere the crust.
- Carefully place the coated fillets into the hot oil, frying in batches to avoid overcrowding, for about 3-4 minutes per side, or until the crust is golden brown and crispy.
- Transfer the fried fillets to a wire rack set over a baking sheet to drain any excess oil, keeping them warm in a 200°F oven if frying in batches.
Velvety inside with a crackling exterior, this fried catfish sings of the South with every bite. Serve it atop a mound of creamy coleslaw or alongside a wedge of cornbread for a meal that feels like home.
Sweet Potato Pie

Under the soft glow of the kitchen light, the sweet potato pie emerges as a humble yet profound delight, its rich flavors whispering stories of comfort and tradition. This recipe, a tender embrace of sweetness and spice, invites you to slow down and savor the process, from the first slice of potato to the final golden crust.
Ingredients
- For the filling:
- 2 cups mashed sweet potatoes
- 3/4 cup granulated sugar
- 1/2 cup brown sugar
- 2 large eggs
- 1/2 cup evaporated milk
- 1/4 cup melted butter
- 1 tsp vanilla extract
- 1/2 tsp ground cinnamon
- 1/4 tsp ground nutmeg
- 1/4 tsp salt
- For the crust:
- 1 1/4 cups all-purpose flour
- 1/2 tsp salt
- 1/2 cup cold butter, cubed
- 3-4 tbsp ice water
Instructions
- Preheat your oven to 350°F (175°C) to ensure it’s ready for baking.
- For the crust, mix flour and salt in a large bowl. Cut in the cold butter until the mixture resembles coarse crumbs.
- Gradually add ice water, 1 tablespoon at a time, stirring until the dough comes together. Tip: Handle the dough as little as possible to keep it flaky.
- Roll out the dough on a floured surface to fit a 9-inch pie dish. Trim and crimp the edges for a decorative finish.
- In a separate bowl, combine all filling ingredients until smooth. Tip: For a smoother filling, blend the sweet potatoes before mixing.
- Pour the filling into the prepared crust, spreading it evenly.
- Bake for 55-60 minutes, or until the filling is set and a knife inserted comes out clean. Tip: Cover the edges with foil if they brown too quickly.
- Allow the pie to cool on a wire rack for at least 2 hours before serving to let the flavors meld.
Zesty with spice and velvety in texture, this sweet potato pie is a canvas for creativity—serve it with a dollop of whipped cream or a sprinkle of toasted pecans for an extra layer of delight.
BBQ Ribs
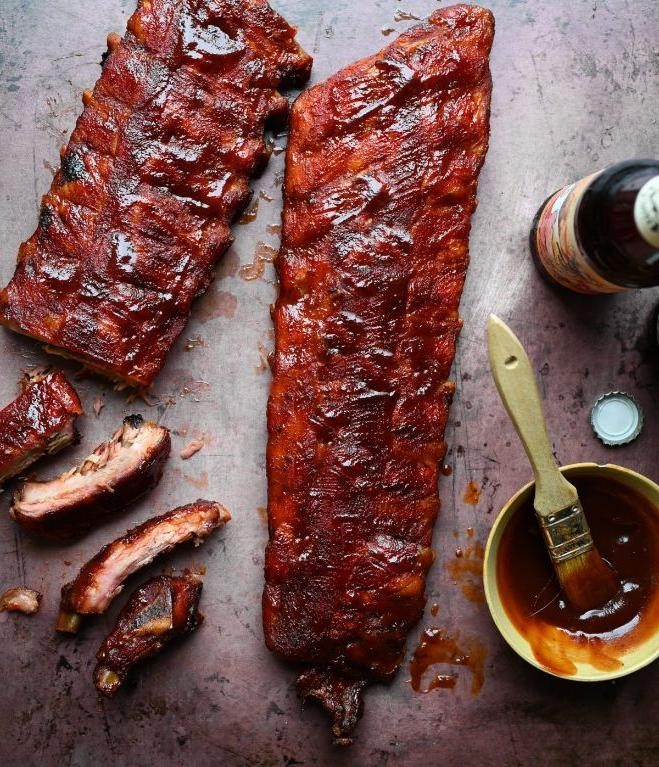
Zenith moments in cooking often come from dishes that require patience and love, like BBQ ribs. There’s something deeply satisfying about the slow transformation of tough meat into tender, flavorful bites that fall off the bone.
Ingredients
- For the ribs:
- 2 racks of baby back ribs (about 4 lbs)
- 1 tbsp kosher salt
- 1 tbsp black pepper
- 1 tbsp garlic powder
- 1 tbsp onion powder
- For the BBQ sauce:
- 1 cup ketchup
- 1/4 cup apple cider vinegar
- 1/4 cup brown sugar
- 1 tbsp Worcestershire sauce
- 1 tsp smoked paprika
Instructions
- Preheat your oven to 275°F. This low temperature is key for tender ribs.
- Remove the membrane from the back of the ribs for better texture and flavor penetration.
- Mix the salt, pepper, garlic powder, and onion powder in a small bowl. Rub this mixture evenly over both sides of the ribs.
- Place the ribs on a baking sheet, cover tightly with aluminum foil, and bake for 3 hours. Tip: The foil keeps the moisture in, making the ribs tender.
- While the ribs bake, combine all BBQ sauce ingredients in a saucepan over medium heat. Simmer for 10 minutes, stirring occasionally, until slightly thickened.
- After 3 hours, remove the ribs from the oven and carefully uncover. Brush a generous layer of BBQ sauce over the ribs.
- Increase the oven temperature to 350°F and return the ribs to the oven, uncovered, for 30 minutes. This step caramelizes the sauce.
- Let the ribs rest for 10 minutes before slicing. Tip: Resting allows the juices to redistribute, ensuring moist ribs.
Unbelievably tender, these ribs boast a perfect balance of smoky, sweet, and tangy flavors. Serve them atop a pile of creamy coleslaw for a delightful contrast in textures.
Chitterlings
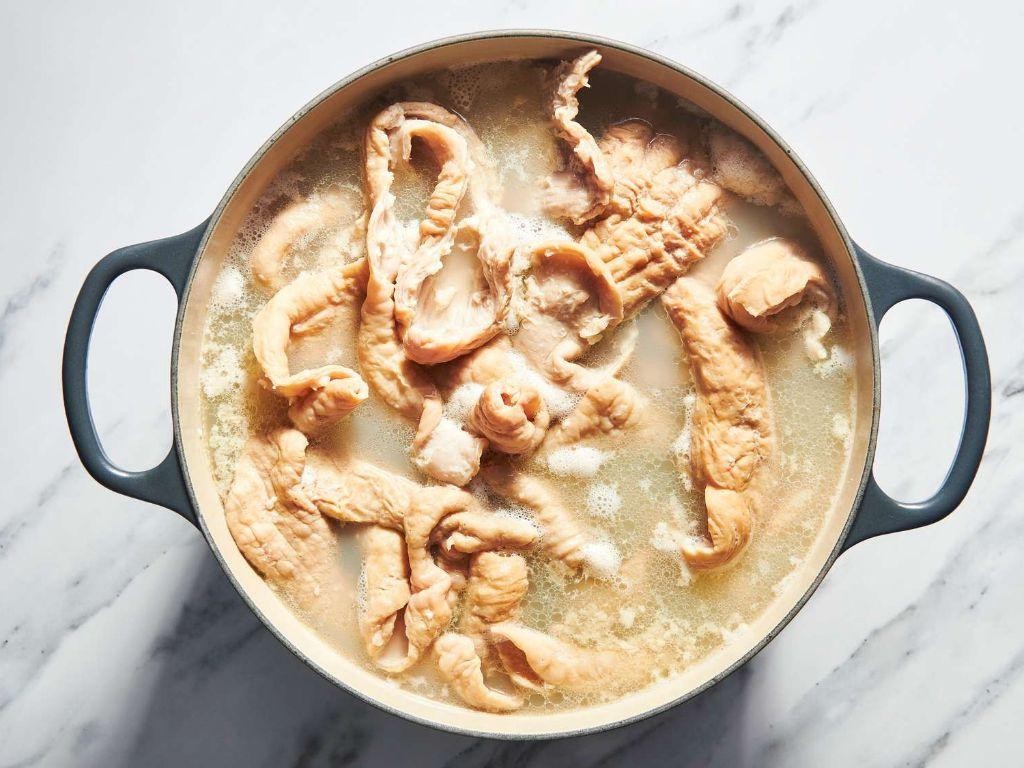
Evenings spent in the kitchen, with the slow simmer of chitterlings on the stove, bring a sense of comfort and tradition that’s hard to replicate. This dish, with its rich history and deep flavors, invites us to pause and savor the process as much as the meal itself.
Ingredients
- For cleaning the chitterlings:
- 10 lbs fresh chitterlings
- 1 cup white vinegar
- 1 gallon cold water
- For cooking the chitterlings:
- 1 large onion, chopped
- 3 cloves garlic, minced
- 1 tbsp salt
- 1 tsp black pepper
- 1 tsp red pepper flakes
- 2 bay leaves
- 4 cups water
Instructions
- Rinse the chitterlings under cold running water to remove any visible debris.
- In a large bowl, combine the chitterlings, white vinegar, and cold water. Let them soak for 30 minutes to help remove any impurities.
- After soaking, rinse the chitterlings thoroughly under cold water again, ensuring they’re clean.
- Place the cleaned chitterlings in a large pot. Add the chopped onion, minced garlic, salt, black pepper, red pepper flakes, bay leaves, and water.
- Bring the mixture to a boil over high heat, then reduce the heat to low. Cover and simmer for 3 to 4 hours, or until the chitterlings are tender.
- During the last hour of cooking, check the tenderness of the chitterlings. They should be soft but still have a slight chew to them.
- Once done, remove the bay leaves and discard them. Adjust the seasoning if necessary.
Mouthwatering and tender, these chitterlings carry a depth of flavor that’s both rustic and refined. Serve them over a bed of creamy grits or alongside collard greens for a meal that honors tradition while satisfying the soul.
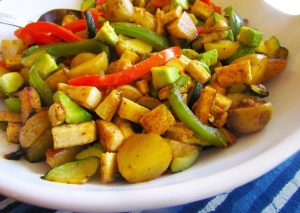
Fried Okra
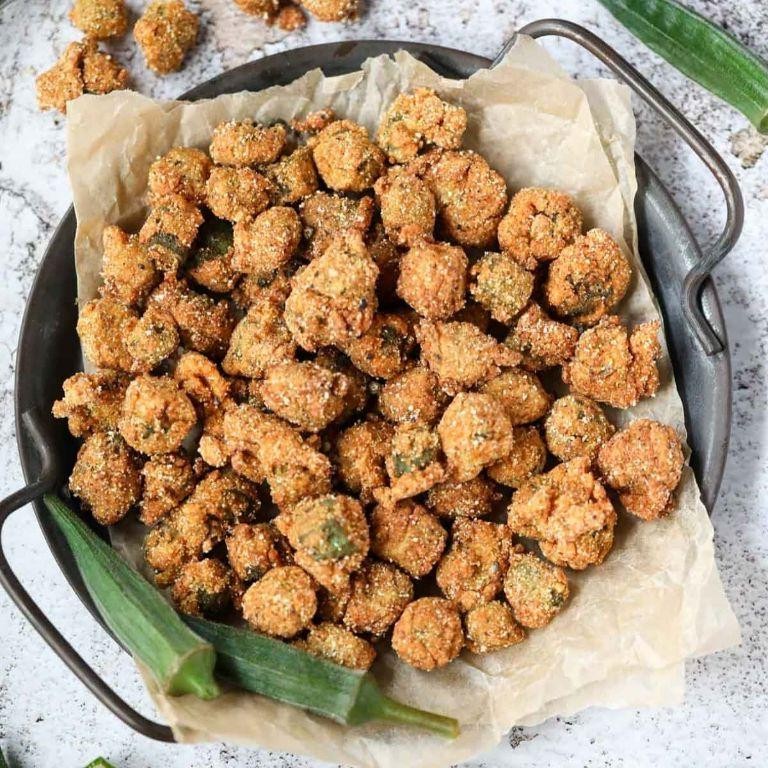
Beneath the golden hues of summer evenings, fried okra emerges as a humble yet irresistible delight, its crisp exterior giving way to a tender, flavorful heart that speaks of Southern comfort and simplicity.
Ingredients
- For the okra:
- 1 pound fresh okra, sliced into 1/2-inch pieces
- 1 cup buttermilk
- For the coating:
- 1 cup cornmeal
- 1/2 cup all-purpose flour
- 1 teaspoon salt
- 1/2 teaspoon black pepper
- 1/2 teaspoon garlic powder
- For frying:
- Vegetable oil, for frying (enough to fill a skillet 1/2 inch deep)
Instructions
- In a medium bowl, soak the sliced okra in buttermilk for 10 minutes to tenderize and add a slight tang.
- In another bowl, whisk together cornmeal, flour, salt, black pepper, and garlic powder for the coating.
- Heat vegetable oil in a large skillet over medium heat until it reaches 350°F, ensuring even frying.
- Drain the okra from the buttermilk, letting excess drip off, then toss in the cornmeal mixture until fully coated.
- Fry the coated okra in batches, avoiding overcrowding, for 3-4 minutes or until golden brown, flipping once for even crispness.
- Transfer fried okra to a paper towel-lined plate to drain any excess oil, seasoning lightly with salt while still hot.
Soaking the okra in buttermilk not only tenderizes but also ensures the coating adheres beautifully. Maintaining the oil temperature is key to achieving that perfect crunch without greasiness. Serve these golden bites with a side of cool ranch or spicy aioli for a delightful contrast.
Pecan Pie
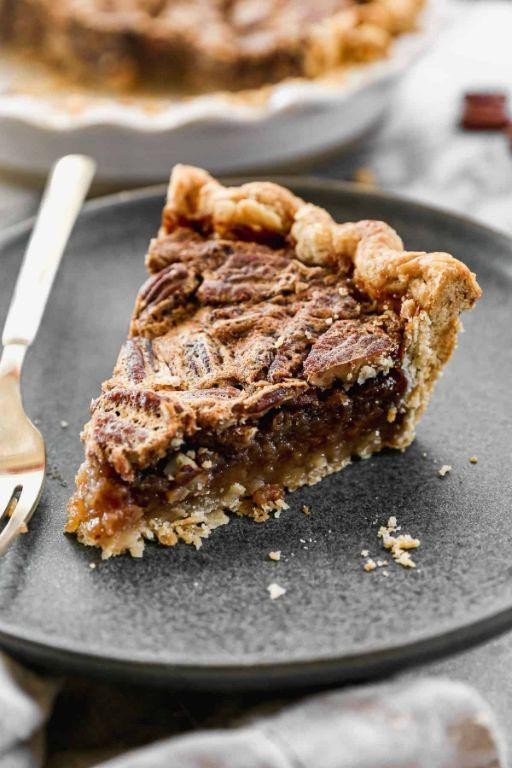
Pecan pie, with its rich, buttery crust and gooey, nut-filled center, feels like a warm embrace on a chilly evening. It’s a dessert that carries the essence of Southern hospitality, blending simplicity with decadence in every bite.
Ingredients
- For the crust:
- 1 1/4 cups all-purpose flour
- 1/2 tsp salt
- 1/2 cup unsalted butter, chilled and diced
- 3-4 tbsp ice water
- For the filling:
- 1 cup light corn syrup
- 1 cup packed dark brown sugar
- 3 large eggs
- 2 tbsp unsalted butter, melted
- 2 tsp vanilla extract
- 1/4 tsp salt
- 2 cups pecan halves
Instructions
- Preheat your oven to 350°F (175°C).
- In a large bowl, whisk together the flour and salt for the crust. Add the diced butter and use your fingers to rub it into the flour until the mixture resembles coarse crumbs.
- Gradually add ice water, one tablespoon at a time, mixing until the dough just comes together. Tip: Avoid overworking the dough to keep the crust tender.
- Roll out the dough on a lightly floured surface to fit a 9-inch pie dish. Trim and crimp the edges as desired.
- In another bowl, whisk together the corn syrup, brown sugar, eggs, melted butter, vanilla, and salt until smooth. Stir in the pecans.
- Pour the filling into the prepared crust. Tip: Arrange a few pecan halves on top for a decorative finish.
- Bake for 50-60 minutes, or until the filling is set and the crust is golden brown. Tip: Cover the edges with foil if they brown too quickly.
- Let the pie cool completely on a wire rack before serving.
Silky and sweet, the filling contrasts beautifully with the crisp, flaky crust, while the pecans add a satisfying crunch. Serve it slightly warm with a dollop of whipped cream or a scoop of vanilla ice cream to elevate the experience.
Red Velvet Cake

Just like the quiet moments before dawn, making a Red Velvet Cake is a gentle process that rewards patience and attention to detail. It’s a dance between the rich cocoa and the vibrant red, a balance that feels almost meditative when done right.
Ingredients
- For the cake:
- 2 1/2 cups all-purpose flour
- 1 1/2 cups sugar
- 1 tsp baking soda
- 1 tsp salt
- 1 tbsp cocoa powder
- 1 1/2 cups vegetable oil
- 1 cup buttermilk, room temperature
- 2 large eggs, room temperature
- 2 tbsp red food coloring
- 1 tsp vanilla extract
- 1 tsp white vinegar
- For the frosting:
- 8 oz cream cheese, softened
- 1/2 cup unsalted butter, softened
- 4 cups powdered sugar
- 1 tsp vanilla extract
Instructions
- Preheat your oven to 350°F (175°C) and grease two 9-inch round cake pans.
- In a large bowl, sift together the flour, sugar, baking soda, salt, and cocoa powder to ensure a smooth batter.
- Add the vegetable oil, buttermilk, eggs, red food coloring, vanilla extract, and white vinegar to the dry ingredients. Mix until just combined; overmixing can lead to a dense cake.
- Divide the batter evenly between the prepared pans and bake for 25-30 minutes, or until a toothpick inserted into the center comes out clean.
- Allow the cakes to cool in the pans for 10 minutes, then transfer to a wire rack to cool completely.
- For the frosting, beat the cream cheese and butter together until smooth. Gradually add the powdered sugar and vanilla extract, continuing to beat until the frosting is light and fluffy.
- Once the cakes are cool, spread a layer of frosting on top of one cake, place the second cake on top, and frost the top and sides of the entire cake.
Moist and velvety, this cake is a symphony of textures and flavors, with the tangy cream cheese frosting cutting through the sweetness. Serve it with a dusting of cocoa powder or fresh berries for an extra touch of elegance.
Gumbo
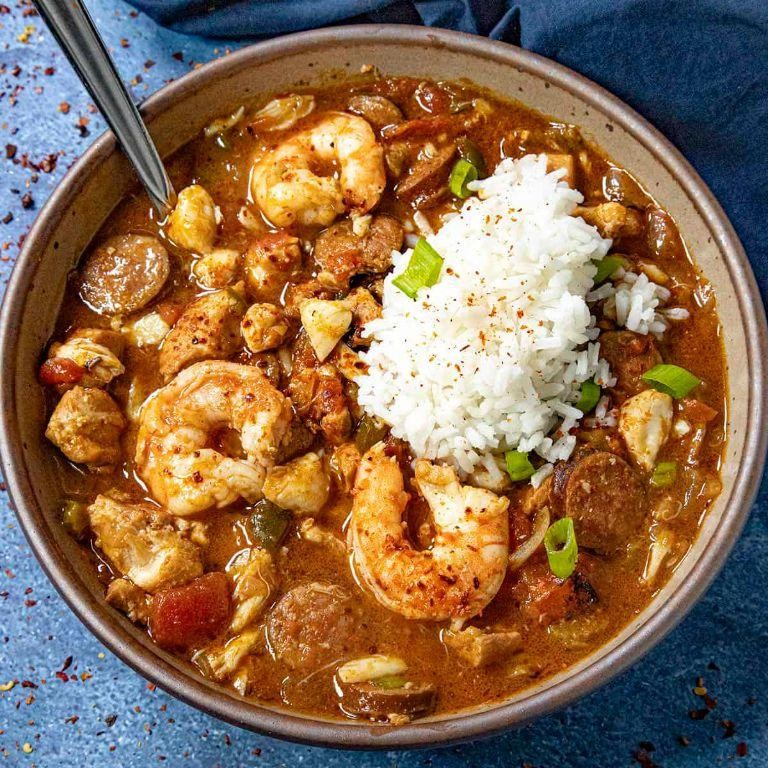
Now, as the evening light fades, there’s something deeply comforting about stirring a pot of gumbo, its rich aromas weaving through the kitchen like a slow, Southern melody.
Ingredients
- For the roux:
- 1/2 cup all-purpose flour
- 1/2 cup vegetable oil
- For the trinity:
- 1 cup diced onions
- 1 cup diced green bell peppers
- 1 cup diced celery
- For the gumbo:
- 6 cups chicken stock
- 1 lb andouille sausage, sliced
- 1 lb chicken thighs, boneless and skinless, cut into pieces
- 1 tbsp garlic, minced
- 1 tsp dried thyme
- 1 tsp smoked paprika
- 2 bay leaves
- Salt and pepper to taste
- 1/2 lb okra, sliced
- 1/4 cup fresh parsley, chopped
- 4 green onions, sliced
Instructions
- In a large pot over medium heat, combine the flour and vegetable oil to make the roux. Stir continuously for 20-25 minutes until it reaches a dark chocolate color. Tip: The key to a perfect roux is patience and constant stirring to prevent burning.
- Add the onions, green bell peppers, and celery to the roux. Cook for 5-7 minutes until the vegetables are softened.
- Pour in the chicken stock, stirring to combine with the roux and vegetables. Bring to a simmer.
- Add the andouille sausage, chicken thighs, garlic, thyme, smoked paprika, and bay leaves. Season with salt and pepper. Simmer for 30 minutes. Tip: Skim off any fat that rises to the surface for a clearer broth.
- Stir in the okra and cook for an additional 10 minutes until tender. Tip: Adding okra towards the end preserves its texture and thickening properties.
- Remove the bay leaves. Stir in the parsley and green onions just before serving.
Silky with a slight chew from the okra, this gumbo balances smoky, spicy, and savory flavors beautifully. Serve it over a mound of steamed rice, letting the grains soak up the rich broth, or with a side of crusty bread for dipping.
Jambalaya
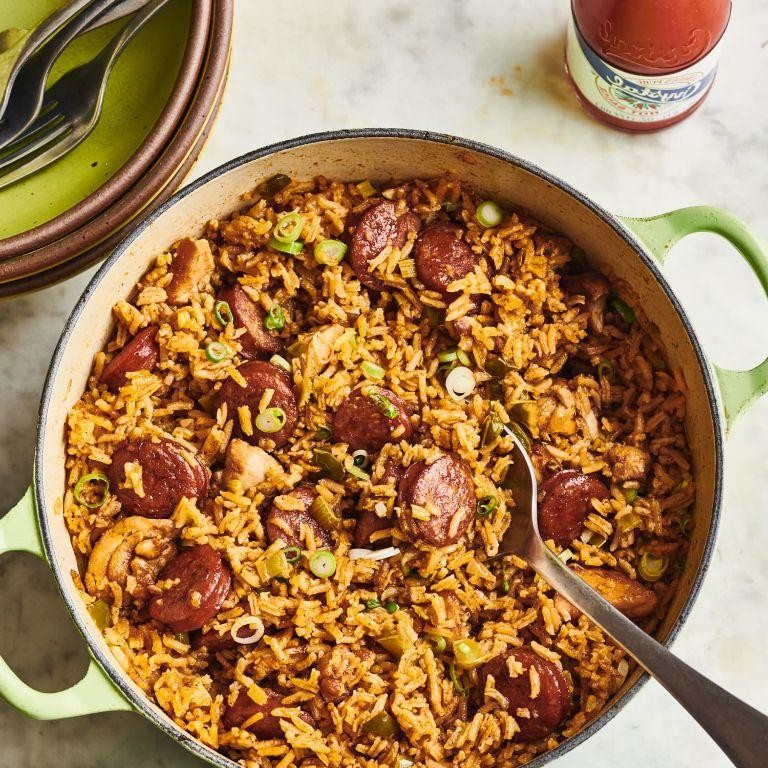
Yesterday, as the evening light faded, I found myself craving something that could warm the soul and bring a bit of Southern comfort to my kitchen. Jambalaya, with its rich history and vibrant flavors, seemed like the perfect dish to explore.
Ingredients
- For the base:
- 1 tbsp olive oil
- 1 cup diced onion
- 1 cup diced green bell pepper
- 1 cup diced celery
- 2 cloves garlic, minced
- For the protein:
- 1/2 lb chicken breast, cubed
- 1/2 lb andouille sausage, sliced
- 1/2 lb shrimp, peeled and deveined
- For the rice and seasoning:
- 1 cup long-grain white rice
- 2 cups chicken broth
- 1 tbsp Cajun seasoning
- 1/2 tsp dried thyme
- 1/2 tsp smoked paprika
- 1 bay leaf
Instructions
- Heat olive oil in a large pot over medium heat until shimmering.
- Add onion, green bell pepper, celery, and garlic. Cook, stirring occasionally, until vegetables are softened, about 5 minutes.
- Add chicken and sausage to the pot. Cook until chicken is no longer pink, about 5 minutes.
- Stir in rice, Cajun seasoning, thyme, smoked paprika, and bay leaf. Cook for 1 minute to toast the rice.
- Pour in chicken broth, bring to a boil, then reduce heat to low. Cover and simmer for 20 minutes.
- Add shrimp to the pot, cover, and cook until shrimp are pink and cooked through, about 5 minutes.
- Remove bay leaf before serving.
Creating this dish, the aroma filled the kitchen, a promise of the hearty meal to come. The jambalaya turned out perfectly, with each grain of rice absorbing the rich flavors of the broth and spices. For a creative twist, serve it with a side of crusty bread to soak up every last bit of the delicious sauce.
Biscuits and Gravy
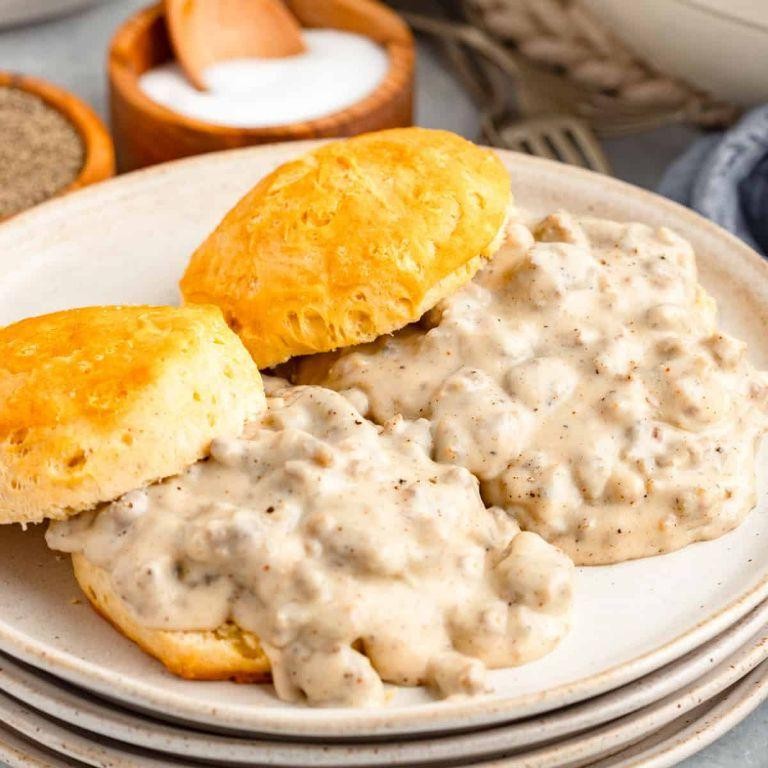
Dusk settles softly outside, and here in the kitchen, the comforting aroma of biscuits and gravy begins to fill the air, a reminder of simpler times and hearty meals shared.
Ingredients
- For the biscuits:
- 2 cups all-purpose flour
- 1 tbsp baking powder
- 1/2 tsp salt
- 1/4 cup cold unsalted butter, cubed
- 3/4 cup whole milk
- For the gravy:
- 1/2 lb breakfast sausage
- 2 tbsp unsalted butter
- 1/4 cup all-purpose flour
- 2 cups whole milk
- Salt and pepper to taste
Instructions
- Preheat your oven to 450°F (232°C) to ensure it’s ready for the biscuits.
- In a large bowl, whisk together 2 cups all-purpose flour, 1 tbsp baking powder, and 1/2 tsp salt for the biscuit dough.
- Add 1/4 cup cold, cubed butter to the flour mixture. Use your fingers to rub the butter into the flour until the mixture resembles coarse crumbs.
- Pour in 3/4 cup whole milk, stirring just until the dough comes together. Overmixing can lead to tough biscuits.
- Turn the dough onto a floured surface, gently pat it into a 1-inch thick rectangle, and cut out biscuits using a 2-inch round cutter.
- Place the biscuits on a baking sheet and bake for 12-15 minutes, or until golden brown.
- While the biscuits bake, brown 1/2 lb breakfast sausage in a skillet over medium heat, breaking it into small pieces as it cooks.
- Add 2 tbsp butter to the skillet with the sausage, letting it melt before sprinkling in 1/4 cup flour. Stir constantly for 1 minute to cook the flour.
- Gradually whisk in 2 cups whole milk, bringing the mixture to a simmer. Cook for 3-5 minutes, or until the gravy thickens, stirring frequently.
- Season the gravy with salt and pepper to taste, then remove from heat.
Fluffy biscuits smothered in creamy, peppery gravy offer a comforting embrace with every bite. Serve them warm, perhaps with a side of scrambled eggs, for a breakfast that feels like home.
Peach Cobbler
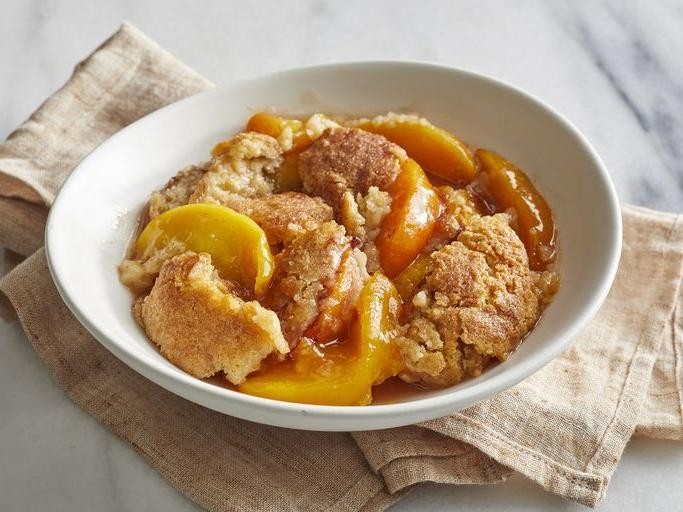
Falling into the rhythm of summer, there’s something deeply comforting about the way peaches soften and sweeten under the warmth of the oven, their juices bubbling up around the edges of a golden, buttery crust. It’s a dish that feels like a slow exhale, a moment to savor the season’s bounty.
Ingredients
- For the filling:
- 6 cups peeled, sliced peaches (about 6 medium peaches)
- 1 cup granulated sugar
- 1/4 cup packed light brown sugar
- 1/4 tsp ground cinnamon
- 1 tbsp lemon juice
- 2 tsp cornstarch
- For the crust:
- 1 cup all-purpose flour
- 1 cup granulated sugar
- 1 tsp baking powder
- 1/2 tsp salt
- 1/2 cup unsalted butter, melted
- 1/4 cup boiling water
Instructions
- Preheat your oven to 425°F (220°C). This high temperature helps achieve a beautifully golden crust.
- In a large bowl, gently toss the sliced peaches with granulated sugar, brown sugar, cinnamon, lemon juice, and cornstarch until evenly coated. Let sit for 5 minutes to allow the flavors to meld.
- Transfer the peach mixture to a 9×13 inch baking dish, spreading it out evenly. Tip: For extra juiciness, avoid overmixing the peaches to prevent breaking them down too much.
- In another bowl, whisk together flour, sugar, baking powder, and salt for the crust. Stir in melted butter and boiling water until just combined. The batter will be thick but pourable.
- Pour the crust batter over the peaches, spreading it gently to cover most of the surface. It’s okay if some peaches peek through; they’ll caramelize beautifully.
- Bake for 25-30 minutes, or until the crust is golden and the filling is bubbly around the edges. Tip: Place a baking sheet underneath to catch any spills for easier cleanup.
- Let the cobbler cool for at least 10 minutes before serving. This allows the filling to thicken slightly. Tip: Serve warm with a scoop of vanilla ice cream for a classic pairing that highlights the peaches’ natural sweetness.
Perfectly balanced between sweet and tart, the peaches meld into a syrupy filling beneath a crisp, sugary crust. For a twist, try serving it with a dollop of whipped cream infused with a hint of vanilla or almond extract to complement the peaches’ flavor.
Pulled Pork
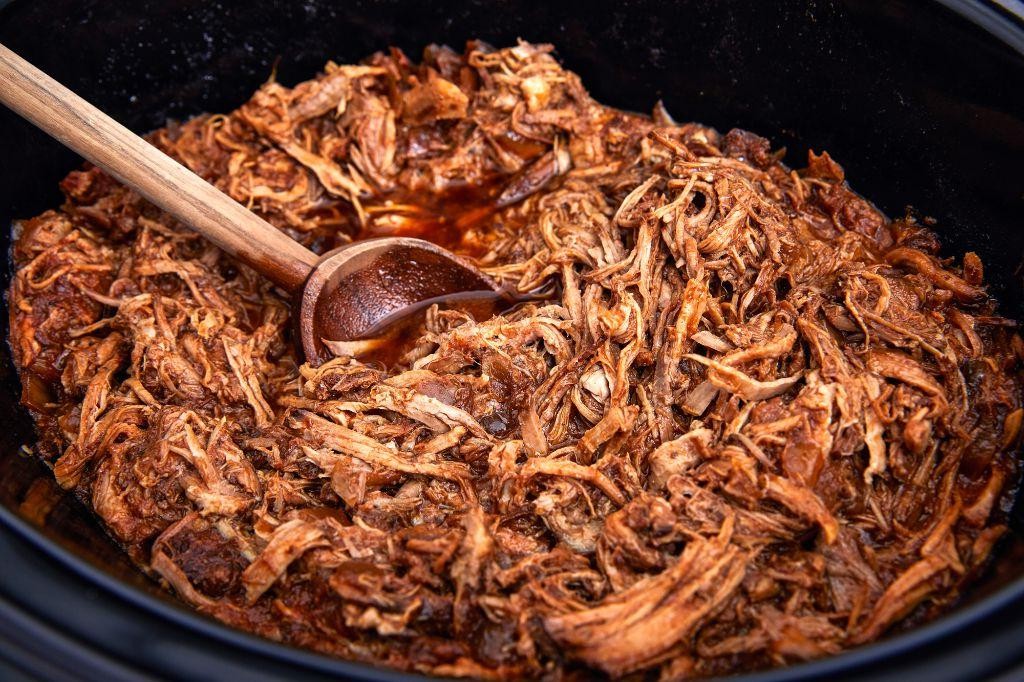
Falling into the comfort of slow-cooked meals, pulled pork stands as a testament to patience and flavor. It’s a dish that whispers stories of backyard gatherings and the quiet joy of a meal that’s been loved into existence.
Ingredients
- For the rub:
- 2 tbsp brown sugar
- 1 tbsp paprika
- 1 tsp garlic powder
- 1 tsp onion powder
- 1 tsp salt
- 1/2 tsp black pepper
- For the pork:
- 3 lbs pork shoulder
- 1 cup apple cider vinegar
- 1/2 cup water
- For the sauce:
- 1 cup ketchup
- 1/4 cup brown sugar
- 2 tbsp apple cider vinegar
- 1 tbsp Worcestershire sauce
- 1 tsp smoked paprika
Instructions
- Preheat your oven to 300°F.
- In a small bowl, mix together all the rub ingredients until well combined.
- Pat the pork shoulder dry with paper towels, then generously apply the rub all over the meat, pressing gently to adhere.
- Place the pork in a Dutch oven or a deep roasting pan. Pour the apple cider vinegar and water around the pork, not over it, to keep the rub intact.
- Cover tightly with a lid or aluminum foil and bake for 4 hours, until the pork is tender enough to pull apart with a fork.
- While the pork cooks, combine all sauce ingredients in a saucepan over medium heat. Simmer for 10 minutes, stirring occasionally, then set aside.
- Once the pork is done, remove it from the oven and let it rest for 10 minutes. Then, using two forks, shred the meat into bite-sized pieces.
- Toss the shredded pork with half of the sauce, reserving the rest for serving.
Kindly savor the tender strands of pork, each bite a melody of smoky sweetness and tang. Serve it piled high on soft buns with a side of coleslaw, or let it star in a hearty breakfast hash the next morning.
Banana Pudding
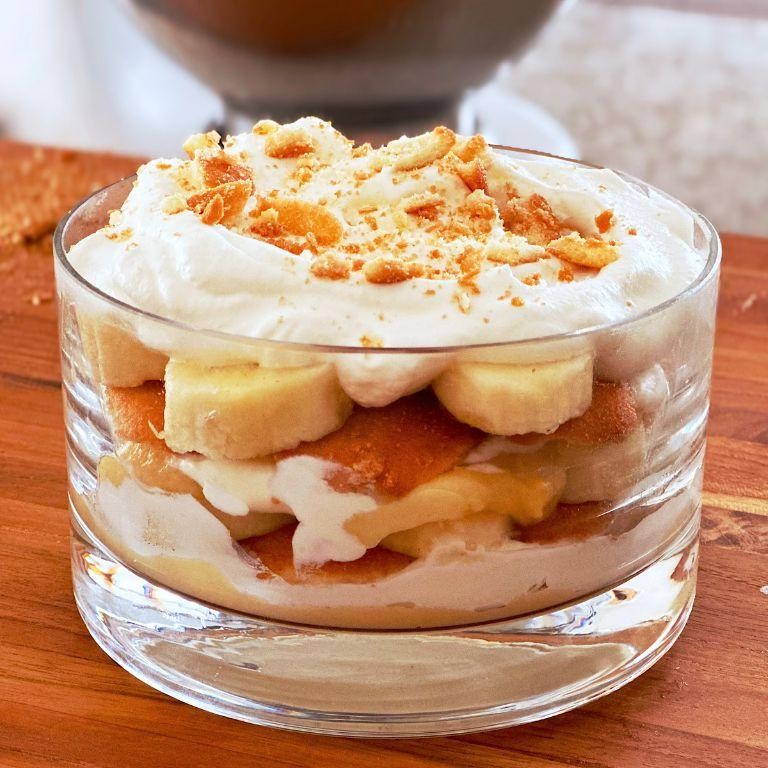
Gently, the sweet aroma of vanilla and ripe bananas fills the kitchen, a comforting reminder of the simple joys in life. This banana pudding, with its layers of creamy custard and soft vanilla wafers, is a nostalgic embrace in every bite.
Ingredients
- For the custard:
- 2 cups whole milk
- 3/4 cup granulated sugar
- 1/4 cup all-purpose flour
- 1/4 tsp salt
- 3 large egg yolks
- 2 tbsp unsalted butter
- 1 tsp vanilla extract
- For assembling:
- 4 ripe bananas, sliced
- 1 box (11 oz) vanilla wafers
- 1 cup heavy cream
- 2 tbsp powdered sugar
Instructions
- In a medium saucepan, whisk together milk, sugar, flour, and salt over medium heat until smooth.
- Continue whisking for 5 minutes until the mixture thickens slightly, then remove from heat.
- In a separate bowl, lightly beat the egg yolks. Gradually whisk in 1/2 cup of the hot milk mixture to temper the eggs.
- Return the egg mixture to the saucepan and cook over low heat, stirring constantly, for 2 minutes until the custard coats the back of a spoon.
- Remove from heat and stir in butter and vanilla until fully incorporated. Let cool for 10 minutes.
- In a large bowl, layer vanilla wafers, banana slices, and custard, repeating until all ingredients are used.
- In a chilled bowl, whip heavy cream and powdered sugar until stiff peaks form, about 3 minutes.
- Spread the whipped cream over the top layer of the pudding. Cover and refrigerate for at least 4 hours, or overnight, to set.
Here, the pudding transforms into a dreamy dessert, with the custard setting into a velvety texture that perfectly complements the crisp wafers and fresh bananas. Serve it in individual glasses for a charming presentation that highlights the layers.
Conclusion
Whether you’re craving comfort or looking to explore rich culinary traditions, these 18 old-school soul food recipes promise to delight. From hearty mains to sweet endings, each dish is a testament to the love and history woven into soul food. We’d love to hear which recipes stole your heart—drop a comment below and don’t forget to share your favorites on Pinterest!