Get ready to spice up your grilling game with these 21 fiery beer can chicken recipes that promise to deliver mouthwatering flavors and juicy tenderness every time. Perfect for those who love a little heat with their meat, this roundup is your ticket to becoming the ultimate grill master. Whether you’re hosting a backyard bash or just craving something deliciously different, these recipes are sure to impress. Let’s dive in!
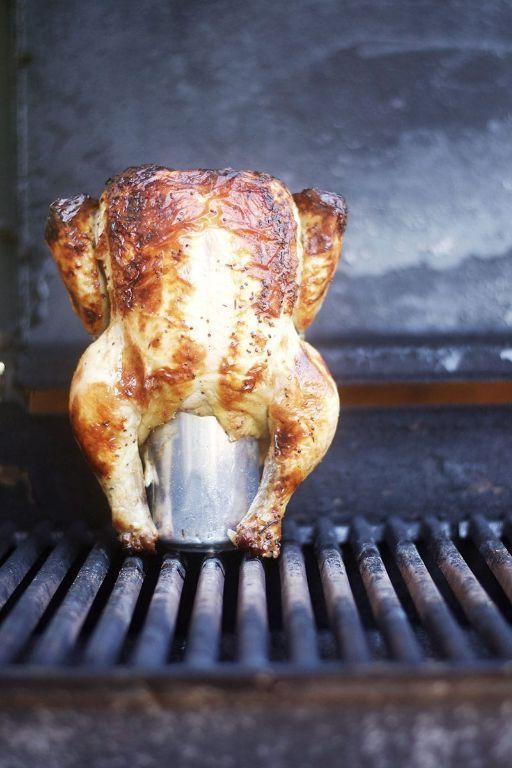
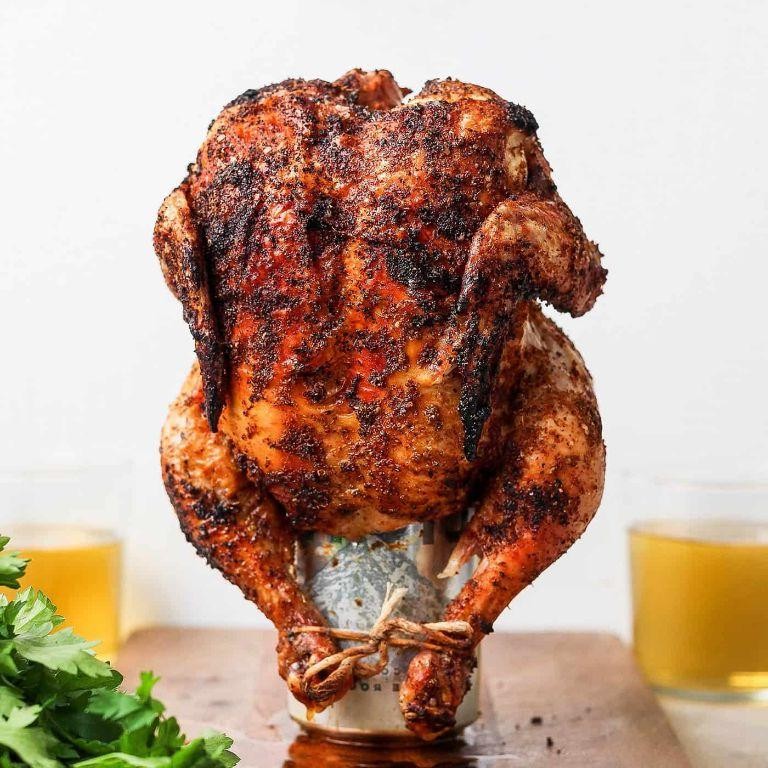
Classic Beer Can Chicken with Garlic and Herbs
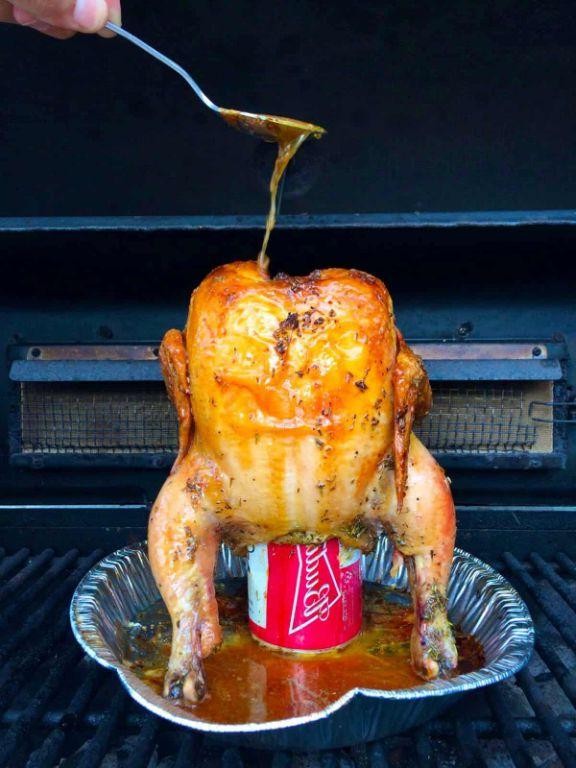
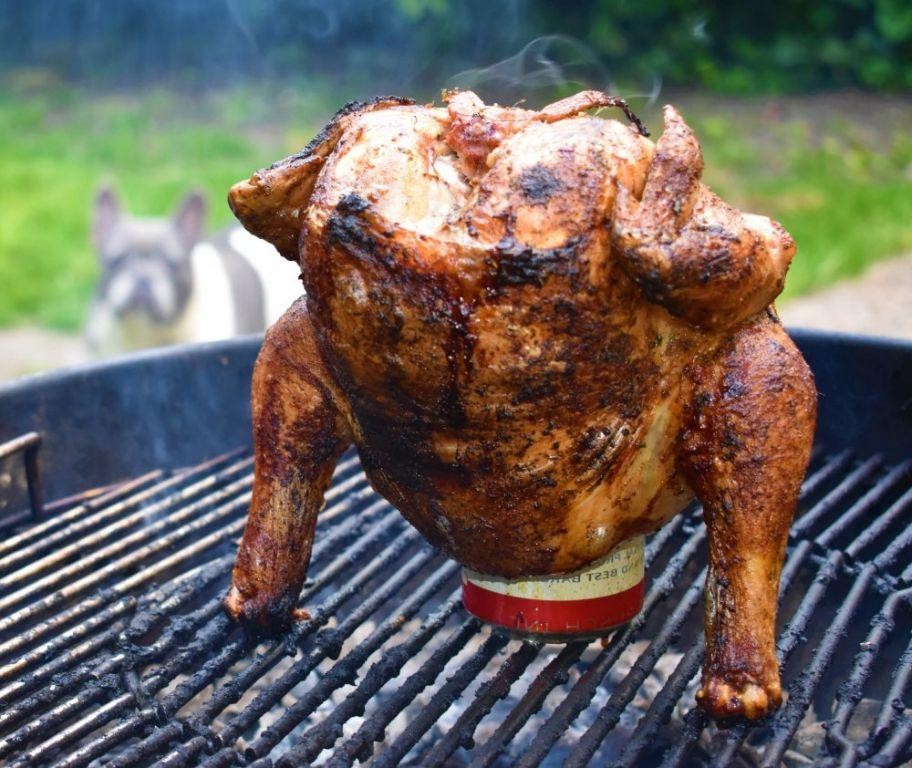
There’s something undeniably fun about balancing a chicken on a beer can, and the result is just as entertaining as the process. I first tried beer can chicken at a friend’s BBQ, and the juicy, flavorful meat had me hooked—now it’s a staple in my summer cooking repertoire.
Ingredients
- 1 whole chicken (4-5 lbs) – pat dry for crispy skin
- 1 can (12 oz) of beer – half-full, or use a beer can chicken stand
- 2 tbsp olive oil – or any neutral oil
- 4 cloves garlic – minced, adjust to taste
- 1 tbsp dried thyme – or fresh if available
- 1 tbsp dried rosemary – crush lightly to release oils
- 1 tsp salt – adjust to taste
- 1/2 tsp black pepper – freshly ground preferred
Instructions
- Preheat your grill to 350°F, setting it up for indirect heat.
- In a small bowl, mix olive oil, minced garlic, thyme, rosemary, salt, and pepper to create a herb rub.
- Gently loosen the skin over the chicken breasts and thighs, then rub half of the herb mixture underneath the skin for maximum flavor.
- Rub the remaining herb mixture all over the outside of the chicken, ensuring even coverage.
- Open the beer can, pour out half, and place the can on a stable surface. Carefully lower the chicken cavity onto the beer can, so the chicken stands upright.
- Place the chicken on the grill over indirect heat, using the legs and beer can as a tripod to keep it stable. Close the grill lid.
- Cook for about 1 to 1.5 hours, or until the internal temperature reaches 165°F at the thickest part of the thigh, not touching bone.
- Let the chicken rest for 10 minutes before carefully removing the beer can and carving.
Flavorful and juicy, this beer can chicken boasts crispy skin infused with garlic and herbs. Serve it with the grilled vegetables from the indirect heat zone for a complete meal that screams summer.
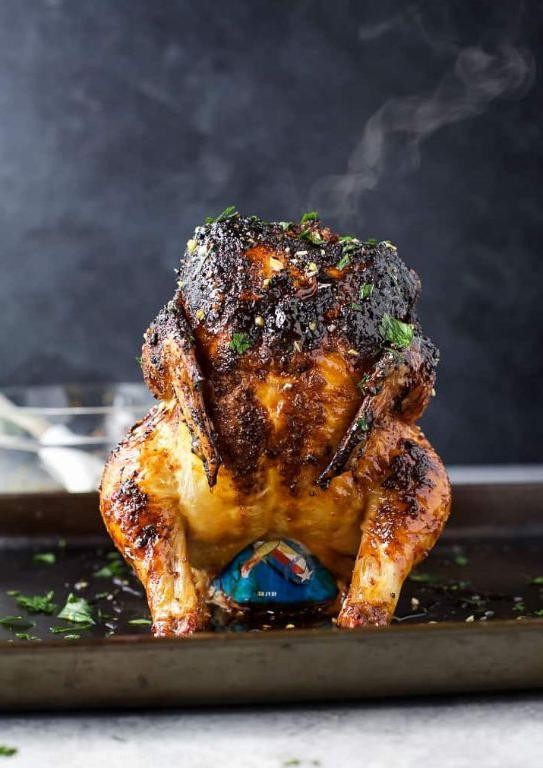
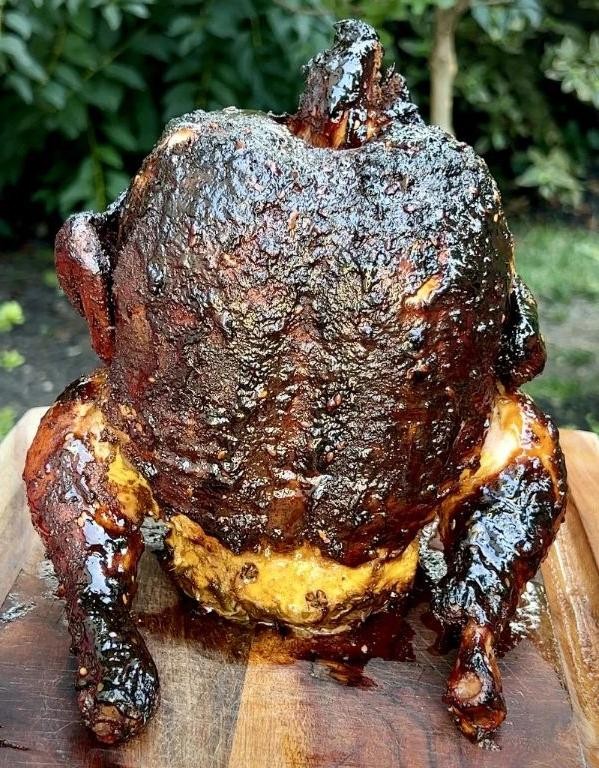
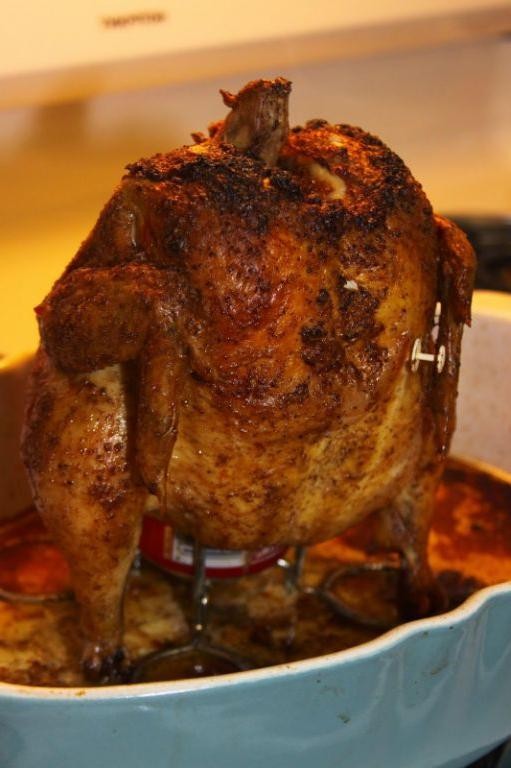
Spicy BBQ Beer Can Chicken
Did you ever think beer and chicken could create magic together? Well, let me tell you, this Spicy BBQ Beer Can Chicken is a game-changer for any backyard BBQ. It’s juicy, flavorful, and has just the right kick to make your taste buds dance.
Ingredients
- 1 whole chicken (about 4-5 lbs)
- 1 can of beer (12 oz, your favorite brand)
- 1/4 cup BBQ sauce (spicy variety for extra heat)
- 2 tbsp olive oil (or any neutral oil)
- 1 tbsp smoked paprika
- 1 tsp garlic powder
- 1 tsp onion powder
- 1/2 tsp cayenne pepper (adjust to taste)
- Salt and pepper to taste
Instructions
- Preheat your grill to 350°F, aiming for indirect heat.
- In a small bowl, mix olive oil, smoked paprika, garlic powder, onion powder, cayenne pepper, salt, and pepper to create a rub.
- Pat the chicken dry with paper towels, then generously apply the rub all over the chicken, including under the skin.
- Open the beer can, drink or pour out half, then place the chicken onto the can so it stands upright.
- Carefully place the beer can chicken on the grill, using the legs to create a stable tripod.
- Close the grill and cook for about 1 to 1.5 hours, or until the internal temperature reaches 165°F at the thigh.
- Brush the chicken with BBQ sauce during the last 10 minutes of cooking for a sticky, flavorful glaze.
- Remove the chicken from the grill, let it rest for 10 minutes before carefully removing the beer can and carving.
Great for serving with a side of coleslaw or grilled vegetables, this chicken is not just about the bold flavors but also the tender, fall-off-the-bone texture that’ll have everyone asking for seconds.
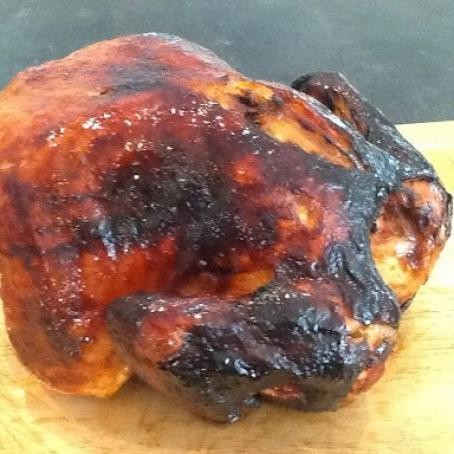
Honey Mustard Glazed Beer Can Chicken

Venturing into the world of beer can chicken felt like a rite of passage for me. There’s something undeniably fun about balancing a chicken on a beer can, and the honey mustard glaze? It’s a game-changer, adding a sweet and tangy crust that’s utterly irresistible.
Ingredients
- 1 whole chicken (about 4-5 lbs) – pat dry for better skin
- 1 can of beer (12 oz) – room temperature, half drank for stability
- 1/4 cup honey – for a sticky, sweet glaze
- 2 tbsp Dijon mustard – or whole grain for texture
- 1 tbsp olive oil – or any neutral oil
- 1 tsp garlic powder – adjust to taste
- 1 tsp smoked paprika – for a hint of smokiness
- Salt and pepper – to season
Instructions
- Preheat your grill or oven to 375°F, aiming for indirect heat if grilling.
- In a small bowl, whisk together honey, Dijon mustard, olive oil, garlic powder, smoked paprika, salt, and pepper to create the glaze.
- Open the beer can and pour out (or drink) about half to prevent overflow. This also makes the can more stable.
- Season the chicken inside and out with salt and pepper, then carefully place it over the beer can, ensuring it stands upright.
- Brush the chicken generously with the honey mustard glaze, covering all sides.
- Place the chicken on the grill or in the oven, balancing it carefully. Cook for about 1 hour and 15 minutes, or until the internal temperature reaches 165°F at the thigh.
- Every 20 minutes, baste the chicken with more glaze to build up a flavorful crust.
- Once cooked, let the chicken rest for 10 minutes before carefully removing the beer can and carving.
What you’ll love most is the juicy interior contrasted with the crispy, flavorful skin. Serve it with a side of roasted veggies or slice it up for sandwiches the next day—either way, it’s a crowd-pleaser.
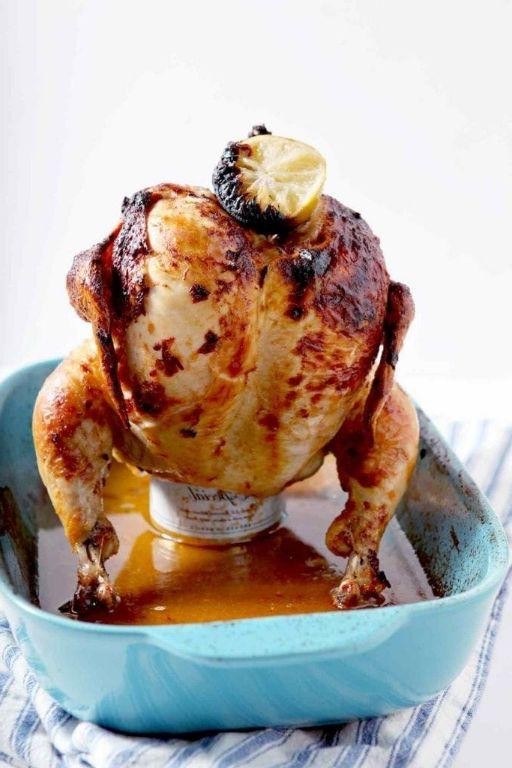
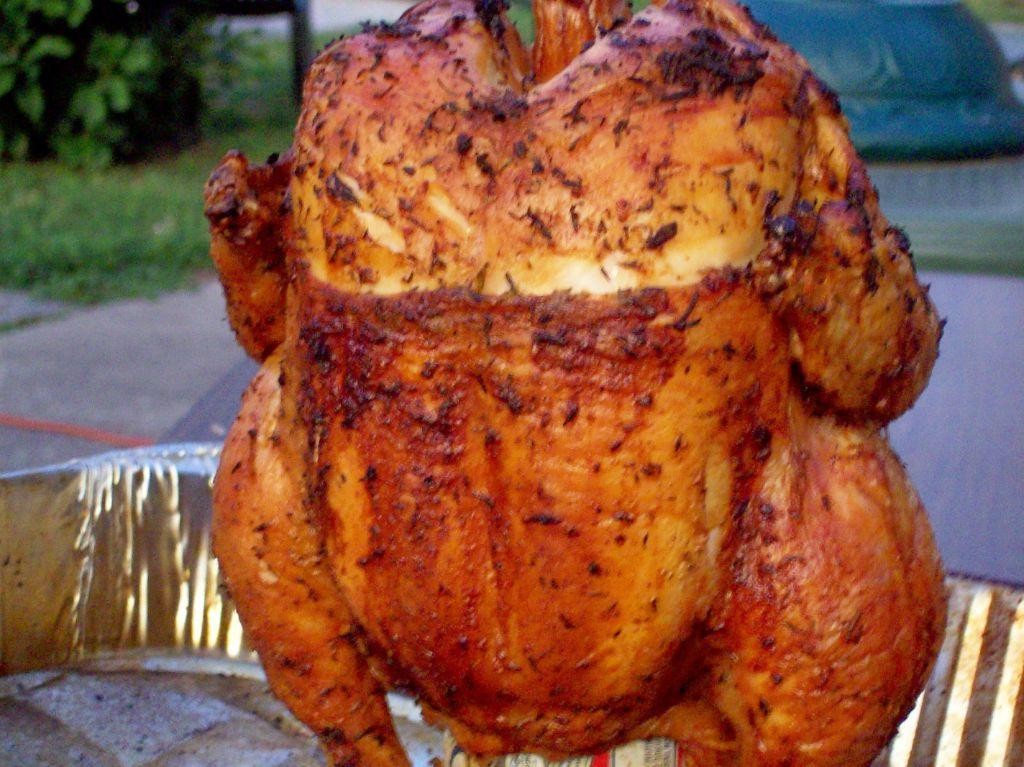
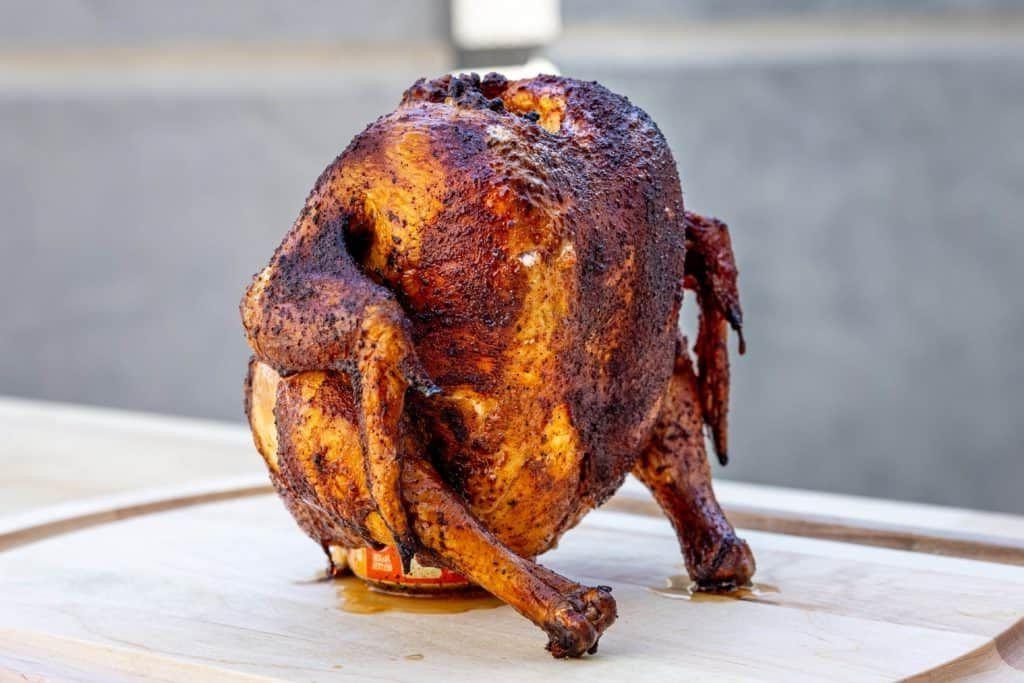
Lemon Pepper Beer Can Chicken
Venturing into the world of beer can chicken, I stumbled upon a zesty twist that’s become a summer staple in my household—Lemon Pepper Beer Can Chicken. It’s the perfect blend of tangy and savory, with a crispy skin that’s to die for. I remember the first time I tried it; the aroma alone had my neighbors peeking over the fence!
Ingredients
- 1 whole chicken (4-5 lbs) – pat dry for crispier skin
- 2 tbsp lemon pepper seasoning – adjust to taste
- 1 can (12 oz) of your favorite beer – half full, or use chicken broth
- 1 tbsp olive oil – or any neutral oil
- 1 lemon, halved – for extra zing
Instructions
- Preheat your grill or oven to 375°F, aiming for indirect heat if grilling.
- Rub the chicken all over with olive oil, then generously coat with lemon pepper seasoning, including under the skin for more flavor.
- Open the beer can, pour out half (or drink it!), and place the half-full can on a stable surface. Carefully lower the chicken onto the can so it stands upright.
- Place the chicken on the grill or in the oven, balancing it carefully. Cook for about 1 hour and 15 minutes, or until the internal temperature reaches 165°F at the thigh.
- Let the chicken rest for 10 minutes before carefully removing the beer can. Squeeze fresh lemon juice over the top for an extra burst of flavor.
Mouthwatering doesn’t even begin to describe this chicken. The skin is irresistibly crispy, while the meat stays juicy and infused with lemony, peppery goodness. Serve it with a side of grilled veggies or slice it up for sandwiches the next day—either way, it’s a winner.
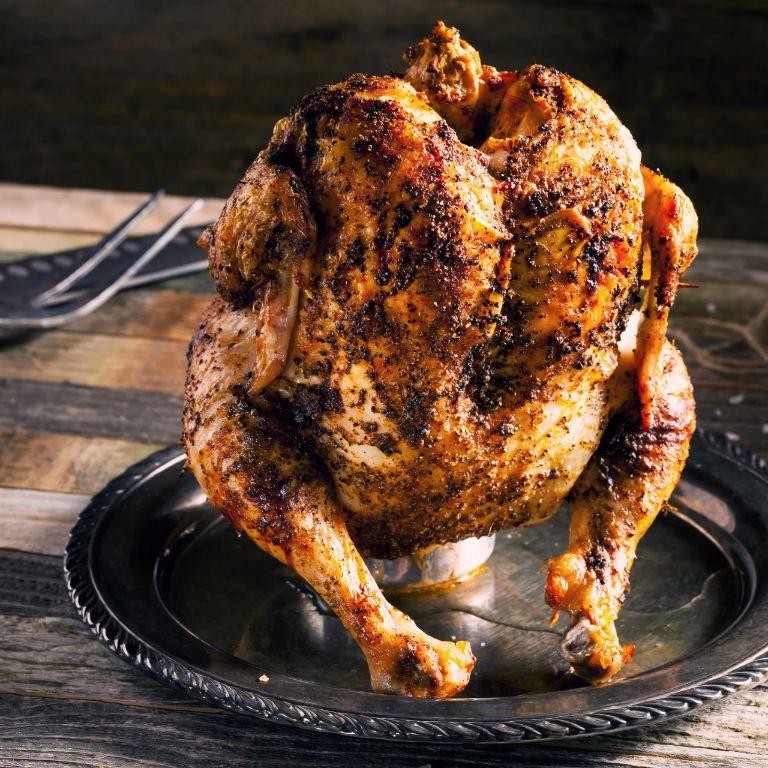
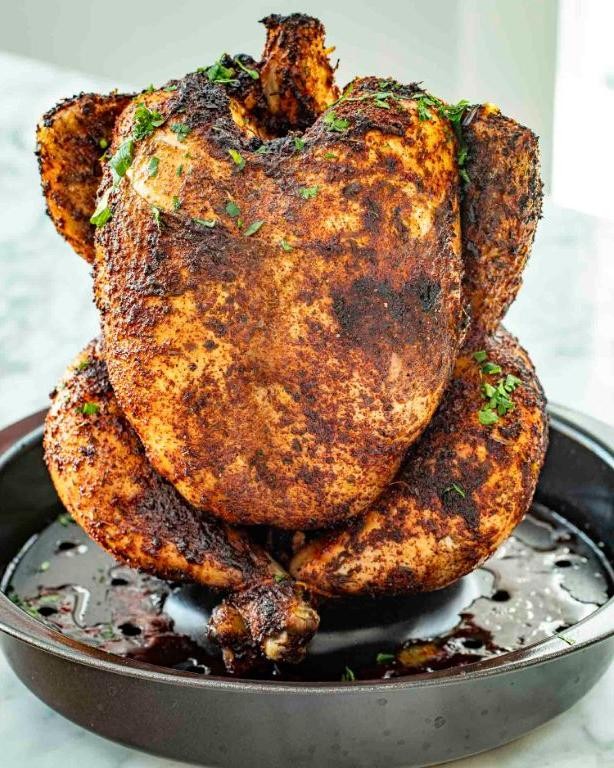
Smoky Paprika Beer Can Chicken
Kicking off the grill season with a bang, I stumbled upon this Smoky Paprika Beer Can Chicken recipe during a backyard BBQ at a friend’s place. The combination of smoky paprika and the subtle beer infusion had me hooked, and I’ve been perfecting it ever since.
Ingredients
- 1 whole chicken (about 4 lbs)
- 2 tbsp smoked paprika (for that deep smoky flavor)
- 1 tbsp garlic powder
- 1 tbsp onion powder
- 1 tsp salt (adjust to taste)
- 1/2 tsp black pepper
- 1 can of beer (12 oz, any brand you like)
- 2 tbsp olive oil (or any neutral oil)
Instructions
- Preheat your grill to 350°F, aiming for indirect heat.
- In a small bowl, mix smoked paprika, garlic powder, onion powder, salt, and black pepper.
- Pat the chicken dry with paper towels to ensure the rub sticks well.
- Rub the chicken all over with olive oil, then evenly apply the spice mixture.
- Open the beer can, drink or pour out half, and place the can on a flat surface.
- Carefully lower the chicken onto the beer can so it stands upright.
- Place the chicken on the grill, using the beer can and legs as a tripod for stability.
- Close the grill and cook for about 1 hour and 15 minutes, or until the internal temperature reaches 165°F at the thigh.
- Let the chicken rest for 10 minutes before carving to keep it juicy.
Every bite of this chicken is a juicy, smoky delight with a crispy skin that’s hard to resist. Serve it with a side of grilled vegetables or slice it up for sandwiches the next day.
Cajun Spiced Beer Can Chicken

Just when I thought I couldn’t love beer can chicken any more, I stumbled upon this Cajun spiced version that’s now a staple in my summer BBQ lineup. There’s something about the smoky, spicy flavors combined with the juiciness of the chicken that makes it irresistible.
Ingredients
- 1 whole chicken (about 4 lbs) – pat dry for better spice adherence
- 2 tbsp Cajun seasoning – adjust based on heat preference
- 1 can (12 oz) of beer – any lager works great
- 1 tbsp olive oil – or any neutral oil
- 1 tsp garlic powder – for an extra flavor kick
Instructions
- Preheat your grill to 350°F, aiming for indirect heat.
- In a small bowl, mix Cajun seasoning, olive oil, and garlic powder to create a paste.
- Rub the spice paste all over the chicken, including under the skin for maximum flavor.
- Open the beer can, pour out half (or drink it!), and place the can on a stable surface.
- Carefully lower the chicken onto the beer can so it stands upright.
- Place the chicken on the grill, using the can and legs as a tripod for stability.
- Close the grill and cook for about 1 hour 15 minutes, or until the internal temperature reaches 165°F at the thigh.
- Let the chicken rest for 10 minutes before carefully removing the beer can and carving.
Let me tell you, the skin comes out perfectly crispy, while the meat stays unbelievably moist. Serve it with a side of coleslaw and cornbread for a meal that’ll have everyone asking for seconds.
Maple Bourbon Beer Can Chicken
Yesterday, I stumbled upon a recipe that combines three of my favorite things: maple syrup, bourbon, and beer can chicken. It’s a game-changer for weekend barbecues, and I can’t wait to share how it turned my usual chicken routine into something extraordinary.
Ingredients
- 1 whole chicken (about 4-5 lbs)
- 1/4 cup maple syrup (the real deal, not imitation)
- 1/4 cup bourbon (choose one you’d drink)
- 1 can of beer (12 oz, any lager or pilsner works)
- 2 tbsp olive oil (or any neutral oil)
- 1 tbsp smoked paprika (adjust to taste)
- 1 tsp garlic powder
- 1 tsp onion powder
- 1 tsp salt (adjust to taste)
- 1/2 tsp black pepper
Instructions
- Preheat your grill to 350°F, aiming for indirect heat.
- In a small bowl, mix maple syrup, bourbon, olive oil, smoked paprika, garlic powder, onion powder, salt, and black pepper to create the marinade.
- Pat the chicken dry with paper towels, then rub the marinade all over the chicken, including under the skin for maximum flavor.
- Open the beer can, drink (or discard) half of it, then place the can on a stable surface. Carefully lower the chicken onto the can so it stands upright.
- Place the chicken on the grill over indirect heat, cover, and cook for about 1 hour and 15 minutes, or until the internal temperature reaches 165°F at the thickest part of the thigh.
- Let the chicken rest for 10 minutes before carefully removing the beer can and carving.
Craving this dish already? The chicken comes out incredibly juicy with a crispy, flavorful skin that’s slightly sweet and smoky. Serve it with grilled vegetables or over a bed of quinoa for a complete meal that’ll impress anyone at your table.
Garlic Parmesan Beer Can Chicken
Sometimes, the best recipes come from the simplest ideas, and that’s exactly how I stumbled upon this Garlic Parmesan Beer Can Chicken. It was a lazy Sunday afternoon, and I was craving something flavorful yet easy to make. That’s when the idea of combining the bold flavors of garlic and parmesan with the juiciness of beer can chicken came to mind.
Ingredients
- 1 whole chicken (about 4-5 lbs)
- 1 can of beer (12 oz, any brand you like)
- 1/2 cup grated parmesan cheese (freshly grated for best flavor)
- 3 tbsp minced garlic (adjust to taste)
- 2 tbsp olive oil (or any neutral oil)
- 1 tbsp smoked paprika (for a hint of smokiness)
- 1 tsp salt (adjust to taste)
- 1 tsp black pepper (freshly ground preferred)
Instructions
- Preheat your grill or oven to 375°F, ensuring it’s ready for indirect cooking.
- Open the beer can and pour out (or drink) about half of it to prevent overflow during cooking.
- In a small bowl, mix together the parmesan cheese, minced garlic, olive oil, smoked paprika, salt, and black pepper to create a paste.
- Pat the chicken dry with paper towels, then rub the garlic parmesan paste all over the chicken, including under the skin for maximum flavor.
- Place the beer can on a stable surface and carefully sit the chicken on top of it, ensuring the can is inserted into the cavity.
- Transfer the chicken (on the beer can) to the grill or oven, positioning it for indirect heat. Cook for about 1 hour and 15 minutes, or until the internal temperature reaches 165°F at the thickest part of the thigh.
- Let the chicken rest for 10 minutes before carefully removing the beer can and carving.
Absolutely, the Garlic Parmesan Beer Can Chicken turns out incredibly juicy with a crispy, flavorful skin that’s packed with the savory notes of garlic and parmesan. Serve it with a side of roasted vegetables or over a bed of creamy mashed potatoes for a meal that’s sure to impress.
Chili Lime Beer Can Chicken
My kitchen smells like a fiesta every time I whip up this Chili Lime Beer Can Chicken. It’s a dish that never fails to bring a little excitement to the dinner table, combining the zesty kick of lime with the deep, smoky flavors of chili. Perfect for those days when you’re craving something bold and unforgettable.
Ingredients
- 1 whole chicken (about 4 lbs) – pat dry for crispy skin
- 1 can (12 oz) of beer – lager works best for a mild flavor
- 2 tbsp chili powder – adjust based on your heat preference
- 1 tbsp lime zest – for that fresh, citrusy punch
- 2 tsp garlic powder – or minced fresh garlic for more intensity
- 1 tsp salt – fine sea salt dissolves evenly
- 1 tsp black pepper – freshly ground tastes best
- 1 tbsp olive oil – or any neutral oil, to help the rub adhere
Instructions
- Preheat your grill to 350°F, aiming for indirect heat to cook the chicken evenly without charring.
- In a small bowl, mix together the chili powder, lime zest, garlic powder, salt, and black pepper to create your rub.
- Rub the olive oil all over the chicken, then evenly coat it with the spice mixture, including under the skin for maximum flavor.
- Open the beer can, drink or pour out half, and carefully place the chicken onto the can so it stands upright.
- Place the chicken on the grill, using the beer can as a stand, and close the lid. Cook for about 1 to 1.5 hours, or until the internal temperature reaches 165°F at the thigh.
- Let the chicken rest for 10 minutes before carefully removing the beer can and carving. Tip: Use tongs to hold the can while removing to avoid burns.
Kick back and enjoy the juicy, flavor-packed chicken with a side of grilled veggies or atop a fresh salad. The skin is irresistibly crispy, while the meat stays tender and moist, infused with the tangy, spicy rub. It’s a showstopper that’s surprisingly simple to pull off.
Herb Crusted Beer Can Chicken
Unbelievably juicy and packed with flavor, this Herb Crusted Beer Can Chicken has become my go-to for weekend barbecues. There’s something about the combination of herbs and beer that transforms the chicken into a masterpiece of tenderness and taste.
Ingredients
- 1 whole chicken (about 4-5 lbs)
- 2 tbsp olive oil (or any neutral oil)
- 1 tbsp salt (adjust to taste)
- 1 tbsp black pepper
- 1 tbsp garlic powder
- 1 tbsp onion powder
- 1 tbsp dried thyme
- 1 tbsp dried rosemary
- 1 tbsp dried sage
- 1 can of beer (12 oz, any brand you like)
Instructions
- Preheat your grill to 350°F, aiming for indirect heat.
- In a small bowl, mix together olive oil, salt, black pepper, garlic powder, onion powder, thyme, rosemary, and sage to create a herb rub.
- Pat the chicken dry with paper towels to ensure the herb rub sticks well.
- Generously apply the herb rub all over the chicken, including under the skin for extra flavor.
- Open the beer can and pour out about a quarter of it to prevent overflow. Place the can on a flat surface.
- Carefully lower the chicken onto the beer can so the can is inside the cavity and the chicken stands upright.
- Place the chicken on the grill over indirect heat, using the legs and can as a tripod to keep it stable.
- Cover the grill and cook for about 1 hour and 15 minutes, or until the internal temperature reaches 165°F at the thickest part of the thigh.
- Let the chicken rest for 10 minutes before carefully removing the beer can and carving.
Absolutely divine, the skin turns out crispy and golden, while the meat inside is impossibly moist, thanks to the beer steaming it from within. Serve it with a side of grilled vegetables or over a bed of wild rice for a meal that’s as beautiful as it is delicious.
Asian Inspired Beer Can Chicken

Just when I thought I couldn’t love chicken more, I stumbled upon the magic of beer can chicken. It’s a game-changer, folks, especially with an Asian twist that brings out flavors you didn’t know your taste buds were missing. Here’s how I make mine, with a little story behind each step.
Ingredients
- 1 whole chicken (about 4 lbs) – pat dry for crispy skin
- 1 can (12 oz) of light beer – or your favorite brew
- 1/4 cup soy sauce – low sodium works too
- 2 tbsp honey – for that perfect glaze
- 1 tbsp sesame oil – or any neutral oil
- 2 cloves garlic, minced – fresh is best
- 1 tbsp ginger, grated – adjust to taste
- 1/2 tsp red pepper flakes – for a slight kick
Instructions
- Preheat your grill or oven to 375°F, aiming for indirect heat if grilling.
- In a bowl, mix soy sauce, honey, sesame oil, garlic, ginger, and red pepper flakes to create the marinade. Tip: Let it sit for 10 minutes to meld flavors.
- Rub half of the marinade inside the chicken cavity and the rest all over the outside. Tip: Don’t forget under the wings and legs!
- Open the beer can, drink or pour out half, and place the chicken upright onto the can. Tip: The beer steams from inside, keeping the chicken moist.
- Place the chicken on the grill or in a roasting pan in the oven. Cook for about 1 hour 15 minutes, or until the internal temperature reaches 165°F at the thigh.
- Let the chicken rest for 10 minutes before carving. Tip: This keeps the juices from running out.
Unbelievable how juicy and flavorful this chicken turns out, with a crispy skin that’s to die for. Serve it over a bed of jasmine rice to soak up all those delicious juices, or shred it for an epic sandwich filling.
Jerk Style Beer Can Chicken
Believe it or not, the first time I tried making Jerk Style Beer Can Chicken, I was skeptical about the beer part. But let me tell you, the magic it works on the chicken is unparalleled, infusing it with moisture and a subtle hoppy flavor that’s just divine.
Ingredients
- 1 whole chicken (about 4 lbs) – pat dry for better seasoning adherence
- 1 can (12 oz) of your favorite beer – lighter beers work best
- 2 tbsp jerk seasoning – adjust to taste
- 1 tbsp olive oil – or any neutral oil
- 1 lime, halved – for a citrusy zing
Instructions
- Preheat your grill to 350°F, aiming for indirect heat.
- Rub the chicken all over with olive oil, then generously coat with jerk seasoning, including under the skin for maximum flavor.
- Open the beer can, pour out (or drink) about half, then place the can on a stable surface.
- Carefully lower the chicken onto the beer can so it stands upright, using the legs as a tripod for stability.
- Place the chicken on the grill, close the lid, and cook for about 1 hour and 15 minutes, or until the internal temperature reaches 165°F at the thigh.
- Squeeze lime halves over the chicken during the last 10 minutes of cooking for an extra flavor boost.
- Let the chicken rest for 10 minutes before carefully removing the beer can and carving.
Resulting in a juicy, flavorful chicken with a crispy skin that’s packed with spicy, smoky, and slightly sweet notes. Serve it with a side of grilled pineapple for a tropical twist that complements the jerk seasoning beautifully.
Teriyaki Beer Can Chicken
Nothing beats the joy of discovering a recipe that’s both fun to make and a total crowd-pleaser. That’s exactly how I felt when I first tried my hand at Teriyaki Beer Can Chicken—a dish that combines the smoky goodness of grilled chicken with the sweet and savory flavors of teriyaki. It’s become a staple in my summer BBQ lineup, and I’m excited to share how you can bring this deliciousness to your table.
Ingredients
- 1 whole chicken (about 4-5 lbs), pat dry
- 1 can of beer (12 oz), half-full (use your favorite brand)
- 1 cup teriyaki sauce (homemade or store-bought, but look for a thick, glossy sauce)
- 2 tbsp vegetable oil (or any neutral oil)
- 1 tbsp garlic powder (adjust to taste)
- 1 tbsp onion powder (adjust to taste)
- 1 tsp black pepper (freshly ground preferred)
Instructions
- Preheat your grill to medium heat, aiming for a steady 350°F. This ensures even cooking without charring the skin too quickly.
- In a small bowl, mix the vegetable oil, garlic powder, onion powder, and black pepper. Rub this mixture all over the chicken, including under the skin for maximum flavor.
- Open the beer can and pour out half of it. Pour 1/2 cup of teriyaki sauce into the beer can. This will infuse the chicken with flavor from the inside out as it cooks.
- Carefully place the chicken over the beer can so it stands upright. The legs and can should form a stable tripod.
- Place the chicken on the grill, close the lid, and cook for about 1 to 1.5 hours, or until the internal temperature reaches 165°F at the thickest part of the thigh.
- During the last 10 minutes of cooking, brush the remaining teriyaki sauce over the chicken to create a sticky, caramelized glaze.
- Remove the chicken from the grill (be careful with the hot beer can) and let it rest for 10 minutes before carving. This allows the juices to redistribute, ensuring moist meat.
My favorite part about this dish is how the teriyaki glaze caramelizes on the grill, giving the chicken a slightly crispy exterior while keeping the inside incredibly juicy. Serve it with a side of grilled vegetables or over a bed of steamed rice to soak up all that delicious teriyaki goodness.
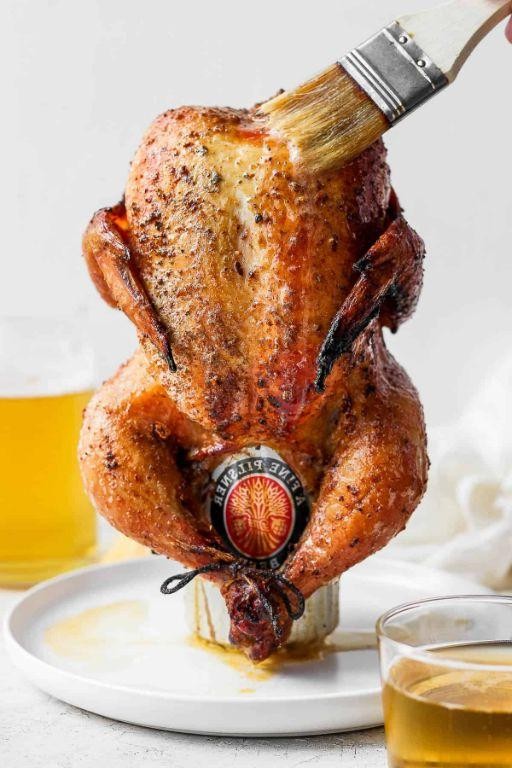
Buffalo Style Beer Can Chicken

Growing up, Sundays were all about family dinners, and nothing brought everyone to the table faster than the aroma of a perfectly roasted chicken. That’s why I’m thrilled to share my twist on a classic: Buffalo Style Beer Can Chicken. It’s a fun, flavorful spin that’s sure to spice up your dinner routine.
Ingredients
- 1 whole chicken (about 4 lbs) – pat dry for crispy skin
- 1 can of beer (12 oz) – choose a light lager for subtle flavor
- 1/2 cup buffalo sauce – adjust heat to your preference
- 2 tbsp unsalted butter, melted – for a richer glaze
- 1 tbsp garlic powder – for a punch of flavor
- 1 tsp smoked paprika – adds depth
- Salt and pepper – season generously
Instructions
- Preheat your grill to 375°F, aiming for indirect heat.
- In a small bowl, mix buffalo sauce, melted butter, garlic powder, smoked paprika, salt, and pepper to create the glaze.
- Open the beer can, drink or discard half, then place the can on a stable surface.
- Carefully lower the chicken onto the beer can so it stands upright, legs down.
- Brush the chicken generously with the buffalo glaze, covering all sides.
- Place the chicken on the grill, using the legs and can as a tripod for stability.
- Close the grill lid and cook for about 1 hour 15 minutes, or until the internal temperature reaches 165°F at the thigh.
- Every 20 minutes, baste the chicken with more glaze to build flavor.
- Once done, carefully remove the chicken from the grill, letting it rest for 10 minutes before carving.
The result? A chicken with irresistibly crispy skin, juicy meat, and a bold buffalo kick that’s not overpowering. Serve it with a side of cool ranch dressing and celery sticks for the ultimate game-day feast.
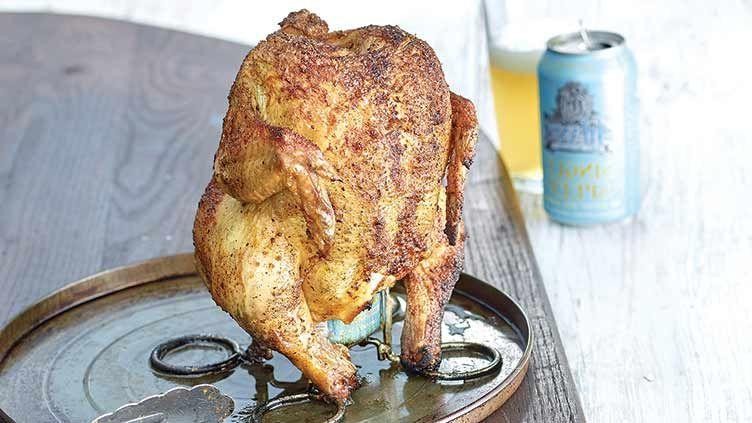
Rosemary and Thyme Beer Can Chicken
Remember the first time I tried beer can chicken? It was at a summer BBQ, and the aroma of herbs and beer had me hooked. Now, it’s my go-to for impressing guests with minimal fuss.
Ingredients
- 1 whole chicken (4-5 lbs), patted dry
- 2 tbsp olive oil (or any neutral oil)
- 1 tbsp kosher salt
- 1 tbsp black pepper, freshly ground
- 1 tbsp garlic powder
- 1 tbsp onion powder
- 1 tsp smoked paprika
- 1/2 cup fresh rosemary, chopped (or 2 tbsp dried)
- 1/2 cup fresh thyme, chopped (or 2 tbsp dried)
- 1 can (12 oz) beer (lager or ale works best)
Instructions
- Preheat your grill to 375°F, aiming for indirect heat by turning off burners on one side or piling coals to one side.
- In a small bowl, mix olive oil, salt, pepper, garlic powder, onion powder, and smoked paprika to create a rub.
- Generously coat the chicken with the rub, ensuring to get under the skin for maximum flavor.
- Open the beer can, pour out (or drink) about half, then add half of the rosemary and thyme directly into the can.
- Place the chicken over the beer can, inserting it into the cavity until the chicken stands upright.
- Carefully transfer the chicken on the can to the grill’s indirect heat side, using the legs as a tripod for stability.
- Close the grill and cook for about 1 hour 15 minutes, or until the internal temperature reaches 165°F at the thigh.
- Let the chicken rest for 10 minutes before carefully removing the beer can and carving.
Great for a weekend feast, this chicken turns out juicy with a crispy skin, infused with the earthy tones of rosemary and thyme. Serve it atop a platter of roasted veggies or shred for tacos with a squeeze of lime.
Pesto Beer Can Chicken
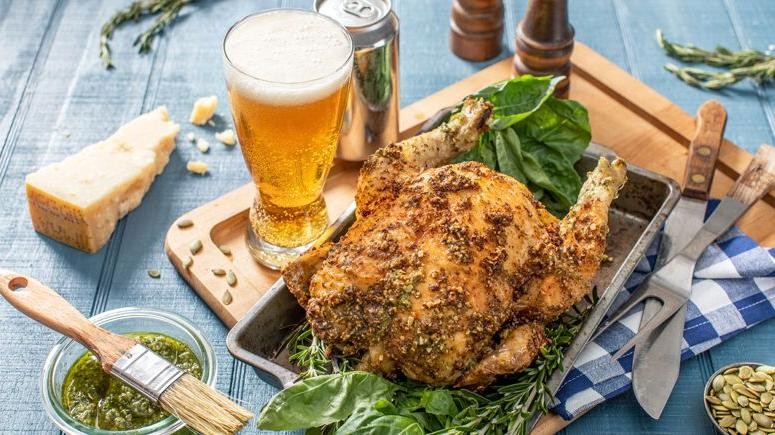
Nothing beats the aroma of a chicken roasting with pesto and beer filling the kitchen. It’s a dish that reminds me of summer barbecues and the joy of sharing meals with friends. Today, I’m excited to share my take on Pesto Beer Can Chicken, a recipe that’s as fun to make as it is delicious to eat.
Ingredients
- 1 whole chicken (about 4-5 lbs)
- 1/2 cup basil pesto (homemade or store-bought)
- 1 can (12 oz) of your favorite beer (half for the chicken, half for the chef)
- 1 tbsp olive oil (or any neutral oil)
- 1 tsp salt (adjust to taste)
- 1/2 tsp black pepper (freshly ground preferred)
- 2 cloves garlic, minced (for extra flavor)
Instructions
- Preheat your grill or oven to 375°F. If using a grill, set it up for indirect heat.
- Pat the chicken dry with paper towels. This helps the skin get crispy.
- Rub the chicken inside and out with olive oil, then season with salt and pepper.
- Coat the chicken evenly with pesto, including under the skin for maximum flavor.
- Open the beer can and pour out half (or drink it). Place the can on a stable surface.
- Carefully lower the chicken onto the beer can so it stands upright. The legs and can should form a tripod.
- Place the chicken on the grill or in the oven. Cook for about 1 hour and 15 minutes, or until the internal temperature reaches 165°F at the thigh.
- Let the chicken rest for 10 minutes before carving. This keeps the juices inside.
Absolutely juicy and flavorful, this Pesto Beer Can Chicken is a showstopper. The skin is crispy, the meat is tender, and the pesto adds a herby brightness that’s irresistible. Serve it with a side of grilled vegetables or a fresh salad for a complete meal that’s sure to impress.
Curry Spiced Beer Can Chicken
Last summer, I stumbled upon the magic of beer can chicken during a backyard BBQ, and it’s been a game-changer for my weeknight dinners ever since. The curry spice rub adds an irresistible depth of flavor that’ll have everyone asking for seconds.
Ingredients
- 1 whole chicken (about 4 lbs) – pat dry for crispier skin
- 2 tbsp curry powder – for a warm, aromatic kick
- 1 tbsp brown sugar – balances the spice with a hint of sweetness
- 1 tsp salt – enhances all the flavors
- 1/2 tsp black pepper – adjust to your heat preference
- 1 can (12 oz) of beer – half full, any light beer works great
- 1 tbsp olive oil – or any neutral oil, to help the rub adhere
Instructions
- Preheat your grill to 350°F, aiming for indirect heat by turning off the burners on one side or piling coals to one side.
- In a small bowl, mix together the curry powder, brown sugar, salt, and black pepper to create your spice rub.
- Rub the chicken all over with olive oil, then generously coat it with the spice mixture, including under the skin for maximum flavor.
- Open the beer can, pour out half (or drink it!), and carefully place the chicken onto the can so it stands upright.
- Place the chicken on the grill over indirect heat, cover, and cook for about 1 hour and 15 minutes, or until the internal temperature reaches 165°F at the thigh.
- Let the chicken rest for 10 minutes before carefully removing the beer can and carving.
Curry spiced beer can chicken comes out incredibly juicy with a crispy, flavorful skin that’s packed with warmth from the curry. Serve it alongside a cool cucumber salad to balance the spices, or shred the leftovers for an epic curry chicken sandwich the next day.
Orange Ginger Beer Can Chicken
Kicking off the grill season with a recipe that’s as fun to make as it is to eat, I stumbled upon this Orange Ginger Beer Can Chicken during a backyard experiment last summer. It’s become a staple for its juicy interior and crispy skin, with a citrusy ginger kick that’s unexpectedly delightful.
Ingredients
- 1 whole chicken (about 4 lbs)
- 1 can (12 oz) ginger beer (not diet, for better caramelization)
- 2 tbsp olive oil (or any neutral oil)
- 1 tbsp orange zest (freshly grated for the best flavor)
- 1 tsp salt (adjust to taste)
- 1/2 tsp black pepper (freshly ground)
- 1 tsp garlic powder
- 1 tsp onion powder
- 1/2 tsp smoked paprika (for a subtle depth)
Instructions
- Preheat your grill to 350°F, aiming for indirect heat by turning off burners on one side or piling coals to one side.
- In a small bowl, mix olive oil, orange zest, salt, pepper, garlic powder, onion powder, and smoked paprika to create a rub.
- Pat the chicken dry with paper towels, then evenly coat it with the rub, including under the skin for maximum flavor.
- Open the ginger beer can and pour out about half (you can drink it or save for later). Carefully place the chicken over the can so it stands upright.
- Place the chicken on the grill’s indirect heat side, cover, and cook for about 1 hour 15 minutes, or until the internal temperature reaches 165°F at the thigh.
- Let the chicken rest for 10 minutes before carefully removing the can and carving.
Not only does this chicken come out incredibly moist, but the orange and ginger flavors meld beautifully, creating a dish that’s both refreshing and deeply savory. Try serving it with a side of grilled vegetables or over a bed of citrusy quinoa for a complete meal.
Tandoori Style Beer Can Chicken

Growing up, the aroma of spices wafting through the kitchen was my cue that something delicious was about to be served. This Tandoori Style Beer Can Chicken recipe is my twist on a classic, combining the bold flavors of tandoori with the juiciness of beer can chicken. It’s a dish that never fails to impress at backyard gatherings, and today, I’m sharing my secrets to getting it just right.
Ingredients
- 1 whole chicken (about 4-5 lbs) – pat dry for better spice adherence
- 1 can of beer (12 oz) – room temperature, half of it used for the marinade
- 1 cup plain yogurt – Greek yogurt works best for thickness
- 2 tbsp tandoori masala – adjust to taste for heat
- 1 tbsp lemon juice – fresh squeezed for brightness
- 2 garlic cloves, minced – or 1 tsp garlic powder
- 1 tbsp ginger paste – or freshly grated ginger
- 1 tbsp vegetable oil – or any neutral oil
- 1 tsp salt – adjust to taste
Instructions
- In a large bowl, mix yogurt, tandoori masala, lemon juice, garlic, ginger, oil, and salt to create the marinade.
- Using your hands, rub the marinade all over the chicken, including under the skin. Let it marinate in the fridge for at least 4 hours, or overnight for deeper flavor.
- Preheat your grill to 350°F, setting it up for indirect heat. If using a charcoal grill, pile the coals on one side.
- Open the beer can and pour out half. Place the can on the grill’s indirect heat side and carefully lower the chicken onto the can so it stands upright.
- Close the grill and cook for about 1.5 hours, or until the internal temperature reaches 165°F at the thigh.
- Let the chicken rest for 10 minutes before carefully removing it from the beer can and carving.
Nothing beats the smoky, spicy crust giving way to the tender, beer-infused meat underneath. Serve it with a side of cooling cucumber raita and warm naan for a meal that’s as vibrant in flavor as it is in color.
Sriracha Honey Beer Can Chicken
Nothing brings back memories of summer barbecues quite like the smell of chicken roasting on the grill. This Sriracha Honey Beer Can Chicken recipe is a game-changer, combining the sweet heat of sriracha and honey with the deep flavors from the beer. It’s a dish that’s sure to impress at your next cookout, and trust me, it’s easier to make than you might think.
Ingredients
- 1 whole chicken (about 4-5 lbs)
- 1 can of beer (12 oz, any light beer works well)
- 1/4 cup honey
- 2 tbsp Sriracha sauce (adjust to taste)
- 1 tbsp olive oil (or any neutral oil)
- 1 tsp garlic powder
- 1 tsp smoked paprika
- Salt and pepper to taste
Instructions
- Preheat your grill to 350°F, aiming for indirect heat.
- In a small bowl, mix together honey, Sriracha, olive oil, garlic powder, smoked paprika, salt, and pepper to create the glaze.
- Open the beer can and pour out about half of it. This prevents overflow when the chicken is placed on it.
- Pat the chicken dry with paper towels, then rub the outside with the prepared glaze, making sure to get under the skin where possible.
- Place the chicken upright onto the beer can, ensuring it’s stable. The beer can should go into the cavity of the chicken.
- Carefully place the chicken on the grill over indirect heat. Close the lid and cook for about 1 hour and 15 minutes, or until the internal temperature reaches 165°F at the thickest part of the thigh.
- Every 20 minutes, baste the chicken with any remaining glaze to build up a sticky, flavorful crust.
- Once cooked, carefully remove the chicken from the grill and let it rest for 10 minutes before carving. Tip: Use tongs to hold the beer can while removing the chicken to avoid burns.
Let me tell you, the first bite of this chicken is a revelation—juicy, with a perfect balance of sweet and spicy, and a smoky depth from the grill. Serve it with a side of grilled vegetables or a fresh salad to round out the meal. And don’t forget to save some of that delicious glaze for dipping!
Balsamic Glazed Beer Can Chicken
Venturing into the world of beer can chicken, I stumbled upon a game-changer: the balsamic glaze. It’s not just about the beer anymore; it’s about that sweet, tangy crust that makes every bite unforgettable. Here’s how I make mine, with a few personal twists along the way.
Ingredients
- 1 whole chicken (about 4-5 lbs) – pat dry for better skin
- 1 can of beer (12 oz) – light lagers work best
- 1/2 cup balsamic vinegar – aged for depth of flavor
- 1/4 cup honey – or maple syrup for a different sweetness
- 2 tbsp olive oil – or any neutral oil
- 1 tsp garlic powder – adjust to taste
- 1 tsp smoked paprika – for a hint of smokiness
- Salt and pepper – to season generously
Instructions
- Preheat your grill or oven to 375°F, aiming for indirect heat if grilling.
- In a small saucepan, combine balsamic vinegar and honey. Simmer over medium heat for 5-7 minutes until slightly thickened, then set aside. Tip: Stir occasionally to prevent burning.
- Season the chicken inside and out with salt, pepper, garlic powder, and smoked paprika. Rub olive oil all over the skin for crispiness.
- Open the beer can, drink or discard half, and place the chicken onto the can so it stands upright. Tip: The beer steams the chicken from inside, keeping it moist.
- Place the chicken on the grill or in the oven, balancing carefully. Cook for about 1 hour 15 minutes, basting with the balsamic glaze every 20 minutes after the first 30 minutes. Tip: Use a meat thermometer to check for an internal temperature of 165°F in the thickest part.
- Let the chicken rest for 10 minutes before carefully removing the beer can and carving. The glaze will have formed a sticky, flavorful crust.
Every bite of this chicken is a perfect balance of juicy meat and crispy, glazed skin. Serve it with a side of grilled vegetables or over a bed of arugula for a meal that’s as beautiful as it is delicious.
Conclusion
Hearty and full of flavor, our roundup of 21 Spicy Beer Can Chicken Recipes is your ticket to grilling greatness. Whether you’re a seasoned pro or just starting out, there’s a recipe here to spice up your next barbecue. Don’t forget to leave a comment with your favorite, and share the love by pinning this article on Pinterest. Happy grilling!