There’s something irresistibly comforting about the rich, nutty flavor of Dubliner cheese that can elevate any dish from good to unforgettable. Whether you’re whipping up a quick weeknight dinner, indulging in some cozy comfort food, or looking for that perfect cheese to star in your seasonal favorites, we’ve got you covered. Dive into our roundup of 25 delicious Dubliner cheese recipes that will make any cheese lover’s heart sing.
Dubliner Cheese and Apple Grilled Sandwich
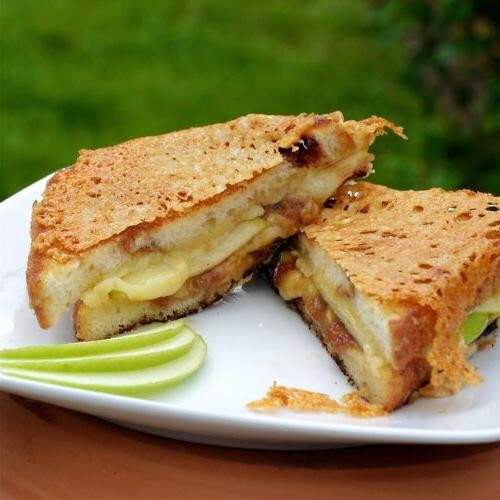
After a recent trip to Ireland, I fell in love with Dubliner cheese and have been experimenting with it in my kitchen ever since. This Dubliner Cheese and Apple Grilled Sandwich is my latest creation, combining the sharpness of the cheese with the sweetness of apples for a perfect balance. It’s become my go-to lunch on busy days.
Ingredients
- 2 slices of your favorite bread (I love a good sourdough for this)
- A handful of Dubliner cheese, grated (about 1/2 cup)
- 1/2 an apple, thinly sliced (I prefer Honeycrisp for their sweetness and crunch)
- A couple of tablespoons of butter, softened
- A splash of honey (optional, but it adds a lovely sweetness)
Instructions
- Start by grating your Dubliner cheese and slicing your apple thinly. This ensures every bite has the perfect mix of flavors.
- Butter one side of each bread slice. This will give your sandwich that golden, crispy exterior we all love.
- Place one slice of bread, buttered side down, in a cold skillet. Top with the grated Dubliner cheese, then the apple slices. If you’re using honey, drizzle it over the apples now.
- Cover with the second slice of bread, buttered side up. Turn the heat to medium-low. Cooking it slowly ensures the cheese melts perfectly without burning the bread.
- Cook for about 3-4 minutes on each side, or until the bread is golden brown and the cheese is melted. Press down gently with a spatula to help everything stick together.
- Let the sandwich sit for a minute before cutting. This allows the cheese to set slightly, making it easier to handle.
The combination of the crispy bread, melted Dubliner cheese, and sweet, crunchy apples is absolutely divine. Sometimes, I like to add a sprinkle of cinnamon on top for an extra flavor boost. It’s a simple sandwich that feels anything but ordinary.
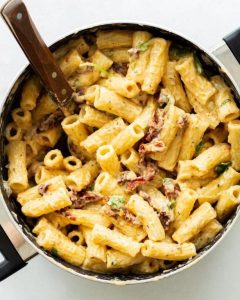
Creamy Dubliner Cheese Pasta
Just last week, I found myself staring into my fridge, pondering what to make for dinner when my eyes landed on a block of Dubliner cheese. That’s when inspiration struck—why not turn this into a creamy, dreamy pasta dish? It’s become my go-to comfort food, especially on those nights when I crave something rich and satisfying without spending hours in the kitchen.
Ingredients
- 8 oz of your favorite pasta (I’m partial to fusilli for its twisty shape)
- A generous cup of shredded Dubliner cheese
- A couple of tablespoons of butter
- A splash of heavy cream
- A pinch of salt and freshly ground black pepper
- A small handful of chopped parsley for garnish
Instructions
- Bring a large pot of salted water to a boil over high heat. Tip: Salting the water is your only chance to season the pasta itself, so don’t be shy!
- Add the pasta and cook according to package instructions until al dente, about 8-10 minutes. Tip: Always reserve a cup of pasta water before draining; it’s gold for adjusting sauce consistency.
- While the pasta cooks, melt the butter in a large skillet over medium heat. Stir in the heavy cream and let it warm through, about 2 minutes.
- Reduce the heat to low and gradually add the shredded Dubliner cheese, stirring constantly until melted and smooth. Tip: Adding the cheese slowly prevents clumping.
- Drain the pasta and add it directly to the skillet with the cheese sauce. Toss to coat, adding a splash of reserved pasta water if needed to loosen the sauce.
- Season with salt and pepper to taste, then garnish with chopped parsley before serving.
The result is a luxuriously creamy pasta with the distinct, nutty flavor of Dubliner cheese shining through. I love serving it with a crisp green salad to cut through the richness, or for an extra indulgent twist, top it with crispy bacon bits.
Dubliner Cheese and Potato Gratin
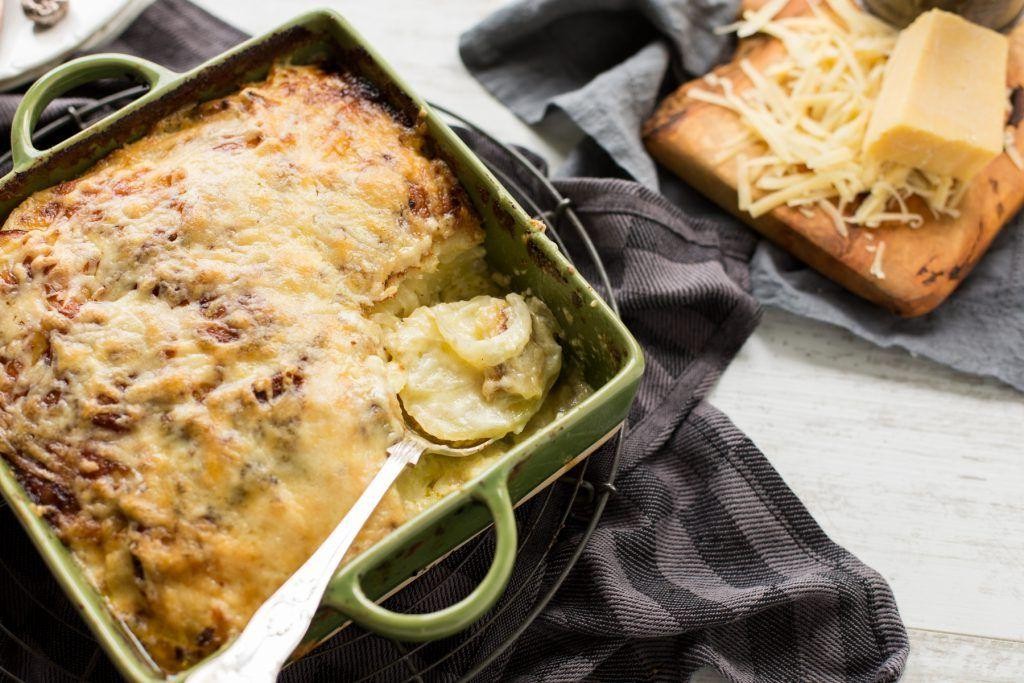
Every time I think about comfort food, my mind immediately goes to this Dubliner Cheese and Potato Gratin. It’s the kind of dish that fills your kitchen with an irresistible aroma, promising a creamy, cheesy delight that’s perfect for any day of the week.
Ingredients
- 2 large russet potatoes, thinly sliced (about 1/8 inch thick)
- 1 cup of grated Dubliner cheese
- 1/2 cup of heavy cream
- A splash of whole milk
- A couple of garlic cloves, minced
- 1 tbsp of butter, for greasing
- A pinch of salt and freshly ground black pepper
Instructions
- Preheat your oven to 375°F (190°C) and lightly grease a baking dish with the butter.
- In a small bowl, mix the heavy cream, a splash of milk, minced garlic, salt, and pepper. This is your creamy mixture that’ll make the gratin irresistibly rich.
- Layer half of the potato slices at the bottom of the greased dish, slightly overlapping them. Pour half of the creamy mixture over the potatoes, then sprinkle half of the grated Dubliner cheese on top.
- Repeat the layering with the remaining potatoes, creamy mixture, and cheese. Tip: Press down gently on the top layer to ensure everything is compact and will cook evenly.
- Cover the dish with aluminum foil and bake for 45 minutes. Then, remove the foil and bake for another 15 minutes or until the top is golden and bubbly. Tip: Letting it sit for 5 minutes before serving makes it easier to slice.
- For an extra crispy top, broil for the last 2-3 minutes, but keep an eye on it to prevent burning. Tip: The gratin is done when a knife easily slides through the potatoes.
Here’s how it turns out: the top is golden and crispy, while the inside is creamy and packed with the nutty flavor of Dubliner cheese. Serve it alongside a simple green salad to cut through the richness, or enjoy it as is for the ultimate comfort food experience.
Savory Dubliner Cheese Scones

Dublin might be thousands of miles away, but these Savory Dubliner Cheese Scones bring a taste of Ireland right to your kitchen. I stumbled upon this recipe during a chilly morning when I was craving something warm, cheesy, and utterly comforting. It’s become my go-to for lazy weekends or when I need to impress last-minute guests.
Ingredients
- 2 cups of all-purpose flour
- 1 tablespoon of baking powder
- A pinch of salt
- 1/2 cup of cold butter, cubed
- 1 cup of grated Dubliner cheese
- A splash of milk
- 1 egg, beaten
Instructions
- Preheat your oven to 400°F (200°C) and line a baking sheet with parchment paper.
- In a large bowl, whisk together the flour, baking powder, and salt.
- Add the cold butter cubes to the flour mixture. Use your fingers to rub the butter into the flour until it resembles coarse crumbs. Tip: Keep the butter cold for flakier scones.
- Stir in the grated Dubliner cheese until evenly distributed.
- Make a well in the center and pour in the beaten egg and a splash of milk. Mix until just combined. Tip: Don’t overmix to keep the scones tender.
- Turn the dough onto a floured surface and gently pat it into a 1-inch thick circle.
- Cut into 8 wedges and place them on the prepared baking sheet. Brush the tops with a little milk for a golden finish.
- Bake for 15-20 minutes, or until the scones are golden and risen. Tip: Check at 15 minutes to prevent overbaking.
Out of the oven, these scones are irresistibly golden with a crisp exterior that gives way to a soft, cheesy interior. Serve them warm with a dollop of butter or alongside a hearty soup for a satisfying meal. The sharpness of the Dubliner cheese really shines through, making each bite a delightful experience.
Dubliner Cheese and Caramelized Onion Tart
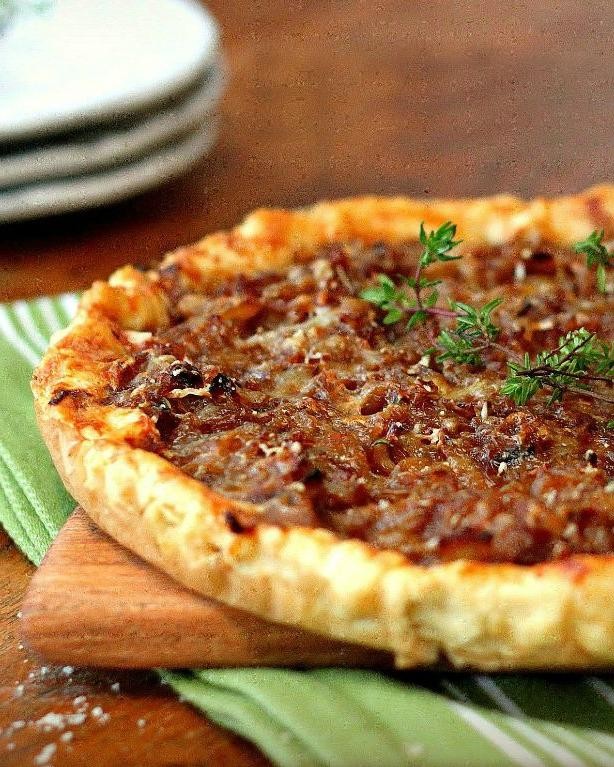
How many times have I found myself staring into the fridge, looking for something that’s both comforting and a little fancy? That’s how this Dubliner Cheese and Caramelized Onion Tart came to be—a perfect blend of rich, nutty cheese and sweet, slow-cooked onions on a buttery crust. It’s my go-to when I want to impress without the stress.
Ingredients
- 1 1/4 cups all-purpose flour, plus a little extra for dusting
- A pinch of salt
- 1/2 cup unsalted butter, cold and cubed
- 3-4 tbsp ice water
- 2 large onions, thinly sliced
- A splash of olive oil
- A couple of sprigs of thyme
- 1 tbsp balsamic vinegar
- 1 cup grated Dubliner cheese
- 2 eggs
- 1/2 cup heavy cream
Instructions
- Start by making the crust: mix flour and salt in a bowl. Add butter, rubbing it in until the mix resembles coarse crumbs.
- Gradually add ice water, a tbsp at a time, until the dough comes together. Tip: Don’t overwork it, or the crust will be tough.
- Flatten the dough into a disk, wrap in plastic, and chill for at least 30 minutes. This rest prevents shrinking during baking.
- While the dough chills, heat olive oil in a pan over medium-low. Add onions and thyme, cooking slowly until golden and sweet, about 25 minutes. Stir in balsamic vinegar at the end for depth.
- Preheat your oven to 375°F. Roll out the dough on a floured surface, then fit it into a tart pan. Trim edges, prick the base with a fork, and blind bake for 15 minutes.
- Whisk together eggs and cream, then stir in the cheese. Spread caramelized onions over the pre-baked crust, pour over the egg mixture, and bake for 25-30 minutes until set and golden.
- Let the tart cool slightly before slicing. The contrast between the crispy crust, creamy filling, and sweet onions is unreal. Try serving it with a simple arugula salad for a meal that feels both rustic and refined.
Rich Dubliner Cheese Fondue
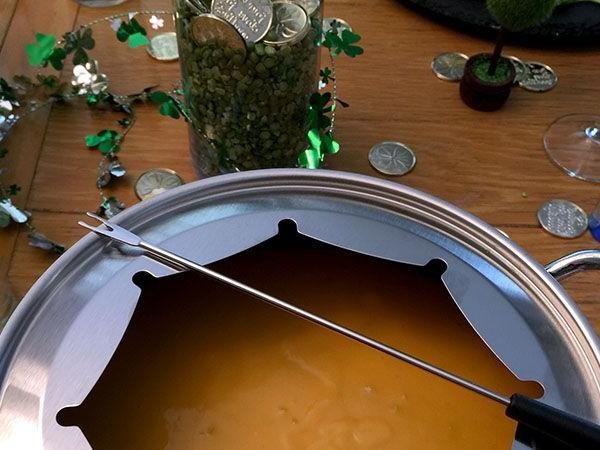
Perfect for those cozy nights in, I stumbled upon this Rich Dubliner Cheese Fondue recipe during a chilly evening when all I craved was something warm, cheesy, and utterly comforting. It’s become my go-to for impressing guests or treating myself to a little luxury at home.
Ingredients
- 1 cup of grated Dubliner cheese (trust me, the sharper the better)
- 1/2 cup of heavy cream (because why not go all out?)
- A splash of white wine (a dry one works wonders here)
- A couple of garlic cloves, minced (for that kick)
- 1 tbsp of butter (the unsalted kind, please)
- A pinch of nutmeg (it’s the secret weapon)
Instructions
- Grab a medium saucepan and melt the butter over low heat. Toss in the minced garlic and sauté for about a minute until it’s fragrant but not browned.
- Pour in the heavy cream and let it warm up for a couple of minutes. You’re looking for it to be just hot enough to steam a bit.
- Gradually add the grated Dubliner cheese, stirring constantly. The key here is patience; let each handful melt before adding the next to avoid clumping.
- Once all the cheese is melted and the mixture is smooth, add that splash of white wine and the pinch of nutmeg. Keep stirring for another minute until everything is beautifully combined.
- Tip: If the fondue seems too thick, a little more cream can loosen it up. Too thin? A bit more cheese will do the trick.
- Serve immediately with your choice of dippers. I love crusty bread, but steamed veggies or apple slices are fantastic too.
Out of this world, this fondue is creamy with a slight tang from the Dubliner cheese, and that hint of nutmeg? Absolute perfection. Try drizzling it over roasted potatoes for a decadent twist.
Dubliner Cheese and Bacon Stuffed Mushrooms

Goodness, do I have a treat for you today! These Dubliner Cheese and Bacon Stuffed Mushrooms are the perfect blend of savory and creamy, with a little crunch from the bacon. I stumbled upon this recipe during a cozy winter evening when I was craving something rich yet easy to whip up.
Ingredients
- 12 large white mushrooms, stems removed
- A couple of slices of bacon, cooked crispy and crumbled
- 1 cup of shredded Dubliner cheese
- A splash of olive oil
- 1/4 cup of breadcrumbs
- 2 tbsp of finely chopped parsley
- A pinch of salt and pepper
Instructions
- Preheat your oven to 375°F (190°C) and lightly grease a baking sheet with a splash of olive oil.
- Place the mushroom caps on the baking sheet, open side up. Tip: A little space between them ensures even cooking.
- In a bowl, mix the crumbled bacon, shredded Dubliner cheese, breadcrumbs, parsley, and a pinch of salt and pepper.
- Spoon the mixture into each mushroom cap, pressing down lightly to pack it in. Tip: Overfilling is okay—the more, the merrier!
- Bake for 20 minutes, or until the cheese is bubbly and golden. Tip: Keep an eye on them after 15 minutes to prevent burning.
- Let them cool for a couple of minutes before serving. They’re piping hot!
Zesty and rich, these stuffed mushrooms are a crowd-pleaser with their gooey cheese center and crispy bacon topping. Serve them as an appetizer at your next gathering, or enjoy them as a decadent snack—either way, they’re sure to disappear fast!
Golden Dubliner Cheese and Beer Soup
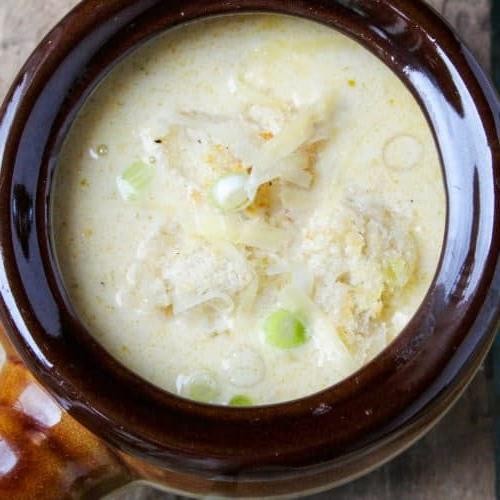
After a long day of exploring the bustling streets of Dublin, I stumbled into a cozy pub where the aroma of cheese and beer soup filled the air. It was love at first spoonful, and I knew I had to recreate this comforting dish at home. Here’s my take on the Golden Dubliner Cheese and Beer Soup, a recipe that’s become a staple in my kitchen during the chilly months.
Ingredients
- 4 tablespoons of unsalted butter
- 1 large onion, diced
- 2 cloves of garlic, minced
- 1/3 cup of all-purpose flour
- 2 cups of chicken broth
- 1 cup of your favorite stout beer (a generous pour)
- 2 cups of heavy cream
- 2 cups of shredded Golden Dubliner cheese
- A pinch of salt and pepper
- A handful of fresh chives, chopped for garnish
Instructions
- Melt the butter in a large pot over medium heat. Tip: Keep the heat medium to avoid browning the butter too quickly.
- Add the diced onion and minced garlic, sautéing until they’re soft and translucent, about 5 minutes.
- Sprinkle in the flour, stirring constantly to create a roux. Cook for 2 minutes to get rid of the raw flour taste.
- Slowly whisk in the chicken broth and beer, ensuring there are no lumps. Tip: Pour the liquids in gradually for a smoother soup.
- Bring the mixture to a simmer, then reduce the heat to low. Let it cook for 10 minutes, stirring occasionally.
- Stir in the heavy cream and shredded cheese until the cheese is fully melted and the soup is smooth. Tip: Add the cheese off the heat to prevent it from becoming grainy.
- Season with a pinch of salt and pepper to taste.
- Garnish with chopped chives before serving.
Ladle this rich and velvety soup into bowls and serve with crusty bread for dipping. The combination of Golden Dubliner cheese and stout beer creates a depth of flavor that’s both bold and comforting. For an extra touch, top with crispy bacon bits or a drizzle of honey to contrast the soup’s richness.
Dubliner Cheese and Spinach Stuffed Chicken
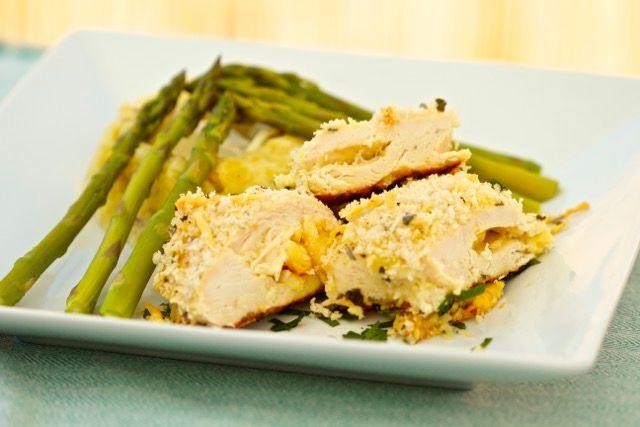
Every now and then, I stumble upon a recipe that feels like it was made just for my kitchen adventures, and this Dubliner Cheese and Spinach Stuffed Chicken is one of those gems. It’s a dish that brings a little elegance to the dinner table without requiring you to spend hours in the kitchen.
Ingredients
- 4 boneless, skinless chicken breasts
- A couple of handfuls of fresh spinach
- 1 cup of shredded Dubliner cheese
- A splash of olive oil
- 1 tsp of garlic powder
- Salt and pepper, just enough to season
- 1/2 cup of breadcrumbs
- 1 egg, beaten
Instructions
- Preheat your oven to 375°F (190°C) and grab a baking dish. A little tip: lining it with parchment paper makes cleanup a breeze.
- Take each chicken breast and make a pocket by slicing horizontally, being careful not to cut all the way through. This is where the magic happens!
- In a bowl, mix the spinach, Dubliner cheese, and a dash of garlic powder. Stuff each chicken breast with this mixture, then seal with toothpicks if needed.
- Dip each stuffed chicken breast into the beaten egg, then coat with breadcrumbs. For extra crispiness, press the breadcrumbs gently onto the chicken.
- Heat a splash of olive oil in a pan over medium-high heat. Brown the chicken for about 2 minutes on each side—just until it’s golden. This step locks in the juices.
- Transfer the chicken to the prepared baking dish and bake for 25 minutes, or until the internal temperature reaches 165°F (74°C).
- Let it rest for 5 minutes before serving. This waiting period is tough, but it ensures every bite is as juicy as can be.
Golden and crispy on the outside, with a gooey, flavorful center, this dish is a showstopper. Serve it alongside a crisp salad or roasted veggies for a meal that’s as beautiful as it is delicious.
Crispy Dubliner Cheese and Herb Fritters

Back when I first stumbled upon the idea of combining Dubliner cheese with herbs into fritters, I was skeptical. But one bite of these crispy, golden delights, and I was sold. They’re perfect for those evenings when you crave something indulgent yet simple to whip up.
Ingredients
- 1 cup of grated Dubliner cheese
- A couple of tablespoons of fresh herbs (I love using parsley and chives)
- 1/2 cup of all-purpose flour
- A splash of milk
- 1 egg, beaten
- A pinch of salt and pepper
- Enough vegetable oil for frying
Instructions
- In a mixing bowl, combine the grated Dubliner cheese, fresh herbs, flour, and a pinch of salt and pepper. Mix well.
- Add the beaten egg and a splash of milk to the mixture. Stir until everything comes together into a sticky dough. Tip: If the mixture feels too dry, add a tiny bit more milk, but don’t overdo it.
- Heat vegetable oil in a deep pan over medium heat until it reaches 350°F. Tip: To test if the oil is ready, drop a small piece of dough in; if it sizzles and rises to the surface, you’re good to go.
- Using a tablespoon, scoop portions of the dough and carefully drop them into the hot oil. Fry in batches to avoid overcrowding.
- Cook each fritter for about 2-3 minutes or until they’re golden brown and crispy. Tip: Flip them halfway through to ensure even cooking.
- Remove the fritters with a slotted spoon and drain on paper towels to remove excess oil.
Perfectly crispy on the outside with a gooey, cheesy center, these fritters are a dream. Serve them with a dollop of sour cream or a tangy apple sauce for an extra flavor kick.
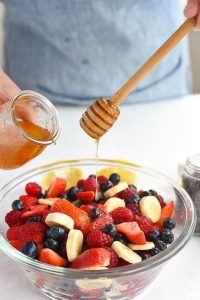
Dubliner Cheese and Pear Salad with Honey Dressing
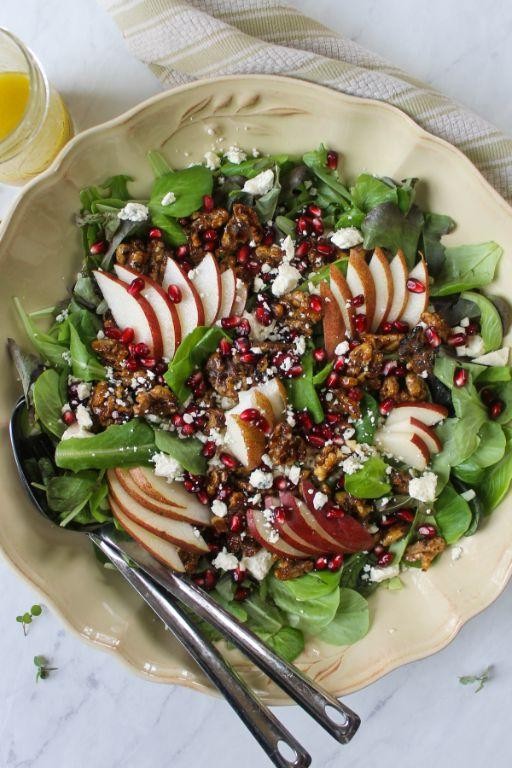
Every time I stumble upon a block of Dubliner cheese at the store, I can’t help but think of the cozy Irish pubs where I first fell in love with its sharp, nutty flavor. It’s the star of this salad, paired with sweet pears and a honey dressing that’s just divine.
Ingredients
- 2 cups of mixed greens (the fresher, the better!)
- 1 ripe pear, thinly sliced (go for Bartlett or Anjou for sweetness)
- 1/2 cup of Dubliner cheese, cubed (trust me, it’s worth the splurge)
- A handful of walnuts, roughly chopped (for that crunch)
- A splash of olive oil (about 2 tbsp)
- A drizzle of honey (1 tbsp, but who’s measuring?)
- A squeeze of lemon juice (half a lemon should do)
- A pinch of salt and pepper (to wake up all those flavors)
Instructions
- Start by washing your mixed greens thoroughly and pat them dry with a clean towel. Tip: A salad spinner works wonders here to avoid soggy greens.
- Slice the pear into thin wedges. If you’re prepping ahead, a quick toss in lemon juice will keep them from browning.
- Cube the Dubliner cheese into bite-sized pieces. Tip: Let the cheese sit out for a few minutes to soften slightly, making it easier to cut.
- In a small bowl, whisk together the olive oil, honey, and lemon juice until well combined. Tip: Adjust the honey to your liking if you prefer it sweeter or more tart.
- In a large salad bowl, combine the greens, pear slices, cheese cubes, and walnuts.
- Drizzle the honey dressing over the salad and gently toss to coat everything evenly. A pinch of salt and pepper finishes it off perfectly.
What I love most about this salad is the contrast of textures—the crisp greens, the juicy pears, and the creamy cheese all come together beautifully. Serve it with a slice of crusty bread to soak up any extra dressing, and you’ve got yourself a meal that feels both indulgent and refreshing.
Hearty Dubliner Cheese and Beef Pie
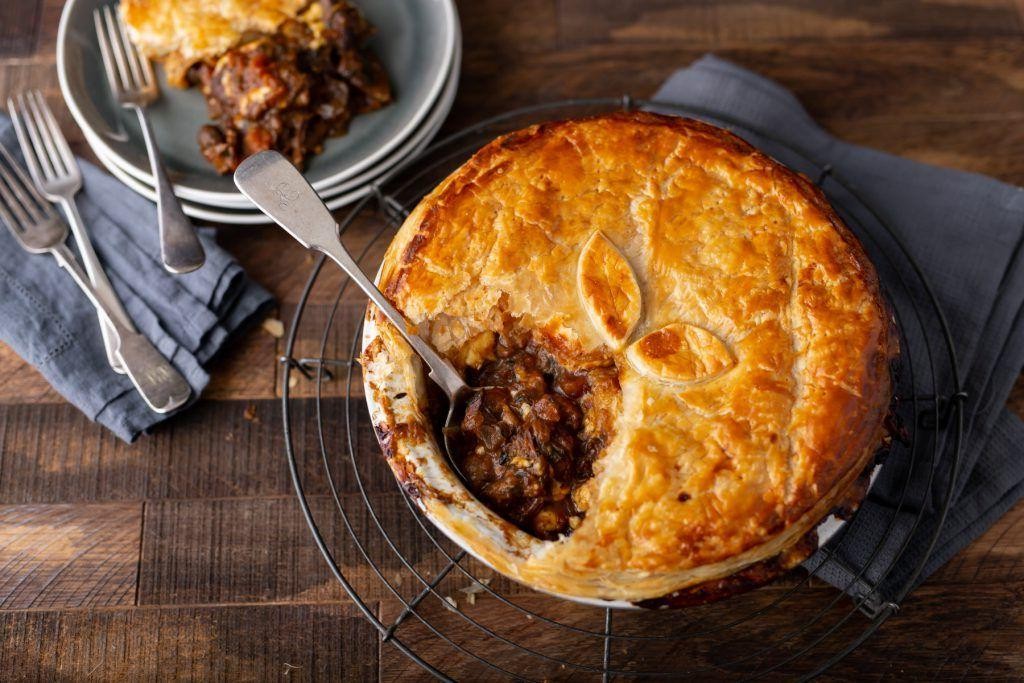
Back when I first stumbled upon the recipe for this Hearty Dubliner Cheese and Beef Pie, I was looking for something that could warm up those chilly evenings without spending hours in the kitchen. It’s become a staple in my home, especially when I need a little comfort food that feels like a hug from the inside.
Ingredients
- 1 lb ground beef (the good, fatty kind for flavor)
- A couple of cups of shredded Dubliner cheese (trust me, it’s worth the splurge)
- 1 cup of diced onions (because what’s a pie without onions?)
- A splash of Worcestershire sauce (for that umami kick)
- 2 cups of all-purpose flour (for the crust)
- A stick of cold butter (because cold butter makes the flakiest crust)
- A pinch of salt (to bring all the flavors together)
- 1/2 cup of cold water (just enough to bring the dough together)
Instructions
- Preheat your oven to 375°F (190°C) – no guessing here, we want it just right.
- In a pan, cook the ground beef over medium heat until it’s nicely browned, about 5-7 minutes. Tip: Don’t stir it too much; letting it sit for a bit gives it a better crust.
- Add the diced onions and cook until they’re soft and translucent, about 3 minutes. Tip: A pinch of salt here helps draw out the moisture faster.
- Splash in the Worcestershire sauce, stir, and remove from heat. Let it cool slightly while you prep the crust.
- For the crust, mix the flour and salt, then cut in the cold butter until it looks like coarse crumbs. Tip: Use your fingers for this – it’s quicker and you can feel the texture better.
- Gradually add the cold water, just until the dough comes together. Roll it out on a floured surface to fit your pie dish.
- Layer the beef mixture and shredded Dubliner cheese in the crust, then top with another layer of dough. Crimp the edges to seal.
- Bake for 25-30 minutes, until the crust is golden brown and you can see the cheese bubbling inside.
This pie comes out with a flaky crust that gives way to a rich, cheesy beef filling that’s just the right amount of hearty. Try serving it with a simple green salad to cut through the richness, or just enjoy it as is – no judgments here.
Dubliner Cheese and Jalapeno Cornbread
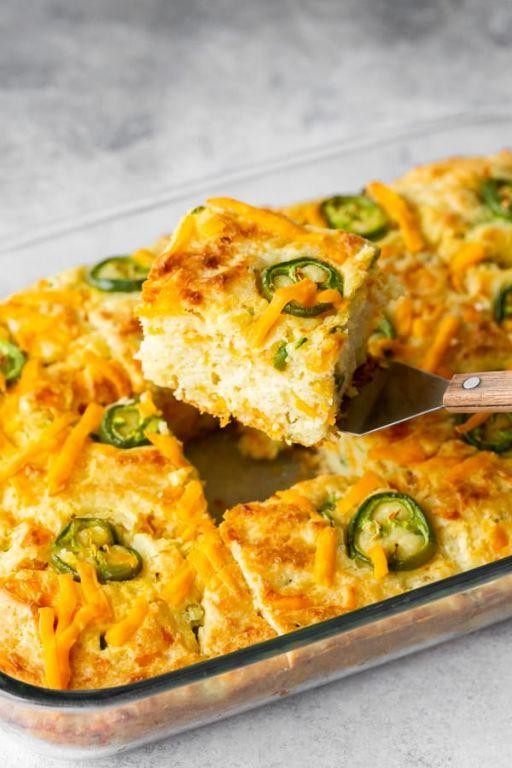
Remember those chilly evenings when all you crave is something warm, cheesy, and with a little kick? That’s exactly what inspired me to whip up this Dubliner Cheese and Jalapeno Cornbread. It’s the perfect blend of savory and spicy, with a texture that’s just right—crispy on the outside, soft and fluffy on the inside.
Ingredients
- 1 cup of cornmeal
- 1 cup of all-purpose flour
- A generous pinch of salt
- 1 tablespoon of baking powder
- A couple of eggs
- 1 cup of buttermilk (or a splash of regular milk with a squeeze of lemon)
- 1/4 cup of melted butter
- 1 cup of shredded Dubliner cheese
- 2 jalapenos, finely chopped (seeds in if you like it hot!)
Instructions
- Preheat your oven to 375°F and grease an 8-inch baking pan. This ensures your cornbread doesn’t stick and gets that golden crust.
- In a large bowl, whisk together the cornmeal, flour, salt, and baking powder. Tip: Sifting the dry ingredients can make your cornbread lighter.
- In another bowl, beat the eggs, then mix in the buttermilk and melted butter. Pour this into the dry ingredients and stir until just combined. Overmixing can lead to tough cornbread.
- Fold in the shredded Dubliner cheese and chopped jalapenos. The cheese adds a rich depth, while the jalapenos bring the heat.
- Pour the batter into the prepared pan and smooth the top. Bake for 20-25 minutes, or until a toothpick comes out clean. Tip: Check at 20 minutes to avoid overbaking.
- Let it cool for a few minutes before slicing. This patience pays off with cleaner slices.
Velvety with a hint of crunch from the cornmeal, this cornbread is a dream. The Dubliner cheese melts into pockets of creamy goodness, while the jalapenos offer little bursts of heat. Serve it warm with a dollop of honey butter for a sweet and spicy contrast.
Fluffy Dubliner Cheese Scrambled Eggs
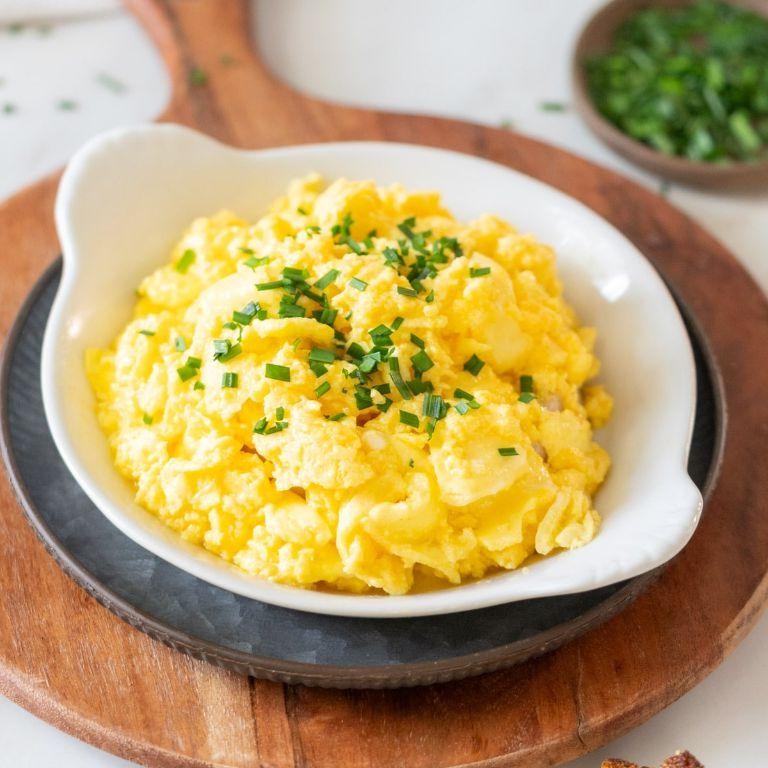
After a recent trip to Ireland, I fell in love with Dubliner cheese and knew I had to incorporate it into my breakfast routine. This Fluffy Dubliner Cheese Scrambled Eggs recipe is my go-to for a quick, satisfying meal that feels a bit fancy without the fuss.
Ingredients
- 4 large eggs
- A splash of whole milk
- A couple of tablespoons of butter
- 1/2 cup of shredded Dubliner cheese
- A pinch of salt
- A dash of black pepper
Instructions
- Crack the eggs into a bowl and whisk them together with the splash of milk until fully combined. Tip: Whisking well is the secret to fluffy eggs.
- Heat a non-stick skillet over medium-low heat and melt the butter, making sure it coats the pan evenly.
- Pour the egg mixture into the skillet. Let it sit for a few seconds until the edges start to set.
- Gently push the eggs from the edges towards the center with a spatula, letting the uncooked eggs flow to the edges. Repeat this process until the eggs are mostly set but still slightly runny. Tip: Low and slow is the way to go for creamy scrambled eggs.
- Sprinkle the shredded Dubliner cheese over the eggs and fold gently until the cheese is melted and the eggs are cooked to your liking. Tip: The residual heat will melt the cheese perfectly, so no need to overdo it.
- Season with a pinch of salt and a dash of black pepper right before serving to enhance all the flavors.
Unbelievably creamy with a sharp, nutty kick from the Dubliner cheese, these scrambled eggs are a game-changer. Serve them on a slice of toasted sourdough or alongside crispy bacon for a breakfast that’s anything but ordinary.
Dubliner Cheese and Roasted Garlic Mashed Potatoes
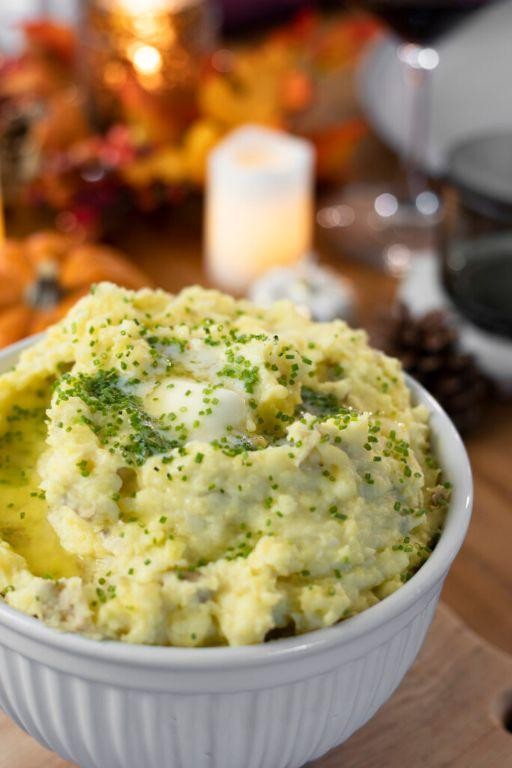
Kind of like that cozy Irish pub where you first fell in love with Dubliner cheese, this dish brings a bit of that warmth right to your kitchen. It’s a twist on the classic mashed potatoes that’ll have everyone asking for seconds—or the recipe.
Ingredients
- 3 large russet potatoes, peeled and cubed
- 1 whole head of garlic
- A splash of olive oil
- 1/2 cup of heavy cream
- 4 tbsp of unsalted butter
- 1 cup of grated Dubliner cheese
- A pinch of salt and pepper
Instructions
- Preheat your oven to 400°F. Cut the top off the head of garlic, drizzle with a splash of olive oil, wrap in foil, and roast for about 30 minutes until soft and golden.
- While the garlic roasts, boil the cubed potatoes in salted water until fork-tender, about 15 minutes.
- Drain the potatoes and return them to the pot. Tip: Let them sit for a minute to evaporate any excess water for fluffier mash.
- Squeeze the roasted garlic cloves out of their skins into the pot with the potatoes.
- Add the heavy cream, butter, and a pinch of salt and pepper. Mash everything together until smooth. Tip: For extra creamy potatoes, warm the cream and butter before adding.
- Stir in the grated Dubliner cheese until melted and fully incorporated. Tip: Reserve a little cheese to sprinkle on top before serving for a nice presentation.
- Give it a final taste and adjust the seasoning if needed.
Fluffy, rich, and with a depth of flavor from the roasted garlic and sharp Dubliner cheese, these mashed potatoes are a game-changer. Serve them alongside a juicy steak or as the star of your vegetarian feast—either way, they’re bound to impress.
Baked Dubliner Cheese and Tomato Risotto

Diving into the comfort food realm today, I’m sharing a recipe that’s been a game-changer in my kitchen—Baked Dubliner Cheese and Tomato Risotto. It’s the kind of dish that fills your home with an irresistible aroma, promising a creamy, cheesy delight that’s perfect for those evenings when you crave something hearty yet sophisticated.
Ingredients
- 1 cup Arborio rice
- A couple of cloves of garlic, minced
- 1 can (14.5 oz) diced tomatoes, undrained
- A splash of white wine (optional, but highly recommended)
- 2 cups chicken or vegetable broth
- 1 cup grated Dubliner cheese
- A handful of fresh basil, chopped
- 2 tbsp olive oil
- Salt and freshly ground black pepper to taste
Instructions
- Preheat your oven to 375°F (190°C). This ensures a perfectly baked risotto with a slightly crispy top.
- In a large oven-proof skillet, heat the olive oil over medium heat. Add the minced garlic and sauté until fragrant, about 1 minute.
- Stir in the Arborio rice, coating it well with the oil and garlic, for about 2 minutes. This step, known as toasting the rice, enhances its nutty flavor.
- Pour in the splash of white wine, stirring until it’s mostly absorbed. The wine adds a depth of flavor that’s unmatched.
- Add the diced tomatoes with their juices and the broth. Bring the mixture to a simmer, then cover and transfer to the oven.
- Bake for 25 minutes, or until the rice is tender and the liquid is absorbed. Resist the urge to stir; this helps achieve the perfect texture.
- Remove from the oven and stir in the grated Dubliner cheese until melted and creamy. Season with salt and pepper to taste.
- Garnish with the chopped fresh basil before serving. The basil adds a fresh contrast to the rich, cheesy risotto.
You’ll love the creamy texture and the way the Dubliner cheese melts into the risotto, creating a dish that’s both comforting and elegant. Try serving it with a crisp green salad for a complete meal that’s sure to impress.
Dubliner Cheese and Chive Buttermilk Biscuits

Very few things in life bring me as much joy as the smell of freshly baked biscuits wafting through my kitchen. Especially when they’re packed with the rich, tangy flavors of Dubliner cheese and fresh chives. I stumbled upon this recipe during a lazy Sunday brunch experiment, and it’s been a staple in my home ever since.
Ingredients
- 2 cups of all-purpose flour
- 1 tablespoon of baking powder
- 1/2 teaspoon of baking soda
- 1 teaspoon of salt
- 1/2 cup of unsalted butter, cold and cubed
- 1 cup of shredded Dubliner cheese
- 1/4 cup of fresh chives, finely chopped
- 3/4 cup of buttermilk, plus a splash more if needed
Instructions
- Preheat your oven to 425°F and line a baking sheet with parchment paper.
- In a large bowl, whisk together the flour, baking powder, baking soda, and salt.
- Add the cold, cubed butter to the dry ingredients. Use your fingers to work the butter into the flour until the mixture resembles coarse crumbs. Tip: The key to flaky biscuits is keeping the butter cold, so work quickly.
- Stir in the shredded Dubliner cheese and chopped chives until evenly distributed.
- Make a well in the center of the mixture and pour in the buttermilk. Stir until just combined. If the dough seems too dry, add a splash more buttermilk. Tip: Overmixing leads to tough biscuits, so mix until the ingredients are just incorporated.
- Turn the dough out onto a lightly floured surface and gently pat it into a 1-inch thick rectangle.
- Use a biscuit cutter to cut out biscuits, pressing straight down without twisting. Tip: Twisting the cutter seals the edges, preventing the biscuits from rising properly.
- Place the biscuits on the prepared baking sheet, leaving a little space between each.
- Bake for 12-15 minutes, or until the biscuits are golden brown on top.
Zesty and rich, these biscuits have a perfect balance of flavors with the sharpness of Dubliner cheese and the freshness of chives. Serve them warm with a dollop of butter or alongside your favorite soup for a comforting meal.
Spicy Dubliner Cheese and Chorizo Quesadillas

Yesterday, I found myself staring into my fridge, pondering what to make for lunch, when my eyes landed on a block of Dubliner cheese and some chorizo. That’s when inspiration struck—why not combine these two into a quesadilla? The result was nothing short of magical, and I knew I had to share it with you.
Ingredients
- 2 large flour tortillas
- A generous handful of shredded Dubliner cheese
- About 1/2 cup of diced chorizo
- A splash of olive oil
- A couple of dashes of your favorite hot sauce
- A small handful of chopped cilantro (optional, but highly recommended)
Instructions
- Heat a splash of olive oil in a large skillet over medium heat (around 350°F).
- Add the diced chorizo to the skillet and cook for about 3 minutes, until it starts to crisp up. Tip: Don’t overcrowd the pan to ensure even cooking.
- Lay one tortilla flat in the skillet and sprinkle half of the shredded Dubliner cheese evenly over it.
- Spread the cooked chorizo over the cheese, then drizzle with hot sauce to your liking. Tip: The hot sauce not only adds heat but also a bit of acidity to balance the richness.
- Sprinkle the remaining cheese on top, then place the second tortilla over everything. Press down gently with a spatula.
- Cook for about 2-3 minutes on each side, or until the tortillas are golden brown and the cheese is melted. Tip: If the quesadilla is browning too quickly, lower the heat to prevent burning.
- Remove from the skillet, let it sit for a minute (this helps the cheese set a bit), then slice into wedges. Garnish with chopped cilantro if using.
Spicy Dubliner Cheese and Chorizo Quesadillas are a delightful mix of spicy, cheesy, and slightly tangy flavors, with a perfect crunch from the tortilla. Serve them with a side of sour cream or guacamole for an extra indulgent treat.
Dubliner Cheese and Walnut Stuffed Dates
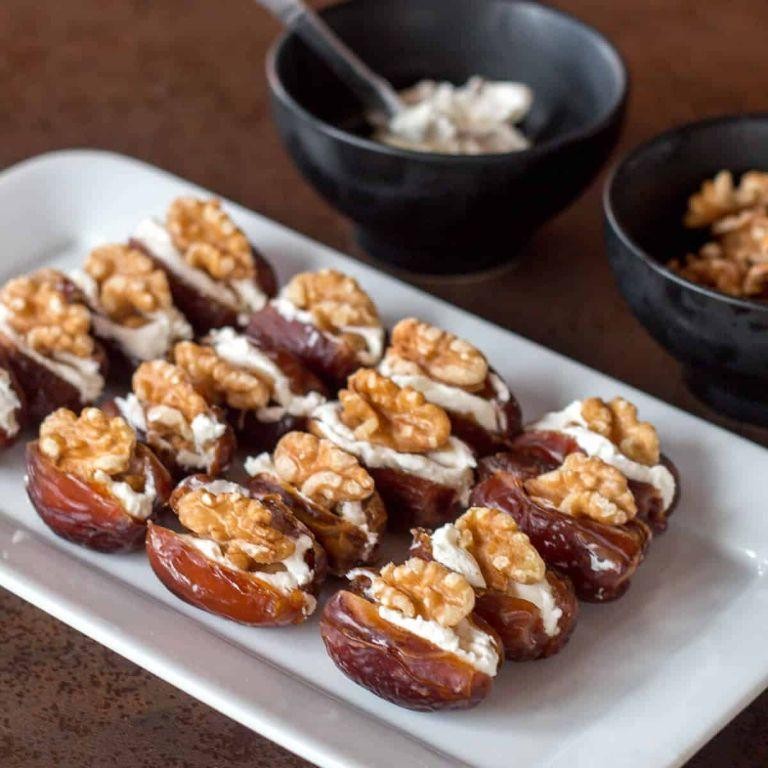
Remember those times when you wanted something sweet, savory, and utterly satisfying all at once? That’s exactly what these Dubliner Cheese and Walnut Stuffed Dates are all about. I stumbled upon this combo during a lazy Sunday fridge raid, and it’s been a game-changer for my snack game ever since.
Ingredients
- A dozen Medjool dates, pitted (because nobody has time for pits)
- A good handful of Dubliner cheese, cubed into tiny, stuffable pieces
- A couple of tablespoons of walnuts, roughly chopped for that crunch
- A splash of honey, because life’s too short not to sweeten the deal
Instructions
- Preheat your oven to 350°F (175°C) – just enough to get everything warm and toasty without turning your kitchen into a sauna.
- Carefully slit each date open with a knife, making sure not to cut all the way through. You’re aiming for a little pocket, not a split personality.
- Stuff each date with a cube of Dubliner cheese and a pinch of chopped walnuts. Don’t be shy; these dates can handle it.
- Drizzle a tiny bit of honey over each stuffed date. This isn’t just for sweetness; it’ll help everything caramelize beautifully in the oven.
- Pop them in the oven for about 5-7 minutes, just until the cheese starts to melt and the honey bubbles. Keep an eye on them – they go from perfect to oops in no time.
- Let them cool for a minute or two before serving. Trust me, molten cheese burns are no joke.
Out of the oven, these dates are a delightful mix of gooey, crunchy, and sweet with a hint of savory from the cheese. Serve them on a fancy platter at your next gathering, or just eat them straight off the baking sheet – I won’t judge.
Classic Dubliner Cheese Platter with Artisan Crackers

Last weekend, I stumbled upon a block of Dubliner cheese at my local farmers’ market, and it inspired me to create this simple yet elegant platter. It’s perfect for those impromptu gatherings where you want to impress without spending hours in the kitchen.
Ingredients
- 8 oz of Dubliner cheese, sliced into thin wedges
- A couple of handfuls of artisan crackers (I love using rosemary sea salt ones for a bit of extra flavor)
- A splash of honey for drizzling
- A small bunch of red grapes, washed and dried
- A handful of walnuts, lightly toasted
Instructions
- Start by arranging the Dubliner cheese wedges on a large wooden board or platter, spacing them out evenly.
- Scatter the artisan crackers around the cheese, filling in any gaps to create a visually appealing layout.
- Drizzle the honey lightly over the cheese wedges for a touch of sweetness that complements the sharpness of the Dubliner.
- Place the red grapes in small clusters around the board to add color and a fresh, juicy element to the platter.
- Sprinkle the toasted walnuts over the top for a crunchy contrast and a nutty flavor that pairs beautifully with the cheese.
Delight in the creamy texture of the Dubliner cheese against the crisp crackers, with the honey adding a smooth sweetness that ties everything together. Serve this platter with a glass of crisp white wine or a hoppy IPA for a match made in heaven.
Dubliner Cheese and Pumpkin Ravioli
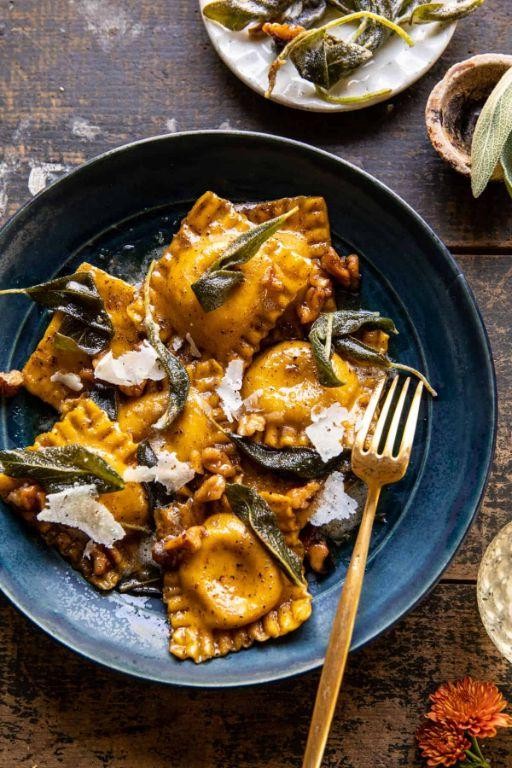
Unbelievable as it may sound, I stumbled upon the idea for Dubliner Cheese and Pumpkin Ravioli during a late-night fridge raid. There’s something about the sharpness of Dubliner cheese paired with the sweet, earthy pumpkin that just works. It’s become my go-to dish for impressing dinner guests or treating myself on a lazy Sunday.
Ingredients
- 1 cup of pumpkin puree (homemade or canned, but let’s be real, I use canned)
- A couple of cups of all-purpose flour, plus extra for dusting
- 2 eggs, because every good pasta starts here
- A splash of olive oil, for that smooth dough
- 1 cup of grated Dubliner cheese, because sharp is the way to go
- A pinch of salt, to bring all the flavors together
- 1/2 teaspoon of nutmeg, for a little warmth
- 2 tablespoons of butter, because butter makes everything better
- A handful of sage leaves, for that crispy, aromatic finish
Instructions
- Start by making the pasta dough: mix the flour and salt on a clean surface, make a well in the center, and add the eggs and olive oil. Knead until smooth, about 10 minutes. Tip: If the dough feels too sticky, add a bit more flour.
- Let the dough rest under a damp cloth for 30 minutes. This makes it easier to roll out.
- While the dough rests, mix the pumpkin puree, Dubliner cheese, and nutmeg in a bowl. This is your filling.
- Roll out the dough into thin sheets. Use a pasta machine if you have one, or a rolling pin if you’re feeling old-school.
- Place small spoonfuls of the filling on one sheet, cover with another sheet, and press around the filling to seal. Cut into ravioli squares. Tip: Use a little water to help seal the edges if they’re not sticking.
- Bring a large pot of salted water to a boil and cook the ravioli for 3-4 minutes, until they float to the top.
- In a pan, melt the butter over medium heat and add the sage leaves until crispy. Tip: Don’t let the butter burn; it should be a golden color.
- Toss the cooked ravioli in the sage butter and serve immediately.
Fresh out of the pan, these ravioli are a dream—creamy inside with a slight bite from the pasta, and that sage butter? Divine. Try serving them with a sprinkle of extra Dubliner on top for an extra cheesy kick.
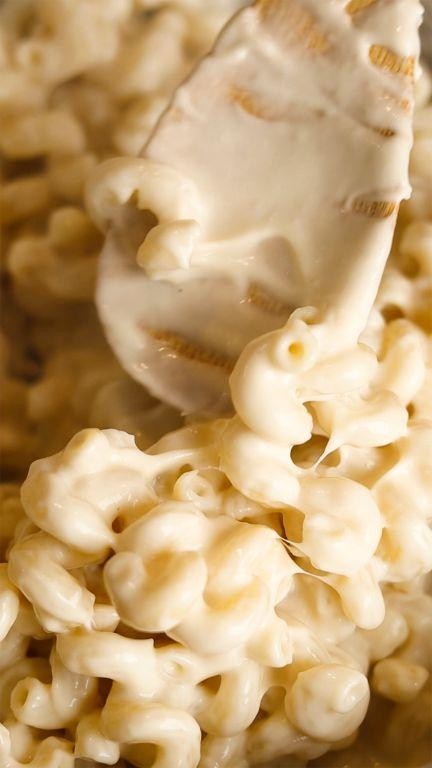
Smoky Dubliner Cheese and Gouda Macaroni
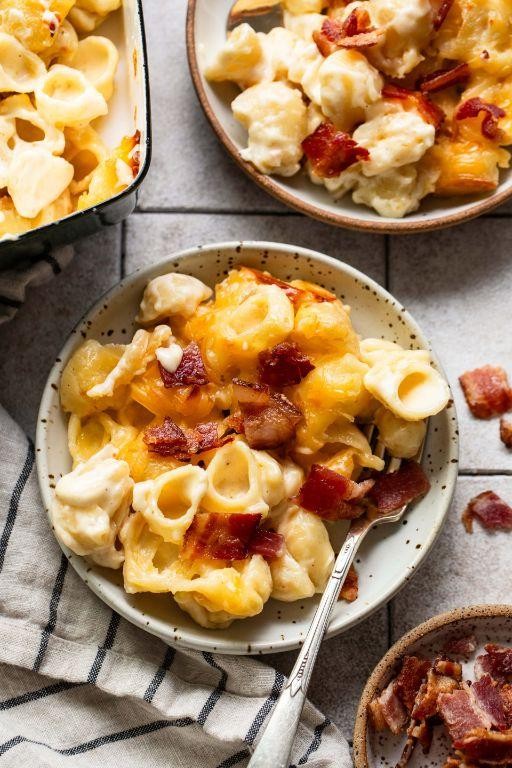
Finally, a mac and cheese that combines the best of both worlds: the sharpness of Dubliner cheese and the smokiness of Gouda. I stumbled upon this combo during a lazy Sunday fridge clean-out, and it’s been a staple in my kitchen ever since.
Ingredients
- 2 cups of elbow macaroni
- A splash of olive oil
- 2 cups of shredded Dubliner cheese
- 1 cup of smoked Gouda, cubed
- A couple of tablespoons of butter
- 1/4 cup of all-purpose flour
- 2 cups of whole milk
- A pinch of salt and pepper
- 1/2 teaspoon of smoked paprika
Instructions
- Preheat your oven to 375°F and grease a baking dish lightly with olive oil.
- Cook the macaroni according to the package instructions, but shave off a minute for al dente perfection. Tip: Always salt your pasta water like the sea!
- While the pasta cooks, melt butter in a saucepan over medium heat, then whisk in flour to create a roux. Cook for about 2 minutes until it’s golden.
- Slowly pour in milk, whisking constantly to avoid lumps. Bring to a gentle simmer until the sauce thickens, about 5 minutes.
- Remove from heat and stir in the Dubliner cheese and Gouda until melted and smooth. Season with salt, pepper, and smoked paprika. Tip: Adding cheese off the heat prevents it from becoming stringy.
- Drain the pasta and mix it into the cheese sauce until every noodle is coated.
- Transfer to the prepared baking dish and bake for 20 minutes until bubbly and slightly crispy on top. Tip: For an extra crispy top, broil for the last 2 minutes.
Now, this mac and cheese is creamy with a kick of smoke and a delightful crunch on top. Serve it straight from the oven with a side of crisp green salad to cut through the richness, or top with breadcrumbs for added texture.
Dubliner Cheese and Asparagus Quiche
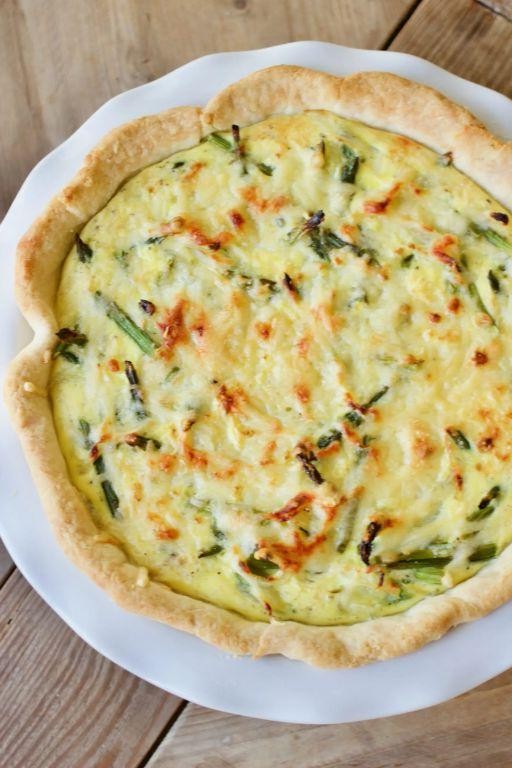
Craving something savory and satisfying for brunch? I recently whipped up this Dubliner Cheese and Asparagus Quiche, and it was a hit with my family. The combination of sharp Dubliner cheese and fresh asparagus in a flaky crust is simply irresistible.
Ingredients
- 1 pre-made pie crust (because who has time to make dough from scratch?)
- A handful of asparagus, trimmed and cut into 1-inch pieces
- 1 cup of shredded Dubliner cheese
- 4 large eggs
- 1 cup of heavy cream
- A pinch of salt and pepper
- A sprinkle of nutmeg for that extra warmth
Instructions
- Preheat your oven to 375°F (190°C). Unroll the pie crust and press it into a 9-inch pie dish. Crimp the edges for a fancy touch.
- Blanch the asparagus pieces in boiling water for 2 minutes, then plunge them into ice water to stop the cooking. This keeps them bright green and crisp-tender.
- Spread the blanched asparagus and shredded Dubliner cheese evenly over the bottom of the pie crust.
- In a bowl, whisk together the eggs, heavy cream, salt, pepper, and nutmeg until smooth. Pour this mixture over the asparagus and cheese.
- Bake for 35-40 minutes, or until the quiche is set and the top is golden brown. A knife inserted into the center should come out clean.
- Let the quiche cool for at least 10 minutes before slicing. This helps it set and makes for cleaner slices.
Zesty and rich, this quiche has a perfect balance of flavors and textures. Serve it warm with a side salad for a light lunch, or enjoy a slice cold straight from the fridge—it’s that good.
Sweet Dubliner Cheese and Fig Jam Crostini
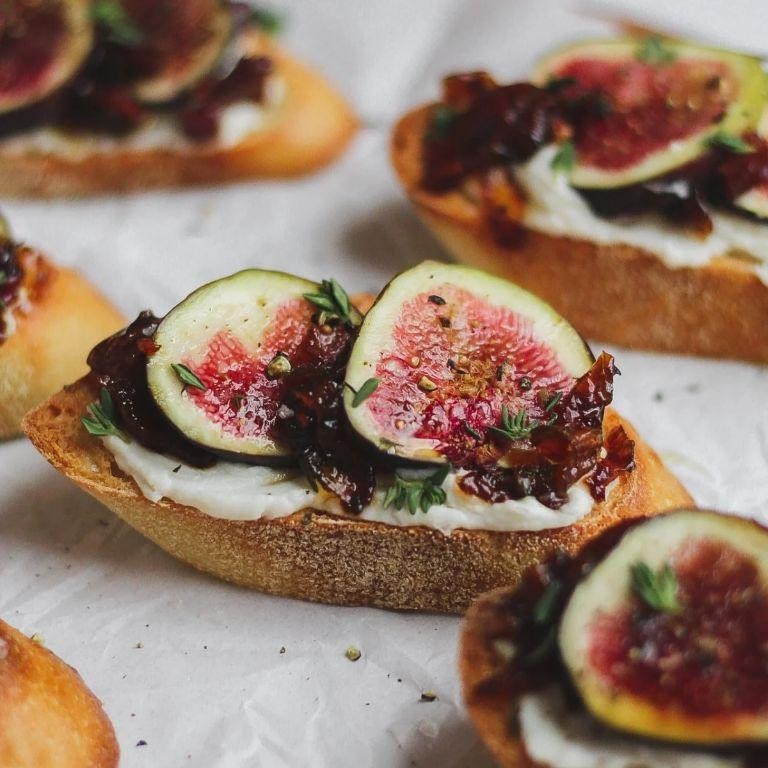
Perfect for those evenings when you’re craving something sweet yet sophisticated, these Sweet Dubliner Cheese and Fig Jam Crostini have become my go-to appetizer. I stumbled upon this combo during a lazy Sunday fridge raid, and it’s been a hit at every gathering since.
Ingredients
- A baguette, sliced into about 20 thin pieces
- 1/2 cup of fig jam (homemade or store-bought, no judgment here)
- 8 oz of Sweet Dubliner cheese, thinly sliced
- A drizzle of honey, for that extra sweetness
- A handful of arugula, to add a peppery kick
- A pinch of sea salt, because it makes everything better
Instructions
- Preheat your oven to 375°F. This ensures your crostini will be perfectly crispy.
- Arrange the baguette slices on a baking sheet in a single layer. Toast them in the oven for about 5 minutes, or until they’re just golden around the edges. Keep an eye on them; they go from perfect to burnt in a flash.
- Let the toasted baguette slices cool for a minute. This prevents the cheese from melting too quickly when you add it.
- Spread a thin layer of fig jam on each slice. The jam acts as a sweet glue for the cheese.
- Top each slice with a piece of Sweet Dubliner cheese. If the cheese is too thick, it won’t melt properly, so thin slices are key.
- Pop them back into the oven for another 3-4 minutes, just until the cheese starts to bubble. This is when the magic happens.
- Remove from the oven and immediately drizzle with honey and sprinkle with sea salt. The honey adds a glossy finish, and the salt balances the sweetness.
- Garnish with a few arugula leaves for a fresh, peppery contrast. It’s not just about looks; the arugula adds a nice bite.
The first bite delivers a crunch from the crostini, followed by the creamy, slightly nutty cheese, and then the sweet jam hits you. Serve these at your next dinner party, and watch them disappear before the main course even makes it to the table.
Dubliner Cheese and Dark Chocolate Truffles
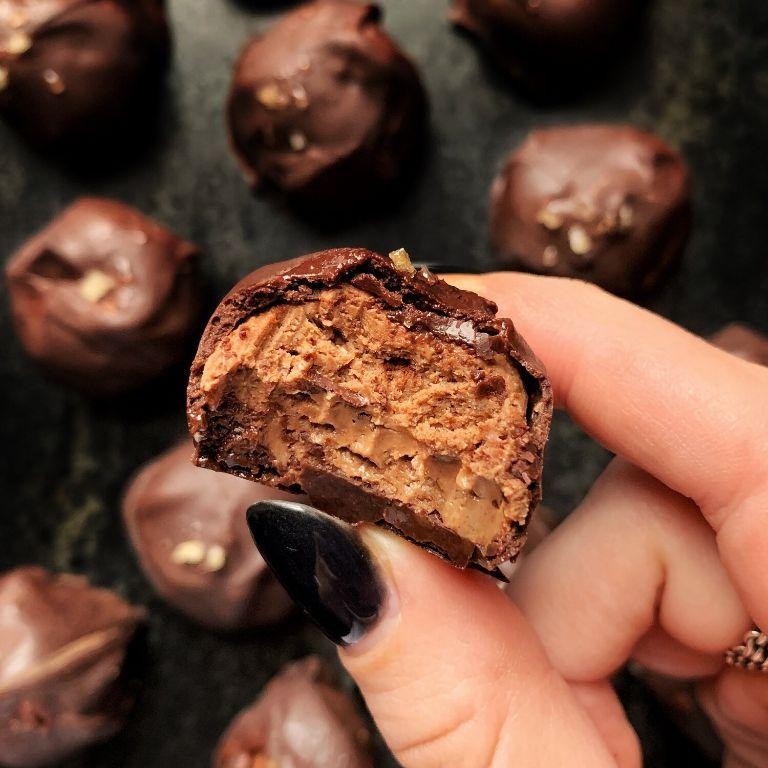
Mmm, have you ever had one of those days where you just need a little something to lift your spirits? That’s exactly how I felt when I first stumbled upon the magical combination of Dubliner cheese and dark chocolate. It’s like they were meant to be together, creating these truffles that are a perfect balance of savory and sweet.
Ingredients
- 8 oz of Dubliner cheese, finely grated (trust me, the finer the better)
- 1 cup of dark chocolate chips (go for the good stuff, it makes all the difference)
- A splash of heavy cream (about 2 tbsp, just enough to bring it all together)
- A couple of tbsp of unsweetened cocoa powder (for that final dusting)
Instructions
- Start by grating your Dubliner cheese as finely as possible. This ensures it’ll melt smoothly into the chocolate.
- In a double boiler, melt the dark chocolate chips over low heat, stirring constantly to avoid any burning. Tip: If you don’t have a double boiler, a heatproof bowl over a pot of simmering water works just as well.
- Once the chocolate is fully melted, remove from heat and immediately stir in the grated cheese until fully incorporated. The residual heat will melt the cheese perfectly.
- Add a splash of heavy cream to the mixture, stirring until the texture is smooth and glossy. Tip: The mixture should be thick but still pourable. If it’s too thick, add a tad more cream.
- Pour the mixture into a shallow dish and refrigerate for at least 2 hours, or until firm enough to handle.
- Using a small spoon or melon baller, scoop out portions of the mixture and roll into balls about 1 inch in diameter. Tip: If the mixture starts to soften too much, pop it back in the fridge for a few minutes.
- Roll each truffle in unsweetened cocoa powder until fully coated, then place on a parchment-lined tray.
- Refrigerate the truffles for another hour before serving to let them set completely.
The texture of these truffles is unbelievably smooth, with the sharpness of the Dubliner cheese cutting through the richness of the dark chocolate. Serve them chilled with a glass of red wine for an unexpectedly perfect pairing.
Conclusion
Nothing brings cheese lovers together like the rich, savory flavors of Dubliner cheese, and our roundup of 25 delicious recipes is your ticket to culinary delight. Whether you’re a seasoned chef or a kitchen newbie, there’s something here to tantalize your taste buds. Don’t forget to try these recipes, share your favorites in the comments, and spread the cheesy love by pinning this article on Pinterest. Happy cooking!