Nothing beats the joy of cooking under the open sky, especially when you have a collection of easy, delicious recipes at your fingertips. Whether you’re craving quick dinners after a long hike or looking for comfort food to enjoy by the campfire, our roundup of 22 easy camp stove recipes is your ticket to outdoor cooking success. Dive in and discover meals that’ll make your next adventure even tastier!
One-Pot Campfire Chili
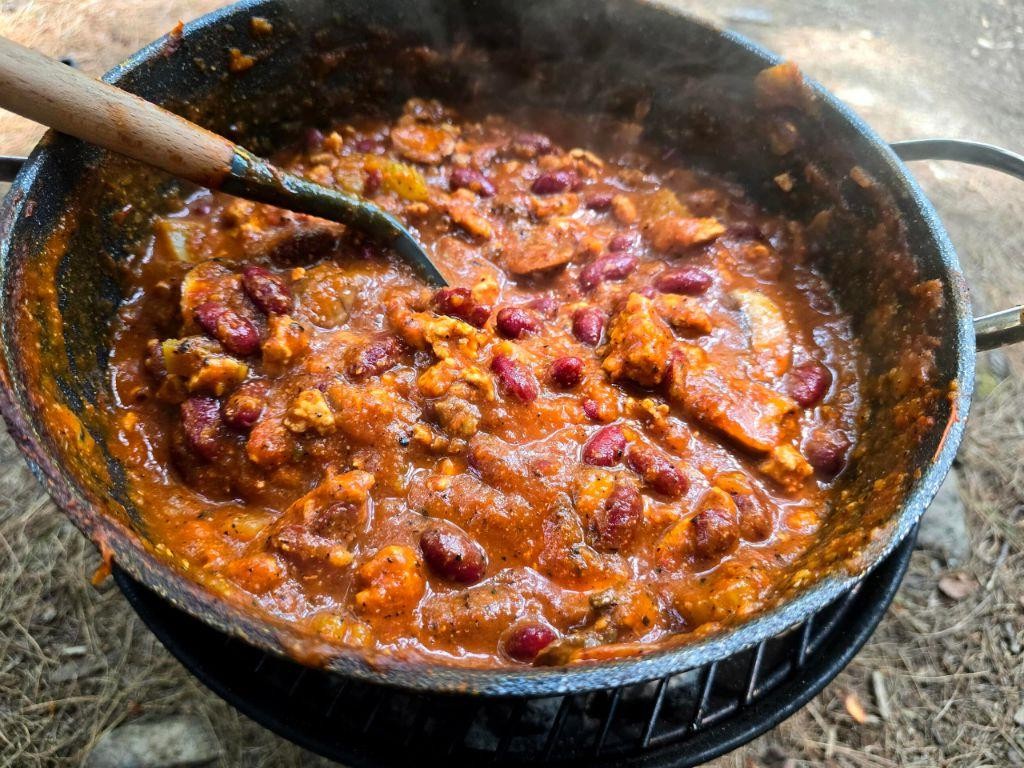
Remembering the last time I sat by the campfire, the chill of the evening air wrapped around us, I longed for something hearty and warm. This one-pot campfire chili is my homage to those moments, a dish that simmers with memories and the simplicity of outdoor cooking.
Ingredients
- 1 lb grass-fed ground beef
- 1 cup diced yellow onion
- 2 cloves garlic, minced
- 1 tbsp clarified butter
- 1 cup organic crushed tomatoes
- 1 cup beef stock, homemade preferred
- 1 tbsp smoked paprika
- 1 tsp ground cumin
- 1/2 tsp cayenne pepper
- 1 cup cooked black beans, rinsed
- 1 cup cooked kidney beans, rinsed
- Sea salt, to precise measurement
Instructions
- In a cast-iron Dutch oven over medium heat, melt the clarified butter until it shimmers.
- Add the diced yellow onion, sautéing until translucent, about 5 minutes, stirring occasionally to prevent burning.
- Introduce the minced garlic to the pot, cooking for 1 minute until fragrant, ensuring it doesn’t brown.
- Increase the heat to medium-high, add the grass-fed ground beef, breaking it apart with a wooden spoon, and cook until no pink remains, approximately 7 minutes.
- Stir in the smoked paprika, ground cumin, and cayenne pepper, coating the beef evenly, toasting the spices for 30 seconds to unlock their flavors.
- Pour in the organic crushed tomatoes and beef stock, bringing the mixture to a gentle boil, then reduce the heat to low.
- Add the cooked black beans and kidney beans, stirring to combine, and let the chili simmer uncovered for 25 minutes, allowing the flavors to meld.
- Season with sea salt, starting with 1/2 tsp and adjusting as needed, tasting after each addition.
Perfectly balanced, this chili boasts a smoky depth with a subtle heat, the beans adding a comforting texture. Serve it straight from the pot, garnished with sharp cheddar and a dollop of sour cream, under a starlit sky for an unforgettable meal.
Camp Stove Beef Stew
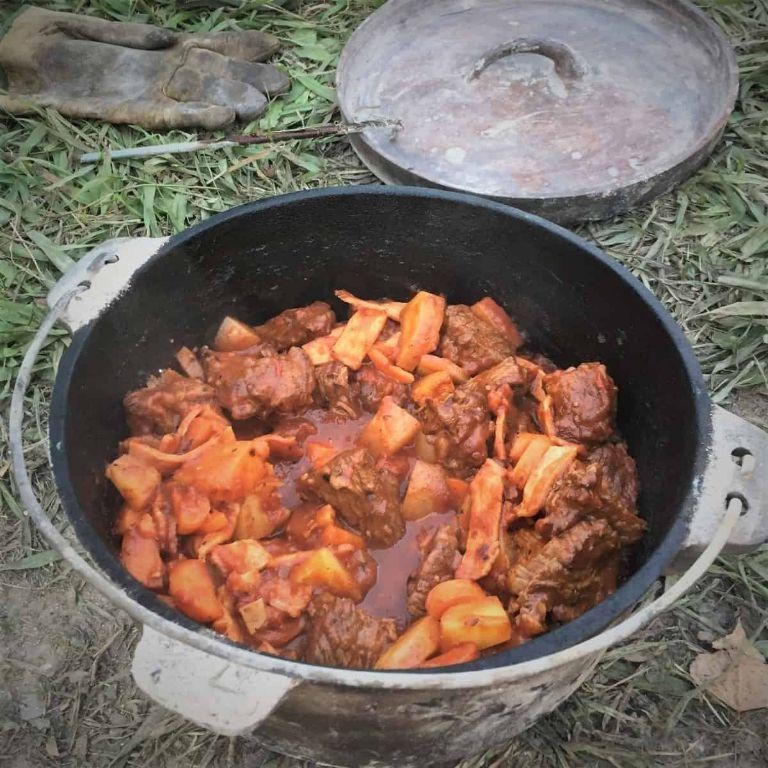
Dusk settles softly around the camp, the air crisp with the promise of evening, and there’s no better companion than a hearty beef stew simmering gently over the camp stove, its rich aromas mingling with the woodland breeze.
Ingredients
- 1.5 lbs chuck beef, cubed
- 2 tbsp clarified butter
- 1 large yellow onion, finely diced
- 3 cloves garlic, minced
- 2 cups beef stock, preferably homemade
- 1 cup dry red wine
- 2 large carrots, peeled and sliced into 1/2-inch rounds
- 2 stalks celery, diced
- 1 lb baby potatoes, halved
- 1 tbsp tomato paste
- 1 tsp fresh thyme leaves
- 1 bay leaf
- Salt and freshly ground black pepper, to season
Instructions
- Heat the clarified butter in a large Dutch oven over medium-high heat until shimmering.
- Season the beef cubes generously with salt and pepper, then sear in batches until deeply browned on all sides, about 3-4 minutes per batch. Transfer to a plate.
- In the same pot, add the diced onion and cook until translucent, about 5 minutes, scraping up any browned bits from the bottom.
- Add the minced garlic and cook for 1 minute until fragrant.
- Deglaze the pot with the red wine, simmering until reduced by half, about 5 minutes.
- Stir in the tomato paste, then return the beef to the pot along with any accumulated juices.
- Add the beef stock, thyme, and bay leaf, bringing to a gentle simmer. Cover and cook on low heat for 1.5 hours.
- Add the carrots, celery, and potatoes, simmering uncovered for an additional 30 minutes until the vegetables are tender and the stew has thickened.
- Adjust seasoning with salt and pepper if needed, then remove the bay leaf before serving.
Hearty and robust, this stew boasts tender chunks of beef and vegetables in a deeply flavorful broth. Serve it with a crusty loaf of bread to soak up every last drop, or under a blanket of stars for an unforgettable campfire meal.
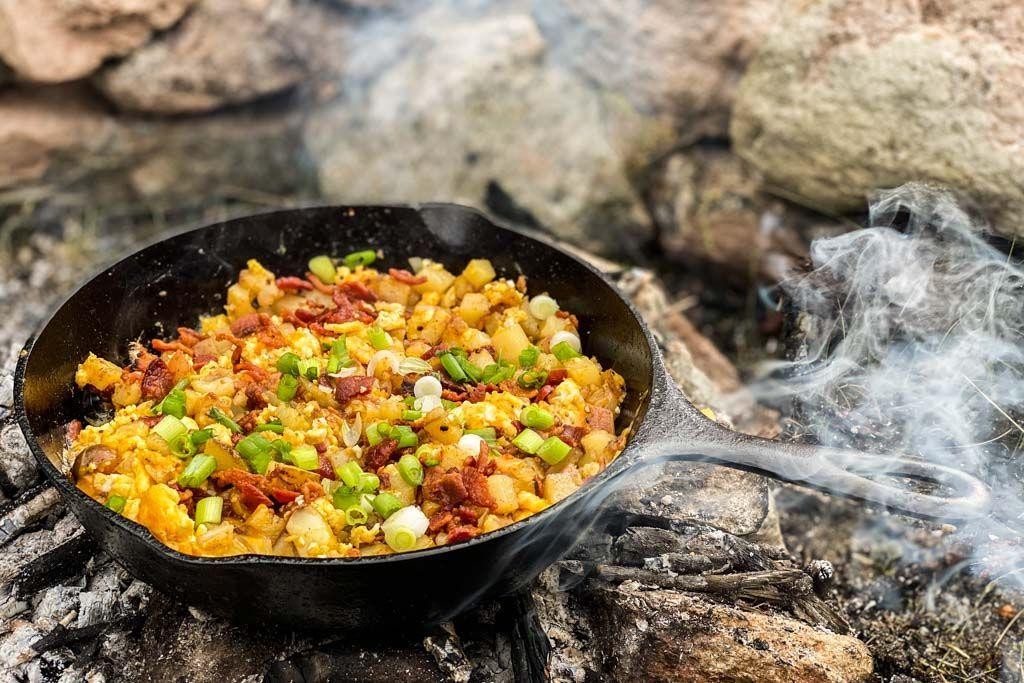
Outdoor Breakfast Skillet
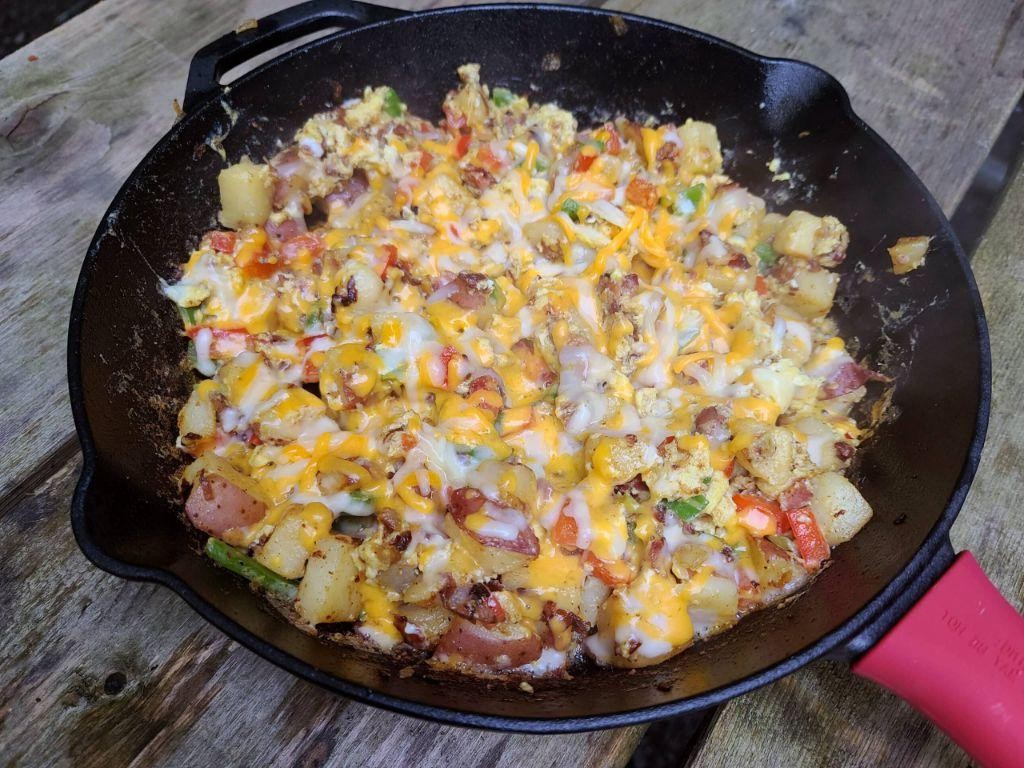
Kneading the morning air with a quiet anticipation, the Outdoor Breakfast Skillet emerges as a humble yet hearty companion to dawn’s first light. Its sizzle is a melody that dances with the crispness of the outdoors, inviting a moment of pause before the day unfolds.
Ingredients
- 2 tbsp clarified butter
- 1 cup diced Yukon Gold potatoes
- 1/2 cup diced red bell pepper
- 1/4 cup finely chopped yellow onion
- 2 pasture-raised eggs, lightly beaten
- 1/4 cup shredded sharp cheddar cheese
- 1/2 tsp smoked paprika
- Salt, 1/4 tsp
- Freshly ground black pepper, 1/8 tsp
Instructions
- Heat a 10-inch cast-iron skillet over medium heat (350°F) and add clarified butter, ensuring the surface is evenly coated.
- Add diced Yukon Gold potatoes, spreading them in a single layer. Cook undisturbed for 5 minutes to achieve a golden crust.
- Incorporate diced red bell pepper and finely chopped yellow onion, stirring gently. Cook for another 4 minutes until vegetables soften.
- Pour lightly beaten pasture-raised eggs over the vegetable mixture, tilting the skillet to distribute evenly. Sprinkle with smoked paprika, salt, and freshly ground black pepper.
- Reduce heat to low (250°F) and cover the skillet with a lid. Allow the eggs to set for 3 minutes, checking for a slight jiggle in the center indicating perfect doneness.
- Remove from heat and sprinkle shredded sharp cheddar cheese over the top. Let it melt residual heat for 1 minute.
Creating a tapestry of textures, the skillet offers a crisp potato base crowned with velvety eggs and a sharp cheese finish. Consider serving directly from the skillet, garnished with fresh herbs, to embrace the rustic charm of outdoor dining.
Campfire Quesadillas

Just imagine the gentle crackle of a campfire, the soft glow of embers lighting up the night, and the comforting aroma of melted cheese mingling with the smoky air. Campfire quesadillas are not just a meal; they’re a moment, a simple yet profound pleasure that brings together the rustic charm of outdoor cooking with the universal love for gooey, crispy quesadillas.
Ingredients
- 4 large flour tortillas, 10-inch diameter
- 2 cups sharp cheddar cheese, freshly grated
- 1 cup Monterey Jack cheese, freshly grated
- 1/2 cup clarified butter
- 1/2 cup red bell pepper, finely diced
- 1/4 cup green onions, thinly sliced
- 1 tbsp smoked paprika
- 1/2 tsp sea salt, finely ground
Instructions
- Prepare your campfire to a medium heat, ensuring you have a steady, even flame with a bed of hot coals for consistent cooking.
- In a small bowl, combine the grated sharp cheddar and Monterey Jack cheeses, ensuring an even mix for optimal meltability.
- Heat a large cast-iron skillet over the campfire, adding 1 tablespoon of clarified butter to coat the bottom evenly.
- Place one flour tortilla in the skillet, sprinkling half of the cheese mixture evenly over the surface, followed by half of the diced red bell pepper and green onions.
- Dust the top with smoked paprika and sea salt, then cover with a second tortilla, pressing down gently to adhere.
- Cook for 3-4 minutes, or until the bottom tortilla is golden brown and crispy, then carefully flip using a wide spatula.
- Add another tablespoon of clarified butter to the skillet, allowing it to melt before returning the quesadilla to cook the other side for an additional 3-4 minutes.
- Remove from the skillet, let it rest for a minute to set, then slice into wedges. Repeat the process with the remaining ingredients.
- For an extra smoky flavor, hold the quesadilla briefly over the open flame before serving, allowing the edges to char slightly.
Each bite offers a delightful contrast between the crispy, buttery exterior and the soft, molten interior, with the smoky undertones elevating the simple ingredients. Serve with a side of fresh salsa or a dollop of sour cream for a refreshing contrast to the richness.
Easy Camp Stove Pasta
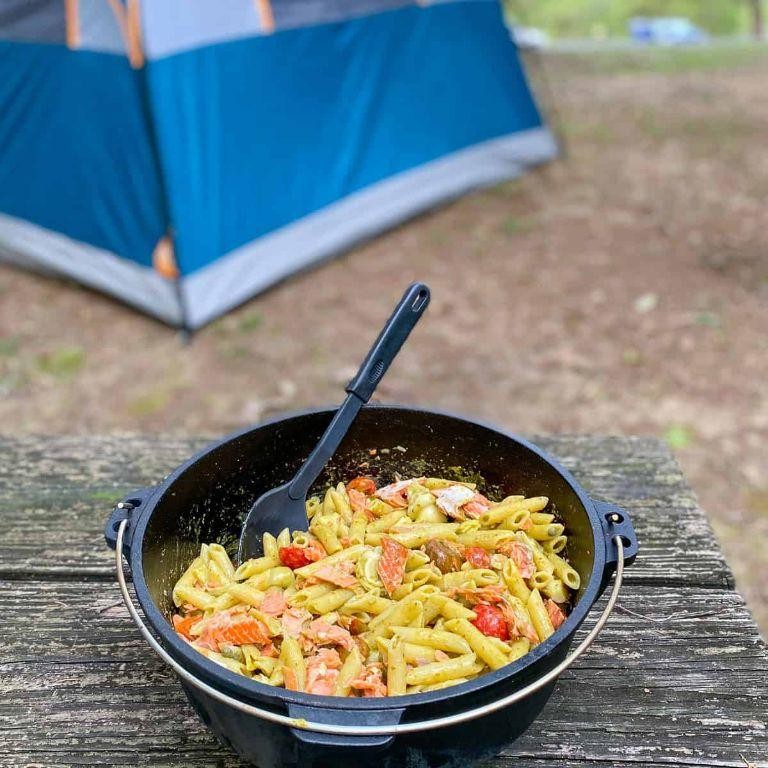
Venturing into the simplicity of outdoor cooking, this dish brings the comfort of a home-cooked meal to the wilderness, blending ease with elegance under the open sky.
Ingredients
- 8 oz. durum wheat semolina pasta
- 2 tbsp extra-virgin olive oil
- 1 clove garlic, minced
- 1/4 tsp crushed red pepper flakes
- 1 cup cherry tomatoes, halved
- 1/4 cup fresh basil leaves, torn
- 1/2 cup Parmesan cheese, freshly grated
- Sea salt, to season
Instructions
- Bring 4 cups of water to a rolling boil in a camp stove pot over medium-high heat. Season generously with sea salt.
- Add the durum wheat semolina pasta to the boiling water, stirring occasionally to prevent sticking, for 8-10 minutes or until al dente.
- While the pasta cooks, heat extra-virgin olive oil in a separate pan over low heat. Sauté minced garlic and crushed red pepper flakes until fragrant, about 1 minute.
- Add halved cherry tomatoes to the pan, cooking until they begin to soften and release their juices, approximately 3 minutes.
- Drain the pasta, reserving 1/4 cup of the pasta water. Tip: The starchy water helps to emulsify the sauce.
- Combine the drained pasta with the tomato mixture in the pan, tossing gently to coat. If needed, add reserved pasta water to loosen the sauce.
- Remove from heat and fold in torn fresh basil leaves and freshly grated Parmesan cheese. Tip: Adding cheese off the heat prevents clumping.
- Season with sea salt to taste, and serve immediately. Tip: For an extra touch, garnish with additional basil leaves and a drizzle of olive oil.
The pasta boasts a delightful chewiness, with the sweetness of tomatoes and the sharpness of Parmesan creating a harmonious balance. Serve it straight from the pan under the stars for an unforgettable dining experience.
Grilled Cheese on a Camp Stove
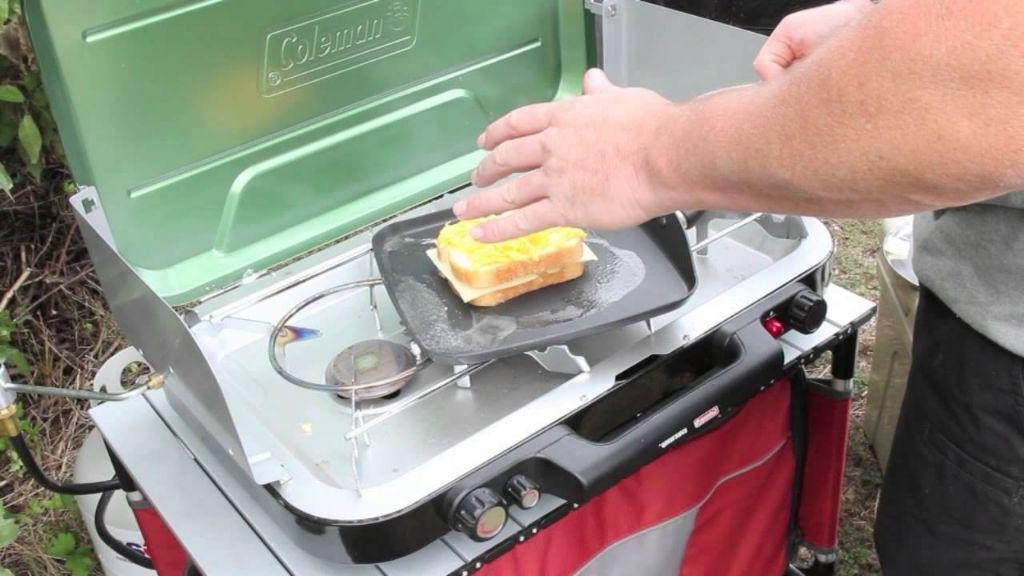
There’s something profoundly comforting about the simplicity of a grilled cheese sandwich, especially when made over the gentle flicker of a camp stove. The process, slow and deliberate, allows for a moment of pause, a chance to savor the quiet before the first bite.
Ingredients
- 2 slices of artisan sourdough bread, approximately 1/2 inch thick
- 2 ounces of aged sharp cheddar cheese, thinly sliced
- 1 tablespoon of clarified butter
- 1 teaspoon of Dijon mustard
Instructions
- Preheat a cast-iron skillet on the camp stove over medium-low heat for 5 minutes to ensure even cooking.
- Spread Dijon mustard evenly on one side of each sourdough slice for a subtle tang that complements the cheese.
- Layer the thinly sliced aged sharp cheddar between the mustard-coated sides of the bread.
- Melt clarified butter in the skillet, swirling to coat the surface, ensuring the bread won’t stick and achieves a golden crust.
- Place the sandwich in the skillet, pressing gently with a spatula to encourage even contact with the heat.
- Cook for 3-4 minutes on the first side, or until the bread is golden brown and the cheese begins to melt at the edges.
- Flip the sandwich carefully, then cook for an additional 3-4 minutes on the second side, adjusting the heat if necessary to prevent burning.
- Remove from the skillet and let rest for 1 minute to allow the cheese to set slightly, making for a cleaner cut.
Velvety melted cheese contrasts with the crisp, buttery exterior, while the sourdough’s tang adds depth. Serve alongside a chilled tomato soup for a classic pairing, or enjoy under the stars for a truly memorable meal.
Camp Stove Pancakes
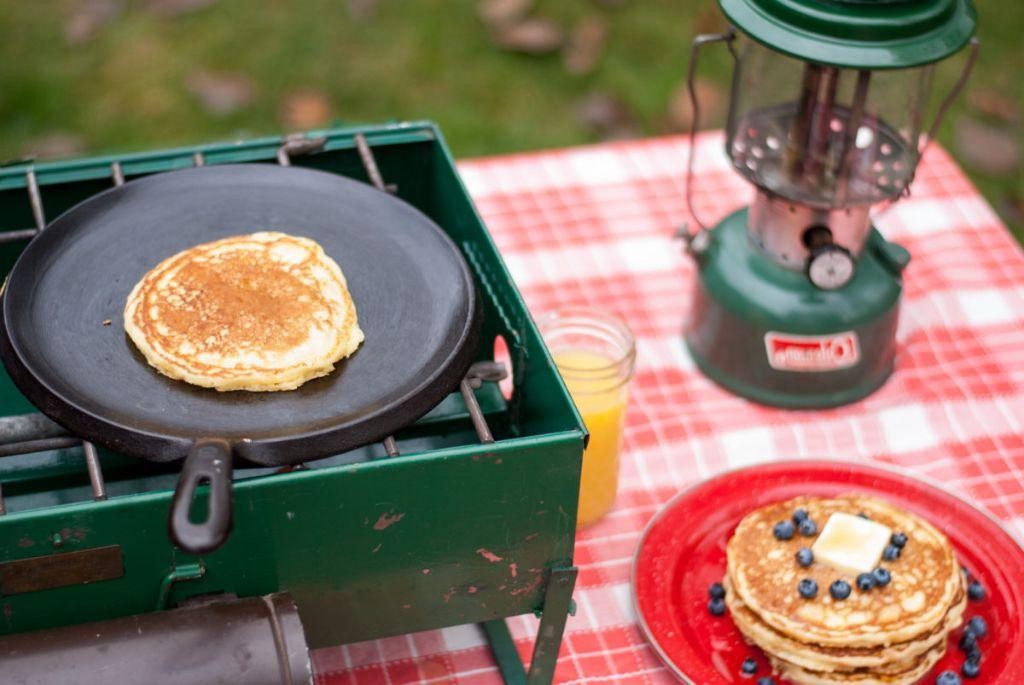
Even in the quiet of the morning, when the world seems to pause, there’s something profoundly comforting about the sizzle of batter on a hot camp stove. These pancakes, fluffy and golden, carry the simplicity of the outdoors and the warmth of home.
Ingredients
- 1 1/2 cups all-purpose flour, sifted
- 3 1/2 tsp baking powder
- 1 tsp fine sea salt
- 1 tbsp granulated sugar
- 1 1/4 cups whole milk
- 1 pasture-raised egg, lightly beaten
- 3 tbsp unsalted butter, melted and slightly cooled
- 1 tsp pure vanilla extract
- Clarified butter, for greasing
Instructions
- In a large mixing bowl, whisk together the sifted flour, baking powder, sea salt, and sugar until well combined.
- Create a well in the center of the dry ingredients and pour in the whole milk, lightly beaten egg, melted butter, and vanilla extract. Gently fold the mixture until just combined; a few lumps are acceptable for tender pancakes.
- Heat a camp stove or griddle over medium heat (350°F) and lightly grease with clarified butter.
- Pour 1/4 cup of batter onto the griddle for each pancake, cooking until bubbles form on the surface and the edges appear set, about 2-3 minutes.
- Flip the pancakes carefully and cook for an additional 1-2 minutes, or until golden brown and cooked through.
- Transfer to a warm plate and repeat with the remaining batter, greasing the griddle as needed.
Kindly savor these pancakes as they are—light, with a delicate crumb and a hint of vanilla. For a rustic touch, serve with a drizzle of maple syrup and a scattering of wild blueberries, if the season permits.
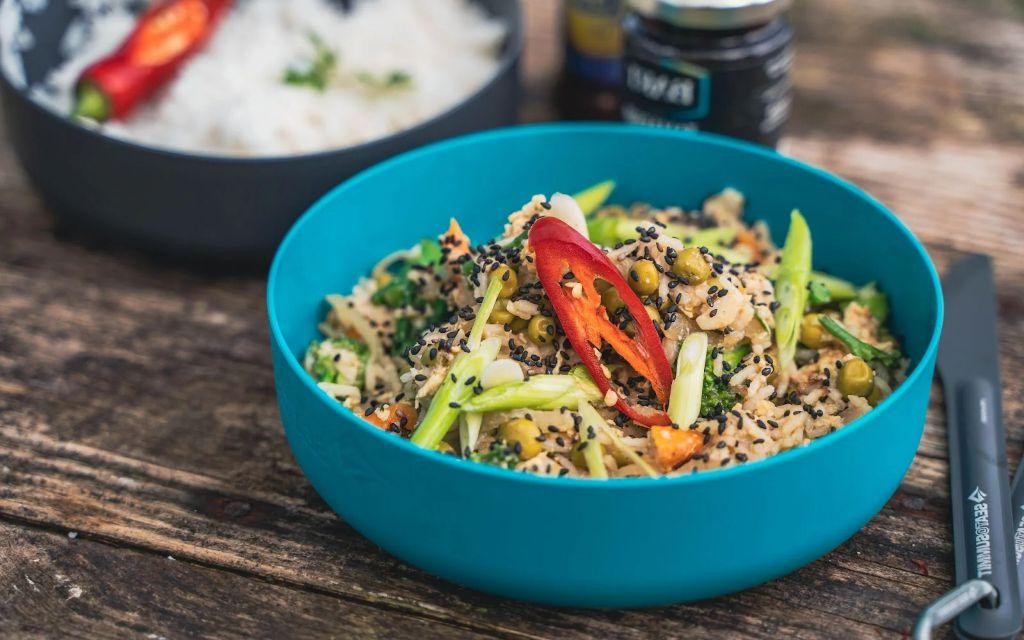
Outdoor Stir Fry
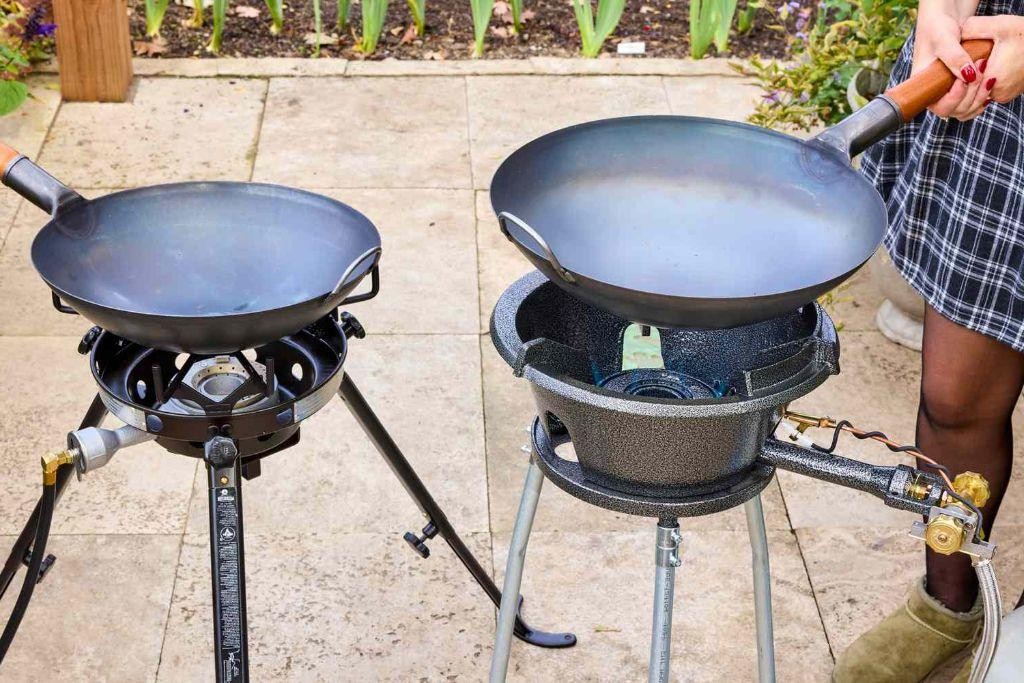
Today, as the sun dips below the horizon, casting a golden glow over the backyard, the idea of an ‘Outdoor Stir Fry’ feels like a gentle invitation to savor the moment. This dish, a harmonious blend of crisp vegetables and tender proteins, is a testament to the joy of cooking under the open sky.
Ingredients
- 2 tbsp cold-pressed sesame oil
- 1 lb grass-fed beef sirloin, thinly sliced against the grain
- 1 cup organic shiitake mushrooms, stems removed and caps thinly sliced
- 1/2 cup heirloom carrots, julienned
- 1/2 cup snap peas, trimmed
- 2 cloves garlic, minced
- 1 tbsp fresh ginger, grated
- 1/4 cup tamari sauce
- 1 tbsp raw honey
- 1 tsp crushed red pepper flakes
- 1/4 cup scallions, thinly sliced
Instructions
- Heat a large cast-iron skillet over medium-high heat until a drop of water sizzles upon contact, about 2 minutes.
- Add the cold-pressed sesame oil to the skillet, swirling to coat the bottom evenly.
- Introduce the grass-fed beef sirloin to the skillet, searing for 1 minute per side to achieve a caramelized crust.
- Transfer the beef to a plate, covering loosely with foil to rest.
- In the same skillet, add the organic shiitake mushrooms, heirloom carrots, and snap peas, stirring frequently for 3 minutes until the vegetables begin to soften.
- Incorporate the minced garlic and grated ginger, cooking for an additional 30 seconds until fragrant.
- Whisk together the tamari sauce, raw honey, and crushed red pepper flakes in a small bowl, then pour over the vegetables, stirring to coat.
- Return the beef to the skillet, tossing gently to combine with the vegetables and sauce, heating through for 1 minute.
- Garnish with thinly sliced scallions before serving.
Best enjoyed al fresco, this stir fry offers a delightful contrast of textures—the crunch of fresh vegetables against the succulence of beef. The interplay of sweet, savory, and spicy notes makes it a versatile dish that pairs beautifully with a chilled glass of sake or a crisp, green salad.
Campfire Mac and Cheese
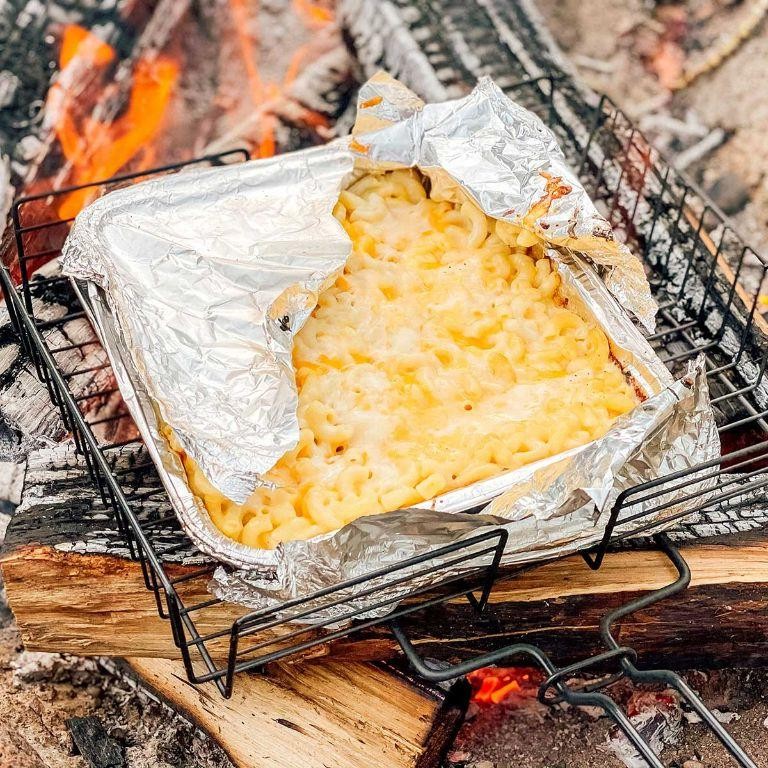
Moments like these, under the vast, starlit sky, call for comfort in a bowl—creamy, dreamy mac and cheese that whispers of campfires and shared stories. This version, rich with smoky undertones and a velvety cheese sauce, is a tribute to those quiet nights when the world seems to pause.
Ingredients
- 8 oz elbow macaroni
- 2 cups whole milk
- 2 cups sharp cheddar cheese, freshly grated
- 1 cup smoked Gouda cheese, freshly grated
- 2 tbsp clarified butter
- 2 tbsp all-purpose flour
- 1/2 tsp smoked paprika
- 1/4 tsp cayenne pepper
- 1/2 tsp sea salt
- 1/4 tsp freshly ground black pepper
- 1/2 cup panko breadcrumbs
Instructions
- Bring a large pot of salted water to a rolling boil over high heat. Add the elbow macaroni and cook for 8 minutes, or until al dente. Drain and set aside.
- In a medium saucepan over medium heat, melt the clarified butter. Whisk in the flour to form a roux, cooking for 2 minutes until golden.
- Gradually whisk in the whole milk, ensuring no lumps remain. Bring to a gentle simmer, stirring constantly, until the mixture thickens, about 5 minutes.
- Reduce heat to low. Stir in the sharp cheddar and smoked Gouda cheeses until fully melted and the sauce is smooth. Season with smoked paprika, cayenne pepper, sea salt, and black pepper.
- Fold the cooked macaroni into the cheese sauce until evenly coated. Transfer to a cast-iron skillet.
- Sprinkle panko breadcrumbs evenly over the top. Place the skillet over a campfire or under a broiler preheated to 375°F for 5 minutes, or until the breadcrumbs are golden and crispy.
- Remove from heat and let stand for 5 minutes before serving. This allows the sauce to thicken slightly for the perfect consistency.
Kindly savor the contrast of the crispy, golden topping against the creamy, smoky mac and cheese beneath. For an extra touch of wilderness, serve straight from the skillet, with a side of pickled jalapeños to cut through the richness.
One-Pot Jambalaya on a Camp Stove
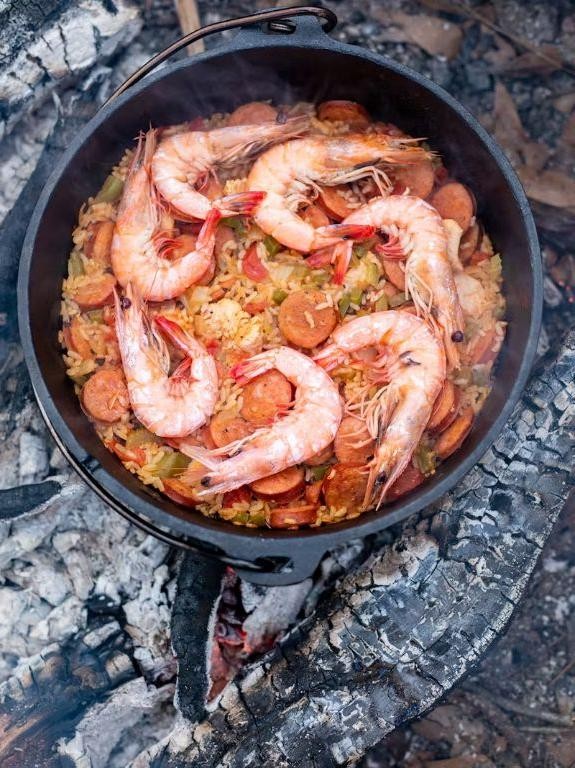
Mornings like these, with the soft hum of the camp stove and the first light filtering through the trees, call for a dish that’s as hearty as it is simple. One-pot jambalaya, with its rich layers of flavor and comforting warmth, is just the thing to start the day under the open sky.
Ingredients
- 1 tbsp clarified butter
- 1 cup andouille sausage, sliced into 1/2-inch rounds
- 1 cup boneless, skinless chicken thighs, diced into 1-inch pieces
- 1/2 cup yellow onion, finely diced
- 1/2 cup green bell pepper, finely diced
- 1/2 cup celery, finely diced
- 2 cloves garlic, minced
- 1 cup long-grain white rice, rinsed
- 2 cups chicken stock, heated to a simmer
- 1/2 tsp smoked paprika
- 1/4 tsp cayenne pepper
- 1/4 tsp dried thyme
- 1 bay leaf
- 1/2 cup shrimp, peeled and deveined
- 2 tbsp fresh parsley, chopped
Instructions
- Heat the clarified butter in a large, heavy-bottomed pot over medium heat until shimmering.
- Add the andouille sausage slices, cooking until browned on both sides, about 3 minutes per side. Remove and set aside.
- In the same pot, add the diced chicken thighs, searing until golden brown, about 4 minutes. Remove and set aside with the sausage.
- Lower the heat to medium-low and add the onion, bell pepper, and celery, sautéing until softened, about 5 minutes.
- Stir in the minced garlic and cook until fragrant, about 30 seconds.
- Add the rinsed rice, stirring to coat in the fats and vegetables, toasting lightly for 2 minutes.
- Pour in the simmering chicken stock, followed by the smoked paprika, cayenne pepper, dried thyme, and bay leaf. Stir to combine.
- Return the sausage and chicken to the pot, bringing the mixture to a simmer. Cover and cook on low heat for 20 minutes, or until the rice is tender.
- Gently fold in the shrimp, covering the pot again to cook for an additional 5 minutes, or until the shrimp are opaque.
- Remove from heat, discard the bay leaf, and let stand covered for 5 minutes before serving.
This jambalaya emerges with a perfect balance of smoky, spicy, and savory notes, the rice fluffy yet distinct. Try serving it straight from the pot, garnished with fresh parsley, for a communal meal that invites sharing stories as much as flavors.
Camp Stove Scrambled Eggs
Gently, the morning unfolds, and with it, the simple yet profound pleasure of preparing a meal outdoors. There’s something deeply satisfying about making scrambled eggs over a camp stove, where the crackle of the flame and the scent of butter melting mingle with the fresh air.
Ingredients
- 2 tbsp clarified butter
- 4 pasture-raised eggs, lightly beaten
- 1/4 tsp fine sea salt
- 1/8 tsp freshly ground black pepper
- 1 tbsp whole milk
Instructions
- Place a 10-inch cast-iron skillet over a camp stove set to medium-low heat. Allow the skillet to warm for 2 minutes to ensure even heat distribution.
- Add the clarified butter to the skillet, swirling gently to coat the bottom. The butter should melt but not brown, indicating the skillet is at the perfect temperature.
- In a medium bowl, whisk together the lightly beaten eggs, fine sea salt, black pepper, and whole milk until just combined. Overmixing can lead to tough eggs.
- Pour the egg mixture into the skillet. Let it sit undisturbed for 20 seconds to allow the edges to set slightly.
- Using a silicone spatula, gently push the set edges toward the center, tilting the skillet to let the uncooked eggs flow to the edges. Repeat this process every 20 seconds for 2 minutes, or until the eggs are softly set but still slightly runny.
- Remove the skillet from the heat. The residual heat will continue to cook the eggs to perfection, achieving a creamy texture without overcooking.
Creatively, these scrambled eggs carry a velvety texture and a rich, buttery flavor that’s enhanced by the subtle sharpness of black pepper. Serve them on a warm tortilla with a sprinkle of fresh herbs for a rustic breakfast wrap, embracing the simplicity and beauty of outdoor cooking.
Outdoor Grilled Veggies
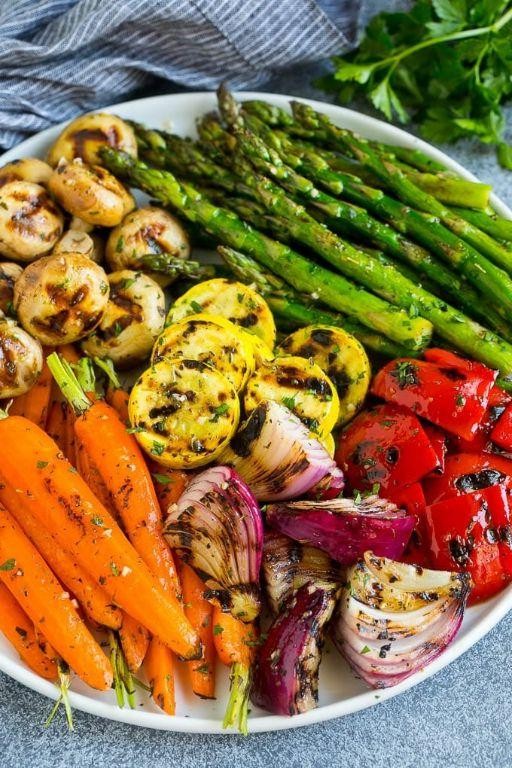
Yesterday, as the golden hues of sunset painted the sky, I found myself lost in the simple joy of preparing a dish that celebrates the earth’s bounty. Outdoor grilled veggies, a humble yet vibrant offering, became my canvas for the evening.
Ingredients
- 2 cups of heirloom cherry tomatoes, halved
- 1 large zucchini, sliced into 1/4-inch rounds
- 1 red bell pepper, seeded and quartered
- 1 yellow bell pepper, seeded and quartered
- 1/4 cup of extra-virgin olive oil
- 2 tbsp of aged balsamic vinegar
- 1 tsp of sea salt flakes
- 1/2 tsp of freshly cracked black pepper
- 2 sprigs of fresh rosemary, leaves finely chopped
Instructions
- Preheat your outdoor grill to a medium-high heat of 375°F, ensuring the grates are clean and lightly oiled to prevent sticking.
- In a large mixing bowl, gently toss the halved cherry tomatoes, zucchini rounds, and bell pepper quarters with extra-virgin olive oil, aged balsamic vinegar, sea salt flakes, and freshly cracked black pepper until evenly coated.
- Arrange the veggies in a single layer on the preheated grill, working in batches if necessary to avoid overcrowding, which can lead to steaming rather than grilling.
- Grill for 4-5 minutes on each side, or until visible grill marks appear and the veggies are tender but still retain a slight crunch.
- Sprinkle the finely chopped fresh rosemary over the grilled veggies immediately after removing them from the grill to release its aromatic oils.
Glistening with olive oil and speckled with rosemary, these grilled veggies offer a smoky sweetness contrasted by the bright acidity of balsamic. Serve them atop a rustic wooden board for an alfresco dining experience that invites conversation and connection.
Campfire French Toast
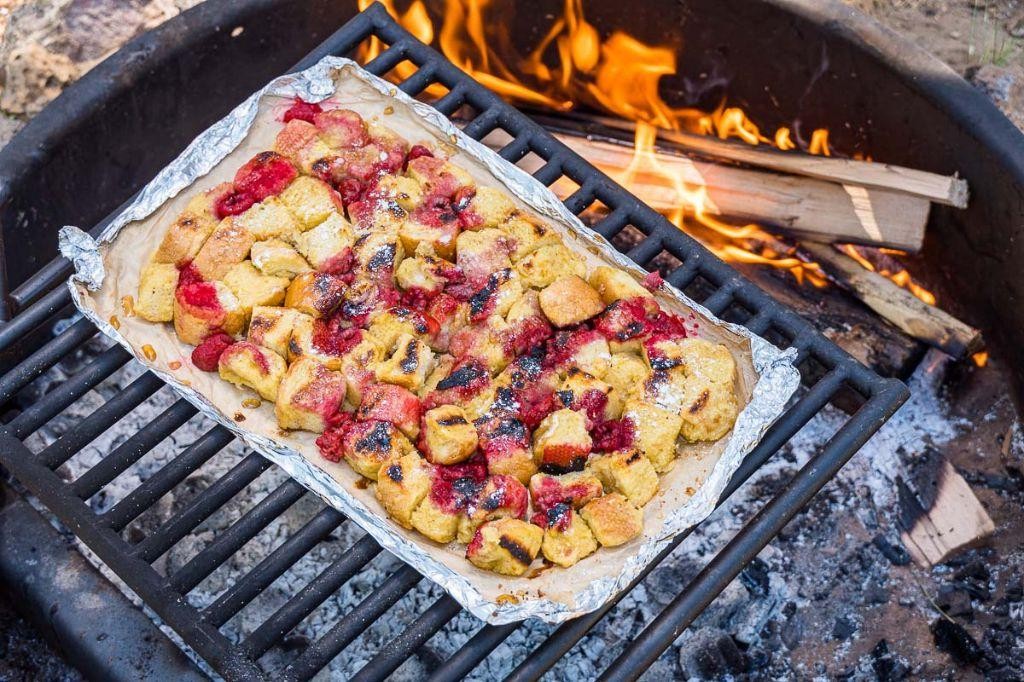
Campfire French Toast
Crisp mornings by the fire call for something warm, something sweet, and something that feels like a hug in a dish. This Campfire French Toast is just that—a comforting, caramelized delight that’s as much about the experience as it is about the taste.
Ingredients
- 4 slices of brioche bread, 1-inch thick
- 2 pasture-raised eggs, lightly beaten
- 1/2 cup whole milk
- 1 tbsp pure vanilla extract
- 1/4 tsp ground cinnamon
- 2 tbsp clarified butter
- 2 tbsp granulated sugar
- 1/4 cup pure maple syrup, for serving
Instructions
- In a wide, shallow bowl, whisk together the lightly beaten eggs, whole milk, pure vanilla extract, and ground cinnamon until fully combined.
- Heat a cast-iron skillet over the campfire to medium heat, approximately 350°F, and melt the clarified butter, ensuring it coats the bottom evenly.
- Dip each slice of brioche bread into the egg mixture, allowing it to soak for 30 seconds per side for maximum absorption without becoming soggy.
- Transfer the soaked brioche slices to the skillet, sprinkling each with 1/2 tbsp of granulated sugar to encourage a caramelized crust.
- Cook for 3-4 minutes per side, or until each side is golden brown and slightly crisp to the touch.
- Remove from the skillet and serve immediately, drizzled with pure maple syrup for a touch of sweetness.
A perfect balance of crispy edges and soft, custardy centers makes this Campfire French Toast a memorable outdoor treat. For an extra indulgent twist, top with a dollop of whipped cream or a scattering of fresh berries.
Easy Camp Stove Pizza

Sometimes, the simplest meals bring the most comfort, especially when crafted under the open sky. This easy camp stove pizza combines the joy of outdoor cooking with the familiar, comforting flavors of home, offering a slice of warmth on a cool evening.
Ingredients
- 1 1/2 cups all-purpose flour, sifted
- 1 tsp fine sea salt
- 1 tsp granulated sugar
- 1 packet (2 1/4 tsp) active dry yeast
- 1/2 cup warm water (110°F)
- 2 tbsp extra-virgin olive oil
- 1/2 cup San Marzano tomato sauce
- 1 cup whole milk mozzarella, freshly grated
- 1/4 cup Parmigiano-Reggiano, finely grated
- Fresh basil leaves, for garnish
Instructions
- In a large mixing bowl, whisk together the sifted all-purpose flour, fine sea salt, and granulated sugar.
- Dissolve the active dry yeast in warm water (110°F) and let it sit for 5 minutes until frothy. Tip: Water that’s too hot can kill the yeast, so use a thermometer for accuracy.
- Stir the yeast mixture and extra-virgin olive oil into the dry ingredients until a dough forms.
- Knead the dough on a lightly floured surface for 5 minutes until smooth and elastic. Tip: If the dough sticks to your hands, add a bit more flour, but avoid over-flouring to keep the crust tender.
- Cover the dough with a damp cloth and let it rise in a warm place for 1 hour, or until doubled in size.
- Preheat your camp stove to medium heat and lightly oil a cast-iron skillet.
- Press the dough into the skillet, forming a thin crust. Cook for 2 minutes, then flip.
- Spread the San Marzano tomato sauce over the crust, leaving a small border. Sprinkle with whole milk mozzarella and Parmigiano-Reggiano.
- Cover the skillet with a lid and cook for 5 minutes, or until the cheese is bubbly and the crust is golden. Tip: For a crispier crust, remove the lid for the last minute of cooking.
- Garnish with fresh basil leaves before serving.
Delightfully crisp at the edges with a chewy center, this pizza boasts a harmonious blend of tangy tomato sauce and rich, melted cheeses. Serve it straight from the skillet, under the stars, for an unforgettable dining experience.
One-Pot Camp Stove Rice
Wandering through the quiet of the morning, the thought of a simple, hearty meal cooked over an open flame brings a sense of peace. This one-pot camp stove rice is a testament to the beauty of minimalism in cooking, where each ingredient shines through.
Ingredients
- 1 cup long-grain white rice, rinsed until the water runs clear
- 2 cups filtered water
- 2 tbsp clarified butter
- 1 small yellow onion, finely diced
- 2 cloves garlic, minced
- 1 tsp sea salt
- 1/2 tsp freshly ground black pepper
- 1/4 cup fresh parsley, finely chopped
Instructions
- Heat the clarified butter in a large, heavy-bottomed pot over medium heat until shimmering.
- Add the finely diced yellow onion, sautéing until translucent, about 3 minutes, stirring occasionally to prevent burning.
- Stir in the minced garlic, cooking for an additional 30 seconds until fragrant, ensuring it doesn’t brown.
- Pour in the rinsed long-grain white rice, stirring to coat each grain with the butter and onion mixture, toasting lightly for 2 minutes.
- Add the filtered water, sea salt, and freshly ground black pepper, bringing the mixture to a gentle boil.
- Reduce the heat to low, covering the pot with a tight-fitting lid, and simmer for 18 minutes without lifting the lid.
- Remove the pot from the heat, letting it stand covered for 5 minutes to allow the rice to steam and become fluffy.
- Fluff the rice with a fork, then gently fold in the finely chopped fresh parsley for a burst of color and freshness.
Zesty and aromatic, this one-pot camp stove rice offers a tender yet distinct grain texture, with the clarified butter lending a subtle richness. Serve it alongside grilled vegetables or as a base for a hearty stew to elevate your outdoor dining experience.
Camp Stove BBQ Chicken
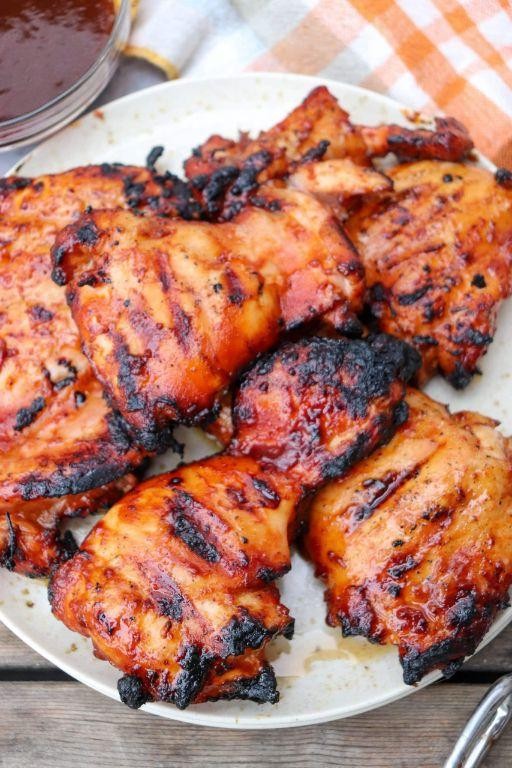
How quietly the evening settles in, the perfect time to gather around the camp stove, where the simplicity of cooking meets the heartiness of BBQ chicken. This dish, with its smoky undertones and tender juiciness, is a testament to the beauty of outdoor cooking.
Ingredients
- 2 lbs free-range chicken thighs, skin-on
- 1/4 cup extra-virgin olive oil
- 2 tbsp smoked paprika
- 1 tbsp garlic powder
- 1 tbsp onion powder
- 1 tsp sea salt
- 1/2 tsp freshly ground black pepper
- 1/2 cup organic apple cider vinegar
- 1/4 cup raw honey
Instructions
- In a large mixing bowl, combine the olive oil, smoked paprika, garlic powder, onion powder, sea salt, and black pepper to create a marinade.
- Add the chicken thighs to the bowl, ensuring each piece is thoroughly coated with the marinade. Cover and refrigerate for at least 4 hours, or overnight for deeper flavor.
- Preheat your camp stove to a medium heat, approximately 350°F, and lightly oil the grill grate to prevent sticking.
- Place the marinated chicken thighs on the grill, skin-side down first, and cook for 5-7 minutes until the skin is crispy and golden brown.
- Flip the chicken thighs and continue cooking for another 5-7 minutes, or until the internal temperature reaches 165°F when checked with a meat thermometer.
- In a small saucepan over the camp stove, whisk together the apple cider vinegar and raw honey, bringing to a gentle simmer for 2-3 minutes to thicken slightly.
- Brush the glaze over the chicken thighs during the last 2 minutes of cooking, allowing it to caramelize slightly.
- Remove the chicken from the grill and let it rest for 5 minutes before serving to ensure the juices redistribute.
Kindly note the caramelized glaze clinging to the crispy skin, a sweet and tangy contrast to the smoky, tender meat beneath. Serve atop a rustic wooden board with grilled vegetables for a visually stunning and utterly satisfying campfire feast.
Outdoor Omelette
Sometimes, the simplest meals are the ones that linger in memory, like this Outdoor Omelette, a dish that captures the essence of morning freshness and the quiet joy of cooking under the open sky.
Ingredients
- 2 tbsp clarified butter
- 3 pasture-raised eggs, lightly beaten
- 1/4 cup finely diced yellow onion
- 1/4 cup diced heirloom tomatoes
- 1 tbsp chopped fresh chives
- 1/4 tsp sea salt
- 1/8 tsp freshly ground black pepper
Instructions
- Heat a 10-inch cast-iron skillet over medium-low heat (300°F) and add clarified butter, swirling to coat the pan evenly.
- Add the finely diced yellow onion to the skillet, sautéing until translucent, about 3 minutes, stirring occasionally to prevent browning.
- Gently pour the lightly beaten pasture-raised eggs into the skillet, tilting to spread evenly. Allow to set for 1 minute without stirring.
- Scatter the diced heirloom tomatoes and chopped fresh chives over the eggs, then season with sea salt and freshly ground black pepper.
- Using a spatula, carefully fold the omelette in half, covering the vegetables, and cook for an additional 2 minutes until the eggs are fully set but still moist.
- Slide the omelette onto a warm plate, garnish with additional chives if desired, and serve immediately.
Light and fluffy with a delicate richness from the clarified butter, this omelette offers a harmonious blend of textures and flavors. For a rustic touch, serve alongside toasted artisanal bread and a drizzle of extra-virgin olive oil.
Campfire Nachos
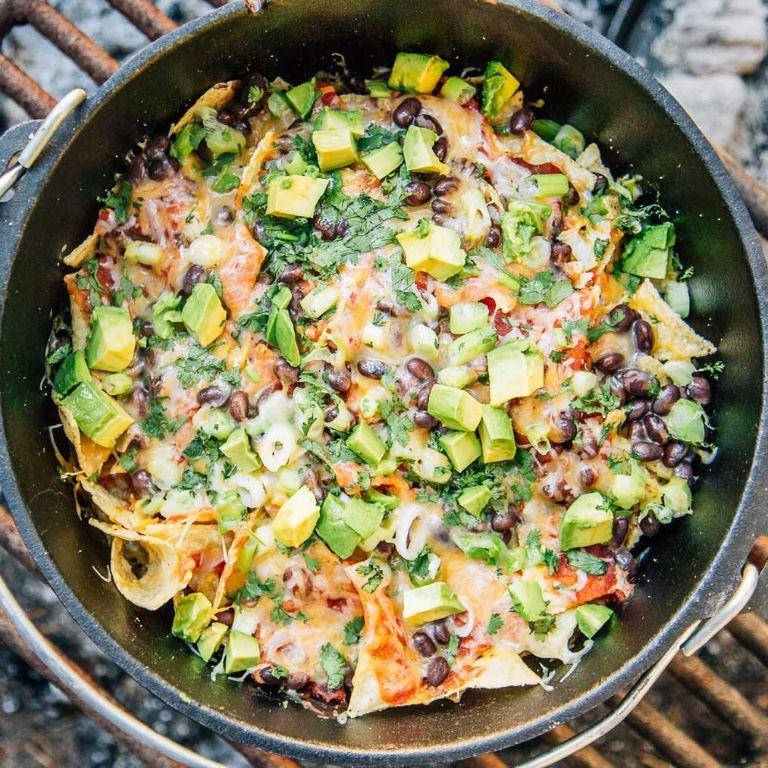
There’s something deeply comforting about gathering around a fire, the crackle of flames setting the stage for a meal that’s as much about the experience as it is about the flavors. Campfire nachos, with their melty cheese and crisp edges, capture this essence perfectly, offering a dish that’s both rustic and indulgent.
Ingredients
- 1 bag of thick-cut, organic tortilla chips
- 2 cups of sharp cheddar cheese, freshly grated
- 1 cup of Monterey Jack cheese, freshly grated
- 1/2 cup of black beans, rinsed and drained
- 1/4 cup of pickled jalapeños, thinly sliced
- 1/4 cup of cilantro, finely chopped
- 1/2 cup of sour cream
- 1/4 cup of green onions, thinly sliced
Instructions
- Preheat a cast iron skillet over the campfire to medium heat, ensuring an even cooking surface.
- Layer half of the tortilla chips at the bottom of the skillet, creating a sturdy base.
- Sprinkle half of the cheddar and Monterey Jack cheeses evenly over the chips, allowing for optimal melt.
- Distribute half of the black beans and jalapeños atop the cheese layer, ensuring each bite has a balance of flavors.
- Repeat the layering process with the remaining chips, cheeses, beans, and jalapeños.
- Cover the skillet with a lid or aluminum foil, and let the nachos cook for 5-7 minutes, or until the cheeses are fully melted and bubbly.
- Remove the skillet from the heat and garnish with cilantro, green onions, and dollops of sour cream.
How the cheeses meld together under the open sky, creating a tapestry of flavors that’s both bold and comforting, is nothing short of magical. Serve these nachos straight from the skillet, letting the communal act of sharing enhance the dish’s inherent warmth.
Easy Camp Stove Soup

Now, as the evening light fades and the air carries a hint of autumn’s approach, there’s something deeply comforting about preparing a simple, nourishing meal outdoors. This Easy Camp Stove Soup is a testament to the beauty of minimal ingredients coming together to create something unexpectedly rich and satisfying.
Ingredients
- 2 tbsp extra-virgin olive oil
- 1 cup diced yellow onion
- 2 cloves garlic, minced
- 3 cups low-sodium chicken broth
- 1 cup diced carrots
- 1 cup diced celery
- 1 cup peeled and diced Yukon Gold potatoes
- 1 tsp fresh thyme leaves
- 1/2 tsp sea salt
- 1/4 tsp freshly ground black pepper
- 1 cup shredded rotisserie chicken
- 1/4 cup chopped fresh parsley
Instructions
- Heat the extra-virgin olive oil in a medium pot over a camp stove set to medium heat until shimmering, about 1 minute.
- Add the diced yellow onion and sauté, stirring occasionally, until translucent, about 5 minutes.
- Stir in the minced garlic and cook until fragrant, about 30 seconds, being careful not to burn.
- Pour in the low-sodium chicken broth, then add the diced carrots, celery, and Yukon Gold potatoes, ensuring all ingredients are submerged.
- Bring the mixture to a gentle boil, then reduce the heat to low and simmer, uncovered, for 20 minutes, or until the vegetables are tender.
- Season with fresh thyme leaves, sea salt, and freshly ground black pepper, adjusting the seasoning as needed.
- Add the shredded rotisserie chicken and chopped fresh parsley, stirring to combine, and heat through for about 2 minutes.
As the soup settles, the broth becomes a golden elixir, rich with the essence of thyme and the sweetness of the vegetables. Serve it with a crusty baguette for dipping, or under a starlit sky for an unforgettable camp dining experience.
One-Pot Camp Stove Curry
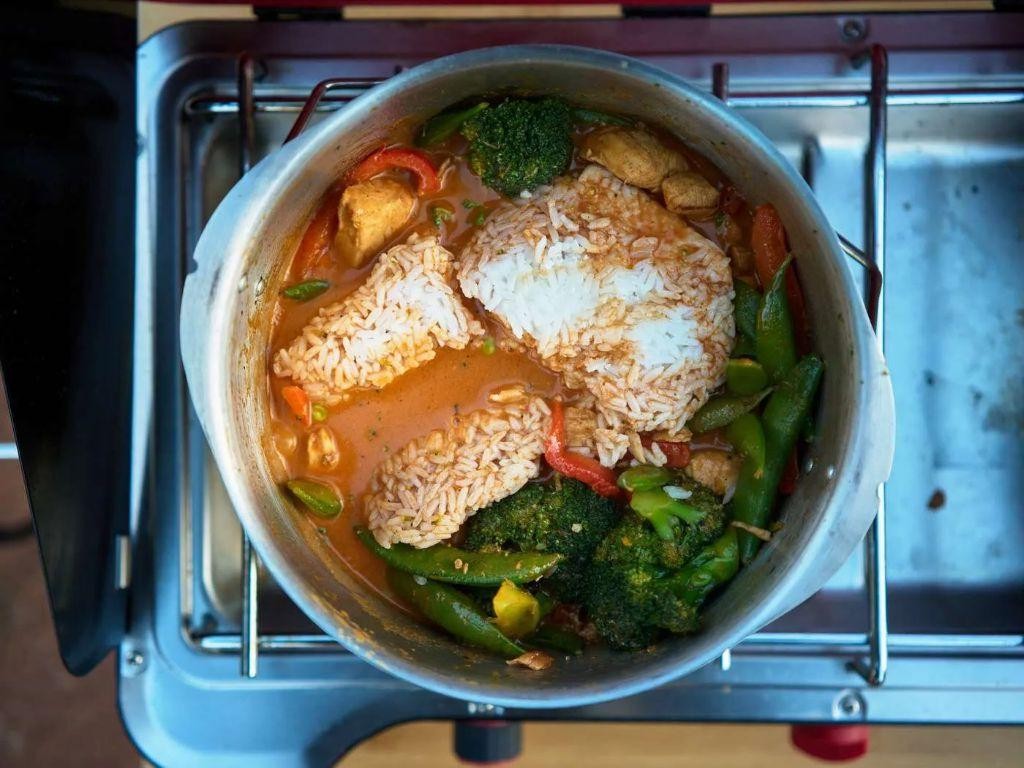
Remembering the quiet moments under the stars, this one-pot camp stove curry brings warmth to the cool evening air, a simple yet deeply flavorful dish that feels like a hug from the inside.
Ingredients
- 1 tbsp clarified butter
- 1 cup diced yellow onion
- 2 cloves garlic, minced
- 1 tbsp freshly grated ginger
- 1 tsp ground turmeric
- 1 tsp ground cumin
- 1/2 tsp ground coriander
- 1/4 tsp cayenne pepper
- 1 cup diced tomatoes
- 1 cup coconut milk
- 1 cup vegetable broth
- 1 cup diced sweet potatoes
- 1 cup chickpeas, drained and rinsed
- 1/2 cup frozen peas
- Salt, to precise measurement (1/2 tsp)
Instructions
- Heat the clarified butter in a large pot over medium heat until it shimmers, about 1 minute.
- Add the diced yellow onion, sautéing until translucent, approximately 3 minutes, stirring occasionally to prevent burning.
- Stir in the minced garlic and grated ginger, cooking for another minute until fragrant.
- Sprinkle in the ground turmeric, cumin, coriander, and cayenne pepper, toasting the spices for 30 seconds to unlock their flavors.
- Pour in the diced tomatoes, scraping the bottom of the pot to deglaze and incorporate any browned bits.
- Add the coconut milk and vegetable broth, bringing the mixture to a gentle simmer.
- Introduce the diced sweet potatoes and chickpeas, simmering uncovered for 15 minutes, or until the sweet potatoes are tender.
- Fold in the frozen peas and salt, cooking for an additional 2 minutes to warm through.
- Remove from heat and let stand for 5 minutes to allow the flavors to meld.
Mellow and creamy, this curry boasts a harmonious blend of spices with a subtle sweetness from the potatoes. Serve it over a bed of fluffy jasmine rice or with a side of warm naan for a comforting meal under the open sky.
Camp Stove Grilled Fish
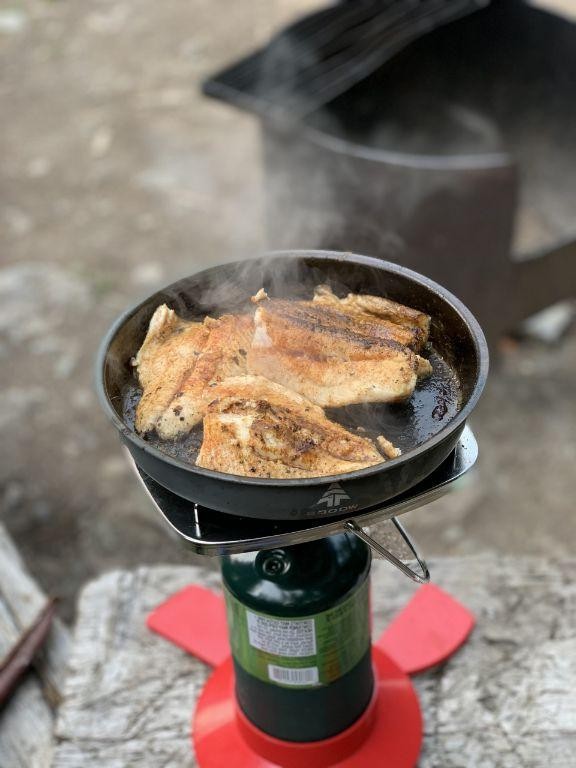
Dusk settles softly over the campsite, the air filled with the promise of a meal that’s as much about the process as it is about the taste. There’s something deeply satisfying about preparing grilled fish over a camp stove, the flames licking the underside of the pan, the scent mingling with the fresh outdoors.
Ingredients
- 1 lb fresh rainbow trout fillets, skin-on
- 2 tbsp clarified butter
- 1 tsp sea salt flakes
- 1/2 tsp freshly ground black pepper
- 1 lemon, thinly sliced
- 2 sprigs fresh dill
Instructions
- Preheat your camp stove to a medium heat, aiming for a surface temperature of approximately 375°F.
- While the stove heats, pat the rainbow trout fillets dry with paper towels to ensure a crisp skin.
- Season both sides of the fillets evenly with sea salt flakes and freshly ground black pepper.
- Melt the clarified butter in a cast-iron skillet over the camp stove, swirling to coat the bottom evenly.
- Carefully place the fillets in the skillet, skin-side down, and cook undisturbed for 4 minutes to achieve a golden crust.
- Flip the fillets gently, add lemon slices and fresh dill sprigs around them, and cook for an additional 3 minutes.
- Remove the skillet from the heat and let the fish rest for 2 minutes before serving to allow the juices to redistribute.
As the fish rests, the skin crisps further, offering a delightful contrast to the tender, flaky flesh beneath. The subtle acidity of the lemon and the aromatic dill elevate the trout’s natural flavors, making it a dish that’s as memorable as the campfire stories that accompany it. Serve it straight from the skillet, with the pan juices drizzled over the top for an extra layer of flavor.
Outdoor Baked Beans
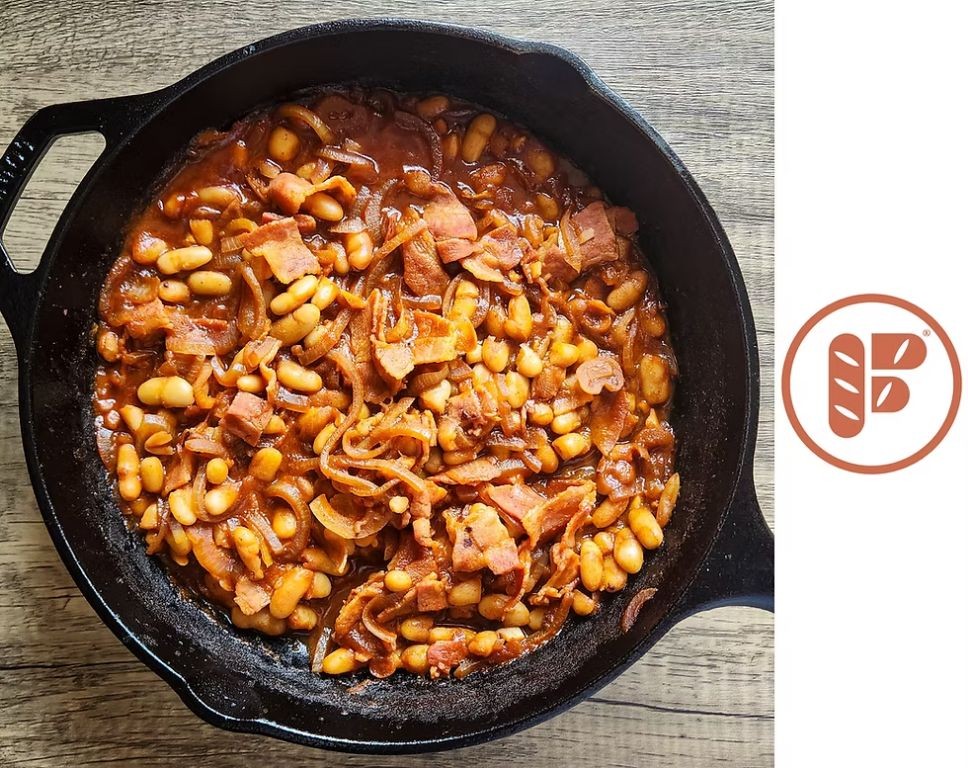
How often do we pause to savor the simple joys, like the rich, smoky aroma of baked beans wafting through the air on a lazy afternoon? This recipe, a humble homage to outdoor gatherings, invites you to slow down and relish the process as much as the result.
Ingredients
- 2 cups dried navy beans, soaked overnight
- 1/4 cup clarified butter
- 1 large yellow onion, finely diced
- 4 cloves garlic, minced
- 1/2 cup dark brown sugar, packed
- 1/4 cup molasses
- 2 tbsp Dijon mustard
- 1 tbsp apple cider vinegar
- 1 tsp smoked paprika
- 1/2 tsp ground black pepper
- 4 cups chicken stock, low-sodium
- 1 bay leaf
Instructions
- Preheat your outdoor oven to 300°F, ensuring a consistent temperature for slow cooking.
- In a large Dutch oven, melt the clarified butter over medium heat, then sauté the onion until translucent, about 5 minutes.
- Add the garlic and cook for an additional minute, stirring constantly to prevent burning.
- Drain the soaked navy beans and add them to the pot, along with the brown sugar, molasses, Dijon mustard, apple cider vinegar, smoked paprika, and black pepper, stirring to combine.
- Pour in the chicken stock and add the bay leaf, then bring the mixture to a gentle simmer.
- Cover the Dutch oven and transfer it to the preheated outdoor oven, baking for 4 hours without stirring to allow the flavors to meld.
- After 4 hours, remove the lid and continue baking for an additional hour, or until the beans are tender and the sauce has thickened to your liking.
- Discard the bay leaf before serving, adjusting the seasoning if necessary.
Zesty and deeply flavorful, these baked beans boast a velvety texture that clings to each bean, offering a perfect balance of sweetness and smoke. Serve them alongside grilled cornbread or as a hearty topping for baked potatoes for a twist on tradition.
Conclusion
You’ve just discovered a treasure trove of 22 easy camp stove recipes that promise to elevate your outdoor cooking adventures. Whether you’re a seasoned camper or a first-time explorer, these recipes are designed to bring simplicity and flavor to your meals under the stars. Don’t forget to try them out, share your favorites in the comments, and pin this article on Pinterest to inspire fellow outdoor enthusiasts. Happy cooking!