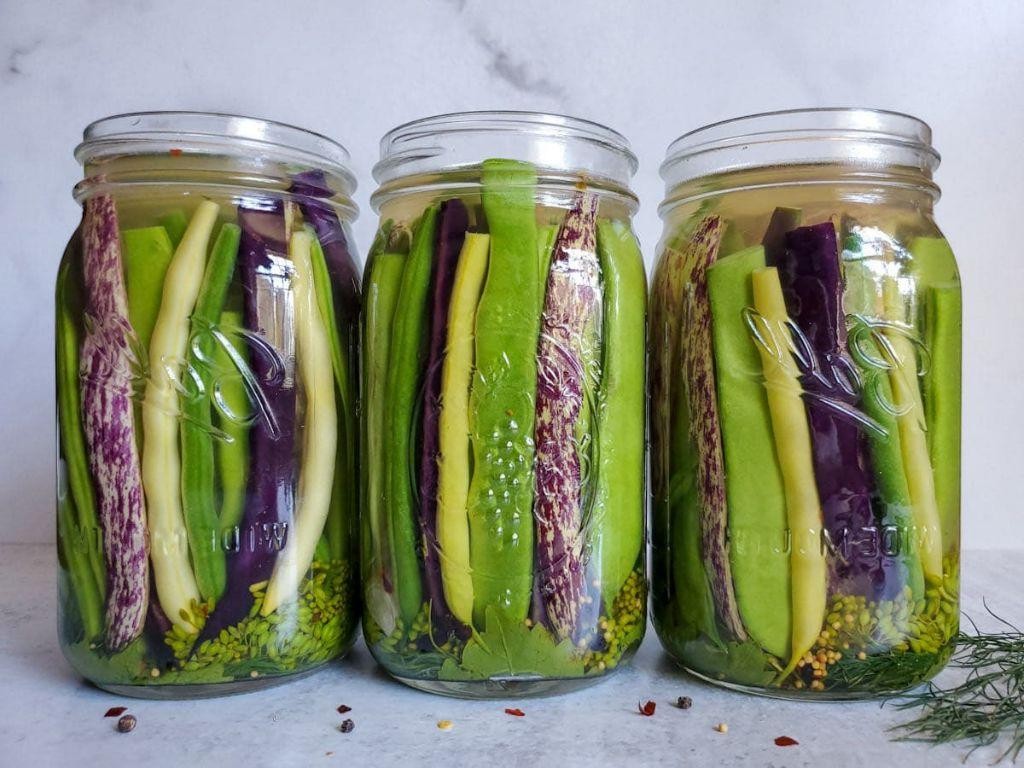
Get ready to add a zesty kick to your snacks and meals with our roundup of 18 Spicy Refrigerator Dilly Beans Recipes Quick! Perfect for home cooks looking to spice up their pantry with minimal fuss, these recipes promise bold flavors and crunchy satisfaction. Whether you’re a canning novice or a pickle pro, there’s something here to tantalize your taste buds. Let’s dive into the deliciousness!
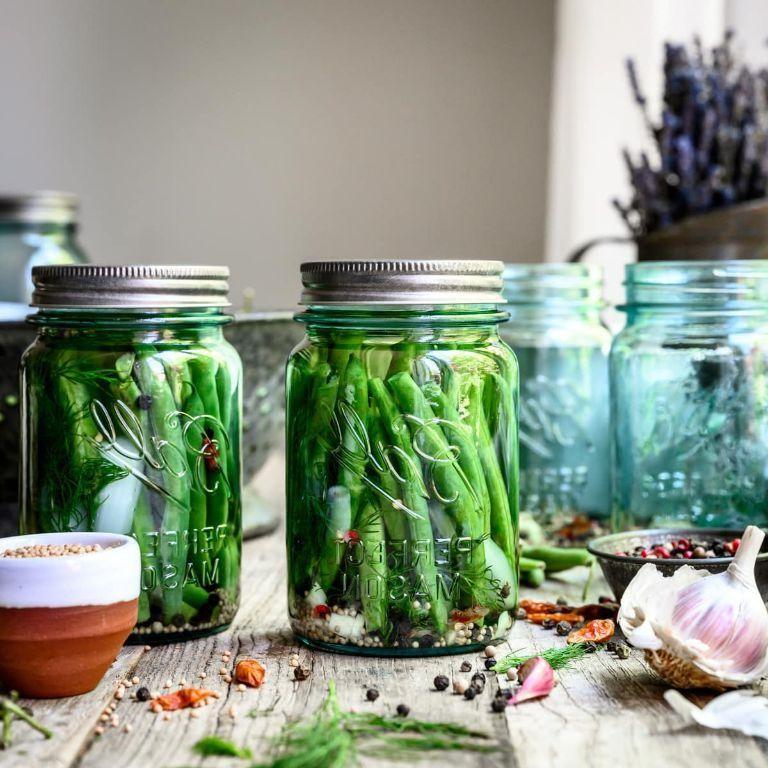
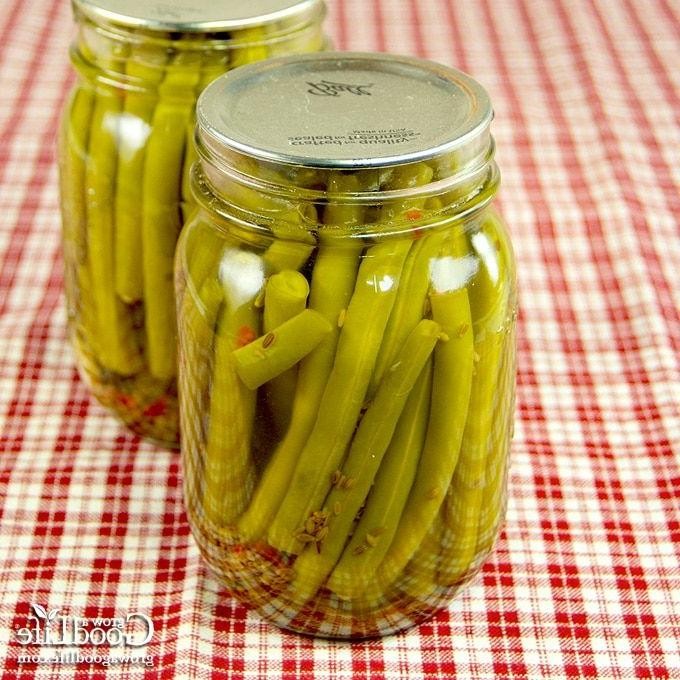
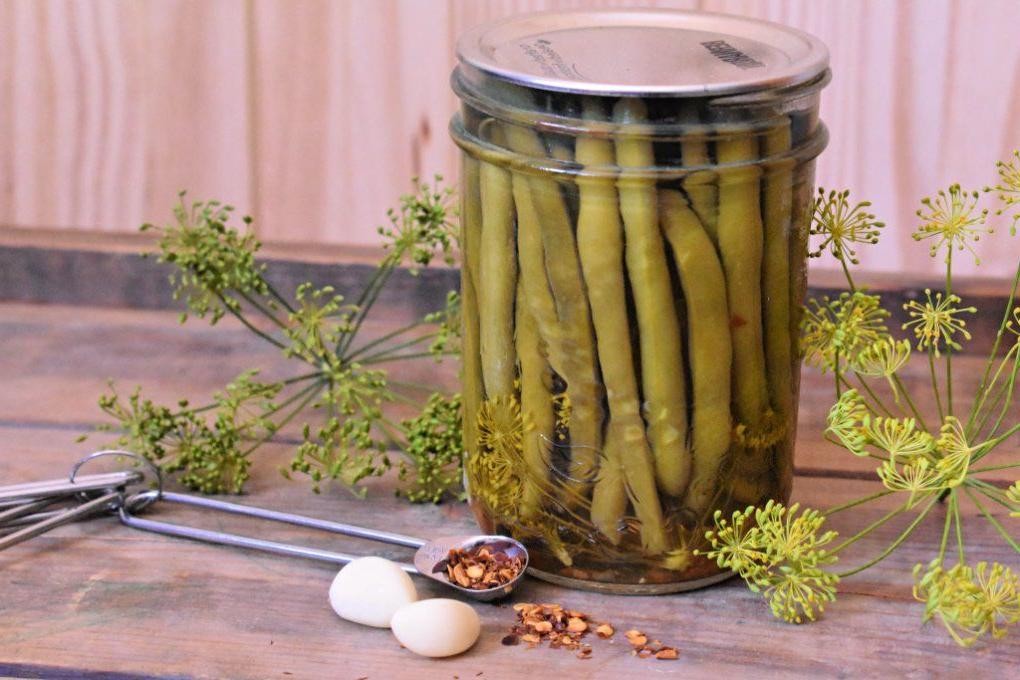
Garlic Infused Spicy Dilly Beans

Outrageously crunchy and packed with flavor, these Garlic Infused Spicy Dilly Beans are a pickled delight. Perfect for snacking or jazzing up your Bloody Mary.
Ingredients
- 1 lb fresh green beans, trimmed (look for the crispest ones at the market)
- 4 cloves garlic, smashed (the more, the merrier for garlic lovers)
- 1 cup apple cider vinegar (I swear by Bragg’s for its tangy depth)
- 1 cup water
- 1 tbsp kosher salt (Diamond Crystal is my pantry staple)
- 1 tsp red pepper flakes (adjust based on your heat tolerance)
- 1 tsp dill seeds (for that classic dilly bean flavor)
Instructions
- In a medium saucepan, combine apple cider vinegar, water, salt, red pepper flakes, and dill seeds. Bring to a boil over high heat.
- Once boiling, reduce heat to low and simmer for 5 minutes to infuse the flavors.
- While the brine simmers, pack the green beans and smashed garlic cloves into a clean quart-sized jar.
- Carefully pour the hot brine over the beans, ensuring they are completely submerged. Tip: Use a chopstick to remove any air bubbles.
- Seal the jar tightly and let it cool to room temperature before refrigerating.
- Wait at least 48 hours before tasting to allow the flavors to meld. Tip: They get better with time, so try to wait a week if you can.
Zesty and vibrant, these beans offer a satisfying crunch with every bite. Serve them alongside a charcuterie board or chop them into salads for an extra kick.
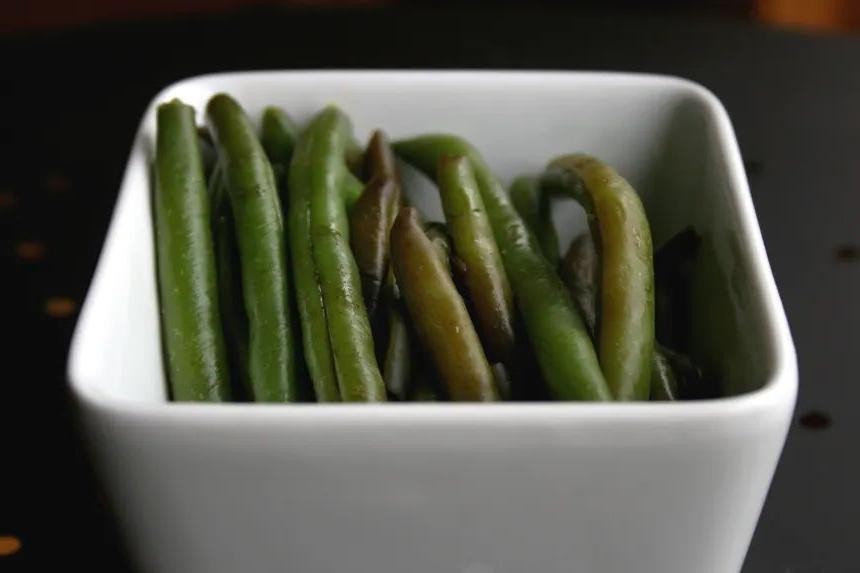
Honey Mustard Dilly Beans

Ready to add a tangy twist to your snack game? These Honey Mustard Dilly Beans are crisp, flavorful, and ridiculously easy to make.
Ingredients
- 1 lb fresh green beans, trimmed (go for the crispest ones you can find)
- 1/2 cup apple cider vinegar (the sharper, the better for that tangy kick)
- 1/4 cup honey (local if you can, for that deep flavor)
- 2 tbsp whole grain mustard (I love the texture it adds)
- 1 tbsp yellow mustard seeds (for a bit of pop)
- 1 tsp salt (sea salt is my preference here)
- 1/2 tsp red pepper flakes (adjust based on your heat tolerance)
- 2 cloves garlic, smashed (because garlic makes everything better)
- 1/2 cup water (filtered, to keep the flavors clean)
Instructions
- In a medium saucepan, combine apple cider vinegar, honey, whole grain mustard, mustard seeds, salt, red pepper flakes, garlic, and water. Bring to a boil over medium-high heat, stirring occasionally to dissolve the honey.
- Once boiling, reduce heat to low and simmer for 5 minutes to meld the flavors. Tip: Taste the brine now; it should be a balance of sweet, tangy, and spicy.
- Add the trimmed green beans to the saucepan, ensuring they’re fully submerged. Simmer for 2 minutes exactly to keep them crisp. Tip: Use a timer for precision.
- Remove from heat and let the beans cool in the brine for 10 minutes. Tip: This step is crucial for flavor absorption.
- Transfer the beans and brine to a clean jar, seal, and refrigerate for at least 4 hours before serving. Overnight is better for maximum flavor.
Honey Mustard Dilly Beans are a crunchy, sweet, and spicy treat. Perfect straight from the jar or chopped into salads for an extra zing.
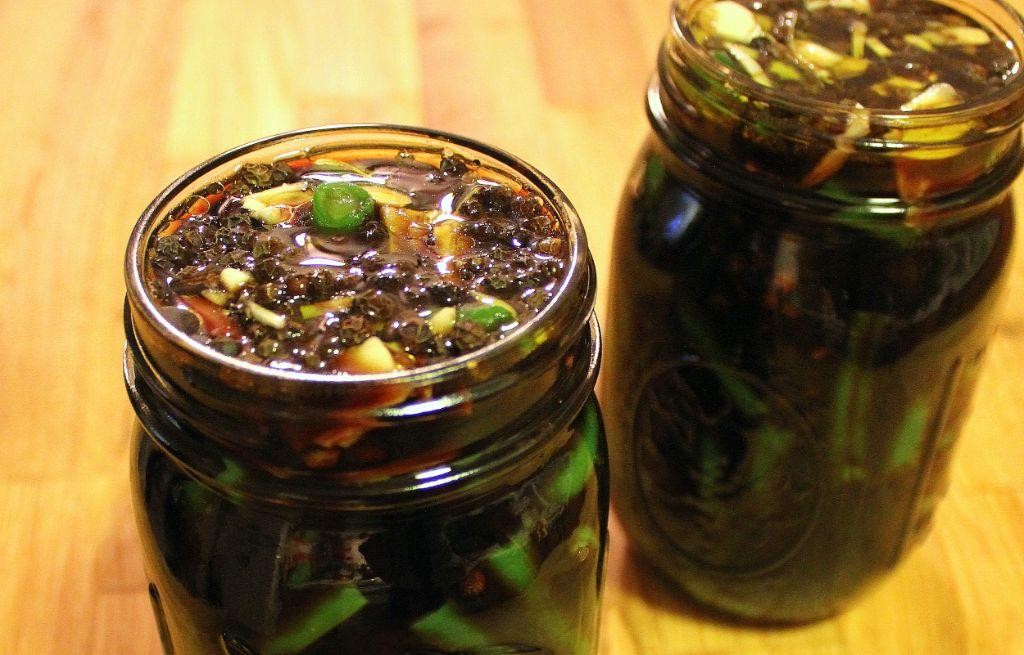
Jalapeno Lime Dilly Beans
Crunchy, tangy, and with a kick, these Jalapeno Lime Dilly Beans are a pickle lover’s dream. Perfect for snacking or gifting, they’re surprisingly simple to make.
Ingredients
- 1 lb fresh green beans, trimmed (look for the crispest ones at the market)
- 2 jalapenos, sliced (keep the seeds for extra heat)
- 4 cloves garlic, smashed (fresh is best here)
- 1 cup white vinegar (I always use Heinz for its clean taste)
- 1 cup water
- 1 tbsp kosher salt (Diamond Crystal is my go-to)
- 1 tbsp sugar (a touch of sweetness balances the heat)
- 1 tsp dill seeds (for that classic dilly flavor)
- Zest and juice of 1 lime (freshly squeezed makes all the difference)
Instructions
- In a large pot, combine vinegar, water, salt, sugar, and dill seeds. Bring to a boil over high heat, stirring until salt and sugar dissolve.
- Pack green beans, jalapenos, and garlic into a clean quart jar. Tuck lime zest in between the beans for even flavor distribution.
- Pour the hot brine over the beans, leaving 1/2 inch headspace. Add lime juice to the jar.
- Seal the jar and let it cool to room temperature. Tip: Gently shake the jar halfway through cooling to distribute flavors.
- Refrigerate for at least 48 hours before eating. The beans will develop more flavor over time.
- For best results, wait a week. The beans will be crisp, tangy, and perfectly spicy.
Vibrant and packed with flavor, these beans are a standout. Try them chopped in a Bloody Mary or alongside a charcuterie board for a crunchy contrast.
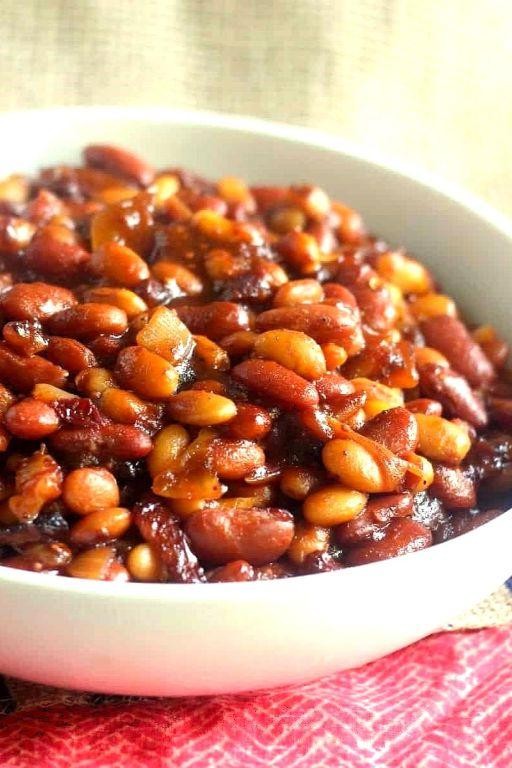
Maple Syrup Glazed Dilly Beans
Ready to add a sweet and tangy twist to your snack game? These Maple Syrup Glazed Dilly Beans are a crunchy, flavorful treat that’s surprisingly easy to make.
Ingredients
- 1 lb fresh green beans, trimmed (look for the crispest ones you can find)
- 1 cup apple cider vinegar (the sharper, the better for that tangy kick)
- 1/2 cup pure maple syrup (none of that pancake syrup stuff)
- 1 tbsp kosher salt (it dissolves better than table salt)
- 2 cloves garlic, smashed (because everything’s better with garlic)
- 1 tsp dill seeds (for that classic dilly bean flavor)
- 1/2 tsp red pepper flakes (adjust if you’re not into heat)
Instructions
- In a medium saucepan, combine apple cider vinegar, maple syrup, kosher salt, garlic, dill seeds, and red pepper flakes. Bring to a boil over medium-high heat, stirring occasionally.
- Once boiling, reduce heat to low and simmer for 5 minutes to let the flavors meld. Tip: Taste the brine now; it should be a balance of sweet, tangy, and spicy.
- Pack the trimmed green beans tightly into a clean quart-sized jar. Pour the hot brine over the beans, ensuring they’re completely submerged. Tip: Use a chopstick to remove any air bubbles.
- Seal the jar and let it cool to room temperature before refrigerating. Wait at least 48 hours before eating for best flavor. Tip: The longer they sit, the more flavorful they become.
Just like that, you’ve got a jar of Maple Syrup Glazed Dilly Beans that are crisp, sweet, and slightly spicy. Perfect as a snack straight from the jar or chopped into salads for an extra crunch.
Smoky Chipotle Dilly Beans
Kick off your summer canning with these Smoky Chipotle Dilly Beans. They’re crisp, spicy, and perfect for snacking or gifting.
Ingredients
– 2 lbs fresh green beans, trimmed (look for the crispest ones at the market)
– 4 cloves garlic, smashed (freshness is key for that punch)
– 2 tbsp whole black peppercorns (I love the extra kick they provide)
– 1 tbsp red pepper flakes (adjust based on your heat tolerance)
– 1 tbsp chipotle powder (for that deep, smoky flavor)
– 1/2 cup apple cider vinegar (the tangier, the better)
– 1/2 cup water (filtered makes a difference)
– 1 tbsp kosher salt (I find it dissolves more evenly)
– 1 tsp sugar (just a hint to balance the acidity)
– 4 sprigs fresh dill (the fresher, the more aromatic)
Instructions
1. Sterilize 2 quart-sized canning jars by boiling them for 10 minutes. Keep them hot until ready to use.
2. Pack the green beans vertically into the jars, leaving 1/2 inch headspace at the top.
3. Divide the garlic, peppercorns, red pepper flakes, chipotle powder, and dill sprigs evenly between the jars.
4. In a saucepan, combine apple cider vinegar, water, salt, and sugar. Bring to a boil over high heat, stirring until the salt and sugar dissolve.
5. Carefully pour the hot brine over the beans in each jar, maintaining the 1/2 inch headspace.
6. Wipe the rims of the jars with a clean, damp cloth to ensure a good seal.
7. Seal the jars with lids and bands, then process in a boiling water bath for 10 minutes.
8. Remove the jars and let them cool undisturbed for 24 hours. Check the seals before storing.
Dive into these beans after a week for optimal flavor. They’re smoky with a crunch that holds up well in salads or as a bold garnish for Bloody Marys.
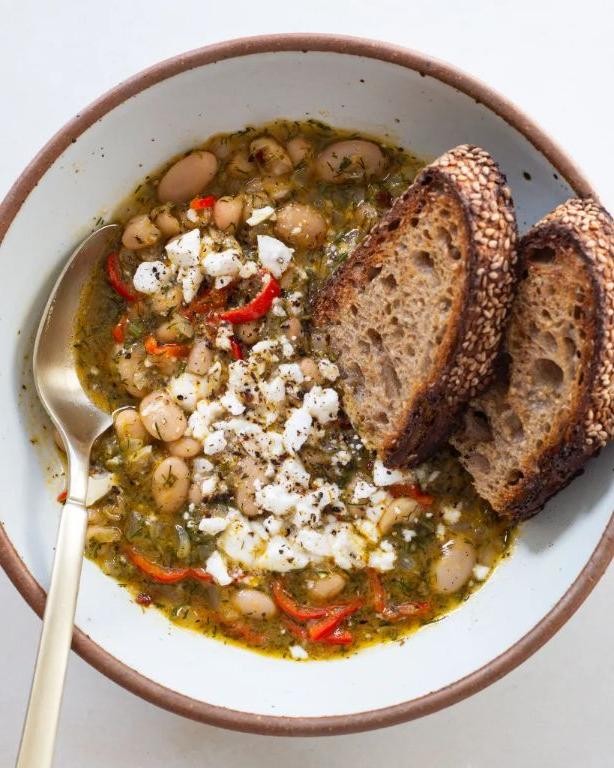
Sweet and Sour Dilly Beans
Perfect for picnics or as a tangy snack, these Sweet and Sour Dilly Beans pack a punch with minimal effort.
Ingredients
- 1 lb green beans, trimmed (I like them crisp, so I pick the freshest bunch)
- 1 cup apple cider vinegar (the sharper, the better for that tangy kick)
- 1 cup water
- 1/2 cup sugar (adjust if you like it less sweet)
- 2 tbsp kosher salt (it dissolves better than table salt)
- 4 cloves garlic, smashed (for a bold flavor)
- 1 tsp dill seeds (don’t skip; they’re the star)
- 1/2 tsp red pepper flakes (adds a nice heat)
Instructions
- Wash and trim the green beans to fit your jar.
- In a saucepan, combine vinegar, water, sugar, and salt. Bring to a boil over medium heat, stirring until sugar dissolves.
- Pack green beans, garlic, dill seeds, and red pepper flakes tightly into a clean quart jar.
- Pour the hot brine over the beans, leaving 1/2 inch headspace. Tip: Tap the jar to remove air bubbles.
- Seal the jar and let it cool to room temperature. Then refrigerate for at least 48 hours before eating. Tip: The longer they sit, the better they taste.
- After 48 hours, check for desired tanginess and crispness. Tip: They’ll keep for up to a month in the fridge.
Vibrant and crunchy, these beans are a hit on cheese boards or alongside grilled meats. Their bold flavor stands out in salads or as a standalone snack.
Curry Spiced Dilly Beans

Every summer, I crave something tangy and spicy to cut through the heat. These curry spiced dilly beans are my go-to for a quick pickle fix.
Ingredients
- 1 lb green beans, trimmed (I like them crisp, so I pick the freshest ones)
- 2 cups apple cider vinegar (the sharper, the better for that tang)
- 1 cup water (filtered makes a difference)
- 2 tbsp kosher salt (it dissolves better than table salt)
- 2 tbsp sugar (just enough to balance the acidity)
- 2 cloves garlic, smashed (for a subtle kick)
- 1 tbsp curry powder (my secret is to toast it first for depth)
- 1 tsp mustard seeds (they pop and add texture)
- 1/2 tsp red pepper flakes (adjust if you’re sensitive to heat)
- 1 bunch fresh dill (the more, the merrier for that herby punch)
Instructions
- In a medium saucepan, combine vinegar, water, salt, and sugar. Bring to a boil over high heat, stirring until salt and sugar dissolve.
- Pack green beans vertically into a clean quart jar. Tuck garlic, curry powder, mustard seeds, red pepper flakes, and dill around them.
- Pour the hot brine over the beans, leaving 1/2 inch headspace. Tap jar gently to release air bubbles.
- Seal the jar and let it cool to room temperature. Then refrigerate for at least 48 hours before tasting.
- Tip: For even flavor, flip the jar once a day. They’re ready when the beans are tangy and the spices have mellowed.
These beans are crunchy with a bold curry and dill flavor. Try them chopped in a potato salad for an unexpected twist.
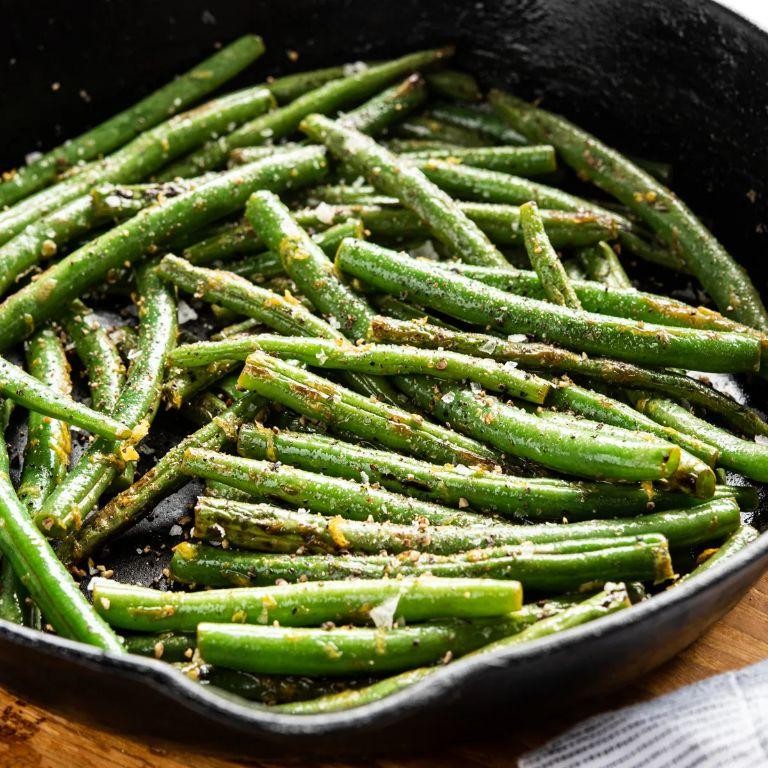
Rosemary and Thyme Dilly Beans

Rosemary and thyme dilly beans bring a herby punch to your pickling game. Ready in a flash, they’re the crunchy, tangy snack you didn’t know you needed.
Ingredients
- 1 lb green beans, trimmed (go for the crispest ones you can find)
- 2 cups apple cider vinegar (the sharper, the better for that tang)
- 2 cups water
- 2 tbsp kosher salt (it dissolves like a dream)
- 4 cloves garlic, smashed (because more garlic is always better)
- 1 tbsp black peppercorns (for a little kick)
- 2 sprigs fresh rosemary (fresh is key here)
- 2 sprigs fresh thyme (ditto)
- 1 tsp red pepper flakes (adjust if you’re heat-shy)
Instructions
- Pack green beans vertically into a clean quart-sized jar, leaving 1/2 inch headspace.
- In a saucepan, combine vinegar, water, and salt. Bring to a boil over high heat, stirring until salt dissolves.
- Add garlic, peppercorns, rosemary, thyme, and red pepper flakes to the jar with the beans.
- Pour the hot brine over the beans, ensuring they’re fully submerged. Tap the jar gently to release any air bubbles.
- Seal the jar and let it cool to room temperature. Then, refrigerate for at least 48 hours before eating. Tip: The longer they sit, the more flavorful they get.
- After 48 hours, check for desired tang and crunch. Adjust seasoning if necessary. Tip: If too tangy, a quick rinse under cold water mellows them out.
- Serve chilled as a snack or alongside grilled meats. Tip: Chopped dilly beans add a zesty crunch to potato salads.
Great for picnics or as a fridge staple, these beans offer a satisfying crunch with every bite. Their herby, garlicky flavor profile makes them a standout side or snack.
Balsamic Vinegar Dilly Beans
Crunchy, tangy, and with a hint of garlic, these Balsamic Vinegar Dilly Beans are a quick pickle dream. Perfect for snacking or gifting, they’re a summer staple in my kitchen.
Ingredients
- 1 pound green beans, trimmed (I like them extra crisp, so I pick the freshest ones at the market)
- 1 cup balsamic vinegar (the good stuff makes a difference here)
- 1 cup water
- 1 tbsp sugar (adjust if you like it less sweet)
- 1 tbsp salt (I use sea salt for a cleaner taste)
- 2 cloves garlic, smashed (because more garlic is always better)
- 1 tsp dill seeds (for that classic dilly bean flavor)
- 1/2 tsp red pepper flakes (optional, but I love the slight heat)
Instructions
- Wash and trim the green beans to fit your jar, leaving about 1/2 inch headspace.
- In a saucepan, combine balsamic vinegar, water, sugar, and salt. Bring to a boil over medium heat, stirring until sugar and salt dissolve.
- Add garlic, dill seeds, and red pepper flakes to the bottom of a clean quart jar.
- Pack the green beans vertically into the jar as tightly as possible without crushing them.
- Pour the hot vinegar mixture over the beans, ensuring they’re completely covered. Leave 1/4 inch headspace.
- Seal the jar and let it cool to room temperature before refrigerating. Tip: The beans taste better after 24 hours, but I can never wait that long.
- Store in the refrigerator for up to 2 months. Tip: Shake the jar gently every few days to distribute the flavors evenly.
Snappy with a perfect balance of sweet and tangy, these beans are a hit straight from the jar. Try them chopped in salads or as a bold garnish for Bloody Marys.
Orange Zest Dilly Beans
Zesty and vibrant, these Orange Zest Dilly Beans bring a refreshing twist to your pickle game. Perfect for snacking or gifting, they’re a crunchy, tangy delight.
Ingredients
- 1 lb fresh green beans, trimmed (look for the crispest ones at the market)
- 1 cup apple cider vinegar (the sharper, the better for that tangy punch)
- 1 cup water (filtered is my choice for cleaner flavors)
- 2 tbsp sugar (a little sweetness balances the acidity)
- 1 tbsp salt (I swear by sea salt for its mildness)
- 2 cloves garlic, smashed (because garlic makes everything better)
- 1 tsp dill seeds (for that classic dilly flavor)
- Zest of 1 orange (the star ingredient, use a microplane for fine zest)
Instructions
- In a medium saucepan, combine apple cider vinegar, water, sugar, and salt. Bring to a boil over high heat, stirring until sugar and salt dissolve completely.
- Pack green beans vertically into a clean quart-sized jar. Tuck garlic cloves and dill seeds among the beans.
- Carefully pour the hot vinegar mixture over the beans, leaving 1/2 inch headspace. The beans should be fully submerged.
- Seal the jar tightly and let it cool to room temperature. Then, refrigerate for at least 48 hours before tasting—patience rewards you with deeper flavors.
- Sprinkle orange zest over the beans just before serving to brighten the dish.
With a crisp texture and a lively mix of tangy and sweet, these beans are a standout. Try them atop a grilled bratwurst or as a bold addition to your next cheese board.
Ginger Soy Dilly Beans
Ginger soy dilly beans are a crunchy, tangy snack that’s perfect for summer picnics. They’re easy to make and packed with flavor.
Ingredients
– 1 lb green beans, trimmed (I like them extra crisp) – 1 cup apple cider vinegar (the sharper, the better) – 1/2 cup soy sauce (low sodium works fine) – 1/4 cup sugar (adjust if you like it less sweet) – 2 tbsp fresh ginger, grated (don’t skip this!) – 2 garlic cloves, smashed (more if you’re a garlic lover) – 1 tsp red pepper flakes (for a slight kick)
Instructions
1. Combine vinegar, soy sauce, sugar, ginger, garlic, and red pepper flakes in a saucepan. 2. Bring the mixture to a boil over medium heat, stirring until sugar dissolves. Tip: Keep an eye on it to prevent boiling over. 3. Remove from heat and let cool for 5 minutes. 4. Pack green beans tightly into a clean quart jar. 5. Pour the warm brine over the beans, ensuring they’re fully submerged. Tip: Use a spoon to press them down if needed. 6. Seal the jar and refrigerate for at least 24 hours before serving. Tip: They taste even better after 48 hours. Perfect for snacking straight from the jar or as a bold side dish. The beans stay crisp with a perfect balance of sweet, salty, and spicy.
Cinnamon Clove Dilly Beans
A unique twist on pickled green beans, these Cinnamon Clove Dilly Beans are a crunchy, flavorful snack. Perfect for summer picnics or as a bold garnish, they’re surprisingly easy to make at home.
Ingredients
- 1 lb fresh green beans, trimmed (look for the crispest ones at the market)
- 2 cups white vinegar (I swear by Heinz for its clean taste)
- 2 cups water
- 1/4 cup granulated sugar (a little sweetness balances the tang)
- 2 tbsp pickling salt (don’t skip this—it’s key for crunch)
- 4 cloves garlic, smashed (more if you’re a garlic lover like me)
- 2 cinnamon sticks (adds a warm, unexpected note)
- 1 tsp whole cloves (for that signature spice kick)
- 1 tsp dill seeds (the ‘dilly’ in dilly beans)
- 1/2 tsp red pepper flakes (adjust based on your heat preference)
Instructions
- Sterilize 2 pint-sized canning jars and their lids by boiling for 10 minutes. Keep them hot until ready to use.
- Pack the green beans vertically into the jars, leaving 1/2 inch headspace at the top.
- In a saucepan, combine vinegar, water, sugar, and pickling salt. Bring to a boil over medium heat, stirring until sugar and salt dissolve.
- Add garlic, cinnamon sticks, cloves, dill seeds, and red pepper flakes to the jars, distributing evenly.
- Pour the hot brine over the beans, ensuring they’re completely submerged. Leave 1/4 inch headspace.
- Wipe the jar rims with a clean, damp cloth to remove any residue. Seal with the lids and bands, tightening only until fingertip-tight.
- Process the jars in a boiling water bath for 10 minutes to seal. Start timing once the water returns to a full boil.
- Remove jars and let cool undisturbed for 24 hours. Check seals by pressing the center of the lid—it should not pop up.
Expect a crisp texture with a bold, spicy-sweet flavor profile. These beans shine on a charcuterie board or chopped into a potato salad for extra zing.
Basil Pesto Dilly Beans
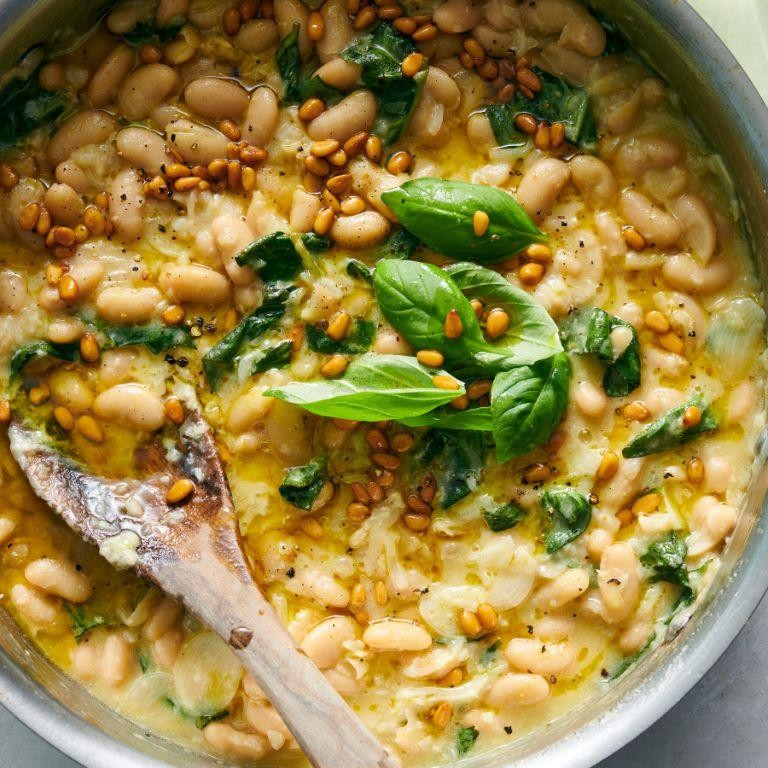
Nothing beats the crunch of dilly beans with a twist of basil pesto. This recipe combines the tangy snap of pickled green beans with the herby richness of pesto for a standout side.
Ingredients
- 1 lb fresh green beans, trimmed (look for the crispest ones at the market)
- 1/2 cup fresh basil leaves (pack them tight for maximum flavor)
- 1/4 cup extra virgin olive oil (my go-to for its fruity notes)
- 2 cloves garlic (freshly minced, none of that jarred stuff)
- 1/4 cup grated Parmesan cheese (the real deal, please)
- 1 tbsp lemon juice (brightens everything up)
- 1 tsp salt (I like sea salt for its clean taste)
- 1/2 tsp black pepper (freshly ground makes a difference)
- 1/2 cup white vinegar (keeps the beans perfectly tangy)
- 1/2 cup water (filtered is best for pickling)
- 1 tbsp sugar (just a touch to balance the acidity)
Instructions
- Blanch green beans in boiling water for 2 minutes, then plunge into ice water to stop cooking. Tip: This keeps them crisp and bright green.
- In a blender, combine basil, olive oil, garlic, Parmesan, lemon juice, salt, and pepper. Blend until smooth. Tip: Scrape down the sides for an even blend.
- In a saucepan, bring vinegar, water, and sugar to a boil. Tip: Stir until sugar dissolves completely for even pickling.
- Pack green beans into a jar, pour hot vinegar mixture over, then seal. Let cool to room temperature.
- Once cooled, drizzle pesto over the beans before serving. Tip: Let them sit for 10 minutes so flavors meld.
Amazingly crisp with a herby punch, these beans are perfect atop a charcuterie board or alongside grilled meats. The pesto adds a luxurious touch to the classic dilly bean.
Red Pepper Flake Dilly Beans
Must-try for pickle lovers, these Red Pepper Flake Dilly Beans pack a crunchy, spicy punch. Perfect for snacking or gifting.
Ingredients
- 1 lb fresh green beans, trimmed (look for the crispest ones at the market)
- 2 cups white vinegar (the clear kind works best for a clean taste)
- 2 cups water
- 2 tbsp kosher salt (I swear by Diamond Crystal for pickling)
- 4 cloves garlic, smashed (more if you’re a garlic fiend like me)
- 2 tsp red pepper flakes (adjust based on your heat tolerance)
- 1 tbsp dill seeds (not dill weed, the seeds have more punch)
Instructions
- Sterilize two pint jars and their lids by boiling for 10 minutes. Keep them hot until ready to use.
- Pack the green beans vertically into the jars, leaving 1/2 inch headspace at the top.
- In a saucepan, combine vinegar, water, and salt. Bring to a boil over high heat, stirring until salt dissolves.
- Add garlic, red pepper flakes, and dill seeds to each jar, distributing evenly.
- Pour the hot brine over the beans, ensuring they’re completely submerged. Leave 1/4 inch headspace.
- Wipe the rims of the jars with a clean, damp cloth to remove any residue.
- Seal the jars with the lids and rings, tightening just until finger-tight.
- Process the jars in a boiling water bath for 10 minutes to ensure a good seal.
- Remove the jars and let them cool on a towel. Listen for the satisfying pop of the lids sealing.
These beans develop more flavor over time but are crunchy and vibrant after just a week. Try them chopped in a bloody mary for an extra kick.
Dill Pickle Dilly Beans

Lately, I’ve been obsessed with adding a crunchy, tangy twist to my snacks, and these Dill Pickle Dilly Beans hit the spot every time.
Ingredients
- 1 lb fresh green beans (trimmed, because nobody likes the woody ends)
- 2 cups white vinegar (the sharper, the better for that classic pickle punch)
- 2 cups water (filtered, to keep the flavors clean)
- 1/4 cup pickling salt (it dissolves like a dream)
- 4 cloves garlic (smashed, because we want that flavor to burst)
- 2 tbsp dill seeds (for that herby kick)
- 1 tsp red pepper flakes (optional, but why not add a little heat?)
Instructions
- Wash and trim the green beans to fit your jars, leaving 1/2 inch headspace.
- In a large pot, combine vinegar, water, and pickling salt. Bring to a boil over high heat, stirring until the salt dissolves completely.
- Pack the green beans vertically into sterilized jars for a neat presentation. Tuck garlic cloves and sprinkle dill seeds and red pepper flakes between the beans.
- Pour the hot brine over the beans, ensuring they’re fully submerged. Leave 1/2 inch headspace.
- Seal the jars and process in a boiling water bath for 10 minutes to ensure safety and longevity.
- Let the jars cool undisturbed for 24 hours. Check the seals before storing.
With a satisfying crunch and a bold dill flavor, these beans are perfect straight from the jar or chopped into salads for an extra zing.
Apple Cider Vinegar Dilly Beans
Gather around for a tangy twist on a classic snack that’s both crunchy and refreshing. Apple Cider Vinegar Dilly Beans are your go-to for a quick pickle fix with a punch.
Ingredients
– 1 lb fresh green beans, trimmed (look for the crispest ones you can find) – 1 1/2 cups apple cider vinegar (the sharper, the better for that tang) – 1 1/2 cups water (filtered makes a difference) – 2 tbsp kosher salt (I swear by Diamond Crystal) – 2 cloves garlic, smashed (more if you’re a garlic lover) – 1 tsp dill seeds (toasted lightly for extra aroma) – 1/2 tsp red pepper flakes (adjust if you like heat)
Instructions
1. Wash and trim the green beans to fit your jar, leaving 1/2 inch headspace. 2. In a saucepan, combine apple cider vinegar, water, and kosher salt. Bring to a boil over high heat. 3. Meanwhile, pack the green beans vertically into a clean quart jar for a neat presentation. 4. Add smashed garlic, dill seeds, and red pepper flakes to the jar. 5. Once the brine boils, carefully pour it over the beans, ensuring they’re fully submerged. 6. Let the jar cool to room temperature, then seal and refrigerate. Wait at least 48 hours before eating for best flavor. Tip: Use a chopstick to remove air bubbles after adding the brine. Tip: For extra crunch, soak the beans in ice water for an hour before packing. Tip: Label your jar with the date to keep track of the pickling time. Cracking open the jar reveals beans with a perfect snap and a vinegary kick. Serve them chilled as a snack or chop into salads for an extra zing.
Lemon Pepper Dilly Beans
Out of all the pickled treats, Lemon Pepper Dilly Beans stand out for their crisp texture and zesty kick. Perfect for snacking or garnishing, they’re a must-try for pickle lovers.
Ingredients
- 1 lb fresh green beans, trimmed (look for the crispest ones at the market)
- 2 cups white vinegar (I swear by Heinz for its clean taste)
- 2 cups water
- 2 tbsp pickling salt (no substitutes here for the best crunch)
- 4 cloves garlic, smashed (the more, the merrier in my book)
- 1 tbsp black peppercorns (freshly cracked adds a nicer aroma)
- 1 tbsp lemon zest (organic lemons give the brightest flavor)
- 1 tsp red pepper flakes (adjust if you’re sensitive to heat)
Instructions
- Sterilize 2 pint jars and lids by boiling for 10 minutes. Keep them hot until ready to use.
- Pack the green beans vertically into the jars, leaving 1/2 inch headspace. Tuck garlic cloves among the beans.
- In a saucepan, combine vinegar, water, and pickling salt. Bring to a boil over high heat, stirring until salt dissolves.
- Pour the hot brine over the beans, maintaining the 1/2 inch headspace. Add peppercorns, lemon zest, and red pepper flakes evenly between jars.
- Wipe the rims clean with a damp cloth. Seal with lids and rings fingertip tight.
- Process in a boiling water bath for 10 minutes. Start timer once water returns to a full boil.
- Remove jars with a canning tool. Cool undisturbed for 24 hours. Check seals before storing.
Expect a delightful crunch with every bite, balanced by the warmth of pepper and brightness of lemon. These beans elevate a simple charcuterie board or add punch to a bloody mary.
Turmeric Garlic Dilly Beans
Just when you think pickles can’t get any better, these Turmeric Garlic Dilly Beans come along. They’re crunchy, tangy, and packed with flavor, perfect for snacking or jazzing up a sandwich.
Ingredients
- 1 lb fresh green beans, trimmed (look for the crispest ones you can find)
- 4 cloves garlic, smashed (more if you’re a garlic fiend like me)
- 1 tsp turmeric powder (for that golden hue and earthy kick)
- 1 tbsp dill seeds (don’t skip these—they’re the soul of the dish)
- 1 cup apple cider vinegar (the sharper, the better)
- 1 cup water (filtered is my preference)
- 1 tbsp kosher salt (it dissolves better than table salt)
- 1 tsp sugar (just a touch to balance the acidity)
Instructions
- Sterilize a quart-sized mason jar and lid by boiling them for 10 minutes. Keep them hot until ready to use.
- Pack the green beans and garlic into the jar tightly, leaving 1/2 inch headspace at the top.
- In a saucepan, combine vinegar, water, salt, sugar, turmeric, and dill seeds. Bring to a boil over high heat, stirring until salt and sugar dissolve.
- Carefully pour the hot brine over the beans, ensuring they’re completely submerged. Leave that 1/2 inch headspace.
- Wipe the jar’s rim with a clean cloth, then seal with the lid. Let cool to room temperature.
- Refrigerate for at least 48 hours before eating. The flavors deepen over time—try to wait a week if you can.
Munch on these beans straight from the jar, or chop them into a potato salad for an extra zing. Their vibrant color and bold flavor make them a standout at any picnic.
Conclusion
Mastering the art of spicy refrigerator dilly beans has never been easier with these 18 vibrant recipes! Perfect for home cooks looking to add a zesty twist to their meals, each recipe promises a quick and delicious adventure. We’d love to hear which one becomes your favorite—drop us a comment below and don’t forget to share the spice on Pinterest!


