Got a sweet tooth that’s begging for something cool and refreshing? Summer’s heat calls for frozen treats that are as delightful to make as they are to devour. From creamy ice creams to fruity popsicles, our roundup of 21 Delicious Frozen Dessert Recipes is your ticket to beating the heat with ease. Dive in and discover your next favorite summer indulgence!
Strawberry Cheesecake Ice Cream
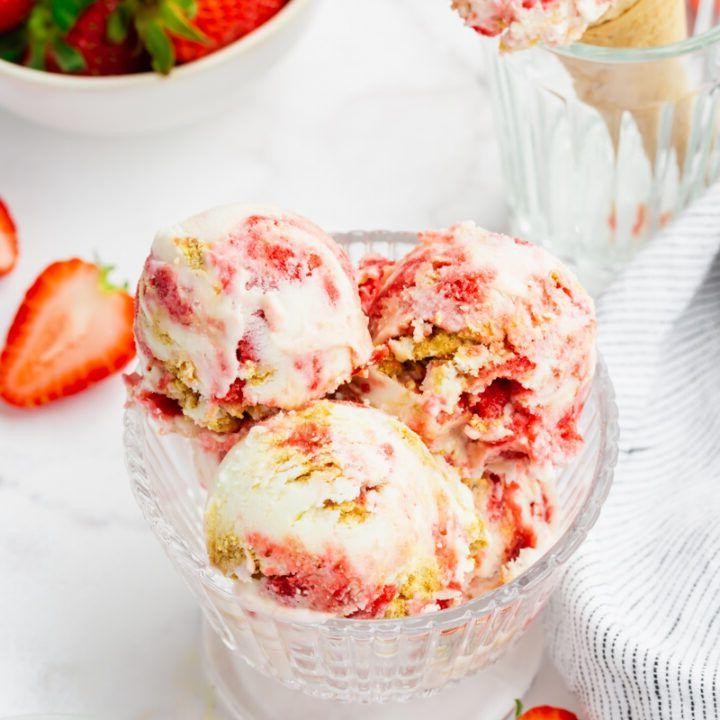
After a long day of testing recipes, there’s nothing I crave more than a scoop of homemade Strawberry Cheesecake Ice Cream. It’s the perfect blend of creamy, tangy, and sweet, with chunks of graham cracker that remind me of summer picnics. Trust me, once you try this, store-bought will never compare.
Ingredients
- 2 cups heavy cream, chilled
- 1 cup whole milk
- 3/4 cup granulated sugar
- 1/4 cup cream cheese, softened
- 1 tsp pure vanilla extract
- 1/2 cup fresh strawberries, hulled and diced
- 1/2 cup graham cracker crumbs
- 1/4 tsp fine sea salt
Instructions
- In a large mixing bowl, combine the heavy cream, whole milk, and granulated sugar. Whisk until the sugar is completely dissolved, about 2 minutes.
- Add the softened cream cheese and vanilla extract to the mixture. Use an electric mixer on medium speed to blend until smooth, ensuring no lumps remain.
- Gently fold in the diced strawberries and graham cracker crumbs with a spatula, distributing them evenly throughout the mixture.
- Pour the mixture into your ice cream maker and churn according to the manufacturer’s instructions, typically about 25-30 minutes, until it reaches a soft-serve consistency.
- Transfer the ice cream to a lidded container, sprinkle with fine sea salt, and freeze for at least 4 hours to harden.
Every bite of this ice cream is a delightful contrast between the smooth, rich base and the crunchy, salty-sweet graham cracker pieces. Serve it in a waffle cone for an extra crunch or alongside fresh strawberry slices for a burst of freshness.
Chocolate Peanut Butter Banana Ice Cream
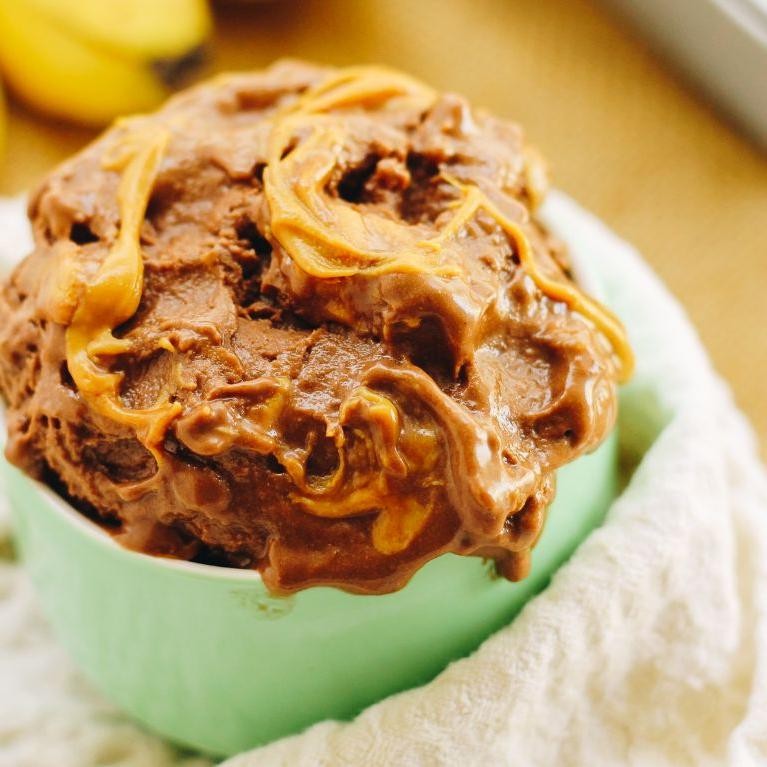
Remember those sweltering summer afternoons when the only solace was a scoop of something cold and creamy? That’s exactly what inspired me to whip up this Chocolate Peanut Butter Banana Ice Cream. It’s a decadent yet surprisingly simple treat that combines the rich flavors of dark chocolate and creamy peanut butter with the natural sweetness of ripe bananas.
Ingredients
- 2 cups heavy cream, chilled
- 1 cup whole milk
- 3/4 cup granulated sugar
- 1/4 cup unsweetened cocoa powder, sifted
- 1/2 cup smooth peanut butter, preferably natural
- 2 ripe bananas, mashed
- 1 tsp pure vanilla extract
- 1/4 tsp fine sea salt
Instructions
- In a large mixing bowl, whisk together the chilled heavy cream and whole milk until well combined.
- Add the granulated sugar and sifted cocoa powder to the cream mixture, whisking until the sugar is completely dissolved and the mixture is smooth.
- Gently fold in the smooth peanut butter, mashed bananas, pure vanilla extract, and fine sea salt until evenly incorporated.
- Pour the mixture into an ice cream maker and churn according to the manufacturer’s instructions, typically about 25-30 minutes, until it reaches a soft-serve consistency.
- Transfer the churned ice cream to a lidded container and freeze for at least 4 hours, or until firm enough to scoop.
- For optimal texture, let the ice cream sit at room temperature for 5 minutes before serving.
Great for those who adore the classic combo of chocolate and peanut butter, this ice cream boasts a velvety texture with chunks of banana throughout. Serve it sandwiched between two chocolate cookies for an extra indulgent treat.
Vanilla Bean Frozen Yogurt
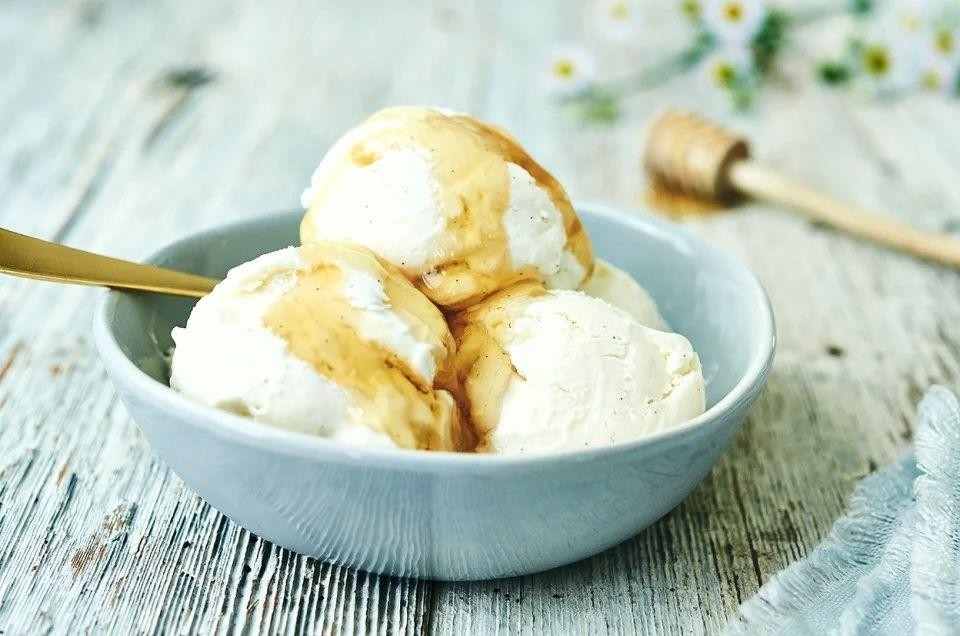
How many times have I found myself craving something sweet yet light on a hot summer evening? Too many to count, which is exactly why this Vanilla Bean Frozen Yogurt has become my go-to. It’s the perfect blend of creamy and refreshing, with the rich, aromatic flavor of real vanilla beans shining through.
Ingredients
- 2 cups whole milk Greek yogurt
- 1/2 cup granulated sugar
- 1 vanilla bean, split and seeds scraped
- 1 tbsp pure vanilla extract
- 1/4 tsp fine sea salt
Instructions
- In a large mixing bowl, combine the Greek yogurt and granulated sugar. Whisk until the sugar is completely dissolved, about 2 minutes.
- Add the scraped vanilla bean seeds, vanilla extract, and fine sea salt to the yogurt mixture. Whisk vigorously to ensure even distribution of the vanilla seeds.
- Pour the mixture into your ice cream maker and churn according to the manufacturer’s instructions, typically about 20-25 minutes, until it reaches a soft-serve consistency.
- Transfer the frozen yogurt to an airtight container and freeze for at least 4 hours, or until firm enough to scoop.
- For the best texture, let the frozen yogurt sit at room temperature for 5 minutes before serving. This allows it to soften slightly, making it easier to scoop and enhancing its creamy texture.
What I love most about this frozen yogurt is its velvety texture and the way the vanilla bean flecks create little bursts of flavor. Serve it with fresh berries or a drizzle of honey for an extra touch of sweetness.
Mango Sorbet
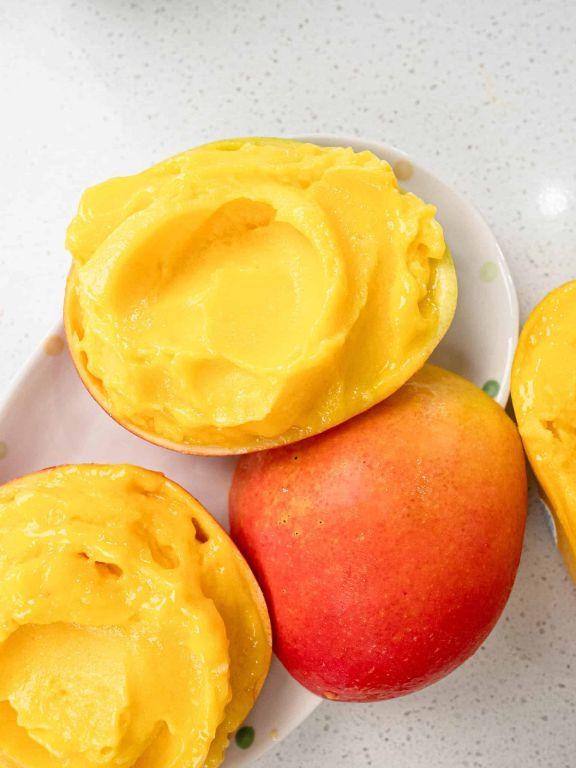
Kicking off the summer with a refreshing treat that’s as vibrant as the season itself, I’m sharing my go-to mango sorbet recipe. It’s a simple yet sublime way to cool down, inspired by a trip to Florida where mangoes were so ripe, they practically begged to be turned into something sweet.
Ingredients
- 2 cups ripe mango puree, strained
- 3/4 cup granulated sugar
- 1/2 cup water
- 1 tbsp freshly squeezed lime juice
- 1/4 tsp fine sea salt
Instructions
- In a medium saucepan over low heat, combine the granulated sugar and water, stirring constantly until the sugar is completely dissolved, about 3 minutes.
- Remove the saucepan from the heat and let the sugar syrup cool to room temperature, approximately 20 minutes.
- In a large mixing bowl, whisk together the mango puree, cooled sugar syrup, freshly squeezed lime juice, and fine sea salt until fully incorporated.
- Pour the mixture into an ice cream maker and churn according to the manufacturer’s instructions, usually about 20-25 minutes, until the sorbet reaches a soft-serve consistency.
- Transfer the sorbet to an airtight container and freeze for at least 4 hours, or until firm.
Ultra-smooth and bursting with tropical flavor, this mango sorbet is a dreamy dessert on its own or paired with a drizzle of honey and a sprinkle of chili powder for an unexpected kick. The texture is luxuriously creamy, thanks to the natural pectin in the mangoes, making each spoonful irresistibly silky.
Cookies and Cream Milkshake
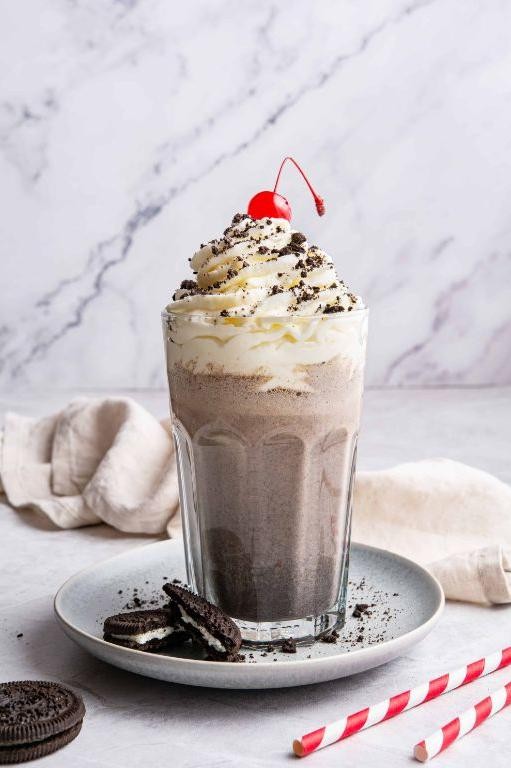
Craving something sweet and nostalgic? I recently found myself reminiscing about the simple joys of childhood summers, where a cookies and cream milkshake was the ultimate treat. Today, I’m sharing my perfected version of this classic, blending creamy indulgence with the satisfying crunch of chocolate cookies.
Ingredients
- 2 cups high-quality vanilla ice cream
- 1 cup whole milk, chilled
- 8 chocolate sandwich cookies, plus extra for garnish
- 1/2 cup heavy cream
- 1 tbsp granulated sugar
- 1 tsp pure vanilla extract
Instructions
- Place the vanilla ice cream, chilled whole milk, and 8 chocolate sandwich cookies into a high-powered blender.
- Blend on high speed for 30 seconds, or until the mixture is smooth and no large cookie chunks remain. Tip: For a thicker shake, add an extra 1/2 cup of ice cream.
- In a separate bowl, whip the heavy cream with granulated sugar and pure vanilla extract until soft peaks form. Tip: Chill your bowl and whisk beforehand for faster whipping.
- Pour the milkshake into two chilled glasses, leaving room at the top for whipped cream.
- Gently spoon the whipped cream over each milkshake, creating a generous layer.
- Crush the remaining chocolate sandwich cookies and sprinkle them over the whipped cream for garnish. Tip: For an extra touch, drizzle with chocolate syrup before adding the cookie crumbs.
Lusciously creamy with a delightful crunch, this cookies and cream milkshake is a decadent throwback to simpler times. Serve it with a striped straw and a side of nostalgia for the full effect.
Pistachio Gelato
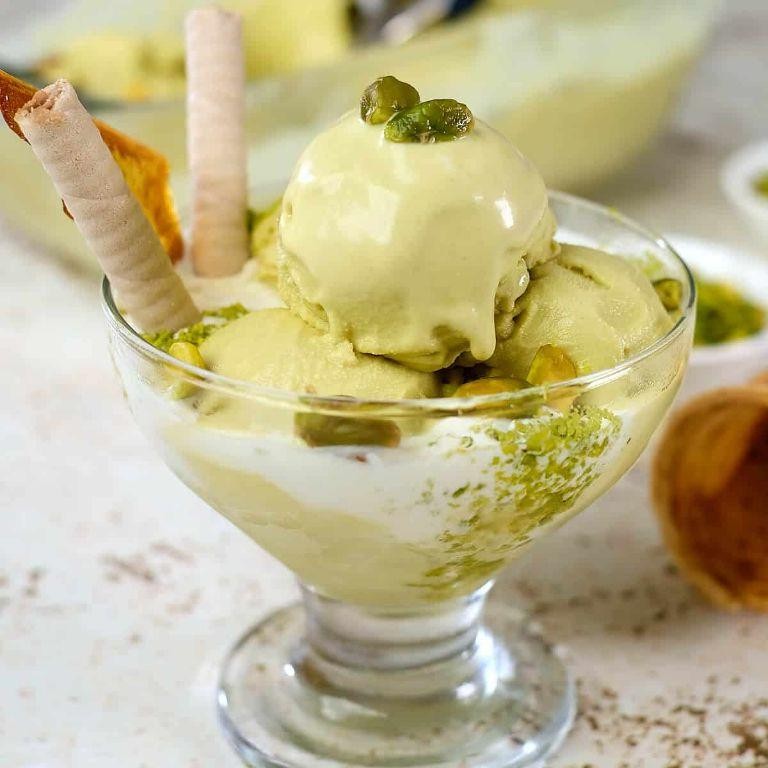
Kind of like stumbling upon a hidden gem, discovering the perfect pistachio gelato recipe felt like a culinary victory. After countless trials, this version, with its creamy texture and nutty depth, has become my go-to for impressing guests or treating myself on a lazy afternoon.
Ingredients
- 2 cups whole milk
- 1 cup heavy cream
- 3/4 cup granulated sugar
- 1/2 cup unsalted pistachios, finely ground
- 4 large egg yolks
- 1/2 teaspoon pure vanilla extract
- 1/4 teaspoon almond extract
- 1 pinch kosher salt
Instructions
- In a medium saucepan over medium heat, combine the whole milk, heavy cream, and half of the granulated sugar, stirring until the sugar dissolves, about 5 minutes.
- Whisk the egg yolks with the remaining sugar in a separate bowl until pale and slightly thickened, about 2 minutes.
- Gradually pour the warm milk mixture into the egg yolks, whisking constantly to temper the eggs.
- Return the mixture to the saucepan and cook over low heat, stirring continuously with a wooden spoon, until it thickens enough to coat the back of the spoon, about 10 minutes. Do not let it boil.
- Remove from heat and strain the mixture through a fine-mesh sieve into a clean bowl to ensure a smooth texture.
- Stir in the finely ground pistachios, vanilla extract, almond extract, and kosher salt until well combined.
- Cover the bowl with plastic wrap, pressing it directly onto the surface of the mixture to prevent a skin from forming, and chill in the refrigerator for at least 4 hours, or overnight for best results.
- Pour the chilled mixture into an ice cream maker and churn according to the manufacturer’s instructions, usually about 25-30 minutes, until it reaches a soft-serve consistency.
- Transfer the gelato to an airtight container and freeze for at least 2 hours before serving to achieve the perfect scoopable texture.
Out of all the desserts I’ve made, this pistachio gelato stands out for its velvety texture and the way the nutty flavors meld with the subtle sweetness. Serve it in a chilled bowl with a drizzle of dark chocolate or a sprinkle of crushed pistachios for an extra touch of elegance.
Raspberry Lemonade Popsicles
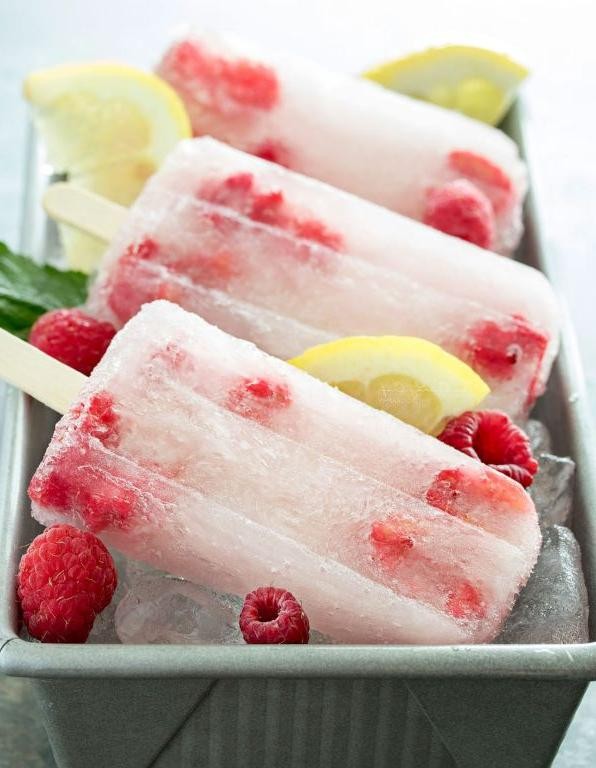
Unbelievably refreshing and bursting with summer vibes, these Raspberry Lemonade Popsicles are my go-to treat when the heat turns up. I remember making these for the first time during a backyard BBQ, and they were such a hit that they’ve become a staple in my freezer ever since.
Ingredients
- 2 cups fresh raspberries, pureed and strained to remove seeds
- 1 cup freshly squeezed lemon juice (about 4-5 large lemons)
- 3/4 cup granulated sugar
- 1 1/2 cups cold water
- 1/4 cup light corn syrup
Instructions
- In a medium saucepan over low heat, combine the lemon juice, granulated sugar, and cold water. Stir continuously until the sugar is completely dissolved, about 3-4 minutes.
- Remove the saucepan from heat and stir in the light corn syrup until fully incorporated. Allow the mixture to cool to room temperature, approximately 20 minutes.
- Once cooled, gently fold in the strained raspberry puree until the mixture is uniformly pink.
- Carefully pour the mixture into popsicle molds, leaving about 1/4 inch of space at the top for expansion. Insert popsicle sticks and freeze until solid, at least 6 hours or overnight for best results.
- To unmold, run warm water over the outside of the molds for 10-15 seconds, then gently pull the popsicles out.
How these popsicles strike the perfect balance between tart and sweet is nothing short of magical. The raspberry adds a vibrant hue and a slight tang that complements the lemonade base beautifully. Serve them at your next summer gathering, or enjoy one as a midday pick-me-up—they’re as versatile as they are delicious.
Blueberry Coconut Ice Cream
Delightfully creamy and bursting with summer flavors, this Blueberry Coconut Ice Cream is my go-to when I crave something sweet yet refreshing. I remember the first time I experimented with coconut milk as a base; the result was so unexpectedly luscious that it’s become a staple in my dessert repertoire.
Ingredients
- 2 cups fresh blueberries, washed and dried
- 1 can (13.5 oz) full-fat coconut milk, chilled
- 1/2 cup granulated sugar
- 1 tsp pure vanilla extract
- 1/4 tsp fine sea salt
Instructions
- In a medium saucepan over medium heat, combine the blueberries and sugar. Cook, stirring occasionally, until the blueberries burst and the mixture thickens slightly, about 10 minutes.
- Remove the blueberry mixture from heat and stir in the vanilla extract and sea salt. Allow to cool to room temperature, then refrigerate for at least 1 hour to chill thoroughly.
- Once chilled, blend the blueberry mixture with the chilled coconut milk in a blender until smooth, about 1 minute. Tip: For an extra smooth texture, strain the mixture through a fine-mesh sieve to remove any blueberry skins.
- Pour the mixture into an ice cream maker and churn according to the manufacturer’s instructions, usually about 20-25 minutes, until it reaches a soft-serve consistency. Tip: If you don’t have an ice cream maker, pour the mixture into a shallow dish and freeze, stirring every 30 minutes for the first 2 hours to prevent ice crystals from forming.
- Transfer the churned ice cream to an airtight container and freeze for at least 4 hours, or until firm. Tip: For easier scooping, let the ice cream sit at room temperature for 5-10 minutes before serving.
Great for those who appreciate a dessert that’s not overly sweet, this ice cream boasts a velvety texture with a tangy blueberry swirl. Serve it in coconut shells for an Instagram-worthy presentation that’ll transport your guests to a tropical paradise.
Caramel Macchiato Granita
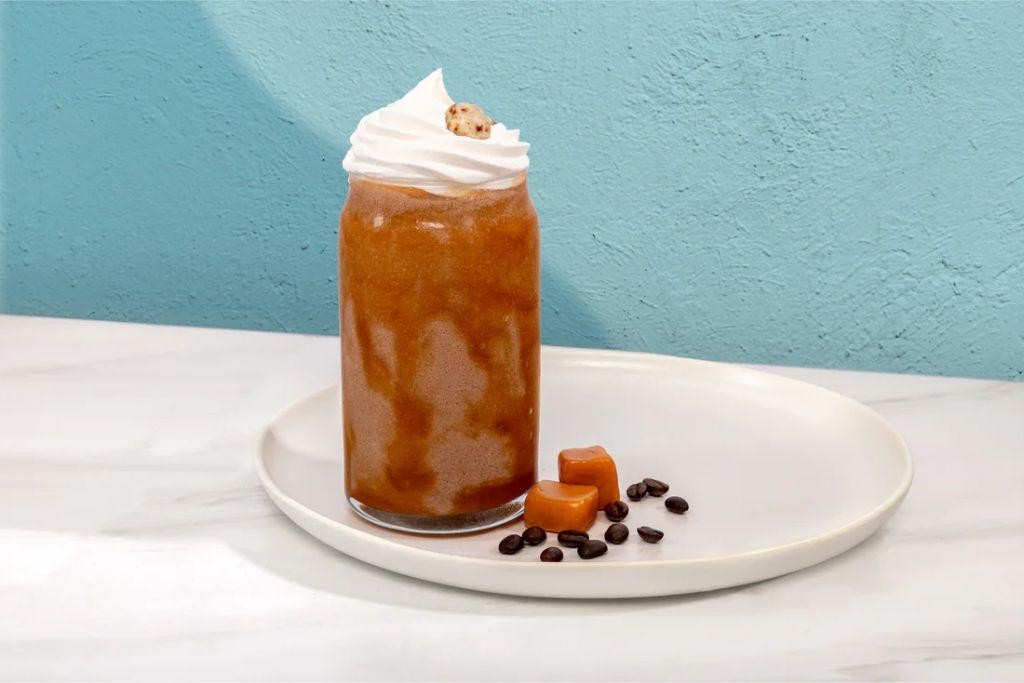
Back when I first stumbled upon the idea of turning my favorite coffeehouse drink into a frozen dessert, I was skeptical. But let me tell you, this Caramel Macchiato Granita is a game-changer for coffee lovers looking for a refreshing twist.
Ingredients
- 1 cup freshly brewed espresso, cooled to room temperature
- 1/2 cup whole milk
- 1/4 cup heavy cream
- 1/3 cup granulated sugar
- 2 tbsp caramel sauce, plus extra for drizzling
- 1 tsp pure vanilla extract
- Pinch of fine sea salt
Instructions
- In a medium mixing bowl, combine the cooled espresso, whole milk, heavy cream, granulated sugar, 2 tbsp caramel sauce, vanilla extract, and a pinch of fine sea salt. Whisk until the sugar is completely dissolved.
- Pour the mixture into a shallow, freezer-safe dish. The larger the surface area, the quicker the granita will freeze.
- Place the dish in the freezer. After 30 minutes, use a fork to scrape the mixture, breaking up any ice crystals that have formed.
- Repeat the scraping process every 30 minutes for about 3 to 4 hours, or until the entire mixture is frozen and has a flaky, crystalline texture.
- Tip: For an even more intense coffee flavor, consider using a dark roast espresso. The robust flavors stand up well to the sweetness of the caramel.
- Tip: If you prefer a smoother texture, scrape the granita more frequently during the freezing process.
- Tip: To prevent the granita from becoming too hard, cover the dish with plastic wrap after the first hour of freezing.
Zesty and invigorating, this granita boasts a perfect balance of bitter espresso and sweet caramel. Serve it in chilled glasses with an extra drizzle of caramel sauce for a decadent touch, or layer it with whipped cream for an indulgent dessert parfait.
Peach Melba Sundae
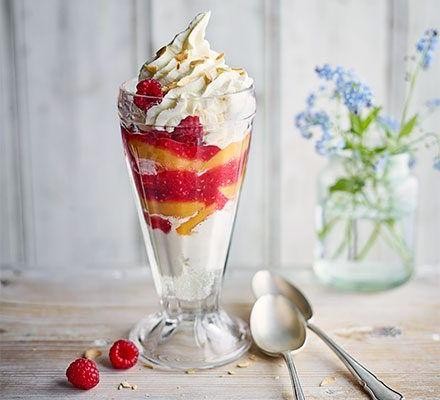
Ah, the Peach Melba Sundae—a classic dessert that never fails to bring a smile to my face. I remember the first time I tried it at a quaint little diner in Georgia; the combination of ripe peaches and raspberry sauce over creamy vanilla ice cream was nothing short of magical. Now, I make it at home whenever I crave something sweet yet refreshing.
Ingredients
- 2 ripe peaches, peeled and sliced
- 1 cup fresh raspberries
- 1/4 cup granulated sugar
- 1 tbsp freshly squeezed lemon juice
- 1/2 tsp pure vanilla extract
- 1 pint premium vanilla bean ice cream
- 1/4 cup sliced almonds, toasted
- Fresh mint leaves for garnish
Instructions
- In a medium saucepan over medium heat, combine the raspberries, granulated sugar, and lemon juice. Stir gently until the sugar dissolves, about 3 minutes.
- Reduce the heat to low and simmer the mixture for 5 minutes, or until the raspberries break down and the sauce thickens slightly. Remove from heat and stir in the vanilla extract. Let cool to room temperature.
- While the sauce cools, divide the vanilla bean ice cream among 4 serving bowls.
- Arrange the sliced peaches over the ice cream, then drizzle with the cooled raspberry sauce.
- Sprinkle the toasted almonds over the top and garnish with fresh mint leaves.
Key to this dessert is the contrast between the warm, tangy raspberry sauce and the cold, creamy ice cream. For an extra touch of elegance, serve it in chilled glass bowls to keep the ice cream from melting too quickly.
Matcha Green Tea Ice Cream
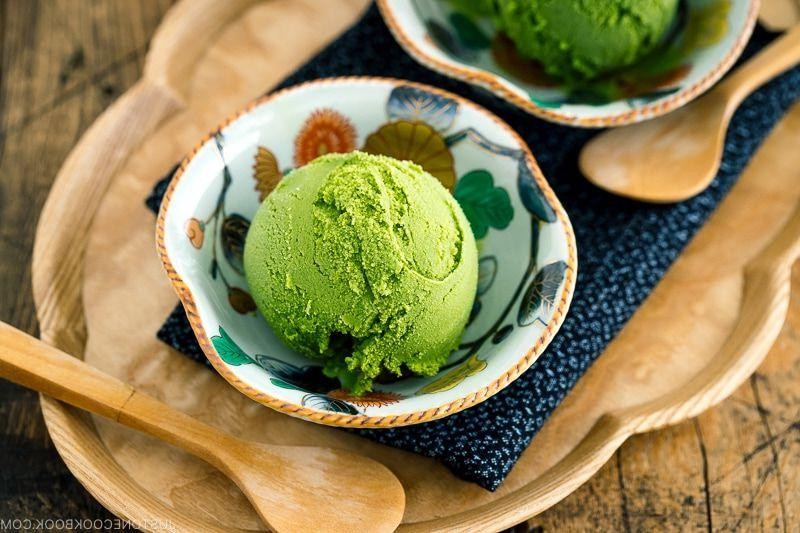
Unbelievably creamy and subtly earthy, this Matcha Green Tea Ice Cream is my go-to when I need a refreshing yet sophisticated dessert. I remember the first time I tried it at a small Kyoto café, and I’ve been obsessed with recreating that perfect balance of sweetness and bitterness ever since.
Ingredients
- 2 cups heavy cream, chilled
- 1 cup whole milk
- 3/4 cup granulated sugar
- 2 tbsp matcha green tea powder, sifted
- 1 tsp pure vanilla extract
- 1/4 tsp fine sea salt
- 6 large egg yolks, pasture-raised and lightly beaten
Instructions
- In a medium saucepan over low heat, combine the heavy cream, whole milk, and granulated sugar, stirring until the sugar dissolves completely, about 5 minutes.
- Whisk in the sifted matcha green tea powder, ensuring no lumps remain, then stir in the vanilla extract and fine sea salt.
- Gradually temper the egg yolks by adding a small amount of the warm cream mixture to them while whisking constantly to prevent curdling.
- Pour the tempered yolks back into the saucepan, cooking over low heat and stirring continuously until the mixture thickens enough to coat the back of a spoon, about 7-10 minutes.
- Strain the custard through a fine-mesh sieve into a clean bowl to ensure a smooth texture, then cover and refrigerate until completely chilled, at least 4 hours or overnight.
- Churn the chilled custard in an ice cream maker according to the manufacturer’s instructions until it reaches a soft-serve consistency, about 20-25 minutes.
- Transfer the ice cream to an airtight container and freeze until firm, about 2 hours, before serving.
Velvety smooth with a vibrant green hue, this ice cream boasts a rich, creamy texture and a complex flavor profile that’s both sweet and slightly bitter. Serve it in a waffle cone for a classic treat or alongside a slice of dark chocolate cake for an elegant dessert pairing.
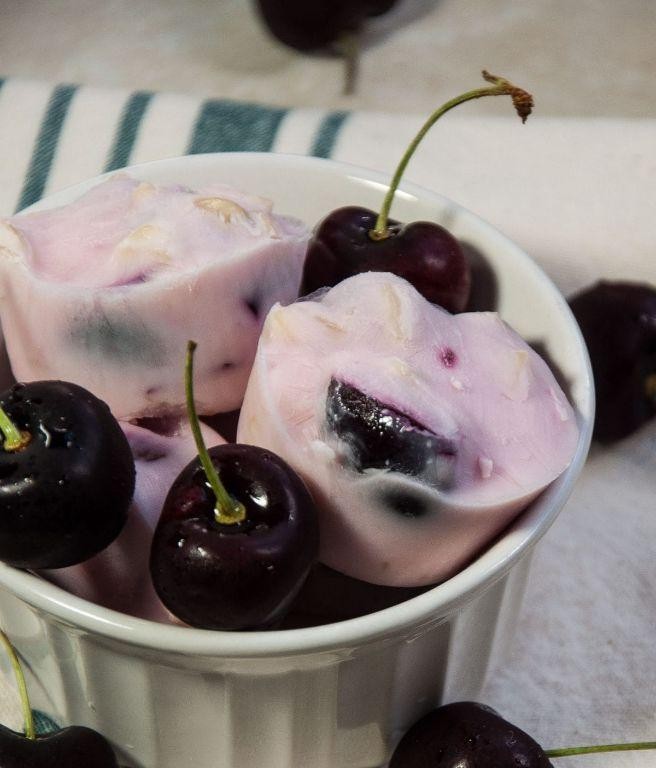
Black Forest Frozen Yogurt
Just when I thought summer couldn’t get any sweeter, I stumbled upon the perfect way to beat the heat with a twist on a classic. Black Forest Frozen Yogurt combines the rich, decadent flavors of chocolate and cherries with the light, tangy freshness of yogurt, creating a dessert that’s as refreshing as it is indulgent. It’s become my go-to for those sweltering afternoons when only something cold and creamy will do.
Ingredients
- 2 cups full-fat Greek yogurt
- 1/2 cup granulated sugar
- 1/4 cup unsweetened cocoa powder, sifted
- 1 tsp pure vanilla extract
- 1 cup fresh cherries, pitted and halved
- 1/4 cup dark chocolate chips
- 1 tbsp cherry liqueur (optional)
Instructions
- In a large mixing bowl, whisk together the Greek yogurt and granulated sugar until the sugar is completely dissolved, about 2 minutes.
- Gently fold in the sifted cocoa powder and vanilla extract until fully incorporated, ensuring no lumps remain.
- Add the pitted and halved cherries, dark chocolate chips, and cherry liqueur (if using) to the yogurt mixture, stirring gently to distribute evenly.
- Pour the mixture into a freezer-safe container, cover with a lid, and freeze for at least 4 hours, or until firm.
- For optimal texture, stir the frozen yogurt every hour during the freezing process to prevent large ice crystals from forming.
- Once fully frozen, let the yogurt sit at room temperature for 5 minutes before scooping to soften slightly for easier serving.
Unbelievably creamy with a perfect balance of tart and sweet, this Black Forest Frozen Yogurt is a dream come true for chocolate and cherry lovers alike. Serve it in a waffle cone for an extra crunch or top with fresh cherries and a drizzle of chocolate sauce for an elegant dessert presentation.
Lemon Basil Sorbet
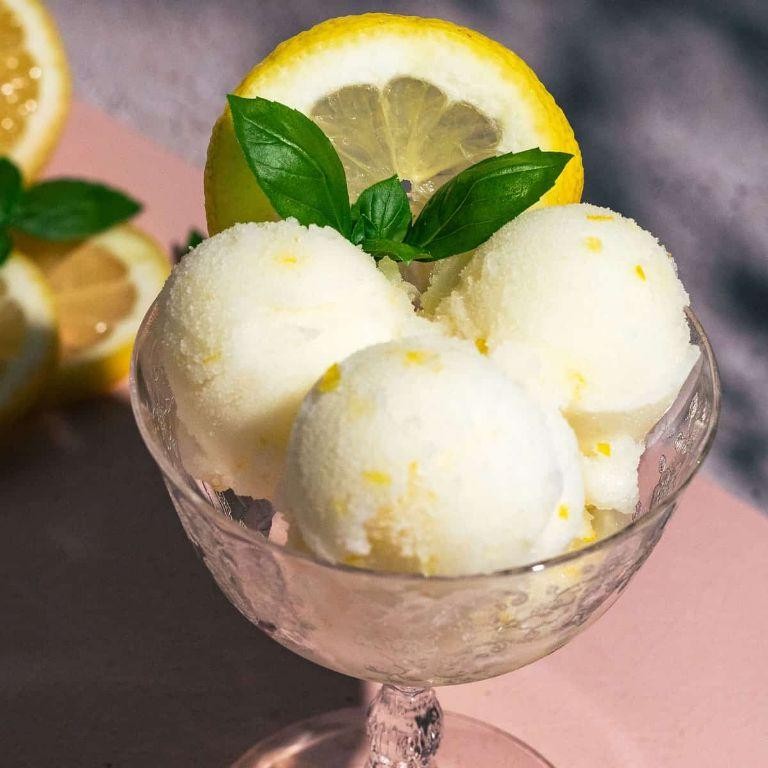
Just when I thought summer couldn’t get any better, I stumbled upon the perfect way to beat the heat—Lemon Basil Sorbet. It’s a refreshing twist on the classic, with the herbal notes of basil elevating the zesty lemon to something truly extraordinary. I remember the first time I tried it at a friend’s garden party; the combination was so unexpectedly delightful, I knew I had to recreate it at home.
Ingredients
- 2 cups granulated sugar
- 2 cups water
- 1 cup freshly squeezed lemon juice (about 6-8 lemons)
- 1/2 cup packed fresh basil leaves, finely chopped
- 1 tbsp lemon zest
Instructions
- In a medium saucepan over medium heat, combine the granulated sugar and water, stirring constantly until the sugar is completely dissolved, about 5 minutes. This creates a simple syrup that’s the base of our sorbet.
- Remove the saucepan from the heat and stir in the freshly squeezed lemon juice, finely chopped basil leaves, and lemon zest. Let the mixture steep for 30 minutes to infuse the flavors fully.
- Strain the mixture through a fine-mesh sieve into a bowl to remove the basil leaves and any pulp, ensuring a smooth texture.
- Pour the strained mixture into an ice cream maker and churn according to the manufacturer’s instructions, usually about 20-25 minutes, until it reaches a soft-serve consistency.
- Transfer the sorbet to a freezer-safe container and freeze for at least 4 hours, or until firm.
Unbelievably smooth and bursting with bright, herbal flavors, this Lemon Basil Sorbet is a summer staple in my kitchen. Serve it in hollowed-out lemon halves for an extra touch of elegance, or alongside a slice of pound cake for a delightful contrast in textures.
Tiramisu Ice Cream Cake
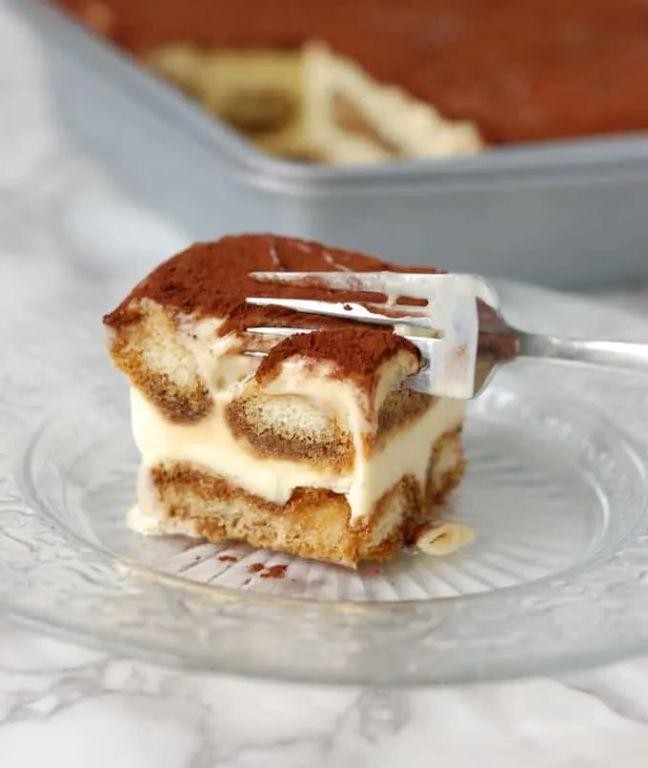
Every summer, I find myself craving the rich, creamy flavors of tiramisu but longing for something a bit cooler to beat the heat. That’s when I decided to merge the classic Italian dessert with the refreshing chill of ice cream, creating this Tiramisu Ice Cream Cake that’s become a staple at my family gatherings.
Ingredients
- 1 1/2 cups heavy cream, chilled
- 1 cup mascarpone cheese, at room temperature
- 3/4 cup granulated sugar
- 1 tsp pure vanilla extract
- 1/4 cup espresso, cooled
- 24 ladyfingers
- 2 tbsp cocoa powder, for dusting
- 1/2 cup dark chocolate shavings
Instructions
- In a large mixing bowl, whip the heavy cream until stiff peaks form, about 3 minutes on high speed.
- Gently fold in the mascarpone cheese, granulated sugar, and vanilla extract until fully incorporated, being careful not to deflate the whipped cream.
- Quickly dip each ladyfinger into the cooled espresso and layer them at the bottom of a 9-inch springform pan.
- Spread half of the mascarpone mixture over the ladyfingers, ensuring an even layer.
- Repeat the layers with the remaining ladyfingers and mascarpone mixture.
- Cover the pan with plastic wrap and freeze for at least 6 hours, or overnight for best results.
- Before serving, dust the top with cocoa powder and sprinkle with dark chocolate shavings.
Finally, this Tiramisu Ice Cream Cake offers a delightful contrast between the creamy, velvety layers and the slight crunch of the espresso-soaked ladyfingers. Serve it on a hot day with a drizzle of chocolate sauce for an extra indulgent treat.
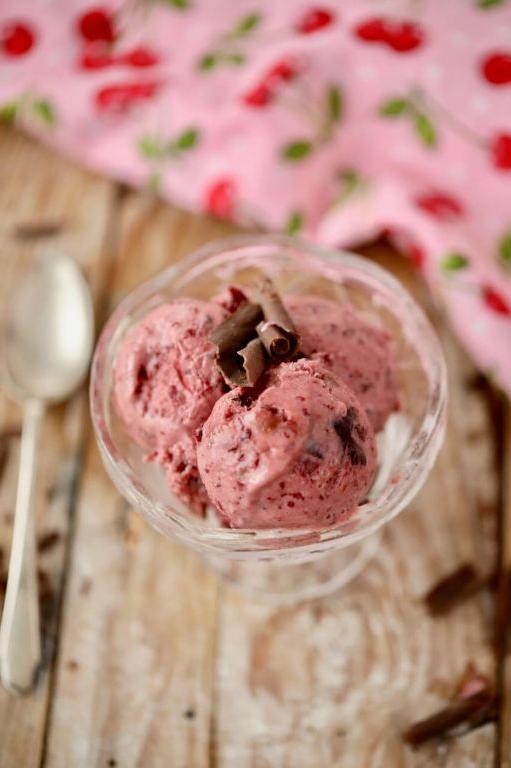
Cherry Almond Frozen Yogurt
Kicking off the summer with a refreshing treat that’s as easy to make as it is delicious, I’m sharing my go-to Cherry Almond Frozen Yogurt recipe. It’s a creamy, dreamy dessert that combines the tartness of cherries with the nutty warmth of almonds, perfect for those sweltering July afternoons.
Ingredients
- 2 cups full-fat Greek yogurt
- 1 cup pitted and halved fresh cherries
- 1/2 cup granulated sugar
- 1/4 cup almond butter
- 1 tsp pure almond extract
- 1/2 tsp fine sea salt
Instructions
- In a blender, combine the Greek yogurt, fresh cherries, granulated sugar, almond butter, almond extract, and fine sea salt.
- Blend on high speed for 1 minute, or until the mixture is completely smooth and the cherries are fully incorporated.
- Pour the mixture into an ice cream maker and churn according to the manufacturer’s instructions, typically about 20-25 minutes, until it reaches a soft-serve consistency.
- Transfer the frozen yogurt to a lidded container and freeze for at least 4 hours, or until firm enough to scoop.
- For the best texture, let the frozen yogurt sit at room temperature for 5 minutes before serving.
Zesty and vibrant, this Cherry Almond Frozen Yogurt is a delightful balance of sweet and tart, with a creamy texture that’s irresistibly smooth. Serve it in a waffle cone for an extra crunch or top with fresh cherries and a drizzle of almond butter for a decadent touch.
Espresso Chocolate Chip Ice Cream
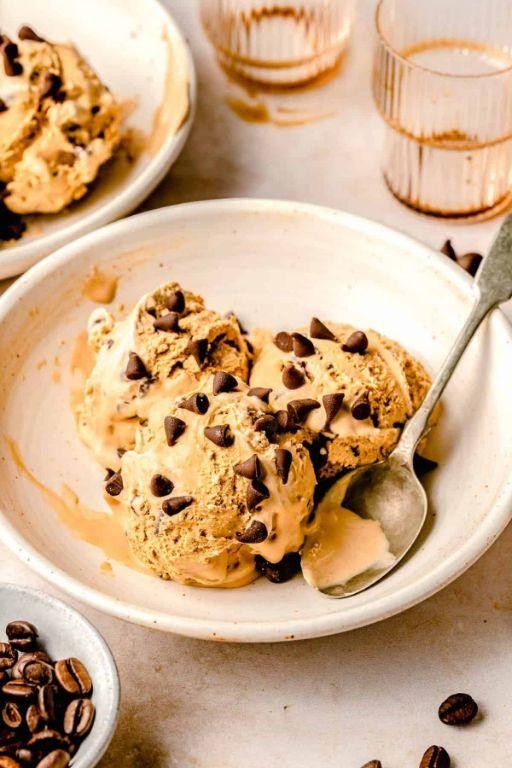
After a long day of testing recipes in my kitchen, nothing beats the rich, creamy delight of homemade Espresso Chocolate Chip Ice Cream. It’s the perfect blend of bold coffee flavor and sweet chocolate chunks, a treat that’s both refreshing and indulgent.
Ingredients
- 2 cups heavy cream, chilled
- 1 cup whole milk
- 3/4 cup granulated sugar
- 1/4 cup espresso, cooled
- 1 tsp pure vanilla extract
- 1/2 cup dark chocolate chips, finely chopped
- 1/4 tsp fine sea salt
Instructions
- In a large mixing bowl, combine the chilled heavy cream, whole milk, and granulated sugar. Whisk until the sugar is completely dissolved.
- Stir in the cooled espresso and pure vanilla extract, ensuring the mixture is well blended.
- Pour the mixture into your ice cream maker and churn according to the manufacturer’s instructions, typically about 25 minutes.
- During the last 5 minutes of churning, add the finely chopped dark chocolate chips and fine sea salt.
- Transfer the churned ice cream to a freezer-safe container, smoothing the top with a spatula.
- Cover the container with a lid and freeze the ice cream for at least 4 hours, or until firm.
Decadently rich with a velvety texture, this Espresso Chocolate Chip Ice Cream is a coffee lover’s dream. Serve it sandwiched between two homemade cookies for an extra special treat.
Pumpkin Spice Ice Cream
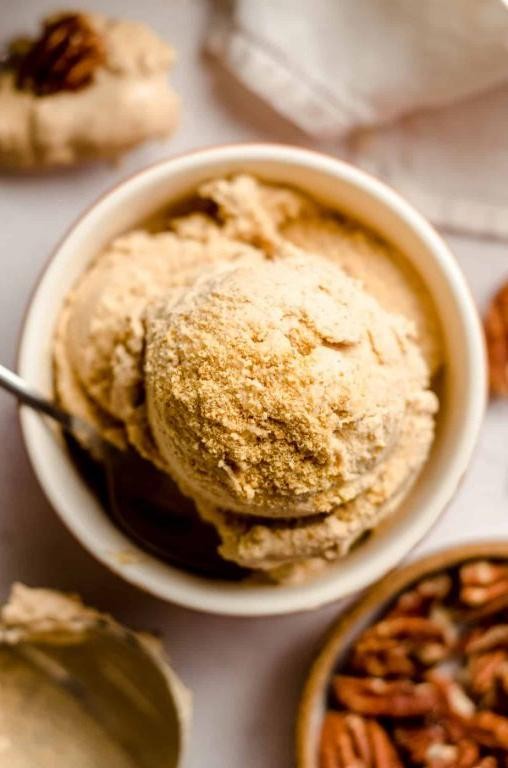
Zesty as the first bite of autumn, this Pumpkin Spice Ice Cream is my go-to when the leaves start to turn. I remember whipping up my first batch during a cozy, rain-soaked afternoon, and now, it’s a staple in my freezer from September through November.
Ingredients
- 1 cup pure pumpkin puree
- 2 cups heavy cream, chilled
- 1 cup whole milk
- 3/4 cup granulated sugar
- 1 tsp pure vanilla extract
- 1 1/2 tsp ground cinnamon
- 1/2 tsp ground ginger
- 1/4 tsp ground nutmeg
- 1/4 tsp ground cloves
- 1/4 tsp fine sea salt
- 5 large pasture-raised egg yolks, lightly beaten
Instructions
- In a medium saucepan over medium heat, combine the heavy cream, whole milk, granulated sugar, vanilla extract, cinnamon, ginger, nutmeg, cloves, and sea salt. Heat until the mixture reaches 170°F, stirring occasionally to dissolve the sugar.
- Gradually whisk about 1/2 cup of the hot cream mixture into the beaten egg yolks to temper them, then pour the yolk mixture back into the saucepan, whisking constantly.
- Cook the mixture over medium heat, stirring continuously with a wooden spoon, until it thickens enough to coat the back of the spoon and reaches 175°F, about 5 minutes.
- Remove from heat and whisk in the pumpkin puree until fully incorporated and smooth.
- Strain the mixture through a fine-mesh sieve into a clean bowl to ensure a silky texture.
- Cover the bowl with plastic wrap, pressing it directly onto the surface of the mixture to prevent a skin from forming, and refrigerate until thoroughly chilled, at least 4 hours or overnight.
- Pour the chilled mixture into an ice cream maker and churn according to the manufacturer’s instructions, usually about 20-25 minutes, until it reaches a soft-serve consistency.
- Transfer the ice cream to an airtight container and freeze until firm, at least 2 hours.
Creamy and rich with the warm spices of fall, this ice cream is a dream when served atop a slice of warm apple pie or simply scooped into a bowl with a drizzle of caramel. The texture is luxuriously smooth, with just the right amount of spice to make each bite unforgettable.
Watermelon Mint Granita
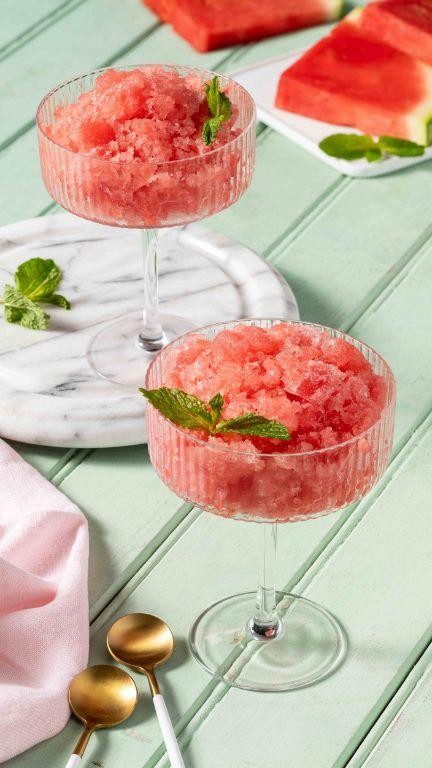
Summer’s here, and there’s nothing quite like the refreshing combo of watermelon and mint to cool you down. I remember the first time I tried making this granita; it was a scorching afternoon, much like today, and I was desperate for something icy and fruity. This recipe is my go-to when I need a quick, no-fuss dessert that feels a bit fancy without the effort.
Ingredients
- 4 cups seedless watermelon, cubed
- 1/4 cup fresh mint leaves, tightly packed
- 1/3 cup granulated sugar
- 1/4 cup fresh lime juice
- 1/2 cup cold water
Instructions
- In a blender, combine the seedless watermelon cubes, fresh mint leaves, granulated sugar, fresh lime juice, and cold water. Blend on high speed until the mixture is completely smooth, about 1 minute.
- Pour the blended mixture through a fine-mesh sieve into a 9×13-inch metal baking dish, pressing on the solids with a spatula to extract as much liquid as possible. Discard the solids.
- Place the baking dish in the freezer. After 1 hour, use a fork to scrape the mixture, breaking up any ice crystals that have formed. Repeat this process every 30 minutes for about 3-4 hours, or until the entire mixture is flaky and frozen.
- For the best texture, let the granita sit at room temperature for 5 minutes before serving. This slight thaw makes it easier to scoop and enhances the flavors.
Granita is all about that perfect, granular texture that melts instantly on your tongue, releasing bursts of watermelon and a hint of mint. Serve it in chilled glasses with a sprig of mint on top for an extra touch of elegance, or layer it with whipped cream for a decadent twist.
Toasted Coconut Ice Cream
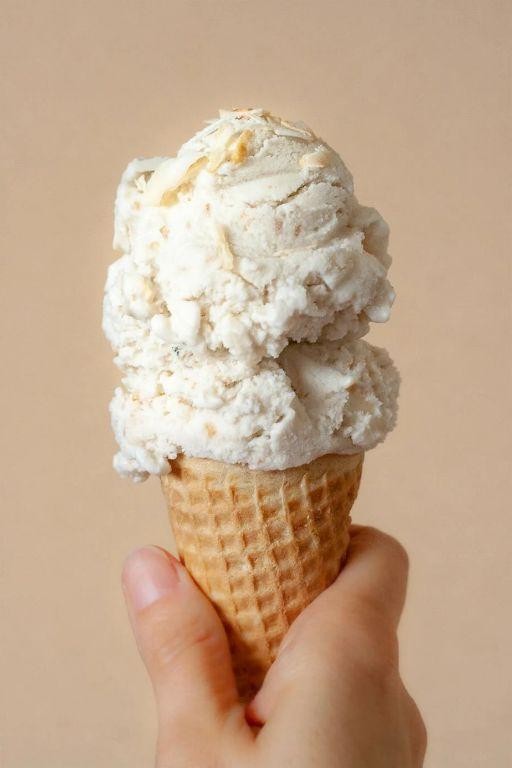
How many times have I found myself craving something sweet, creamy, and with a hint of tropical flair? Too many to count, which is exactly why this Toasted Coconut Ice Cream has become a staple in my freezer. It’s the perfect blend of rich, creamy texture and the deep, nutty flavor of toasted coconut that makes it irresistible.
Ingredients
- 2 cups heavy cream
- 1 cup whole milk
- 3/4 cup granulated sugar
- 1/2 teaspoon pure vanilla extract
- 1/4 teaspoon fine sea salt
- 1 cup unsweetened shredded coconut, toasted
Instructions
- In a medium saucepan over medium heat, combine the heavy cream, whole milk, granulated sugar, vanilla extract, and fine sea salt. Heat the mixture, stirring occasionally, until the sugar has completely dissolved, about 5 minutes. Do not let it boil.
- Remove the saucepan from the heat and stir in the toasted shredded coconut. Cover and let steep at room temperature for 1 hour to infuse the coconut flavor.
- After steeping, strain the mixture through a fine-mesh sieve into a bowl, pressing on the coconut to extract as much liquid as possible. Discard the coconut solids.
- Cover the bowl with plastic wrap, ensuring it touches the surface of the cream mixture to prevent a skin from forming. Chill in the refrigerator for at least 4 hours, or overnight, until completely cold.
- Pour the chilled mixture into an ice cream maker and churn according to the manufacturer’s instructions, usually about 20-25 minutes, until it reaches a soft-serve consistency.
- Transfer the churned ice cream to an airtight container and freeze for at least 2 hours, or until firm enough to scoop.
Creating this Toasted Coconut Ice Cream is a labor of love, but the payoff is a dessert that’s luxuriously creamy with a pronounced coconut flavor and a slight crunch from the toasted bits. Serve it in a coconut shell for an extra tropical touch or alongside a slice of warm pineapple upside-down cake for a decadent dessert pairing.
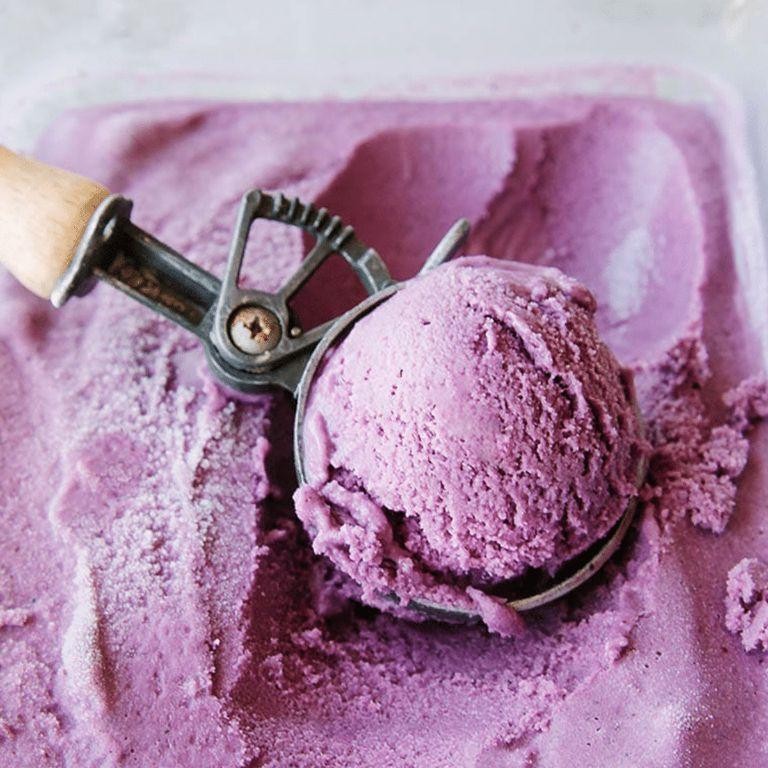
Blackberry Cabernet Sorbet
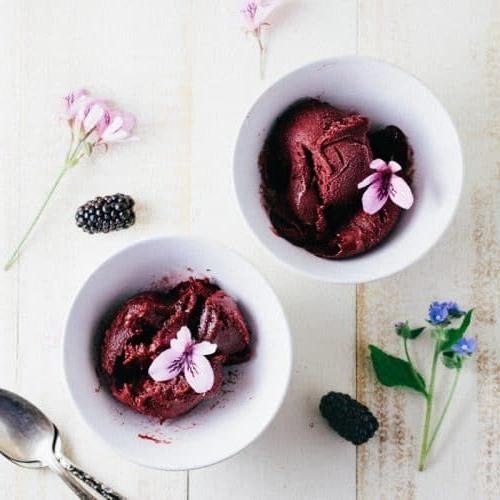
Every summer, I find myself craving something refreshing yet sophisticated to beat the heat, and this Blackberry Cabernet Sorbet is my go-to. It’s a delightful blend of bold flavors that reminds me of the time I first experimented with wine in desserts during a particularly sweltering July.
Ingredients
- 2 cups fresh blackberries, rinsed and patted dry
- 1 cup Cabernet Sauvignon
- 3/4 cup granulated sugar
- 1 tbsp freshly squeezed lemon juice
- 1/4 tsp fine sea salt
Instructions
- In a medium saucepan over medium heat, combine the blackberries, Cabernet Sauvignon, and granulated sugar. Stir gently until the sugar dissolves completely, about 5 minutes.
- Reduce the heat to low and simmer the mixture for 10 minutes, allowing the flavors to meld and the blackberries to soften.
- Remove the saucepan from the heat and stir in the freshly squeezed lemon juice and fine sea salt. Let the mixture cool to room temperature, about 20 minutes.
- Once cooled, transfer the mixture to a blender and puree until smooth. For a smoother texture, strain the puree through a fine-mesh sieve to remove the seeds.
- Pour the strained mixture into an ice cream maker and churn according to the manufacturer’s instructions, typically about 25 minutes, until it reaches a soft sorbet consistency.
- Transfer the sorbet to a freezer-safe container and freeze for at least 4 hours, or until firm.
Captivatingly vibrant with a velvety texture, this sorbet is a perfect balance of tart and sweet. Serve it in chilled glasses garnished with fresh blackberries for an elegant touch at your next dinner party.
Salted Caramel Pretzel Ice Cream
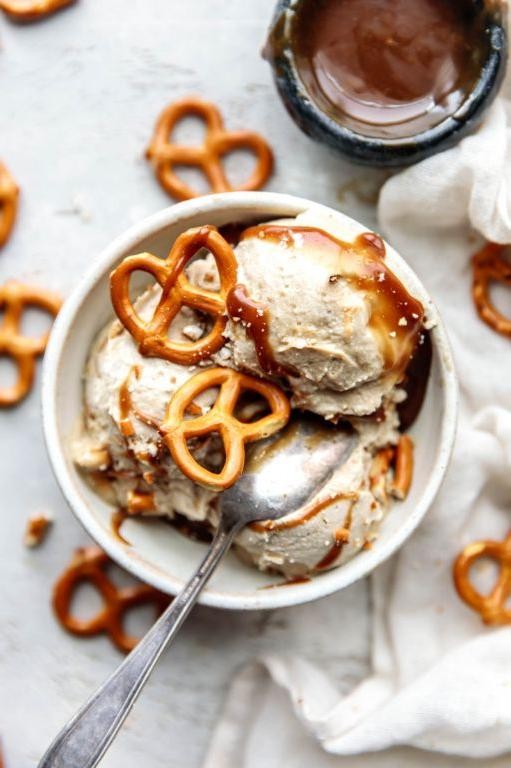
Believe it or not, the first time I tried making Salted Caramel Pretzel Ice Cream, it was a complete disaster. The caramel seized, the pretzels turned soggy, and let’s just say the texture was… interesting. But after a few tweaks (and a lot of taste-testing), I’ve perfected this sweet and salty treat that’s become a summer staple in my house.
Ingredients
- 2 cups heavy cream, chilled
- 1 cup whole milk
- 3/4 cup granulated sugar
- 1/4 cup light corn syrup
- 1/4 cup water
- 1 tsp pure vanilla extract
- 1/2 tsp sea salt, finely ground
- 1 cup pretzel twists, coarsely crushed
- 1/2 cup salted caramel sauce, homemade or store-bought
Instructions
- In a medium saucepan over medium heat, combine the sugar, corn syrup, and water. Stir gently until the sugar dissolves, then stop stirring and cook until the mixture turns a deep amber color, about 6-8 minutes.
- Carefully whisk in the heavy cream until fully incorporated. The mixture will bubble vigorously, so stand back to avoid splatters.
- Remove from heat and stir in the milk, vanilla extract, and sea salt until smooth. Transfer to a bowl and chill in the refrigerator for at least 4 hours, or until completely cold.
- Pour the chilled mixture into an ice cream maker and churn according to the manufacturer’s instructions, usually about 20-25 minutes.
- During the last 5 minutes of churning, add the crushed pretzels and drizzle in the salted caramel sauce, allowing it to swirl naturally.
- Transfer the ice cream to a freezer-safe container, cover, and freeze until firm, at least 4 hours or overnight.
My favorite thing about this ice cream is the contrast between the creamy base and the crunchy pretzel bits, with the salted caramel adding a rich, gooey surprise in every bite. Serve it in waffle cones for an extra crunch or layer it between chocolate cookies for an indulgent ice cream sandwich.
Conclusion
These 21 delicious frozen dessert recipes are your ticket to beating the summer heat with ease and creativity. From creamy ice creams to refreshing sorbets, there’s something for every sweet tooth. We’d love to hear which recipes become your favorites—drop us a comment below! And if you enjoyed this roundup, don’t forget to share the love on Pinterest. Happy chilling!