As the leaves turn golden and the air gets crisp, there’s nothing quite like wrapping yourself in the warmth of homemade comfort food. Our roundup of 19 Cozy November Recipes is your ticket to savoring the season’s best flavors, from hearty soups to sweet, spiced desserts. Perfect for busy weeknights or leisurely weekends, these dishes promise to delight your taste buds and soothe your soul. Let’s dive in!
Roasted Butternut Squash Soup

Lately, I’ve found myself drawn to the simplicity and warmth of a well-made soup, especially as the evenings begin to cool. There’s something about the roasted butternut squash soup that feels like a gentle embrace, its creamy texture and sweet, nutty flavor a comfort on any day.
Ingredients
- 1 large butternut squash, about 3 lbs (I love the ones with a deep orange hue—they’re sweeter)
- 2 tbsp extra virgin olive oil (my go-to for roasting)
- 1 medium onion, chopped (yellow onions work best for their sweetness)
- 2 cloves garlic, minced (freshly minced makes all the difference)
- 4 cups vegetable broth (homemade if you have it, but store-bought is fine)
- 1/2 tsp ground cinnamon (just a whisper to enhance the squash’s natural sweetness)
- Salt and freshly ground black pepper (to layer the flavors as you go)
- 1/2 cup heavy cream (for that luxurious finish)
Instructions
- Preheat your oven to 400°F (200°C). This ensures the squash roasts evenly, developing those caramelized edges we love.
- Peel the butternut squash, then cut it in half lengthwise. Scoop out the seeds with a spoon—save them for roasting if you like a crunchy garnish.
- Dice the squash into 1-inch cubes. Uniform pieces mean even roasting, so take your time here.
- Toss the squash cubes with 1 tbsp olive oil, then spread them out on a baking sheet. Roast for 25-30 minutes, until they’re fork-tender and slightly golden.
- While the squash roasts, heat the remaining 1 tbsp olive oil in a large pot over medium heat. Add the chopped onion, cooking until translucent, about 5 minutes.
- Stir in the minced garlic and cook for another minute, just until fragrant—this prevents it from burning and turning bitter.
- Add the roasted squash to the pot, followed by the vegetable broth and cinnamon. Bring to a simmer, then let it cook for 10 minutes to meld the flavors.
- Use an immersion blender to puree the soup until smooth. If you prefer a bit of texture, blend it less. Tip: For an extra smooth soup, strain it through a fine-mesh sieve.
- Stir in the heavy cream, then season with salt and pepper to taste. Let it heat through for another 2-3 minutes.
Delightfully creamy with a hint of sweetness from the squash and a warm spice note from the cinnamon, this soup is a bowl of autumn. Serve it with a drizzle of cream and a sprinkle of roasted squash seeds for a bit of crunch, or alongside a slice of crusty bread for dipping.
Herb-Crusted Turkey Breast
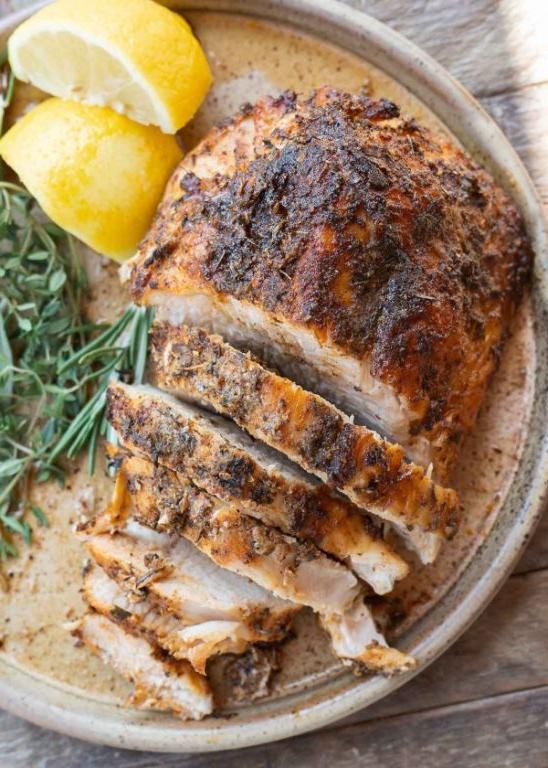
Beneath the golden crust of this herb-crusted turkey breast lies a tender, juicy center that whispers of home and heart. It’s a dish that carries the warmth of a shared table, perfect for those moments when you crave something both comforting and celebratory.
Ingredients
- 1 boneless turkey breast (about 3 lbs) – I find the size just right for a family dinner, with leftovers for sandwiches.
- 2 tbsp extra virgin olive oil – my go-to for its fruity depth.
- 1/2 cup fresh breadcrumbs – day-old sourdough gives the best crunch.
- 1/4 cup grated Parmesan – a sharp aged variety adds a nice bite.
- 2 tbsp chopped fresh parsley – flat-leaf for its bright, clean flavor.
- 1 tbsp chopped fresh thyme – just a whisper of earthiness.
- 1 tsp garlic powder – for a hint of warmth without overpowering.
- 1/2 tsp salt – I like sea salt for its clean, mineral taste.
- 1/4 tsp black pepper – freshly ground, always.
Instructions
- Preheat your oven to 375°F (190°C) – a moderate heat ensures the turkey cooks evenly without drying out.
- Pat the turkey breast dry with paper towels – this helps the crust adhere better.
- Brush the turkey all over with olive oil – a light coating is all you need.
- In a bowl, mix breadcrumbs, Parmesan, parsley, thyme, garlic powder, salt, and pepper – the aroma at this stage is irresistible.
- Press the herb mixture onto the turkey breast, covering it evenly – use the back of a spoon to gently pat it down.
- Place the turkey on a rack in a roasting pan – elevating it allows air to circulate for a crispier crust.
- Roast for 50-60 minutes, until the internal temperature reaches 165°F (74°C) – a meat thermometer is your best friend here.
- Let the turkey rest for 10 minutes before slicing – this keeps all those precious juices inside.
Unveiling the turkey, you’ll find the crust golden and fragrant, the meat beneath moist and flavorful. Serve it sliced atop a bed of roasted vegetables, or carve it thick for a hearty sandwich the next day.
Sweet Potato Casserole with Marshmallows
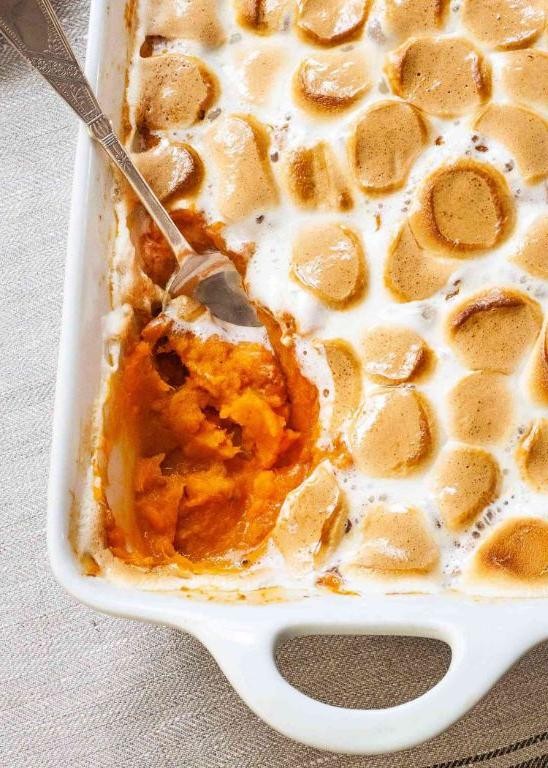
Perhaps it’s the way the marshmallows turn golden and slightly crisp on top, or how the sweet potatoes meld into a creamy, spiced base that makes this dish a nostalgic favorite. It’s a recipe that feels like a warm hug, perfect for those moments when you crave comfort in every bite.
Ingredients
- 3 cups mashed sweet potatoes (I find roasting them first brings out their natural sweetness)
- 1/2 cup granulated sugar (a little less if you like it not too sweet)
- 2 large eggs, room temperature (they blend better when not cold)
- 1/2 cup milk (whole milk makes it richer, but any kind works)
- 1/4 cup unsalted butter, melted (I always go for unsalted to control the saltiness)
- 1 tsp vanilla extract (the real deal, not imitation)
- 1/2 tsp ground cinnamon (a bit more if you’re a cinnamon lover like me)
- 1/4 tsp ground nutmeg (freshly grated if possible)
- 1 cup mini marshmallows (or more, because why not?)
Instructions
- Preheat your oven to 350°F (175°C) and lightly grease a 9×13 inch baking dish.
- In a large bowl, combine the mashed sweet potatoes, sugar, eggs, milk, melted butter, vanilla extract, cinnamon, and nutmeg. Mix until smooth. Tip: A hand mixer can make this step quicker and ensure a smoother texture.
- Pour the sweet potato mixture into the prepared baking dish, spreading it evenly with a spatula.
- Bake for 25 minutes, then remove from the oven. Tip: The edges should start to pull away slightly from the dish, a sign it’s ready for the next step.
- Evenly sprinkle the mini marshmallows over the top of the sweet potato mixture.
- Return the dish to the oven and bake for an additional 10 minutes, or until the marshmallows are golden brown. Tip: Keep an eye on them during the last few minutes to prevent burning.
- Let the casserole cool for about 5 minutes before serving. This allows it to set slightly, making it easier to scoop.
Combining the creamy sweetness of the potatoes with the gooey, toasted marshmallows creates a delightful contrast in textures. Serve it warm, perhaps with a drizzle of maple syrup for an extra layer of flavor, and watch it disappear before your eyes.
Cranberry Orange Bread
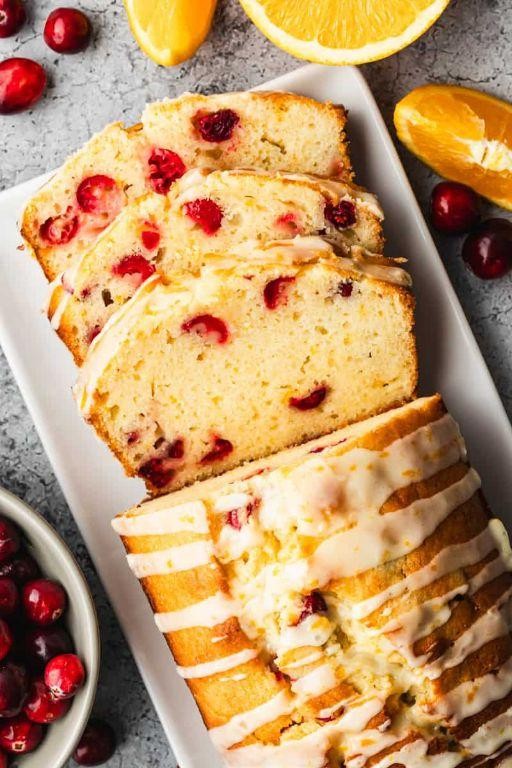
Today, as the morning light filters through my kitchen window, I find myself drawn to the comforting ritual of baking, a moment to pause and savor the simple joys. There’s something deeply satisfying about the blend of tart cranberries and sweet orange in a loaf that feels like a hug in every slice.
Ingredients
- 2 cups all-purpose flour (I always sift mine for that extra lightness)
- 1 cup sugar (granulated, though I’ve been curious about trying coconut sugar)
- 1 1/2 tsp baking powder
- 1/2 tsp baking soda
- 1/2 tsp salt (a pinch more if you’re like me and love that contrast)
- 1 cup fresh cranberries (chopped, their tartness is a revelation)
- 1 tbsp orange zest (from about 1 large orange, the fragrance is everything)
- 3/4 cup orange juice (freshly squeezed, it makes all the difference)
- 1/4 cup unsalted butter, melted (I let it cool slightly to avoid cooking the eggs)
- 1 large egg (room temperature, it blends more smoothly)
- 1 tsp vanilla extract (the good kind, it’s worth it)
Instructions
- Preheat your oven to 350°F (175°C) and grease a 9×5 inch loaf pan. A light spray or butter coating ensures easy release.
- In a large bowl, whisk together the flour, sugar, baking powder, baking soda, and salt. This dry mix is the foundation, so take a moment to ensure it’s well combined.
- Stir in the chopped cranberries and orange zest, distributing them evenly. The zest oils will perfume the flour beautifully.
- In another bowl, mix the orange juice, melted butter, egg, and vanilla extract until smooth. Pouring this into the dry ingredients, stir just until combined; overmixing leads to toughness.
- Transfer the batter to the prepared loaf pan, smoothing the top with a spatula. A little jiggle settles it evenly.
- Bake for 50-60 minutes, or until a toothpick inserted into the center comes out clean. The top should be golden and spring back when lightly touched.
- Let the bread cool in the pan for 10 minutes, then turn out onto a wire rack to cool completely. This patience prevents crumbling.
Perfectly moist with a tender crumb, this bread sings with the bright harmony of orange and cranberry. I love serving it slightly warmed, with a smear of cream cheese that melts just so, turning each bite into a little celebration.
Pumpkin Spice Latte Cupcakes

Yesterday, as the first light of dawn crept through my kitchen window, I found myself lost in the comforting embrace of baking. There’s something profoundly peaceful about the ritual of measuring, mixing, and the anticipation of what’s to come. Today, I’m sharing a recipe that captures the essence of autumn in every bite, a sweet homage to the season’s favorite flavors.
Ingredients
- 1 1/2 cups all-purpose flour (I always sift mine for that airy texture)
- 1 tsp baking powder (the fresher, the better)
- 1/2 tsp baking soda
- 1/2 tsp salt
- 1 tsp pumpkin pie spice (homemade blend if you have it)
- 1/2 cup unsalted butter, room temperature (softened to the touch)
- 1 cup granulated sugar
- 2 large eggs (room temperature eggs blend more smoothly)
- 1 tsp vanilla extract (pure, for that deep, rich flavor)
- 1/2 cup canned pumpkin puree (not pumpkin pie filling)
- 1/2 cup strong brewed coffee, cooled (I use a dark roast for depth)
Instructions
- Preheat your oven to 350°F (175°C) and line a muffin tin with cupcake liners.
- In a medium bowl, whisk together the flour, baking powder, baking soda, salt, and pumpkin pie spice until well combined.
- In a large bowl, beat the butter and sugar together on medium speed until light and fluffy, about 3 minutes. Tip: Scrape down the sides of the bowl occasionally to ensure everything is evenly mixed.
- Add the eggs one at a time, beating well after each addition, then stir in the vanilla extract.
- Alternately add the flour mixture and pumpkin puree to the butter mixture, beginning and ending with the flour mixture. Stir in the coffee until just combined. Tip: Overmixing can lead to dense cupcakes, so fold gently.
- Divide the batter evenly among the prepared muffin cups, filling each about 2/3 full.
- Bake for 18-20 minutes, or until a toothpick inserted into the center comes out clean. Tip: Rotate the pan halfway through baking for even browning.
- Allow the cupcakes to cool in the pan for 5 minutes before transferring to a wire rack to cool completely.
Biting into one of these cupcakes is like wrapping yourself in a warm blanket on a crisp fall morning. The moist crumb, infused with the earthy sweetness of pumpkin and the bold whisper of coffee, is a delightful contrast to the spicy warmth of the pumpkin pie spice. Serve them with a dollop of whipped cream and a sprinkle of cinnamon for an extra cozy touch.
Apple Cider Donuts

Cool autumn mornings call for something warm and spiced, something that feels like a hug in food form. That’s where apple cider donuts come in, with their tender crumb and cozy cinnamon sugar coating, they’re the perfect treat to savor slowly.
Ingredients
- 2 cups apple cider (reduced to 1/2 cup for concentrated flavor)
- 3 1/2 cups all-purpose flour (I like to sift mine for extra fluffiness)
- 2/3 cup granulated sugar (for that just-right sweetness)
- 2 tsp baking powder (the fresher, the better)
- 1 tsp salt (I always use fine sea salt)
- 1 tsp ground cinnamon (plus extra for dusting)
- 1/4 tsp ground nutmeg (a little goes a long way)
- 2 large eggs (room temperature blends smoother)
- 1/2 cup buttermilk (for a slight tang and tenderness)
- 4 tbsp unsalted butter, melted (I prefer European-style for its richness)
- Vegetable oil for frying (about 4 cups, enough for 2 inches in your pot)
Instructions
- In a saucepan, simmer the apple cider over medium heat until reduced to 1/2 cup, about 20 minutes. Let it cool slightly.
- In a large bowl, whisk together flour, sugar, baking powder, salt, cinnamon, and nutmeg.
- In another bowl, beat the eggs, then mix in the buttermilk, melted butter, and reduced apple cider.
- Gradually add the wet ingredients to the dry, stirring until just combined. Overmixing leads to tough donuts.
- Heat oil in a deep pot to 375°F. Use a candy thermometer for accuracy.
- Drop tablespoonfuls of batter into the hot oil, frying in batches to avoid crowding. Fry for about 1 minute per side until golden brown.
- Remove with a slotted spoon and drain on paper towels. Tip: Keep fried donuts warm in a low oven while you finish batches.
- Toss warm donuts in a mix of cinnamon and sugar for that classic coating. Tip: Do this while they’re still slightly oily for better adherence.
Soft and cakey inside with a crisp sugar shell, these donuts are best enjoyed fresh. Serve them stacked high on a platter with extra cider for dipping, turning breakfast into a celebration.
Brussels Sprouts with Bacon and Maple Syrup
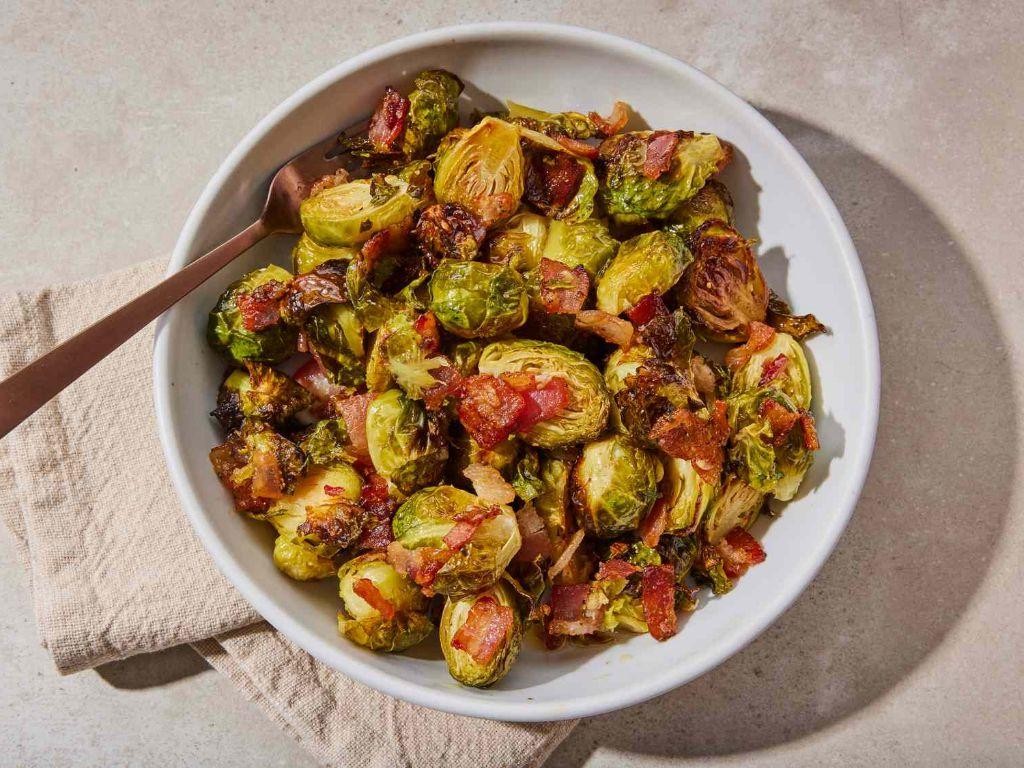
Dappled sunlight filters through the kitchen window as I prepare this dish, a humble yet transformative combination of flavors that never fails to comfort. Brussels sprouts with bacon and maple syrup is a dish that dances between sweet and savory, a testament to the beauty of simple ingredients coming together.
Ingredients
- 1 lb Brussels sprouts, halved (the smaller ones are sweeter, I’ve found)
- 4 slices thick-cut bacon, chopped (I lean towards applewood smoked for its subtle sweetness)
- 2 tbsp pure maple syrup (the darker the grade, the richer the flavor)
- 1 tbsp extra virgin olive oil (my kitchen staple for its fruity notes)
- Salt and freshly ground black pepper (to season, but we’ll be specific about amounts)
Instructions
- Preheat your oven to 400°F (200°C), ensuring it’s fully heated for even cooking.
- On a large baking sheet, toss the halved Brussels sprouts with olive oil, 1/2 tsp salt, and 1/4 tsp black pepper, making sure each piece is lightly coated.
- Spread the sprouts in a single layer, cut side down, to encourage caramelization—this is where the magic happens.
- Scatter the chopped bacon over the sprouts, allowing its fat to render and flavor the dish as it cooks.
- Roast for 20 minutes, then drizzle with maple syrup, stirring gently to combine. Tip: Use a silicone brush to evenly distribute the syrup without disturbing the sprouts too much.
- Return to the oven for another 10-15 minutes, until the sprouts are tender and the bacon is crispy. Tip: Keep an eye on the syrup to prevent burning; it should glaze the sprouts, not blacken.
- Let the dish rest for 5 minutes before serving to allow the flavors to meld. Tip: A final sprinkle of flaky sea salt can elevate the dish beautifully.
Rich in contrasts, this dish offers a crispy, caramelized exterior with a tender heart, the bacon’s smokiness perfectly balanced by the maple’s sweetness. Serve it alongside a creamy polenta or as a standout side at your next gathering, where it’s sure to spark conversations.
Pecan Pie Bars
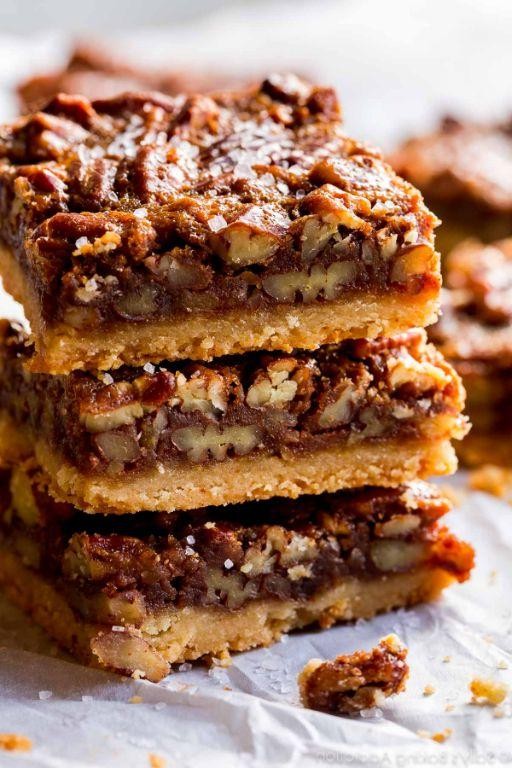
Fondly remembering the first time I baked these, the kitchen filled with a warmth that only comes from butter and brown sugar caramelizing together. These pecan pie bars are a simpler, sliceable version of the classic, perfect for when you crave that deep, nutty sweetness without the fuss of a pie crust.
Ingredients
- 1 cup unsalted butter, softened (I find room temperature butter blends more smoothly)
- 2 cups all-purpose flour (a spoon and level method ensures you don’t overmeasure)
- 1/2 cup granulated sugar (for that slight crunch in the crust)
- 1/4 tsp salt (just enough to balance the sweetness)
- 4 large eggs (room temperature eggs incorporate better)
- 1 1/2 cups packed light brown sugar (the key to that molasses depth)
- 1 cup light corn syrup (for the perfect gooey texture)
- 2 tbsp melted butter (extra richness never hurt)
- 2 tsp pure vanilla extract (the good stuff makes a difference)
- 2 cups chopped pecans (toasted for an extra layer of flavor)
Instructions
- Preheat your oven to 350°F (175°C) and line a 9×13 inch baking pan with parchment paper, leaving an overhang for easy removal.
- In a medium bowl, mix 1 cup softened butter, flour, granulated sugar, and salt until crumbly. Press firmly into the prepared pan. Tip: Use the bottom of a measuring cup to evenly press the crust.
- Bake the crust for 20 minutes until lightly golden. Let it cool slightly while you prepare the filling.
- In a large bowl, whisk together eggs, brown sugar, corn syrup, 2 tbsp melted butter, and vanilla until smooth. Stir in pecans. Tip: Toasting pecans beforehand enhances their flavor.
- Pour the filling over the warm crust, spreading evenly. Bake for 25-30 minutes until the filling is set but still slightly jiggly in the center. Tip: Overbaking can make the bars too hard.
- Cool completely in the pan on a wire rack, then refrigerate for at least 2 hours to set before cutting into bars.
The bars emerge with a buttery shortbread-like base, a gooey, pecan-packed middle, and a crisp top. Serve them slightly chilled with a drizzle of dark chocolate for an indulgent twist.
Spiced Pumpkin Cheesecake
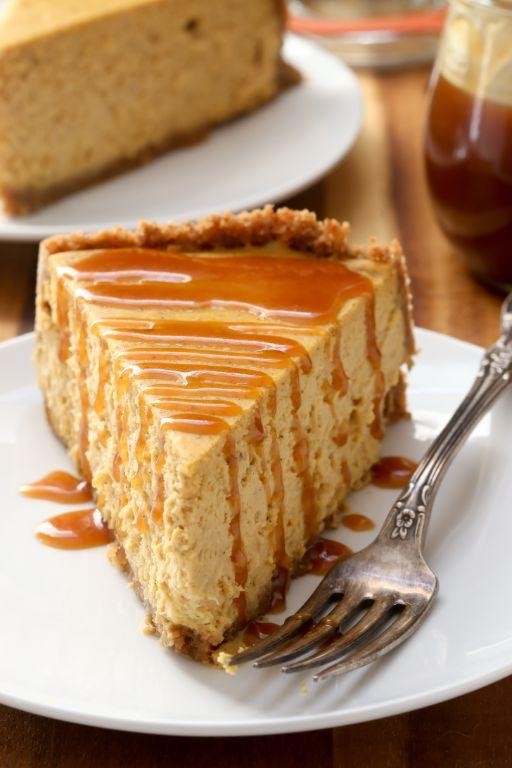
Wandering through the flavors of fall, there’s something deeply comforting about the blend of spices and pumpkin in a cheesecake. It’s a dish that carries the warmth of the season in every bite, inviting you to slow down and savor the moment.
Ingredients
- 1 1/2 cups graham cracker crumbs (I love the slight sweetness they add)
- 1/4 cup granulated sugar (just enough to balance the spices)
- 1/2 cup unsalted butter, melted (I prefer it slightly cooled for easier mixing)
- 3 packages (8 oz each) cream cheese, softened (room temp is key for a smooth filling)
- 1 cup granulated sugar (for that perfect sweetness)
- 1 can (15 oz) pure pumpkin puree (the heart of our dish)
- 3 large eggs (room temp eggs blend better, trust me)
- 1 tsp vanilla extract (a splash of warmth)
- 1 tsp ground cinnamon (the spice that sings)
- 1/2 tsp ground ginger (for a little kick)
- 1/4 tsp ground nutmeg (just a whisper)
- 1/4 tsp ground cloves (the secret depth)
Instructions
- Preheat your oven to 325°F (163°C). A steady temperature ensures even baking.
- Mix graham cracker crumbs, 1/4 cup sugar, and melted butter in a bowl until well combined. Press firmly into the bottom of a 9-inch springform pan. Tip: Use the bottom of a glass to press the crust evenly.
- Bake the crust for 10 minutes. Let it cool while you prepare the filling. This helps prevent sogginess.
- In a large bowl, beat the cream cheese and 1 cup sugar until smooth. Tip: Scrape the sides of the bowl to ensure no lumps remain.
- Add pumpkin puree, eggs, vanilla, and spices to the cream cheese mixture. Beat until just combined. Overmixing can introduce air bubbles, so go easy.
- Pour the filling over the crust. Smooth the top with a spatula for an even finish.
- Bake for 55-60 minutes, or until the center is almost set but still slightly wobbly. Tip: A slight jiggle in the center means it’s perfectly done.
- Turn off the oven and leave the cheesecake inside with the door slightly ajar for 1 hour. This gradual cooling prevents cracking.
- Remove from the oven and cool completely on a wire rack. Then refrigerate for at least 4 hours, preferably overnight, to set fully.
Unveiling the cheesecake reveals a creamy, spiced masterpiece, with a texture that’s both rich and light. Serve it with a dollop of whipped cream or a drizzle of caramel for an extra touch of indulgence.
Caramel Apple Crisp
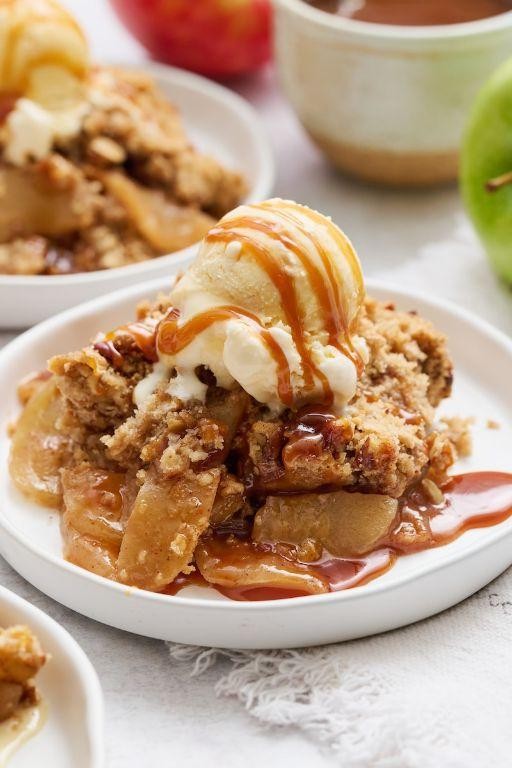
Sometimes, the simplest combinations bring the most comfort, like the way caramel and apples come together in this crisp. It’s a dish that feels like a hug, especially when the air starts to carry that first hint of autumn.
Ingredients
- 4 large Granny Smith apples, peeled and thinly sliced (their tartness balances the sweetness perfectly)
- 1/2 cup granulated sugar (I find this amount just right, but you can adjust slightly based on your apples’ sweetness)
- 1 tbsp lemon juice (freshly squeezed makes all the difference)
- 1 tsp ground cinnamon (the heart of the spice blend)
- 1/4 tsp ground nutmeg (a whisper of warmth)
- 1/2 cup caramel sauce (homemade or store-bought, but go for the good stuff)
- 1 cup all-purpose flour (I always sift mine for a lighter topping)
- 1/2 cup packed brown sugar (dark brown for a deeper flavor)
- 1/2 cup unsalted butter, cold and cubed (the key to a flaky crisp)
- 1/2 cup old-fashioned oats (for that irresistible crunch)
- Pinch of salt (to elevate all the flavors)
Instructions
- Preheat your oven to 375°F (190°C) and lightly grease a 9-inch baking dish.
- In a large bowl, toss the sliced apples with granulated sugar, lemon juice, cinnamon, and nutmeg until evenly coated.
- Spread the apple mixture evenly in the prepared baking dish, then drizzle with caramel sauce.
- In another bowl, combine flour, brown sugar, oats, and salt. Add the cubed butter and use your fingers to work it into the dry ingredients until the mixture resembles coarse crumbs.
- Sprinkle the topping evenly over the apples, covering them completely.
- Bake for 35-40 minutes, or until the topping is golden brown and the apples are bubbling around the edges.
- Let the crisp cool for at least 10 minutes before serving to allow the caramel to set slightly.
Perfectly balanced between sweet and tart, this caramel apple crisp offers a delightful contrast of textures—soft, tender apples beneath a crisp, buttery topping. Serve it warm with a scoop of vanilla ice cream for an extra indulgent treat, or enjoy it as is, letting the flavors shine on their own.
Maple Glazed Carrots
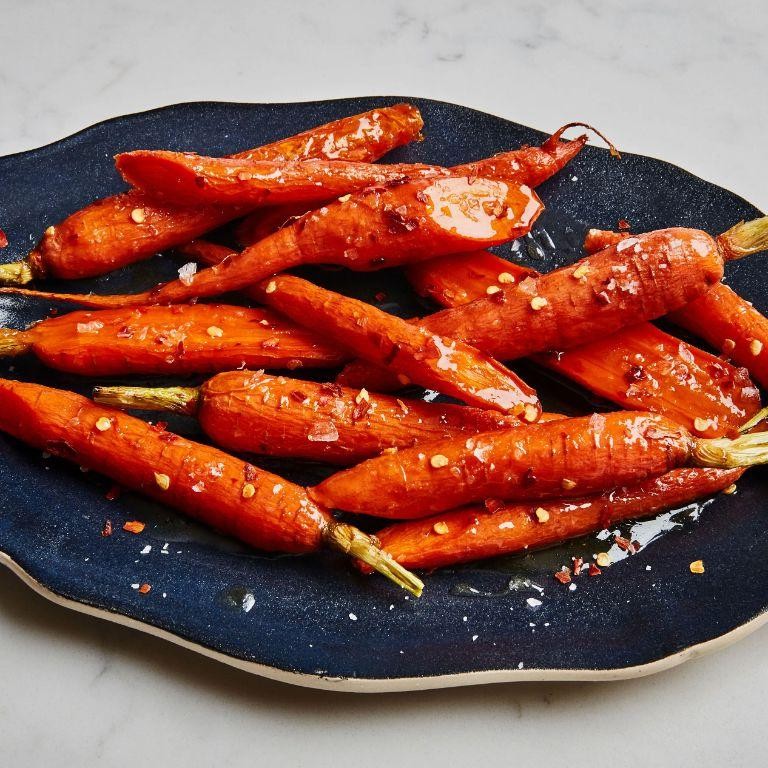
Maple glazed carrots have a way of bringing warmth to the table, their sweet and earthy flavors mingling like old friends catching up over a quiet dinner. It’s a dish that feels both comforting and a little celebratory, perfect for those moments when you want to savor the simplicity of good food.
Ingredients
- 1 pound of carrots, peeled and sliced into even sticks (I find that uniformity here ensures they all cook at the same rate)
- 2 tablespoons of unsalted butter (because it lends a richer flavor to the glaze)
- 3 tablespoons of pure maple syrup (the real deal makes all the difference)
- 1/2 teaspoon of salt (to balance the sweetness)
- 1/4 teaspoon of black pepper (for a slight kick)
- 1/4 cup of water (to help steam the carrots to perfection)
Instructions
- In a large skillet over medium heat, melt the butter until it’s just beginning to foam, about 1 minute.
- Add the carrots to the skillet, stirring to coat them evenly with the butter. Let them cook undisturbed for 2 minutes to get a slight char.
- Pour in the water, then cover the skillet with a lid. Reduce the heat to medium-low and let the carrots steam for 5 minutes, or until they’re just tender.
- Uncover the skillet and add the maple syrup, salt, and pepper. Stir well to combine, then increase the heat to medium-high. Cook for another 3-4 minutes, stirring occasionally, until the glaze thickens and coats the carrots beautifully.
- Tip: Don’t walk away during this last step—the syrup can go from perfectly glazed to burnt in a blink.
- Once the carrots are glossy and the glaze has reduced to a sticky consistency, remove them from the heat. Let them sit for a minute; they’ll thicken slightly as they cool.
- Tip: For an extra layer of flavor, a sprinkle of fresh thyme or a dash of cinnamon can be magical here.
- Serve the carrots warm, with a drizzle of any remaining glaze from the skillet. They’re delightful alongside roasted meats or as part of a vibrant vegetable platter.
The carrots emerge tender yet crisp, with a glaze that’s sweet but not cloying, thanks to the butter’s richness and the pepper’s subtle heat. Try serving them over a bed of creamy polenta for a dish that feels both rustic and refined.
Wild Rice and Mushroom Stuffing
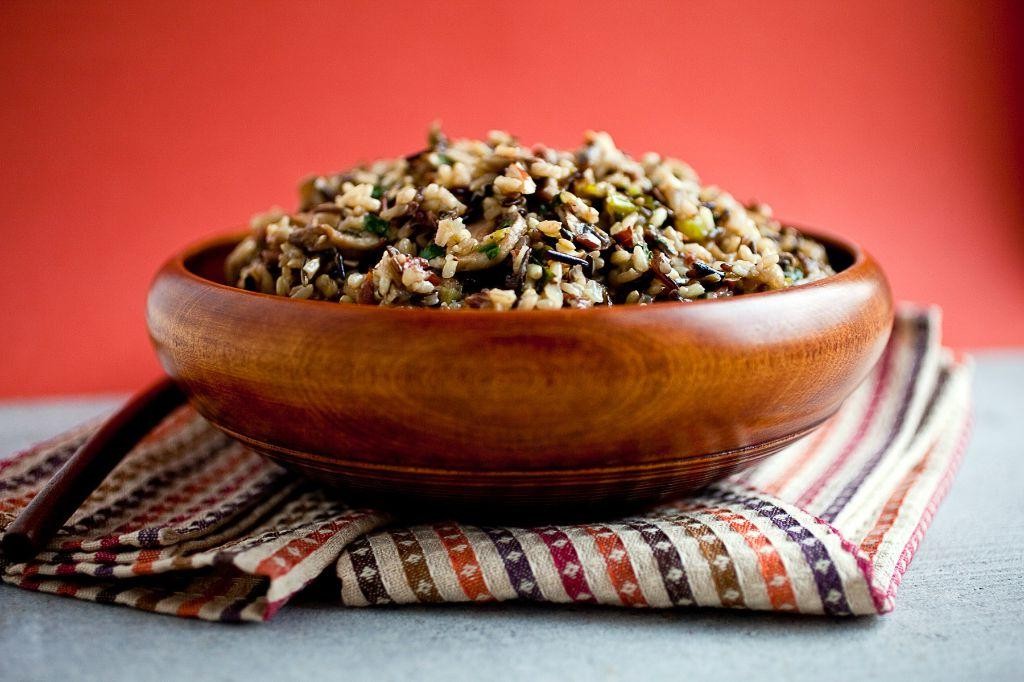
Kindly imagine the warmth of a kitchen filled with the earthy aroma of wild rice and mushrooms, a dish that whispers the comforts of home with every spoonful. This stuffing, a humble yet profound blend of textures and flavors, invites you to slow down and savor the process as much as the result.
Ingredients
- 1 cup wild rice (I love the nutty texture it brings)
- 2 cups vegetable broth (homemade is my preference, but store-bought works in a pinch)
- 2 tbsp extra virgin olive oil (my go-to for its fruity notes)
- 1 large onion, diced (yellow onions are my choice for their sweetness)
- 2 cloves garlic, minced (freshly minced makes all the difference)
- 8 oz cremini mushrooms, sliced (their earthy flavor is perfect here)
- 1 tsp dried thyme (rubbed between fingers to release its oils)
- 1/2 tsp salt (I prefer sea salt for its clean taste)
- 1/4 tsp black pepper (freshly ground, please)
- 1/4 cup chopped parsley (for that fresh, green finish)
Instructions
- Rinse the wild rice under cold water until the water runs clear to remove any debris.
- In a medium saucepan, combine the rinsed wild rice and vegetable broth. Bring to a boil over high heat, then reduce to a simmer, cover, and cook for 45 minutes, or until the rice is tender and the liquid is absorbed. Tip: Resist the urge to stir the rice as it cooks to prevent it from becoming mushy.
- While the rice cooks, heat the olive oil in a large skillet over medium heat. Add the diced onion and cook, stirring occasionally, until translucent, about 5 minutes.
- Add the minced garlic and sliced mushrooms to the skillet. Cook, stirring frequently, until the mushrooms are golden and have released their moisture, about 8 minutes. Tip: Don’t overcrowd the skillet to ensure the mushrooms brown nicely.
- Stir in the dried thyme, salt, and black pepper, cooking for another minute until fragrant.
- Once the wild rice is cooked, fluff it with a fork and gently fold in the mushroom mixture and chopped parsley until well combined. Tip: Let the stuffing sit for 5 minutes off the heat to allow the flavors to meld.
This wild rice and mushroom stuffing emerges with a delightful contrast of chewy rice and tender mushrooms, enveloped in the deep, savory notes of thyme and garlic. Try serving it alongside roasted vegetables or as a hearty filling for acorn squash for a meal that feels both nourishing and indulgent.
Cinnamon Roll Apple Pie
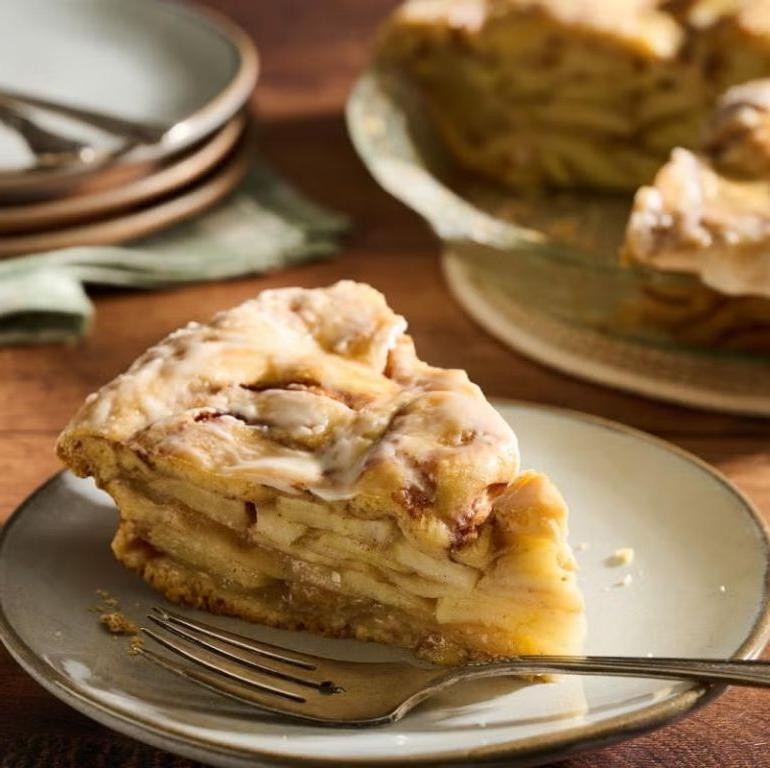
Just imagine the warmth of cinnamon rolls merging with the classic comfort of apple pie, creating a dessert that feels like a hug on a chilly evening. This recipe is a labor of love, perfect for those moments when you crave something sweet yet nostalgic.
Ingredients
- 2 cups all-purpose flour (I always sift mine for extra fluffiness)
- 1/2 cup granulated sugar (a little extra never hurt)
- 1 tsp salt (the secret to balancing sweetness)
- 1 cup unsalted butter, cold and cubed (quality butter makes all the difference)
- 1/2 cup whole milk (room temperature blends better)
- 2 large eggs (I prefer room temp eggs here)
- 4 medium apples, peeled and thinly sliced (Granny Smith for tartness, Honeycrisp for sweetness)
- 1 tbsp ground cinnamon (the star of the show)
- 1/2 cup brown sugar (for that deep, caramel-like flavor)
- 1 tsp vanilla extract (pure, not imitation)
Instructions
- Preheat your oven to 375°F (190°C) and lightly grease a 9-inch pie dish.
- In a large bowl, whisk together the flour, granulated sugar, and salt.
- Add the cubed butter to the dry ingredients. Use your fingers to work the butter into the flour until the mixture resembles coarse crumbs.
- In a separate bowl, whisk together the milk, eggs, and vanilla extract. Pour this into the flour mixture, stirring until a dough forms.
- Divide the dough in half. Roll out one half to fit the bottom of your pie dish, leaving a slight overhang.
- Arrange the apple slices over the dough in the pie dish. Sprinkle with brown sugar and cinnamon.
- Roll out the second half of the dough and place it over the apples. Trim any excess dough and crimp the edges to seal.
- Cut a few slits in the top crust to allow steam to escape. Bake for 45-50 minutes, or until the crust is golden brown and the filling is bubbly.
- Let the pie cool for at least 30 minutes before serving to allow the filling to set.
Rich in flavor with a tender, flaky crust, this Cinnamon Roll Apple Pie is a delightful twist on tradition. Serve it warm with a scoop of vanilla ice cream for an extra indulgent treat, or enjoy a slice with your morning coffee for a sweet start to the day.
Roasted Garlic Mashed Potatoes
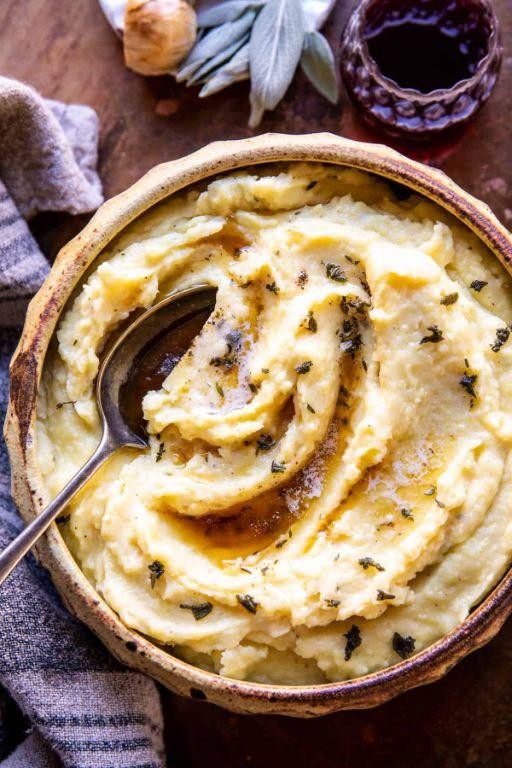
Comforting and rich, roasted garlic mashed potatoes are a dish that feels like a warm hug on a chilly evening. The golden, caramelized garlic melds beautifully with the creamy potatoes, creating a side that’s both simple and deeply flavorful.
Ingredients
- 2 lbs Yukon Gold potatoes (their buttery texture is unbeatable for mashing)
- 1 whole head of garlic (roasting transforms its sharpness into something sweet and mellow)
- 1/2 cup whole milk (warmed, to avoid cooling down the potatoes)
- 4 tbsp unsalted butter (I always reach for European-style for its richer flavor)
- 1 tsp salt (fine sea salt dissolves evenly)
- 1/4 tsp freshly ground black pepper (for a slight, welcome bite)
Instructions
- Preheat your oven to 400°F. Cut the top off the head of garlic to expose the cloves, drizzle with a bit of olive oil, wrap in foil, and roast for 40 minutes until soft and golden.
- While the garlic roasts, peel and quarter the potatoes. Place them in a large pot, cover with cold water by an inch, and add a generous pinch of salt.
- Bring the pot to a boil over high heat, then reduce to a simmer. Cook for 15-20 minutes until the potatoes are fork-tender.
- Drain the potatoes well and return them to the pot. Let them sit for a minute to evaporate any excess moisture—this prevents watery mashed potatoes.
- Squeeze the roasted garlic cloves out of their skins into the pot with the potatoes. Add the butter, milk, salt, and pepper.
- Mash everything together until smooth and creamy. For extra fluffiness, a potato ricer works wonders, but a good old masher does the job too.
Velvety and rich, these mashed potatoes carry the deep, sweet notes of roasted garlic in every bite. Serve them alongside a juicy roast or fold in some grated Parmesan for an extra layer of flavor.
Pumpkin Bread with Cream Cheese Swirl
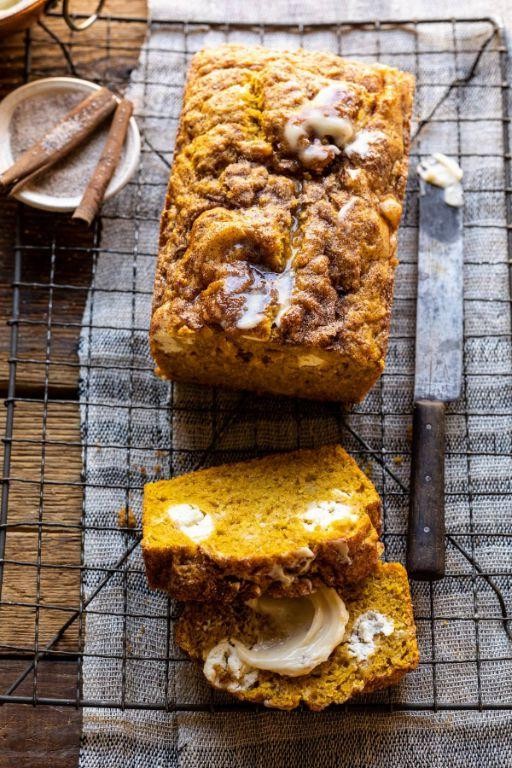
Now, as the morning light filters through the kitchen, there’s something deeply comforting about the idea of pumpkin bread with a creamy swirl. It’s a recipe that feels like a hug, perfect for those moments when you crave a little warmth and sweetness in your day.
Ingredients
- 1 3/4 cups all-purpose flour (I like to sift mine for a lighter texture)
- 1 tsp baking soda (freshness matters here, so check the date)
- 1/2 tsp salt (a pinch more if you’re using unsalted butter)
- 1 1/2 tsp pumpkin pie spice (homemade blend is my secret)
- 1 cup pumpkin puree (not pie filling, the real deal)
- 1/2 cup vegetable oil (or melted coconut oil for a subtle twist)
- 2 large eggs (room temperature blends better)
- 1 1/2 cups sugar (I sometimes reduce it to 1 cup)
- 1/4 cup water (to loosen the batter just right)
- 4 oz cream cheese, softened (full-fat for the best swirl)
- 1/4 cup sugar (for the cream cheese mixture)
- 1 tsp vanilla extract (pure, always)
Instructions
- Preheat your oven to 350°F (175°C) and grease a 9×5 inch loaf pan. A light spray or butter works wonders.
- In a medium bowl, whisk together the flour, baking soda, salt, and pumpkin pie spice. This ensures no lumps and even distribution.
- In a larger bowl, mix the pumpkin puree, oil, eggs, sugar, and water until smooth. Tip: Don’t overmix to keep the bread tender.
- Gradually add the dry ingredients to the wet, stirring just until combined. A few lumps are okay; they’ll disappear in baking.
- In a small bowl, beat the cream cheese, 1/4 cup sugar, and vanilla until smooth. This swirl is what makes the bread special.
- Pour half the pumpkin batter into the prepared pan. Dollop half the cream cheese mixture on top, then swirl with a knife. Repeat with the remaining batter and cream cheese. Tip: Don’t over-swirl or you’ll lose the pattern.
- Bake for 50-60 minutes, or until a toothpick inserted into the center comes out clean. The top should be golden and slightly cracked.
- Let the bread cool in the pan for 10 minutes, then transfer to a wire rack. Tip: It’s tempting, but waiting ensures the swirl sets beautifully.
Best enjoyed slightly warm, the pumpkin bread is moist and spiced, with pockets of creamy cheese that melt in your mouth. Try it toasted with a dab of butter for an extra indulgent breakfast.
Chocolate Pecan Pie
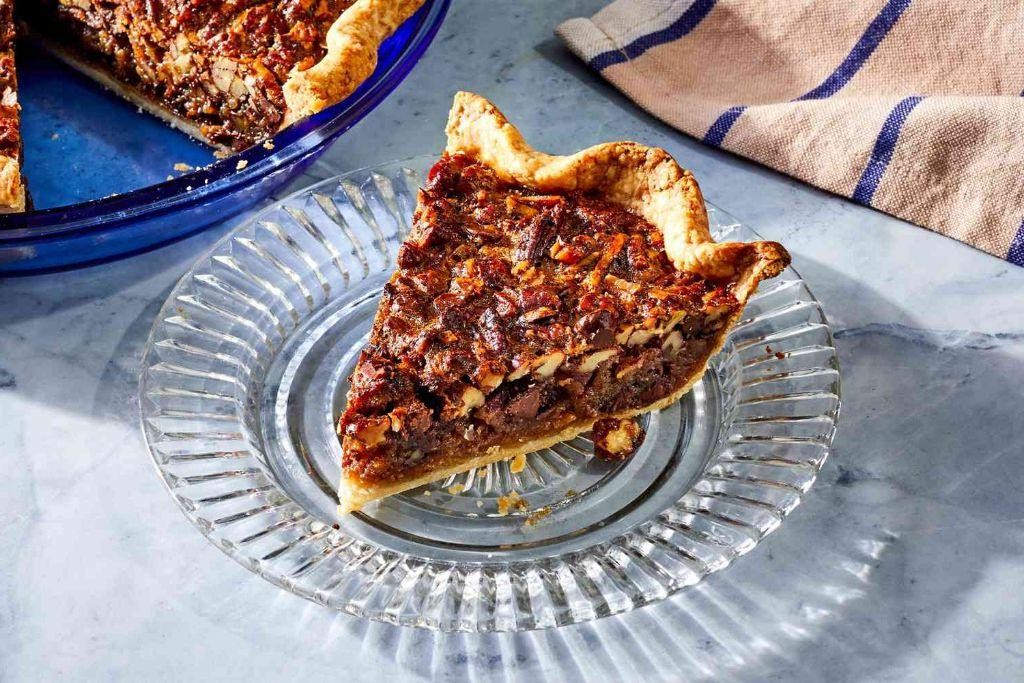
Kneading through the memories of countless family gatherings, I find myself drawn back to the warmth of a chocolate pecan pie, its rich aroma filling the kitchen like a sweet embrace.
Ingredients
- 1 1/2 cups pecans, roughly chopped (I love the crunch they add when left a bit chunky)
- 1 cup semi-sweet chocolate chips (the melty kind that pools just right)
- 1/2 cup unsalted butter, melted (because everything’s better with butter)
- 3/4 cup light brown sugar, packed (for that deep, molasses kiss)
- 1/4 cup granulated sugar (just a whisper of sweetness)
- 3 large eggs, room temperature (they blend smoother this way)
- 1 tsp vanilla extract (the good stuff, please)
- 1/4 tsp salt (to balance the sweetness)
- 1 unbaked 9-inch pie crust (homemade or store-bought, no judgment here)
Instructions
- Preheat your oven to 350°F (175°C), letting it warm up while you prepare the filling.
- In a large bowl, whisk together the melted butter, brown sugar, granulated sugar, eggs, vanilla extract, and salt until smooth.
- Stir in the chocolate chips and chopped pecans, ensuring they’re evenly distributed throughout the mixture.
- Pour the filling into the unbaked pie crust, spreading it out to the edges with a spatula.
- Bake for 45-50 minutes, or until the center is set but still slightly wobbly—this ensures a gooey center.
- Let the pie cool on a wire rack for at least 2 hours before slicing; patience rewards you with clean slices.
Rich in flavor and texture, this chocolate pecan pie offers a delightful contrast between the crisp pecans and the velvety chocolate. Serve it slightly warm with a dollop of whipped cream or a scoop of vanilla ice cream for an indulgent twist.
Autumn Harvest Salad with Pomegranate Vinaigrette
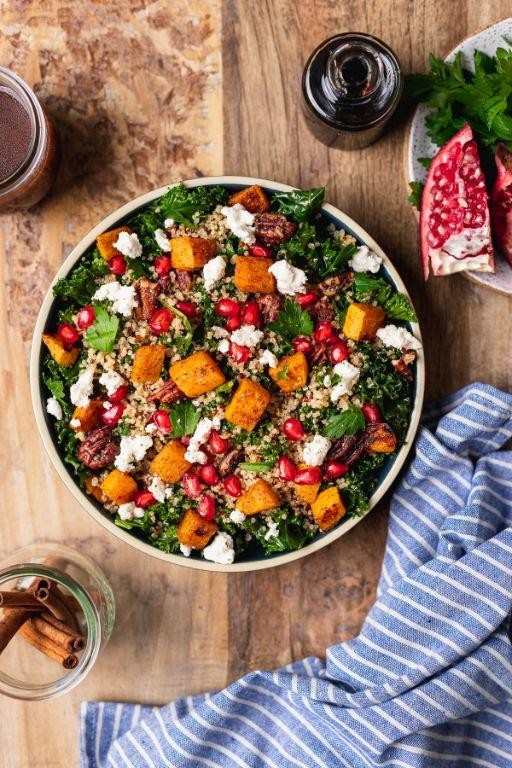
Lately, I’ve found myself drawn to the warmth and richness of autumn flavors, especially when they come together in a dish that feels both nourishing and indulgent. This salad, with its vibrant colors and textures, is a celebration of the season’s bounty, offering a perfect balance of sweet, tart, and earthy notes.
Ingredients
- 6 cups mixed greens (I love a blend of arugula and spinach for their peppery and tender qualities)
- 1 cup roasted butternut squash, cubed (roasting brings out its natural sweetness)
- 1/2 cup pomegranate seeds (their juicy burst is irresistible)
- 1/4 cup crumbled goat cheese (it adds a creamy tang)
- 1/4 cup chopped pecans (toasted, for a crunchy contrast)
- 2 tbsp extra virgin olive oil (my go-to for dressings)
- 1 tbsp balsamic vinegar (for a deep, rich acidity)
- 1 tsp honey (to smooth out the flavors)
- 1/2 tsp Dijon mustard (it emulsifies the dressing beautifully)
- Salt and freshly ground black pepper (to season)
Instructions
- Preheat your oven to 400°F. Toss the butternut squash cubes with 1 tbsp olive oil, salt, and pepper. Spread them on a baking sheet and roast for 25 minutes, or until tender and caramelized at the edges.
- While the squash roasts, toast the pecans in a dry skillet over medium heat for 3-5 minutes, stirring frequently, until fragrant. Tip: Keep an eye on them to prevent burning.
- In a small bowl, whisk together the remaining olive oil, balsamic vinegar, honey, Dijon mustard, salt, and pepper to make the vinaigrette. Tip: Adjust the honey or vinegar to suit your taste preference for sweetness or tang.
- In a large salad bowl, combine the mixed greens, roasted butternut squash, pomegranate seeds, toasted pecans, and crumbled goat cheese.
- Drizzle the vinaigrette over the salad and toss gently to coat. Tip: Add the dressing just before serving to keep the greens crisp.
The salad is a delightful mix of textures, from the creamy goat cheese to the crunchy pecans, with the roasted squash adding a soft, sweet contrast. Serve it on a large platter for a family-style meal or in individual bowls for a more intimate dining experience.
Baked Brie with Cranberry Sauce
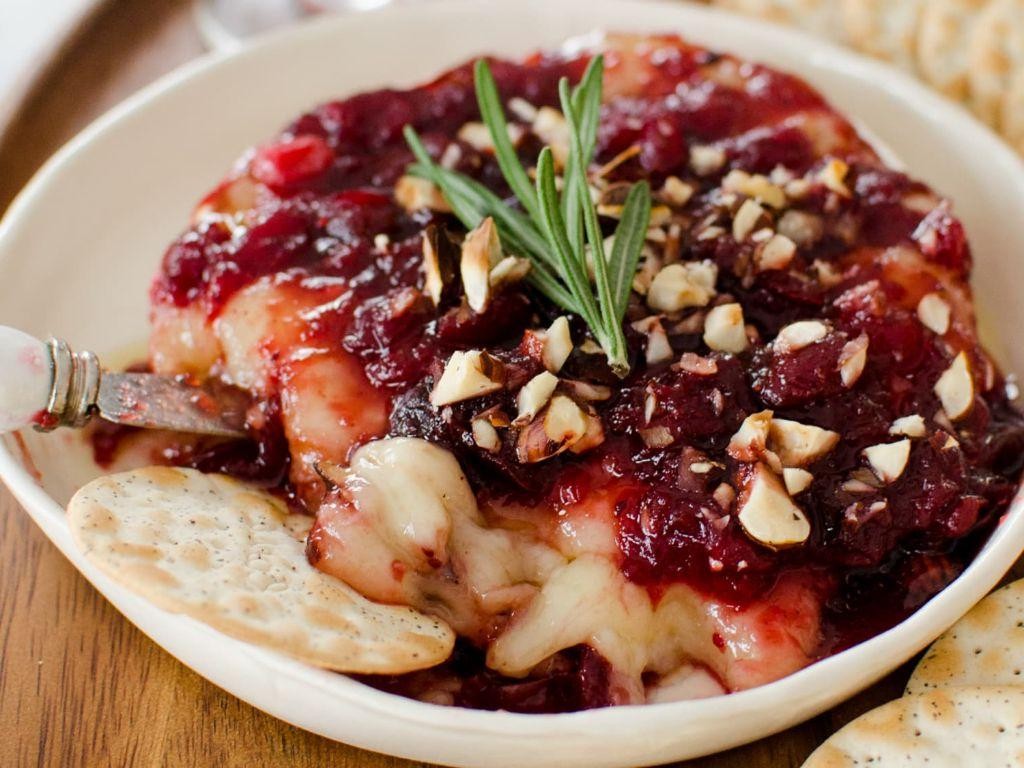
How quietly the morning unfolds, much like the gentle melting of brie in the oven, a simple pleasure that feels both indulgent and comforting. This baked brie with cranberry sauce is a testament to the beauty of minimal ingredients coming together to create something truly special.
Ingredients
- 1 wheel of brie (about 8 oz) – I love leaving the rind on for that extra bit of texture.
- 1/2 cup cranberry sauce – homemade or store-bought, both work beautifully here.
- 1 tbsp honey – for a touch of sweetness that balances the tartness of the cranberries.
- 1/4 cup chopped walnuts – because their crunch contrasts so nicely with the creamy brie.
- 1 sprig of rosemary – just a hint of herby freshness to elevate the dish.
Instructions
- Preheat your oven to 350°F (175°C), ensuring it’s perfectly heated for even melting.
- Place the brie wheel on a parchment-lined baking sheet, a simple step that makes cleanup a breeze.
- Spread the cranberry sauce evenly over the top of the brie, allowing some to drip down the sides for a beautiful presentation.
- Drizzle the honey over the cranberry sauce, using the back of a spoon to guide it into an even layer.
- Sprinkle the chopped walnuts on top, pressing them gently into the sauce so they adhere.
- Bake for 15-20 minutes, until the brie is soft to the touch but not completely melted through.
- Garnish with the rosemary sprig right before serving, adding a pop of color and aroma.
Zesty and warm, this baked brie emerges from the oven with a gooey center that’s perfectly offset by the tart cranberry sauce and crunchy walnuts. Serve it with slices of baguette or apple for a delightful contrast in textures.
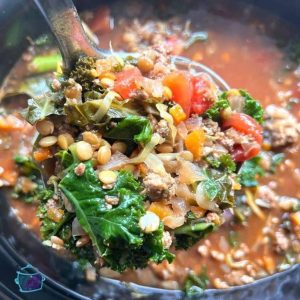
Slow Cooker Beef Stew with Winter Vegetables
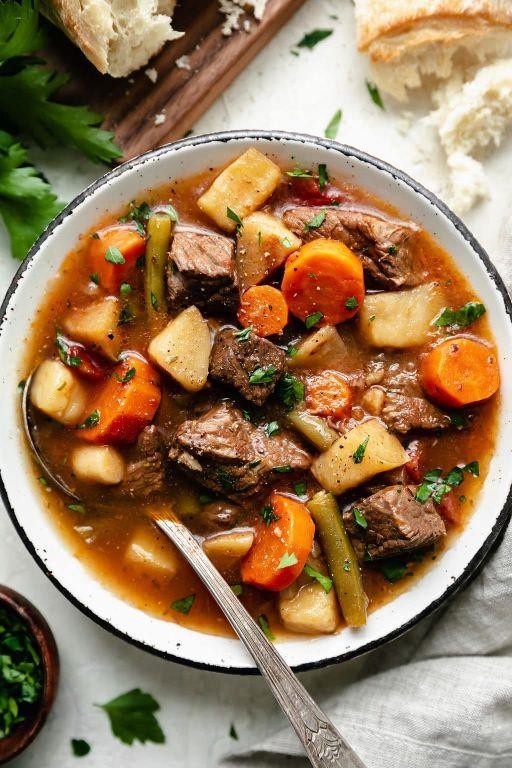
On a quiet morning like this, when the air carries a crispness that whispers of changing seasons, my thoughts drift to the comforting embrace of a slow-cooked meal. There’s something profoundly soothing about the way flavors meld and deepen over hours, transforming simple ingredients into a dish that feels like a warm hug.
Ingredients
- 2 lbs beef chuck, cut into 1-inch pieces (I find the marbling in chuck adds incredible richness)
- 4 cups beef broth (homemade if you have it, but store-bought works beautifully)
- 3 large carrots, peeled and cut into thick coins (their sweetness balances the savory broth)
- 2 parsnips, peeled and diced (a humble veggie that brings an earthy depth)
- 1 large onion, roughly chopped (I love the way they caramelize slowly)
- 3 cloves garlic, minced (because what’s a stew without garlic?)
- 2 tbsp tomato paste (it’s my secret for a richer, more complex base)
- 1 tbsp Worcestershire sauce (just a splash to elevate the umami)
- 1 tsp dried thyme (its floral notes are perfect here)
- Salt and freshly ground black pepper (to season every layer)
- 2 tbsp all-purpose flour (for that silky, thickened gravy we all crave)
- 2 tbsp olive oil (extra virgin is my go-to for its fruity undertones)
Instructions
- Heat the olive oil in a large skillet over medium-high heat until shimmering, about 2 minutes.
- Season the beef pieces generously with salt and pepper, then brown them in batches to avoid crowding the pan, about 4 minutes per side. (Tip: Don’t rush this step—the browned bits are flavor gold.)
- Transfer the beef to your slow cooker, leaving any excess oil behind.
- In the same skillet, sauté the onion and garlic until just softened, about 3 minutes, scraping up any browned bits from the bottom.
- Stir in the tomato paste and cook for 1 minute to deepen its flavor, then sprinkle the flour over the mixture, stirring constantly for another minute.
- Gradually whisk in the beef broth and Worcestershire sauce, bringing the mixture to a simmer to thicken slightly before pouring it over the beef in the slow cooker.
- Add the carrots, parsnips, and thyme to the slow cooker, stirring gently to combine. (Tip: Layering the vegetables on top ensures they steam perfectly without becoming mushy.)
- Cover and cook on low for 8 hours or on high for 4 hours, until the beef is fork-tender. (Tip: Resist the urge to peek—keeping the lid on traps heat and moisture.)
- Season the stew with additional salt and pepper to taste before serving.
Now, the stew emerges tender and aromatic, the beef yielding effortlessly to the slightest pressure of a fork, surrounded by vegetables that have soaked up every bit of the rich, savory broth. Serve it in deep bowls with a crusty loaf of bread for dipping, or over a mound of creamy mashed potatoes for the ultimate comfort meal.
Conclusion
Vibrant and varied, these 19 cozy November recipes are your ticket to delicious comfort food this season. From hearty soups to sweet treats, there’s something to warm every heart and home. We’d love to hear which dishes become your favorites—drop us a comment below! And if you enjoyed this roundup, don’t forget to share the love on Pinterest. Happy cooking!