Perfect for those days when you’re craving something sweet but don’t want to turn on the oven, we’ve rounded up 22 delicious, no-bake dessert recipes that are as easy as they are irresistible. From creamy cheesecakes to fruity delights, these treats promise to satisfy your sweet tooth with minimal effort. Dive into our list and discover your next favorite dessert that’s sure to impress without the baking fuss!
No-Bake Chocolate Peanut Butter Bars
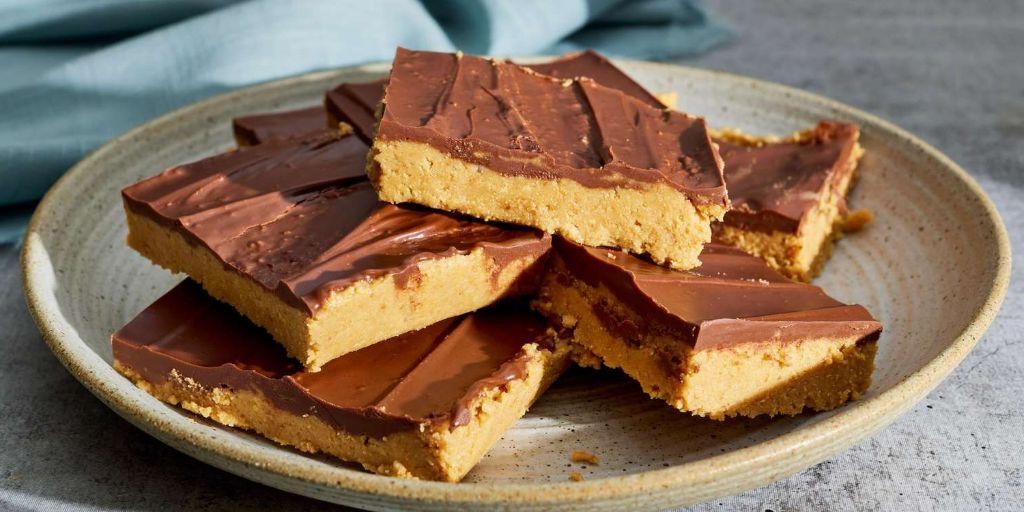
Evenings like these call for something effortlessly sweet, a treat that doesn’t demand much but gives back in rich, comforting flavors. These no-bake chocolate peanut butter bars are just that—a simple yet indulgent escape into creamy peanut butter and dark chocolate, layered over a crisp, buttery base.
Ingredients
- 1 1/2 cups finely ground graham cracker crumbs
- 1/2 cup unsalted butter, melted and slightly cooled
- 1/4 cup granulated sugar
- 1 cup creamy peanut butter, preferably natural and unsweetened
- 1/2 cup powdered sugar
- 1 teaspoon pure vanilla extract
- 1 1/4 cups semi-sweet chocolate chips
- 1/4 cup clarified butter
Instructions
- In a medium mixing bowl, combine the graham cracker crumbs, melted unsalted butter, and granulated sugar until the mixture resembles wet sand.
- Press the mixture firmly into the bottom of an 8×8 inch baking dish lined with parchment paper, ensuring an even layer. Chill in the refrigerator for 15 minutes to set.
- While the base chills, whisk together the creamy peanut butter, powdered sugar, and pure vanilla extract in another bowl until smooth and fully incorporated.
- Spread the peanut butter mixture over the chilled base, using a spatula to create a smooth, even layer. Return to the refrigerator for another 15 minutes.
- In a small saucepan over low heat, melt the semi-sweet chocolate chips with the clarified butter, stirring constantly until smooth and glossy, about 3 minutes.
- Pour the melted chocolate over the peanut butter layer, tilting the dish to ensure even coverage. Chill in the refrigerator for at least 2 hours, or until the chocolate is fully set.
- Once set, lift the bars from the dish using the parchment paper and cut into squares with a sharp knife warmed under hot water for cleaner cuts.
Yieldingly rich and decadent, these bars offer a perfect contrast between the crunchy base and the smooth, velvety layers above. For an extra touch, sprinkle flaky sea salt over the chocolate before it sets, or serve alongside a dollop of whipped cream for a dessert that feels both humble and luxurious.
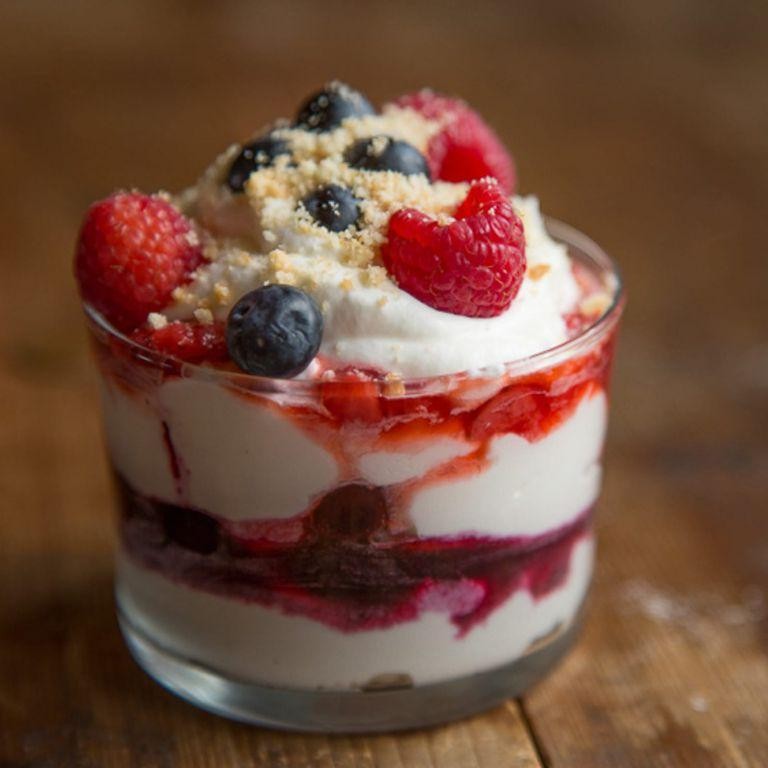
Strawberry Cheesecake Parfaits
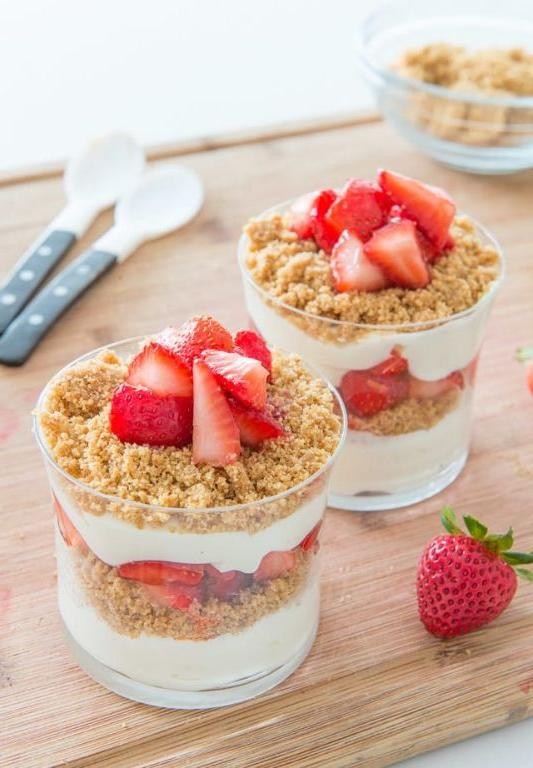
Kneading through the memories of summer picnics and the joy of shared desserts, I find myself drawn to the simplicity and elegance of Strawberry Cheesecake Parfaits. This dish, a harmonious blend of creamy and fruity, whispers of leisurely afternoons and the sweetness of seasonal strawberries.
Ingredients
- 1 cup fresh strawberries, hulled and thinly sliced
- 8 oz cream cheese, softened to room temperature
- 1/2 cup granulated sugar
- 1 tsp pure vanilla extract
- 1 cup heavy cream, chilled
- 1/2 cup graham cracker crumbs
- 1 tbsp unsalted butter, melted
Instructions
- In a medium bowl, combine the graham cracker crumbs and melted butter until the mixture resembles wet sand. Press 2 tablespoons of the mixture into the bottom of each serving glass to form the base layer.
- Using an electric mixer on medium speed, beat the softened cream cheese, granulated sugar, and vanilla extract in a large bowl until smooth and creamy, about 2 minutes.
- In a separate bowl, whip the chilled heavy cream to stiff peaks, about 3 minutes. Gently fold the whipped cream into the cream cheese mixture until fully incorporated.
- Layer the cream cheese mixture over the graham cracker base in the serving glasses, followed by a layer of sliced strawberries. Repeat the layers until the glasses are filled, ending with a strawberry layer on top.
- Chill the parfaits in the refrigerator for at least 2 hours before serving to allow the flavors to meld and the layers to set.
Glistening with the freshness of strawberries and the richness of cream cheese, these parfaits offer a delightful contrast of textures from the crunchy base to the velvety filling. Serve them as a sophisticated dessert at your next gathering or enjoy them as a personal treat on a quiet evening.
Lemon Icebox Pie
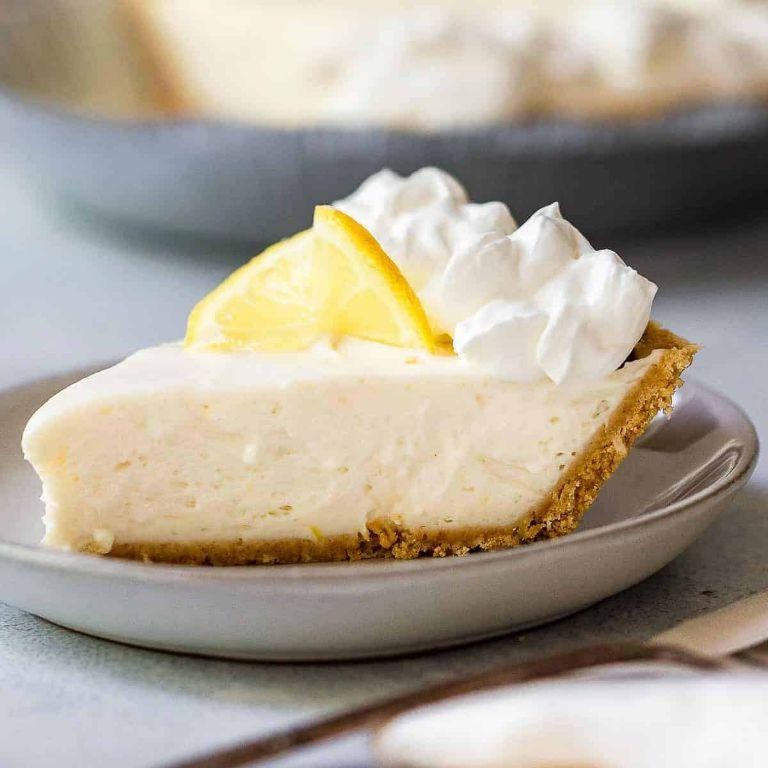
Under the soft glow of the kitchen light, the simplicity of a Lemon Icebox Pie whispers of summer evenings and the joy of uncomplicated desserts. Its creamy, tangy filling nestled in a crisp, buttery crust offers a refreshing end to any meal, embodying the essence of effortless elegance.
Ingredients
- 1 1/2 cups graham cracker crumbs, finely ground
- 1/3 cup clarified butter, melted
- 1/4 cup granulated sugar
- 4 pasture-raised eggs, lightly beaten
- 1 can (14 oz) sweetened condensed milk
- 1/2 cup freshly squeezed lemon juice
- 1 tbsp lemon zest, finely grated
- 1 cup heavy cream, chilled
- 2 tbsp powdered sugar
Instructions
- Preheat the oven to 350°F (175°C).
- In a medium bowl, combine graham cracker crumbs, clarified butter, and granulated sugar until the mixture resembles wet sand.
- Press the crumb mixture firmly into the bottom and up the sides of a 9-inch pie dish, using the back of a measuring cup to ensure an even layer.
- Bake the crust for 10 minutes, or until lightly golden. Remove from the oven and let cool completely on a wire rack.
- In a large bowl, whisk together the lightly beaten eggs, sweetened condensed milk, lemon juice, and lemon zest until smooth and fully combined.
- Pour the filling into the cooled crust and bake for 15 minutes, or until the filling is set but still slightly wobbly in the center.
- Remove the pie from the oven and let cool to room temperature, then refrigerate for at least 4 hours, or until fully chilled.
- In a chilled bowl, whip the heavy cream and powdered sugar to stiff peaks, then spread over the chilled pie or serve dolloped on individual slices.
Cool and creamy, the Lemon Icebox Pie sings with the bright acidity of lemon, balanced by the sweetness of condensed milk and the richness of whipped cream. For a striking presentation, garnish with thin lemon slices or a sprinkle of zest just before serving.
Raspberry Coconut Macaroons
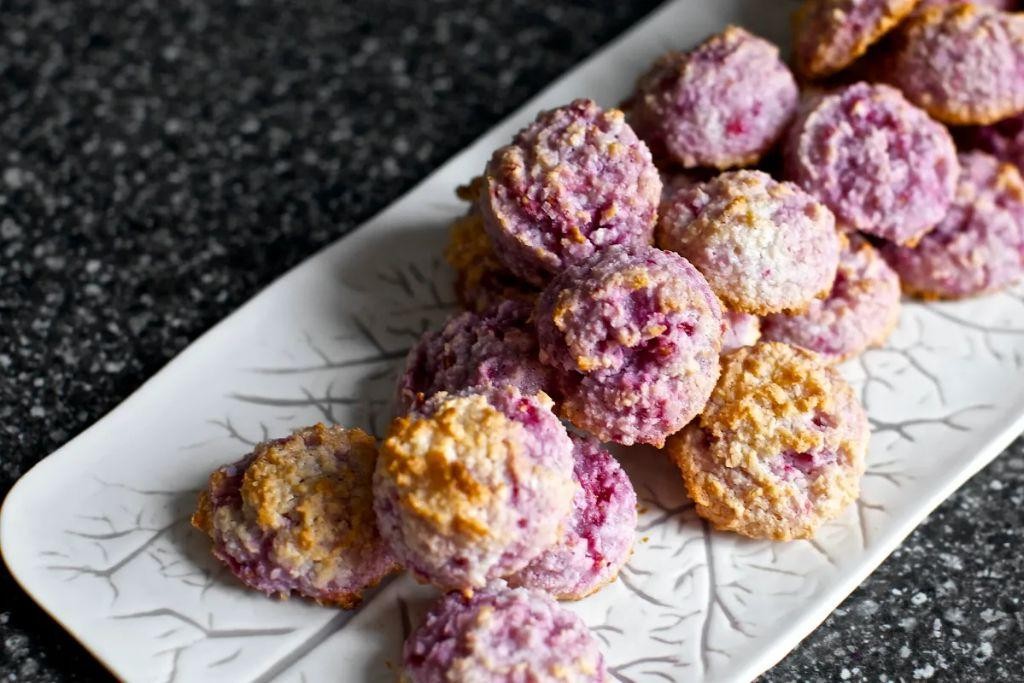
Delicate and dreamy, these raspberry coconut macaroons are a tender embrace of sweet and tart, a perfect little indulgence for those quiet afternoons when the world seems to pause just for you.
Ingredients
- 2 cups unsweetened shredded coconut
- 3/4 cup granulated sugar
- 2 large pasture-raised eggs, lightly beaten
- 1/2 teaspoon pure vanilla extract
- 1/4 teaspoon fine sea salt
- 1/2 cup fresh raspberries, gently crushed
- 4 ounces high-quality dark chocolate, finely chopped
Instructions
- Preheat your oven to 325°F (163°C) and line a baking sheet with parchment paper.
- In a large mixing bowl, combine the shredded coconut, granulated sugar, lightly beaten eggs, pure vanilla extract, and fine sea salt. Stir until the mixture is uniformly moist.
- Gently fold in the crushed raspberries, being careful not to overmix to maintain some texture.
- Using a tablespoon, scoop the mixture onto the prepared baking sheet, spacing them about 2 inches apart to allow for slight spreading.
- Bake for 20-25 minutes, or until the macaroons are golden brown around the edges and firm to the touch.
- While the macaroons cool, melt the finely chopped dark chocolate in a double boiler over simmering water, stirring until smooth.
- Once the macaroons are completely cool, drizzle or dip the tops in the melted chocolate, then set aside to allow the chocolate to harden.
Velvety and rich, these macaroons offer a delightful contrast between the crispy exterior and the chewy, fruity interior. Serve them alongside a cup of Earl Grey tea for an afternoon treat that feels both indulgent and refined.
Chocolate Avocado Mousse
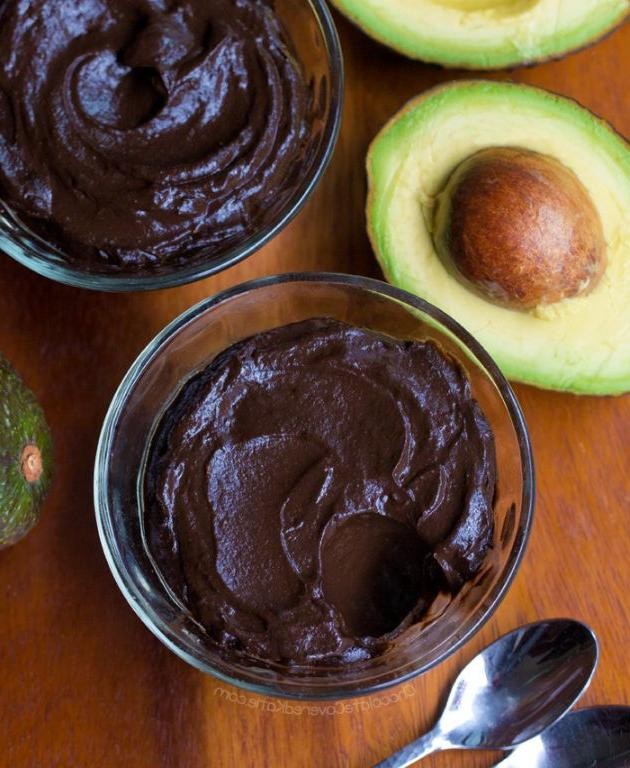
On a quiet evening, when the kitchen becomes a sanctuary, there’s something profoundly comforting about creating a dessert that’s both indulgent and nourishing. This Chocolate Avocado Mousse is a testament to the magic that happens when simplicity meets sophistication, offering a velvety texture and rich flavor that belies its wholesome ingredients.
Ingredients
- 2 ripe avocados, peeled and pitted
- 1/2 cup high-quality dark cocoa powder
- 1/4 cup pure maple syrup
- 1/2 cup coconut milk, full-fat
- 1 tsp pure vanilla extract
- 1/8 tsp sea salt
- 1/2 cup heavy whipping cream, chilled
- 1 tbsp powdered sugar
Instructions
- In a food processor, combine the avocados, cocoa powder, maple syrup, coconut milk, vanilla extract, and sea salt. Process until the mixture is completely smooth, scraping down the sides as needed, about 2 minutes.
- Transfer the mousse to a large bowl and set aside. For a lighter texture, you can refrigerate the mousse for 30 minutes before serving, though this step is optional.
- In a separate bowl, whip the chilled heavy whipping cream and powdered sugar until stiff peaks form, about 3 minutes. Gently fold the whipped cream into the avocado mixture until just combined, being careful not to deflate the cream.
- Divide the mousse among serving dishes. For best results, chill for at least 1 hour before serving to allow the flavors to meld and the texture to set.
Lusciously smooth with a deep chocolate flavor, this mousse is a delightful paradox of richness and lightness. Serve it garnished with fresh berries or a sprinkle of cocoa nibs for an added crunch that contrasts beautifully with its creamy texture.
Vanilla Pudding with Fresh Berries

Yesterday, as the golden light of late afternoon spilled across my kitchen counter, I found myself lost in the simple joy of making vanilla pudding with fresh berries. It’s a dish that whispers of summer’s bounty and the comfort of home, a delicate balance between the creamy and the tart.
Ingredients
- 2 cups whole milk
- 1/2 cup granulated sugar
- 1/4 cup cornstarch
- 1/4 teaspoon fine sea salt
- 2 large pasture-raised eggs, lightly beaten
- 2 tablespoons unsalted butter, cut into small pieces
- 2 teaspoons pure vanilla extract
- 1 cup mixed fresh berries (such as strawberries, blueberries, and raspberries)
Instructions
- In a medium saucepan, whisk together the whole milk, granulated sugar, cornstarch, and fine sea salt over medium heat until the mixture begins to thicken, about 5 minutes.
- Reduce the heat to low and slowly whisk in the lightly beaten pasture-raised eggs, ensuring a smooth consistency without curdling, for about 2 minutes.
- Remove the saucepan from the heat and stir in the unsalted butter pieces and pure vanilla extract until fully incorporated and the pudding is silky.
- Pour the pudding into four serving dishes and chill in the refrigerator for at least 2 hours, or until set.
- Before serving, top each pudding with a generous handful of mixed fresh berries.
Unbelievably smooth with a rich vanilla depth, this pudding pairs beautifully with the bright acidity of fresh berries. For an extra touch of elegance, serve it in vintage glassware to catch the light and the colors of the berries.
Peanut Butter Banana Yogurt Dip
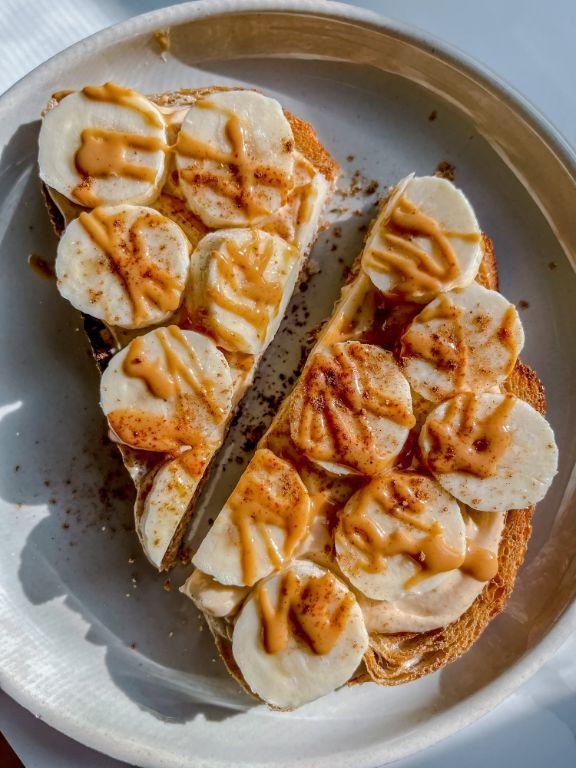
Sometimes, the simplest combinations bring the most comfort, like this Peanut Butter Banana Yogurt Dip. It’s a creamy, dreamy blend that feels both indulgent and wholesome, perfect for those quiet moments when you need a little sweetness in your day.
Ingredients
- 1 cup Greek yogurt, full-fat
- 2 ripe bananas, medium-sized
- 1/4 cup creamy peanut butter, unsweetened
- 1 tbsp honey, raw
- 1/2 tsp vanilla extract, pure
- 1/4 tsp cinnamon, ground
- Pinch of sea salt, fine
Instructions
- In a medium mixing bowl, combine the Greek yogurt and peanut butter, stirring until smooth and fully incorporated.
- Mash the bananas thoroughly with a fork in a separate bowl, ensuring no large chunks remain for a uniformly creamy texture.
- Fold the mashed bananas into the yogurt and peanut butter mixture gently, maintaining the dip’s airy consistency.
- Drizzle in the honey and vanilla extract, stirring to blend evenly throughout the mixture.
- Sprinkle the ground cinnamon and a pinch of sea salt over the top, then stir once more to distribute the spices.
- Chill the dip in the refrigerator for at least 30 minutes before serving to allow the flavors to meld beautifully.
Now, the dip boasts a luxuriously smooth texture with a perfect balance of sweet and savory notes. Try spreading it on whole-grain toast or dolloping it over a bowl of fresh berries for a delightful contrast.
Oreo Truffles
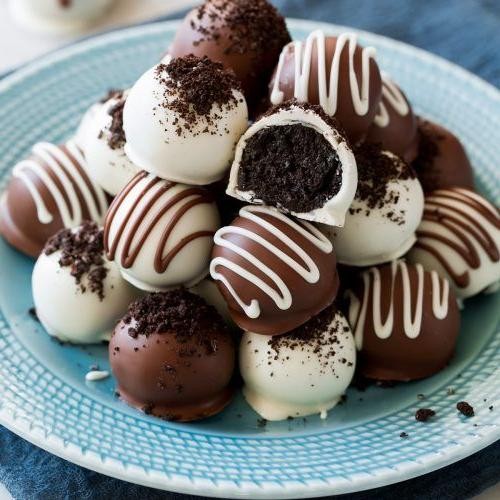
Under the soft glow of the kitchen light, there’s something deeply comforting about transforming simple ingredients into a decadent treat. Oreo truffles, with their rich, creamy center and crisp chocolate shell, are a testament to the magic of minimal effort meeting maximum delight.
Ingredients
- 1 package (14.3 oz) Oreo cookies, finely crushed
- 8 oz cream cheese, room temperature
- 12 oz semi-sweet chocolate chips, for coating
- 1 tbsp coconut oil, for thinning chocolate
Instructions
- In a large mixing bowl, combine the finely crushed Oreo cookies and room temperature cream cheese until a uniform dough forms. Tip: Ensure the cream cheese is fully softened to avoid lumps.
- Using a tablespoon, scoop the mixture and roll into 1-inch balls. Place on a parchment-lined baking sheet. Tip: For uniform truffles, use a small ice cream scoop.
- Freeze the rolled balls for 30 minutes to firm up, making them easier to coat.
- In a microwave-safe bowl, melt the semi-sweet chocolate chips with coconut oil in 30-second intervals, stirring until smooth. Tip: The coconut oil helps thin the chocolate for a smoother coating.
- Using a fork, dip each frozen Oreo ball into the melted chocolate, allowing excess to drip off before returning to the parchment paper.
- Chill the coated truffles in the refrigerator for at least 1 hour, or until the chocolate shell is set.
Finished with a glossy chocolate shell, these truffles offer a delightful contrast between the crunchy exterior and the velvety, Oreo-laced interior. Serve them atop a drizzle of caramel or alongside a cup of robust espresso for an indulgent finish to any meal.
Key Lime Pie in a Jar
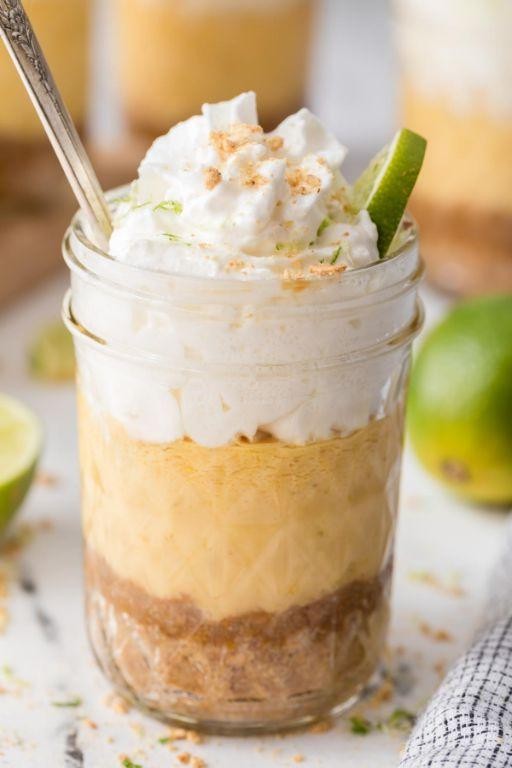
Sometimes, the simplest pleasures come in the most unassuming packages, like this Key Lime Pie in a Jar, a dessert that marries the tangy zest of key limes with the creamy sweetness of a traditional pie, all nestled within the cozy confines of a mason jar.
Ingredients
- 1 1/2 cups graham cracker crumbs
- 1/4 cup granulated sugar
- 6 tbsp unsalted butter, melted
- 4 pasture-raised egg yolks, lightly beaten
- 1 can (14 oz) sweetened condensed milk
- 1/2 cup key lime juice, freshly squeezed
- 1 tbsp key lime zest
- 1 cup heavy cream, chilled
- 2 tbsp powdered sugar
Instructions
- Preheat your oven to 350°F (175°C) to ensure it’s ready for baking the crust.
- In a medium bowl, combine the graham cracker crumbs, granulated sugar, and melted butter until the mixture resembles wet sand.
- Press the mixture firmly into the bottom of each mason jar to form a compact crust layer, using the back of a spoon for even distribution.
- Bake the crusts in the preheated oven for 10 minutes, then remove and let cool completely on a wire rack.
- In another bowl, whisk together the egg yolks and sweetened condensed milk until smooth, then gradually blend in the key lime juice and zest until fully incorporated.
- Pour the filling over the cooled crusts, filling each jar about three-quarters full to allow room for the topping.
- Chill the jars in the refrigerator for at least 4 hours, or until the filling is set and firm to the touch.
- Just before serving, whip the chilled heavy cream with powdered sugar until stiff peaks form, then dollop generously on top of each pie.
Just as the sun sets, casting golden hues across the sky, this dessert offers a balance of bright citrus and velvety cream, best enjoyed with a long spoon to savor every layer. For an extra touch of whimsy, garnish with a thin lime wheel or a sprinkle of zest before serving.
Mixed Berry Fool
Moments like these, when the light filters through the kitchen window just so, remind me of the simple joys in life—like the first spoonful of a Mixed Berry Fool, its creamy texture and vibrant berry flavors a testament to the beauty of uncomplicated desserts.
Ingredients
- 2 cups mixed fresh berries (strawberries, raspberries, blueberries), hulled and halved if large
- 1/2 cup granulated sugar
- 1 tbsp fresh lemon juice
- 1 1/2 cups heavy cream, chilled
- 1/2 tsp pure vanilla extract
Instructions
- In a medium bowl, gently toss the mixed berries with 1/4 cup of the granulated sugar and the fresh lemon juice. Set aside to macerate for 15 minutes, allowing the berries to release their natural juices.
- Using a slotted spoon, transfer half of the macerated berries to a separate bowl, reserving the juices. Mash the berries lightly with a fork to create a chunky compote.
- In a large mixing bowl, whip the chilled heavy cream with the remaining 1/4 cup of granulated sugar and the pure vanilla extract until soft peaks form, about 3-4 minutes on medium-high speed.
- Gently fold the mashed berry compote into the whipped cream until just combined, creating a marbled effect without overmixing to maintain the cream’s lightness.
- Divide the remaining whole macerated berries among serving glasses, spooning a portion of the reserved berry juices over each.
- Top the berries with the whipped cream and berry mixture, layering as desired for a visually appealing presentation.
- Chill the assembled desserts in the refrigerator for at least 30 minutes before serving to allow the flavors to meld.
Delightfully light yet indulgent, the Mixed Berry Fool offers a symphony of textures—from the silky cream to the burst of fresh berries. Serve it in clear glasses to showcase the beautiful layers, or garnish with a sprig of mint for an extra touch of elegance.
Chocolate Covered Strawberries

Fragrant memories of summer often lead me back to the simplicity of chocolate covered strawberries, a dessert that marries the lush sweetness of ripe berries with the rich depth of dark chocolate. It’s a pairing that feels both indulgent and innocent, a reminder of warm afternoons and the joy of sharing.
Ingredients
- 1 pound fresh strawberries, preferably organic, with stems attached
- 8 ounces high-quality dark chocolate (70% cacao), finely chopped
- 1 tablespoon coconut oil, unrefined
Instructions
- Line a baking sheet with parchment paper, ensuring it’s large enough to accommodate all strawberries without touching.
- Gently rinse the strawberries under cold water and pat dry thoroughly with paper towels; any moisture will prevent the chocolate from adhering properly.
- In a double boiler over medium heat, melt the dark chocolate and coconut oil together, stirring occasionally until smooth and fully combined, about 5 minutes. Tip: Avoid overheating the chocolate to prevent seizing.
- Holding each strawberry by the stem, dip it into the melted chocolate, swirling to coat evenly up to the stem. Allow excess chocolate to drip back into the bowl.
- Place the dipped strawberries on the prepared baking sheet. Tip: For a decorative touch, drizzle any remaining chocolate over the strawberries using a fork.
- Refrigerate the strawberries for at least 30 minutes, or until the chocolate is set and firm to the touch. Tip: For best results, avoid stacking the strawberries until fully set to prevent smudging.
Rich in contrast, the crisp shell of dark chocolate gives way to the juicy burst of strawberry beneath, a texture play that’s as satisfying to bite into as it is to behold. Serve these on a chilled platter for an elegant touch, or pack them in individual boxes for a heartfelt gift.
Pineapple Coconut Balls
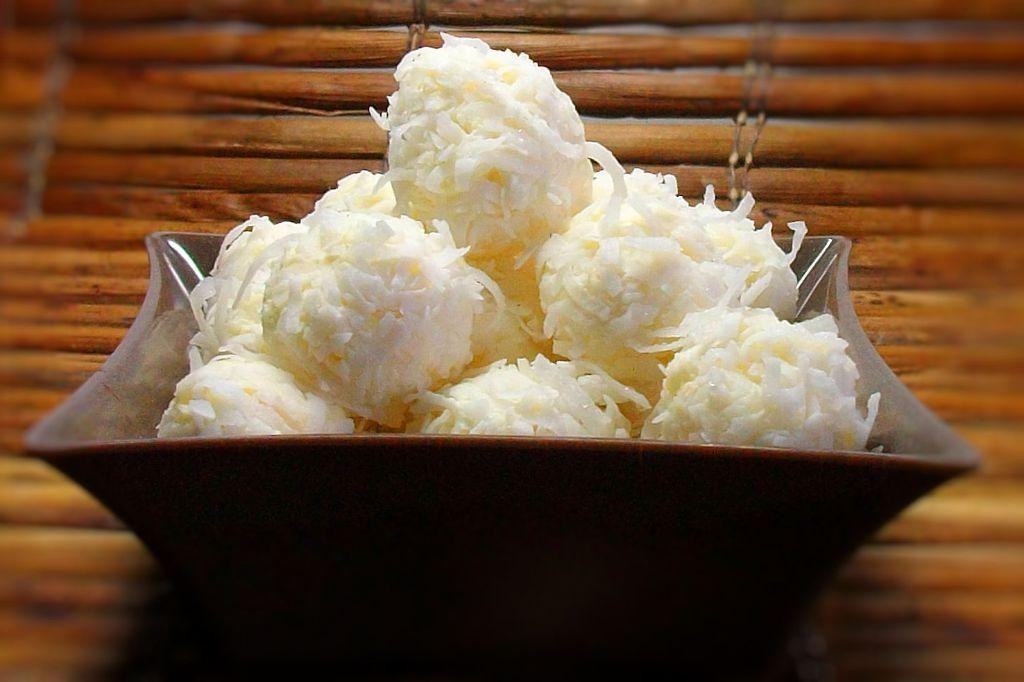
How the gentle fusion of tropical pineapple and creamy coconut can transport you to a serene beach with just one bite is nothing short of magical. These Pineapple Coconut Balls are a testament to the beauty of simple ingredients coming together to create something truly enchanting.
Ingredients
- 1 cup finely shredded unsweetened coconut
- 1/2 cup pineapple puree, strained
- 1/4 cup coconut flour
- 2 tbsp pure maple syrup
- 1 tsp vanilla extract
- 1/4 tsp sea salt
Instructions
- In a medium mixing bowl, combine the finely shredded unsweetened coconut, coconut flour, and sea salt, whisking gently to ensure an even distribution.
- Add the strained pineapple puree, pure maple syrup, and vanilla extract to the dry ingredients, stirring until the mixture becomes cohesive and slightly sticky.
- Using a tablespoon measure, scoop the mixture and roll between your palms to form 1-inch balls. Tip: If the mixture is too sticky, lightly dampen your hands with water to prevent sticking.
- Place the formed balls on a parchment-lined baking sheet, spacing them about 1 inch apart. Chill in the refrigerator for at least 30 minutes to firm up. Tip: For a quicker set, you can place them in the freezer for 15 minutes.
- Once chilled, roll each ball in additional shredded coconut for a textured exterior. Tip: For an extra touch of elegance, drizzle with melted dark chocolate before serving.
Each bite of these Pineapple Coconut Balls offers a delightful contrast between the soft, chewy interior and the crisp coconut coating. The subtle sweetness of pineapple paired with the richness of coconut makes these treats perfect for a light dessert or a midday snack. Serve them on a platter garnished with fresh pineapple slices for a visually appealing presentation.
Mango Sorbet
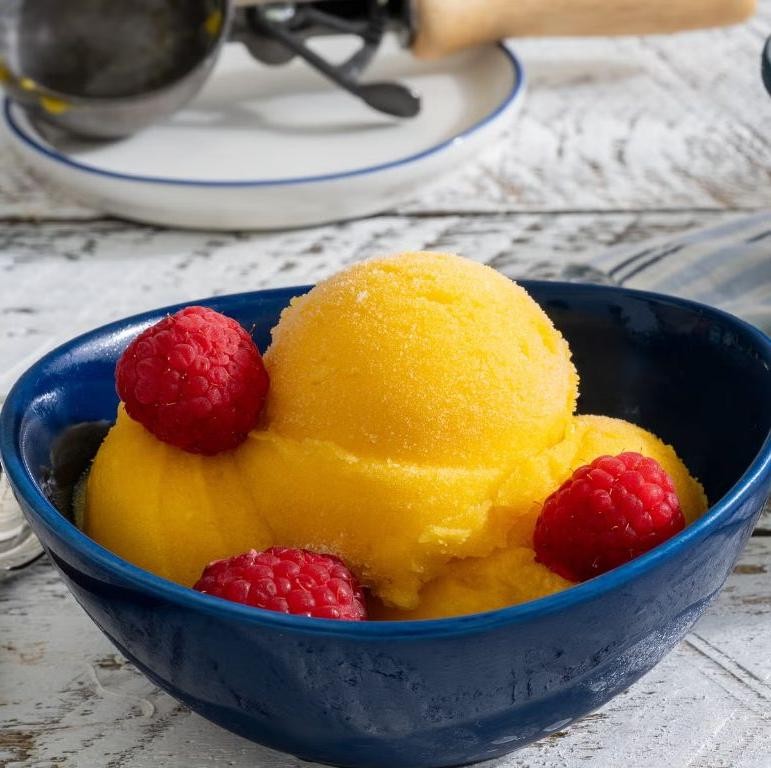
Evenings like these call for something light yet indulgent, a sweet escape that doesn’t weigh you down. Mango sorbet, with its vibrant hue and refreshing taste, is just the thing to savor slowly, letting each spoonful melt away the day’s heat.
Ingredients
- 2 cups ripe mango puree, strained
- 3/4 cup granulated sugar
- 1/2 cup water
- 1 tbsp freshly squeezed lime juice
- 1/4 tsp fine sea salt
Instructions
- In a small saucepan over medium heat, combine the granulated sugar and water, stirring constantly until the sugar completely dissolves, about 3 minutes. Remove from heat and let cool to room temperature.
- Once cooled, whisk the sugar syrup into the mango puree until fully incorporated. Add the lime juice and fine sea salt, stirring gently to combine.
- Pour the mixture into an ice cream maker and churn according to the manufacturer’s instructions, typically about 20-25 minutes, until the sorbet reaches a soft-serve consistency.
- Transfer the sorbet to a freezer-safe container, cover with parchment paper pressed directly against the surface to prevent ice crystals, and freeze for at least 4 hours, or until firm.
- For optimal texture, let the sorbet sit at room temperature for 5 minutes before scooping. Serve in chilled bowls or hollowed-out mango halves for a playful presentation.
The sorbet should be luxuriously smooth, with a bright, tangy sweetness that dances on the palate. Consider garnishing with a sprinkle of chili powder or a drizzle of honey for an unexpected twist.
Apple Cinnamon Energy Bites
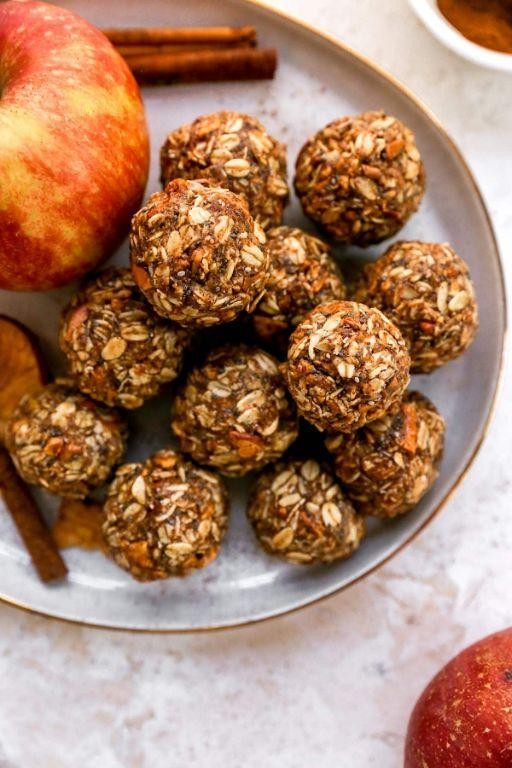
Evening light filters through the kitchen window as I ponder the simple joys of homemade snacks, these Apple Cinnamon Energy Bites are a testament to the beauty of combining wholesome ingredients into something effortlessly delightful.
Ingredients
- 1 cup rolled oats, finely ground
- 1/2 cup almond butter, creamy and unsweetened
- 1/4 cup pure maple syrup
- 1/2 cup dried apples, finely chopped
- 1 tsp ground cinnamon
- 1/4 tsp sea salt
- 1 tbsp chia seeds
Instructions
- In a large mixing bowl, combine the finely ground rolled oats, almond butter, and pure maple syrup until the mixture is uniformly moist.
- Fold in the finely chopped dried apples, ground cinnamon, sea salt, and chia seeds, ensuring an even distribution throughout the mixture.
- Using a tablespoon measure, scoop the mixture and roll between your palms to form 1-inch balls. Tip: If the mixture is too sticky, lightly wet your hands to prevent sticking.
- Place the formed bites on a parchment-lined baking sheet and refrigerate for at least 30 minutes to firm up. Tip: For a quicker set, place in the freezer for 15 minutes.
- Once set, transfer the energy bites to an airtight container. Tip: Layer between sheets of parchment paper to prevent sticking if stacking.
Zesty with cinnamon and sweet from the apples, these bites offer a chewy texture with a subtle crunch from the chia seeds. Serve them alongside a cup of chai tea for an afternoon pick-me-up or pack them for a hike to enjoy nature’s bounty.
Chocolate Hazelnut Spread Dip
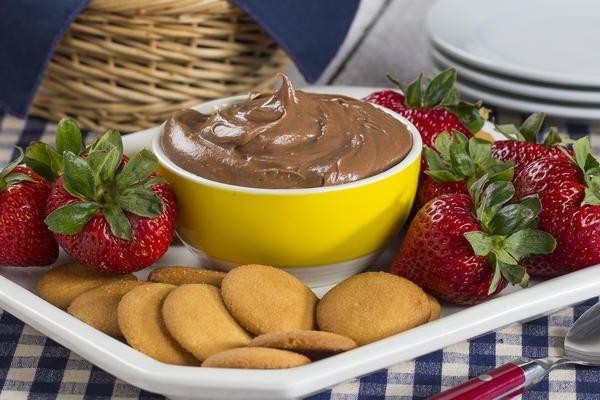
Sometimes, the simplest pleasures come from the most unexpected combinations, like this Chocolate Hazelnut Spread Dip that whispers of lazy Sunday mornings and the joy of sharing.
Ingredients
- 1 cup high-quality chocolate hazelnut spread
- 1/2 cup heavy cream, preferably organic
- 1/4 cup unsalted butter, clarified
- 1 tsp pure vanilla extract
- 1/4 tsp fine sea salt
Instructions
- In a medium saucepan, gently warm the heavy cream over low heat until it reaches a simmer, about 3 minutes, stirring occasionally to prevent a skin from forming.
- Add the clarified butter to the saucepan, whisking continuously until fully incorporated and the mixture is smooth, about 2 minutes.
- Reduce the heat to the lowest setting and gradually fold in the chocolate hazelnut spread, ensuring it melts evenly without scorching, for approximately 5 minutes.
- Stir in the pure vanilla extract and fine sea salt, blending thoroughly to enhance the flavors, about 1 minute.
- Remove the saucepan from the heat and let the dip cool slightly, about 5 minutes, to thicken to a luscious, spoonable consistency.
Buttery and rich, this dip boasts a velvety texture that clings lovingly to fruit slices or artisanal bread. Its deep, nutty sweetness is balanced by a hint of salt, making it irresistible when drizzled over morning pancakes or as a decadent fondue for evening gatherings.
Blueberry Lemon Chia Pudding
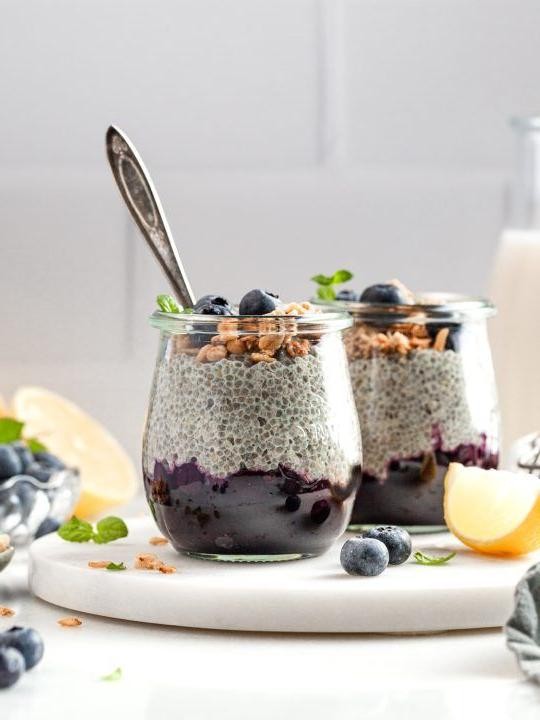
Now, as the early morning light filters through the kitchen, there’s something profoundly comforting about preparing a dish that feels both nourishing and indulgent. This blueberry lemon chia pudding is a testament to the beauty of simple ingredients coming together to create something unexpectedly delightful.
Ingredients
- 1 cup unsweetened almond milk
- 1/4 cup chia seeds
- 1 tbsp pure maple syrup
- 1/2 tsp vanilla extract
- 1/2 cup fresh blueberries
- 1 tbsp lemon zest
- 1 tbsp freshly squeezed lemon juice
Instructions
- In a medium mixing bowl, combine the unsweetened almond milk, chia seeds, pure maple syrup, and vanilla extract. Whisk vigorously for 1 minute to prevent clumping.
- Cover the bowl with plastic wrap, ensuring it touches the surface of the mixture to prevent a skin from forming. Refrigerate for at least 4 hours, or overnight, until the mixture has thickened to a pudding-like consistency.
- In a small saucepan over medium heat, gently warm the fresh blueberries, lemon zest, and lemon juice for 3-4 minutes, until the blueberries begin to burst and release their juices. Remove from heat and let cool slightly.
- Layer the chia pudding and blueberry compote in serving glasses, starting with the pudding and finishing with a spoonful of compote on top.
- Chill the assembled puddings for an additional 30 minutes before serving to allow the flavors to meld.
Zesty and vibrant, this pudding strikes a perfect balance between the tartness of lemon and the sweetness of blueberries. The chia seeds lend a delightful texture that’s both creamy and slightly crunchy, making each spoonful a joy. For an extra touch of elegance, garnish with a sprig of mint or a sprinkle of additional lemon zest before serving.
Peach Melba Parfait
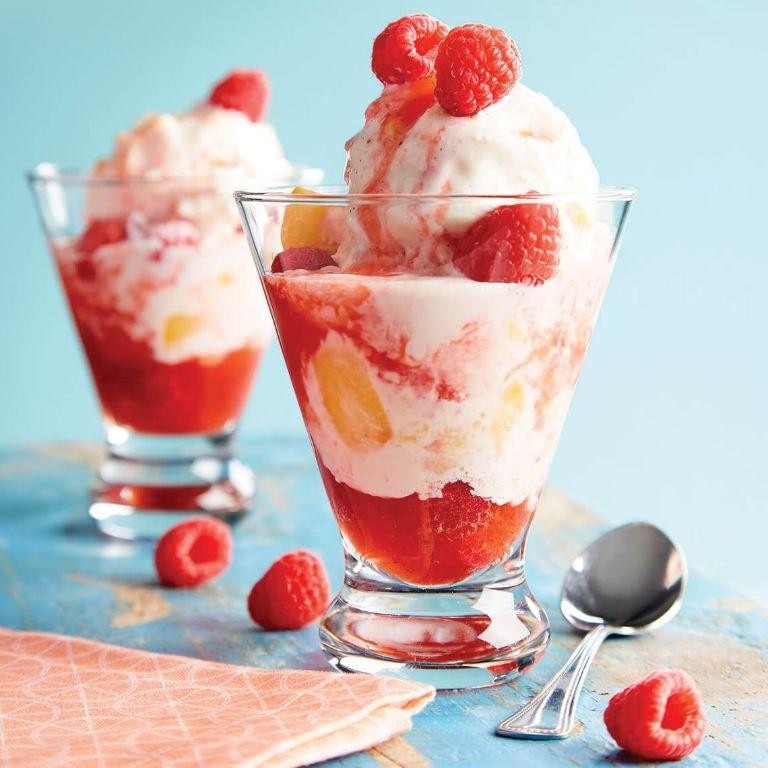
Lingering in the quiet of the morning, the thought of a Peach Melba Parfait brings a gentle smile, its layers a testament to the beauty of simplicity and the joy of seasonal fruits. This dessert, a harmonious blend of ripe peaches and raspberry coulis, layered with vanilla-infused cream, is a celebration of texture and taste.
Ingredients
- 2 cups ripe peaches, peeled and diced
- 1 cup fresh raspberries
- 1/4 cup granulated sugar
- 1 tbsp lemon juice, freshly squeezed
- 1 cup heavy cream, cold
- 1/2 cup Greek yogurt
- 1 tsp pure vanilla extract
- 2 tbsp powdered sugar
- 1/2 cup granola, for garnish
Instructions
- In a small saucepan over medium heat, combine the raspberries, granulated sugar, and lemon juice. Cook for 5 minutes, stirring occasionally, until the raspberries break down and the mixture thickens slightly. Strain through a fine-mesh sieve to remove seeds, then cool to room temperature.
- In a large bowl, whip the heavy cream, Greek yogurt, vanilla extract, and powdered sugar to soft peaks. This should take about 3-4 minutes with an electric mixer on medium speed.
- In serving glasses, layer the diced peaches, raspberry coulis, and vanilla cream mixture, repeating until the glasses are filled to the top.
- Garnish each parfait with a sprinkle of granola for added crunch.
- Chill the parfaits in the refrigerator for at least 30 minutes before serving to allow the flavors to meld.
Best enjoyed when the vanilla cream melds softly with the tart raspberry and sweet peach, each spoonful offers a delightful contrast. For an elegant touch, serve with a sprig of mint or a drizzle of honey to accentuate the natural sweetness of the fruits.
Raspberry Chocolate Ganache Cups
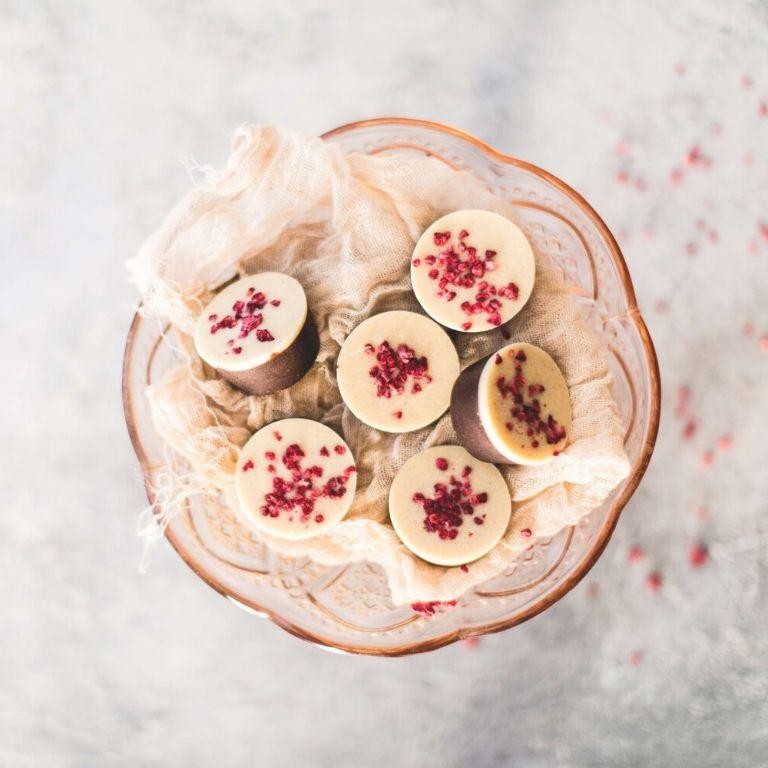
Sometimes, the simplest pleasures come in small packages, like these Raspberry Chocolate Ganache Cups that marry the tartness of fresh raspberries with the rich depth of dark chocolate. It’s a dessert that feels both indulgent and intimate, perfect for those moments when you crave something sweet yet sophisticated.
Ingredients
- 1 cup high-quality dark chocolate, finely chopped
- 1/2 cup heavy cream
- 1 tbsp unsalted butter, room temperature
- 1/2 tsp pure vanilla extract
- 12 fresh raspberries, for garnish
Instructions
- Place the finely chopped dark chocolate in a heatproof bowl.
- In a small saucepan, heat the heavy cream over medium heat until it just begins to simmer, about 2-3 minutes. Do not let it boil.
- Pour the hot cream over the chocolate and let it sit undisturbed for 1 minute to allow the chocolate to soften.
- Gently stir the mixture with a rubber spatula until smooth and fully combined. Tip: Ensure no water gets into the mixture to prevent seizing.
- Add the room temperature butter and vanilla extract to the ganache, stirring until the butter is completely melted and the mixture is glossy.
- Divide the ganache evenly among 12 small silicone cups or molds, filling each about 3/4 full.
- Refrigerate the cups for at least 2 hours, or until the ganache is set and firm to the touch. Tip: For a quicker set, place them in the freezer for 30 minutes.
- Once set, gently press a fresh raspberry into the center of each cup before serving. Tip: For an elegant touch, dust the tops with cocoa powder or edible gold dust.
Brimming with velvety texture and a balance of flavors, these Raspberry Chocolate Ganache Cups are a testament to the beauty of minimalism in dessert. Serve them on a slate board for a dramatic presentation, or pair with a glass of sparkling wine to elevate the experience.
Banana Split Bites
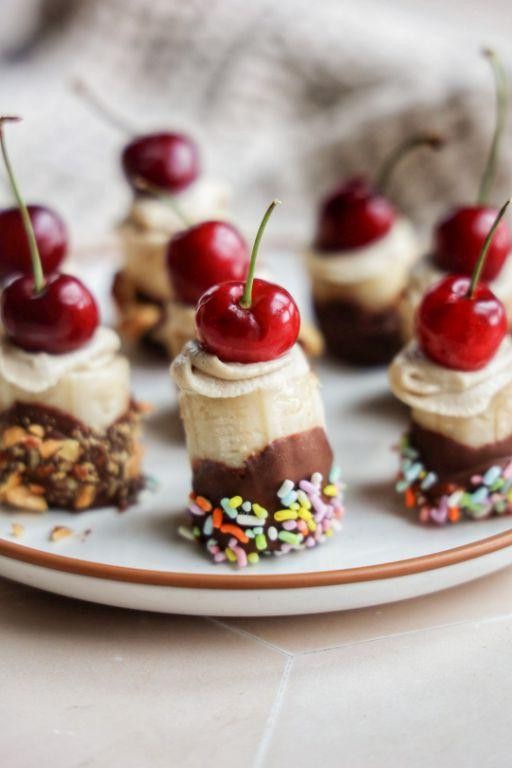
Moments like these call for simplicity, a return to the joys of childhood with a twist that speaks to the adult in us all. Banana Split Bites are a nostalgic nod to the classic dessert, reimagined for those who cherish both flavor and ease.
Ingredients
- 2 ripe bananas, sliced into 1/2-inch rounds
- 1/2 cup dark chocolate chips, melted
- 1/4 cup crushed peanuts, toasted
- 1/4 cup maraschino cherries, drained and halved
- 1/2 cup whipped cream, freshly whipped
- 1 tsp vanilla extract, pure
- 1 tbsp unsalted butter, clarified
Instructions
- Line a baking sheet with parchment paper and set aside.
- In a double boiler over medium heat, melt the dark chocolate chips with clarified butter, stirring until smooth. Tip: Ensure no water droplets enter the chocolate to prevent seizing.
- Dip each banana round halfway into the melted chocolate, allowing excess to drip off.
- Place the chocolate-dipped bananas on the prepared baking sheet. Immediately sprinkle with toasted crushed peanuts and top with a halved maraschino cherry. Tip: Work quickly before the chocolate sets to ensure toppings adhere.
- Refrigerate the bites for 15 minutes, or until the chocolate is firm.
- Just before serving, dollop each bite with a small amount of freshly whipped cream flavored with vanilla extract. Tip: For best results, whip the cream to soft peaks for a light, airy texture.
Kindly savor the contrast of creamy banana against the crisp chocolate shell, the crunch of peanuts, and the sweet burst of cherry. These bites shine when served on a platter for sharing, or as a whimsical garnish atop a scoop of vanilla bean ice cream.
Pistachio Rose Water Pudding
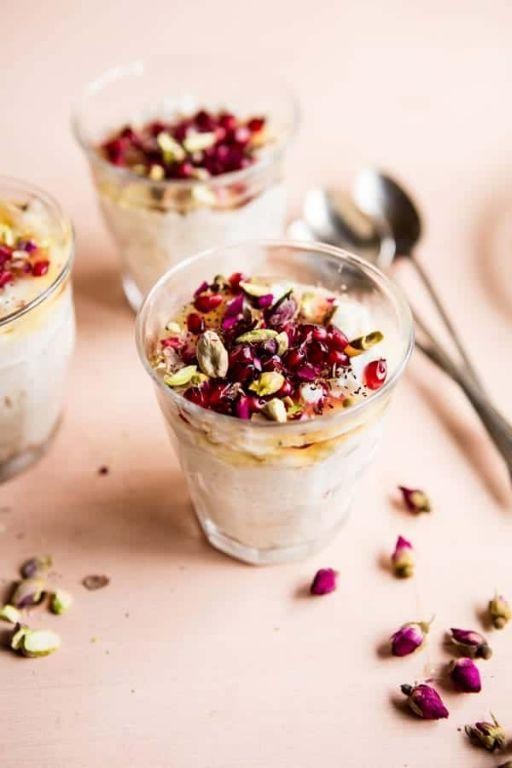
Now, as the light filters softly through the kitchen window, let’s embark on the gentle process of creating a Pistachio Rose Water Pudding, a dish that whispers of faraway places and the quiet joy of cooking.
Ingredients
- 1 cup shelled pistachios, finely ground
- 3 cups whole milk
- 1/2 cup granulated sugar
- 1/4 cup cornstarch
- 1 tbsp rose water
- 1/2 tsp cardamom, freshly ground
- Pinch of saffron threads, lightly crushed
- 1 tbsp unsalted butter, at room temperature
Instructions
- In a medium saucepan, combine the ground pistachios and whole milk over medium heat. Warm the mixture gently, stirring occasionally, until it begins to steam, about 5 minutes. Avoid boiling to preserve the delicate flavors.
- Whisk together the granulated sugar and cornstarch in a small bowl to prevent lumps. Gradually add this mixture to the warmed milk, whisking constantly to ensure a smooth consistency.
- Continue to cook the mixture over medium heat, stirring frequently, until it thickens noticeably and coats the back of a spoon, about 10 minutes. This is the perfect time to savor the aromatic blend of pistachio and rose water filling your kitchen.
- Remove the saucepan from the heat. Stir in the rose water, freshly ground cardamom, and crushed saffron threads, blending them thoroughly into the pudding for a fragrant depth of flavor.
- Finally, incorporate the unsalted butter, stirring until it melts completely and adds a silky richness to the pudding. Pour the pudding into individual serving dishes or a large bowl.
- Cover the surface directly with plastic wrap to prevent a skin from forming. Chill in the refrigerator for at least 4 hours, or until set and cold.
Delight in the creamy texture and the harmonious balance of floral rose water with the nutty depth of pistachios. Serve chilled, garnished with a sprinkle of crushed pistachios and a few edible rose petals for an elegant touch.
Coconut Lime Bars
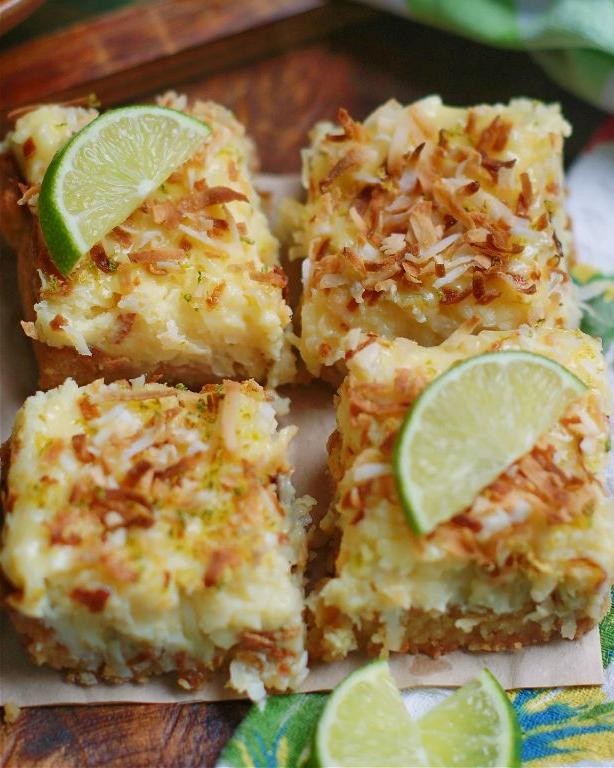
Kindly imagine the gentle fusion of tropical coconut and zesty lime, coming together in a dessert that whispers of summer breezes and leisurely afternoons. These Coconut Lime Bars are a testament to the beauty of simple ingredients creating something unexpectedly sublime.
Ingredients
- 1 1/2 cups all-purpose flour
- 1/2 cup powdered sugar
- 3/4 cup clarified butter, chilled
- 4 pasture-raised eggs, lightly beaten
- 1 1/2 cups granulated sugar
- 1/2 cup fresh lime juice
- 2 tbsp lime zest
- 1/2 cup unsweetened shredded coconut
- 1/4 cup all-purpose flour
- 1/2 tsp baking powder
- Pinch of sea salt
Instructions
- Preheat your oven to 350°F (175°C) and line an 8×8-inch baking pan with parchment paper, allowing excess to hang over the sides for easy removal.
- In a medium bowl, whisk together 1 1/2 cups all-purpose flour and powdered sugar. Cut in the chilled clarified butter until the mixture resembles coarse crumbs. Press firmly into the prepared pan to form an even crust.
- Bake the crust for 15-20 minutes, or until the edges are just beginning to turn golden. Tip: Chilling the crust for 10 minutes before baking helps prevent shrinkage.
- While the crust bakes, in a large bowl, combine the lightly beaten eggs, granulated sugar, fresh lime juice, and lime zest. Whisk until smooth.
- Stir in the shredded coconut, 1/4 cup all-purpose flour, baking powder, and sea salt until just combined. Tip: For a more intense lime flavor, add an extra tablespoon of zest.
- Pour the filling over the hot crust and return to the oven. Bake for 25-30 minutes, or until the filling is set and the top is lightly golden. Tip: A toothpick inserted into the center should come out clean when done.
- Allow the bars to cool completely in the pan on a wire rack before lifting out using the parchment overhang and cutting into squares.
These bars offer a delightful contrast between the crisp, buttery crust and the creamy, tangy filling, with the shredded coconut adding a subtle chew. Serve them chilled with a dusting of powdered sugar and a slice of lime for an extra touch of elegance.
Dark Chocolate Almond Clusters
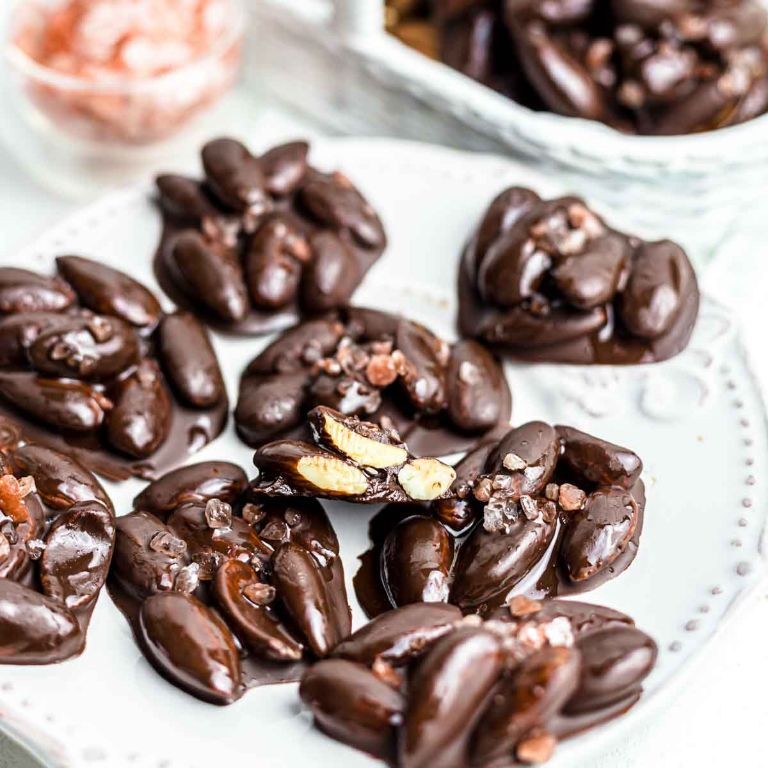
Zenfully, the process of making Dark Chocolate Almond Clusters begins with the simple pleasure of combining rich, velvety dark chocolate with the satisfying crunch of almonds. It’s a recipe that invites patience and presence, transforming basic ingredients into a luxurious treat.
Ingredients
- 8 ounces high-quality dark chocolate (70% cocoa), finely chopped
- 1 cup whole almonds, toasted
- 1 tablespoon coconut oil
- 1/4 teaspoon flaky sea salt
Instructions
- Line a baking sheet with parchment paper and set aside.
- In a double boiler over medium heat, melt the dark chocolate and coconut oil together, stirring occasionally until smooth and fully combined, about 5 minutes.
- Remove the double boiler from heat and gently fold in the toasted almonds, ensuring each piece is evenly coated with the chocolate mixture.
- Using a tablespoon, drop clusters of the chocolate-covered almonds onto the prepared baking sheet, spacing them about 1 inch apart.
- Sprinkle each cluster lightly with flaky sea salt for a contrast in flavors.
- Place the baking sheet in the refrigerator for at least 30 minutes, or until the chocolate has fully set and the clusters are firm to the touch.
Delightfully, these clusters emerge with a perfect balance of bitter and sweet, their texture a harmonious blend of crisp and creamy. Serve them atop a scoop of vanilla bean ice cream for an elegant dessert, or simply enjoy them as a refined snack with your afternoon tea.
Conclusion
Ready to satisfy your sweet tooth without turning on the oven? This roundup of 22 no-bake desserts is your ticket to easy, delicious treats perfect for any occasion. From creamy cheesecakes to fruity delights, there’s something for everyone. We’d love to hear which recipes you try—drop a comment with your favorites! Don’t forget to share the love by pinning this article on Pinterest for later. Happy no-bake baking!


