Delight in the joy of the holiday season with our collection of 20 Delicious Easy Holiday Dessert Recipes! Whether you’re whipping up a quick treat for a festive gathering or indulging in some cozy comfort food at home, these creative desserts are sure to sparkle on your table. Keep reading to discover sweet inspirations that will make your holidays even more memorable.
Peppermint Bark Chocolate Cups

Begin by exploring the delightful combination of rich chocolate and refreshing peppermint in these easy-to-make Peppermint Bark Chocolate Cups. Perfect for holiday gifting or a festive treat, this recipe guides you through each step to ensure success.
Ingredients
- 1 cup dark chocolate chips (or semi-sweet for a milder flavor)
- 1/2 cup white chocolate chips
- 1/4 tsp peppermint extract (adjust to taste)
- 1/4 cup crushed candy canes (for a festive crunch)
- 1 tbsp coconut oil (or any neutral oil, to thin the chocolate)
Instructions
- Line a mini muffin tin with paper liners and set aside.
- In a microwave-safe bowl, combine dark chocolate chips and 1/2 tbsp coconut oil. Microwave in 30-second intervals, stirring between each, until fully melted (about 1-2 minutes).
- Evenly distribute the melted dark chocolate into the prepared muffin liners, filling each about halfway. Tap the tin gently on the counter to remove air bubbles.
- Place the tin in the freezer for 10 minutes, or until the chocolate is set but not fully hardened.
- Meanwhile, melt the white chocolate chips with the remaining 1/2 tbsp coconut oil using the same method as the dark chocolate. Stir in the peppermint extract.
- Remove the tin from the freezer and spoon the peppermint white chocolate over the dark chocolate layer. Sprinkle with crushed candy canes immediately.
- Return the tin to the freezer for another 10 minutes, or until completely set.
Finally, these Peppermint Bark Chocolate Cups offer a perfect balance of creamy and crunchy textures with a refreshing minty finish. Serve them chilled straight from the freezer for a crisp bite or let them sit at room temperature for a softer texture.
Easy Eggnog Cheesecake
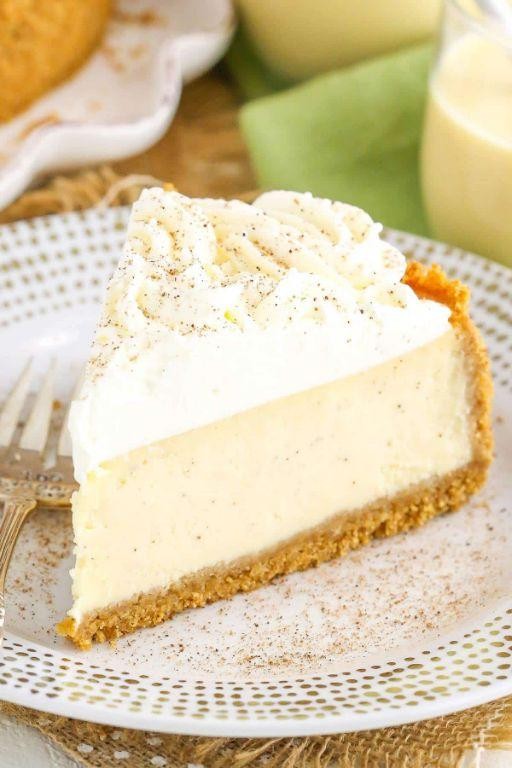
Here’s a delightful twist on the classic cheesecake that’s perfect for the holiday season or any time you’re craving something rich and creamy. This Easy Eggnog Cheesecake combines the festive flavors of eggnog with the smooth texture of cheesecake, creating a dessert that’s sure to impress.
Ingredients
- 1 1/2 cups graham cracker crumbs (for a nuttier flavor, try using ginger snaps)
- 1/4 cup granulated sugar
- 6 tbsp unsalted butter, melted (for a richer crust, use browned butter)
- 2 packages (8 oz each) cream cheese, softened (to ensure a smooth filling)
- 1/2 cup granulated sugar
- 1 cup eggnog (homemade or store-bought, but ensure it’s full-fat for best results)
- 2 large eggs (room temperature blends better)
- 1 tsp vanilla extract (pure extract offers the best flavor)
- 1/2 tsp ground nutmeg (freshly grated nutmeg enhances the eggnog flavor)
Instructions
- Preheat your oven to 325°F (163°C) to ensure it’s ready for baking.
- In a medium bowl, mix the graham cracker crumbs, 1/4 cup sugar, and melted butter until well combined. Tip: Press the mixture firmly into the bottom of a 9-inch springform pan to create an even crust.
- Bake the crust for 10 minutes, then remove from the oven and let it cool slightly. Tip: This pre-baking step helps prevent a soggy crust.
- In a large bowl, beat the cream cheese and 1/2 cup sugar until smooth. Tip: Scrape down the sides of the bowl to ensure all the cream cheese is incorporated.
- Gradually beat in the eggnog, eggs, vanilla extract, and nutmeg until the mixture is smooth and well combined.
- Pour the filling over the cooled crust and smooth the top with a spatula.
- Bake for 45-50 minutes, or until the center is almost set but still slightly wobbly. Tip: Avoid overbaking to prevent cracks.
- Turn off the oven and leave the cheesecake inside with the door slightly ajar for 1 hour to cool gradually.
- Refrigerate the cheesecake for at least 4 hours, or overnight, before serving.
Now, this cheesecake boasts a creamy, velvety texture with a hint of spice from the nutmeg, perfectly complementing the rich eggnog flavor. Serve it chilled with a dollop of whipped cream and a sprinkle of cinnamon for an extra festive touch.
Simple Gingerbread Cookies

Unwrap the joy of holiday baking with these simple gingerbread cookies, a timeless treat that fills your home with warmth and spice. Perfect for beginners, this recipe walks you through each step to ensure delicious results every time.
Ingredients
- 3 cups all-purpose flour (spooned and leveled for accuracy)
- 1 tbsp ground ginger (adjust for more or less spice)
- 1 tsp ground cinnamon
- 1/4 tsp ground cloves
- 1/2 tsp baking soda
- 1/4 tsp salt
- 3/4 cup unsalted butter, softened (room temperature for easier mixing)
- 3/4 cup packed brown sugar (light or dark, based on preference)
- 1 large egg
- 1/2 cup molasses (not blackstrap for a milder flavor)
Instructions
- In a medium bowl, whisk together the flour, ginger, cinnamon, cloves, baking soda, and salt until well combined. Tip: Sifting the dry ingredients can prevent lumps.
- In a large bowl, beat the softened butter and brown sugar with an electric mixer on medium speed until light and fluffy, about 2 minutes. Tip: Scrape down the sides of the bowl to ensure even mixing.
- Add the egg and molasses to the butter mixture, beating until fully incorporated. The mixture may look curdled, but it will come together with the dry ingredients.
- Gradually mix in the dry ingredients on low speed until just combined. Tip: Overmixing can lead to tough cookies, so stop as soon as the flour disappears.
- Divide the dough in half, flatten into disks, wrap in plastic, and chill for at least 2 hours or overnight. This step is crucial for manageable dough.
- Preheat the oven to 350°F and line baking sheets with parchment paper.
- On a lightly floured surface, roll one disk of dough to 1/4-inch thickness. Use cookie cutters to shape, transferring to prepared sheets 2 inches apart.
- Bake for 8-10 minutes, until the edges are set but centers are still soft. Cool on sheets for 5 minutes, then transfer to wire racks.
Baked to perfection, these gingerbread cookies boast a crisp edge with a chewy center, rich with molasses and spice. Serve them plain, or decorate with icing for a festive touch that delights all ages.
No-Bake Pumpkin Pie
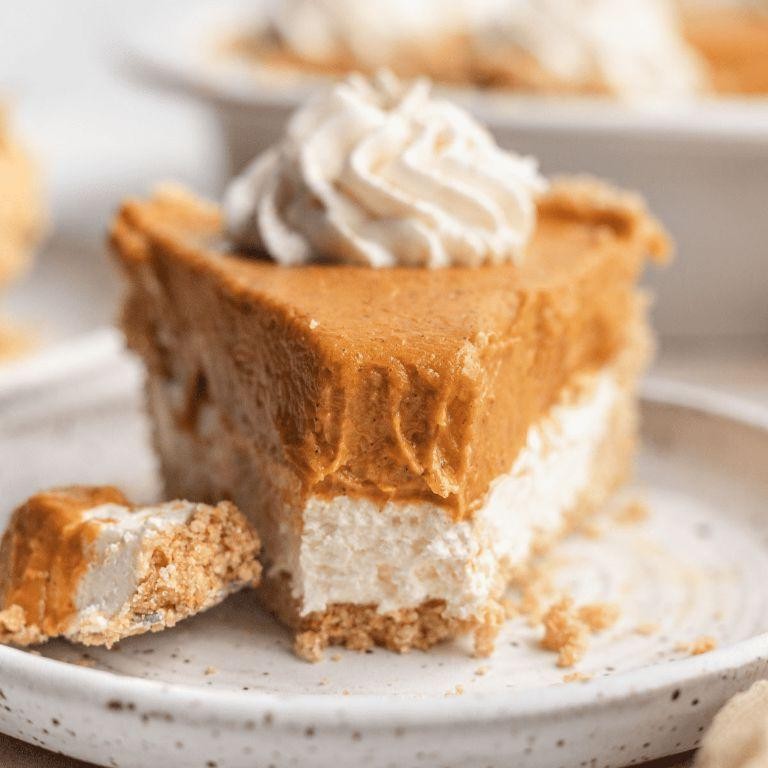
Starting with the basics, no-bake pumpkin pie is a delightful dessert that requires minimal effort but delivers maximum flavor, perfect for those warm days when you’d rather not turn on the oven.
Ingredients
- 1 1/2 cups graham cracker crumbs (store-bought or homemade)
- 1/4 cup granulated sugar (adjust to taste)
- 6 tbsp unsalted butter, melted (or any neutral oil)
- 1 (15 oz) can pumpkin puree (not pumpkin pie filling)
- 1 (8 oz) package cream cheese, softened (room temperature blends easier)
- 1/2 cup brown sugar, packed (for a deeper flavor)
- 1 tsp ground cinnamon (plus extra for garnish)
- 1/2 tsp ground ginger (adjust to taste)
- 1/4 tsp ground nutmeg (freshly grated for best flavor)
- 1 cup heavy cream, cold (for whipping)
- 1/4 cup powdered sugar (for stabilizing the whipped cream)
- 1 tsp vanilla extract (pure for best flavor)
Instructions
- In a medium bowl, combine graham cracker crumbs, granulated sugar, and melted butter until the mixture resembles wet sand.
- Press the crumb mixture firmly into the bottom and up the sides of a 9-inch pie dish. Use the back of a measuring cup for an even layer. Chill in the refrigerator for at least 30 minutes to set.
- In a large bowl, beat the softened cream cheese until smooth and creamy, about 2 minutes on medium speed.
- Add the pumpkin puree, brown sugar, cinnamon, ginger, and nutmeg to the cream cheese. Beat on low speed until fully combined and smooth.
- In another bowl, whip the heavy cream, powdered sugar, and vanilla extract on high speed until stiff peaks form, about 3-4 minutes.
- Gently fold half of the whipped cream into the pumpkin mixture to lighten it, then fold in the remaining whipped cream until no white streaks remain.
- Pour the filling into the chilled crust and smooth the top with a spatula. Refrigerate for at least 4 hours, or overnight, until set.
- Before serving, garnish with a sprinkle of cinnamon or additional whipped cream if desired.
The pie sets to a creamy, mousse-like texture with a perfect balance of spice and sweetness. For an elegant twist, serve each slice with a drizzle of caramel sauce and a sprinkle of toasted pecans.
Quick Chocolate Yule Log
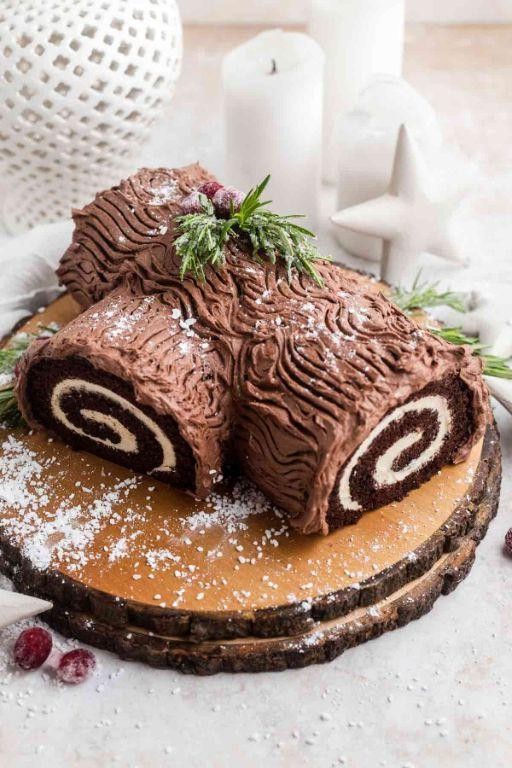
Here’s a delightful way to bring a festive touch to your holiday table with minimal fuss. This Quick Chocolate Yule Log is not only a showstopper but also surprisingly simple to make, even for beginners.
Ingredients
- 1 cup all-purpose flour (sifted for a lighter texture)
- 1/2 cup cocoa powder (use Dutch-processed for a richer flavor)
- 1 tsp baking powder (ensure it’s fresh for maximum rise)
- 1/4 tsp salt (fine sea salt blends best)
- 4 large eggs (room temperature for better volume)
- 3/4 cup granulated sugar (can reduce to 1/2 cup for less sweetness)
- 1 tsp vanilla extract (pure extract for the best flavor)
- 1/2 cup heavy cream (chilled for whipping)
- 1 tbsp powdered sugar (for dusting, optional)
Instructions
- Preheat your oven to 350°F (175°C) and line a 10×15 inch jelly roll pan with parchment paper, leaving an overhang on the sides for easy removal.
- In a medium bowl, whisk together the flour, cocoa powder, baking powder, and salt until well combined.
- In a large bowl, beat the eggs and granulated sugar with an electric mixer on high speed until pale and thick, about 5 minutes. Tip: The mixture should ribbon when the beaters are lifted.
- Gently fold in the vanilla extract and the dry ingredients into the egg mixture in three additions, being careful not to deflate the batter.
- Pour the batter into the prepared pan, spreading it evenly with a spatula. Bake for 12-15 minutes, or until the cake springs back when lightly touched.
- While the cake is still warm, carefully roll it up from the short end with the parchment paper inside. Let it cool completely on a wire rack. Tip: Rolling while warm prevents cracking.
- Once cooled, unroll the cake and spread the whipped heavy cream evenly over the surface. Re-roll the cake without the parchment paper and transfer to a serving platter.
- Dust with powdered sugar before serving to mimic a snowy log. Tip: For a more festive look, use a fork to create bark-like lines in the powdered sugar.
This Quick Chocolate Yule Log boasts a moist, spongy texture with a rich chocolate flavor that’s perfectly balanced by the light, creamy filling. Serve it sliced to reveal the beautiful spiral, or garnish with fresh berries and mint leaves for a pop of color.
Easy Cranberry Orange Trifle
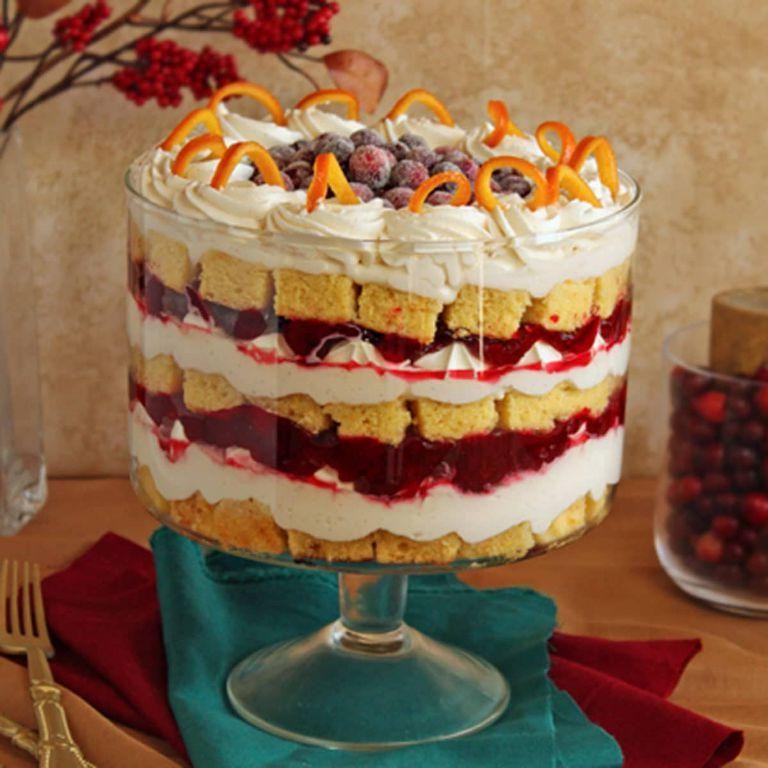
Making a delightful Easy Cranberry Orange Trifle is simpler than you might think, perfect for beginners eager to impress. This guide will walk you through each step, ensuring a delicious outcome every time.
Ingredients
- 2 cups cranberry sauce (homemade or store-bought)
- 1 cup orange juice (freshly squeezed for best flavor)
- 1 package (3.4 oz) instant vanilla pudding mix
- 2 cups cold milk (whole milk recommended for creaminess)
- 1 loaf (16 oz) pound cake, cut into 1-inch cubes
- 1 cup whipped cream (homemade or store-bought, adjust to taste)
- 1/2 cup toasted almonds (for crunch, optional)
Instructions
- In a large bowl, whisk together the orange juice and cranberry sauce until well combined. Set aside.
- In another bowl, prepare the vanilla pudding by whisking the pudding mix with cold milk for 2 minutes until thickened. Let it sit for 5 minutes to set.
- Layer half of the pound cake cubes at the bottom of a trifle dish or large glass bowl.
- Spread half of the cranberry-orange mixture over the pound cake, followed by half of the vanilla pudding.
- Repeat the layers with the remaining pound cake, cranberry-orange mixture, and vanilla pudding.
- Top the trifle with whipped cream and sprinkle with toasted almonds for added texture.
- Refrigerate for at least 2 hours before serving to allow the flavors to meld.
Offering a harmonious blend of tart cranberries and sweet orange, this trifle boasts layers of soft cake and creamy pudding. Serve it chilled in individual glasses for an elegant presentation at your next gathering.
Simple Apple Cinnamon Turnovers
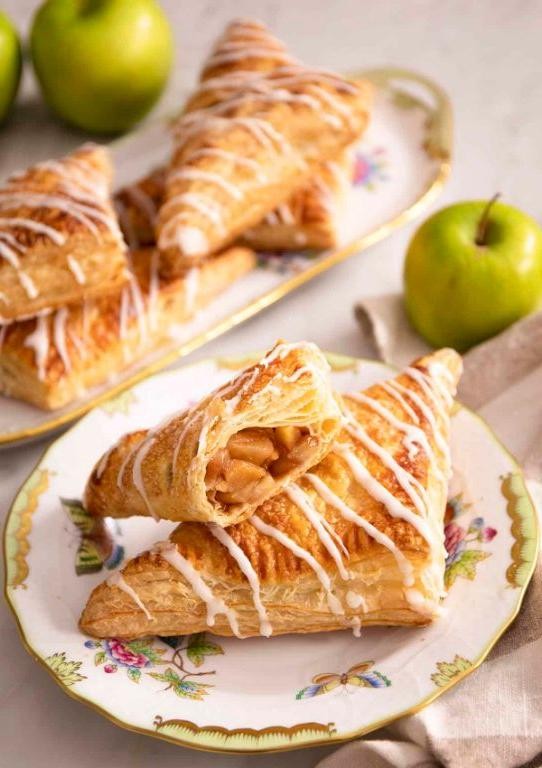
Apple cinnamon turnovers are a delightful treat that combines the sweet tartness of apples with the warm spice of cinnamon, all wrapped in a flaky pastry. A perfect way to start your morning or enjoy as an afternoon snack, these turnovers are surprisingly simple to make at home.
Ingredients
- 2 cups all-purpose flour (plus extra for dusting)
- 1/2 cup unsalted butter, cold and cubed (or any neutral oil)
- 1/4 cup granulated sugar (adjust to taste)
- 1/2 tsp salt
- 1/4 cup ice water
- 2 medium apples, peeled and diced (Granny Smith recommended for tartness)
- 1 tsp ground cinnamon
- 1 tbsp lemon juice (to prevent browning)
- 1 egg, beaten (for egg wash)
Instructions
- In a large bowl, mix the flour, sugar, and salt. Add the cold butter cubes and use your fingers to rub them into the flour until the mixture resembles coarse crumbs.
- Gradually add ice water, 1 tablespoon at a time, mixing until the dough just comes together. Tip: Avoid overworking the dough to keep it flaky.
- Wrap the dough in plastic wrap and refrigerate for at least 30 minutes. This helps relax the gluten and makes the dough easier to roll out.
- While the dough chills, prepare the filling by combining the diced apples, cinnamon, and lemon juice in a bowl. Set aside.
- Preheat your oven to 375°F (190°C) and line a baking sheet with parchment paper.
- On a lightly floured surface, roll out the dough to about 1/8-inch thickness. Cut into 6-inch squares.
- Place a spoonful of the apple mixture in the center of each square. Fold the dough over the filling to form a triangle, pressing the edges to seal. Tip: Use a fork to crimp the edges for a decorative touch.
- Brush the tops of the turnovers with the beaten egg. This will give them a golden, shiny finish.
- Bake for 20-25 minutes, or until the turnovers are golden brown and the filling is bubbly.
Coming out of the oven, these turnovers boast a crisp, buttery crust with a soft, spiced apple center. Serve them warm with a scoop of vanilla ice cream for an extra indulgent treat.
No-Churn Vanilla Bean Ice Cream
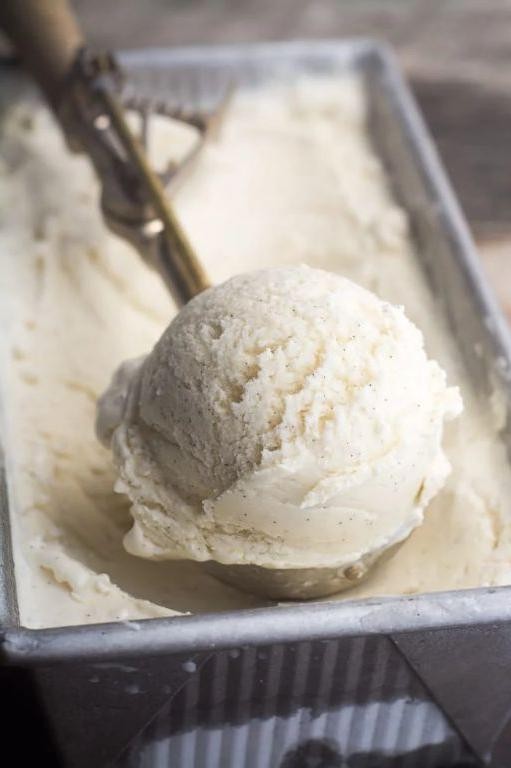
Great news for ice cream lovers who don’t own an ice cream maker! This no-churn vanilla bean ice cream is creamy, dreamy, and surprisingly simple to make with just a few ingredients and no special equipment.
Ingredients
- 2 cups heavy cream (chilled for best results)
- 1 (14 oz) can sweetened condensed milk (use full-fat for richest texture)
- 1 vanilla bean (split and scraped, or 2 tsp pure vanilla extract as a substitute)
- 1/8 tsp fine sea salt (enhances flavor)
Instructions
- In a large bowl, pour the chilled heavy cream. Using an electric mixer on medium-high speed, whip the cream until stiff peaks form, about 3-4 minutes. Tip: Ensure your bowl and beaters are cold to help the cream whip faster.
- In a separate bowl, combine the sweetened condensed milk, scraped vanilla bean seeds (or vanilla extract), and sea salt. Stir gently until fully mixed.
- Gently fold the whipped cream into the sweetened condensed milk mixture with a rubber spatula until no white streaks remain. Tip: Fold slowly to keep the mixture light and airy.
- Transfer the mixture to a loaf pan or airtight container. Cover with plastic wrap, pressing it directly onto the surface of the ice cream to prevent ice crystals from forming.
- Freeze for at least 6 hours, or overnight, until firm. Tip: For easier scooping, let the ice cream sit at room temperature for 5-10 minutes before serving.
Kick back and enjoy the smooth, velvety texture and the rich, aromatic flavor of vanilla in every spoonful. Serve it solo, or elevate it with a drizzle of caramel sauce and a sprinkle of sea salt for a gourmet twist.
Quick Peanut Butter Fudge
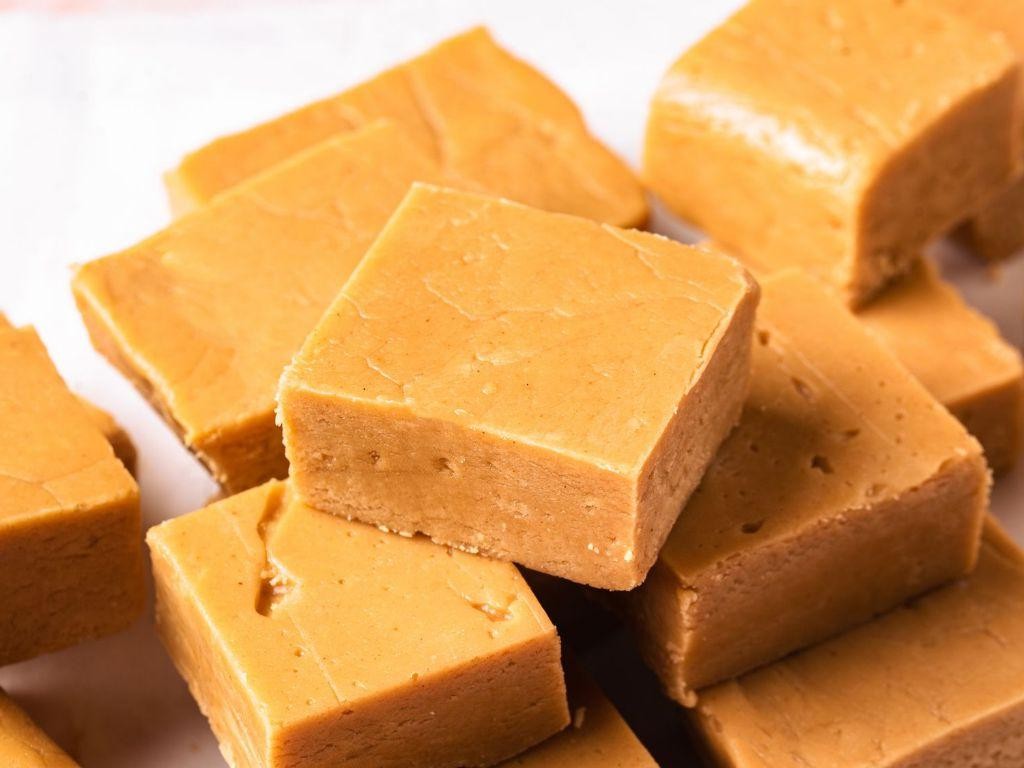
Here’s a foolproof method to whip up some delicious Quick Peanut Butter Fudge that’s sure to satisfy your sweet tooth. Perfect for beginners, this recipe is straightforward and requires minimal ingredients.
Ingredients
- 1 cup creamy peanut butter (use a high-quality brand for best results)
- 1/2 cup unsalted butter (softened for easier mixing)
- 1 tsp vanilla extract (pure extract enhances flavor)
- 2 cups powdered sugar (sifted to avoid lumps)
- 1/4 tsp salt (adjust to taste)
Instructions
- Line an 8×8 inch baking dish with parchment paper, leaving some overhang for easy removal.
- In a medium saucepan, melt the peanut butter and butter together over low heat, stirring constantly to prevent burning.
- Once fully melted and combined, remove from heat and stir in the vanilla extract and salt.
- Gradually add the powdered sugar to the mixture, stirring until completely smooth and no lumps remain.
- Pour the mixture into the prepared baking dish, spreading it evenly with a spatula.
- Chill in the refrigerator for at least 2 hours, or until the fudge is firm to the touch.
- Once set, lift the fudge out of the dish using the parchment overhang and cut into 1-inch squares.
Light and creamy with a rich peanut butter flavor, this fudge is a crowd-pleaser. For an extra touch, drizzle melted chocolate over the top before chilling or sprinkle with sea salt for a sweet and salty contrast.
Easy Raspberry Almond Thumbprint Cookies
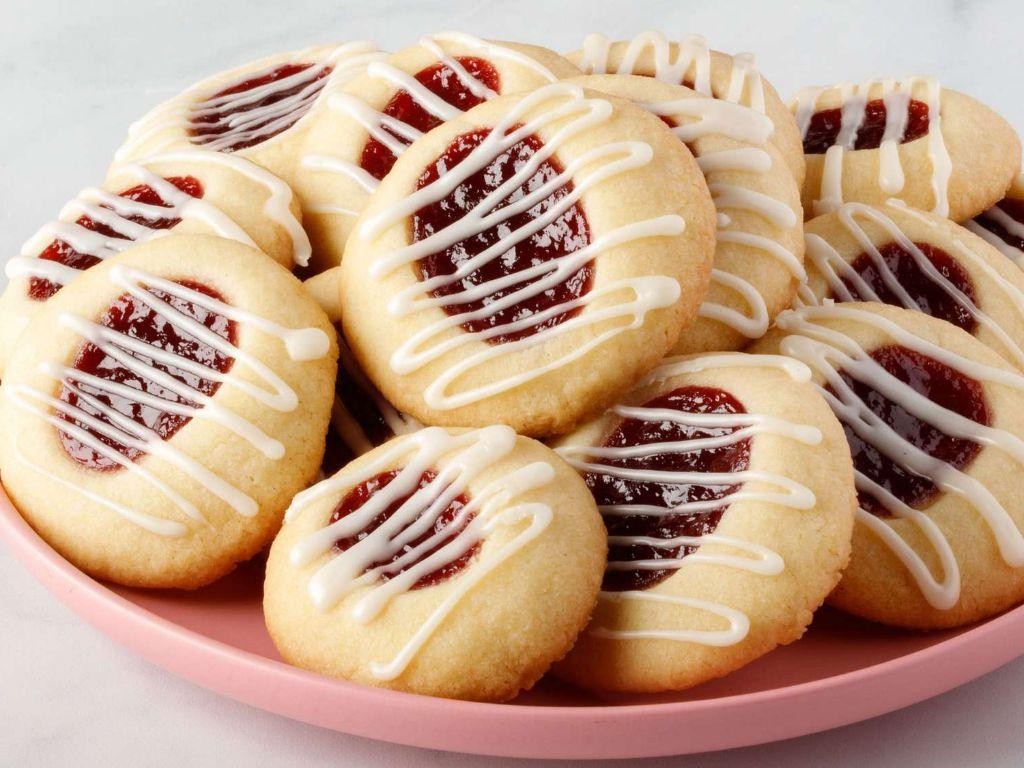
First, let’s dive into making these delightful Easy Raspberry Almond Thumbprint Cookies, a perfect blend of nutty and fruity flavors that are as fun to make as they are to eat. Follow these steps carefully, and you’ll have a batch of cookies that are sure to impress.
Ingredients
- 1 cup almond flour (for a nutty base)
- 1/4 cup granulated sugar (adjust to taste)
- 1/4 tsp salt (to balance sweetness)
- 1/2 cup unsalted butter, softened (for richness)
- 1 tsp vanilla extract (for aroma)
- 1/2 cup raspberry jam (or any fruit jam you prefer)
- 1/4 cup sliced almonds (for garnish)
Instructions
- Preheat your oven to 350°F (175°C) and line a baking sheet with parchment paper.
- In a mixing bowl, combine almond flour, granulated sugar, and salt until well mixed.
- Add softened butter and vanilla extract to the dry ingredients, mixing until a dough forms. Tip: If the dough is too sticky, chill it for 10 minutes.
- Roll the dough into 1-inch balls and place them on the prepared baking sheet, spacing them about 2 inches apart.
- Using your thumb or the back of a teaspoon, make an indentation in the center of each dough ball. Tip: Dip your thumb in water to prevent sticking.
- Fill each indentation with about 1/2 tsp of raspberry jam. Tip: Warm the jam slightly for easier filling.
- Sprinkle sliced almonds around the edges of each cookie for added crunch and visual appeal.
- Bake for 12-15 minutes, or until the edges are lightly golden. Let cool on the baking sheet for 5 minutes before transferring to a wire rack.
Last but not least, these cookies boast a tender almond base with a sweet raspberry center, offering a delightful contrast in textures. Serve them alongside a cup of tea or as a festive addition to your dessert table for a touch of elegance.
Simple Chocolate Dipped Shortbread
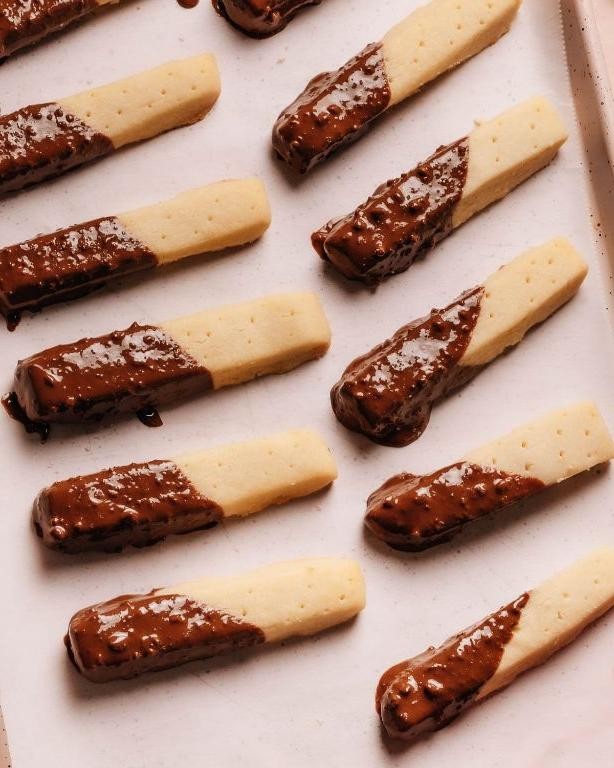
Simple Chocolate Dipped Shortbread is a delightful treat that combines the buttery crispness of shortbread with the rich, smooth taste of chocolate. Starting with a basic shortbread recipe, we’ll guide you through each step to ensure perfect results every time.
Ingredients
- 1 cup unsalted butter, softened (for easier mixing)
- 1/2 cup granulated sugar (adjust to taste)
- 2 cups all-purpose flour (sifted for lightness)
- 1/4 tsp salt (enhances flavor)
- 1 cup semi-sweet chocolate chips (or dark for a richer taste)
- 1 tbsp coconut oil (makes chocolate smoother for dipping)
Instructions
- Preheat your oven to 325°F (163°C) to ensure it’s ready for baking.
- In a large bowl, cream together the softened butter and granulated sugar until light and fluffy, about 3 minutes. Tip: Scrape down the sides of the bowl to ensure even mixing.
- Gradually add the sifted flour and salt to the butter mixture, mixing until just combined. Overmixing can lead to tough shortbread.
- Press the dough evenly into an ungreased 8×8 inch baking pan. Tip: Use the bottom of a glass to smooth the dough for an even thickness.
- Bake for 25-30 minutes, or until the edges are lightly golden. The center should still be soft but will firm up as it cools.
- Allow the shortbread to cool completely in the pan before cutting into desired shapes.
- Melt the chocolate chips and coconut oil together in a microwave-safe bowl in 30-second intervals, stirring until smooth. Tip: Avoid overheating the chocolate to prevent seizing.
- Dip each shortbread piece halfway into the melted chocolate, then place on a parchment-lined tray to set. For quicker setting, refrigerate for 10 minutes.
Delightfully crisp and buttery, these chocolate-dipped shortbread cookies offer a perfect balance of textures and flavors. Serve them alongside a cup of coffee or tea for a simple yet elegant dessert.
No-Bake Cherry Cheesecake
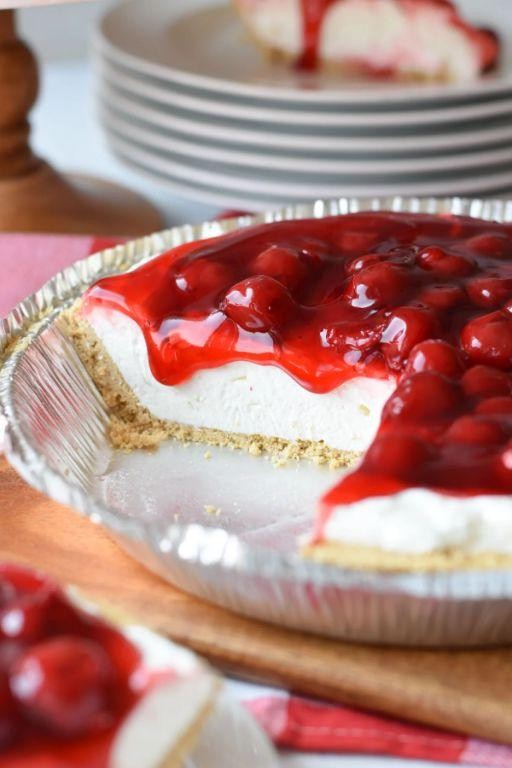
Every home cook deserves a dessert that’s both impressive and easy to make, and this No-Bake Cherry Cheesecake fits the bill perfectly. With a creamy filling and a tangy cherry topping, it’s a crowd-pleaser that requires no oven time.
Ingredients
- 1 1/2 cups graham cracker crumbs (about 10 full sheets)
- 1/4 cup granulated sugar
- 6 tbsp unsalted butter, melted (plus extra for greasing)
- 16 oz cream cheese, softened to room temperature (use full-fat for best texture)
- 1 cup powdered sugar, sifted (to avoid lumps)
- 1 tsp vanilla extract (pure for best flavor)
- 1 cup heavy cream, cold (for whipping)
- 21 oz cherry pie filling (or homemade if preferred)
Instructions
- Lightly grease a 9-inch springform pan with butter to prevent sticking.
- In a medium bowl, mix graham cracker crumbs, granulated sugar, and melted butter until combined. Press firmly into the bottom of the prepared pan to form an even crust. Chill in the refrigerator for 10 minutes to set.
- In a large bowl, beat the softened cream cheese until smooth, about 2 minutes on medium speed. Gradually add powdered sugar and vanilla extract, beating until fully incorporated.
- In a separate bowl, whip the heavy cream to stiff peaks, about 3-4 minutes on high speed. Gently fold the whipped cream into the cream cheese mixture until no streaks remain.
- Spread the cheesecake filling over the chilled crust, smoothing the top with a spatula. Cover and refrigerate for at least 4 hours, or overnight, to set completely.
- Before serving, spoon the cherry pie filling over the top of the cheesecake, spreading it evenly. Release the springform pan sides, slice, and serve.
No need to worry about baking; this cheesecake sets beautifully in the fridge, offering a silky texture and a perfect balance of sweet and tart flavors. For a festive touch, garnish with fresh mint leaves or a drizzle of chocolate sauce before serving.
Quick Cinnamon Sugar Donuts
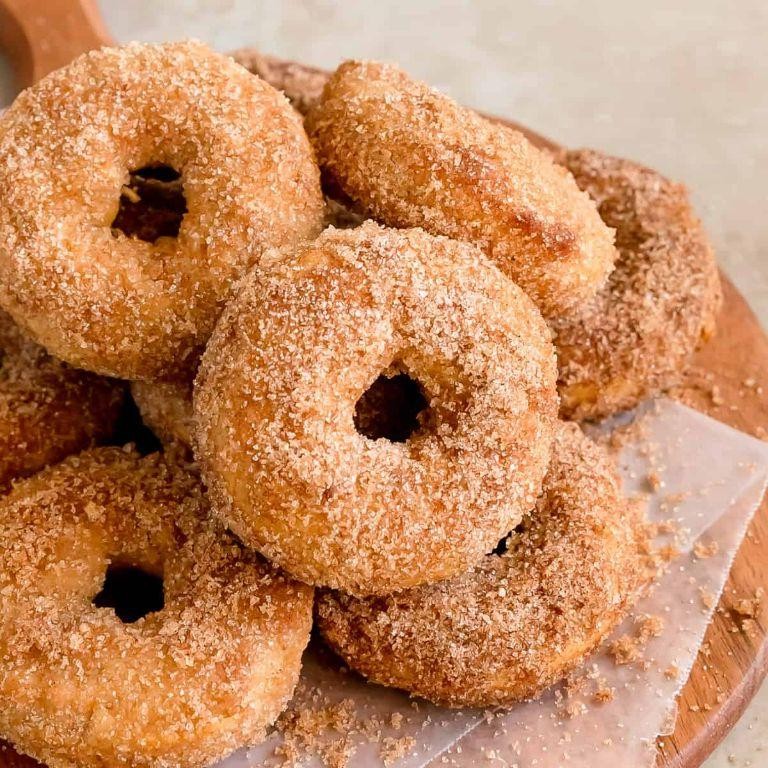
Every home cook deserves a quick, delicious treat that feels like a hug in dessert form, and these Quick Cinnamon Sugar Donuts are just that. Easy to make with ingredients you likely have on hand, they’re perfect for satisfying sweet cravings any time of day.
Ingredients
- 1 cup all-purpose flour (spooned and leveled for accuracy)
- 1/4 cup granulated sugar (adjust to taste)
- 1 tsp baking powder (ensure it’s fresh for best rise)
- 1/2 tsp salt (enhances flavor)
- 1/2 cup milk (whole milk recommended for richness)
- 1 large egg (room temperature blends easier)
- 2 tbsp unsalted butter, melted (or any neutral oil)
- 1 tsp vanilla extract (pure for best flavor)
- 1/2 cup granulated sugar (for coating)
- 1 tbsp ground cinnamon (adjust to taste)
- Vegetable oil (for frying, enough to fill 2 inches in pan)
Instructions
- In a large bowl, whisk together 1 cup all-purpose flour, 1/4 cup granulated sugar, 1 tsp baking powder, and 1/2 tsp salt until well combined.
- In another bowl, mix 1/2 cup milk, 1 large egg, 2 tbsp melted unsalted butter, and 1 tsp vanilla extract until smooth.
- Pour the wet ingredients into the dry ingredients, stirring just until combined; avoid overmixing to keep donuts tender.
- Heat vegetable oil in a deep pan over medium heat until it reaches 350°F, using a thermometer for accuracy.
- While oil heats, mix 1/2 cup granulated sugar and 1 tbsp ground cinnamon in a shallow bowl for coating.
- Drop tablespoon-sized portions of batter into the hot oil, frying in batches to avoid crowding, for about 1-2 minutes per side or until golden brown.
- Remove donuts with a slotted spoon, draining excess oil on paper towels, then immediately roll in cinnamon sugar mixture.
- Serve warm for the best texture and flavor, perhaps with a side of cold milk or coffee for dipping.
Unbelievably soft inside with a crispy, sugary exterior, these donuts are a delightful contrast of textures. Try serving them stacked high on a plate for a visually appealing treat that’s sure to disappear quickly.
Easy Lemon Snowball Cookies
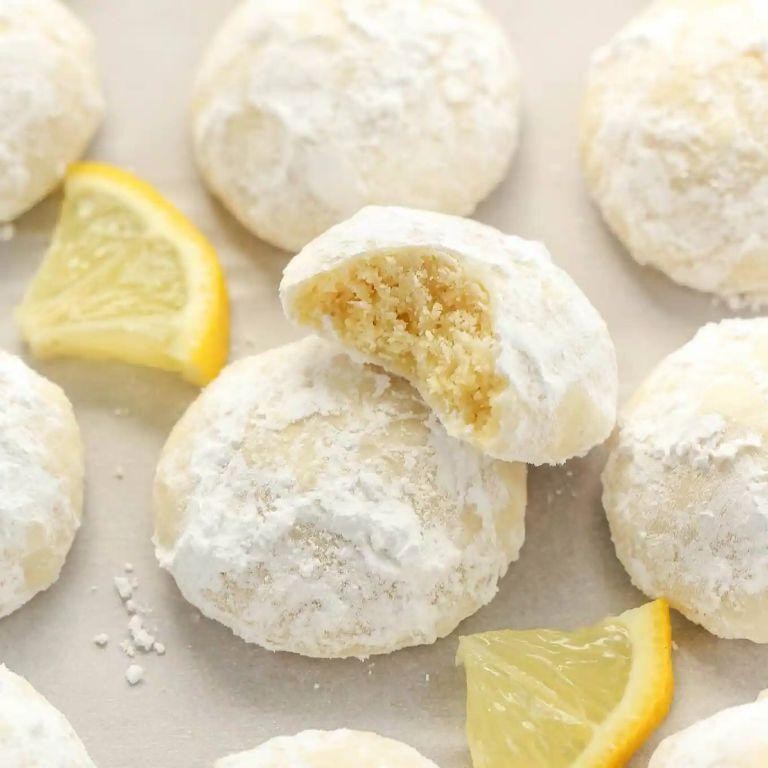
Creating these Easy Lemon Snowball Cookies is a delightful way to bring a touch of citrusy brightness to your cookie jar. Perfect for beginners, this recipe walks you through each step with precision, ensuring a foolproof baking experience.
Ingredients
- 1 cup unsalted butter, softened (room temperature for easier mixing)
- 1/2 cup powdered sugar, plus extra for dusting
- 2 tbsp lemon zest (freshly grated for the best flavor)
- 2 cups all-purpose flour (sifted to avoid lumps)
- 1/4 tsp salt (enhances the lemon flavor)
- 1 tsp vanilla extract (pure for a richer taste)
Instructions
- Preheat your oven to 350°F (175°C) to ensure it’s ready for baking.
- In a large bowl, cream together the softened butter and powdered sugar until light and fluffy, about 3 minutes. Tip: Scrape down the sides of the bowl to ensure even mixing.
- Add the lemon zest and vanilla extract to the butter mixture, mixing until fully incorporated.
- Gradually mix in the sifted flour and salt, stirring just until the dough comes together. Overmixing can lead to tough cookies.
- Roll the dough into 1-inch balls and place them 2 inches apart on a parchment-lined baking sheet. Tip: Chill the dough for 30 minutes if it’s too soft to handle.
- Bake for 12-15 minutes, or until the bottoms are lightly golden. The tops should remain pale.
- Allow the cookies to cool on the baking sheet for 5 minutes, then roll them in powdered sugar while still warm. Tip: For a thicker sugar coating, roll them again once completely cooled.
You’ll love the melt-in-your-mouth texture and the bright, lemony flavor of these cookies. They’re perfect for gifting or serving at tea parties, offering a refreshing twist on the classic snowball cookie.
Simple Pecan Pie Bars
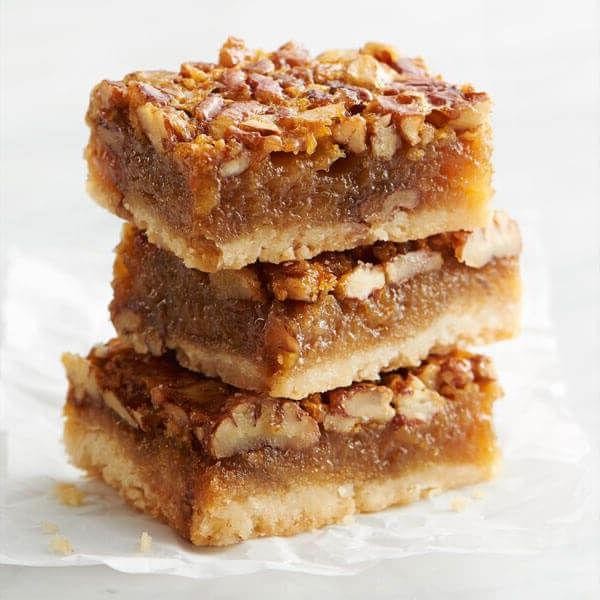
Here’s a foolproof way to create delicious pecan pie bars that are sure to impress. Whether you’re a novice or a seasoned baker, these bars offer the perfect blend of simplicity and decadence.
Ingredients
- 1 1/2 cups all-purpose flour (spooned and leveled)
- 1/2 cup unsalted butter, melted (cool slightly before using)
- 1/4 cup granulated sugar (for a slightly less sweet crust)
- 3 large eggs (room temperature for best results)
- 1 cup light corn syrup (or dark for a deeper flavor)
- 2/3 cup packed brown sugar (light or dark, based on preference)
- 2 tbsp unsalted butter, melted (for the filling)
- 1 tsp vanilla extract (pure for the best flavor)
- 1 1/2 cups chopped pecans (toasted for extra crunch)
Instructions
- Preheat your oven to 350°F (175°C) and line an 8-inch square baking pan with parchment paper, leaving an overhang on the sides for easy removal.
- In a medium bowl, mix the flour, melted butter, and granulated sugar until combined. Press the mixture firmly into the bottom of the prepared pan to form an even crust.
- Bake the crust for 15 minutes, or until lightly golden. Tip: Pressing the crust with the back of a spoon ensures it’s compact and bakes evenly.
- While the crust bakes, whisk together the eggs, corn syrup, brown sugar, melted butter, and vanilla extract in a large bowl until smooth. Stir in the chopped pecans.
- Pour the pecan mixture over the hot crust, spreading it evenly with a spatula. Tip: Tapping the pan gently on the counter removes any air bubbles.
- Return the pan to the oven and bake for 25-30 minutes, or until the filling is set and slightly puffed. Tip: The center should jiggle just slightly when shaken; it will firm up as it cools.
- Allow the bars to cool completely in the pan on a wire rack, then lift them out using the parchment overhang and cut into squares.
After cooling, these pecan pie bars develop a rich, buttery flavor with a crisp crust and a gooey, nutty filling. Serve them at room temperature for the best texture, or warm them slightly and top with a scoop of vanilla ice cream for an indulgent dessert.
No-Bake Chocolate Oatmeal Cookies

These no-bake chocolate oatmeal cookies are a quick and delightful treat that requires no oven time, perfect for satisfying your sweet tooth in a pinch. They’re packed with rich chocolate flavor and a satisfying chew from the oats, making them a hit with both kids and adults alike.
Ingredients
- 1/2 cup unsalted butter (or coconut oil for a dairy-free version)
- 2 cups granulated sugar (adjust to taste)
- 1/2 cup milk (any type works, including almond or soy)
- 1/4 cup cocoa powder (use high-quality for best flavor)
- 1/2 cup peanut butter (creamy or crunchy, based on preference)
- 1 tsp vanilla extract (pure extract recommended)
- 3 cups quick-cooking oats (not instant)
Instructions
- In a medium saucepan, melt the butter over medium heat, stirring constantly to prevent burning.
- Add the sugar, milk, and cocoa powder to the melted butter, stirring until well combined. Bring the mixture to a rolling boil for exactly 1 minute, then remove from heat.
- Quickly stir in the peanut butter and vanilla extract until smooth, ensuring all ingredients are fully incorporated.
- Fold in the oats, mixing thoroughly to coat every piece with the chocolate mixture.
- Drop tablespoon-sized portions of the mixture onto wax paper or a silicone baking mat, spacing them about 2 inches apart.
- Allow the cookies to set at room temperature for at least 30 minutes, or until firm to the touch.
After setting, these cookies will have a fudgy texture with a slight crunch from the oats. For an extra touch, drizzle melted chocolate over the top or serve with a glass of cold milk for the ultimate comfort food experience.
Quick Coconut Macaroons
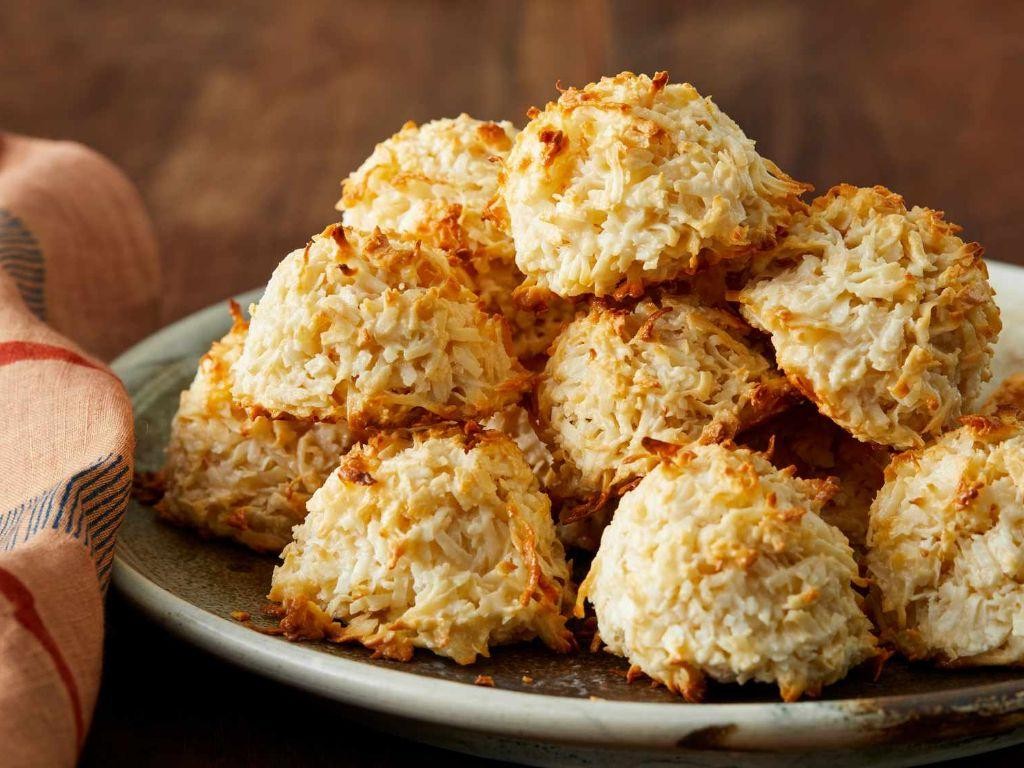
Let’s dive into making these delightful Quick Coconut Macaroons, a perfect treat for coconut lovers looking for a simple yet satisfying dessert. These macaroons are not only easy to make but also require minimal ingredients, making them a great choice for beginners.
Ingredients
- 3 cups sweetened shredded coconut (packed for best texture)
- 3/4 cup sweetened condensed milk (adjust for desired sweetness)
- 2 large egg whites (room temperature for better volume)
- 1 tsp vanilla extract (or almond extract for a different flavor profile)
- 1/4 tsp salt (to balance the sweetness)
Instructions
- Preheat your oven to 325°F (163°C) and line a baking sheet with parchment paper to prevent sticking.
- In a large bowl, combine the sweetened shredded coconut, sweetened condensed milk, and vanilla extract. Mix until all the coconut is evenly coated.
- In a separate bowl, beat the egg whites and salt until stiff peaks form. This will take about 3-4 minutes with an electric mixer on high speed.
- Gently fold the beaten egg whites into the coconut mixture. Be careful not to deflate the egg whites to keep the macaroons light.
- Using a cookie scoop or two spoons, drop tablespoon-sized mounds of the mixture onto the prepared baking sheet, spacing them about 2 inches apart.
- Bake for 20-25 minutes, or until the macaroons are golden brown on the edges and tops. Rotate the baking sheet halfway through for even baking.
- Allow the macaroons to cool on the baking sheet for 5 minutes before transferring them to a wire rack to cool completely.
Zesty and sweet, these Quick Coconut Macaroons offer a chewy interior with a slightly crispy exterior. Serve them as is, or drizzle with melted chocolate for an extra indulgent treat.
Easy Red Velvet Cake Balls

Kickstart your baking adventure with these Easy Red Velvet Cake Balls, a delightful treat that combines the rich flavors of red velvet with the fun, bite-sized form of cake pops. Perfect for beginners, this recipe guides you through each step to ensure delicious results every time.
Ingredients
- 1 box red velvet cake mix (or homemade equivalent)
- 1 cup cream cheese frosting (store-bought or homemade for a personal touch)
- 2 cups white chocolate chips (high-quality for smoother melting)
- 1 tbsp vegetable oil (or any neutral oil to thin the chocolate)
- Sprinkles or crushed nuts for decoration (optional, for added texture and color)
Instructions
- Preheat your oven to 350°F (175°C) and prepare the red velvet cake mix according to the package instructions. Bake in a 9×13 inch pan for 25-30 minutes, or until a toothpick inserted comes out clean.
- Allow the cake to cool completely, then crumble it into fine pieces in a large bowl. Tip: Ensure the cake is fully cooled to prevent the frosting from melting when mixed.
- Add 1 cup of cream cheese frosting to the crumbled cake and mix until well combined. The mixture should hold together when pressed. Tip: Start with 3/4 cup of frosting and add more as needed to avoid a too-wet mixture.
- Roll the mixture into 1-inch balls and place them on a baking sheet lined with parchment paper. Freeze for at least 30 minutes to firm up. Tip: Freezing helps the balls hold their shape when dipped in chocolate.
- In a microwave-safe bowl, melt the white chocolate chips with 1 tbsp of vegetable oil in 30-second intervals, stirring until smooth. Tip: Avoid overheating the chocolate to prevent seizing.
- Dip each cake ball into the melted chocolate using a fork, allowing excess to drip off, then place back on the parchment paper. Immediately add sprinkles or crushed nuts if desired.
- Let the chocolate set at room temperature or refrigerate for 15 minutes for quicker setting. Serve at room temperature for the best texture and flavor.
How delightful these Easy Red Velvet Cake Balls turn out, with a moist interior and a crisp chocolate shell. For a festive twist, drizzle with contrasting colored chocolate or serve alongside a scoop of vanilla ice cream.
Simple Salted Caramel Brownies
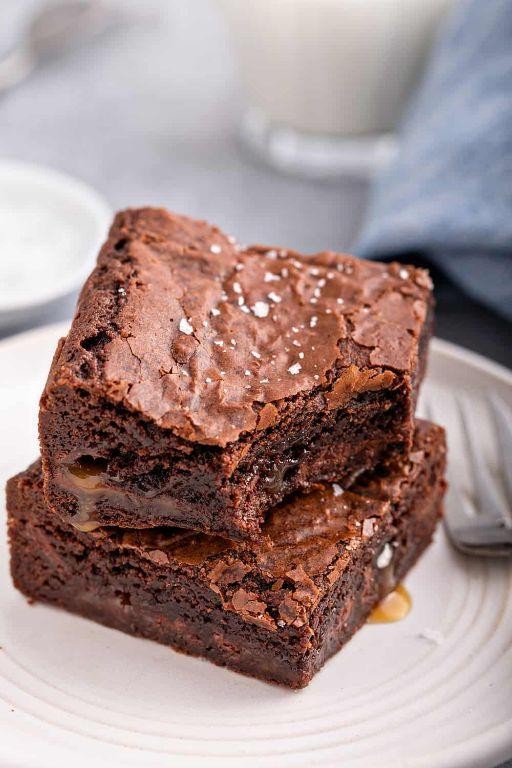
Making Simple Salted Caramel Brownies is a delightful way to indulge in a sweet treat that balances rich chocolate with the perfect hint of salty caramel. Follow these steps carefully to create a batch that’s sure to impress.
Ingredients
- 1 cup unsalted butter (melted, or use coconut oil for a dairy-free option)
- 2 cups granulated sugar
- 4 large eggs (room temperature for best results)
- 1 tsp vanilla extract
- 1 cup all-purpose flour (sifted to avoid lumps)
- 3/4 cup cocoa powder (unsweetened, for a deep chocolate flavor)
- 1/2 tsp salt (adjust to taste)
- 1/2 cup salted caramel sauce (store-bought or homemade)
Instructions
- Preheat your oven to 350°F (175°C) and line a 9×13 inch baking pan with parchment paper, leaving an overhang for easy removal.
- In a large bowl, whisk together the melted butter and sugar until well combined.
- Add the eggs one at a time, whisking after each addition, then stir in the vanilla extract.
- Sift in the flour, cocoa powder, and salt, folding gently until just combined to avoid overmixing.
- Pour half of the batter into the prepared pan, spreading it evenly with a spatula.
- Drizzle 1/4 cup of salted caramel sauce over the batter, then top with the remaining batter.
- Use a knife to swirl the caramel into the batter for a marbled effect.
- Bake for 25-30 minutes, or until a toothpick inserted into the center comes out with a few moist crumbs.
- Let the brownies cool in the pan for 10 minutes, then drizzle with the remaining caramel sauce before serving.
Enjoy these brownies warm for a gooey center or chilled for a firmer texture. The contrast of the rich chocolate and the salty caramel makes them irresistible, especially when paired with a scoop of vanilla ice cream.
No-Churn Eggnog Ice Cream
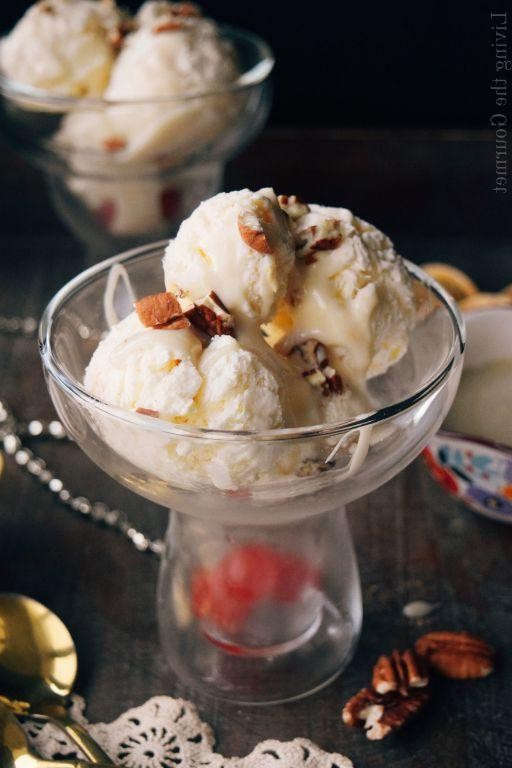
You’ll find this No-Churn Eggnog Ice Cream recipe to be a delightful twist on the traditional holiday drink, perfect for cooling down during the festive season or any time you crave its rich, creamy flavors.
Ingredients
- 2 cups heavy cream (chilled for best results)
- 1 (14 oz) can sweetened condensed milk (for sweetness and creaminess)
- 1/2 cup eggnog (store-bought or homemade, adjust to taste)
- 1 tsp vanilla extract (for depth of flavor)
- 1/2 tsp ground nutmeg (plus extra for garnish)
- 1/4 tsp ground cinnamon (for a warm spice note)
Instructions
- In a large mixing bowl, pour the chilled heavy cream. Using an electric mixer, beat on high speed until stiff peaks form, about 3-4 minutes. Tip: Ensure your bowl and beaters are cold to help the cream whip faster.
- Gently fold in the sweetened condensed milk with a spatula until fully incorporated. Be careful not to deflate the whipped cream.
- Add the eggnog, vanilla extract, ground nutmeg, and ground cinnamon to the mixture. Fold gently until all ingredients are evenly combined. Tip: Taste the mixture before freezing to adjust the spices to your preference.
- Transfer the mixture to a loaf pan or a freezer-safe container. Smooth the top with a spatula. Sprinkle a little extra ground nutmeg on top for garnish.
- Cover the container with plastic wrap or a lid. Freeze for at least 6 hours, or overnight for best results. Tip: For easier scooping, let the ice cream sit at room temperature for 5 minutes before serving.
Delightfully creamy and rich, this No-Churn Eggnog Ice Cream captures the essence of holiday cheer in every spoonful. Serve it in small cups with a cinnamon stick for an elegant touch or alongside warm pie for a comforting dessert duo.
Conclusion
You’ve just discovered a treasure trove of 20 delicious, easy holiday dessert recipes that promise to sweeten your celebrations without the stress. Whether you’re a seasoned baker or trying your hand at holiday treats for the first time, there’s something here for everyone. We’d love to hear which recipes become your favorites—drop us a comment below! And don’t forget to share the joy by pinning this article on Pinterest. Happy baking!