Hey busy parents! We know your time is precious, and so is your family’s health. That’s why we’ve whipped up 20 Nutritious WIC Recipes that are as easy to make as they are delicious. From quick weeknight dinners to comforting classics with a healthy twist, these meals will keep everyone happy and nourished. Ready to simplify your cooking routine? Let’s dive into these tasty, time-saving solutions!
Cheesy Broccoli and Rice Casserole

Let’s dive into creating a comforting and cheesy broccoli and rice casserole that’s perfect for any weeknight dinner. This dish combines simple ingredients into a creamy, satisfying meal that everyone will love.
Ingredients
- 1 cup uncooked white rice (for a nuttier flavor, try brown rice)
- 2 cups broccoli florets (fresh or frozen, thawed)
- 1 cup shredded cheddar cheese (sharp cheddar adds more flavor)
- 1/2 cup milk (whole milk for creaminess)
- 1/4 cup butter (unsalted, to control saltiness)
- 1/4 cup all-purpose flour (for thickening the sauce)
- 1/2 tsp salt (adjust to taste)
- 1/4 tsp black pepper (freshly ground preferred)
- 1/4 tsp garlic powder (optional, for extra flavor)
Instructions
- Preheat your oven to 350°F (175°C) and lightly grease a 9×13 inch baking dish.
- Cook the rice according to package instructions, then set aside.
- In a medium saucepan, melt the butter over medium heat. Tip: Keep the heat medium to avoid browning the butter too quickly.
- Whisk in the flour, salt, pepper, and garlic powder until smooth, cooking for 1 minute to remove the raw flour taste.
- Gradually whisk in the milk, ensuring no lumps form, and cook until the mixture thickens, about 3-5 minutes.
- Remove the saucepan from heat and stir in the cheddar cheese until melted and smooth. Tip: Adding cheese off the heat prevents it from becoming grainy.
- Combine the cooked rice, broccoli florets, and cheese sauce in the prepared baking dish, mixing well.
- Bake uncovered for 20-25 minutes, or until the casserole is bubbly and the top is lightly golden. Tip: For a crispier top, broil for the last 2 minutes.
Fluffy rice and tender broccoli enveloped in a rich, cheesy sauce make this casserole a hearty dish. Serve it alongside a crisp green salad or as a standalone meal for a comforting dinner.
Homemade Whole Wheat Pancakes
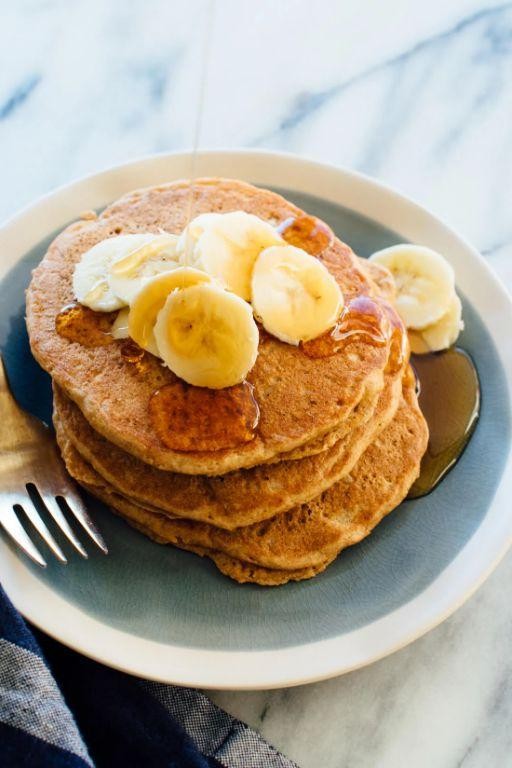
Homemade whole wheat pancakes are a wholesome twist on the classic breakfast favorite, offering a nuttier flavor and a heartier texture that’s sure to satisfy. Here’s how to make them from scratch, even if you’re new to the kitchen.
Ingredients
- 1 cup whole wheat flour (for a lighter texture, you can use half whole wheat and half all-purpose flour)
- 1 tbsp sugar (adjust to taste)
- 2 tsp baking powder (ensure it’s fresh for maximum rise)
- 1/4 tsp salt
- 1 cup milk (any kind, even plant-based alternatives work)
- 1 large egg (room temperature blends more easily)
- 2 tbsp melted butter or any neutral oil (plus extra for the pan)
Instructions
- In a large bowl, whisk together the whole wheat flour, sugar, baking powder, and salt until well combined.
- In another bowl, beat the milk, egg, and melted butter together until smooth.
- Pour the wet ingredients into the dry ingredients and stir until just combined; a few lumps are okay to avoid overmixing.
- Heat a non-stick skillet or griddle over medium heat (350°F if using an electric griddle) and lightly grease with butter or oil.
- For each pancake, pour 1/4 cup of batter onto the skillet. Cook until bubbles form on the surface and the edges look set, about 2-3 minutes.
- Flip the pancakes and cook for another 1-2 minutes until golden brown and cooked through.
- Serve warm with your favorite toppings, such as maple syrup, fresh fruit, or a dollop of yogurt.
Kickstart your morning with these fluffy, wholesome pancakes that boast a delightful texture and a rich, nutty flavor. For an extra special touch, try layering them with almond butter and banana slices for a decadent yet healthy breakfast treat.
Sweet Potato and Black Bean Quesadillas

Mastering the art of making quesadillas is a game-changer for quick, satisfying meals. Today, we’re focusing on a nutritious and flavorful twist with sweet potato and black bean quesadillas, perfect for any meal of the day.
Ingredients
- 1 medium sweet potato, peeled and diced into 1/2-inch cubes (about 2 cups)
- 1 tbsp olive oil (or any neutral oil)
- 1/2 tsp ground cumin (adjust to taste)
- 1/2 tsp smoked paprika
- 1/4 tsp salt
- 1 cup canned black beans, rinsed and drained
- 4 large flour tortillas (8-inch diameter)
- 1 cup shredded Monterey Jack cheese (or any meltable cheese)
- 1/4 cup chopped fresh cilantro (optional for garnish)
- 1 tbsp unsalted butter (for cooking)
Instructions
- Preheat your oven to 400°F (200°C). Line a baking sheet with parchment paper.
- In a bowl, toss the diced sweet potato with olive oil, cumin, smoked paprika, and salt until evenly coated.
- Spread the sweet potato cubes in a single layer on the prepared baking sheet. Roast for 20-25 minutes, or until tender and slightly caramelized, stirring halfway through.
- While the sweet potatoes roast, mash the black beans lightly in a bowl, leaving some whole for texture.
- Heat a large skillet over medium heat. Place one tortilla in the skillet, sprinkle half of the cheese evenly over the tortilla, then spread half of the mashed black beans and roasted sweet potatoes over the cheese. Top with another tortilla.
- Cook for 2-3 minutes on each side, or until the tortillas are golden brown and the cheese is melted, pressing down lightly with a spatula. Repeat with the remaining ingredients.
- Cut each quesadilla into wedges and garnish with chopped cilantro if desired.
Sweet and smoky flavors meld beautifully in these quesadillas, with the creamy beans and melted cheese complementing the tender sweet potatoes. Serve with a side of salsa or avocado slices for an extra layer of flavor and texture.
Apple Cinnamon Oatmeal
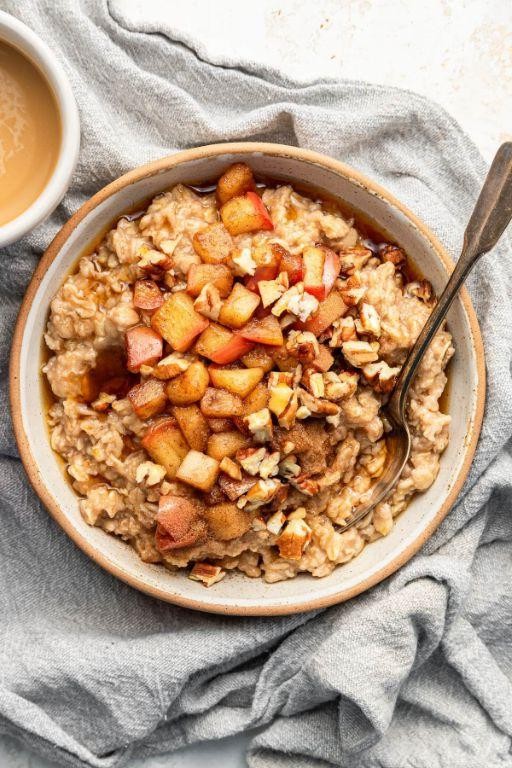
Zesty mornings call for a warm, comforting bowl of Apple Cinnamon Oatmeal, a dish that combines the wholesome goodness of oats with the sweet and spicy flavors of apple and cinnamon. Perfect for beginners, this recipe is straightforward and rewarding, ensuring a delicious start to your day.
Ingredients
- 1 cup rolled oats (old-fashioned oats work best for texture)
- 2 cups water (or milk for creamier oatmeal)
- 1 medium apple, diced (any variety, but Fuji or Honeycrisp add nice sweetness)
- 1 tbsp brown sugar (adjust to taste)
- 1/2 tsp cinnamon (or more for a stronger flavor)
- 1/4 tsp salt (enhances all the flavors)
- 1 tbsp butter (or any neutral oil for a dairy-free version)
Instructions
- In a medium saucepan, bring 2 cups of water to a boil over high heat.
- Add 1 cup of rolled oats to the boiling water, reduce the heat to medium-low, and stir to combine.
- Let the oats simmer for 5 minutes, stirring occasionally to prevent sticking. Tip: For creamier oatmeal, stir more frequently.
- While the oats cook, melt 1 tbsp of butter in a small skillet over medium heat.
- Add the diced apple to the skillet and sauté for 3-4 minutes, until slightly softened.
- Sprinkle 1/2 tsp of cinnamon and 1 tbsp of brown sugar over the apples, stirring to coat evenly. Cook for another minute. Tip: Adding cinnamon at this stage deepens its flavor.
- Once the oats have thickened to your liking, stir in the sautéed apples and 1/4 tsp of salt. Tip: The salt balances the sweetness and enhances the overall taste.
- Remove from heat and let the oatmeal sit for 2 minutes before serving to allow the flavors to meld.
The Apple Cinnamon Oatmeal should have a creamy texture with tender bites of sweet, spiced apples. For an extra touch, top with a drizzle of maple syrup or a handful of toasted nuts for added crunch.
Banana Peanut Butter Smoothie
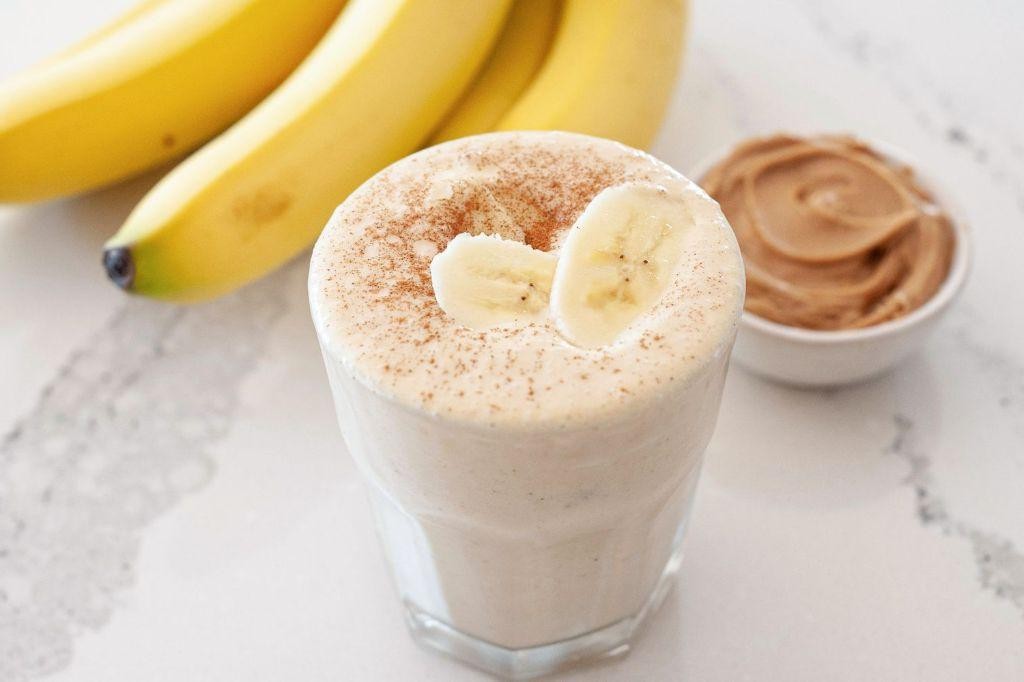
Perfect for a quick breakfast or a refreshing snack, this Banana Peanut Butter Smoothie combines creamy peanut butter with ripe bananas for a deliciously smooth drink. Follow these simple steps to whip up this nutritious treat in no time.
Ingredients
- 1 ripe banana (the riper, the sweeter)
- 2 tablespoons peanut butter (creamy or crunchy, as preferred)
- 1 cup milk (dairy or any plant-based alternative)
- 1/2 cup ice cubes (more or less to adjust thickness)
- 1 teaspoon honey (optional, adjust to sweetness preference)
Instructions
- Peel the banana and break it into chunks for easier blending.
- Add the banana chunks, peanut butter, milk, and ice cubes into a blender.
- Blend on high speed for 30 seconds, or until the mixture is smooth and no ice chunks remain. Tip: If the smoothie is too thick, add a little more milk and blend again.
- Taste the smoothie and add honey if desired, then blend for another 10 seconds to incorporate. Tip: For a colder smoothie, freeze the banana chunks before blending.
- Pour the smoothie into a glass and serve immediately. Tip: Garnish with a slice of banana or a drizzle of peanut butter on top for an extra touch.
Now this smoothie boasts a velvety texture with the perfect balance of sweetness from the banana and richness from the peanut butter. Try serving it with a sprinkle of granola on top for added crunch or enjoy it as is for a quick energy boost.
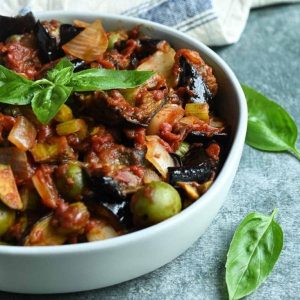
Vegetable Lentil Soup

This hearty Vegetable Lentil Soup is a comforting dish that’s perfect for any season. Today, we’ll walk through each step to ensure you end up with a flavorful and nutritious meal.
Ingredients
- 1 tbsp olive oil (or any neutral oil)
- 1 medium onion, diced
- 2 carrots, peeled and diced
- 2 celery stalks, diced
- 3 garlic cloves, minced
- 1 cup dried green lentils, rinsed
- 4 cups vegetable broth (adjust salt to taste)
- 1 can (14.5 oz) diced tomatoes, undrained
- 1 tsp ground cumin
- 1/2 tsp smoked paprika
- Salt and pepper, to taste
- 2 cups fresh spinach, roughly chopped
Instructions
- Heat olive oil in a large pot over medium heat until shimmering, about 1 minute.
- Add onion, carrots, and celery. Cook, stirring occasionally, until vegetables soften, about 5 minutes.
- Stir in garlic and cook until fragrant, about 30 seconds. Tip: Avoid browning the garlic to prevent bitterness.
- Add lentils, vegetable broth, diced tomatoes, cumin, and smoked paprika. Bring to a boil.
- Reduce heat to low, cover, and simmer until lentils are tender, about 25 minutes. Tip: Stir occasionally to prevent sticking.
- Season with salt and pepper. Tip: Taste and adjust seasoning before adding spinach.
- Add spinach and cook until just wilted, about 2 minutes.
You’ll love the creamy texture of the lentils paired with the freshness of the spinach. Serve with a slice of crusty bread for a complete meal.
Whole Grain Pasta with Tomato Sauce
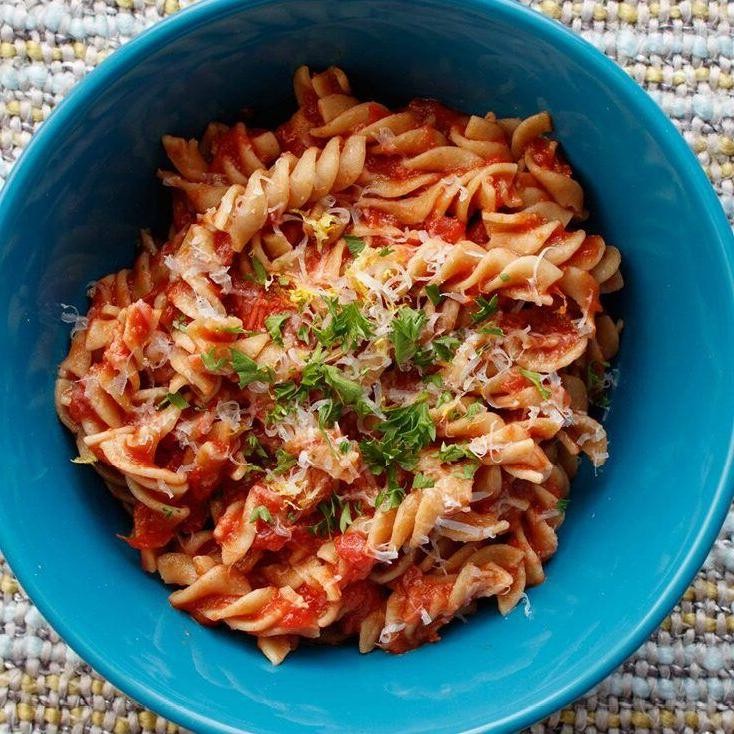
Just when you thought pasta couldn’t get any better, whole grain pasta with tomato sauce comes along to prove you wrong. This dish is a hearty, nutritious twist on a classic that’s both simple to make and satisfying to eat.
Ingredients
- 8 oz whole grain pasta (look for a shape that holds sauce well, like penne or fusilli)
- 2 tbsp olive oil (or any neutral oil)
- 3 cloves garlic, minced (adjust to taste)
- 1 can (28 oz) crushed tomatoes (San Marzano preferred for sweetness)
- 1 tsp salt (adjust to taste)
- 1/2 tsp black pepper (freshly ground for best flavor)
- 1/4 tsp red pepper flakes (optional, for a bit of heat)
- 1/4 cup fresh basil, chopped (or 1 tsp dried basil)
- 1/4 cup grated Parmesan cheese (for serving)
Instructions
- Bring a large pot of salted water to a boil over high heat. Tip: Salting the water is your only chance to season the pasta itself.
- Add the whole grain pasta to the boiling water and cook according to package instructions, usually about 8-10 minutes, until al dente. Tip: Stir occasionally to prevent sticking.
- While the pasta cooks, heat olive oil in a large skillet over medium heat. Add minced garlic and sauté for about 1 minute, until fragrant but not browned.
- Pour in the crushed tomatoes, salt, black pepper, and red pepper flakes if using. Stir to combine and bring to a simmer. Tip: Letting the sauce simmer for at least 10 minutes will deepen the flavors.
- Once the pasta is done, reserve 1/2 cup of the pasta water, then drain the pasta.
- Add the drained pasta to the skillet with the tomato sauce. Toss to coat, adding reserved pasta water as needed to loosen the sauce.
- Stir in the fresh basil and remove from heat.
- Serve hot, topped with grated Parmesan cheese.
Here’s how it turns out: the whole grain pasta offers a nutty depth that pairs beautifully with the bright, tangy tomato sauce. For a creative twist, try topping with a drizzle of olive oil and a sprinkle of red pepper flakes before serving.
Scrambled Eggs with Spinach and Cheese

Every morning calls for a breakfast that’s both nutritious and easy to whip up, and this scrambled eggs with spinach and cheese recipe is just that. It’s a simple yet flavorful dish that combines the richness of eggs with the freshness of spinach and the creaminess of cheese, perfect for starting your day on a high note.
Ingredients
- 4 large eggs (preferably at room temperature for even cooking)
- 1 cup fresh spinach, roughly chopped (packed tightly for measurement)
- 1/4 cup shredded cheddar cheese (or any meltable cheese you prefer)
- 1 tbsp unsalted butter (or any neutral oil for a lighter version)
- Salt and pepper (adjust to taste, but start with 1/4 tsp salt and a pinch of pepper)
Instructions
- Crack the eggs into a medium bowl and whisk them until the yolks and whites are fully combined. Tip: Whisking introduces air, making the eggs fluffier.
- Heat a non-stick skillet over medium-low heat and add the butter, letting it melt completely without browning. Tip: Low heat prevents the eggs from drying out.
- Add the chopped spinach to the skillet, sautéing for about 1 minute until just wilted. This ensures the spinach retains its vibrant color and nutrients.
- Pour the whisked eggs into the skillet over the spinach. Let them sit undisturbed for 20 seconds to start setting.
- Gently stir the eggs with a spatula, folding them over from the edges to the center. Continue this process for about 2-3 minutes until the eggs are softly set but still slightly runny.
- Sprinkle the shredded cheese over the eggs, then cover the skillet with a lid for 30 seconds to melt the cheese. Tip: Covering traps steam, melting the cheese evenly without overcooking the eggs.
- Remove from heat, season with salt and pepper, and give one final gentle stir to incorporate everything.
Perfectly cooked scrambled eggs with spinach and cheese should be creamy, with the spinach adding a slight crunch and the cheese a gooey texture. Serve it on a warm toast or alongside avocado slices for a more filling meal.
Turkey and Cheese Roll-Ups

Crafting the perfect Turkey and Cheese Roll-Ups is simpler than you might think, making it an ideal recipe for beginners and a quick, delicious option for any meal. Follow these steps to create a dish that’s both satisfying and easy to make.
Ingredients
- 4 large flour tortillas (whole wheat for a healthier option)
- 8 slices of turkey breast (thinly sliced for easier rolling)
- 1 cup shredded cheddar cheese (sharp for more flavor)
- 1/2 cup cream cheese, softened (easier to spread)
- 1 tbsp olive oil (or any neutral oil)
- 1 tsp garlic powder (adjust to taste)
- 1/2 tsp black pepper (freshly ground preferred)
Instructions
- Lay out the flour tortillas on a clean, flat surface.
- Spread 2 tablespoons of softened cream cheese evenly over each tortilla, leaving a small border around the edges.
- Sprinkle 1/4 cup of shredded cheddar cheese over the cream cheese on each tortilla.
- Place 2 slices of turkey breast on top of the cheese on each tortilla, ensuring even coverage.
- Lightly sprinkle garlic powder and black pepper over the turkey slices to season.
- Carefully roll each tortilla tightly, starting from one end to the other, ensuring the fillings stay inside.
- Heat 1 tablespoon of olive oil in a large skillet over medium heat (350°F) until shimmering.
- Place the rolled tortillas seam-side down in the skillet and cook for 2-3 minutes on each side, or until golden brown and crispy.
- Remove the roll-ups from the skillet and let them cool for a minute before slicing diagonally into 1-inch pieces.
Delight in the crispy exterior and the creamy, savory interior of these Turkey and Cheese Roll-Ups. Serve them with a side of marinara sauce for dipping or pack them as a protein-rich snack for on-the-go meals.
Peanut Butter and Banana Sandwich
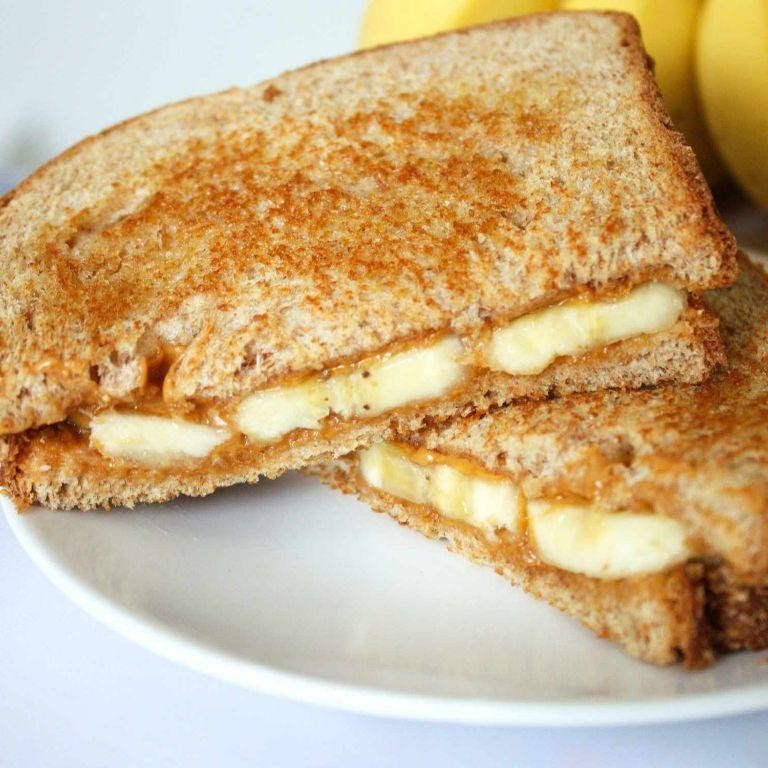
Every now and then, we all crave something simple yet satisfying, and that’s where the peanut butter and banana sandwich comes in. This classic combo is not just easy to make but also packs a punch of flavor and energy, perfect for any time of the day.
Ingredients
- 2 slices of whole wheat bread (or any bread of your choice)
- 2 tbsp creamy peanut butter (adjust thickness to preference)
- 1 medium banana, sliced (ripe but firm)
- 1 tsp honey (optional, for extra sweetness)
- 1/2 tsp cinnamon (optional, for a flavor boost)
Instructions
- Place the two slices of bread on a clean, flat surface.
- Spread 1 tbsp of peanut butter evenly on one side of each bread slice. Tip: For easier spreading, you can lightly toast the bread first.
- Arrange the banana slices evenly over the peanut butter on one slice of bread. Tip: Slicing the banana at an angle gives you longer slices for better coverage.
- Drizzle honey over the banana slices if using, then sprinkle with cinnamon if desired.
- Carefully place the second slice of bread on top, peanut butter side down, to complete the sandwich.
- Cut the sandwich diagonally for easier handling and a more appealing presentation. Tip: Use a serrated knife for a clean cut without squishing the sandwich.
Great for a quick breakfast or a midday snack, this sandwich offers a delightful contrast between the creamy peanut butter and the soft, sweet bananas. Try serving it with a side of yogurt or a drizzle of chocolate sauce for an extra indulgent treat.
Yogurt Parfait with Granola and Fruit
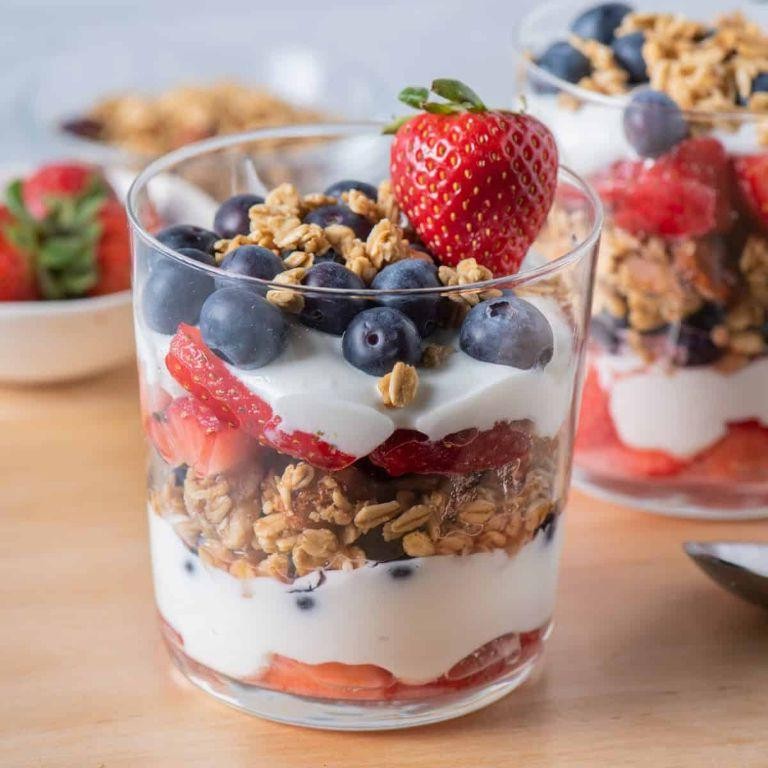
Starting your day with a Yogurt Parfait with Granola and Fruit is not only delicious but also packed with nutrients to fuel your morning. Simple to assemble, this dish layers creamy yogurt, crunchy granola, and fresh fruit for a perfect balance of textures and flavors.
Ingredients
- 1 cup Greek yogurt (or any yogurt of choice for a lighter option)
- 1/2 cup granola (homemade or store-bought for convenience)
- 1/2 cup mixed berries (fresh or frozen, adjust based on preference)
- 1 tbsp honey (optional, for added sweetness)
Instructions
- Begin by selecting a clear glass or bowl to showcase the layers of your parfait.
- Add 1/2 cup of Greek yogurt to the bottom of the glass, spreading it evenly with a spoon.
- Sprinkle 1/4 cup of granola over the yogurt, creating a crunchy layer.
- Top the granola with 1/4 cup of mixed berries, distributing them evenly.
- Repeat the layers by adding the remaining 1/2 cup of yogurt, followed by another 1/4 cup of granola and 1/4 cup of berries.
- Drizzle 1 tbsp of honey over the top for a touch of sweetness, if desired.
- Serve immediately to enjoy the contrast between the creamy yogurt, crunchy granola, and juicy berries.
Perfect for a quick breakfast or a healthy snack, this yogurt parfait offers a delightful mix of creamy, crunchy, and sweet. Try experimenting with different fruits or adding a sprinkle of cinnamon for a warm spice note.
Baked Chicken with Sweet Potatoes
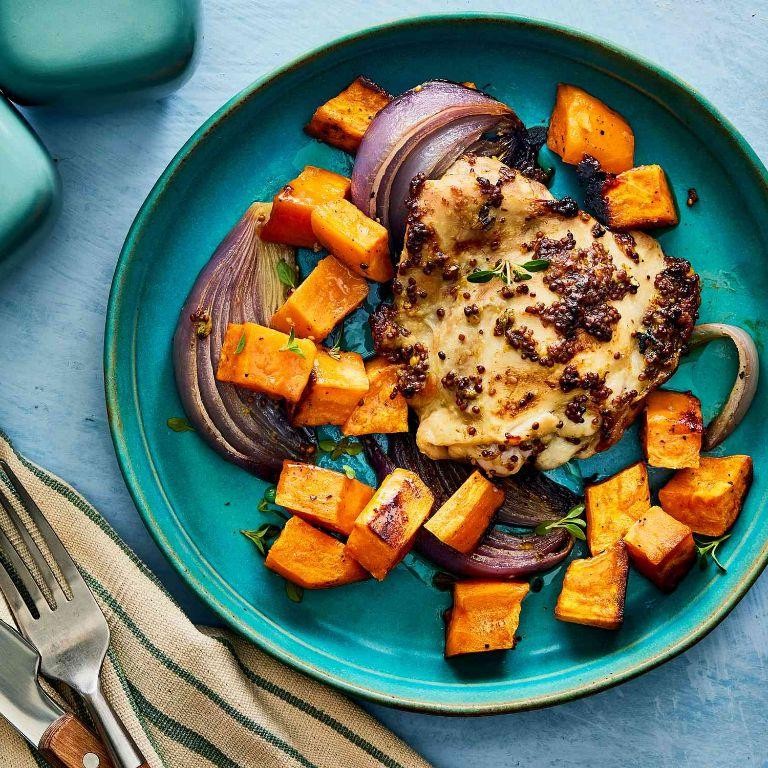
Gathering around the table for a wholesome meal doesn’t have to be complicated, and this Baked Chicken with Sweet Potatoes recipe is proof. Perfect for beginners, this dish combines simplicity with nutrition, guiding you through each step to ensure a delicious outcome.
Ingredients
- 2 boneless, skinless chicken breasts (about 1 lb total, for even cooking)
- 2 medium sweet potatoes, peeled and cubed (1-inch pieces for uniform cooking)
- 2 tbsp olive oil (or any neutral oil)
- 1 tsp garlic powder (adjust to taste)
- 1 tsp paprika (for a smoky flavor)
- 1/2 tsp salt (adjust to taste)
- 1/4 tsp black pepper (freshly ground preferred)
- 1 tbsp fresh rosemary, chopped (or 1 tsp dried)
Instructions
- Preheat your oven to 400°F (200°C) to ensure it’s hot enough for roasting.
- In a large bowl, toss the sweet potato cubes with 1 tbsp olive oil, 1/2 tsp salt, and 1/4 tsp black pepper until evenly coated.
- Spread the sweet potatoes in a single layer on a baking sheet, ensuring they’re not overcrowded for even roasting.
- Bake the sweet potatoes for 20 minutes, stirring halfway through, until they start to soften.
- While the sweet potatoes bake, season the chicken breasts with garlic powder, paprika, the remaining salt, and rosemary, rubbing the spices in for full coverage.
- In a skillet over medium-high heat, heat the remaining 1 tbsp olive oil and sear the chicken for 2-3 minutes per side until golden brown.
- Transfer the seared chicken to the baking sheet with the sweet potatoes, arranging them so they’re not touching.
- Return the baking sheet to the oven and bake for 15-20 minutes, or until the chicken reaches an internal temperature of 165°F (74°C) and the sweet potatoes are tender.
- Let the chicken rest for 5 minutes before slicing to retain its juices.
When served, the chicken is juicy and flavorful, complemented by the caramelized sweetness of the potatoes. For a vibrant meal, pair it with a crisp green salad or steamed greens.
Quinoa and Vegetable Stir Fry
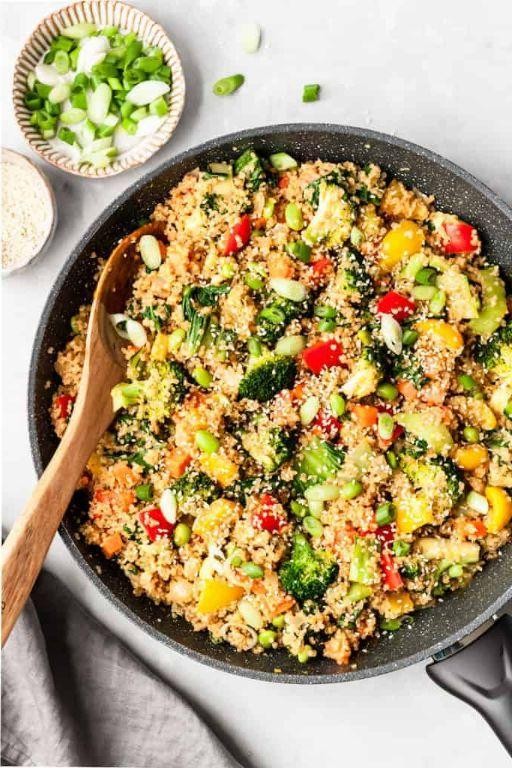
Great for a quick, nutritious meal, this Quinoa and Vegetable Stir Fry combines wholesome ingredients with vibrant flavors. Let’s walk through the process to ensure your dish turns out perfectly every time.
Ingredients
- 1 cup quinoa, rinsed (for better texture)
- 2 cups water (or vegetable broth for extra flavor)
- 2 tbsp olive oil (or any neutral oil)
- 1 bell pepper, diced (any color)
- 1 cup broccoli florets (fresh or frozen)
- 1 carrot, julienned (for a crunchy texture)
- 2 cloves garlic, minced (adjust to taste)
- 1 tbsp soy sauce (low sodium preferred)
- 1 tsp ginger, grated (fresh for best flavor)
- 1/2 tsp red pepper flakes (optional for heat)
Instructions
- In a medium saucepan, combine quinoa and water. Bring to a boil over high heat.
- Reduce heat to low, cover, and simmer for 15 minutes, or until water is absorbed and quinoa is fluffy.
- While quinoa cooks, heat olive oil in a large skillet over medium-high heat.
- Add bell pepper, broccoli, and carrot to the skillet. Stir-fry for 5-7 minutes, until vegetables are tender-crisp.
- Add minced garlic, grated ginger, and red pepper flakes to the skillet. Stir-fry for 1 minute, until fragrant.
- Stir in the cooked quinoa and soy sauce. Mix well to combine and heat through for 2 minutes.
- Remove from heat and let sit for 2 minutes to allow flavors to meld.
Just like that, you’ve got a dish that’s bursting with textures from the crunchy vegetables to the fluffy quinoa. Serve it topped with a sprinkle of sesame seeds or a drizzle of sriracha for an extra kick.
Whole Wheat Macaroni and Cheese
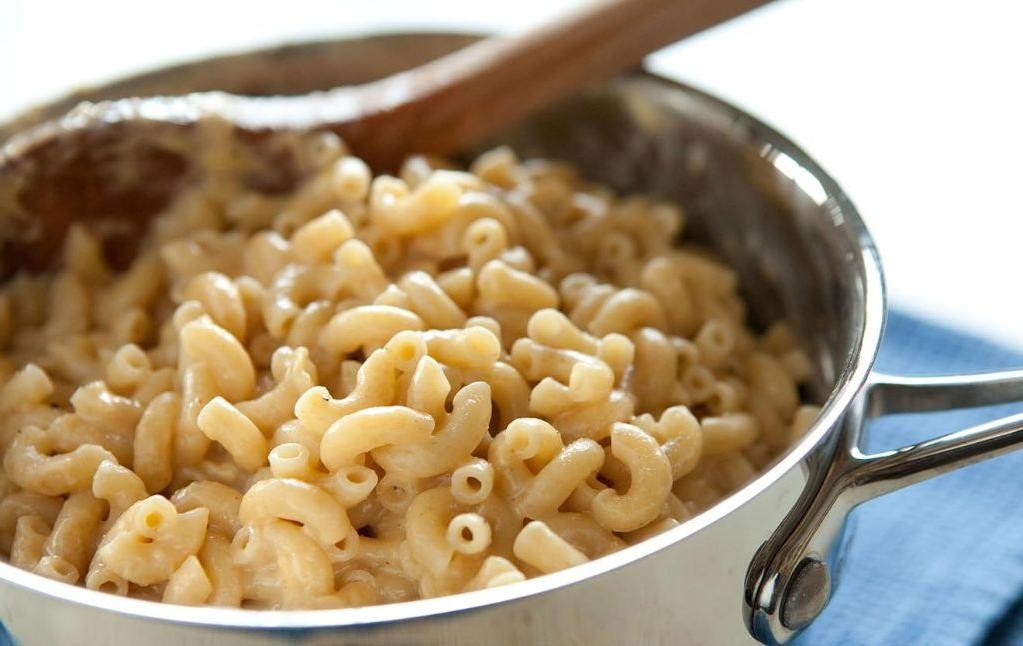
Just when you thought macaroni and cheese couldn’t get any better, we’re introducing a wholesome twist with whole wheat pasta. This version maintains all the creamy, cheesy goodness you love while adding a nutty depth of flavor and extra fiber.
Ingredients
- 8 oz whole wheat macaroni (or any short pasta shape you prefer)
- 2 cups whole milk (for creamier sauce, half-and-half works too)
- 2 tbsp unsalted butter (helps create a smooth roux)
- 2 tbsp all-purpose flour (the base for thickening the sauce)
- 2 cups shredded sharp cheddar cheese (freshly grated melts better)
- 1/2 tsp salt (adjust to taste)
- 1/4 tsp black pepper (freshly ground preferred)
- 1/4 tsp paprika (adds a subtle smokiness)
Instructions
- Bring a large pot of salted water to a boil over high heat. Add the whole wheat macaroni and cook according to package instructions until al dente, about 8-10 minutes. Drain and set aside.
- In the same pot, melt the butter over medium heat. Whisk in the flour and cook for 1-2 minutes until golden, stirring constantly to prevent burning.
- Gradually whisk in the milk, ensuring no lumps form. Continue to cook, stirring frequently, until the mixture thickens slightly, about 3-5 minutes.
- Reduce the heat to low. Add the shredded cheddar cheese, salt, pepper, and paprika. Stir until the cheese is completely melted and the sauce is smooth.
- Add the drained macaroni to the cheese sauce, stirring gently to coat every piece evenly. Cook for an additional 2 minutes to let the flavors meld.
- Remove from heat and let sit for 5 minutes before serving. This allows the sauce to thicken slightly for the perfect consistency.
Velvety smooth with a comforting chew from the whole wheat pasta, this dish is a hearty upgrade to the classic. Try topping with crispy breadcrumbs or a drizzle of truffle oil for an elegant finish.
Bean and Cheese Burritos

Delving into the world of homemade Mexican cuisine, bean and cheese burritos stand out as a comforting and versatile dish. Perfect for beginners, this recipe walks you through each step to ensure a delicious outcome every time.
Ingredients
- 1 cup refried beans (canned or homemade)
- 1/2 cup shredded cheddar cheese (or any meltable cheese)
- 4 large flour tortillas (warmed for flexibility)
- 1 tbsp vegetable oil (or any neutral oil)
- 1/4 tsp salt (adjust to taste)
- 1/4 tsp cumin (optional for extra flavor)
Instructions
- Heat the refried beans in a small saucepan over medium heat for 5 minutes, stirring occasionally, until warm and spreadable.
- Warm the tortillas in a dry skillet over medium heat for 30 seconds on each side to make them pliable.
- Spread 1/4 cup of warm refried beans in the center of each tortilla, leaving a 1-inch border around the edges.
- Sprinkle 2 tablespoons of shredded cheese over the beans on each tortilla.
- Fold the sides of the tortilla inward, then roll from the bottom up to enclose the filling tightly.
- Heat 1 tablespoon of vegetable oil in a large skillet over medium heat. Place the burritos seam-side down and cook for 2-3 minutes until golden brown, then flip and cook the other side for an additional 2-3 minutes.
- Remove from the skillet and let rest for 1 minute before serving to allow the cheese to set slightly.
Enjoy the crispy exterior giving way to the creamy, cheesy interior of these bean and cheese burritos. For an extra kick, serve with a side of salsa or sour cream.
Fruit and Yogurt Smoothie
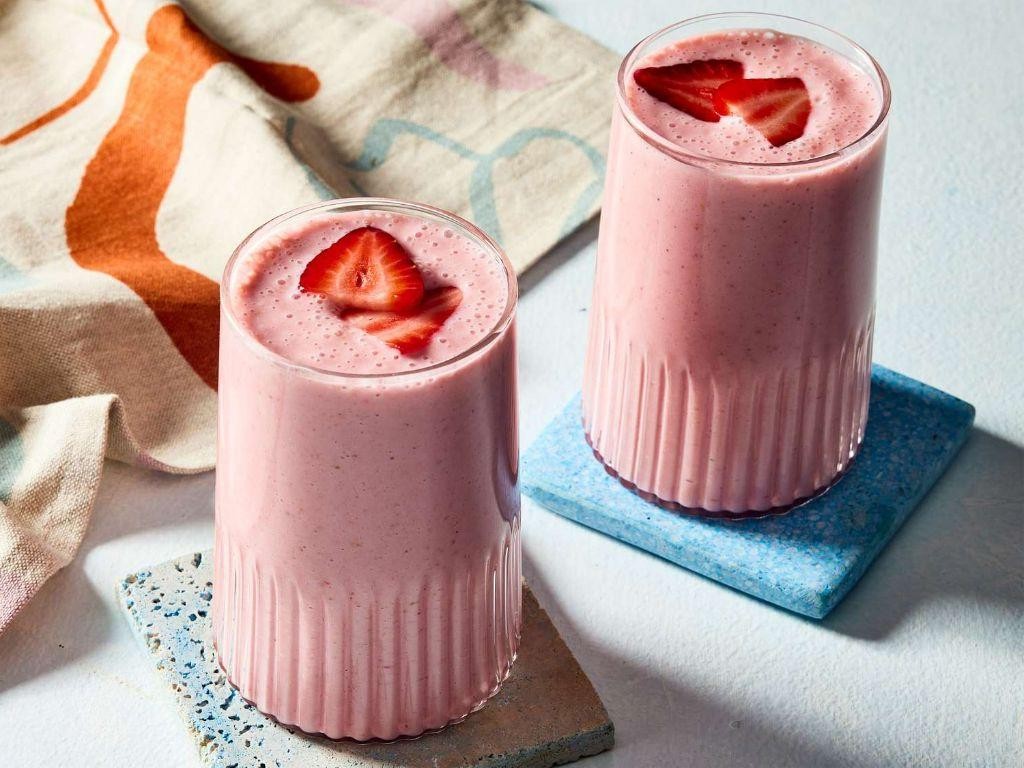
This refreshing Fruit and Yogurt Smoothie is the perfect blend of creamy and fruity, ideal for a quick breakfast or a healthy snack. Let’s dive into making this delightful drink with simple, step-by-step instructions.
Ingredients
- 1 cup plain yogurt (Greek yogurt for extra creaminess)
- 1/2 cup milk (any type, adjust for desired thickness)
- 1 cup mixed frozen fruits (mango, berries, or banana work well)
- 1 tbsp honey (adjust to taste)
- 1/2 tsp vanilla extract (optional for extra flavor)
Instructions
- Gather all your ingredients and a blender. This ensures a smooth preparation process.
- Add 1 cup of plain yogurt to the blender. Using Greek yogurt will give your smoothie a thicker texture.
- Pour in 1/2 cup of milk. The amount can be adjusted based on how thick or thin you prefer your smoothie.
- Add 1 cup of mixed frozen fruits to the blender. Frozen fruits make the smoothie cold and refreshing without diluting it.
- Drizzle 1 tbsp of honey over the ingredients. Adjust the amount based on your sweetness preference.
- If using, add 1/2 tsp of vanilla extract for an extra layer of flavor.
- Blend all the ingredients on high speed for about 1 minute, or until the mixture is smooth and no fruit chunks remain.
- Pour the smoothie into a glass and serve immediately for the best texture and flavor.
Just like that, you’ve made a creamy, dreamy Fruit and Yogurt Smoothie that’s bursting with flavor. Enjoy it as is, or top with granola for a crunchy contrast.
Oatmeal Banana Muffins

Gathering the right ingredients and following these steps will lead you to delicious Oatmeal Banana Muffins, perfect for a healthy breakfast or snack. Let’s start by preheating the oven and preparing our muffin tin.
Ingredients
- 1 1/2 cups all-purpose flour (for a healthier option, substitute half with whole wheat flour)
- 1 cup rolled oats (old-fashioned oats work best for texture)
- 1/2 cup brown sugar (adjust to taste)
- 2 tsp baking powder (ensure it’s fresh for best rise)
- 1/2 tsp salt
- 1 tsp cinnamon (add more for extra spice)
- 2 ripe bananas, mashed (the riper, the sweeter)
- 1/2 cup milk (any type, dairy or plant-based)
- 1/4 cup vegetable oil (or any neutral oil)
- 1 large egg (room temperature blends better)
- 1 tsp vanilla extract (pure extract recommended)
Instructions
- Preheat your oven to 375°F (190°C) and line a 12-cup muffin tin with paper liners or grease lightly.
- In a large bowl, whisk together the flour, oats, brown sugar, baking powder, salt, and cinnamon until well combined.
- In another bowl, mix the mashed bananas, milk, oil, egg, and vanilla extract until smooth.
- Pour the wet ingredients into the dry ingredients and stir just until combined; overmixing can lead to tough muffins.
- Divide the batter evenly among the prepared muffin cups, filling each about 2/3 full.
- Bake for 18-20 minutes, or until a toothpick inserted into the center of a muffin comes out clean.
- Allow the muffins to cool in the tin for 5 minutes, then transfer to a wire rack to cool completely.
Lightly spiced and moist, these muffins have a delightful texture from the oats and bananas. Serve them warm with a dab of butter or a drizzle of honey for an extra treat.
Grilled Cheese with Tomato Soup

Every home cook knows the comfort of a classic grilled cheese paired with tomato soup, a duo that’s both simple to make and deeply satisfying. Let’s break down how to achieve the perfect balance of crispy, buttery bread and melty cheese, alongside a rich, velvety tomato soup.
Ingredients
- 4 slices of white bread (sourdough adds a nice tang)
- 2 cups shredded cheddar cheese (sharp for more flavor)
- 2 tbsp unsalted butter (softened for easy spreading)
- 1 can (14.5 oz) crushed tomatoes (San Marzano for sweetness)
- 1 cup chicken broth (vegetable broth as an alternative)
- 1/2 cup heavy cream (for a richer soup)
- 1 tbsp olive oil (or any neutral oil)
- 1 small onion, diced (yellow for mildness)
- 2 garlic cloves, minced (fresh for best flavor)
- 1 tsp sugar (adjust to taste)
- Salt and pepper (to season)
Instructions
- Heat olive oil in a medium pot over medium heat. Add diced onion and cook until translucent, about 5 minutes.
- Add minced garlic to the pot and cook for 1 minute until fragrant, stirring constantly to prevent burning.
- Pour in crushed tomatoes and chicken broth. Bring to a simmer, then reduce heat to low. Cook for 15 minutes, stirring occasionally.
- While the soup simmers, spread softened butter on one side of each bread slice. Place two slices, buttered side down, in a skillet over medium heat.
- Sprinkle shredded cheddar cheese evenly over the bread in the skillet. Top with the remaining bread slices, buttered side up.
- Cook the sandwiches for 3-4 minutes on each side, or until golden brown and the cheese has melted. Press down lightly with a spatula for even cooking.
- Stir heavy cream and sugar into the soup. Season with salt and pepper. Simmer for an additional 5 minutes.
- Remove the grilled cheese sandwiches from the skillet and let them rest for a minute before cutting. This helps the cheese set slightly.
- Ladle the tomato soup into bowls and serve alongside the grilled cheese sandwiches.
Perfectly executed, the grilled cheese boasts a crispy exterior with a gooey, cheesy center, while the tomato soup offers a smooth, creamy contrast with a hint of sweetness. For a twist, try adding a sprinkle of fresh basil to the soup or a slice of tomato inside the sandwich for extra freshness.
Chicken and Vegetable Stir Fry
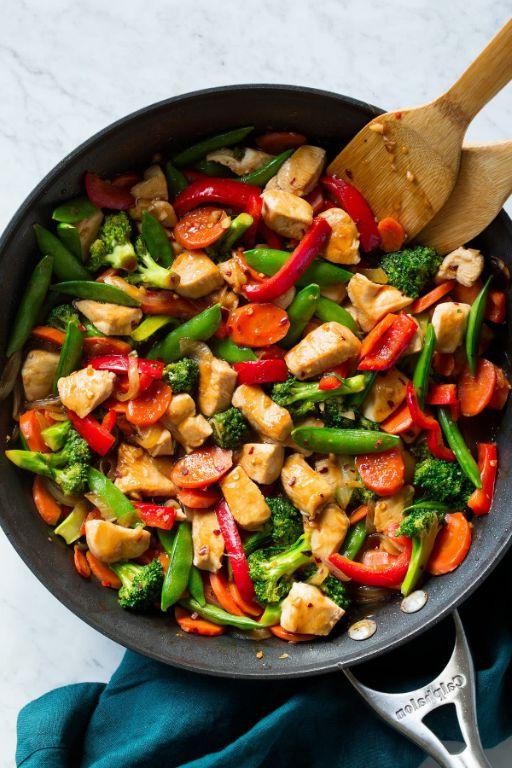
When you’re looking for a quick, nutritious meal that doesn’t skimp on flavor, this Chicken and Vegetable Stir Fry is your go-to dish. Perfect for busy weeknights, it combines tender chicken with crisp vegetables in a savory sauce.
Ingredients
- 1 lb boneless, skinless chicken breasts, cut into 1-inch pieces (for even cooking)
- 2 cups broccoli florets (fresh or frozen, no need to thaw)
- 1 red bell pepper, sliced (adds a sweet crunch)
- 2 tbsp vegetable oil (or any neutral oil)
- 2 cloves garlic, minced (for a flavor boost)
- 1 tbsp soy sauce (low sodium preferred, adjust to taste)
- 1 tsp ginger, grated (fresh is best for vibrant flavor)
- 1/2 cup chicken broth (helps create a light sauce)
Instructions
- Heat 1 tbsp of vegetable oil in a large skillet or wok over medium-high heat until shimmering, about 1 minute.
- Add the chicken pieces to the skillet, spreading them out in a single layer. Cook for 5-6 minutes, turning occasionally, until golden brown and cooked through. Tip: Don’t overcrowd the pan to ensure each piece gets a nice sear.
- Remove the chicken from the skillet and set aside on a plate.
- Add the remaining 1 tbsp of oil to the skillet. Toss in the broccoli and red bell pepper, stirring frequently for 3-4 minutes until vegetables are crisp-tender. Tip: High heat is key for keeping the veggies vibrant and crisp.
- Push the vegetables to one side of the skillet. Add the garlic and ginger to the cleared space, cooking for about 30 seconds until fragrant. Tip: This quick bloom releases their flavors without burning.
- Return the chicken to the skillet, mixing well with the vegetables. Pour in the soy sauce and chicken broth, stirring to combine. Cook for another 2 minutes, allowing the sauce to slightly thicken.
This stir fry delivers a delightful contrast of textures, from the juicy chicken to the crisp-tender vegetables, all coated in a light, flavorful sauce. Serve it over a bed of steamed rice or noodles for a complete meal that’s sure to satisfy.
Peanut Butter Oat Bars
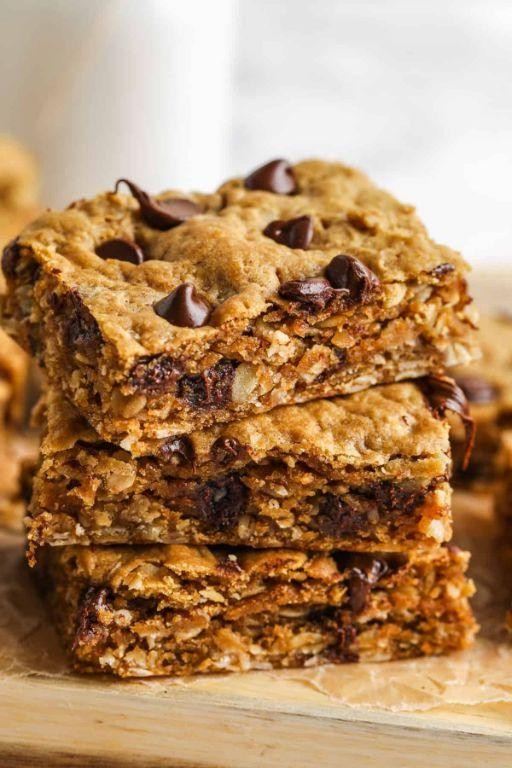
When you’re craving something sweet yet wholesome, these Peanut Butter Oat Bars are your go-to. They’re easy to make, require no baking, and are packed with nutrients to keep you energized throughout the day.
Ingredients
- 1 cup creamy peanut butter (natural, unsweetened preferred for a healthier option)
- 1/2 cup honey (or maple syrup for a vegan alternative)
- 2 cups old-fashioned oats (gluten-free if necessary)
- 1/4 cup mini chocolate chips (optional, for a sweet touch)
- 1 tsp vanilla extract (pure for best flavor)
Instructions
- Line an 8×8 inch baking dish with parchment paper, leaving some overhang for easy removal.
- In a medium saucepan over low heat, combine 1 cup peanut butter and 1/2 cup honey. Stir constantly until the mixture is smooth and well combined, about 3-5 minutes. Tip: Avoid overheating to prevent the peanut butter from separating.
- Remove the saucepan from heat and stir in 1 tsp vanilla extract until fully incorporated.
- Add 2 cups oats to the saucepan, mixing until all the oats are evenly coated with the peanut butter mixture. Tip: For a chewier texture, let the mixture cool for 5 minutes before adding the oats.
- Transfer the mixture to the prepared baking dish, pressing down firmly with the back of a spoon or a spatula to create an even layer.
- Sprinkle 1/4 cup mini chocolate chips evenly over the top, gently pressing them into the mixture so they adhere. Tip: For a cleaner cut, chill the bars for at least 2 hours before slicing.
- Refrigerate the bars for at least 2 hours, or until firm, before lifting them out of the dish using the parchment overhang and cutting into squares.
So, these Peanut Butter Oat Bars offer a delightful chewiness with a rich peanut butter flavor, balanced by the subtle sweetness of honey. Serve them chilled for a refreshing treat or slightly warmed to enhance the gooey texture of the chocolate chips.
Conclusion
We hope these 20 nutritious WIC recipes make busy days a little easier and meals a lot more delicious! Each dish is designed to be simple, healthy, and family-friendly. Give them a try, and don’t forget to share your favorites in the comments or on Pinterest. Happy cooking from our kitchen to yours!