Who says ice cream is just for scooping? Dive into our roundup of 20 Delicious Ice Cream Dessert Recipes that are anything but ordinary! From no-bake wonders to show-stopping sundaes, these treats are perfect for beating the heat or celebrating any day. Whether you’re a novice or a dessert pro, get ready to transform your favorite frozen delight into something truly amazing. Let’s get mixing!
Vanilla Ice Cream with Hot Fudge Sauce
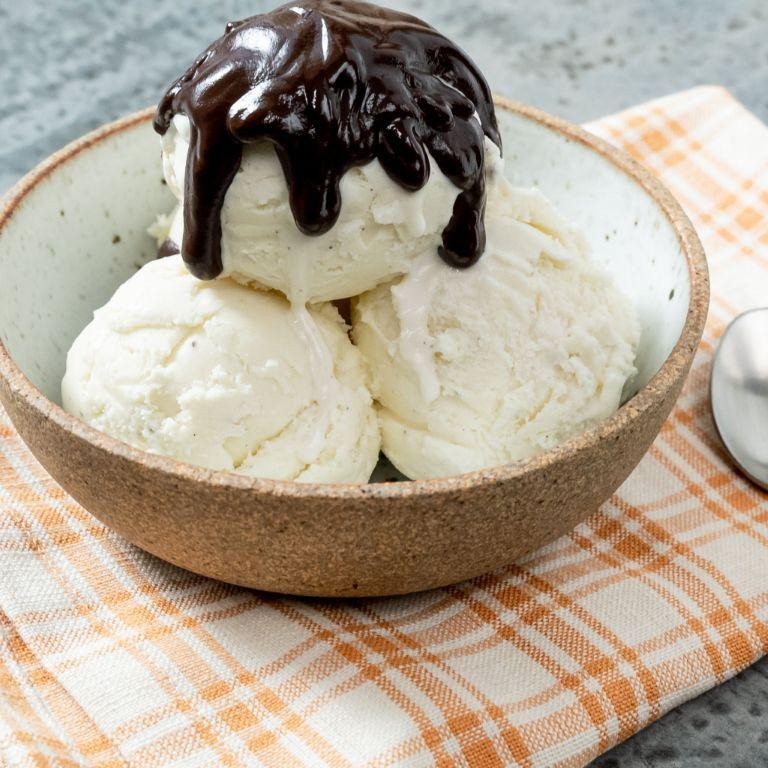
Zesty flavors and comforting textures come together in this classic dessert that’s perfect for any occasion. Today, we’re diving into the art of making Vanilla Ice Cream with Hot Fudge Sauce, a timeless treat that combines the cool creaminess of ice cream with the rich, decadent warmth of fudge.
Ingredients
- 2 cups heavy cream, chilled
- 1 cup whole milk
- 3/4 cup granulated sugar
- 1 vanilla bean, split and seeds scraped
- 5 large egg yolks, pasture-raised and lightly beaten
- 1/4 tsp fine sea salt
- 1 cup high-quality dark chocolate, finely chopped
- 1/2 cup unsalted butter
- 1/2 cup light corn syrup
- 1 tsp pure vanilla extract
Instructions
- In a medium saucepan over low heat, combine the heavy cream, whole milk, half of the sugar, and the vanilla bean seeds. Heat until the mixture is warm but not boiling, stirring occasionally to dissolve the sugar.
- In a separate bowl, whisk together the egg yolks, remaining sugar, and sea salt until pale and slightly thickened.
- Gradually pour the warm cream mixture into the egg yolks, whisking constantly to temper the eggs.
- Return the mixture to the saucepan and cook over medium heat, stirring constantly with a wooden spoon, until the custard thickens enough to coat the back of the spoon (about 170°F).
- Strain the custard through a fine-mesh sieve into a clean bowl. Cover and chill in the refrigerator for at least 4 hours, or overnight, to develop the flavors.
- Once chilled, churn the custard in an ice cream maker according to the manufacturer’s instructions until it reaches a soft-serve consistency.
- Transfer the ice cream to a lidded container and freeze for at least 2 hours to harden.
- For the hot fudge sauce, combine the dark chocolate, butter, and corn syrup in a small saucepan over low heat. Stir until the chocolate and butter are completely melted and the mixture is smooth.
- Remove from heat and stir in the vanilla extract. Keep warm until ready to serve.
Oozing with rich, velvety fudge over the smooth, creamy vanilla ice cream, this dessert is a study in contrasts. Serve it in chilled bowls for an extra touch of elegance, or drizzle the fudge sauce over ice cream sandwiches for a playful twist.
Strawberry Ice Cream Pie
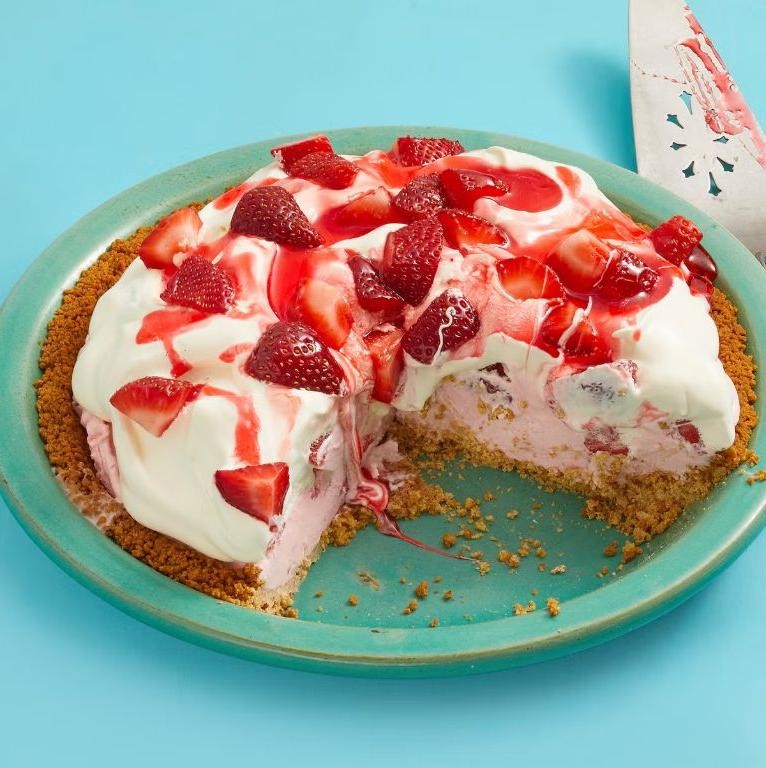
Delight in the simplicity and elegance of this Strawberry Ice Cream Pie, a perfect blend of creamy and fruity flavors that’s sure to impress. Designed with beginners in mind, this recipe walks you through each step with precision, ensuring a delicious outcome every time.
Ingredients
- 1 1/2 cups graham cracker crumbs
- 1/4 cup granulated sugar
- 6 tbsp unsalted butter, melted
- 1 quart premium strawberry ice cream, slightly softened
- 1 cup fresh strawberries, hulled and sliced
- 1/2 cup heavy cream
- 1 tbsp confectioners’ sugar
- 1 tsp pure vanilla extract
Instructions
- Preheat your oven to 350°F (175°C) to prepare for baking the crust.
- In a medium bowl, combine the graham cracker crumbs, granulated sugar, and melted butter until the mixture resembles wet sand. Tip: Ensure the butter is fully melted for even distribution.
- Press the crumb mixture firmly into the bottom and up the sides of a 9-inch pie dish, creating an even layer. Bake for 10 minutes, then cool completely on a wire rack.
- Once the crust is cooled, spread the slightly softened strawberry ice cream evenly over the crust. Tip: Allow the ice cream to sit at room temperature for about 10 minutes for easier spreading.
- Arrange the sliced strawberries on top of the ice cream layer, covering it completely. Freeze the pie for at least 4 hours, or until firm.
- Before serving, whip the heavy cream, confectioners’ sugar, and vanilla extract until stiff peaks form. Tip: Chill your mixing bowl and beaters in the freezer for 10 minutes before whipping for best results.
- Spread or pipe the whipped cream over the pie, then slice and serve immediately.
The Strawberry Ice Cream Pie offers a delightful contrast between the crunchy graham cracker crust and the smooth, creamy ice cream, punctuated by the fresh, tangy strawberries. For an extra touch of elegance, garnish each slice with a whole strawberry or a drizzle of strawberry sauce.
Chocolate Ice Cream Sundae

Now, let’s dive into creating a classic Chocolate Ice Cream Sundae, a delightful treat that combines rich flavors and textures for a truly indulgent experience. This guide will walk you through each step to ensure your sundae is perfectly balanced and irresistibly delicious.
Ingredients
- 2 scoops of premium chocolate ice cream
- 1/4 cup of hot fudge sauce, warmed to 110°F
- 1 tbsp of crushed, toasted hazelnuts
- 1/2 cup of freshly whipped heavy cream, chilled to 40°F
- 1 maraschino cherry, stem intact
- 1 tsp of high-quality cocoa powder, for dusting
Instructions
- Place two scoops of premium chocolate ice cream into a chilled sundae glass, ensuring they are evenly spaced to create a balanced base.
- Drizzle the warmed hot fudge sauce over the ice cream, allowing it to cascade down the sides for a visually appealing effect.
- Sprinkle the crushed, toasted hazelnuts evenly over the top, adding a crunchy texture and nutty flavor contrast.
- Gently spoon the freshly whipped heavy cream over the sundae, covering the nuts and fudge sauce with a light, airy layer.
- Place the maraschino cherry on top of the whipped cream, centering it for a classic finish.
- Lightly dust the entire sundae with high-quality cocoa powder using a fine mesh sieve for a professional touch.
Zesty and rich, this Chocolate Ice Cream Sundae offers a harmonious blend of creamy, crunchy, and sweet elements. For an extra touch of elegance, serve it with a side of artisan shortbread cookies to complement the deep chocolate flavors.
Cookies and Cream Ice Cream Cake
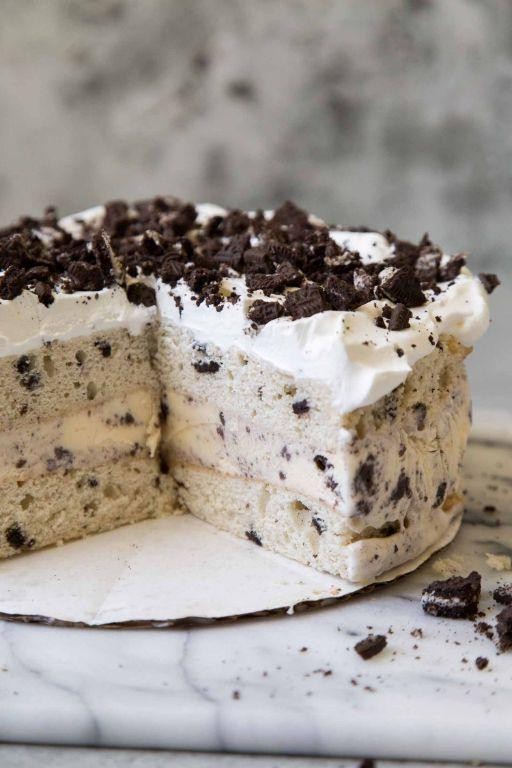
Every baker, whether novice or seasoned, will find joy in crafting this Cookies and Cream Ice Cream Cake. It’s a delightful blend of creamy textures and rich flavors, perfect for any celebration or a sweet treat to end the day.
Ingredients
- 1.5 cups heavy cream, chilled
- 1 cup whole milk
- 3/4 cup granulated sugar
- 1 tsp pure vanilla extract
- 1/8 tsp fine sea salt
- 15 chocolate sandwich cookies, coarsely crushed
- 5 chocolate sandwich cookies, finely crushed for garnish
Instructions
- In a large mixing bowl, combine the heavy cream, whole milk, granulated sugar, vanilla extract, and fine sea salt. Whisk until the sugar is completely dissolved, about 2 minutes.
- Pour the mixture into an ice cream maker and churn according to the manufacturer’s instructions, typically about 20-25 minutes, until it reaches a soft-serve consistency.
- Gently fold in the coarsely crushed chocolate sandwich cookies until evenly distributed throughout the ice cream.
- Transfer the mixture to a 9-inch springform pan, spreading it evenly with a spatula. Sprinkle the finely crushed cookies on top for garnish.
- Cover the pan with plastic wrap, ensuring it touches the surface of the ice cream to prevent ice crystals from forming. Freeze for at least 6 hours, or until firm.
- Once set, remove the cake from the freezer and let it sit at room temperature for 5 minutes before slicing. This allows for easier cutting and a smoother texture.
Perfectly creamy with a satisfying crunch from the cookies, this ice cream cake is a crowd-pleaser. Serve it with a drizzle of chocolate sauce or a dollop of whipped cream for an extra indulgent touch.
Mint Chocolate Chip Ice Cream Sandwiches
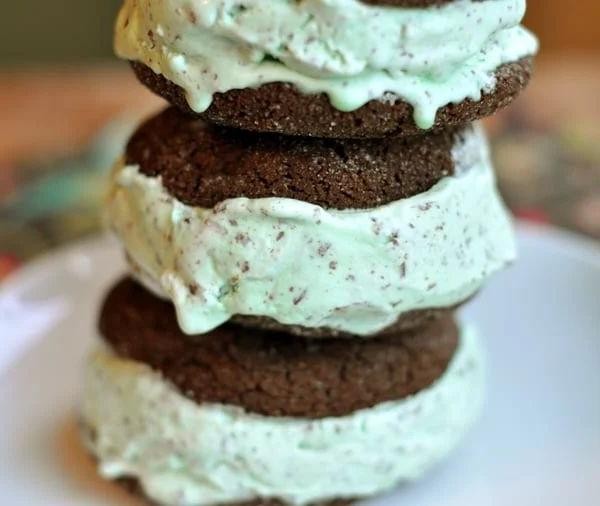
Zesty and refreshing, these Mint Chocolate Chip Ice Cream Sandwiches are the perfect treat to cool down with on a warm day. Combining the crispness of mint with the richness of chocolate, this dessert is a delightful balance of flavors and textures.
Ingredients
- 1 cup granulated sugar
- 2 cups heavy cream, chilled
- 1 cup whole milk
- 1/2 tsp pure peppermint extract
- 1/2 cup mini semi-sweet chocolate chips
- 12 chocolate wafer cookies, store-bought or homemade
Instructions
- In a large mixing bowl, combine 1 cup granulated sugar, 2 cups heavy cream, and 1 cup whole milk. Whisk until the sugar is completely dissolved.
- Add 1/2 tsp pure peppermint extract to the mixture and stir to incorporate evenly.
- Pour the mixture into an ice cream maker and churn according to the manufacturer’s instructions, typically about 20-25 minutes, until it reaches a soft-serve consistency.
- Gently fold in 1/2 cup mini semi-sweet chocolate chips with a spatula to distribute them throughout the ice cream.
- Transfer the ice cream to a loaf pan and smooth the top with the spatula. Cover with plastic wrap, pressing it directly onto the surface of the ice cream to prevent ice crystals from forming.
- Freeze the ice cream for at least 4 hours, or until firm.
- Once the ice cream is firm, place a scoop between two chocolate wafer cookies and gently press to form a sandwich. Repeat with the remaining cookies and ice cream.
- Serve immediately or wrap individually in parchment paper and freeze for up to 1 week.
Brimming with the cool essence of mint and the satisfying crunch of chocolate chips, these ice cream sandwiches offer a playful twist on a classic dessert. For an extra touch of elegance, drizzle with melted dark chocolate before serving.
Peanut Butter Ice Cream Brownie Delight
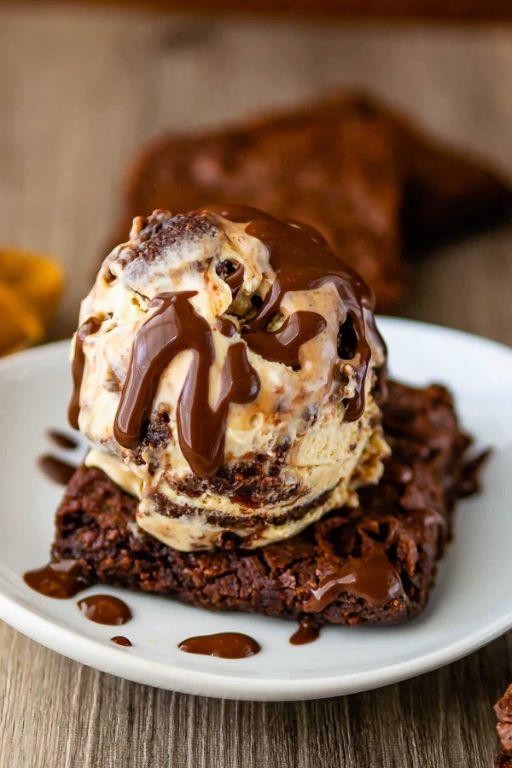
Venturing into the realm of decadent desserts, this recipe combines the rich, creamy texture of peanut butter ice cream with the dense, chocolatey goodness of brownies, creating a symphony of flavors that’s both indulgent and satisfying.
Ingredients
- 1 cup unsalted butter, melted and slightly cooled
- 2 cups granulated sugar
- 4 large pasture-raised eggs, lightly beaten
- 1 tsp pure vanilla extract
- 1 cup all-purpose flour, sifted
- 3/4 cup cocoa powder, Dutch-processed
- 1/2 tsp sea salt
- 1 pint premium peanut butter ice cream, slightly softened
- 1/2 cup roasted peanuts, roughly chopped
Instructions
- Preheat your oven to 350°F (175°C) and grease a 9×13 inch baking pan with clarified butter, ensuring an even coat.
- In a large mixing bowl, whisk together the melted unsalted butter and granulated sugar until fully combined and slightly glossy.
- Gradually add the lightly beaten pasture-raised eggs to the butter-sugar mixture, whisking continuously to incorporate air and create a light base.
- Stir in the pure vanilla extract, blending it thoroughly into the mixture for a fragrant depth of flavor.
- Sift together the all-purpose flour, Dutch-processed cocoa powder, and sea salt, then fold these dry ingredients into the wet mixture until just combined, avoiding overmixing to ensure tender brownies.
- Pour the batter into the prepared baking pan, spreading it evenly with a spatula to reach all corners.
- Bake for 25-30 minutes, or until a toothpick inserted into the center comes out with a few moist crumbs. Allow the brownies to cool completely in the pan on a wire rack.
- Once cooled, evenly spread the slightly softened premium peanut butter ice cream over the brownie layer, using an offset spatula for a smooth finish.
- Sprinkle the roughly chopped roasted peanuts over the ice cream layer, pressing them gently to adhere.
- Freeze the assembled dessert for at least 4 hours, or until the ice cream layer is firm to the touch.
Yielded is a dessert with a delightful contrast of textures—the fudgy brownie base against the creamy ice cream, all punctuated by the crunch of peanuts. Serve slices with a drizzle of warm chocolate sauce for an extra touch of luxury.
Caramel Swirl Ice Cream Cheesecake
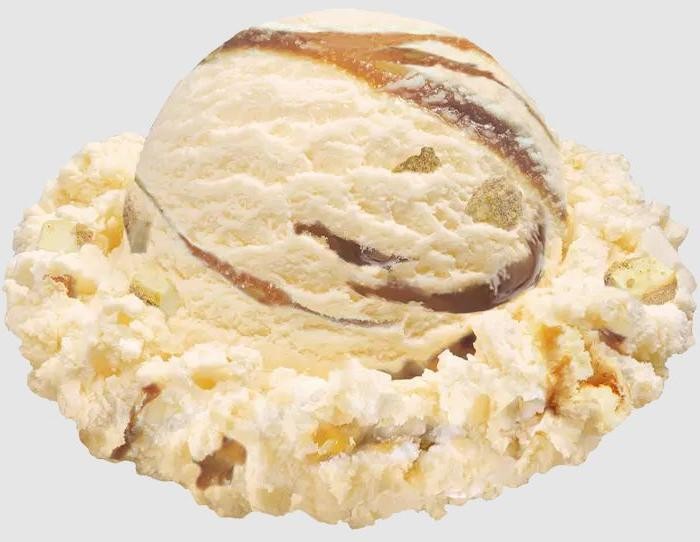
Amidst the sweltering heat of summer, there’s no better way to cool down than with a decadent Caramel Swirl Ice Cream Cheesecake. This dessert combines the creamy richness of cheesecake with the sweet, buttery swirls of caramel, all nestled in a crisp graham cracker crust for a treat that’s as visually stunning as it is delicious.
Ingredients
- 1 1/2 cups graham cracker crumbs
- 1/4 cup granulated sugar
- 6 tbsp unsalted butter, melted
- 24 oz cream cheese, room temperature
- 3/4 cup granulated sugar
- 1 tsp pure vanilla extract
- 2 pasture-raised eggs, lightly beaten
- 1/2 cup caramel sauce, plus extra for swirling
- 1 pint vanilla ice cream, slightly softened
Instructions
- Preheat your oven to 325°F (163°C) and lightly grease a 9-inch springform pan.
- In a medium bowl, combine the graham cracker crumbs, 1/4 cup sugar, and melted butter until the mixture resembles wet sand. Press firmly into the bottom of the prepared pan. Tip: Use the bottom of a measuring cup to evenly press the crust.
- Bake the crust for 10 minutes, then remove from the oven and let cool.
- In a large bowl, beat the cream cheese, 3/4 cup sugar, and vanilla extract until smooth and creamy. Tip: Ensure the cream cheese is at room temperature to avoid lumps.
- Gradually add the lightly beaten eggs to the cream cheese mixture, beating just until combined. Overmixing can incorporate too much air, leading to cracks.
- Pour the filling over the cooled crust, then dollop with 1/2 cup caramel sauce and swirl with a knife.
- Bake for 45-50 minutes, or until the edges are set but the center is slightly wobbly. Tip: A water bath can help prevent cracks during baking.
- Let the cheesecake cool to room temperature, then spread the slightly softened vanilla ice cream over the top. Freeze for at least 4 hours, or until firm.
- Before serving, drizzle with additional caramel sauce and slice with a hot knife for clean cuts.
Out of the freezer, this Caramel Swirl Ice Cream Cheesecake boasts a velvety texture with a perfect balance of sweet and tangy flavors. Serve it on a warm summer evening with a sprinkle of sea salt to elevate the caramel’s richness.
Rocky Road Ice Cream Parfait
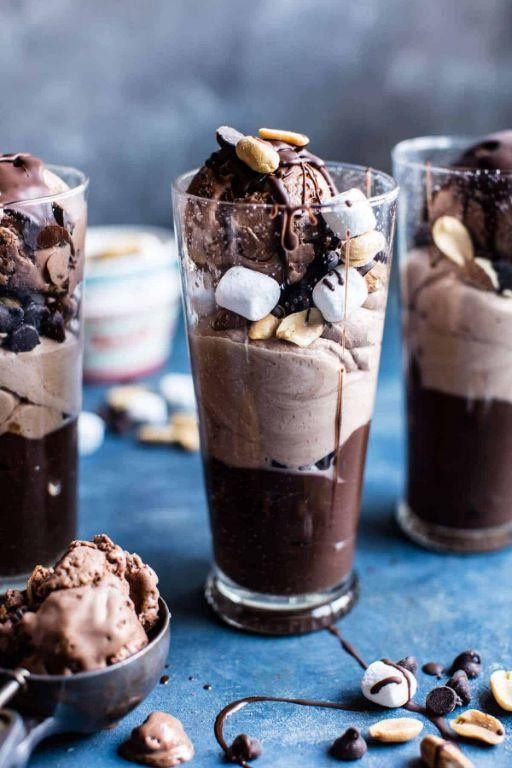
Perfect for those warm summer evenings, this Rocky Road Ice Cream Parfait combines the rich flavors of chocolate, marshmallows, and nuts into a delightful dessert that’s both easy to make and impressive to serve. Let’s walk through the process step by step to ensure your parfait turns out perfectly every time.
Ingredients
- 1 cup high-quality chocolate ice cream, slightly softened
- 1/2 cup mini marshmallows
- 1/4 cup roasted almonds, roughly chopped
- 1/4 cup chocolate syrup
- 1/2 cup whipped cream, freshly whipped to stiff peaks
- 2 tbsp crushed graham crackers
Instructions
- In a clear parfait glass, layer 1/4 cup of the slightly softened chocolate ice cream as the base.
- Drizzle 1 tbsp of chocolate syrup over the ice cream layer for a rich flavor contrast.
- Sprinkle 1 tbsp of crushed graham crackers evenly over the syrup to add a subtle crunch.
- Add a layer of 1/4 cup mini marshmallows, ensuring they’re evenly distributed for a gooey texture.
- Repeat the layers with the remaining ingredients, finishing with a dollop of whipped cream on top.
- Garnish the whipped cream with the remaining roasted almonds and a final drizzle of chocolate syrup for a visually appealing finish.
Unbelievably creamy with a perfect balance of textures, this parfait is a testament to the joy of homemade desserts. Serve it immediately to enjoy the contrast between the cold ice cream and the soft, melted marshmallows, or customize it with your favorite nuts for a personal touch.
Banana Split Ice Cream Bowl

Ready to dive into a classic dessert with a twist? The Banana Split Ice Cream Bowl combines the nostalgic flavors of a banana split with the creamy texture of homemade ice cream, perfect for those warm summer days or whenever you’re craving something sweet and satisfying.
Ingredients
- 2 ripe bananas, sliced into 1/4-inch rounds
- 1 cup heavy cream, chilled
- 1/2 cup whole milk, chilled
- 1/2 cup granulated sugar
- 1 tsp pure vanilla extract
- 1/4 cup crushed pineapple, drained
- 2 tbsp hot fudge sauce, warmed
- 2 tbsp strawberry jam
- 1/4 cup whipped cream
- 2 maraschino cherries, stemmed
- 2 tbsp chopped walnuts, toasted
Instructions
- In a large mixing bowl, combine the heavy cream, whole milk, granulated sugar, and vanilla extract. Whisk until the sugar is completely dissolved, about 2 minutes.
- Pour the mixture into an ice cream maker and churn according to the manufacturer’s instructions, typically 20-25 minutes, until it reaches a soft-serve consistency.
- Gently fold in the sliced bananas and crushed pineapple into the churned ice cream, ensuring even distribution without overmixing.
- Transfer the ice cream to a freezer-safe bowl, cover with plastic wrap pressed directly onto the surface, and freeze for at least 4 hours, or until firm.
- To serve, scoop the ice cream into bowls, drizzle with warmed hot fudge sauce and strawberry jam, then top with whipped cream, maraschino cherries, and toasted walnuts.
Whisking together the cream and milk ensures a smooth base for the ice cream, while folding in the fruits at the end preserves their texture. The contrast between the cold ice cream and the warm sauces creates a delightful temperature play, and the toasted walnuts add a satisfying crunch. Serve this bowl with extra toppings on the side for a customizable dessert experience.
Espresso Ice Cream Affogato
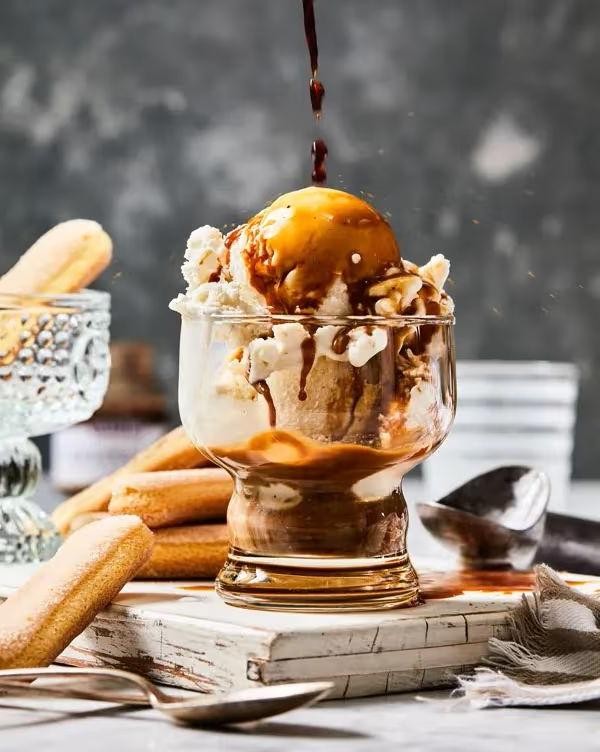
Kickstart your dessert game with this Espresso Ice Cream Affogato, a luxurious yet straightforward treat that combines the boldness of espresso with the creamy sweetness of vanilla ice cream. Perfect for those who appreciate the finer details in their desserts, this recipe is a delightful way to end any meal.
Ingredients
- 1 cup high-quality vanilla bean ice cream
- 2 shots freshly brewed espresso, hot
- 1 tbsp dark chocolate shavings
- 1 tsp pure vanilla extract
Instructions
- Scoop the vanilla bean ice cream into a chilled serving glass or bowl, ensuring it’s firm and holds its shape.
- Brew 2 shots of espresso using freshly ground beans for the best flavor, aiming for a temperature of 200°F.
- Immediately pour the hot espresso over the scooped ice cream, allowing the contrast between hot and cold to create a velvety texture.
- Sprinkle the dark chocolate shavings evenly over the top for a subtle crunch and depth of flavor.
- Drizzle the pure vanilla extract around the edges of the glass for an aromatic finish that complements the espresso.
Presenting a harmonious blend of temperatures and textures, this Espresso Ice Cream Affogato offers a silky smooth ice cream base with a robust espresso kick. For an extra touch of elegance, serve with a side of biscotti or enjoy it as a sophisticated afternoon pick-me-up.
Pistachio Ice Cream with Honey Drizzle
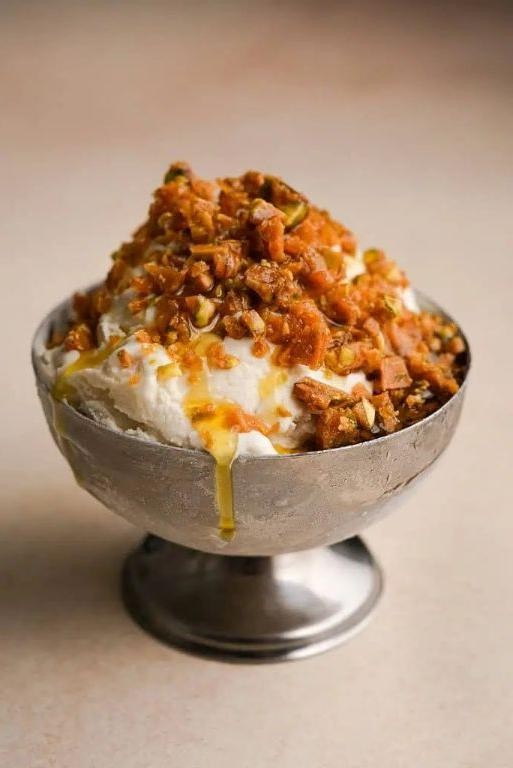
Here’s a delightful way to enjoy the rich, nutty flavors of pistachios combined with the natural sweetness of honey in a homemade ice cream that’s sure to impress. This recipe is designed for beginners, with each step carefully explained to ensure success.
Ingredients
- 2 cups heavy cream, chilled
- 1 cup whole milk
- 3/4 cup granulated sugar
- 1/2 cup shelled pistachios, finely ground
- 1/4 cup honey
- 1 tsp pure vanilla extract
- 1/4 tsp fine sea salt
Instructions
- In a medium saucepan over low heat, combine the heavy cream, whole milk, and granulated sugar. Stir continuously until the sugar is completely dissolved, about 5 minutes. Do not allow the mixture to boil.
- Remove the saucepan from the heat and whisk in the finely ground pistachios, honey, vanilla extract, and fine sea salt until fully incorporated.
- Transfer the mixture to a large bowl and cover with plastic wrap, ensuring the wrap touches the surface to prevent a skin from forming. Chill in the refrigerator for at least 4 hours, or overnight for best results.
- Pour the chilled mixture into an ice cream maker and churn according to the manufacturer’s instructions, typically about 25-30 minutes, until the ice cream reaches a soft-serve consistency.
- Transfer the churned ice cream to a freezer-safe container, cover with a lid, and freeze for at least 2 hours to firm up before serving.
Light and creamy with a subtle crunch from the pistachios, this ice cream is a perfect balance of sweet and nutty flavors. Drizzle with additional honey before serving for an extra touch of sweetness and a beautiful presentation.
Coconut Ice Cream with Toasted Almonds

Every summer demands a dessert that’s both refreshing and indulgent, and this Coconut Ice Cream with Toasted Almonds is just that. Perfect for beginners, this recipe guides you through creating a creamy, dreamy treat with a delightful crunch.
Ingredients
- 2 cups full-fat coconut milk, chilled
- 1 cup granulated sugar
- 1 teaspoon pure vanilla extract
- 1/2 cup sliced almonds, toasted
- 1 pinch sea salt
Instructions
- In a medium mixing bowl, whisk together the chilled coconut milk and granulated sugar until the sugar is completely dissolved, about 2 minutes.
- Stir in the pure vanilla extract and a pinch of sea salt, ensuring the mixture is well combined.
- Pour the mixture into an ice cream maker and churn according to the manufacturer’s instructions, typically about 20-25 minutes, until it reaches a soft-serve consistency.
- While the ice cream churns, toast the sliced almonds in a dry skillet over medium heat for 3-5 minutes, stirring frequently, until golden and fragrant. Let them cool completely.
- Once the ice cream has churned, fold in the toasted almonds gently to distribute them evenly throughout.
- Transfer the ice cream to a lidded container and freeze for at least 4 hours, or until firm.
Presenting a velvety texture with a hint of tropical sweetness, this coconut ice cream is elevated by the nutty crunch of toasted almonds. Serve it in chilled bowls or atop a warm brownie for a contrast in temperatures that’s simply irresistible.
Lemon Sorbet Ice Cream Float
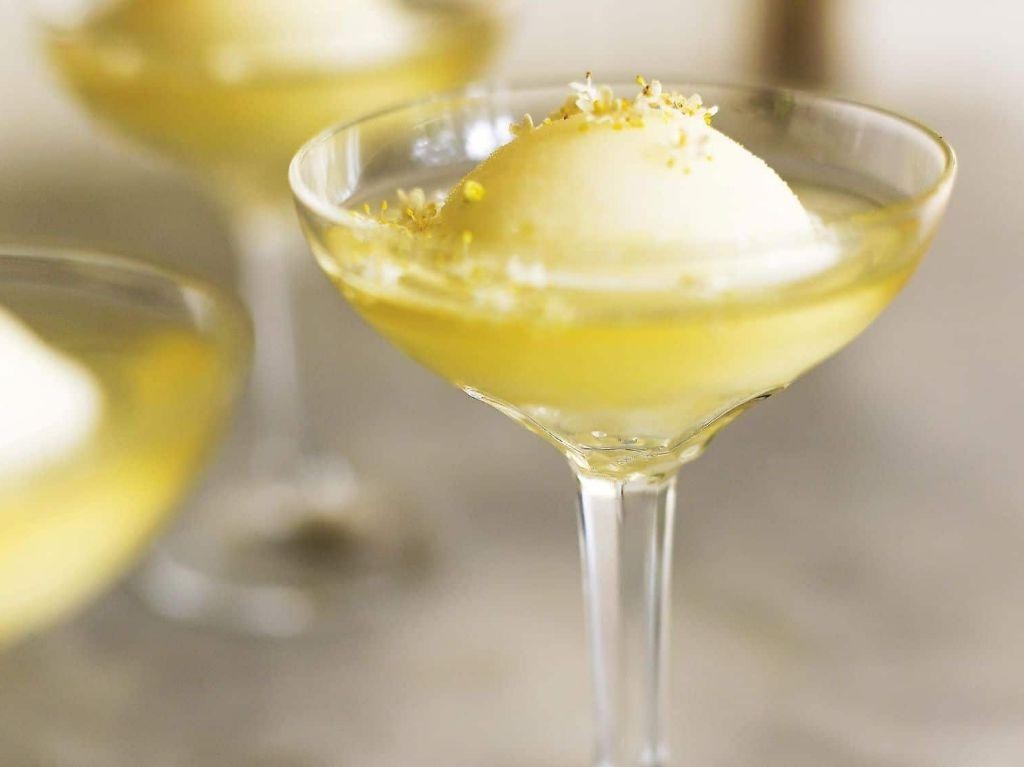
Whisking together the zest of summer and the chill of a cool breeze, this Lemon Sorbet Ice Cream Float is a refreshing twist on the classic soda fountain treat. Perfect for those sweltering days when only something citrusy and cold will do, it’s a simple yet sophisticated dessert that’s sure to impress.
Ingredients
- 1 cup freshly squeezed lemon juice, strained
- 1/2 cup granulated sugar
- 1 cup cold sparkling water
- 2 scoops premium vanilla bean ice cream
- Fresh mint leaves, for garnish
Instructions
- In a medium saucepan over medium heat, combine the freshly squeezed lemon juice and granulated sugar. Stir continuously until the sugar has completely dissolved, about 3 minutes. Tip: Avoid boiling to preserve the lemon’s bright flavor.
- Remove the saucepan from heat and let the lemon syrup cool to room temperature, approximately 20 minutes. For quicker cooling, place the saucepan in an ice bath, stirring occasionally.
- Once cooled, pour the lemon syrup into a shallow dish and freeze until solid, about 4 hours. Tip: Covering the dish with plastic wrap prevents ice crystals from forming.
- Using a fork, scrape the frozen lemon syrup to create a fluffy sorbet texture. This should yield about 2 cups of lemon sorbet.
- Divide the lemon sorbet between two tall glasses. Slowly pour 1/2 cup of cold sparkling water into each glass, allowing the sorbet to fizz slightly.
- Gently add a scoop of premium vanilla bean ice cream to each glass. Tip: For an elegant presentation, layer the ice cream on top of the sorbet before adding the sparkling water.
- Garnish with fresh mint leaves and serve immediately with a long spoon and a straw.
Presenting a delightful contrast between the tart lemon sorbet and the creamy vanilla ice cream, this float is a symphony of textures and flavors. For an extra touch of whimsy, serve it with a side of lemon shortbread cookies for dipping.
Raspberry Ripple Ice Cream Pavlova
Start by preheating your oven to 250°F to ensure a gentle, even bake for your pavlova base. This dessert combines the crisp exterior and marshmallow-like interior of a classic pavlova with the tangy sweetness of raspberry ripple ice cream, creating a delightful contrast in textures and flavors.
Ingredients
- 4 large pasture-raised egg whites, at room temperature
- 1 cup superfine sugar
- 1 tsp white vinegar
- 1 tsp pure vanilla extract
- 1 tbsp cornstarch
- 1 pint high-quality raspberry ripple ice cream
- Fresh raspberries, for garnish
- Mint leaves, for garnish
Instructions
- Preheat your oven to 250°F and line a baking sheet with parchment paper.
- In a large, clean bowl, beat the egg whites on medium speed until soft peaks form, about 3 minutes.
- Gradually add the superfine sugar, a tablespoon at a time, while continuing to beat until the mixture is glossy and stiff peaks form, about 5 minutes.
- Gently fold in the white vinegar, vanilla extract, and cornstarch with a spatula, being careful not to deflate the mixture.
- Spoon the meringue onto the prepared baking sheet, shaping it into a 9-inch circle with a slight indentation in the center.
- Bake for 1 hour and 30 minutes, then turn off the oven and let the pavlova cool inside for at least 2 hours to prevent cracking.
- Just before serving, carefully transfer the pavlova to a serving plate and top with scoops of raspberry ripple ice cream.
- Garnish with fresh raspberries and mint leaves for a pop of color and freshness.
Varying the garnishes can add a personal touch to this dessert; consider edible flowers or a drizzle of raspberry coulis for extra flair. The pavlova’s crisp shell gives way to a soft, chewy center, perfectly complemented by the creamy, fruity ice cream.
Tiramisu Ice Cream Trifle
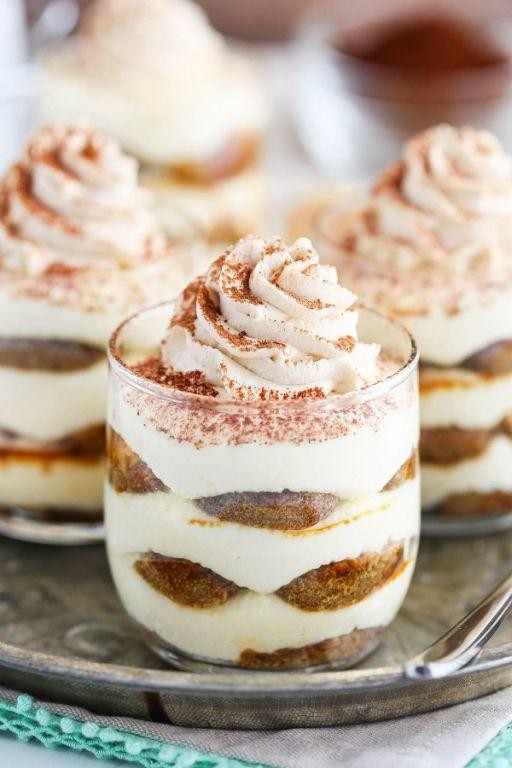
Ready to elevate your dessert game with a show-stopping Tiramisu Ice Cream Trifle? This decadent layered dessert combines the rich flavors of traditional tiramisu with the cool, creamy texture of ice cream, perfect for any occasion.
Ingredients
- 1 1/2 cups heavy cream, chilled
- 1/2 cup granulated sugar
- 1 tsp pure vanilla extract
- 8 oz mascarpone cheese, room temperature
- 1 cup strong brewed coffee, cooled to room temperature
- 2 tbsp coffee liqueur
- 24 ladyfingers
- 1 pint vanilla ice cream, slightly softened
- 1/4 cup cocoa powder, for dusting
Instructions
- In a large mixing bowl, whip the heavy cream, granulated sugar, and vanilla extract on medium-high speed until stiff peaks form, about 3 minutes.
- Gently fold the mascarpone cheese into the whipped cream mixture until fully incorporated, being careful not to deflate the mixture.
- In a shallow dish, combine the cooled brewed coffee and coffee liqueur. Quickly dip each ladyfinger into the coffee mixture, ensuring they are moist but not soggy.
- Arrange a layer of dipped ladyfingers at the bottom of a trifle dish or large glass bowl.
- Spread half of the mascarpone mixture over the ladyfingers, smoothing it into an even layer.
- Add a layer of slightly softened vanilla ice cream over the mascarpone mixture, spreading evenly.
- Repeat the layers with the remaining ladyfingers, mascarpone mixture, and vanilla ice cream.
- Cover the trifle with plastic wrap and freeze for at least 4 hours, or until firm.
- Before serving, dust the top of the trifle with cocoa powder for a classic tiramisu finish.
Kick back and enjoy the luxurious layers of coffee-soaked ladyfingers, creamy mascarpone, and smooth vanilla ice cream in every bite. For an extra touch of elegance, serve with a drizzle of chocolate sauce or a sprinkle of espresso powder on top.
Salted Caramel Ice Cream Tart
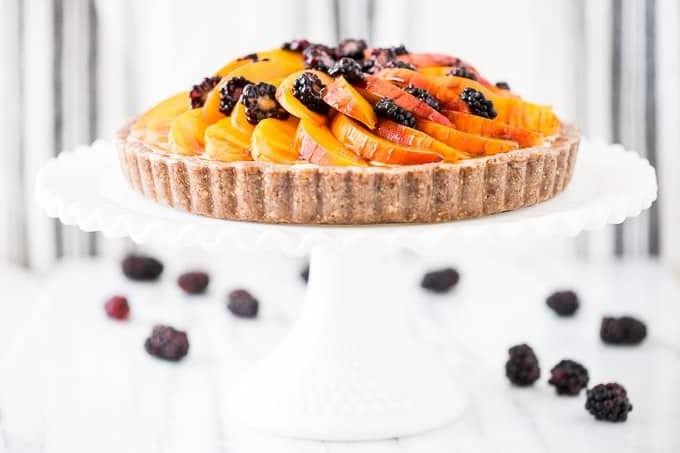
Delightfully combining the rich flavors of salted caramel with the creamy texture of ice cream, this Salted Caramel Ice Cream Tart is a decadent dessert that’s surprisingly straightforward to make. Follow these steps to create a show-stopping treat that balances sweet and salty perfectly.
Ingredients
- 1 1/2 cups all-purpose flour
- 1/2 cup unsalted butter, chilled and diced
- 1/4 cup granulated sugar
- 1/4 tsp fine sea salt
- 1 large pasture-raised egg yolk
- 2 tbsp ice water
- 1 1/2 cups heavy cream
- 1 cup whole milk
- 3/4 cup granulated sugar
- 4 large pasture-raised egg yolks
- 1 tsp pure vanilla extract
- 1/2 tsp fine sea salt
- 1/2 cup salted caramel sauce
Instructions
- Preheat your oven to 350°F (175°C).
- In a food processor, combine the all-purpose flour, chilled diced unsalted butter, granulated sugar, and fine sea salt. Pulse until the mixture resembles coarse crumbs.
- Add the large pasture-raised egg yolk and ice water. Pulse until the dough begins to come together.
- Press the dough evenly into a 9-inch tart pan with a removable bottom. Chill for 30 minutes.
- Bake the chilled dough for 20 minutes, or until golden brown. Let cool completely.
- In a saucepan, heat the heavy cream and whole milk over medium heat until it just begins to simmer.
- In a separate bowl, whisk together the granulated sugar and large pasture-raised egg yolks until pale and thick.
- Gradually pour the hot cream mixture into the egg mixture, whisking constantly to prevent curdling.
- Return the mixture to the saucepan and cook over low heat, stirring constantly, until it thickens enough to coat the back of a spoon.
- Remove from heat and stir in the pure vanilla extract and fine sea salt. Let cool to room temperature, then chill in the refrigerator for at least 4 hours.
- Pour the chilled custard into the cooled tart shell. Drizzle with salted caramel sauce.
- Freeze the tart for at least 6 hours, or until firm.
The tart emerges from the freezer with a crisp, buttery crust that contrasts beautifully with the smooth, creamy ice cream filling. The salted caramel adds a luxurious depth of flavor, making each bite a perfect balance of sweet and salty. Serve slices with an extra drizzle of caramel sauce for an indulgent finish.
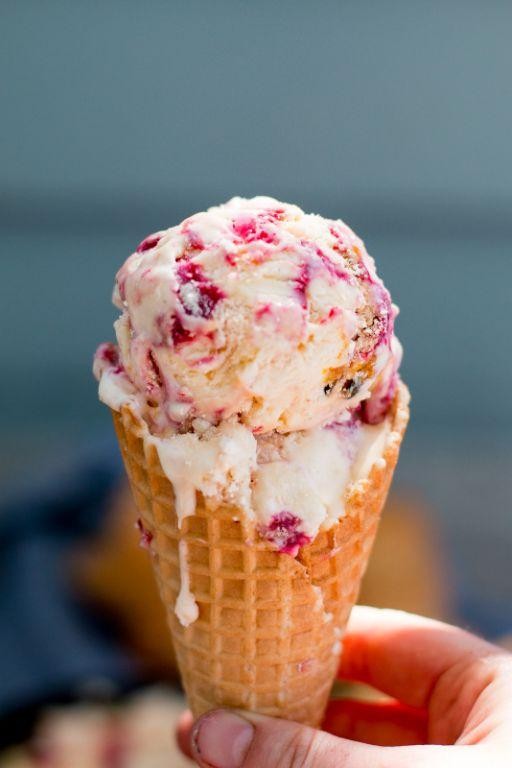
Blueberry Cheesecake Ice Cream
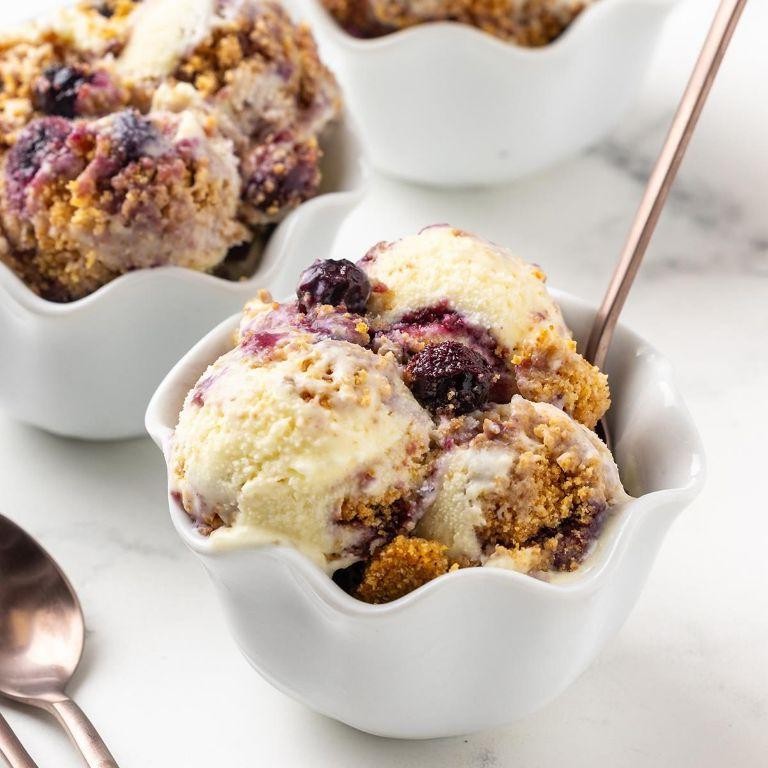
Delightfully creamy and bursting with the fresh, tangy flavor of blueberries, this Blueberry Cheesecake Ice Cream is a summer dessert dream come true. Perfect for beginners, this recipe guides you through each step with precision, ensuring a decadent treat that’s sure to impress.
Ingredients
- 2 cups heavy cream, chilled
- 1 cup whole milk
- 3/4 cup granulated sugar
- 1/4 tsp fine sea salt
- 1 tbsp pure vanilla extract
- 8 oz cream cheese, softened
- 1 cup fresh blueberries, pureed and strained
- 1/2 cup graham cracker crumbs
Instructions
- In a large mixing bowl, combine the chilled heavy cream, whole milk, granulated sugar, and fine sea salt. Whisk until the sugar is completely dissolved.
- Add the pure vanilla extract and softened cream cheese to the mixture. Use an electric mixer on medium speed to blend until smooth and creamy, about 2 minutes.
- Gently fold in the strained blueberry puree until evenly distributed throughout the mixture.
- Pour the mixture into an ice cream maker and churn according to the manufacturer’s instructions, typically about 25-30 minutes, until it reaches a soft-serve consistency.
- While the ice cream is churning, toast the graham cracker crumbs in a dry skillet over medium heat for 2-3 minutes, stirring constantly, until fragrant and lightly golden.
- Once the ice cream has reached the desired consistency, layer it in a freezer-safe container with the toasted graham cracker crumbs, creating swirls as you go.
- Cover the container with a lid and freeze for at least 4 hours, or until firm.
Marvel at the creamy texture and the perfect balance of sweet and tangy flavors in every bite. Serve this ice cream with a drizzle of blueberry sauce or atop a warm slice of pound cake for an extra special treat.
Matcha Green Tea Ice Cream Mochi
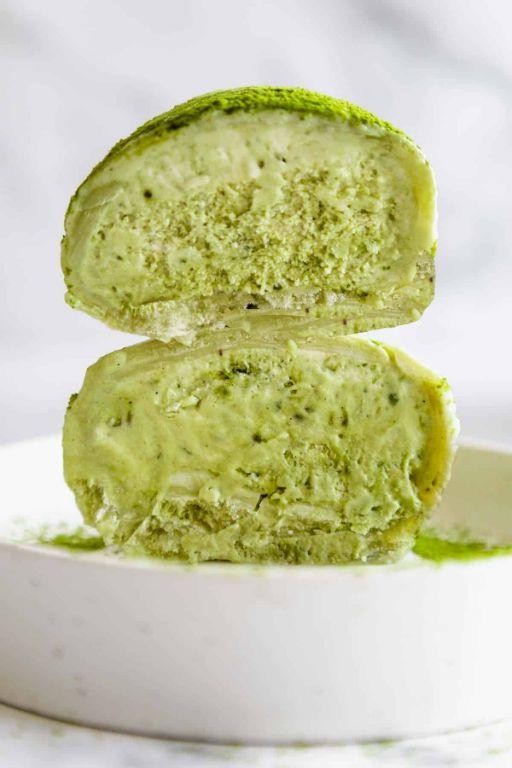
This delightful fusion of Japanese tradition and modern dessert trends brings you Matcha Green Tea Ice Cream Mochi, a treat that’s as fun to make as it is to eat. Today, we’ll guide you through creating these bite-sized delights with a methodical approach, ensuring even beginners can achieve perfect results.
Ingredients
- 1 cup sweet rice flour (mochiko)
- 1/4 cup granulated sugar
- 1 tbsp matcha green tea powder
- 3/4 cup water
- 1 pint premium vanilla ice cream, slightly softened
- Cornstarch, for dusting
Instructions
- In a microwave-safe bowl, whisk together 1 cup sweet rice flour, 1/4 cup granulated sugar, and 1 tbsp matcha green tea powder until evenly combined.
- Gradually add 3/4 cup water to the dry ingredients, stirring continuously until the mixture is smooth and free of lumps.
- Cover the bowl with plastic wrap, leaving a small vent for steam to escape, and microwave on high for 1 minute. Stir the mixture thoroughly, then microwave for another minute. Tip: The dough should be slightly translucent and sticky when done.
- Dust a clean work surface with cornstarch and turn the hot dough onto it. Dust the dough and your hands with more cornstarch to prevent sticking.
- Divide the dough into 12 equal pieces. Flatten each piece into a disc about 3 inches in diameter.
- Place a small scoop of slightly softened premium vanilla ice cream in the center of each disc. Carefully wrap the dough around the ice cream, pinching the edges to seal. Tip: Work quickly to prevent the ice cream from melting.
- Roll each mochi in cornstarch to coat lightly, then place on a parchment-lined tray. Freeze for at least 2 hours before serving. Tip: For best texture, serve the mochi straight from the freezer.
A perfect balance of chewy mochi and creamy ice cream, these Matcha Green Tea Ice Cream Mochi are a refreshing treat. Serve them as a unique dessert at your next gathering or enjoy them as a cool snack on a warm day.
Cherry Garcia Ice Cream Pie
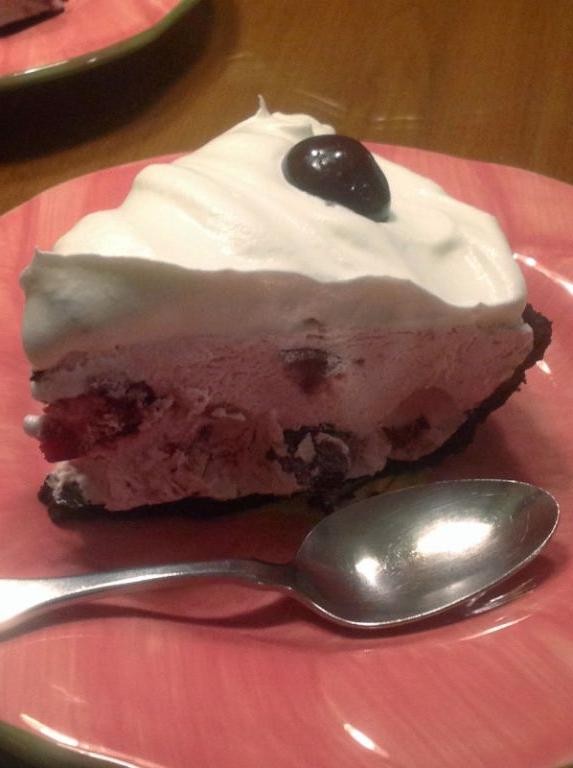
Just when you thought Cherry Garcia couldn’t get any better, we’ve turned it into an irresistible ice cream pie. This dessert combines the iconic flavors of cherry and chocolate in a creamy, frozen delight that’s perfect for summer gatherings or a sweet treat any day of the week.
Ingredients
- 1 1/2 cups chocolate cookie crumbs
- 1/4 cup unsalted butter, melted
- 1 pint Cherry Garcia ice cream, softened
- 1/2 cup heavy cream
- 1/4 cup semi-sweet chocolate chips
- 1/4 cup maraschino cherries, drained and chopped
Instructions
- Preheat your oven to 350°F (175°C).
- In a medium bowl, combine the chocolate cookie crumbs and melted butter until the mixture resembles wet sand.
- Press the crumb mixture firmly into the bottom and up the sides of a 9-inch pie plate. Bake for 10 minutes, then cool completely on a wire rack.
- Once the crust is cool, spread the softened Cherry Garcia ice cream evenly over the crust. Freeze for at least 2 hours, or until firm.
- In a small saucepan, heat the heavy cream over medium heat until it just begins to simmer. Remove from heat and pour over the chocolate chips in a heatproof bowl. Let sit for 2 minutes, then stir until smooth.
- Drizzle the chocolate ganache over the frozen pie and sprinkle with chopped maraschino cherries. Freeze for another 30 minutes before serving.
For an extra touch, serve each slice with a fresh cherry on top or a dollop of whipped cream. The contrast between the crunchy crust, creamy ice cream, and rich chocolate ganache makes every bite a delightful experience.
Double Chocolate Ice Cream Bread Pudding
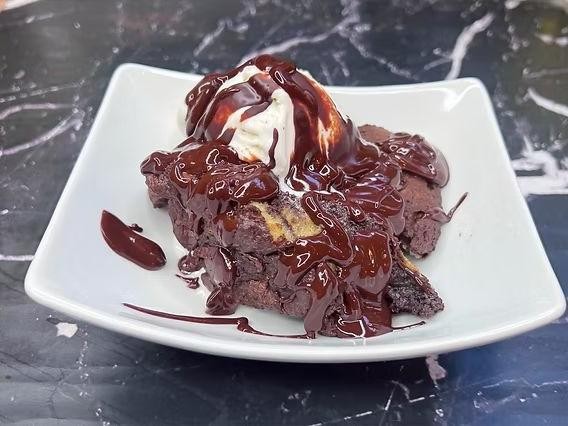
Delightfully decadent and surprisingly simple to make, this Double Chocolate Ice Cream Bread Pudding transforms everyday ingredients into a luxurious dessert. Follow these steps to create a dish that’s as rich in flavor as it is in texture.
Ingredients
- 4 cups day-old brioche, cut into 1-inch cubes
- 2 cups premium double chocolate ice cream, slightly softened
- 3 pasture-raised eggs, lightly beaten
- 1 cup heavy cream
- 1/2 cup granulated sugar
- 1 tsp pure vanilla extract
- 1/4 tsp fine sea salt
- 1/2 cup semi-sweet chocolate chips
Instructions
- Preheat your oven to 350°F (175°C) and lightly grease a 9-inch square baking dish with butter.
- In a large mixing bowl, combine the brioche cubes and slightly softened double chocolate ice cream, ensuring the bread is evenly coated.
- In a separate bowl, whisk together the lightly beaten eggs, heavy cream, granulated sugar, pure vanilla extract, and fine sea salt until fully combined.
- Pour the egg mixture over the ice cream-coated brioche cubes, gently pressing down to ensure all bread absorbs the liquid.
- Sprinkle the semi-sweet chocolate chips evenly over the top of the mixture.
- Bake in the preheated oven for 45 minutes, or until the top is golden and the center is set but still slightly wobbly.
- Allow the pudding to cool for 10 minutes before serving to let the flavors meld together beautifully.
Creating a water bath for baking can prevent the edges from drying out too quickly. For an extra chocolatey experience, drizzle with melted chocolate before serving. This pudding is best enjoyed warm, with the chocolate chips still slightly gooey, offering a delightful contrast to the creamy custard and tender bread.
Conclusion
We hope you’ve enjoyed exploring these 20 delicious ice cream dessert recipes as much as we loved rounding them up for you! Whether you’re in the mood for something classic or daring, there’s a treat here for every occasion. Don’t forget to try out your favorites, share your thoughts in the comments, and pin this article on Pinterest to spread the joy of homemade ice cream desserts. Happy cooking!