Who says delicious desserts have to be complicated or time-consuming? Whether you’re craving something chocolatey, fruity, or a little bit of both, we’ve got you covered with 20 Delicious, Easy, Quick Dessert Recipes that are sure to impress. Perfect for busy weeknights or last-minute gatherings, these treats are as simple to make as they are amazing to taste. Let’s dive into the sweet possibilities!
Chocolate Mug Cake
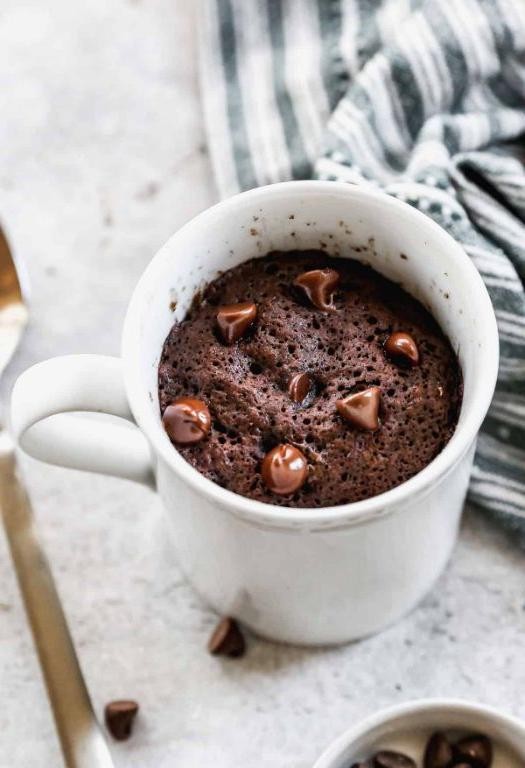
Just when you thought your chocolate cravings couldn’t be satisfied in minutes, here comes the Chocolate Mug Cake to prove you wrong. This single-serving delight is not only quick to make but also requires minimal cleanup, making it the perfect treat for those late-night sweet tooth emergencies.
Ingredients
- 4 tbsp all-purpose flour (I like to sift mine for a fluffier cake)
- 2 tbsp granulated sugar (for that perfect sweetness)
- 2 tbsp unsweetened cocoa powder (the darker, the better for a rich chocolate flavor)
- 1/8 tsp baking powder (a little goes a long way)
- 3 tbsp milk (whole milk makes it extra creamy)
- 1 tbsp vegetable oil (I use canola for its neutral taste)
- 1/4 tsp vanilla extract (pure extract adds depth)
- 1 tbsp chocolate chips (because more chocolate is always better)
Instructions
- In a 12-ounce microwave-safe mug, whisk together the flour, sugar, cocoa powder, and baking powder until no lumps remain.
- Add the milk, vegetable oil, and vanilla extract to the dry ingredients. Stir until just combined; a few lumps are okay.
- Fold in the chocolate chips, ensuring they’re evenly distributed throughout the batter.
- Microwave on high for 1 minute and 30 seconds. The cake should rise and look set on top but still be slightly gooey in the center.
- Let the cake cool in the mug for 1 minute before digging in. This rest time allows the cake to finish cooking from residual heat.
Out of the microwave, this Chocolate Mug Cake emerges moist and rich, with molten chocolate chips that create pockets of gooey goodness. Serve it straight from the mug for a cozy, no-fuss dessert, or top it with a scoop of vanilla ice cream for an indulgent twist.
3-Ingredient Peanut Butter Cookies
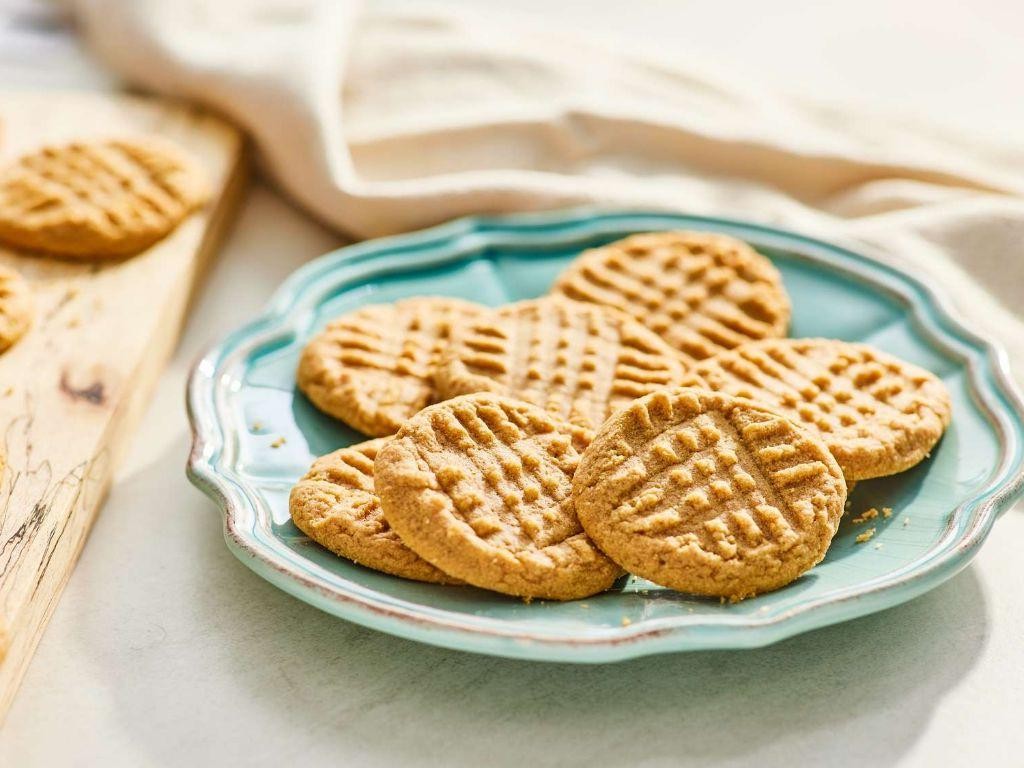
After a long day, there’s nothing quite like the simplicity and satisfaction of baking something delicious with minimal ingredients. These 3-Ingredient Peanut Butter Cookies are a testament to how easy baking can be, offering a perfect blend of sweetness and nuttiness in every bite.
Ingredients
- 1 cup smooth peanut butter (I swear by the creamy texture of Jif for these cookies)
- 1 cup granulated sugar (for that perfect crunch)
- 1 large egg, room temperature (it blends more smoothly into the dough)
Instructions
- Preheat your oven to 350°F (175°C) and line a baking sheet with parchment paper for easy cleanup.
- In a medium bowl, combine the peanut butter, sugar, and egg. Mix until the dough is smooth and all ingredients are fully incorporated. Tip: If the dough feels too sticky, chilling it for 10 minutes makes it easier to handle.
- Roll the dough into 1-inch balls and place them on the prepared baking sheet, spacing them about 2 inches apart.
- Use a fork to gently press down on each ball, creating a crisscross pattern. This not only flattens the cookies but also gives them that classic peanut butter cookie look. Tip: Dipping the fork in sugar before pressing can add a little extra sweetness and prevent sticking.
- Bake for 10-12 minutes, or until the edges are just starting to turn golden. Tip: They might look underdone, but they’ll firm up as they cool, so resist the urge to overbake.
- Let the cookies cool on the baking sheet for 5 minutes before transferring them to a wire rack to cool completely.
Ready to enjoy, these cookies boast a crisp edge with a wonderfully chewy center, packed with peanut butter flavor. For an extra treat, try sandwiching a scoop of vanilla ice cream between two cookies for a decadent dessert.
Quick Lemon Bars
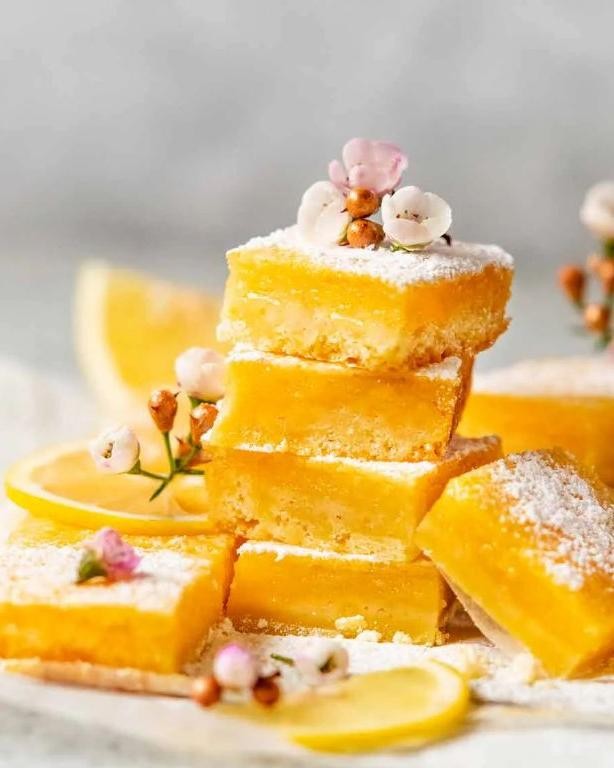
Here’s a simple yet delightful recipe for Quick Lemon Bars that’s perfect for any occasion. Whether you’re a beginner or a seasoned baker, these bars are sure to impress with their bright flavor and buttery crust.
Ingredients
- 1 cup all-purpose flour (I always sift mine for a lighter crust)
- 1/2 cup unsalted butter, softened (room temp blends better)
- 1/4 cup powdered sugar (for that perfect sweet crust)
- 2 large eggs (room temp eggs mix more smoothly)
- 1 cup granulated sugar (the sweetness balances the lemon)
- 2 tbsp all-purpose flour (just a bit more to thicken the filling)
- 1/2 tsp baking powder (for a slight lift)
- 3 tbsp fresh lemon juice (freshly squeezed makes all the difference)
- Zest of 1 lemon (for that extra zing)
Instructions
- Preheat your oven to 350°F (175°C) and grease an 8×8 inch baking pan.
- In a medium bowl, mix 1 cup flour, softened butter, and powdered sugar until a dough forms. Tip: Use your hands for the best consistency.
- Press the dough evenly into the prepared pan. Bake for 15 minutes until lightly golden. Tip: Prick the crust with a fork to prevent bubbling.
- While the crust bakes, whisk together eggs, granulated sugar, 2 tbsp flour, baking powder, lemon juice, and zest until smooth.
- Pour the lemon mixture over the hot crust and return to the oven. Bake for 20-25 minutes until the filling is set. Tip: The edges should be slightly golden but the center still jiggles a bit.
- Cool completely on a wire rack, then dust with powdered sugar before cutting into squares.
Zesty and refreshing, these lemon bars have a perfect balance of sweet and tart with a crumbly, buttery crust. Serve them chilled for a refreshing summer treat or at room temperature to highlight the creamy filling.
Easy No-Bake Cheesecake
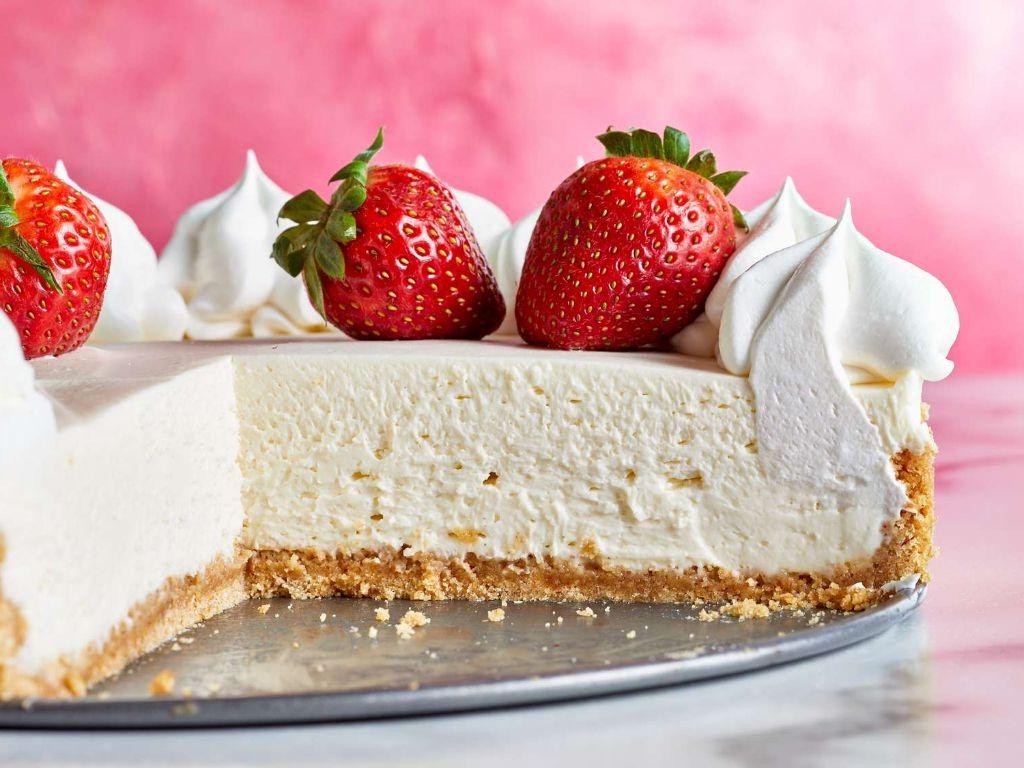
Unbelievably simple yet irresistibly creamy, this no-bake cheesecake is the perfect dessert for when you’re craving something sweet but don’t want to turn on the oven. Follow these steps, and you’ll have a delightful treat that’s sure to impress.
Ingredients
- 1 1/2 cups graham cracker crumbs (I love using honey grahams for a touch of sweetness)
- 1/2 cup unsalted butter, melted (extra creamy butter makes all the difference)
- 2 (8 oz) packages cream cheese, softened to room temperature (this ensures a smooth filling)
- 1 cup powdered sugar (sifted to avoid lumps)
- 1 tsp vanilla extract (pure vanilla adds a depth of flavor)
- 1 cup heavy whipping cream (chilled for best whipping results)
Instructions
- In a medium bowl, mix the graham cracker crumbs and melted butter until well combined. Press firmly into the bottom of a 9-inch springform pan to form the crust.
- In a large bowl, beat the softened cream cheese until smooth. Gradually add the powdered sugar and vanilla extract, continuing to beat until fully incorporated.
- In a separate bowl, whip the heavy cream until stiff peaks form. Gently fold the whipped cream into the cream cheese mixture until no streaks remain.
- Pour the filling over the prepared crust, smoothing the top with a spatula. Chill in the refrigerator for at least 4 hours, or until set.
- Once set, release the springform pan sides. Slice and serve chilled, garnished as desired.
Creating a velvety texture with a hint of vanilla, this cheesecake pairs wonderfully with fresh berries or a drizzle of chocolate sauce. For an extra touch, try topping with a sprinkle of crushed graham crackers for added crunch.
5-Minute Chocolate Avocado Mousse
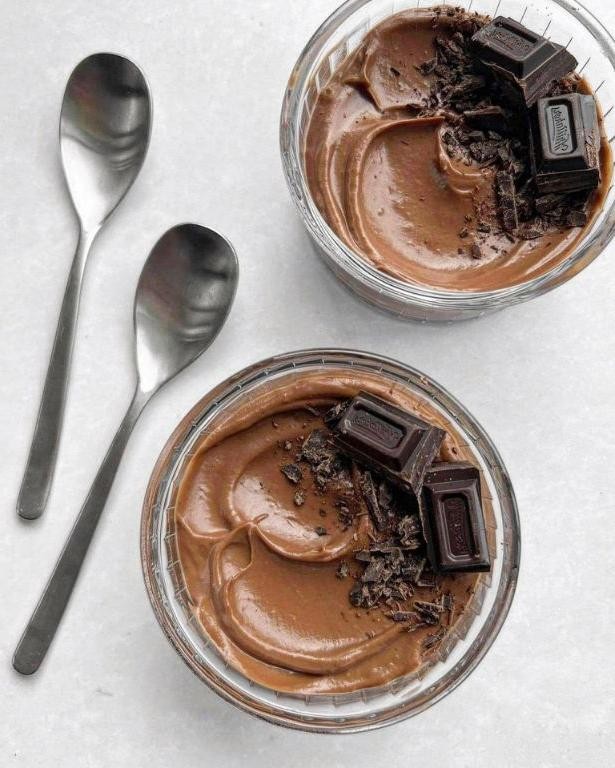
Very few desserts can boast the combination of health and indulgence quite like this one. Perfect for those last-minute cravings or unexpected guests, this 5-Minute Chocolate Avocado Mousse is a game-changer in the world of quick desserts.
Ingredients
- 2 ripe avocados – The creamier, the better for that silky texture.
- 1/4 cup cocoa powder – I swear by Dutch-processed for its deep flavor.
- 1/4 cup maple syrup – Pure maple syrup adds a nuanced sweetness.
- 1 tsp vanilla extract – A splash of vanilla elevates the chocolate.
- A pinch of salt – Just a dash to balance the sweetness.
Instructions
- Scoop the flesh of 2 ripe avocados into a blender. Tip: Ensure they’re ripe for a smooth mousse without lumps.
- Add 1/4 cup cocoa powder, 1/4 cup maple syrup, 1 tsp vanilla extract, and a pinch of salt to the blender.
- Blend on high for 1-2 minutes until completely smooth, scraping down the sides as needed. Tip: If the mixture is too thick, a tablespoon of almond milk can loosen it up.
- Divide the mousse into serving dishes and chill for at least 30 minutes before serving. Tip: Chilling firms up the mousse, enhancing its texture.
Rich and velvety, this mousse surprises with its depth of flavor, thanks to the avocado’s richness. Serve it with a sprinkle of sea salt or fresh berries for a contrast that delights the palate.
Simple Strawberry Shortcake
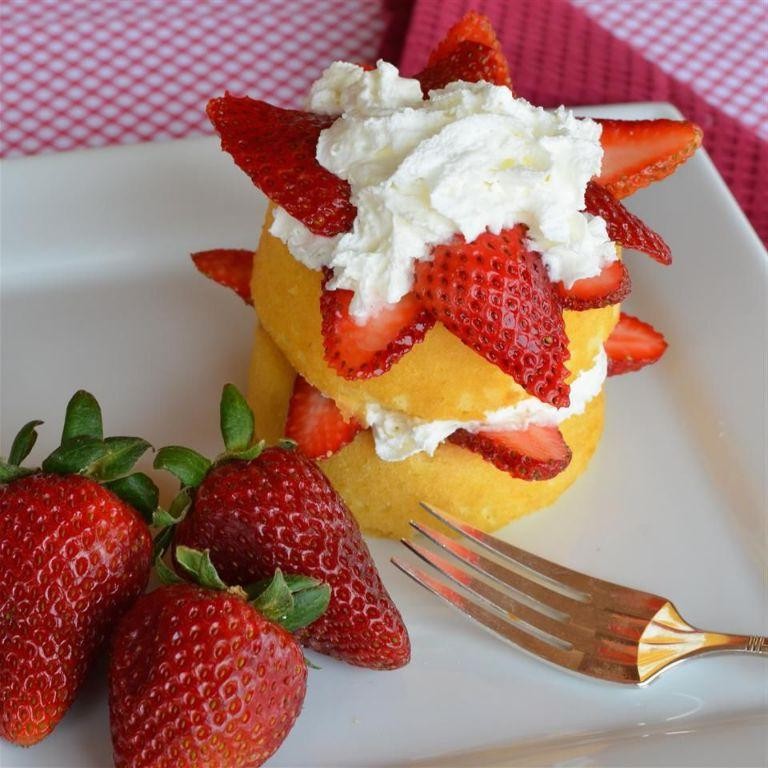
Creating a Simple Strawberry Shortcake is a delightful way to celebrate the sweetness of summer. Carefully selecting fresh, ripe strawberries will ensure your dessert is bursting with flavor.
Ingredients
- 2 cups all-purpose flour (I like to sift mine for a lighter texture)
- 1/4 cup granulated sugar (a little extra for sprinkling on top never hurts)
- 1 tbsp baking powder (make sure it’s fresh for the best rise)
- 1/2 tsp salt (I prefer fine sea salt for its clean taste)
- 1/2 cup unsalted butter, cold and cubed (the colder, the flakier the shortcake)
- 2/3 cup whole milk (room temperature blends more smoothly)
- 1 tsp vanilla extract (pure extract makes all the difference)
- 1 lb fresh strawberries, hulled and sliced (the riper, the better)
- 1 cup heavy cream (chilled is best for whipping)
- 2 tbsp powdered sugar (for sweetening the cream just right)
Instructions
- Preheat your oven to 425°F (218°C) to ensure it’s ready for baking.
- In a large bowl, whisk together the flour, granulated sugar, baking powder, and salt.
- Add the cold, cubed butter to the dry ingredients. Use a pastry cutter or your fingers to work the butter into the flour until the mixture resembles coarse crumbs.
- Pour in the milk and vanilla extract, stirring just until the dough comes together. Overmixing can lead to tough shortcakes.
- Turn the dough onto a lightly floured surface and gently pat it into a 1-inch thick rectangle. Cut into 6 equal pieces.
- Place the pieces on a baking sheet lined with parchment paper, spacing them about 2 inches apart. Sprinkle the tops with a little granulated sugar for a sweet crunch.
- Bake for 12-15 minutes, or until the shortcakes are golden brown and a toothpick inserted into the center comes out clean.
- While the shortcakes cool, whip the heavy cream and powdered sugar together until soft peaks form.
- Slice the shortcakes in half horizontally. Spoon a generous amount of whipped cream and sliced strawberries onto the bottom half, then replace the top.
Enjoy the contrast of the crisp, buttery shortcake with the creamy whipped cream and juicy strawberries. For an extra touch, drizzle with a bit of honey or sprinkle with mint leaves before serving.
Raspberry Yogurt Parfait

You’ll find that making a Raspberry Yogurt Parfait is as delightful as it is simple, perfect for a quick breakfast or a refreshing dessert. Let’s layer up these flavors with precision and care.
Ingredients
- 1 cup Greek yogurt (I love the creaminess of full-fat for this recipe)
- 1/2 cup fresh raspberries (frozen can work in a pinch, but fresh brings a brighter flavor)
- 1/4 cup granola (homemade or store-bought, choose your favorite crunch)
- 1 tbsp honey (local honey adds a lovely floral note)
- 1/2 tsp vanilla extract (pure extract makes all the difference)
Instructions
- Start by gathering all your ingredients to ensure everything is within reach.
- In a small bowl, mix the Greek yogurt with vanilla extract until well combined. This step ensures every bite is flavorful.
- Take a clear glass or jar and begin layering: first, add a spoonful of the yogurt mixture to the bottom.
- Next, sprinkle a layer of granola over the yogurt, pressing lightly to compact it slightly for texture contrast.
- Add a few raspberries on top of the granola, distributing them evenly for bursts of fruitiness.
- Repeat the layers until the glass is nearly full, finishing with a final dollop of yogurt on top.
- Drizzle honey over the top layer for a sweet finish that also adds a beautiful sheen.
- Garnish with a few extra raspberries and a sprinkle of granola for visual appeal and extra crunch.
Just like that, you’ve created a parfait with layers of creamy yogurt, crunchy granola, and juicy raspberries, all brought together with a hint of vanilla and honey. Serve it immediately to enjoy the contrast of textures, or let it sit for a few minutes to allow the granola to soften slightly for a different experience.
Microwave Brownie in a Cup
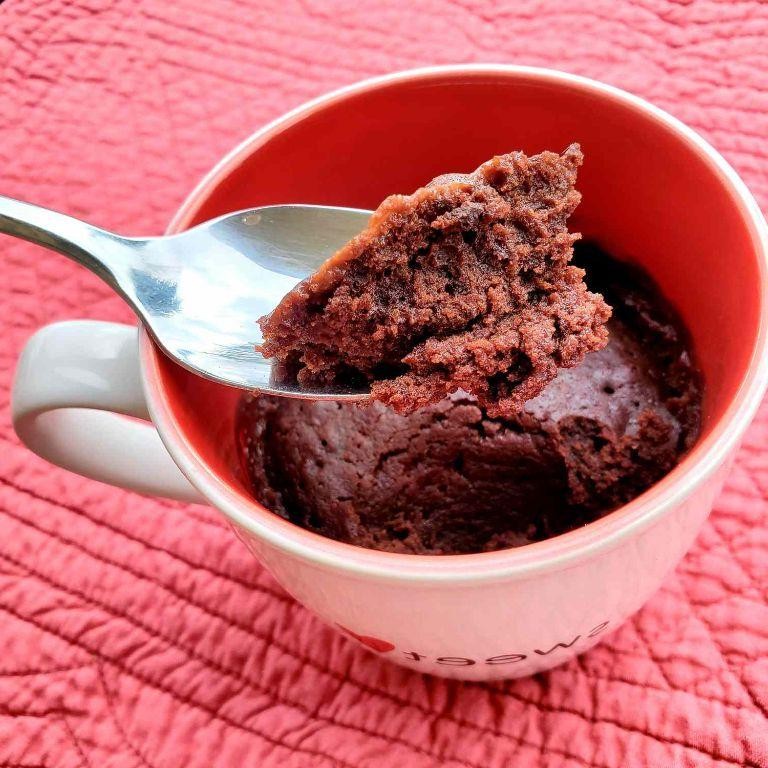
Zesty and quick, this Microwave Brownie in a Cup is your go-to dessert when you’re craving something chocolatey but don’t want to spend hours in the kitchen. Perfect for beginners, this recipe simplifies the process without compromising on that rich, fudgy texture we all love in a brownie.
Ingredients
- 4 tbsp all-purpose flour (I like to sift mine for a smoother texture)
- 4 tbsp granulated sugar (for that perfect sweetness)
- 2 tbsp unsweetened cocoa powder (the darker, the better for a deep chocolate flavor)
- 2 tbsp vegetable oil (extra virgin olive oil works too, but it adds a slight fruity note)
- 2 tbsp water (room temperature blends better)
- A pinch of salt (to balance the sweetness)
- 1/4 tsp vanilla extract (pure extract makes a difference)
Instructions
- In a microwave-safe mug, whisk together the flour, sugar, cocoa powder, and salt until well combined.
- Add the vegetable oil, water, and vanilla extract to the dry ingredients. Stir until the mixture is smooth and no dry spots remain. Tip: Scrape the sides of the mug with a spoon to ensure everything is incorporated.
- Microwave the mug on high for 1 minute and 30 seconds. Tip: Microwave strengths vary, so start checking at 1 minute. The brownie is done when it’s puffed up but still slightly moist on top.
- Let the brownie sit in the mug for 1 minute to cool slightly. Tip: This resting time helps the brownie set for the perfect texture.
Craving a twist? Serve this brownie warm with a scoop of vanilla ice cream or a drizzle of caramel sauce for an extra indulgent treat. The texture is delightfully fudgy, with a rich chocolate flavor that’s sure to satisfy any sweet tooth.
Banana Oatmeal Cookies
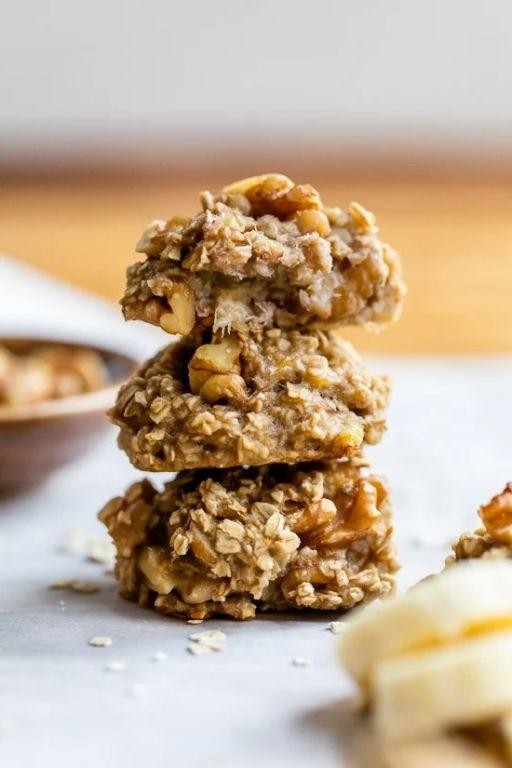
Now, let’s dive into making these delightful Banana Oatmeal Cookies, a perfect blend of sweetness and health that’s sure to become a staple in your baking repertoire.
Ingredients
- 2 ripe bananas (the spottier, the better for natural sweetness)
- 1 cup rolled oats (I love the texture they add)
- 1/4 cup peanut butter (creamy or chunky, based on your preference)
- 1 tbsp honey (for that extra touch of sweetness)
- 1/2 tsp vanilla extract (pure extract makes all the difference)
- A pinch of salt (to balance the flavors)
Instructions
- Preheat your oven to 350°F (175°C) and line a baking sheet with parchment paper for easy cleanup.
- In a large bowl, mash the bananas until smooth. A few small lumps are okay for texture.
- Add the rolled oats, peanut butter, honey, vanilla extract, and a pinch of salt to the mashed bananas. Mix until all ingredients are well combined.
- Using a tablespoon, scoop the mixture and form into small balls. Place them on the prepared baking sheet, spacing them about 2 inches apart.
- Flatten each ball slightly with the back of a spoon or your fingers to form cookie shapes.
- Bake in the preheated oven for 15-20 minutes, or until the edges are golden brown. Keep an eye on them after 15 minutes to prevent over-baking.
- Remove from the oven and let cool on the baking sheet for 5 minutes before transferring to a wire rack to cool completely.
Ready to enjoy! These cookies are wonderfully chewy with a hint of banana sweetness, perfect for a healthy snack or breakfast on the go. Try serving them with a dollop of Greek yogurt for an extra protein boost.
Easy Apple Crumble
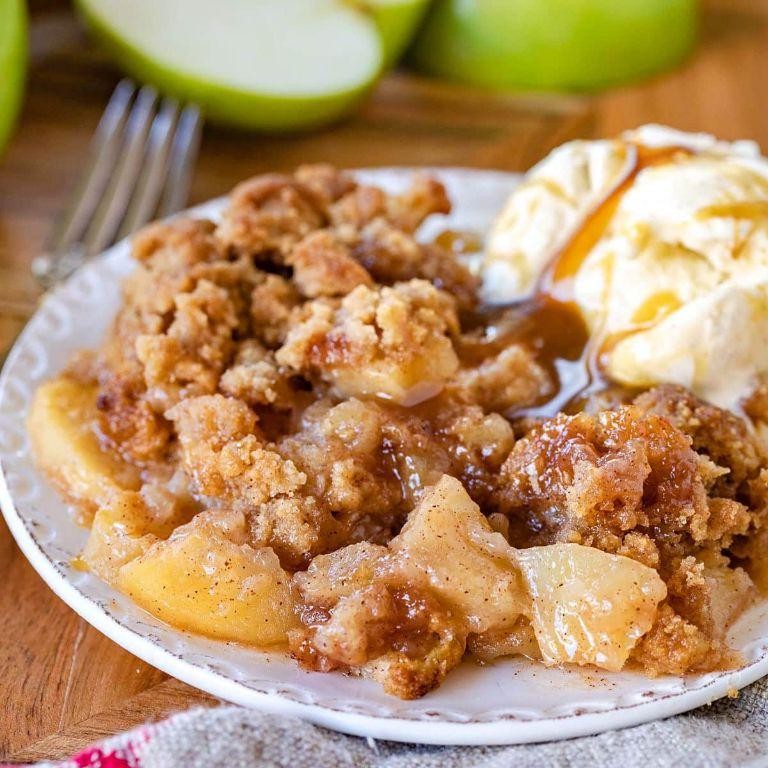
Making an Easy Apple Crumble is a delightful way to bring the warmth of homemade dessert to your table, especially when you’re craving something sweet yet simple. This recipe walks you through each step, ensuring a perfect crumble every time.
Ingredients
- 4 cups peeled and sliced apples (I love using Honeycrisp for their perfect balance of sweet and tart)
- 1/2 cup granulated sugar (adjust slightly if your apples are very sweet)
- 1 tsp ground cinnamon (the secret to that cozy flavor)
- 1/2 cup all-purpose flour (spooned and leveled for accuracy)
- 1/2 cup old-fashioned oats (for that irresistible texture)
- 1/3 cup packed brown sugar (light or dark, based on your preference)
- 1/4 tsp salt (to balance the sweetness)
- 1/3 cup unsalted butter, cold and cubed (I find cold butter makes the best crumbly topping)
Instructions
- Preheat your oven to 375°F (190°C) to ensure it’s ready for baking.
- In a large bowl, toss the sliced apples with granulated sugar and cinnamon until evenly coated. Tip: Letting this mixture sit for 10 minutes enhances the flavors.
- Transfer the apple mixture to an 8-inch baking dish, spreading it out evenly.
- In another bowl, combine flour, oats, brown sugar, and salt. Mix well to blend the dry ingredients.
- Add the cold, cubed butter to the dry mixture. Use your fingers to work the butter into the flour mixture until it resembles coarse crumbs. Tip: Working quickly prevents the butter from melting.
- Sprinkle the crumb mixture evenly over the apples in the baking dish.
- Bake for 35-40 minutes, or until the topping is golden brown and the apples are bubbly. Tip: Placing a baking sheet underneath catches any drips and makes cleanup easier.
Delight in the contrast of the crunchy, buttery topping with the soft, cinnamon-spiced apples beneath. Serve warm with a scoop of vanilla ice cream for an extra indulgent treat, or enjoy it as is for a comforting dessert any day of the week.
Quick Vanilla Pudding
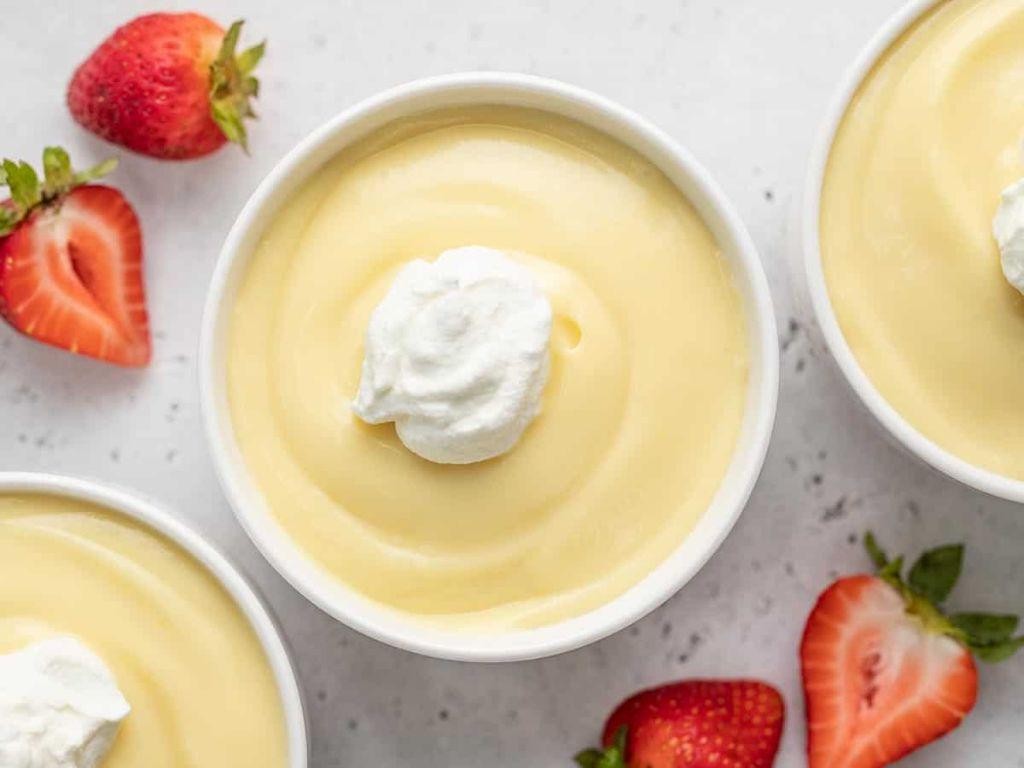
Ready to whip up a dessert that’s both comforting and effortlessly elegant? This Quick Vanilla Pudding is your go-to for a creamy, dreamy treat that comes together in no time, perfect for beginners and seasoned cooks alike.
Ingredients
- 2 cups whole milk (for that rich, creamy texture we all love)
- 1/2 cup granulated sugar (I like to keep it slightly less sweet, but adjust to your liking)
- 3 tbsp cornstarch (the magic thickener that ensures your pudding sets perfectly)
- 1/4 tsp salt (just a pinch to balance the sweetness)
- 2 large egg yolks (room temperature eggs blend more smoothly into the mixture)
- 2 tbsp unsalted butter (adds a luxurious richness)
- 2 tsp pure vanilla extract (the star of the show, don’t skimp on quality here)
Instructions
- In a medium saucepan, whisk together the milk, sugar, cornstarch, and salt over medium heat until the mixture begins to steam, about 5 minutes. Tip: Constant whisking prevents lumps from forming.
- In a separate bowl, lightly beat the egg yolks. Gradually whisk in about 1/2 cup of the hot milk mixture to temper the eggs, then pour everything back into the saucepan. Tip: Tempering avoids scrambling the eggs.
- Continue to cook, stirring constantly, until the pudding thickens and bubbles, about 2-3 minutes. Tip: The pudding is ready when it coats the back of a spoon.
- Remove from heat and stir in the butter and vanilla extract until fully incorporated.
- Pour the pudding into serving dishes and cover with plastic wrap directly on the surface to prevent a skin from forming. Chill for at least 2 hours before serving.
Great for those who appreciate the classic vanilla flavor, this pudding boasts a silky texture that’s simply irresistible. Serve it topped with fresh berries or a dollop of whipped cream for an extra special touch.
Chocolate Covered Strawberries
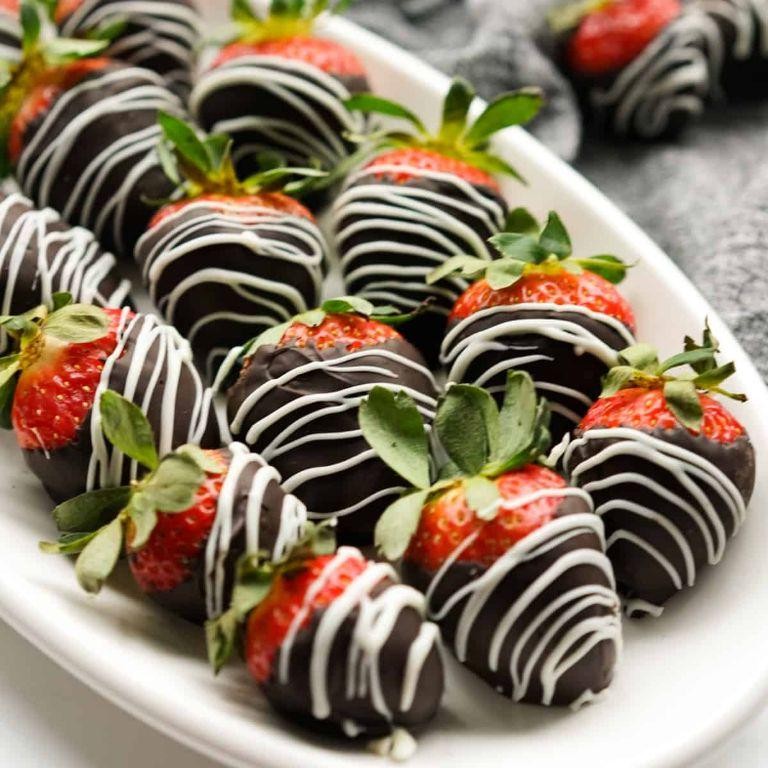
Whipping up chocolate covered strawberries is a delightful way to combine the freshness of fruit with the rich indulgence of chocolate. This guide will walk you through the process, ensuring your treats come out perfectly every time.
Ingredients
- 1 pound fresh strawberries (look for bright red, firm berries for the best results)
- 8 ounces high-quality semi-sweet chocolate chips (I find Ghirardelli melts smoothly)
- 1 tablespoon coconut oil (this helps the chocolate coat the strawberries evenly)
Instructions
- Rinse the strawberries under cold water and pat them completely dry with a paper towel. Any water can cause the chocolate to seize.
- Line a baking sheet with parchment paper. This will prevent the strawberries from sticking once dipped.
- Combine the chocolate chips and coconut oil in a microwave-safe bowl. Microwave in 30-second intervals, stirring between each, until fully melted. Tip: Avoid overheating to prevent the chocolate from burning.
- Hold a strawberry by the stem and dip it into the melted chocolate, swirling to coat evenly. Allow excess chocolate to drip off.
- Place the dipped strawberry on the prepared baking sheet. Repeat with remaining strawberries.
- Refrigerate the strawberries for at least 30 minutes, or until the chocolate is set. Tip: For a glossy finish, avoid covering them while they set.
Decadent and visually appealing, these chocolate covered strawberries offer a crisp bite followed by a melt-in-your-mouth chocolate layer. Serve them on a decorative platter for an elegant touch at your next gathering.
No-Bake Chocolate Oat Bars
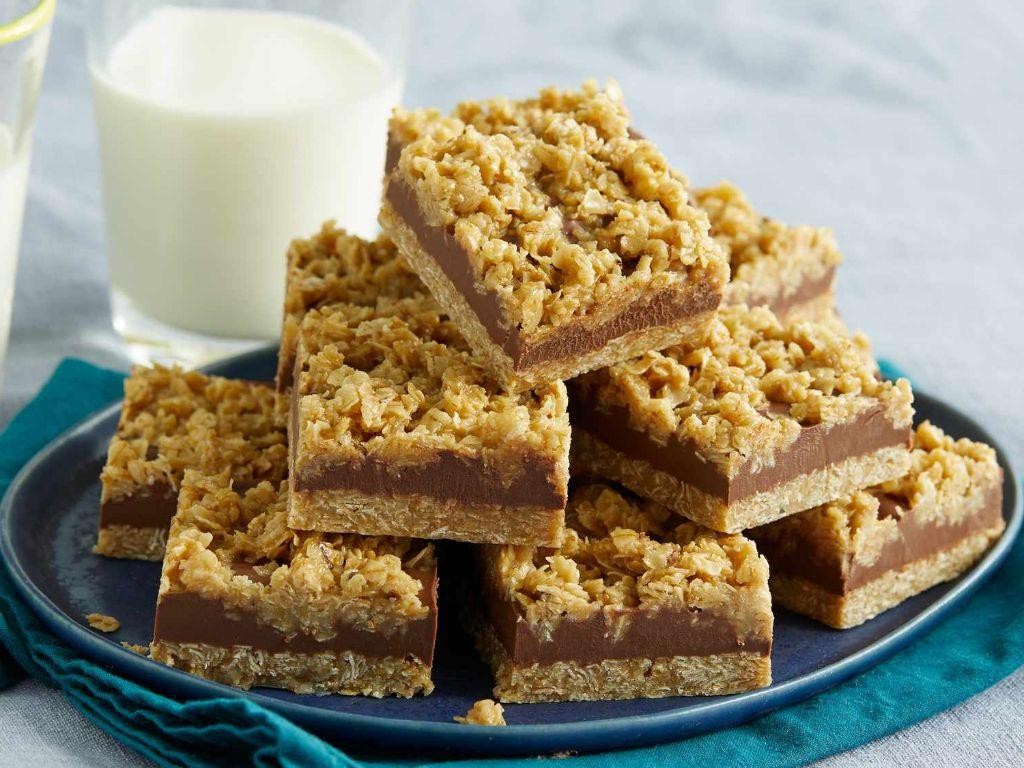
Baking can be intimidating, but these No-Bake Chocolate Oat Bars are here to prove that delicious treats don’t always require an oven. Perfect for beginners, this recipe walks you through each step with precision, ensuring a foolproof path to chocolatey goodness.
Ingredients
- 2 cups quick oats (I love the texture they bring, but old-fashioned oats work in a pinch)
- 1 cup creamy peanut butter (the natural, stir-in kind adds a lovely depth of flavor)
- 1/2 cup honey (local honey is my preference for its subtle floral notes)
- 1/2 cup unsalted butter (room temperature blends smoother)
- 1 tsp vanilla extract (pure extract makes all the difference)
- 1 cup semi-sweet chocolate chips (I sometimes mix in dark chocolate for a richer taste)
Instructions
- Line an 8×8 inch baking dish with parchment paper, leaving some overhang for easy removal later.
- In a medium saucepan over low heat, melt the butter, peanut butter, and honey together, stirring constantly until smooth. Tip: Keep the heat low to prevent scorching.
- Remove the saucepan from heat and stir in the vanilla extract and quick oats until fully combined. Tip: If the mixture seems too thick, a splash of milk can loosen it up.
- Press half of the oat mixture firmly into the prepared baking dish, using the back of a spoon to create an even layer.
- Sprinkle the chocolate chips evenly over the first oat layer, then gently press them down with your fingers.
- Carefully spread the remaining oat mixture over the chocolate chips, pressing down firmly to seal the layers together. Tip: Wetting your fingers slightly can prevent sticking.
- Chill in the refrigerator for at least 2 hours, or until set. For quicker setting, you can place it in the freezer for 30 minutes.
- Once set, lift the bars out using the parchment overhang and cut into squares with a sharp knife.
Chewy, chocolatey, and irresistibly nutty, these bars are a testament to the magic of no-bake desserts. Serve them chilled with a drizzle of melted chocolate on top for an extra decadent touch.
Easy Peach Cobbler
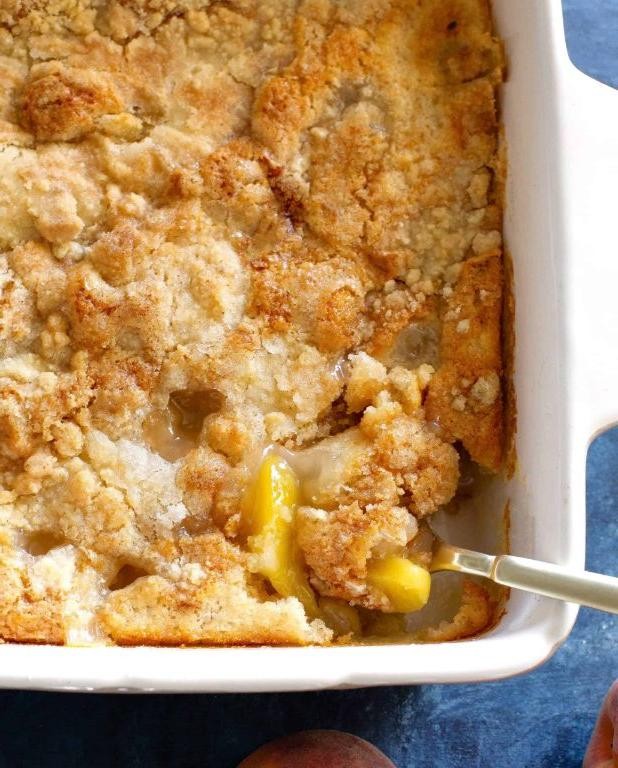
Here’s a simple yet delightful recipe for Easy Peach Cobbler that’s perfect for any season. Whether you’re a novice or a seasoned baker, this guide will walk you through each step to ensure a delicious outcome.
Ingredients
- 4 cups of fresh peaches, peeled and sliced (frozen works too, but fresh gives the best flavor)
- 1 cup all-purpose flour (I always sift mine for a lighter texture)
- 1 cup granulated sugar, plus 2 tablespoons for sprinkling (adjust based on the sweetness of your peaches)
- 1 teaspoon baking powder (aluminum-free is my preference)
- 1/2 teaspoon salt (I use sea salt for a cleaner taste)
- 1/2 cup unsalted butter, melted (let it cool slightly to avoid cooking the eggs)
- 1/2 cup milk (whole milk makes it richer, but any kind will do)
- 1 large egg (room temperature blends more smoothly)
- 1 teaspoon vanilla extract (pure vanilla elevates the flavor)
Instructions
- Preheat your oven to 375°F (190°C) and grease a 9×13 inch baking dish lightly with butter or cooking spray.
- In a large bowl, mix the peaches with 2 tablespoons of sugar and set aside to macerate while you prepare the batter.
- In another bowl, whisk together the flour, 1 cup of sugar, baking powder, and salt until well combined.
- Stir in the melted butter, milk, egg, and vanilla extract into the dry ingredients until just combined; avoid overmixing to keep the cobbler light.
- Pour the batter into the prepared baking dish and spread evenly with a spatula.
- Distribute the sugared peaches and their juices over the batter evenly—no need to stir.
- Bake for 45-50 minutes, or until the top is golden brown and a toothpick inserted into the cobbler comes out clean.
- Let the cobbler cool for at least 10 minutes before serving to allow the juices to thicken slightly.
Kick back and enjoy the warm, bubbly goodness of this peach cobbler, where the tender peaches meet a fluffy, cake-like topping. Serve it with a scoop of vanilla ice cream for an extra indulgent treat, or enjoy it as is for a comforting dessert any day of the week.
Quick Cinnamon Rolls
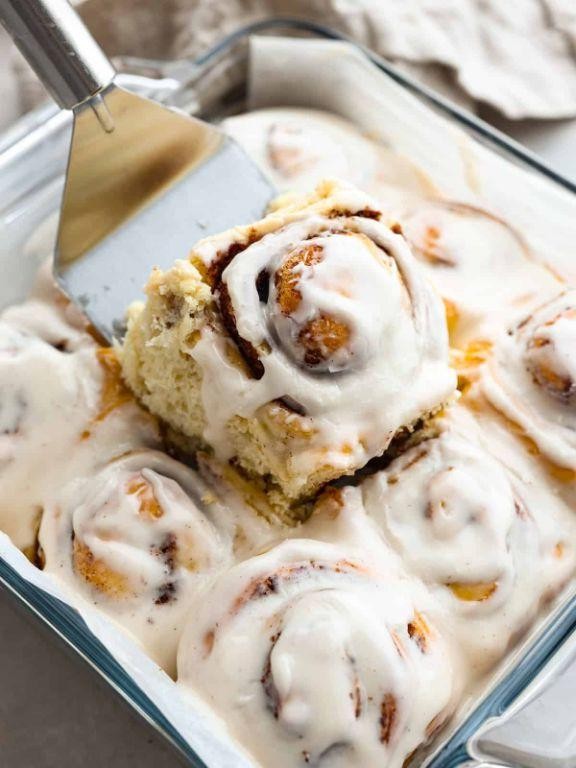
Zesty mornings call for something sweet and comforting, and these Quick Cinnamon Rolls are just the ticket. Perfect for beginners, this recipe breaks down the process into simple, foolproof steps, ensuring delicious results every time.
Ingredients
- 1 cup warm milk (110°F, I find this temp activates the yeast perfectly)
- 1/4 cup granulated sugar (for a hint of sweetness in the dough)
- 1/3 cup melted butter (unsalted, because I like to control the saltiness)
- 1 package active dry yeast (about 2 1/4 tsp, always check the expiration date!)
- 3 1/2 cups all-purpose flour (plus extra for dusting, I prefer King Arthur for consistency)
- 1/2 tsp salt (just enough to balance the sweetness)
- 1/2 cup brown sugar (packed, for that deep molasses flavor)
- 2 tbsp ground cinnamon (the star of the show, don’t skimp!)
- 1/4 cup softened butter (for spreading, room temp blends easier)
Instructions
- In a large bowl, combine warm milk, granulated sugar, and melted butter. Sprinkle yeast over the top and let sit for 5 minutes until frothy.
- Stir in flour and salt until a dough forms. Tip: If the dough sticks to your hands, add a little more flour, but avoid making it too dry.
- Knead the dough on a floured surface for 5 minutes until smooth. Place in a greased bowl, cover, and let rise in a warm place for 1 hour or until doubled in size.
- Roll out the dough on a floured surface into a 16×21 inch rectangle. Spread softened butter over the surface, then sprinkle evenly with brown sugar and cinnamon.
- Roll up the dough tightly from the long side and cut into 12 slices. Tip: Use a sharp knife or dental floss for clean cuts.
- Place rolls in a greased 9×13 inch baking dish, cover, and let rise for 30 minutes. Preheat oven to 350°F during the last 10 minutes.
- Bake for 20-25 minutes until golden brown. Tip: For extra gooey rolls, brush with melted butter right out of the oven.
Kickstart your day with these fluffy, cinnamon-spiced rolls that pull apart with ease. Serve them warm with a drizzle of cream cheese frosting or a simple dusting of powdered sugar for a breakfast that feels like a hug.
Simple Blueberry Pie
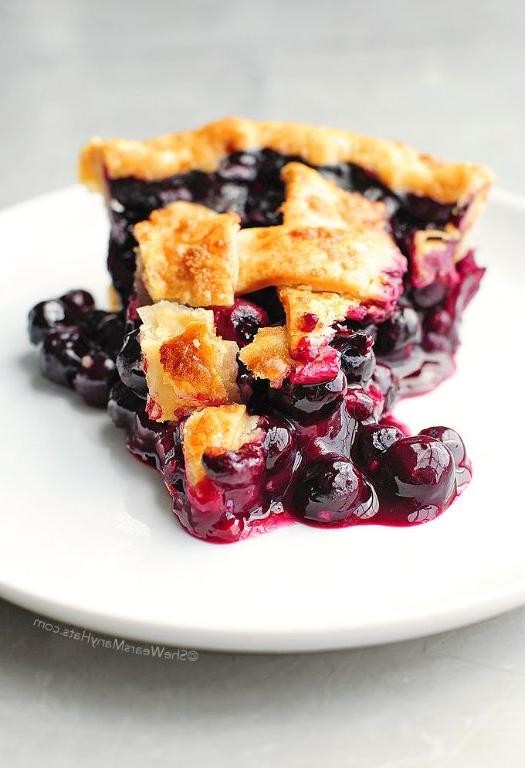
Unveiling the simplicity and joy of baking, this Simple Blueberry Pie is a delightful treat that combines the freshness of blueberries with the warmth of a flaky crust. Perfect for beginners, this recipe guides you through each step with precision, ensuring a delicious outcome every time.
Ingredients
- 2 cups fresh blueberries (frozen can work in a pinch, but fresh is best for that burst of flavor)
- 1 cup granulated sugar (I like to reduce this to 3/4 cup if the berries are super sweet)
- 1/4 cup all-purpose flour (this helps thicken the filling just right)
- 1 tbsp lemon juice (a splash of acidity brightens the whole pie)
- 1/2 tsp ground cinnamon (my secret for a hint of warmth)
- 1 package (14.1 oz) refrigerated pie crusts (homemade is great, but store-bought saves time and stress)
- 1 tbsp unsalted butter, cut into small pieces (for dotting the filling, because butter makes everything better)
- 1 egg, beaten (for that golden crust finish)
Instructions
- Preheat your oven to 375°F (190°C). This ensures a perfectly baked crust and bubbling filling.
- In a large bowl, gently mix the blueberries, sugar, flour, lemon juice, and cinnamon until the blueberries are evenly coated. Tip: Avoid overmixing to keep the berries whole.
- Unroll one pie crust and place it into a 9-inch pie plate. Press it gently against the bottom and sides. Tip: Let the crust overlap the edges; you’ll trim it later.
- Pour the blueberry mixture into the crust, then dot with butter pieces for extra richness.
- Place the second pie crust over the filling. Trim the excess dough, then crimp the edges with a fork or your fingers to seal. Tip: Cut a few slits in the top crust to let steam escape.
- Brush the top crust with the beaten egg for a shiny, golden finish.
- Bake for 45-50 minutes, or until the crust is golden and the filling is bubbly. Tip: Place a baking sheet under the pie to catch any drips.
Delight in the contrast of the crisp, buttery crust with the juicy, sweet-tart blueberry filling. Serve warm with a scoop of vanilla ice cream for an irresistible dessert that celebrates the simplicity of homemade pie.
Microwave Caramel Popcorn
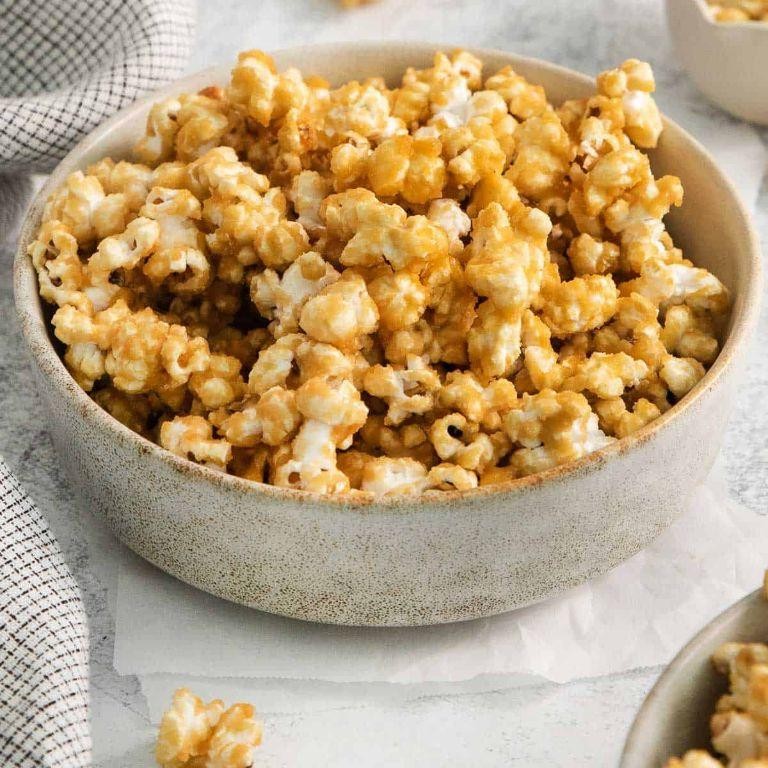
Whipping up a batch of Microwave Caramel Popcorn is easier than you think, and it’s the perfect sweet treat for movie night or a quick snack. Let’s walk through the process together, ensuring you get that perfect crunch and caramel coating every time.
Ingredients
- 1/2 cup popcorn kernels (I find that white kernels pop the fluffiest)
- 1/2 cup unsalted butter (salted works too, but I like controlling the saltiness)
- 1 cup packed brown sugar (dark brown gives a deeper flavor)
- 1/4 cup light corn syrup (this ensures the caramel doesn’t crystallize)
- 1/2 teaspoon baking soda (the secret to a lighter caramel coating)
- 1 teaspoon vanilla extract (pure vanilla makes all the difference)
Instructions
- Place the popcorn kernels in a large microwave-safe bowl, cover with a microwave-safe plate, and microwave on high for 2-3 minutes or until the popping slows to 2 seconds between pops. Tip: Listen closely to avoid burning.
- In a medium saucepan over medium heat, melt the butter, then stir in the brown sugar and corn syrup. Bring to a boil, stirring constantly, and boil for 2 minutes without stirring. Tip: A candy thermometer should read 250°F for perfect caramel.
- Remove from heat and carefully stir in the baking soda and vanilla extract. The mixture will foam up—this is normal. Tip: Work quickly to ensure even coating.
- Immediately pour the caramel over the popcorn, stirring gently to coat. Microwave the mixture for 1 minute, stir, then microwave for another minute. Tip: This step ensures the caramel adheres well.
- Spread the popcorn onto a parchment-lined baking sheet to cool. Break apart any large clusters once cooled.
Freshly made, this Microwave Caramel Popcorn has a delightful crunch with a buttery, sweet coating that’s irresistible. Try serving it in individual paper cones for a fun, party-friendly presentation.
Easy Pumpkin Spice Cookies
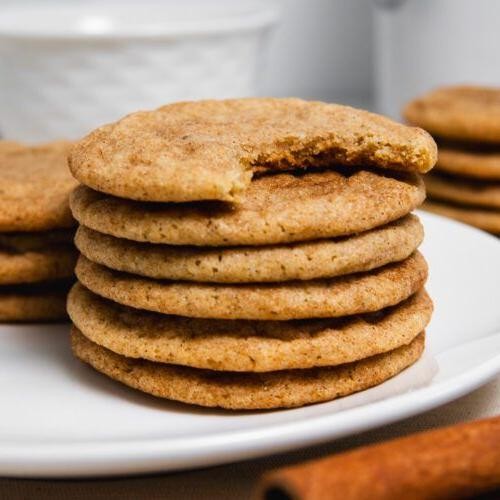
Here’s a simple yet delightful recipe for pumpkin spice cookies that’ll fill your kitchen with the warm, inviting aromas of fall. Perfect for beginners, this guide will walk you through each step to ensure your cookies come out perfectly spiced and irresistibly soft.
Ingredients
- 1 cup canned pumpkin puree (not pumpkin pie filling)
- 1 cup granulated sugar (I find this amount perfectly balances the spices)
- 1/2 cup vegetable oil (extra virgin olive oil can add a nice depth)
- 1 large egg (room temperature eggs blend more smoothly)
- 2 cups all-purpose flour (sifted for a lighter texture)
- 2 tsp baking powder
- 1 tsp baking soda
- 2 tsp pumpkin pie spice (homemade or store-bought, both work great)
- 1/2 tsp salt
- 1 tsp vanilla extract (pure extract makes a difference)
Instructions
- Preheat your oven to 350°F (175°C) and line a baking sheet with parchment paper.
- In a large bowl, whisk together the pumpkin puree, sugar, vegetable oil, egg, and vanilla extract until smooth.
- In a separate bowl, sift together the flour, baking powder, baking soda, pumpkin pie spice, and salt.
- Gradually add the dry ingredients to the wet ingredients, stirring until just combined. Tip: Overmixing can lead to tough cookies.
- Drop tablespoon-sized portions of dough onto the prepared baking sheet, spacing them about 2 inches apart.
- Bake for 10-12 minutes, or until the edges are lightly golden. Tip: The cookies will look soft but will firm up as they cool.
- Allow the cookies to cool on the baking sheet for 5 minutes before transferring to a wire rack to cool completely. Tip: This resting time helps them set without falling apart.
Perfectly spiced and wonderfully moist, these pumpkin spice cookies are a treat any time of day. Serve them with a dollop of whipped cream for an extra indulgent dessert or enjoy them as is with your morning coffee.
Quick Raspberry Sorbet
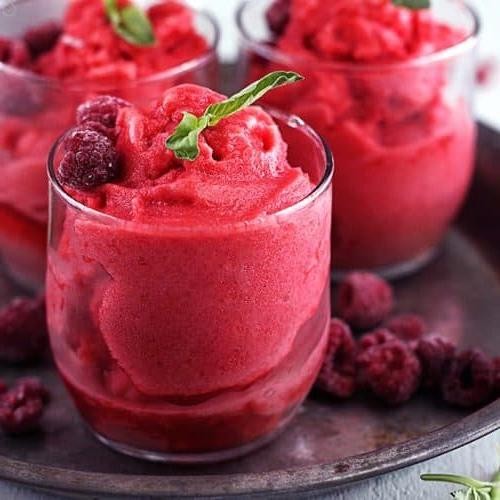
For those sweltering summer days when you crave something sweet yet refreshing, this Quick Raspberry Sorbet is your go-to dessert. It’s incredibly simple to make, requiring just a handful of ingredients and no fancy equipment.
Ingredients
- 2 cups frozen raspberries (I find that organic raspberries give the best flavor)
- 1/2 cup granulated sugar (adjust based on your sweetness preference)
- 1 tbsp fresh lemon juice (this brightens the flavor beautifully)
- 1/2 cup cold water (essential for achieving the right consistency)
Instructions
- In a blender, combine the frozen raspberries, granulated sugar, fresh lemon juice, and cold water.
- Blend on high speed for about 1 minute, or until the mixture is completely smooth. Tip: If your blender struggles, let the raspberries sit at room temperature for 5 minutes to slightly thaw.
- Pour the mixture into a shallow dish or a loaf pan for quicker freezing.
- Freeze for at least 4 hours, or until firm. Tip: For a smoother texture, stir the sorbet every hour during the first 3 hours of freezing.
- Once fully frozen, let it sit at room temperature for about 5 minutes before scooping. Tip: Use an ice cream scoop dipped in hot water for perfect scoops every time.
Enjoy the vibrant, tangy sweetness of this sorbet, with its velvety texture that melts delightfully on the tongue. Serve it in chilled glasses for an extra refreshing touch or alongside a slice of pound cake for a decadent dessert.
Simple Chocolate Chip Cookies
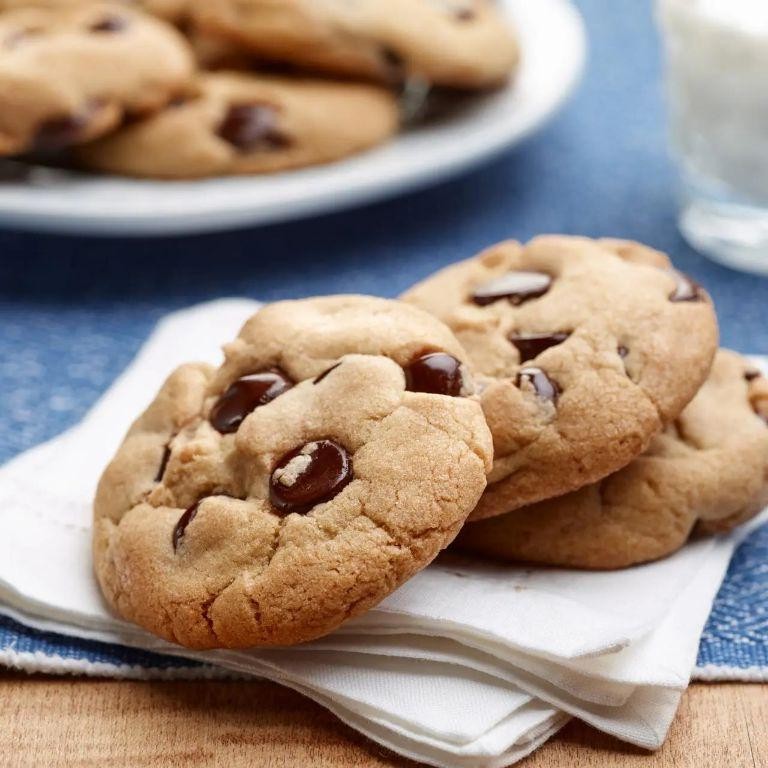
Now, let’s dive into making the ultimate comfort food that everyone loves—simple chocolate chip cookies. These cookies are a classic for a reason, offering a perfect balance of chewiness and crispiness with every bite. Follow these steps closely, and you’ll have a batch of delicious cookies ready in no time.
Ingredients
- 1 cup unsalted butter, softened (I find that room temperature butter blends more smoothly)
- 3/4 cup granulated sugar (for that perfect sweetness)
- 3/4 cup packed brown sugar (adds a lovely depth of flavor)
- 2 large eggs (room temperature eggs incorporate better)
- 1 tsp pure vanilla extract (the real deal makes all the difference)
- 2 1/4 cups all-purpose flour (sifted to avoid lumps)
- 1 tsp baking soda (for that ideal rise)
- 1/2 tsp salt (balances the sweetness)
- 2 cups semisweet chocolate chips (because more chocolate is always better)
Instructions
- Preheat your oven to 375°F (190°C) to ensure it’s ready for baking.
- In a large bowl, cream together the softened butter, granulated sugar, and brown sugar until light and fluffy. Tip: This should take about 2-3 minutes with an electric mixer.
- Beat in the eggs one at a time, then stir in the vanilla extract. Tip: Adding eggs one at a time ensures they’re fully incorporated.
- In a separate bowl, whisk together the sifted flour, baking soda, and salt.
- Gradually add the dry ingredients to the wet ingredients, mixing until just combined. Tip: Overmixing can lead to tough cookies.
- Fold in the chocolate chips until evenly distributed throughout the dough.
- Drop rounded tablespoons of dough onto ungreased baking sheets, spacing them about 2 inches apart.
- Bake for 9 to 11 minutes, or until golden brown. Tip: The cookies will continue to cook on the baking sheet, so it’s okay if they look slightly underdone.
- Let the cookies cool on the baking sheets for 2 minutes before transferring to wire racks to cool completely.
Very soon, you’ll be enjoying cookies with a crispy edge and a soft, chewy center. For an extra treat, serve them warm with a glass of cold milk or sandwich a scoop of vanilla ice cream between two cookies for an indulgent dessert.
Conclusion
We hope this roundup of 20 delicious, easy, and quick dessert recipes inspires your next sweet adventure in the kitchen! Whether you’re a seasoned baker or just starting out, there’s something here for everyone. Don’t forget to leave a comment with your favorite recipe and share the love by pinning this article on Pinterest. Happy baking!